Jump to content
 
  • entries
    129
  • comments
    741
  • views
    181,772

Ropley - Illuminating - Updated 30SEP


TomE

1,718 views

29SEP12-002b.jpg

Shedding some light on things.


Hi All.


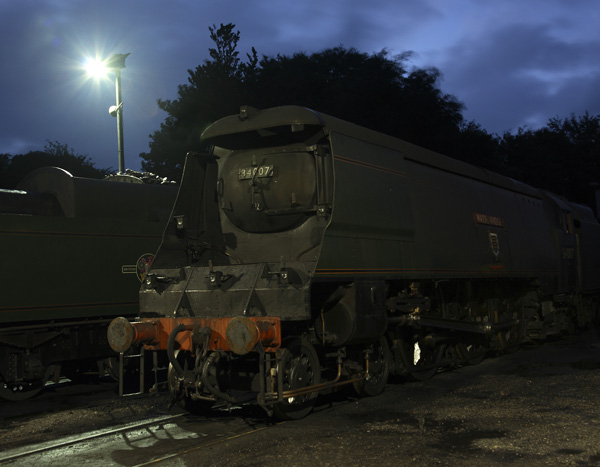
For a little while now I've been thinking about whether I should go to the trouble of adding working lighting to the layout. Whilst there isn't that much around the yard, it would add another level of realism, and potentially allow some atmospheric N Gauge photos! Just take a look at Missy's blog post here to see what kind of effects can be achieved.


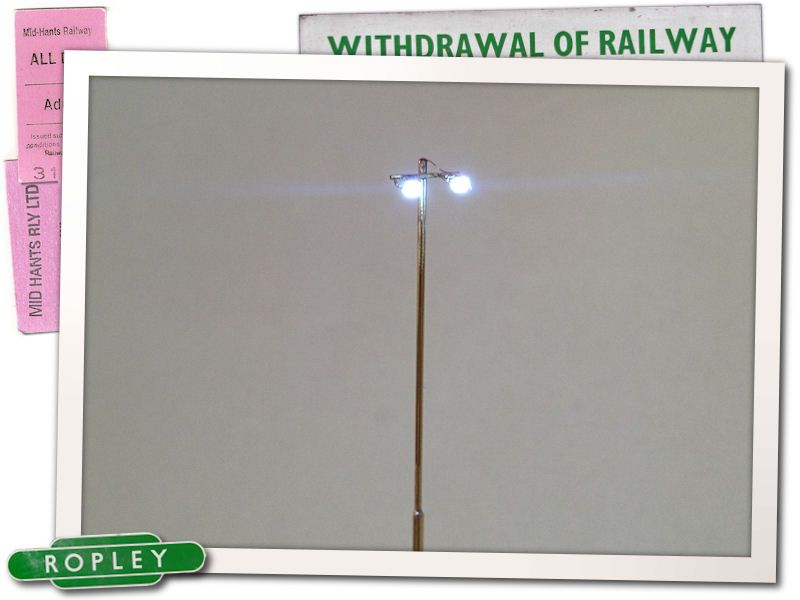
So, this afternoon I plugged in the soldering iron, dug out some 0.8mm diameter brass and located my supply of minature LEDs. Photos to hand show that the lights in the yard are more of a white light, so white LEDs were used. If nessecary these can be toned down a little with some clear yellow paint. A very thin piece of brass, an off cut from an etch of something else, was used to create a J shape to represent the light fixing before being soldered to the LED then the post cross brace. In reality this should be more of a U shape, but as I'm using this to conduct power, the other side will be added from a thin piece of plastic once the light hood is made. Some very fine wire was soldered to the other side of the LED and then fed down the post. As you'll see from the photo below this handily replicates the power cables of the real thing. The 0.8mm tube was then soldered to som 1mm tube to represent the wider base.


29SEP12-003b.jpg

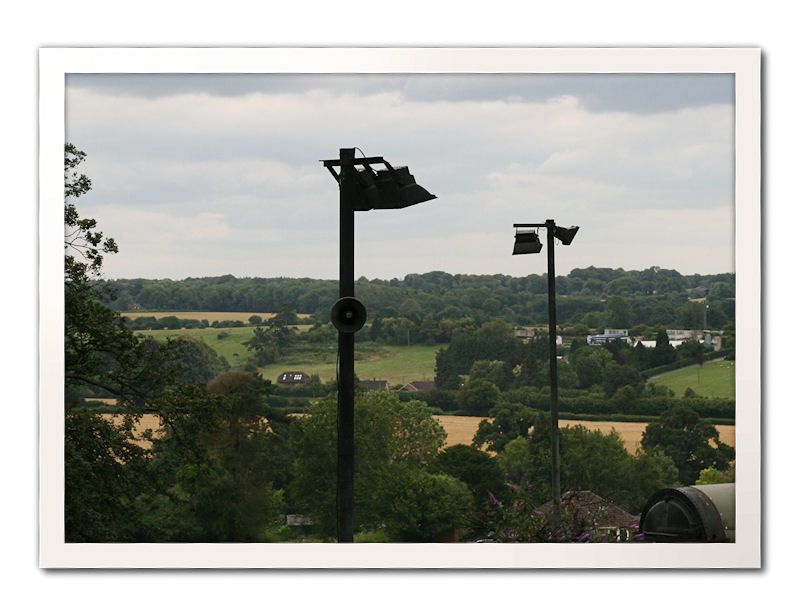
One of the prototype lights in the yard

29SEP12-001b.jpg

And the much smaller version.


Amazingly the whole thing works and now just needs the light hoods making from thin plastic and then paint it before being installed. That isn't going to happen until more of the scenery towards the rear of the layout is complete, otherwise it's liable to get damaged.


Now the first one is proven to work, the remaing four should be a fairly easy task, and I think the finished effect will be worth the effort!
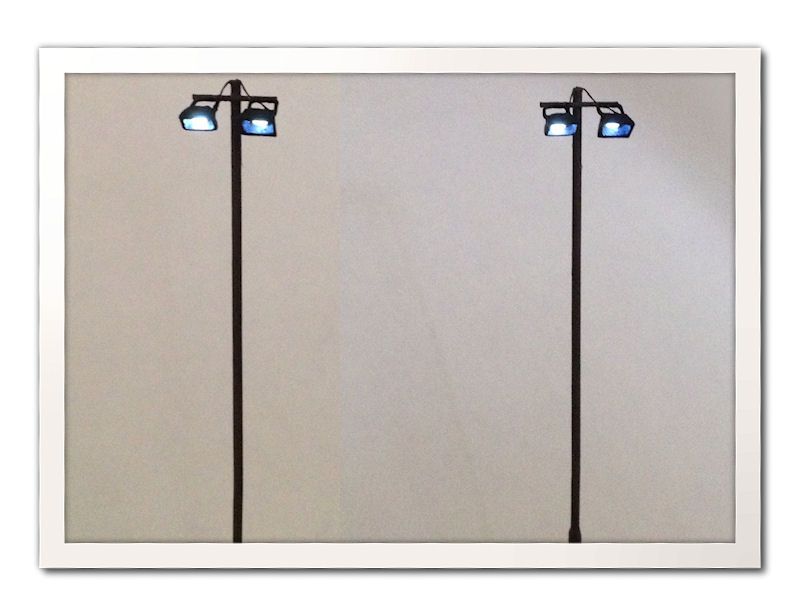


UPDATE


Rather than add a new entry, heres a quick update showing the whole thing pretty much finished bar some thin clear plastic over the fronts of the light units, which I need to source from somewhere. Quite pleased with how this has turned out given my usual aversion to anything electonic!

30SEP12-002b.jpg


Cheers,


Tom.

  • Like 21

12 Comments


Recommended Comments

  • RMweb Gold

Thanks Stephen. That isnt something I'd given any thought too in honesty, but I don't really envisage them being on for extended periods of time. In all probability the layout won't be set up for night running at exhibitions (It's not something that happens often on the real thing!)


Cheers,


Tom.

Link to comment

Stirling job there. I like the way that you have even added the wide base to the bottom of the column

  • Like 1
Link to comment
  • RMweb Gold

They look fantastic Tom...glad I waited a bit longer to comment and got to see the finished article with the lamp enclosures.


Now, looking forward to see some 'Ropley by night' photos...:yes:

  • Like 2
Link to comment
  • RMweb Gold

Thanks Matt, Pete & David!


The lamp enclosures are from 10 thou plastic and made up of four pieces, top, bottom & 2 sides. They were a bit fiddly but worth the effort! Since the photo this morning I've found some very thin clear plastic to make the covers for the front of each unit. They were fixed in place with PVA and then then around the edge painted black. Heres a rather cruel close up to show this:


30SEP12-003b.jpg


In the end I decided the light was a little too blue, so I painted on a very thin layer of Tamiya clear yellow which has brought it down a notch or two.


Cheers,


Tom.

  • Like 5
Link to comment

Hi Tom,


Those lights look amazing mate! Especially in this small scale! Will you be doing some night time shots of the layout??


Best regards,


Jeremy

  • Like 1
Link to comment
  • RMweb Gold

Hello Tom.

Nice one - perhaps I ought to do this on my 0 scale "Ramchester" branch.


railwayrod


Thanks! If I can do it in this scale then really you have no excuse not too ;)


Hi Tom,


Those lights look amazing mate! Especially in this small scale! Will you be doing some night time shots of the layout??


Best regards,


Jeremy


Thanks Jeremy!


Eventually, once the yard is a little more complete. I really need to work on the embankment and get some of the scenery complete at the rear of the layout before I install the lights to prevent accidental damage.


Cheers,


Tom.

Link to comment

I'm struggling to make convincing lamp enclosures for OO......... I have no excuses now!! what a fantastic effort, well done


Guy

  • Like 1
Link to comment

I'm struggling to make convincing lamp enclosures for OO......... I have no excuses now!! what a fantastic effort, well done


Guy


A lot of them aren't as small as you might think and the taller the column they are mounted on the bigger they are (in general) the smallest street lights are 0.5m and they double in size for the larger ones on taller columns.


Often dimensions are given in the literature on lighting manufacturers websites if you find something that looks like the type of lantern you are looking to create in miniature.

Link to comment
  • RMweb Premium

In a late answer to an earlier question, LEDs of this size should not get warm. I would expect they should be bright enough with 10mA of current flowing through them. As they drop a voltage of about 2 volts, the power dissipated (Voltage x Current) will be 20mW (20 thousandth of Watt) which is insignificant.


Being LEDs, they will need a current limiting resistor, which will presumably be below the baseboard somewhere. Assuming a 12VDC power supply, and a resistor for each LED the resistor will need to drop 10V at 10mA. Ohm's law gives Resistance=Voltage/Current so a 1k resistor (one thousand ohms) would be required. Power dissipated in the resistor = Voltage x Current = 0.1W which will not even warm it up on a cold day.

Link to comment

Create an account or sign in to comment

You need to be a member in order to leave a comment

Create an account

Sign up for a new account in our community. It's easy!

Register a new account

Sign in

Already have an account? Sign in here.

Sign In Now
×
×
  • Create New...