

Einheitslok to the second: A new pair of DB Schenker class 140 electrics

Entry posted by NGT6 1315
1,171 views
Morning all!
In this morning's entry, I should like to present the result of a recent loco modding endeavour to which I treated a pair of Roco class 140 electrics in DB Schenker traffic red livery. As some of you might recall, I had done a similar rebuild last year, converting one of the two locos from that project to DSA 200 single arm pantographs.
I but had ended up being less than satisfied with the result of that rebuild. In a nutshell, there hadn't been any really clean way of aligning the X-shaped base frame of the pantographs with the supporting insulators, as a result of which I needed to help myself by slightly bending the insulators inwards. I suppose relocating these items, coupled with removing and scratchbuilding the moulded-on rooftop fixtures might have been a better solution, but at the time, I had been in doubt whether my skills would have been sufficient to carry out this step without leaving visible traces on the model. (Yes, I know the only way of acquiring such skills is actually doing it...)
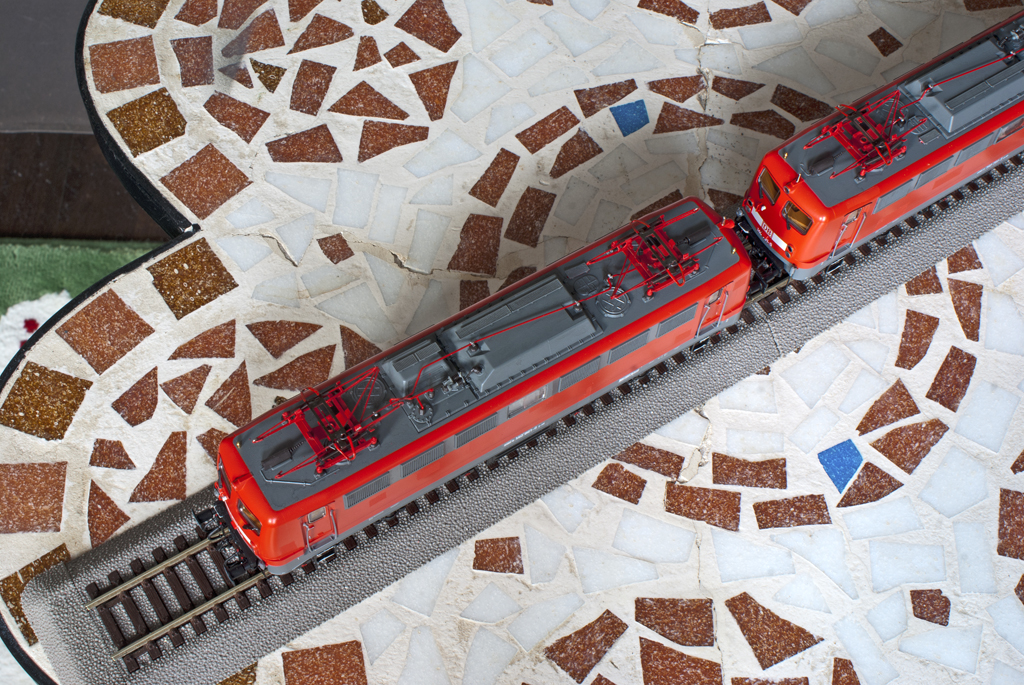
However, when, earlier this year, an option had presented itself for obtaining a pair of identical locos in a bargain, I had decided to have another go at customising a double unit of 140s. This time, I decided that the locomotives would change their identities to 140 791 and 140 861 – both of which have retained diamond pantographs.
The basic model I started from is, again Roco's #62348, which out of the box represents 140 815 as she appeared before the appearance of EVN-formatted running numbers. Technically, that model is mostly identical to the one of Mittelweserbahn's "Sunrail" liveried 140 002, except for a couple of differences between early and late 140s which are correctly represented. So, for general information about both the real 140s and the model, I should like to point you to my earlier loco profile, "Soak Up The Sun."
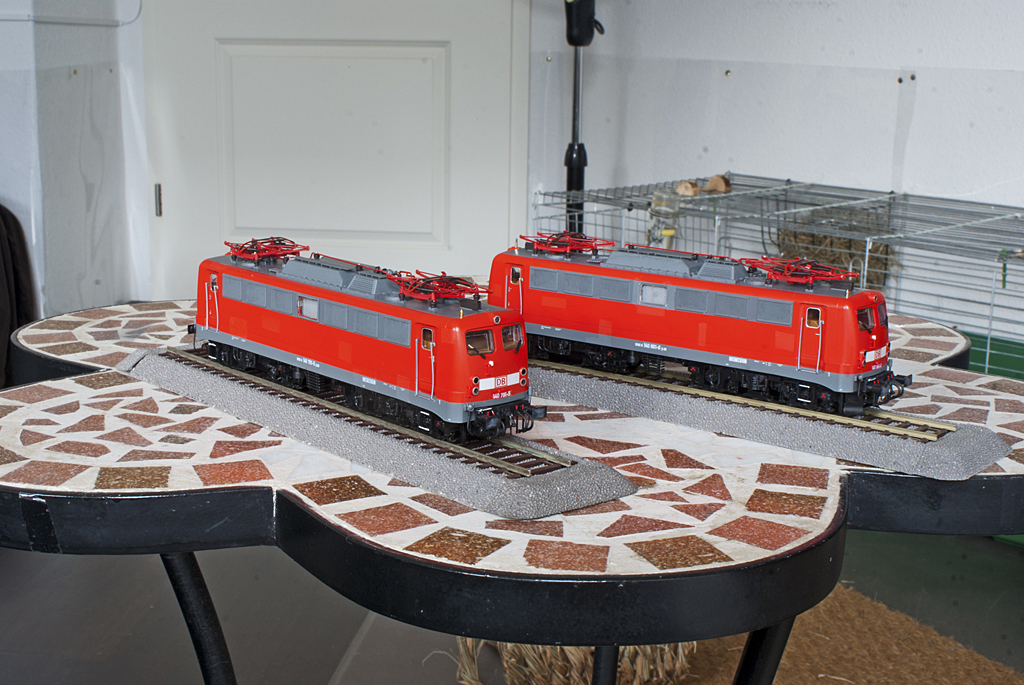
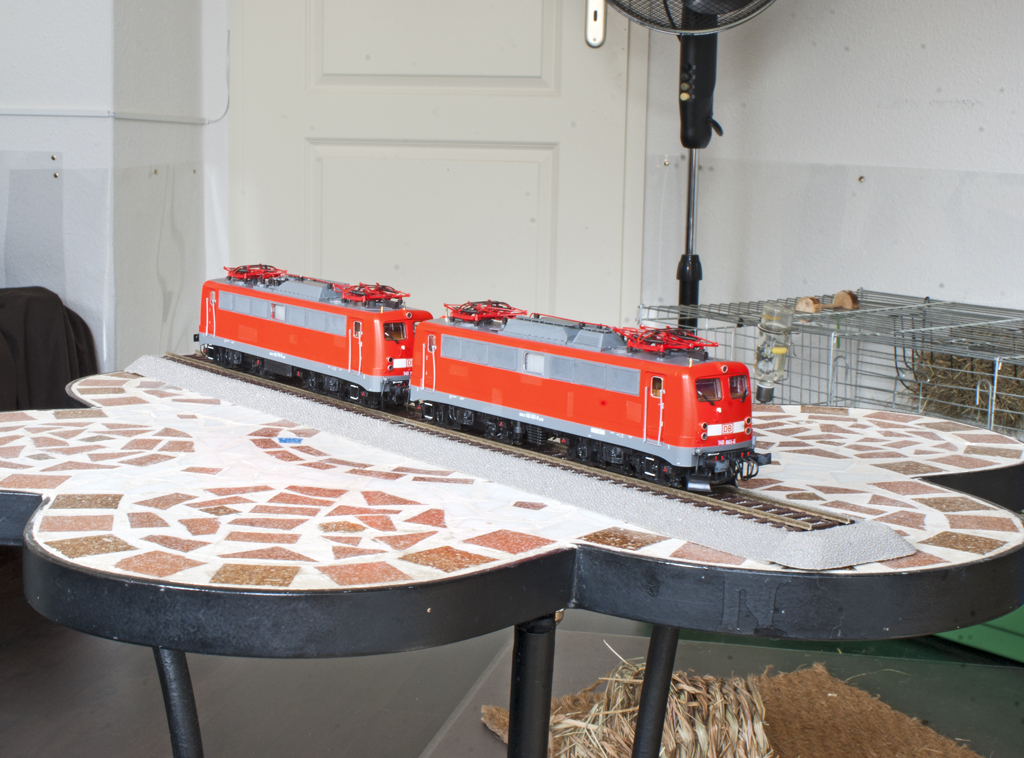
Side by side and then in line, 140 791 and 861 report their readiness for service.
Even on a highly standardised type of locomotive such as the 140, you can encounter a variety of peculiarities large and small. 140 861 is one of that lot of 140.8s which are equipped with snow ploughs, adapted from the 139s.
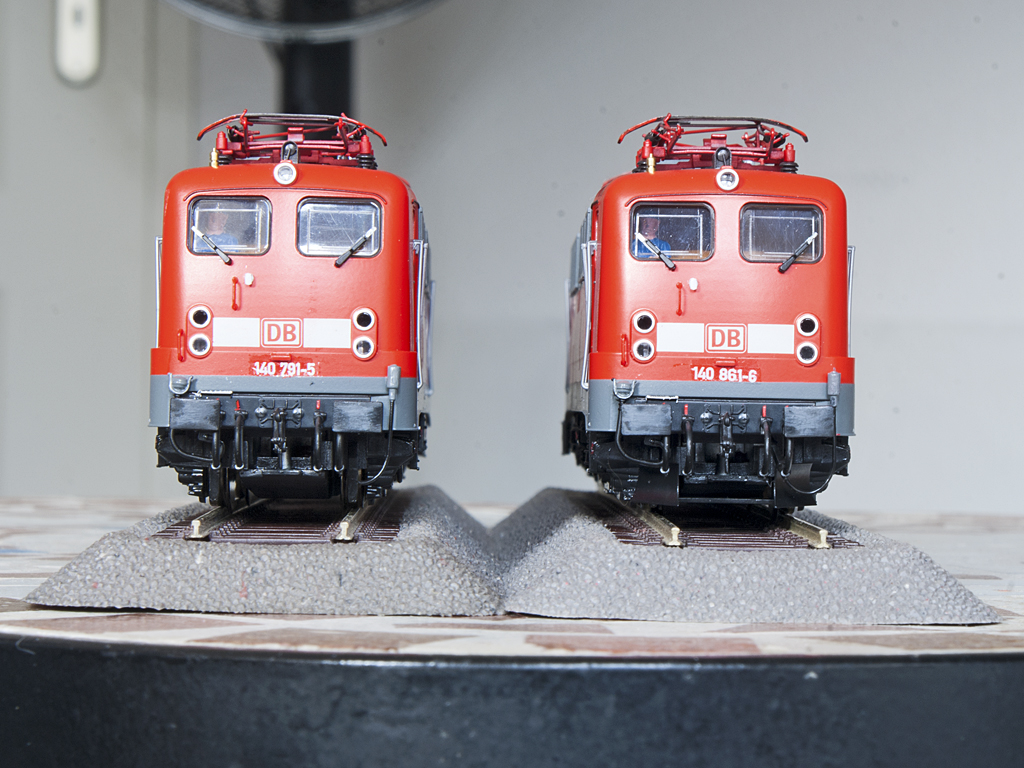
To enhance the appearance of this "Dynamic Duo," I sanded the buffer plates to a slightly dull finish, and daubed on a bit of Revell #78 "Tank Grey" to represent the grease usually applied to buffer plates. A first step towards actual weathering, yeah!
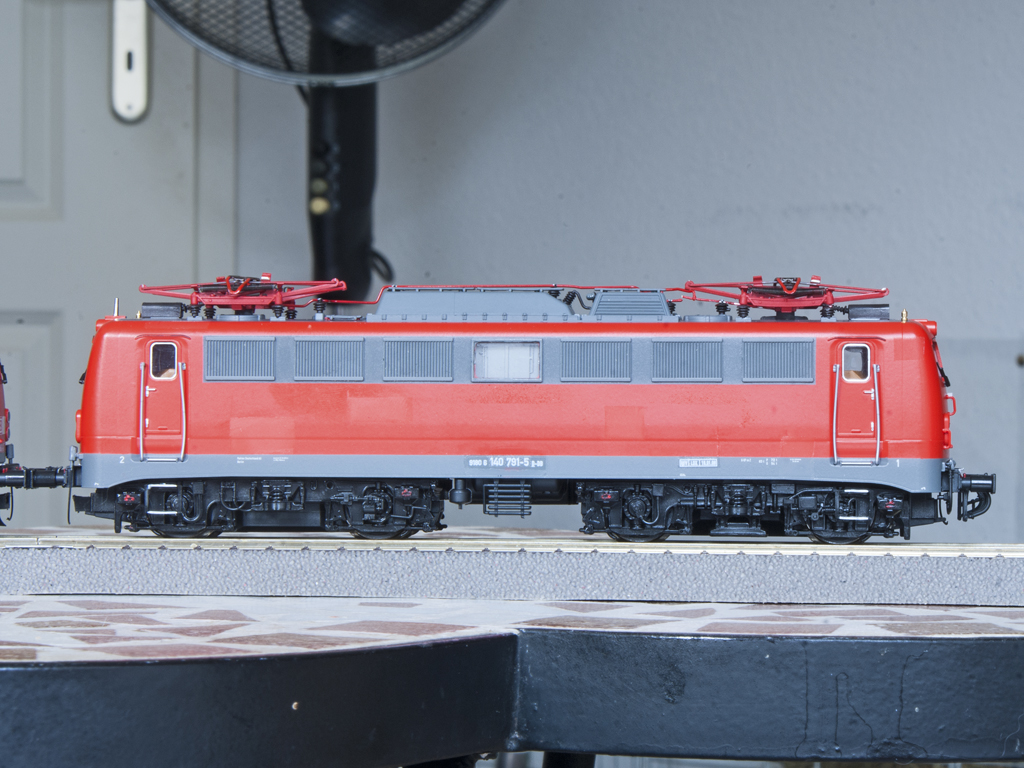
With the 140 being fairly compact, this broadside view of 140 791...
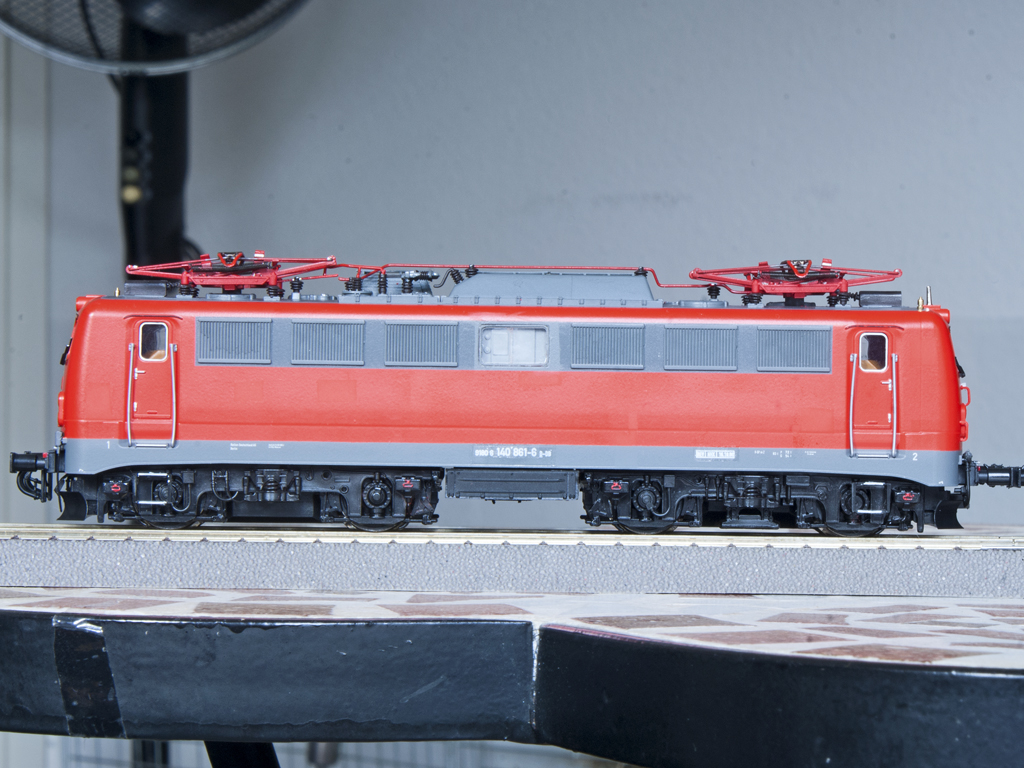
...and this of 140 861 should give you an additional impression of these sturdy stalwarts. – Roco's #62348 is a bit hampered by the cab door grab rails being slightly too long and made of a fairly soft kind of plastic, which is easily bent. There really doesn't seem to be any sensible way for straightening them bar drilling a new set of alignment holes at the top or bottom end, though I suppose this might indeed make them recognisable as being slightly too long... I'll need to do some more thinking about this.
Do note that one of the changes to have kept appearing during the 140s' lifetime had been the consecutive replacement of the engine room ventilation grilles and side windows. There were essentially three types of engine room windows – flush with and without sliding pane, and outside frame without sliding pane. The third variant is the one you can see on 140 791, while 140 861 has the flush variant with no sliding pane.
I therefore obtained the relevant parts set from Roco for one of the earlier styles of 140s. As it turned out the body opening for the engine room window on #62348 but was tailored for the outside frame window, I needed to slightly fill in the four corners to obtain a more or less seamless fit for the flush window. To ensure a snug fit, I first daubed tiny chunks of fresh putty in the corners, then snapping in the transparent pieces and allowing everything to dry. After that, I masked off the window pane and the surrounding body area, and put in some Revell #378 "Dark Grey" which is equivalent to the RAL 7012 "Basalt Grey" used by Deutsche Bahn.
Like on – to my knowledge – all surviving 140s, the busbar cut-off switch which used to be located between Pantograph 1 and the circuit breaker was removed from 140 791 and 861. To shut the pin hole on the former mounting positions of this item, I just cut off the retaining pins and slid them into the retaining holes, carefully concealing them with a touch of Revell #378 "Dark Grey." The length of busbar which had been missing after this operation was fabricated from thin steel wire, which was then painted red to match the rest of the busbar.
So, this would be it for this morning. As always, thanks for reading!
-
 1
1

1 Comment
Recommended Comments
Create an account or sign in to comment
You need to be a member in order to leave a comment
Create an account
Sign up for a new account in our community. It's easy!
Register a new accountSign in
Already have an account? Sign in here.
Sign In Now