Jump to content
 
  • entries
    172
  • comments
    1,473
  • views
    376,514

Boring – more about cheap scatter materials


Silver Sidelines

2,622 views

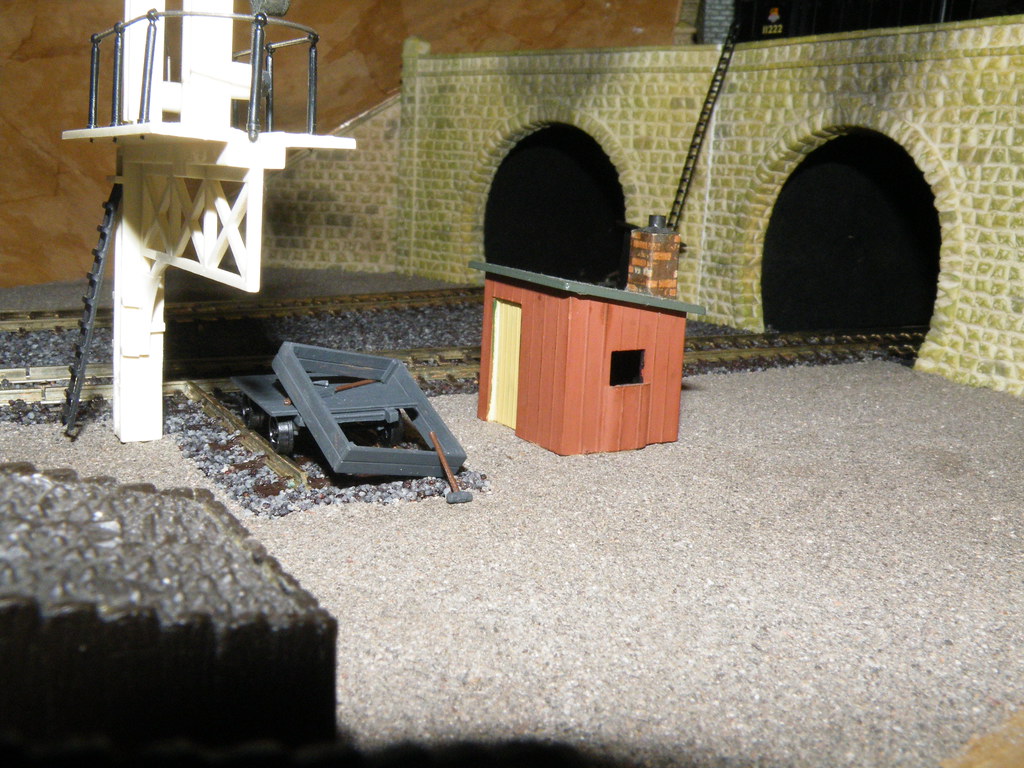
Time has been spent these last few weeks covering up the bare baseboard and the shiny screws:


8035717996_14e0f8870c_b.jpg


The aims were to find a series of scatter materials that could be easily replicated and were cheap – better still ‘free’. In our case the answer lies in the garden. We had a quantity of gravel left over from some construction work.


8004026187_23cd492535_b.jpg

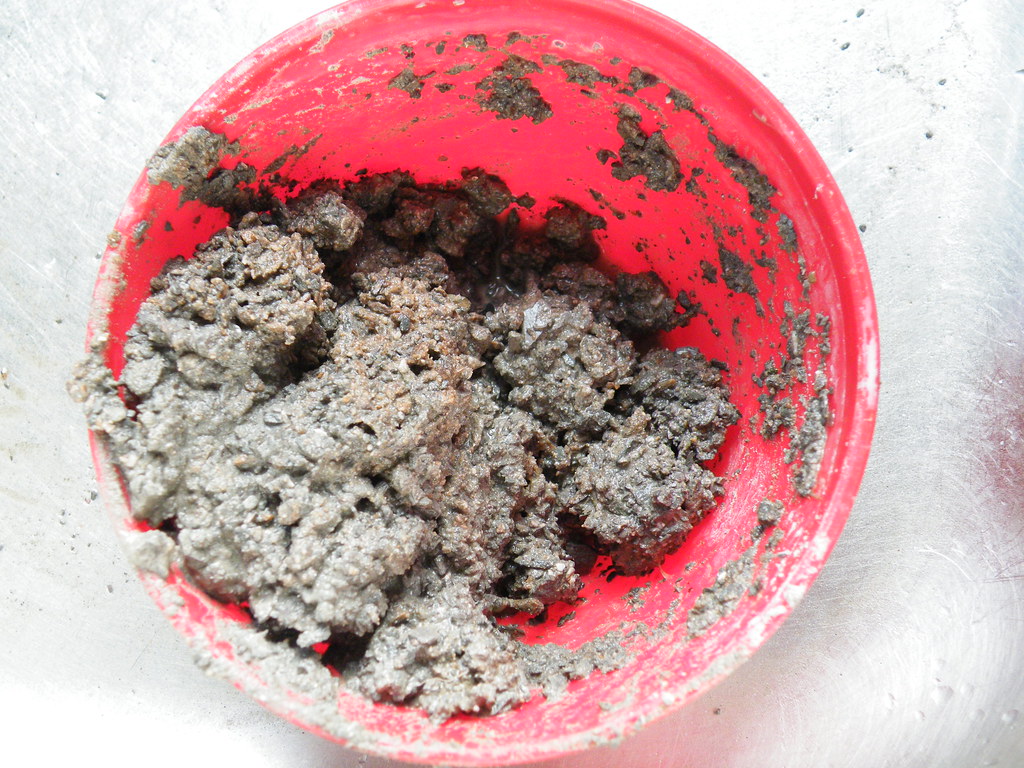
Waste Gravel straight from the garden.


First the material needs washing – you should be on good terms with the lady of the house as you will need the stainless steel wire mesh sieve from the kitchen to pass the fine material through. Wet sieving with a flow of water is far superior to dry sieving.
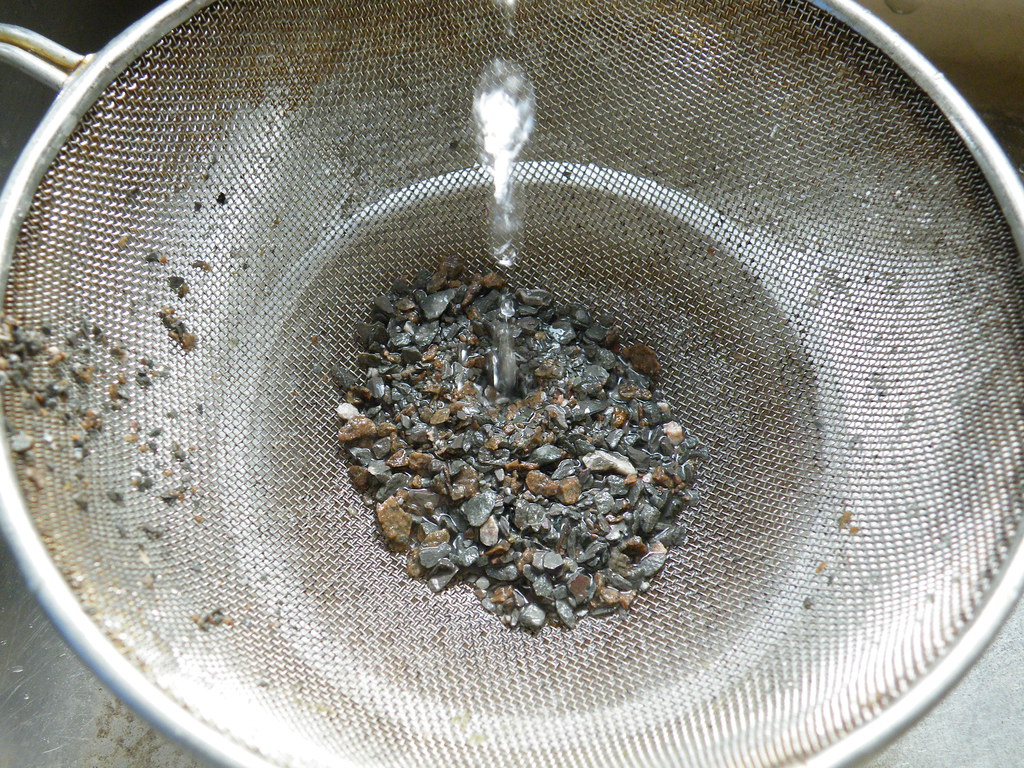
 

8004023930_52d0b7614a_b.jpg

Wet Sieving


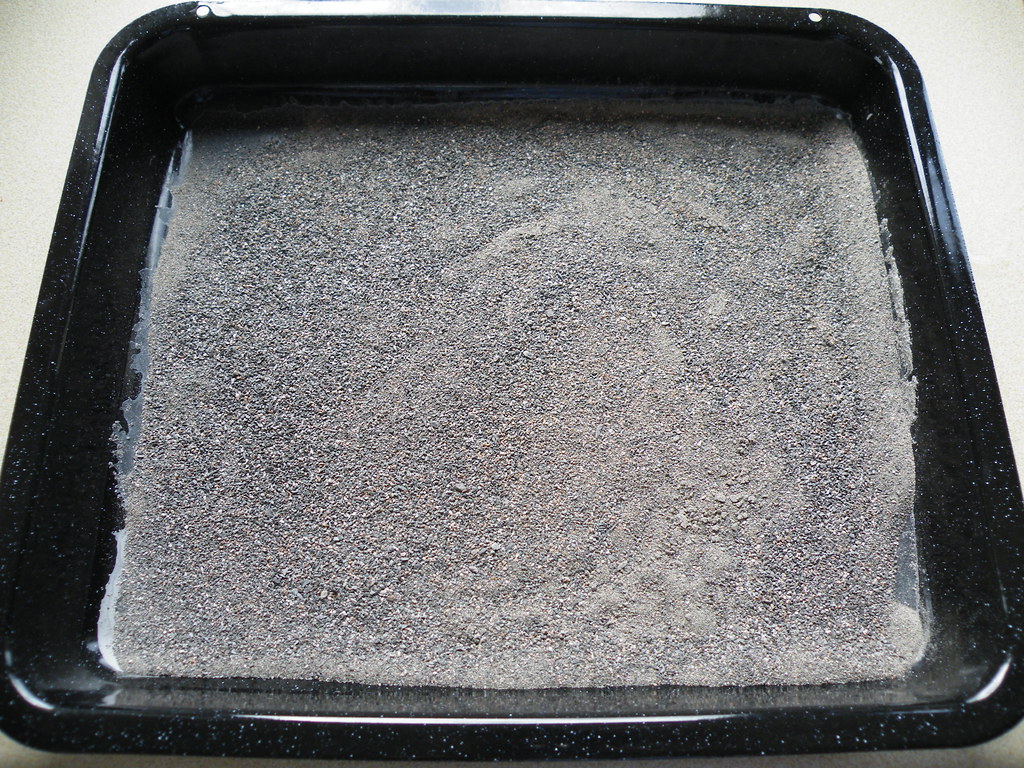
The residue should look something like this. If there is a lot of clay / dust present this will be carried over in the washing water and in my case was allowed to flow away.


8004018885_25549465de_b.jpg

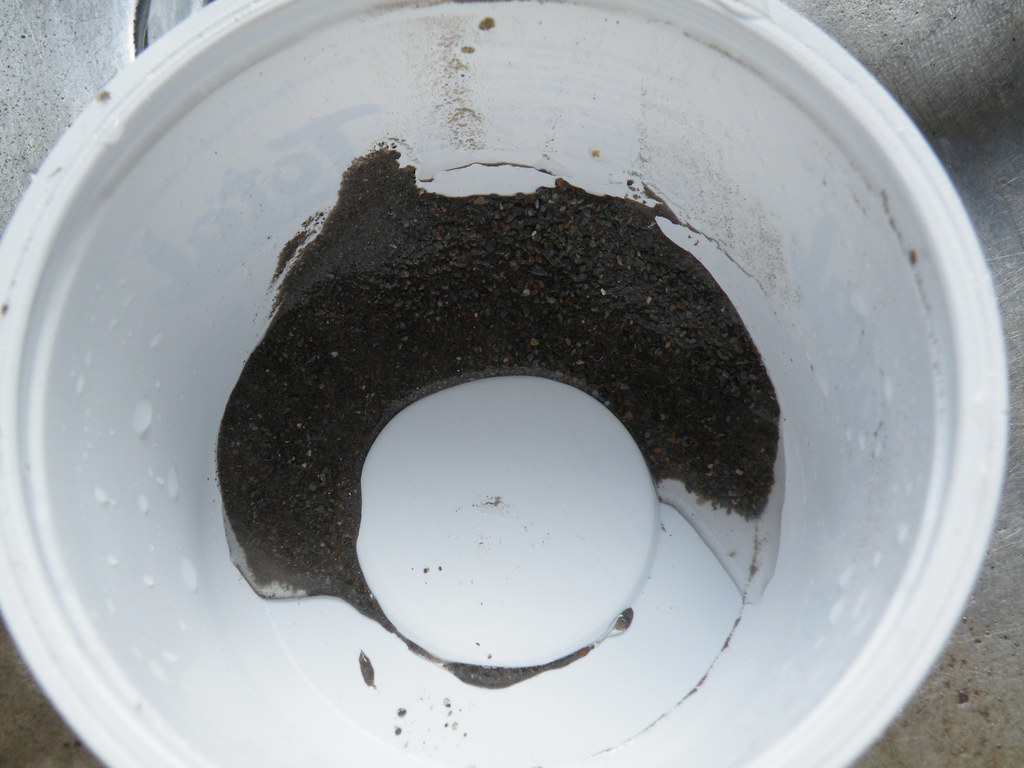
The Fine Residue - wet


The fine residue is then oven dried - I also separately dried the larger gravel. A couple of hours on a low heat should be fine – bottom right oven in our Aga.


8004016512_a51a1518c3_b.jpg

The Fine Residue - dried


8004001645_24a18fa259_b.jpg

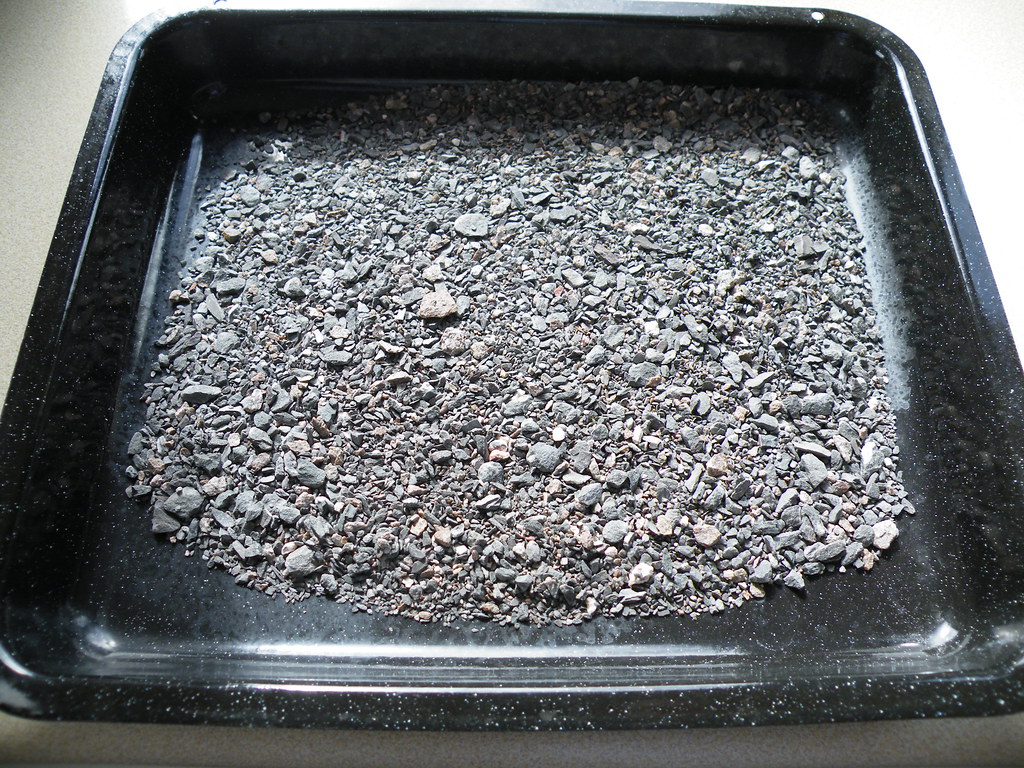
The Large Gravel - dried.


For using on the layout I made up my usual stiff mix of wall paper paste. The dried fine residue was then added to the already mixed paste:


8004008829_646bc15eb3_b.jpg

Wallpaper Paste and dry fine Residue


The quantity of fine residue added to the paste should be sufficient to produce a stiff mix – reminiscent to filling holes in plaster work!


8004005253_3f250767c5_b.jpg

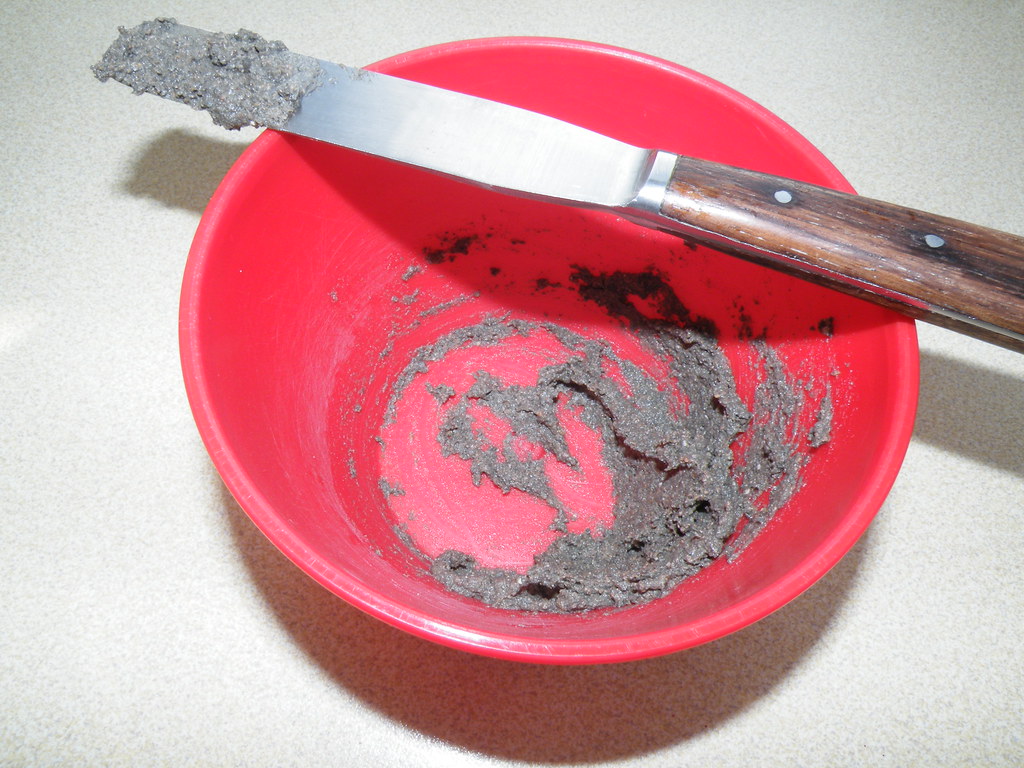
Scatter Mix ready for spreading


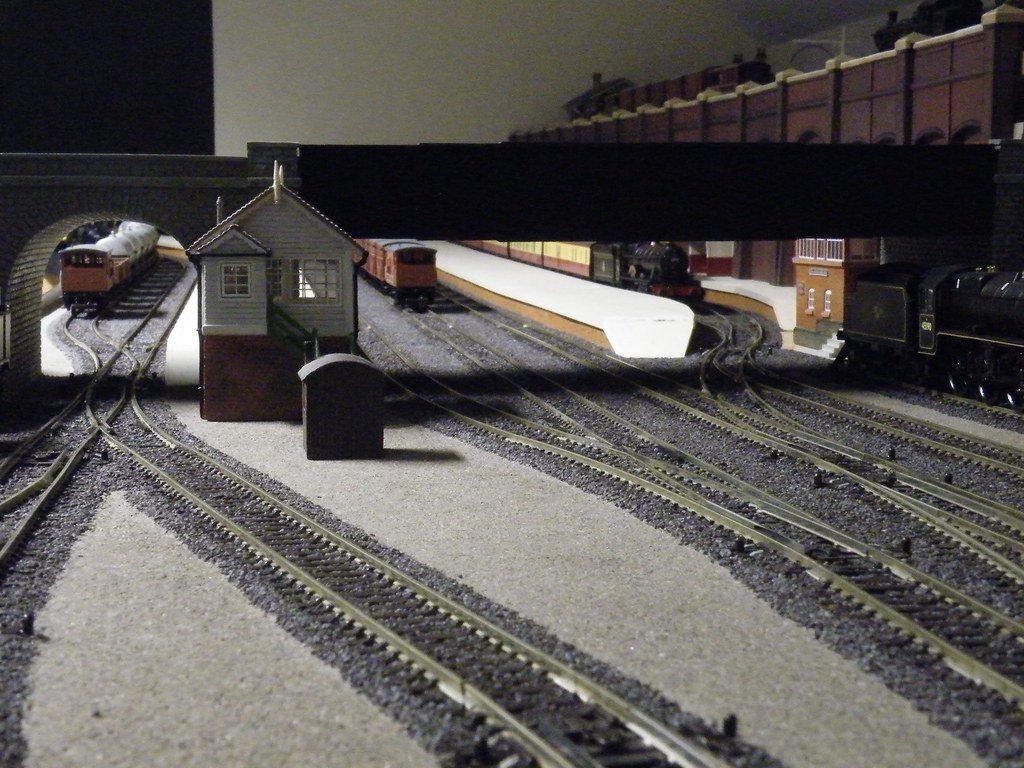
Another view of the finished product covering the areas between the running lines (they must be using lots of weedkiller?):


8035715287_93b2835464_b.jpg


For the record our gravel came out of the borehole that was drilled for our heat pump.


6175052727_1ef921177e_b.jpg


I would say that the basic technique could be applied to any sandy gravelly material such as beach sand, river sand, quarry waste or even garden soil.

Must get on and add some coal dust.

  • Like 5

13 Comments


Recommended Comments

  • RMweb Premium

Fully endorse this method - there's nothing like the real thing when it comes to scatter/ballast. I've used real crushed coal in my bunkers on Cheslyn - can't get a better effect than that.


Regards


Mike

  • Like 1
Link to comment

Fully endorse this method - there's nothing like the real thing when it comes to scatter/ballast. I've used real crushed coal in my bunkers on Cheslyn - can't get a better effect than that.


Regards


Mike

Hello Mike


I have a long way to go to catch with Cheslyn - it looks very good. Yes the coal dust - to differentiate between stations I will experiment and make up a darker scatter material for the main junction. I am also thinking about some coarser gravel to form a rather over-steep embankment.


Regards Ray


PS Eire must be nearly as quiet as round here!

  • Like 1
Link to comment

I agree with this method too. I always use natural materials whenever I can and am still even a user of the dyed tea leaves, I think it is good to recycle whatever you can rather than buy new.


Regards


Jim

  • Like 1
Link to comment
  • RMweb Premium

Hi Ray


My hat's off to anyone who has planned a full layout then committed themselves to building it. I haven't the patience and get easily bored with projects. Probably why I stick to small layouts like Cheslyn. Your project looks superb and you are obviously getting a lot of fun out of building it. You're going to achieve some brilliant scenery and detail with your steadfast approach. Great work - keep posting - could you do an overall shot of the layout so far? I see from your website that it has some lovely, generous curves. The carpentry work is absolutely superb by the way.


Regards


Mike

  • Like 1
Link to comment

I agree with this method too. I always use natural materials whenever I can and am still even a user of the dyed tea leaves, I think it is good to recycle whatever you can rather than buy new.


Regards


Jim


Thanks Jim, I like recycling. I have used tea leaves but not dyed (yet). We have a stock of dried tea leaves and also a large jar of spent mate.


Ray

Link to comment

Hi Ray


........... Great work - keep posting - could you do an overall shot of the layout so far? I see from your website that it has some lovely, generous curves. The carpentry work is absolutely superb by the way.


Regards


Mike

Mike


I thank you for those kind words. Yes there is plenty of space for scenery - just not always the 'will power'. I don't think I have any overall views - possibly a subject for an Blog entry. From your comments on carpentry I am thinking that you have been onto Flickr - there is a 'set' with some layout diagrams and more general views.


Speak again Ray

Link to comment
  • RMweb Premium

Hi Ray


Had another look at your site - those electrical boards are seriously neat - probably the neatest DIY electrics I've ever seen. What patience!


By the way - where is the quiet place you live? I live by a little village called Gneeveguilla, County Kerry and the silence can be deafening sometimes. I grew up in Birmingham and it took me an awful long time to adjust to how quiet it is around here.


Regards


Mike

Link to comment

Mike, Making the control panels is very satisfying. They have to be planned and then built up in layers. Using single core wire which can be cut and shaped makes the task easier.


We stay in SW Scotland - just off the old 'Port Road'.


Ray

  • Like 1
Link to comment

Hi Ray

Following from the flickr thread.

Recycling is superb and using natural elements in the layout is an excellent way to achieve a realistic look. I've smiled after reading about the spent mate leaves. Here in Argentina many modellers use it in their layouts. However, the colour isn't adequate and may need adjusting. About painting scatter, I used the following technique:

-As I have several kinds of scatter with different colours, I did several mixtures. Many times the resulting colour was extravagant, even if the texture was good.

-I prepared a watered greyish or brownish colour mix, and I applied it over the glued scatter.

-The different colours became harmonized.

By the way, I use to glue scatter in position placing a layer of PVA glue and the scatter material over it. I leave it to dry and then I vacuum any loose residue.

Cheers,

Jose

Link to comment

I use thinned ink washes to tint natural scatters to provide variety, GW do some ready made ones, or just use Windsor and Newton bottles, their peat colour is very useful. Agreed about commercial scatters often being too uniform or garish, but the good thing about ink washes instead of dyes is that dripping them from a pipette gives a variation and they allow the natural colour to show through.

Excellent explanation of your extraction technique, thank you.

  • Like 1
Link to comment

I use thinned ink washes to tint natural scatters to provide variety........

Excellent - something to try. I think the natural textures are very important, and paint just like too much varnish on a plastic model, ruins the detail.


Thanks again Ray

Link to comment

Hi Ray

Using watered or diluted acrylic colours, or poster paint, or ink, as other member suggested, permits the original colours to show through the paintwork. It's very helpful with the commercial scatter materials I use. It also helps to keep it in place!

J

Link to comment

Create an account or sign in to comment

You need to be a member in order to leave a comment

Create an account

Sign up for a new account in our community. It's easy!

Register a new account

Sign in

Already have an account? Sign in here.

Sign In Now
×
×
  • Create New...