

DMusings
.thumb.jpg.60c53fcbcaa34017b05b8919d1a9e6d2.jpg)
Entry posted by Silver Sidelines
2,539 views
Following on from my last Post I have been running playing with my
When I want to watch trains ‘go by’ I can operate the Main Line as a continuous loop with up to three different trains following each around all at the same time. The power comes from four different Gaugemaster DS controllers which is kept constant for all trains. This does have the disadvantage that if one train runs faster than the others it will catch one of the other trains up. Not to worry it is relatively easy to find a rail section and let it have a rest. Similarly if one of the trains is significantly slower, then the other two trains will have to have a rest!
I was attempting to run all three Bachmann DMUs, Class 105, Class 108 and Derby Lightweight. It was very obvious that the Class 108 was lagging – why? On first inspection there did not appear to be anything seriously amiss. However I did note that the PCB was dated 2006 showing that the unit was seven years old. On further inspection I was concerned about the gluey grease around the worm drive and gearing. To cut a long story short I cleaned the grease off with methylated spirits, reapplied some sewing machine oil, and made an instant improvement in performance
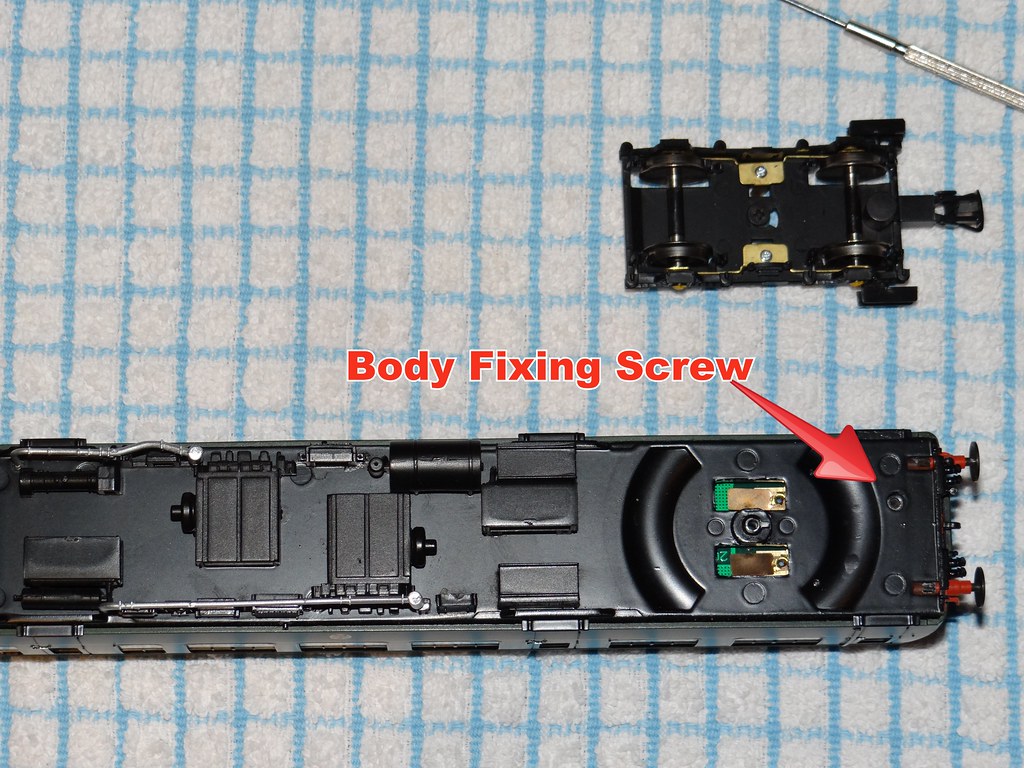
Body fixing screw
First the single body fixing screw needs to be unscrewed – this is easier to do with the front bogie removed.
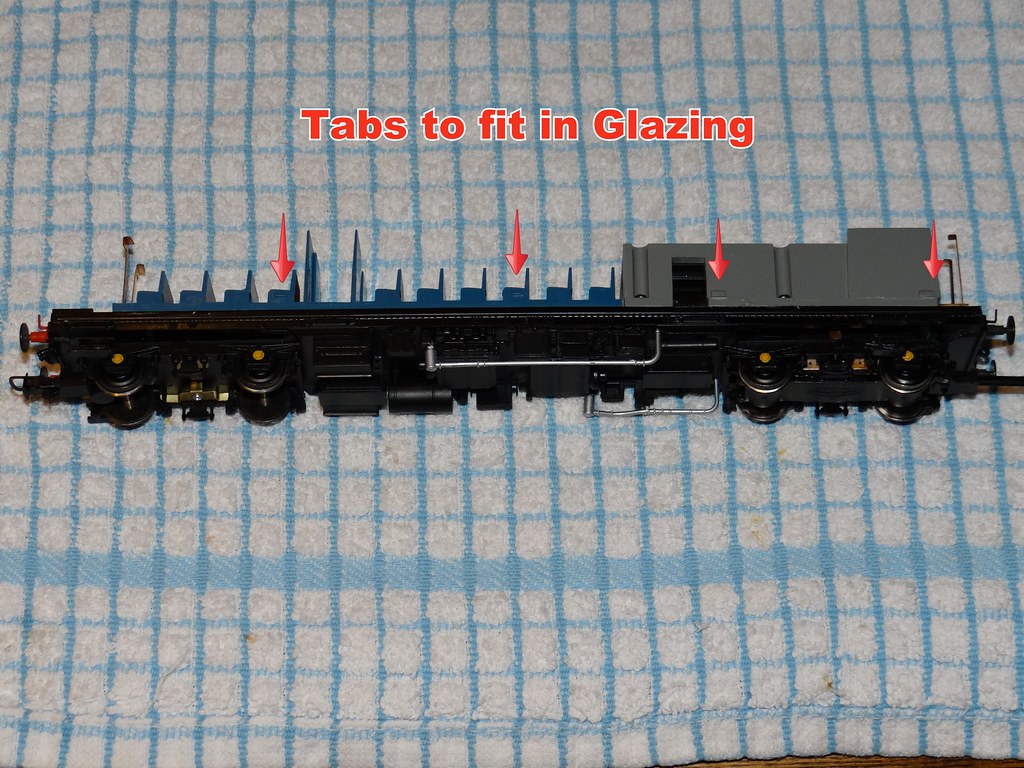
Showing fixing tabs
Getting inside the Bachmann Class 108 is a similar exercise to that on their Blue Pullman. There are four tabs on each side sticking out from the seating unit and rear metal motor enclosure. In my case working from the front of the unit I was able to lever the body shell away from the chassis with my finger nails – if you have less confidence you might need to adopt the technique I used for the Blue Pullman and slide in a piece of stiff paper.
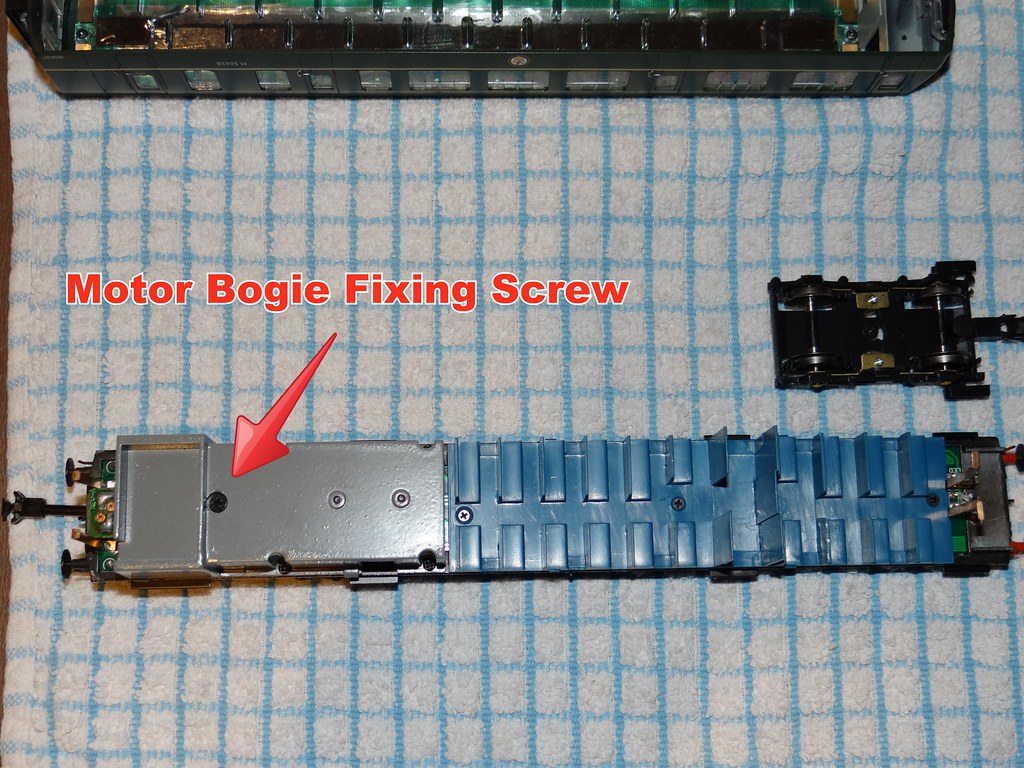
Motor bogie retaining screw
With body shell removed the single motor bogie fixing screw can be undone – allowing the motor bogie itself to drop out. There is no need to remove the four screws on the metal motor housing unless you are wanting to inspect the motor and perhaps drop a spot of oil on the main motor bearing.
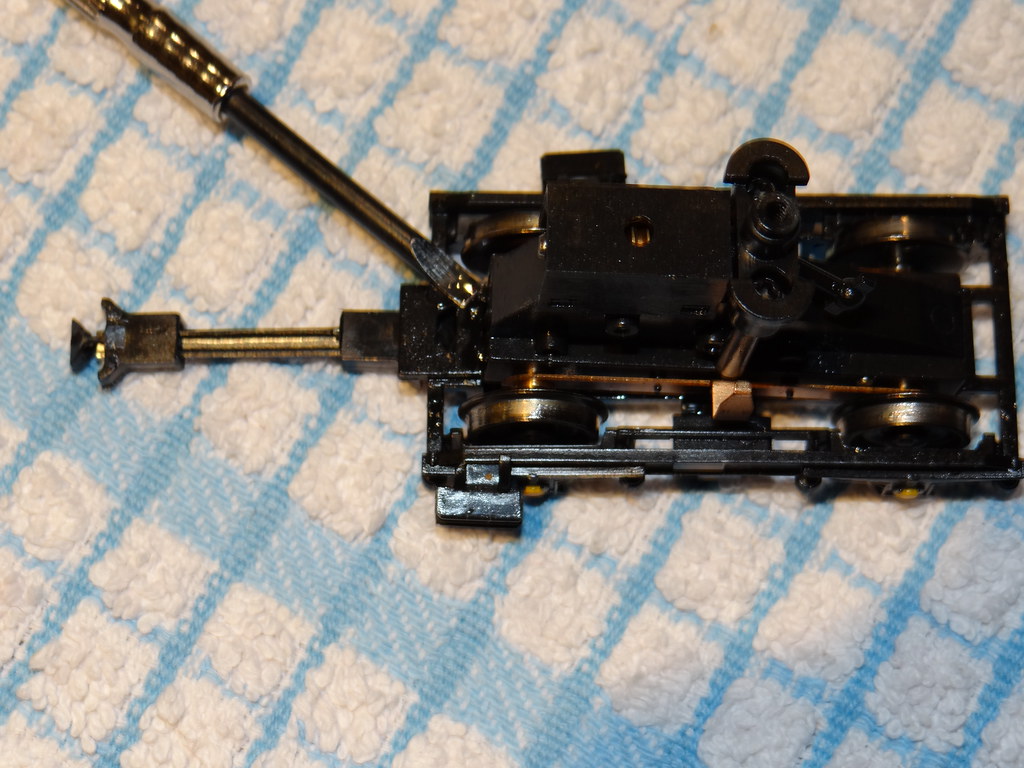
The base plate on the motor bogie can be disassembled using a small screw driver to prise apart.
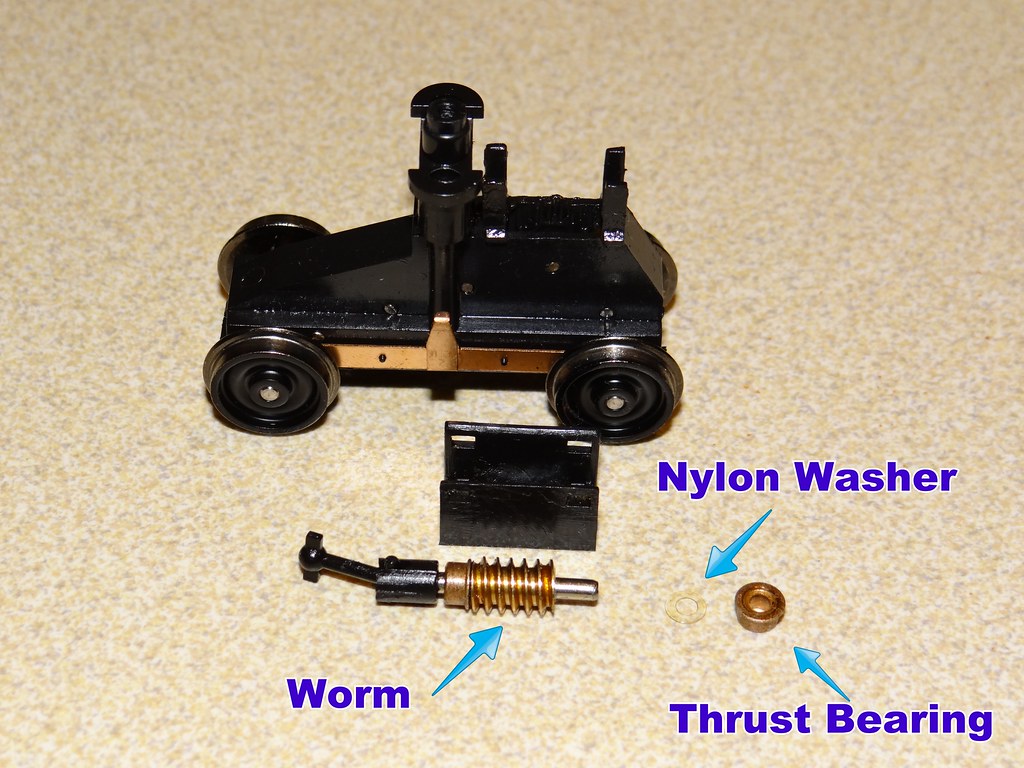
Motor bogie disassembled
The view above shows the main parts cleaned of grease. You will need to take care not to lose the small nylon washer that Bachmann have used between the brass worm and brass thrust bearing.
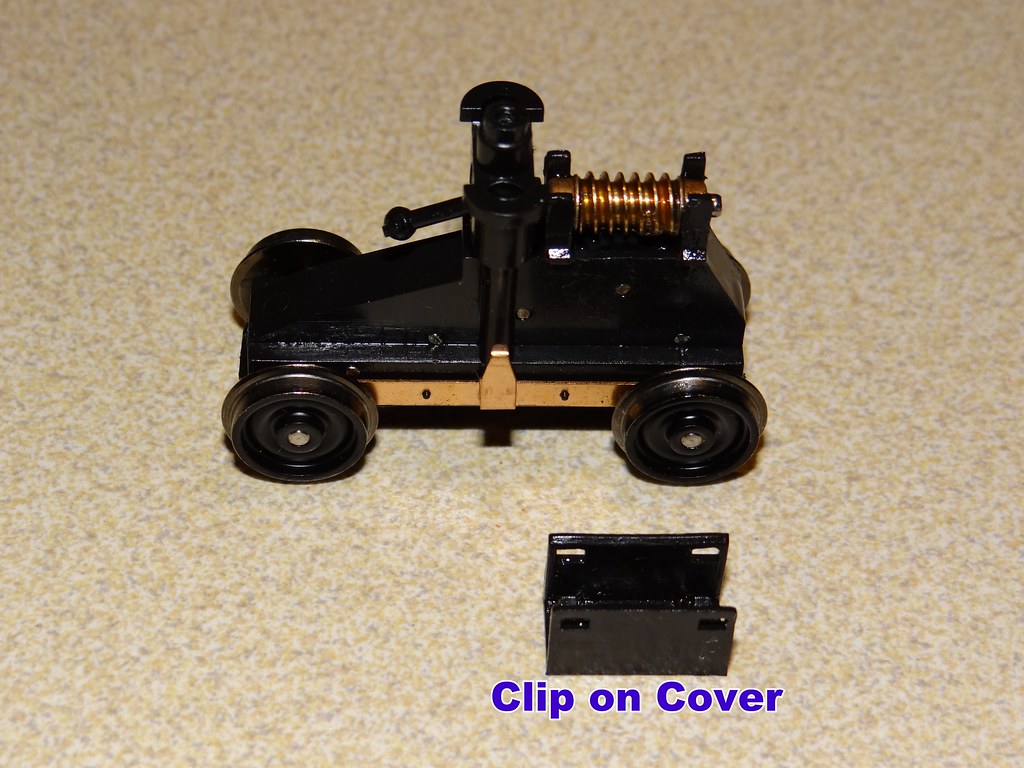
Motor tower reassembled
Another view, this time with the worm drive back in place and waiting for the cover to be fitted (a clip fit).
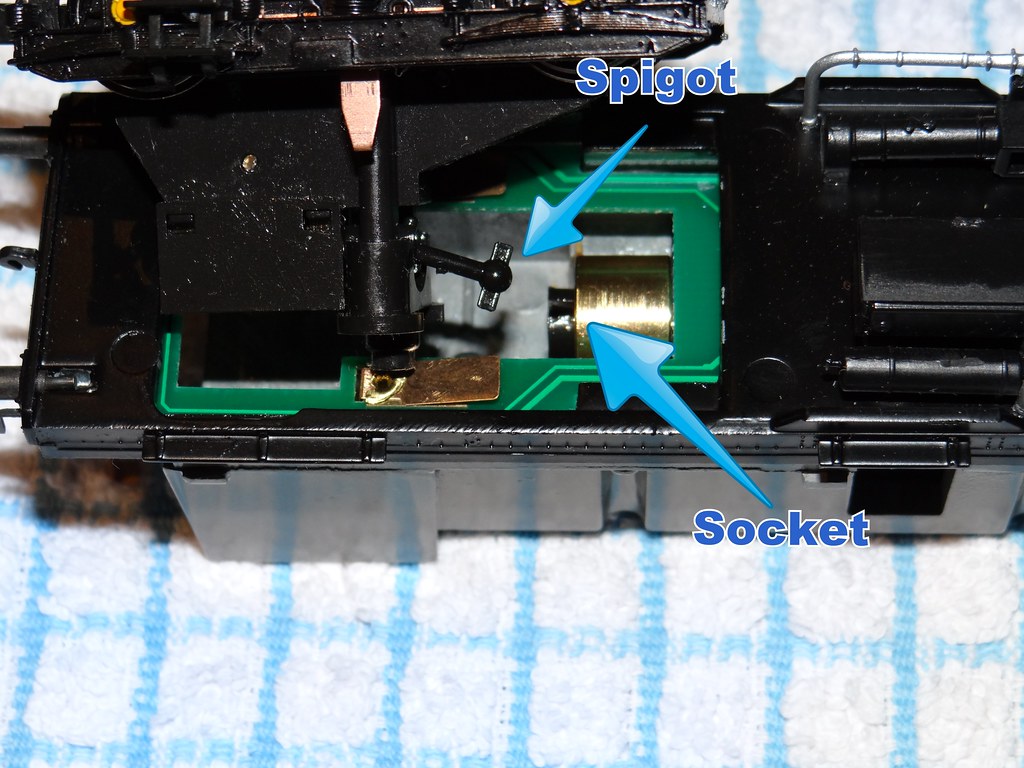
Refitting motor bogie
Getting the motor bogie back into the recess in the PCB requires a little bit of care (and perhaps confidence). Once ‘inside’ the unit there is sufficient space to allow the bogie and driving spigot to be lined up and pushed into the matching recess in the motor. At the same time the top of the bogie has to be lined up with the hole in the top of the metal motor housing and the fixing screw fastened. Finally the body shell and chassis are matched together not forgetting to replace the body fixing screw under the front bogie.
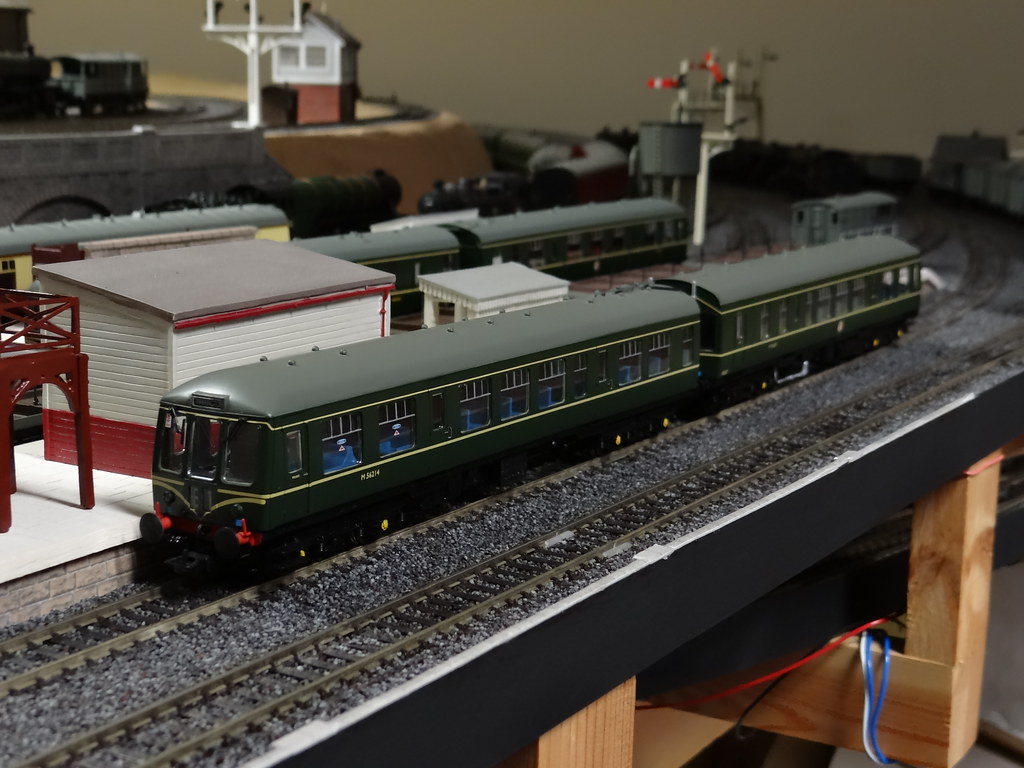
Back in service
Finally a view of the reassembled unit. From a quick inspection of my other Bachmann DMUs, they all seem to be assembled in a similar fashion. The only significant difference that I noted was that the motor in the Derby Lightweight unit is hard wired to the PCB. I did wonder if this perhaps accounted for its noisier operation - some vibration from the motor being transmitted directly to the body shell?
The performance of my elderly Class 108s is now midway between the Class 105 (Cravens) and the Derby Lightweight. The latter have by far the brightest internal lighting – so is that where some of the power is being used? One final observation – all my DMUs seem to perform better with the motor car pushing the trailing car – is that something about the efficiency of the worm drive and thrust bearing?
-
 5
5

6 Comments
Recommended Comments
Create an account or sign in to comment
You need to be a member in order to leave a comment
Create an account
Sign up for a new account in our community. It's easy!
Register a new accountSign in
Already have an account? Sign in here.
Sign In Now