Jump to content
 
  • entries
    172
  • comments
    1,473
  • views
    376,516

Wiring – a knotty problem


Silver Sidelines

2,248 views

There has been some discussion recently about techniques and materials for connecting ‘droppers’.


8510083704_8d133641a7_b.jpg

Single Core 0.6mm tinned wire for making droppers


Those of you who read this Blog will know that it is an account of my own experiences and as such it contains descriptions of activities and techniques that work for me. Since 1980 I have constructed three large layouts. They have all used Code 100 Peco Streamline track. For each layout I have reused and added to the components from the previous layout. Hence I do not know the current length of track – but I am guessing that it is perhaps in the order of 150 yards. Certainly there are over 100 points some of which date back to the 1980s. The only concession to the 21st Century being that some of the earliest Peco points have had shims added at the frog to ease the passage of the finer scale wheels favoured by Bachmann.


7652091498_076691bbb4_b.jpg

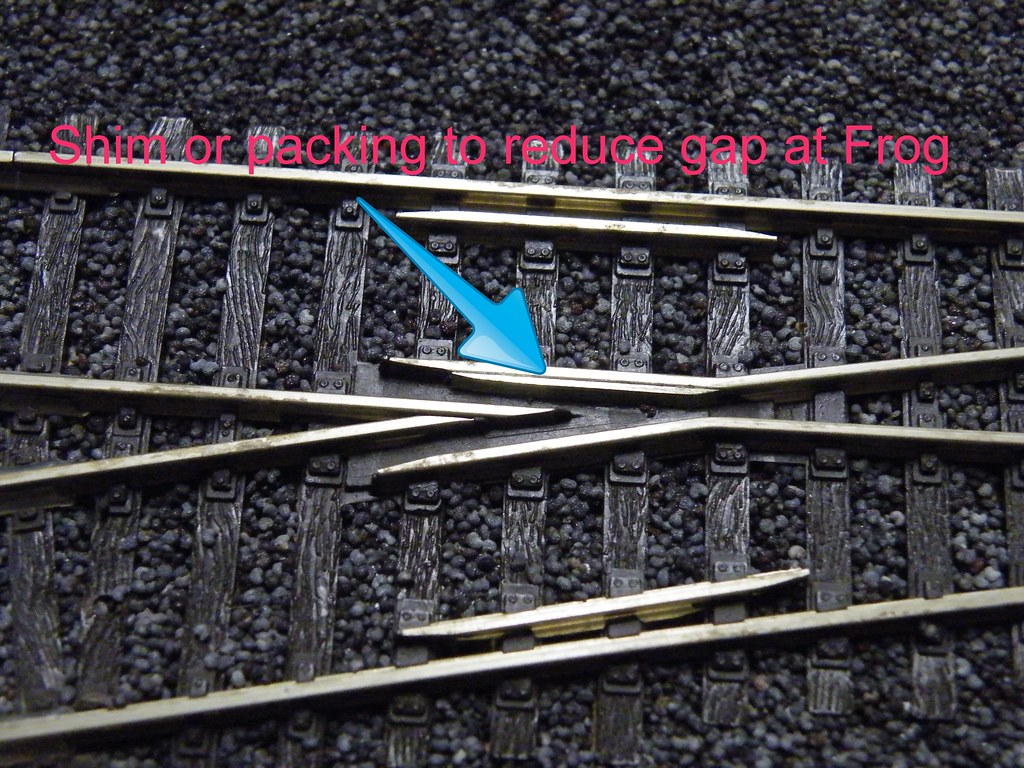
Early Peco Medium Radius Electrofrog Point with shim


All three layouts have been DC and have used ‘Cab Control’. That is where the track is divided up electrically into individual sections separated by nylon insulating rail joiners. Within each track section the individual lengths of track are connected with Peco SL-10 nickel silver rail joiners. For running lines there will be typically three or four lengths of track to each ‘Section’ all connected together with Peco rail joiners. However where sidings are involved there may be a dozen or more lengths of track all connected together in one ‘Section’. In the early days I once purchased some Lima flexible track and some of their rail joiners. Not something that I was minded to repeat and I would definitely not be recommending.


8510073760_767a224180_b.jpg

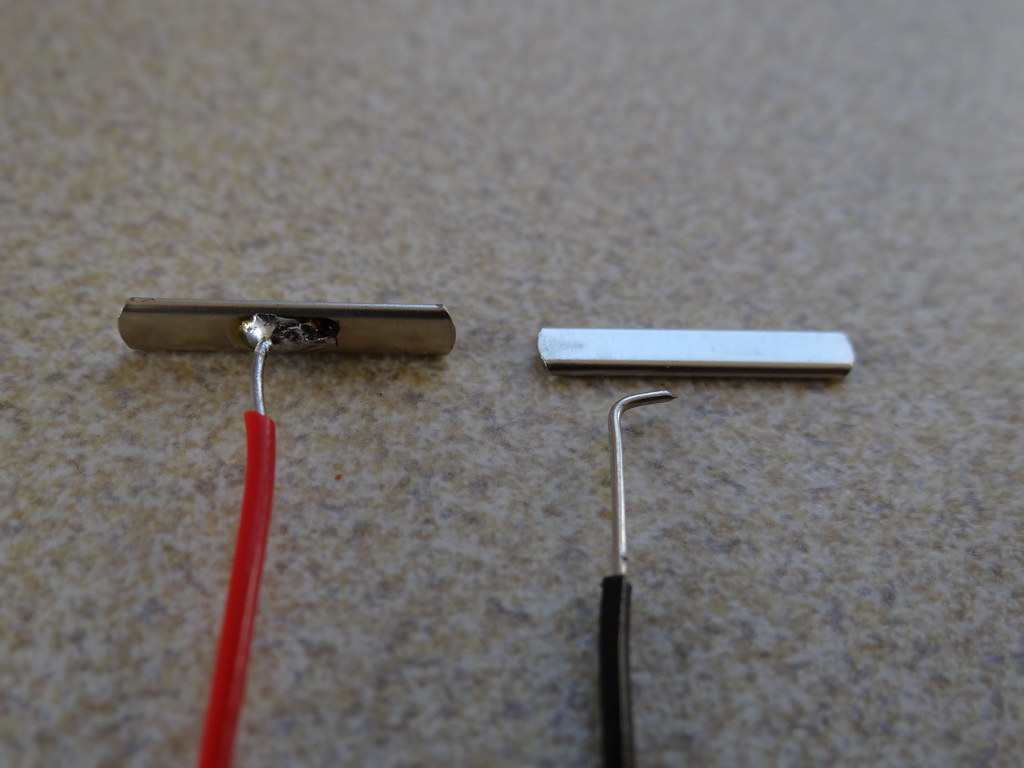
Droppers – single core 0.6mm wire attached to Peco rail joiners


The technique that I have adopted over the years for connecting the power supply to the track involves the use of droppers – short lengths of single core 0.6mm cross section wire fitted to track lengths prior to laying. In the early days I attached the droppers directly to the Code 100 nickel silver rail. However the rail is quite a large ‘heat sink’ and by the time it has been heated up locally to attach the dropper there is a distinct possibility of melting the surrounding chairs and sleepers. Hence I have for some time attached the droppers to ‘brand new’ rail joiners, red wires for connection to the Control Panel, black wires for connection to the common return. There is an added benefit in the development stage of the layout in that any problems with points and motors can be dealt with relatively easily by sliding back the soldered rail joiners and lifting out the affected point.


8510080160_63e5fb9fd3_b.jpg

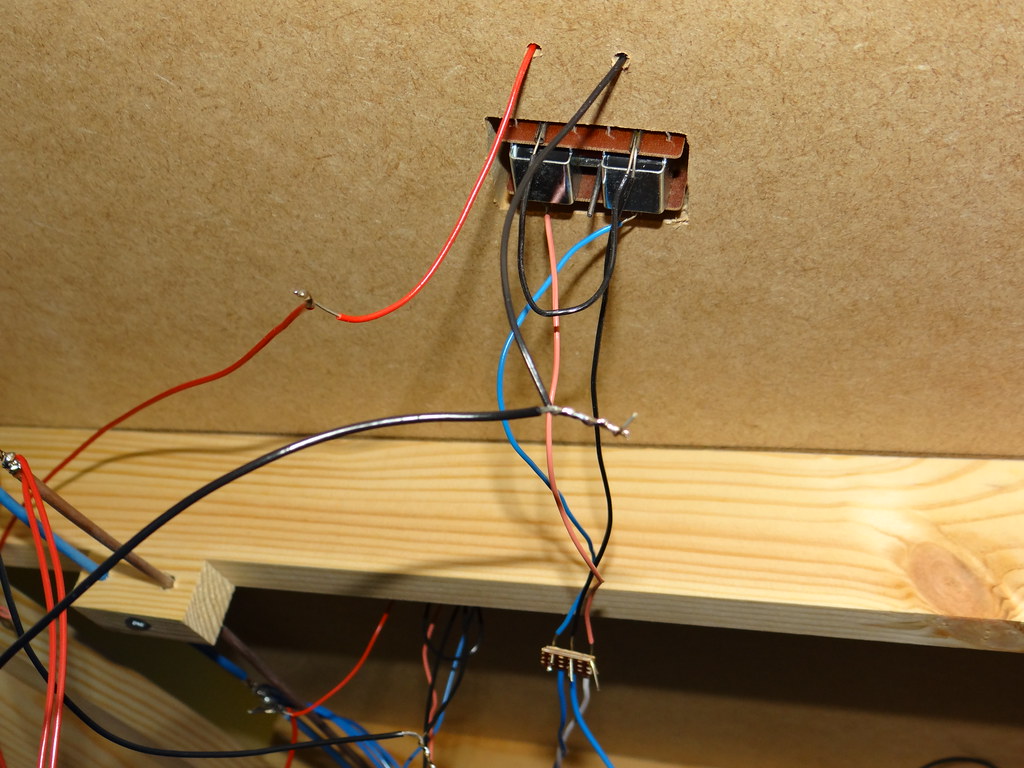
Underside baseboard view beneath turnout


The view above shows the arrangement of the wring at the toe of a turnout, showing the droppers attached to larger multi strand wire used to connect back to the Control Panel (red) or Common return (black). The combination of single core wire with multi-strand wire has the benefit for the more elderly railway modeller, in that the two wires can be wrapped together prior to soldering without the need for extra hands– something which can be tricky underneath the baseboard with hot solder. Do I hear ‘Risk Assessments’ mentioned?


8510071042_cb509e5f35_b.jpg

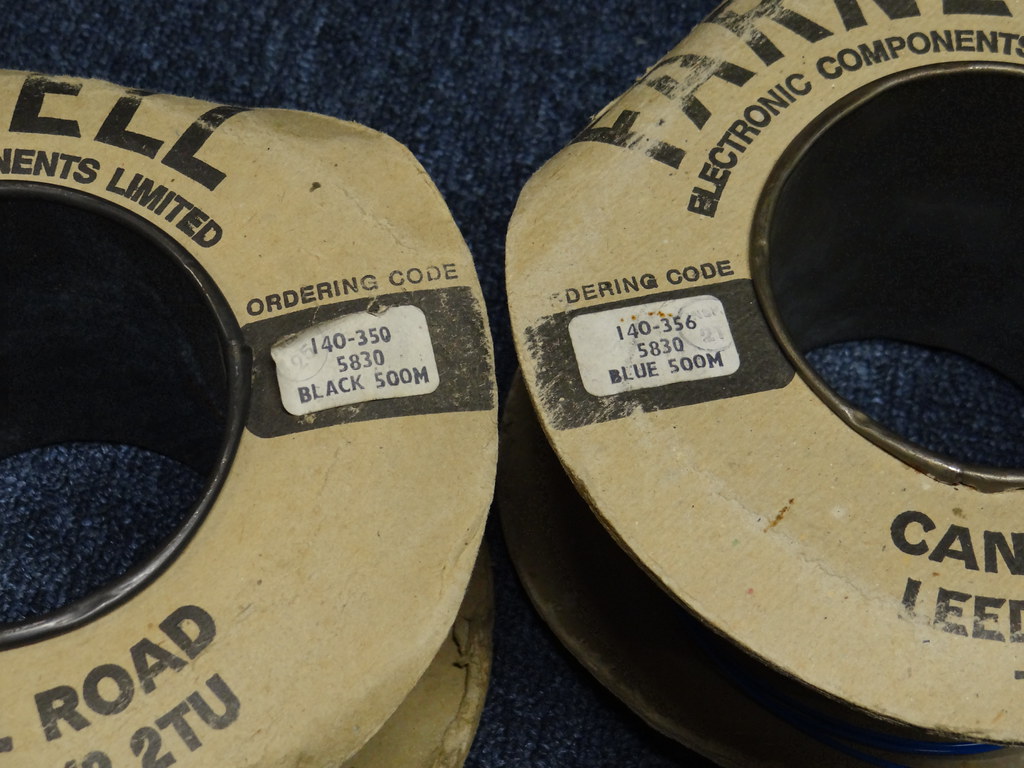
Reels of Multi-Strand Wire


I have included a picture of the reels of wire I use for connecting the droppers to the Control Panel and to the Common Return. It seemed suitably heavy and was available – perhaps the labels will mean something to others of you ‘out there’?


8508958637_8a4dc49edf_b.jpg

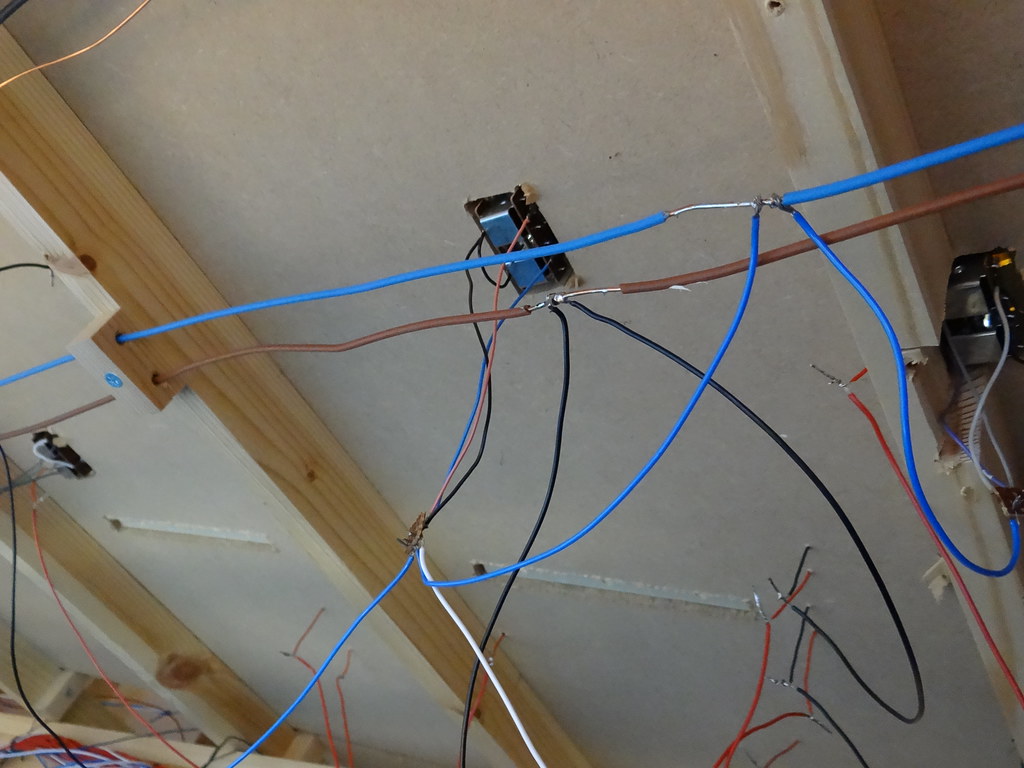
Not a pretty picture


A picture for all seasons? A typical view beneath the baseboard showing the ‘brown’ Common Return stripped from 240 volt ring main cable. The parallel blue core fulfills a similar role with regard to powering the point motors.


Does it work? Of course it works – take a look at the

. You can gauge the size of the layout by the fact that it takes nearly four minutes to circuit just the Main Line.
  • Like 7

10 Comments


Recommended Comments

140-350 and 140-356 are the old Farnell codes for 16/0.2mm gauge wires. The current codes for 500 metre reels are Black - 117-2916 and Blue - 117-2924.

  • Like 1
Link to comment

140-350 and 140-356 are the old Farnell codes for 16/0.2mm gauge wires. The current codes for 500 metre reels are Black - 117-2916 and Blue - 117-2924.

cpman46 - thank you for that - an answer within a few hours of posting is amazing.  You deserve two stars!


Regards


Ray

Link to comment
  • RMweb Premium

Thanks for the tip about the shims!

All my layouts are wired with droppers the same way except I use single core wire throughout and burnish the underside of the rail joiners.

The only thing to watch out for is if cleaning your track with denatured alcahol the liquid is so thin that it can wash the dirt down into the rail joiners and cause shorts!


Shaun

  • Like 1
Link to comment

Hello Shaun


Good to hear from you again - good point, I had not thought of that problem.  All my rolling stock has metal wheels and I do feel that this keeps the track cleaner. There are places on the layout where I do get a build up of 'black' on the track but I can usually just wipe it off with a piece of dry cloth.


Regards


Ray

Link to comment
  • RMweb Premium

Hi Ray


There was a very good article in one of the magazines quite a few years ago about standards with regards to all things track.

It talked about using back to back gauges, track setters, coupling height gauges and using metal wheels. I too replaced all  plastic wheels and couplings at great cost! It was well worth the effort. Dapol do good wheels (which are cheaper than Bachmann or Hornby) which I employ in brass barings along with Bachmann mini type couplings on most of my kit/scratch built stock to great effect! I've even perfected a simple Heath Robinson style uncoupling system that uses Ratio signal levers, a block of wood, cable tie and a cast plate that sits at sleeper height.


Regards Shaun.   

  • Like 1
Link to comment

You are likely to find that putting a shim on the check rail will improve the performance of the turnout rather more than putting it on the wing rail (as you have done).  This is because the job of the checkrail is to bear on the rear of the flange and make sure that the other wheel is not tempted to take the wrong route at the crossing.

Link to comment

.. putting a shim on the check rail ... rather more than putting it on the wing rail .

I am following Peco literature of the time which recommended the use of a 0.6mm nickel silver shim fitted as I have used.  I hear your argument but I am not convinced.  I think that for 'toy trains' the gap at the frog is the critical factor and 'finer scale' wheels need more support as they cross the gap when diverging - as opposed to going straight on.  From a practical point of view I would say inserting a short straight fillet is easier than adding a longer curved section to the check rail.


Swings and Roundabouts


Ray

Link to comment

Dapol do good wheels...... which I employ in brass barings along with Bachmann mini type couplings ..... I've even perfected a simple Heath Robinson style uncoupling system that uses Ratio signal levers, a block of wood, cable tie and a cast plate that sits at sleeper height.

Hello Shaun


Lots to answer.  Yes Bachmann mini type couplings have lots of uses and can usefully replace a lot of the old Airfix types continued by Hornby.  I look forward to reading more about your uncoupling system.


I am really interested in your use of brass bearings.  I have rakes of Bachmann Mk1s which run superbly using their original steel axle to plastic bearings.  I have a close coupled rake of Honrby Hawksworth which I should Blog about which also used to run superbly.  However the coaches seem to be losing their free running characteristics and an examination of the axles suggests that they are wearing the plastic bogie frame - not good.


Not sure I agree about the Dapol wheels, I bought some replacement spoked wheels which were very wobbly.


Speak again


Ray

  • Like 1
Link to comment
  • RMweb Premium

The uncoupling system is on my blog as of Tuesday.

I have repaired RTR bogie stock by slicing off the axle box covers and drilling out to fit plain bearings, making sure all is true before gluing the covers back on!

Prolonged use of stock with plastic bearings will eventually wear out.

A spot of lubrication helps and any dirt in there say from weathering powders, will only speed up the wear!

Will check my latest batch of Dapol wheels. I like Romfords the most but they're more costly.

Got some mainline wagons from a chap in California which need smaller Hornby couplings and metal wheels but it's so nice to have 30 year old stock that

  • Like 1
Link to comment

Create an account or sign in to comment

You need to be a member in order to leave a comment

Create an account

Sign up for a new account in our community. It's easy!

Register a new account

Sign in

Already have an account? Sign in here.

Sign In Now
×
×
  • Create New...