

Buffers – fitting sprung buffers to Hornby Duke of Gloucester
.thumb.jpg.60c53fcbcaa34017b05b8919d1a9e6d2.jpg)
Entry posted by Silver Sidelines
5,140 views
As a break from work work I took a day off to replace the buffers on my Hornby Duke of Gloucester (DoG).
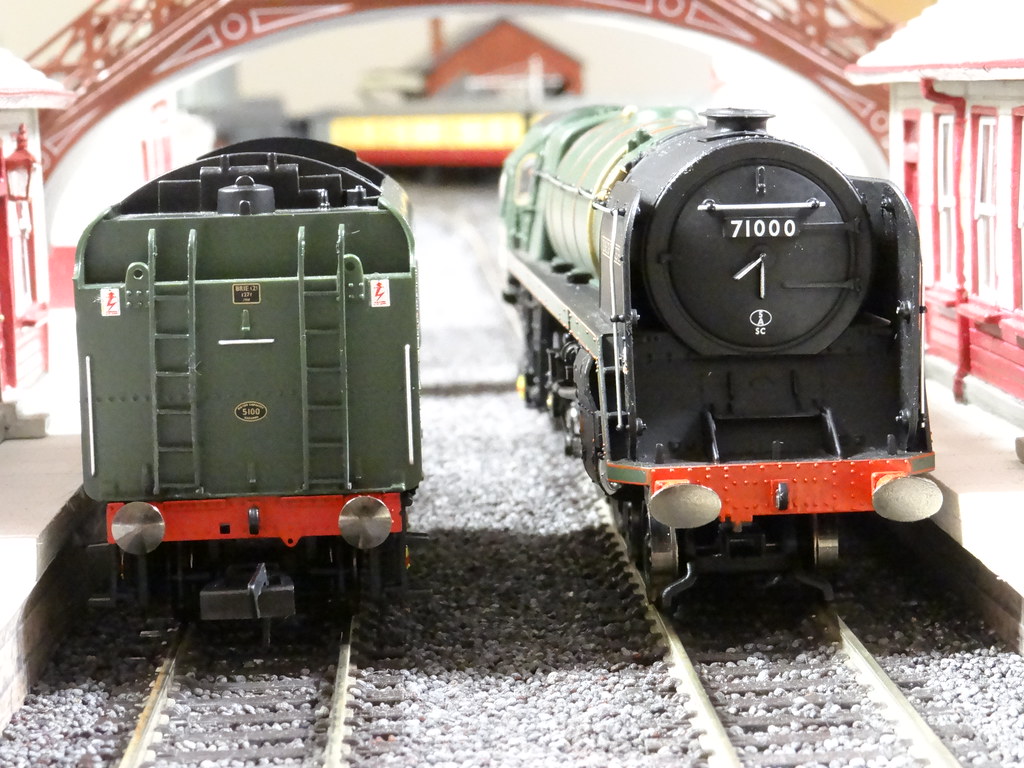
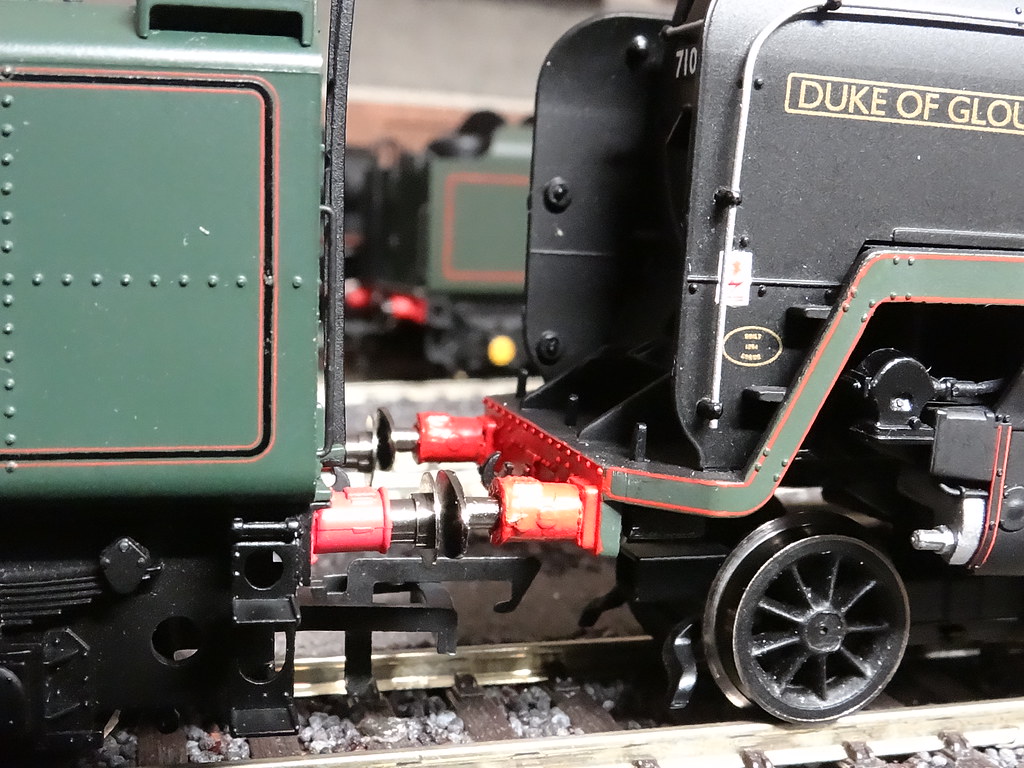
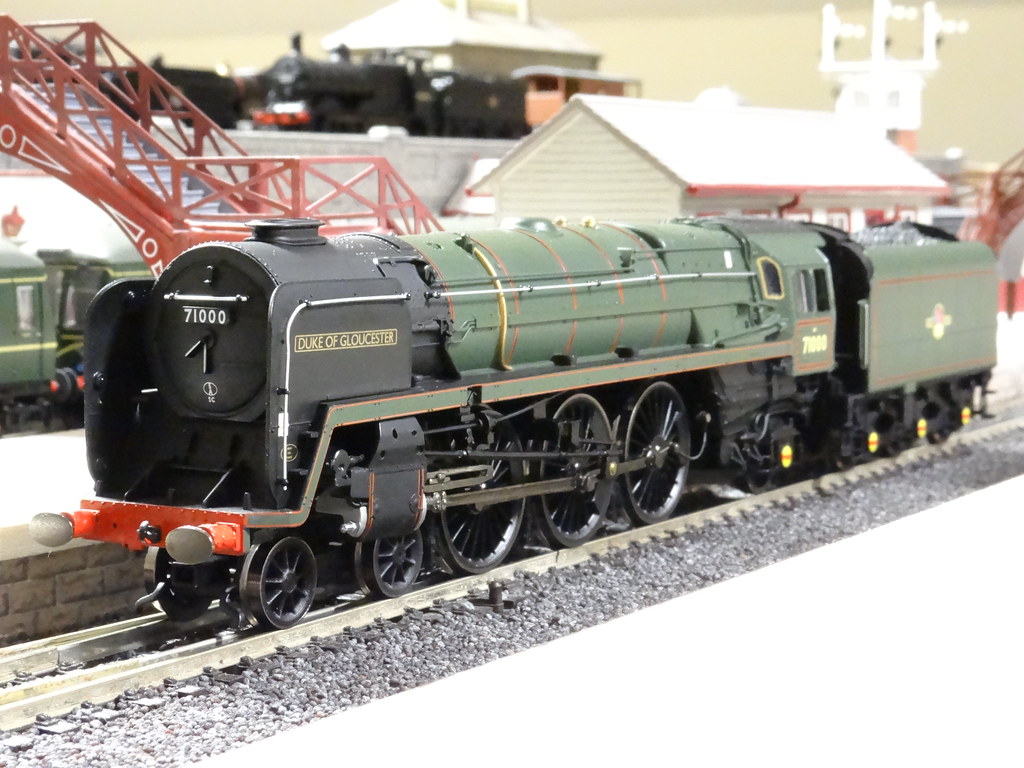
Hornby R3191 Duke of Gloucester as I think it should be with Sprung Buffers
I was inspired by Matt otherwise known as ‘Bluebell Model Railway’ of this website.
Fitting the buffers to the front was straightforward. I followed Matt’s suggestion and used Hornby Spare Part No. X9313. My usual supplier did not have the R (red) variant so mine were black and had to be painted red.
There are two square holes in the back of the buffer beam which had been used to locate the original buffers. After cutting off the old shanks I used a 0.5mm size drill to extend these holes through to the front. I then gradually enlarged the holes from the front starting with 1/16 drill bit, moving up to 5/64 and finishing with 3/32. The Hornby body shell is made of relatively soft plastic and I rotated the drill bits with my fingers. Finally I used a craft knife again to clean the edges of the holes. I used Super Glue to fix the new buffers. This type of glue can dissolve the plastic so use sparingly.
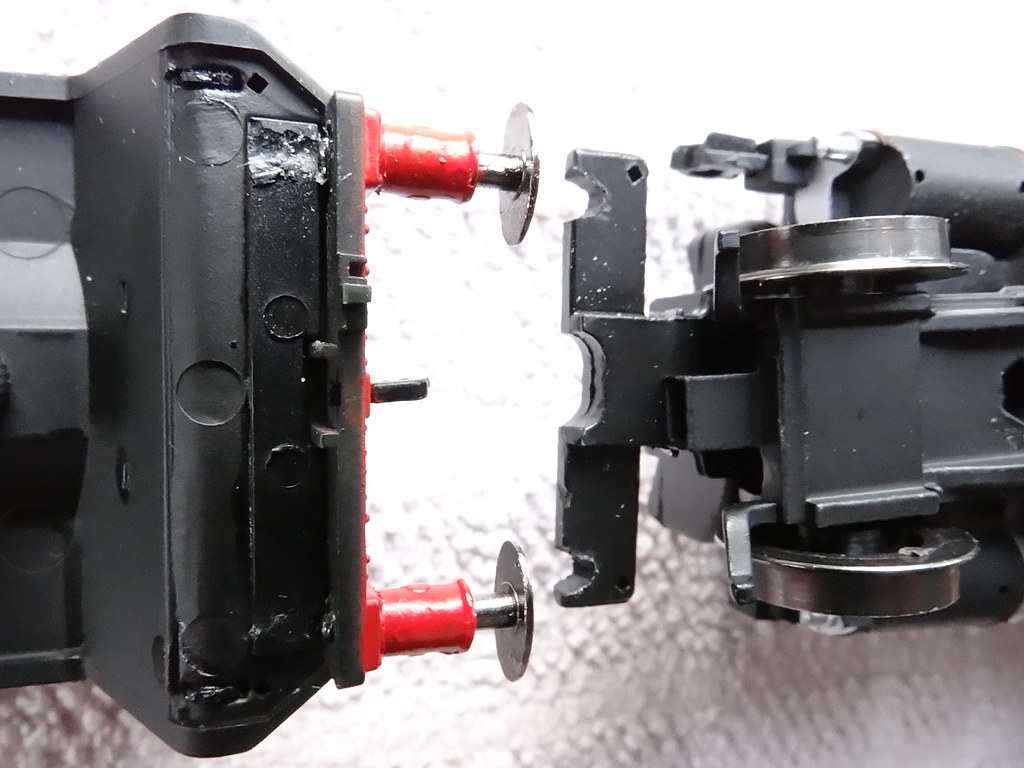
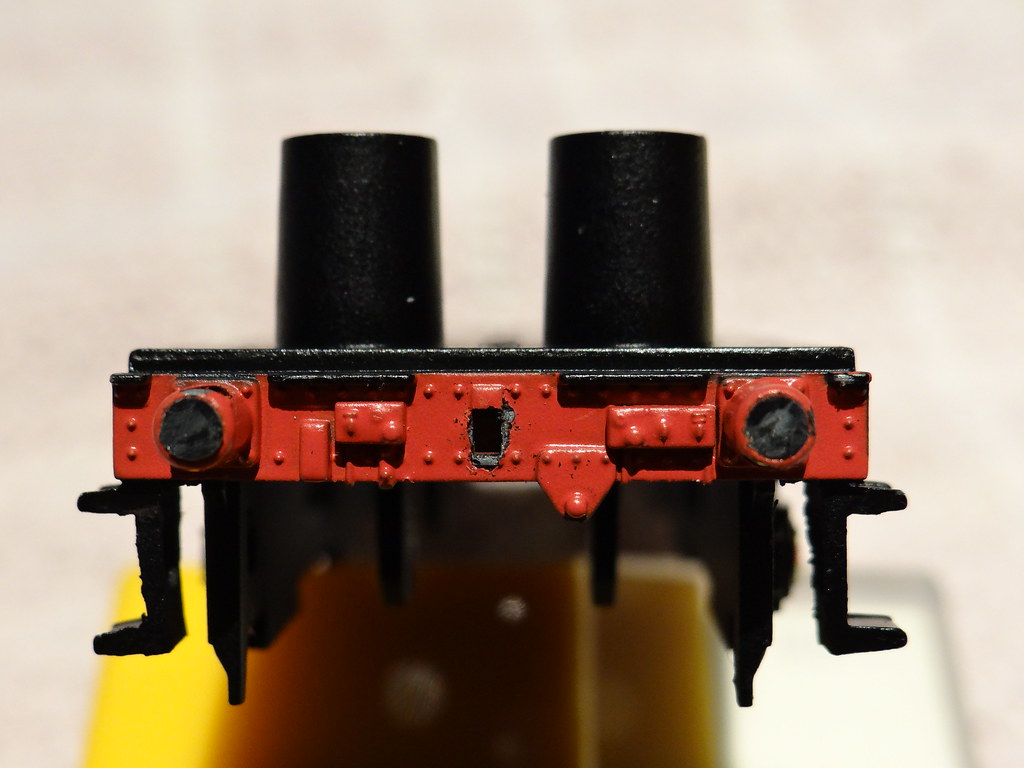
Engine Buffers Hornby X9313 fixed to buffer beam, left, grooves ground into chassis, right
With work on the bodyshell complete l used a minicutting disc to grind two grooves in the front of the chassis to allow the sprung buffers to retract.
Matt suggests X96202 buffers for the Tender. These are for the Hornby 28xx/38xx range and in my opinion are not a good match for DoG. I would try a different approach. I would swap the DoG tender underframe complete with buffers for a Hornby spare from a Britannia. There seems to be two variants available, X9601 has plain black axle boxes and a four pin socket to connect with the engine, and X9602 which has yellow painted axle boxes and a two pin socket. DoG does not have tender pickups and I didn’t need a socket, I would use X9602 and add a red stripe to the yellow ‘BR TIMKEN’ axle covers to match the engine.

Masking the Timken Bearing Covers prior to painting red
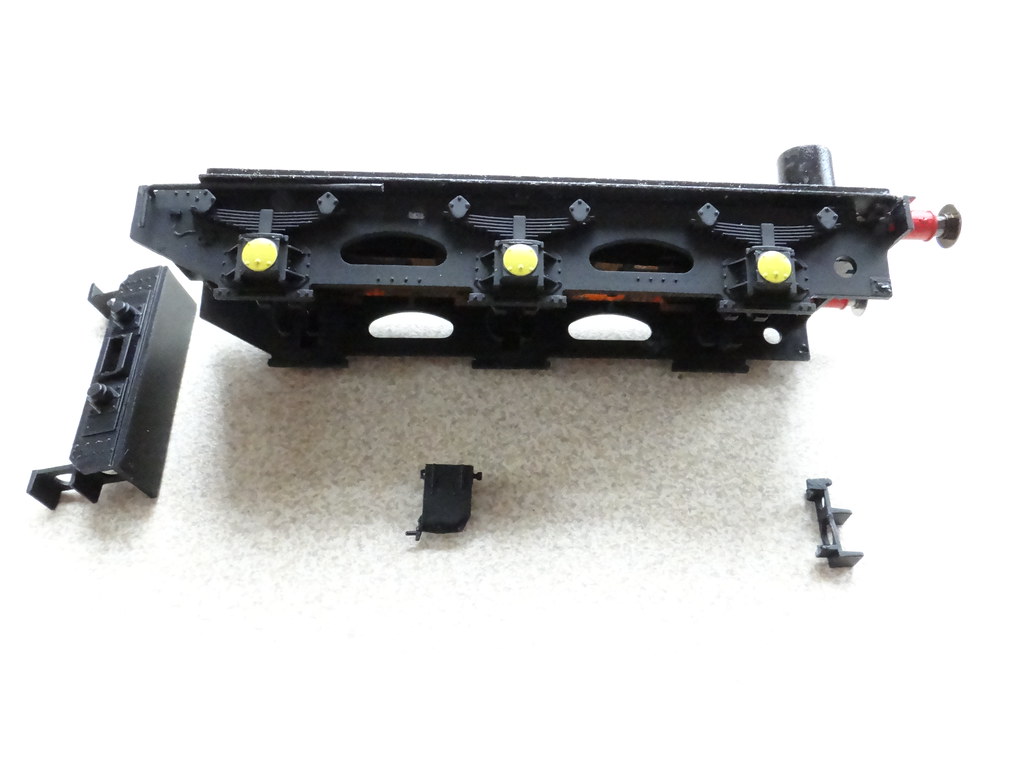
Whilst the DoG and Britannia tender frames appear similar, their construction is quite different. In fact Hornby would appear to have engineered the whole DoG from scratch without any attempt to utilise parts from previous models. I shall return to this point later.
DoG Diecast metal tender frame - nice detail but a bit chunky
’BR TIMKEN’- good detail beneath the paint
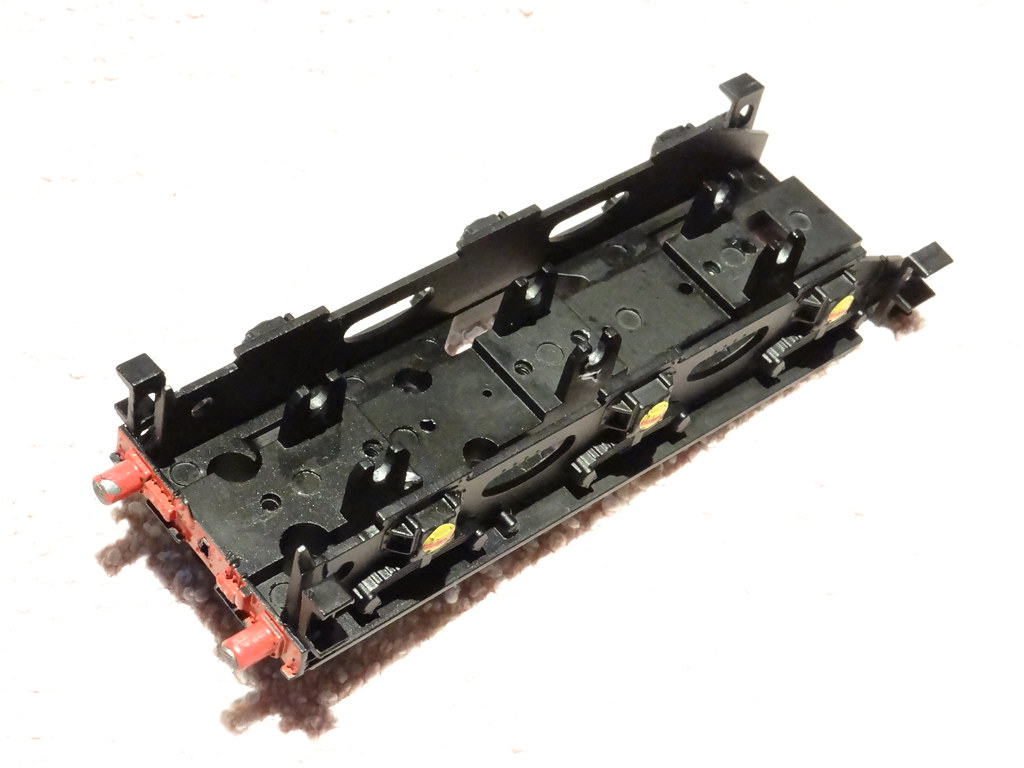
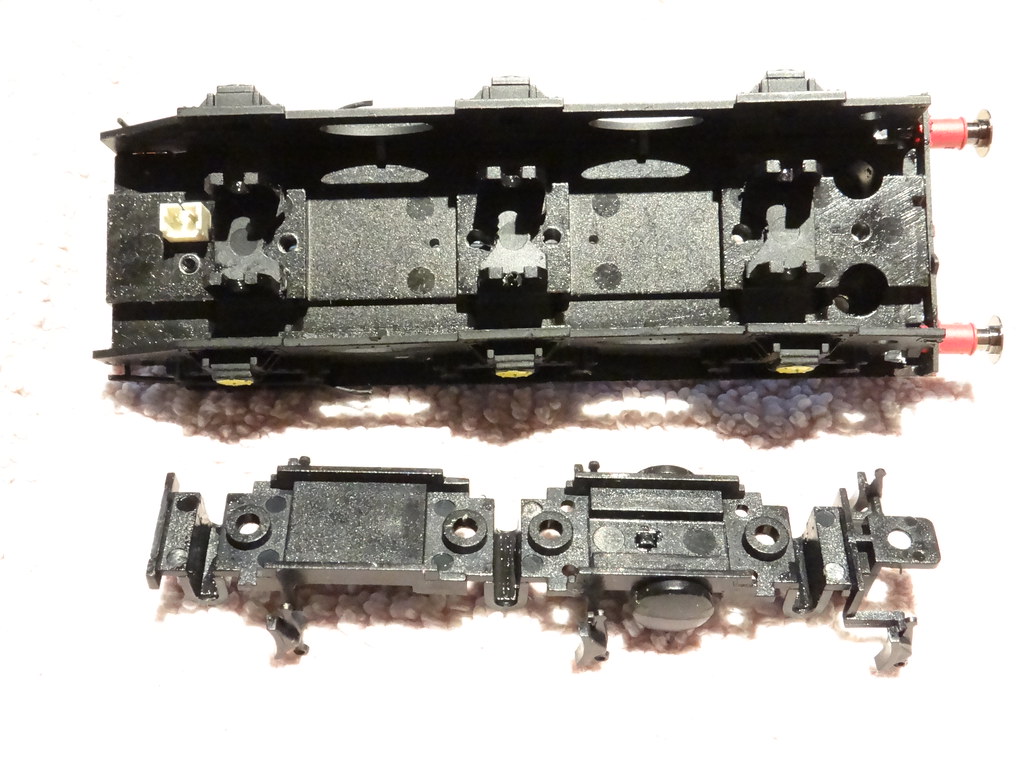
Now below a view of DoG tender underframe showing the parts that need to be removed and highlighting the difference in engine to tender couplings.
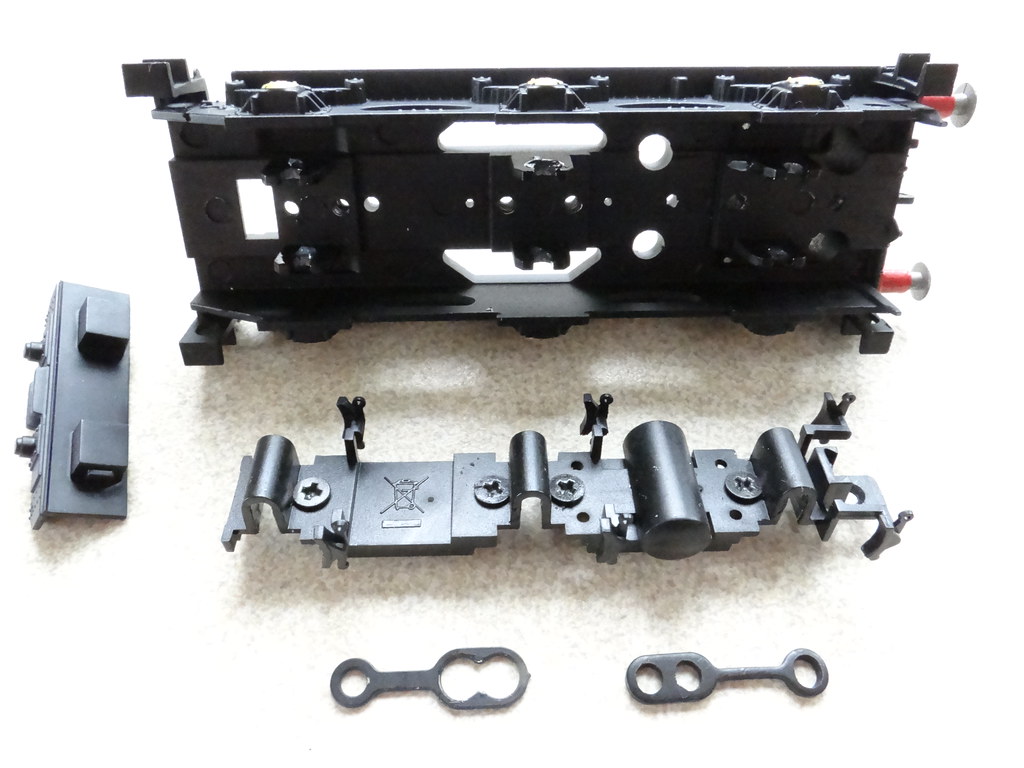
DoG Tender Frame disassembled – DoG versus Britannia engine coupling bottom
The Britannia Tender frame has a die cast platform but the rest, including dummy side frames, inside wheel bearings and rear buffer beam are all add on highly detailed plastic components. Luckily the adhesive bond between the die casting and the plastic is poor and both DoG and the Britannia tender underframes can be rapidly disassembled to assist with conversion and repainting.
Britannia Tender Frame Part No X9602 - beginning to disassemble - and what is the little tank used for?
The Hornby adhesive works well for plastics. If like me you wish to use the DoG front platform with the Britannia front tender steps it is likely that you will need to prise the plastic front steps off the Britannia front platform. Hot water is no help. Soaking in acetone nail varnish remover softens the adhesive – and some of the plastics – so be warned!
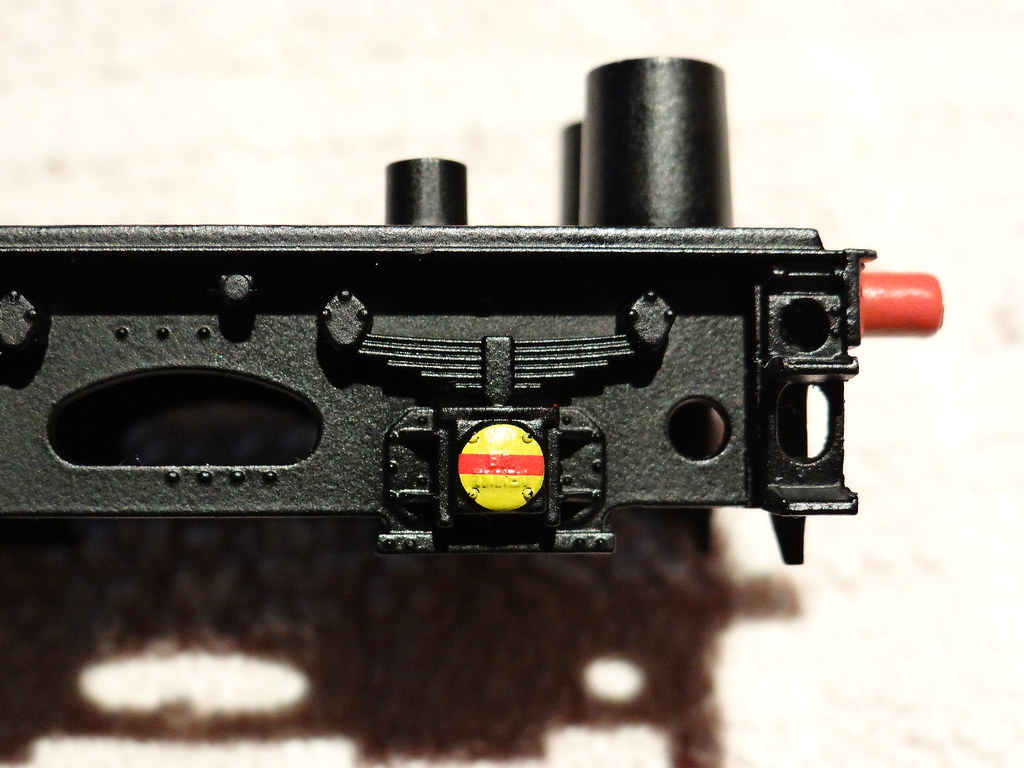
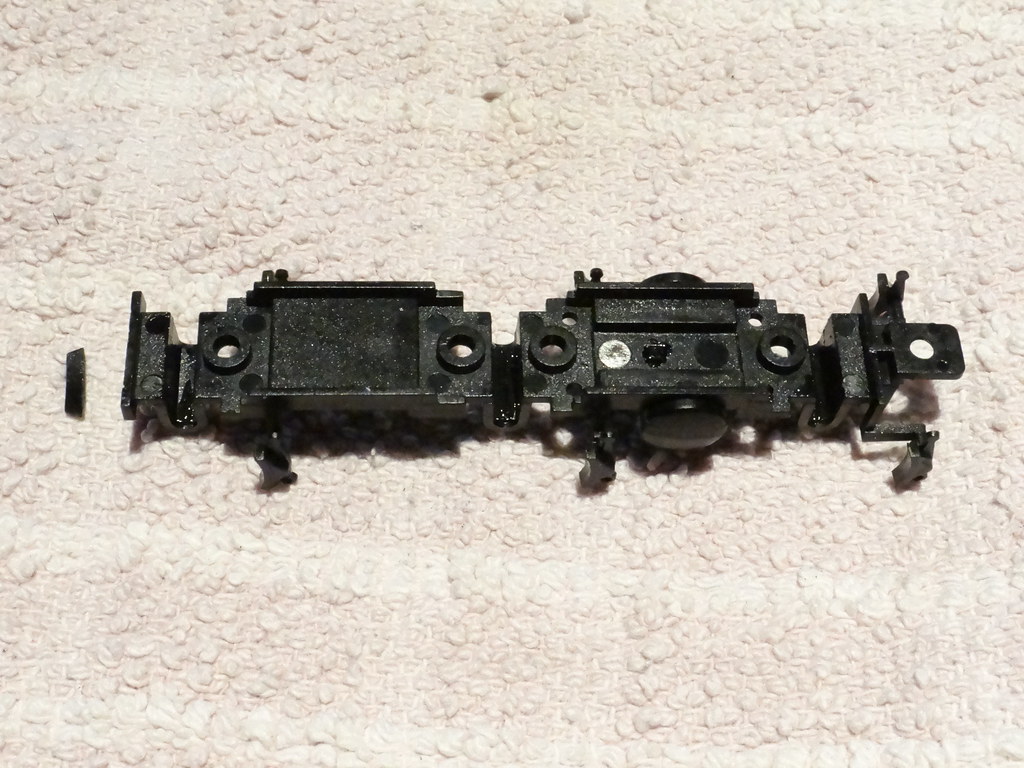
The three views below show how to mix and match the axle keeper from DoG with the inside wheel bearings from Britannia.
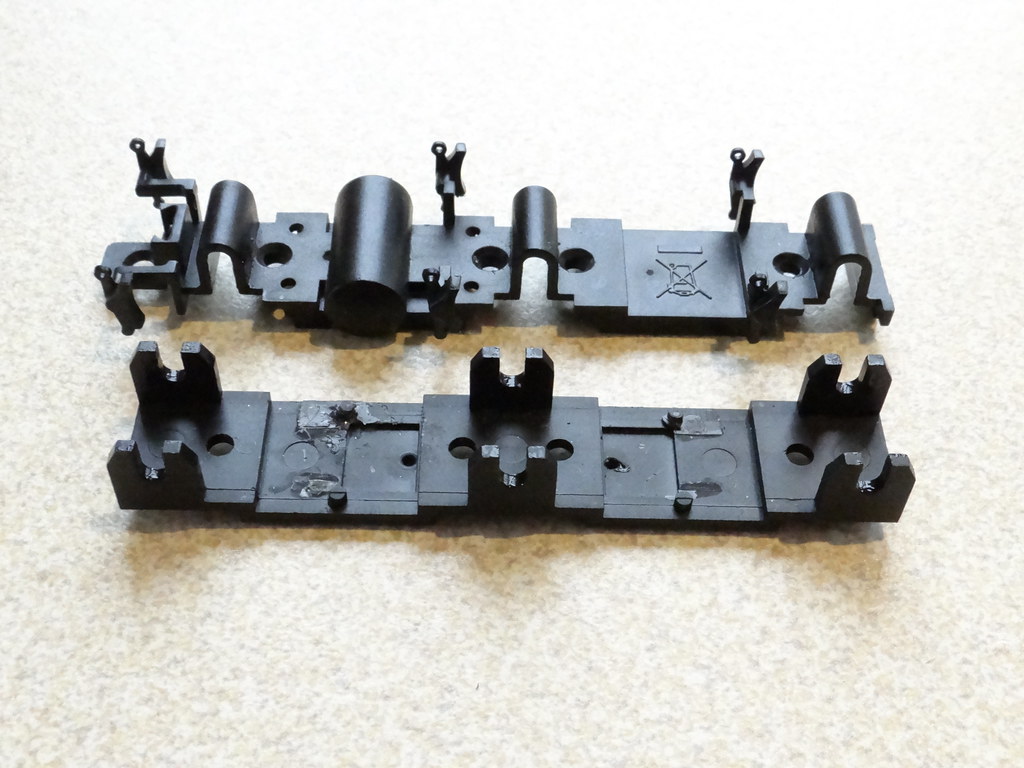
Mix and match-DoG keeper - top, Britannia chassis - bottom
The DoG axle keeper top is not a good fit with Britannia chassis bottom
Cut Britannia wheel supports and fit individually ready for DoG keeper plate - bottom
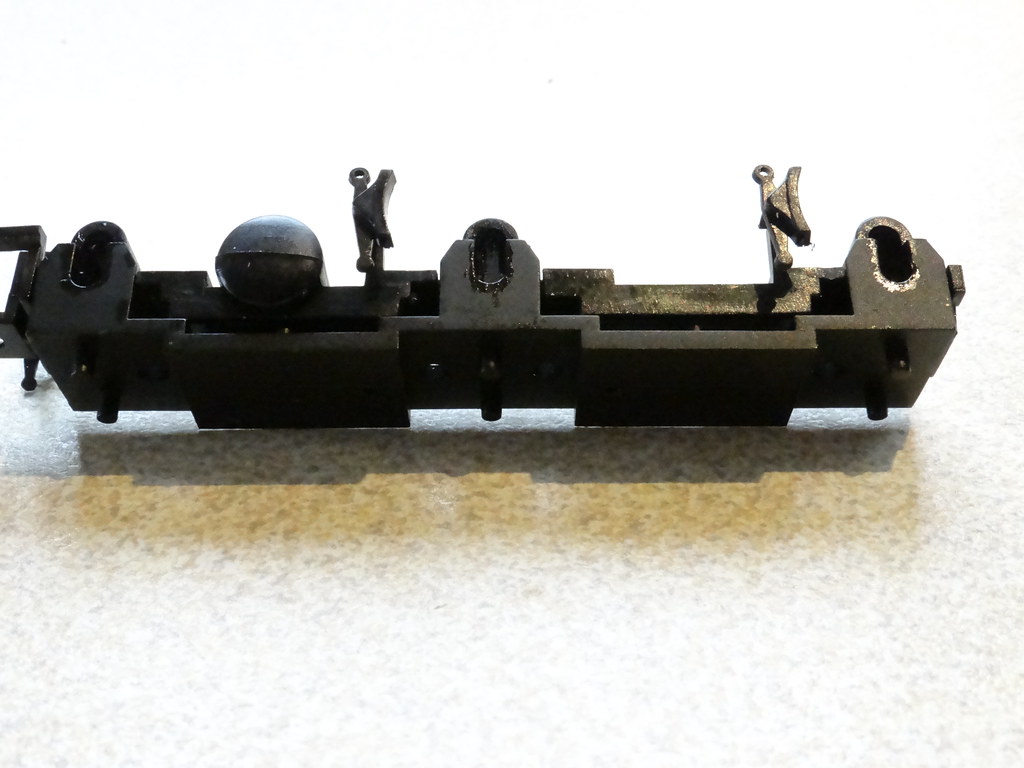
I did try to leave the DoG components ‘unmolested’ however it is necessary to remove a small lip from the axle keeper plate as shown below.
DoG retainer - need to remove lip at left hand side
Reassembly is straight forward. Most important parts are screwed together. For the finer detail I again used Super Glue. Remember to insert the engine to tender coupling before gluing the front platform in place! Also for consideration are the two little side tanks that hang down from the tender sides (I have to admit I don’t know their prototype use). For Britannia the top green part of the tanks are part of the tender top and the lower black parts are attached to the tender frame. On DoG all of the tanks are part of the tender body moulding. As I have said already I tried to leave DoG parts unmolested. I chose to snap off the bits of black coloured tank from the Britannia chassis – the broken fixings being completely masked when the DoG tender top is lowered into position.
Replacing the tender frame is more costly than swapping buffers but I would say there are added benefits.
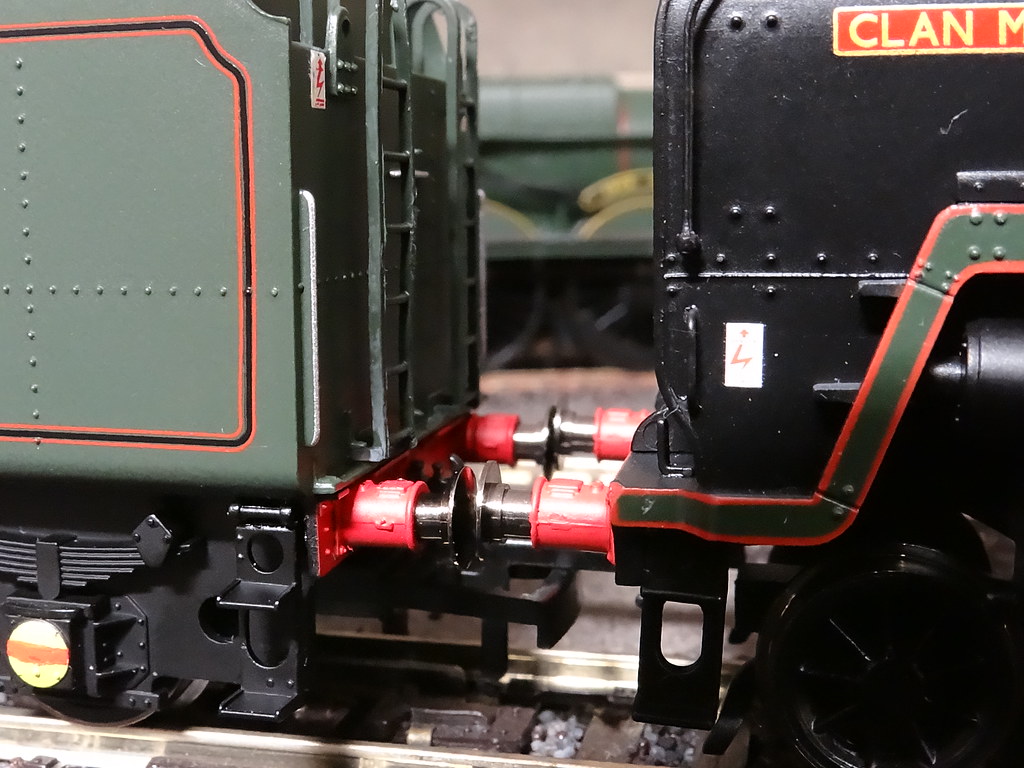
Duke of Gloucester Tender - left versus Hornby Clan - right
Altogether I think a vast improvement.
Hornby Clan Tender - left versus Duke of Gloucester with Replacement Buffers - right
The spare tender frame for Britannia came without a scale coupling hook so I needed to recover the plastic moulding from DoG.
DoG Diecast metal tender frame – note the chunky rear steps and plain cast buffer shanks
I was lucky and after soaking in nail varnish remover for a good few hours the DoG hook was prised loose. – but oh dear the plastic buffers. The silver grey paint over the buffer heads was perfectly intact but the plastic inside has collapsed – so be warned. What I found more interesting was that the spigot on the coupling hook from DoG was about twice the size of the hole in the Britannia buffer beam. Yet another example where DoG seems to have been totally redesigned without reference to any pre-existing Hornby parts or models.
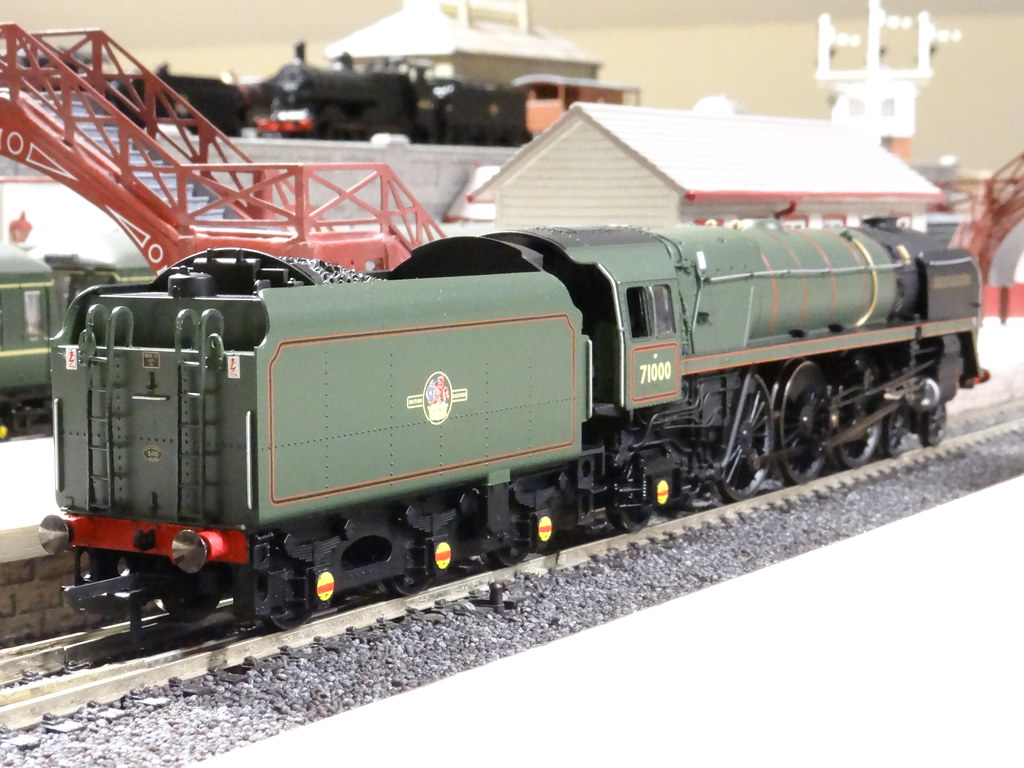
Hornby R3191 Duke of Gloucester as should have been with Sprung Buffers?
The trade price of a set of four Hornby sprung buffers must be around £2.00 whilst a plastic smoke box dart might be around 10p? It ‘beggars belief’ as to why Hornby thought that it was a good idea to miss these parts off the model and in the case of the buffers to substitute some rather clumsy, poorly detailed items not seen on a model since Triang days. Is the clue in the recent Financial Statement to the Stock Exchange? Are Hornby’s ‘trouble’ with suppliers similar to events back in the 1980s when I seem to remember Airfix did not own completely the rights to various models – hence Airfix, Mainline, Replica, Dapol and finally Hornby were all able to ‘sell’ ex GWR ‘B’ set coaches manufactured at the independent Chinese factory?
Much improved
So why didn’t Hornby spend just a few more pennies?
-
 5
5

12 Comments
Recommended Comments
Create an account or sign in to comment
You need to be a member in order to leave a comment
Create an account
Sign up for a new account in our community. It's easy!
Register a new accountSign in
Already have an account? Sign in here.
Sign In Now