Jump to content
 
  • entries
    172
  • comments
    1,473
  • views
    376,469

Silver Sidelines

3,655 views

My last Post discussed the merits of various proprietary couplings that could be used to close the gap between two B Set Brake Composites. Sometimes the solution is so obvious that it gets overlooked. I should thank Nergle for his comment and for pointing me the in right direction.

16734587794_ed1b78fd26_b.jpg

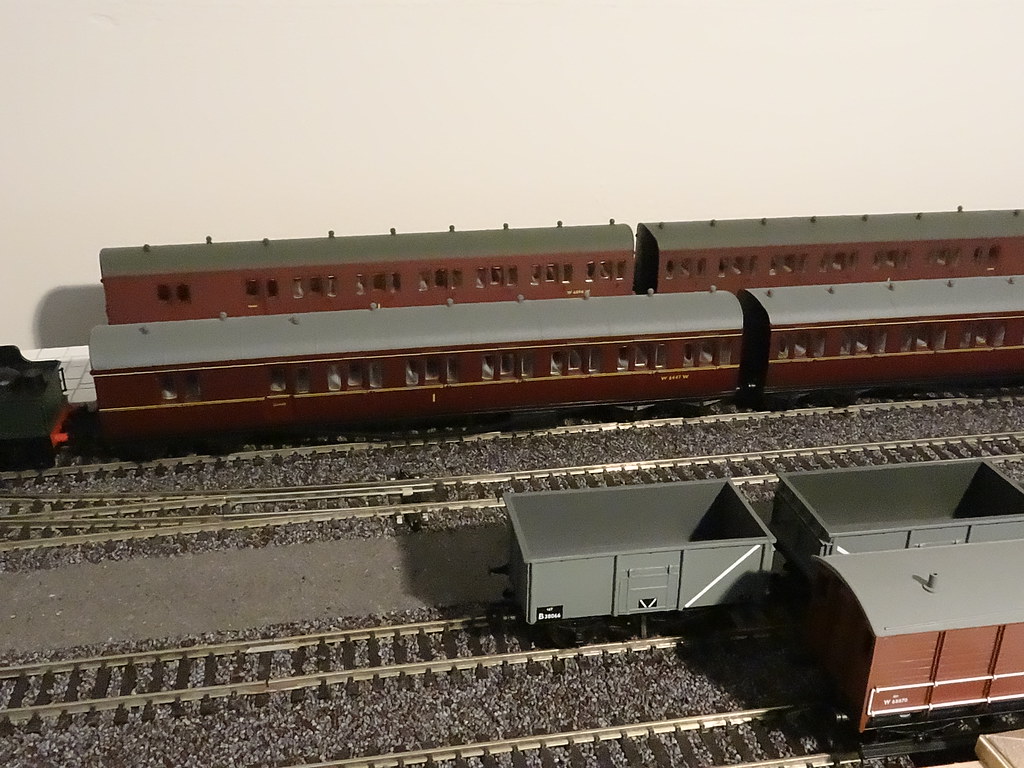
Close Coupled B Sets, Airfix back, Mainline front

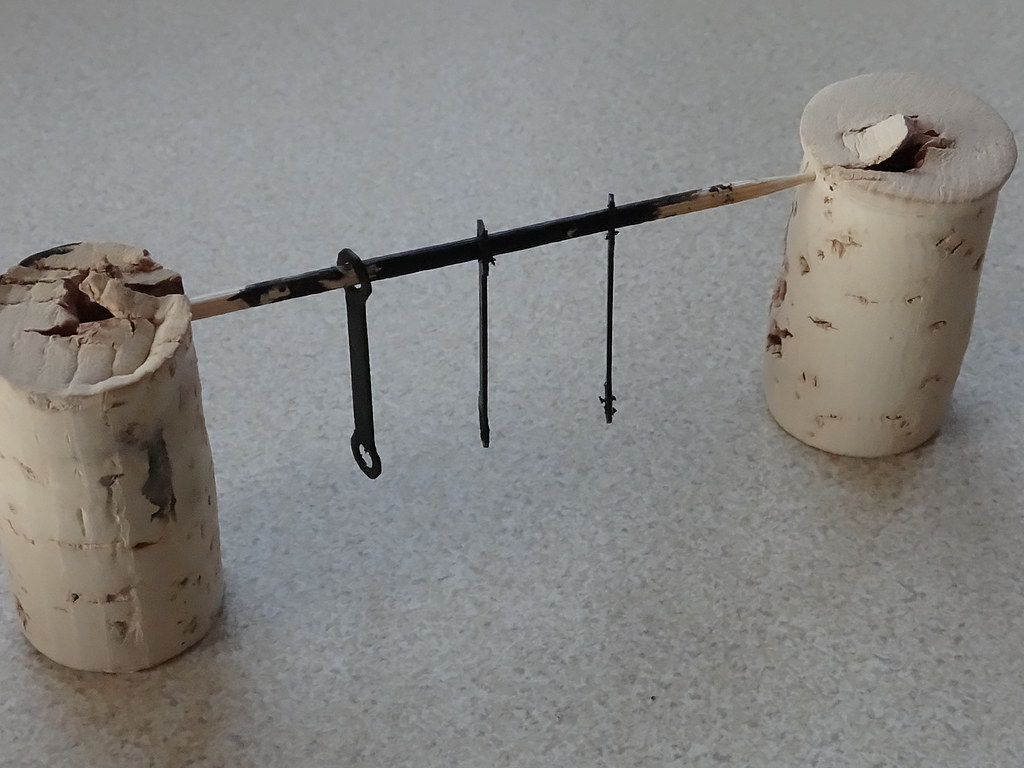
A search of the Internet points to an old blog from Tim Venton currently with a work bench thread on the Scale Four web site. The picture montage below is from Tim's old Blog and shows two types of semi permanent ‘bar’ couplings that were used on some of the prototype coaches.

17167476958_c00415230d_o.jpg

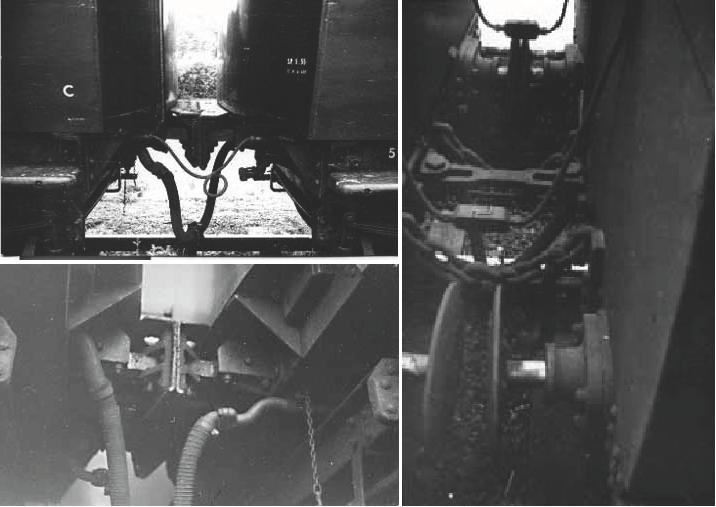
B Set Inner Bar Couplings, Diagram E129 left, Diagram E147, coaches No W6907W + W6908W right, courtesy of Tim Venton

If a simple bar was good enough for coupling the prototype why not for the model?

17355355505_cb58d6cc56_b.jpg

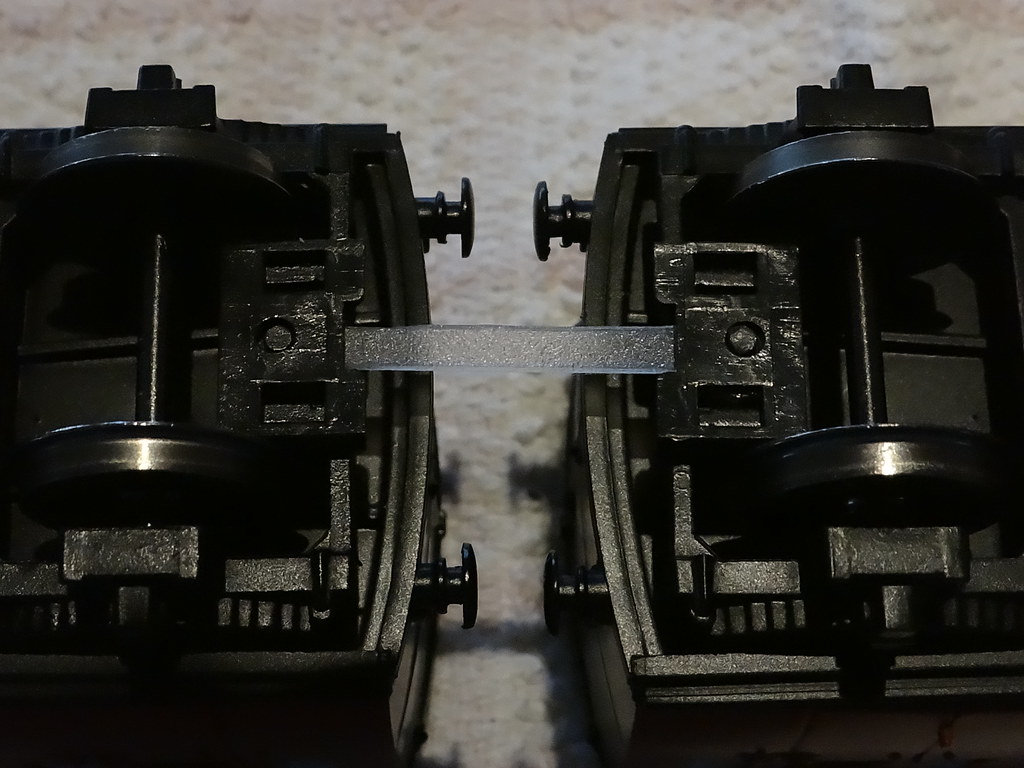
29 mm x 5mm strip cut from translucent vinyl divider

What to use? I settled on some thick plastic / vinyl film that I could cut with a craft knife.

17353437142_0e94cb003f_b.jpg

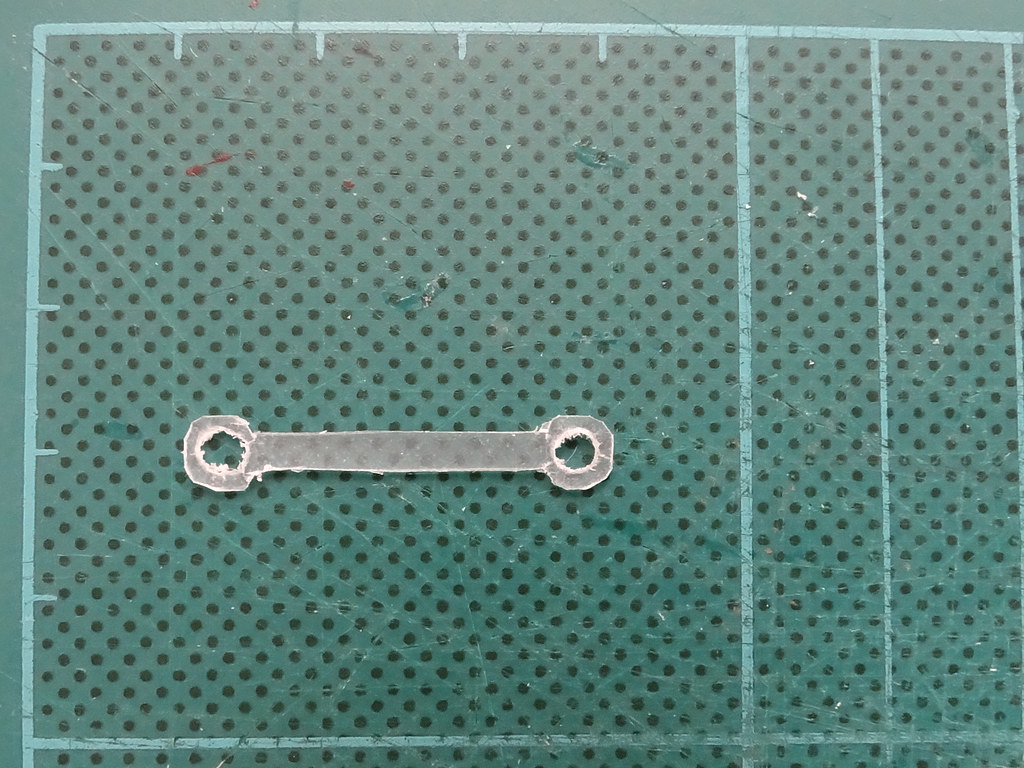
Coupling bar cut to shape, 1/8 inch diameter holes at 24mm centres

In order to safely traverse Peco Medium, Radius Points I arrived at a diameter of 1/8 inch for the fixing holes and a spacing of 24mm.

16735067333_7e43f7e53d_b.jpg

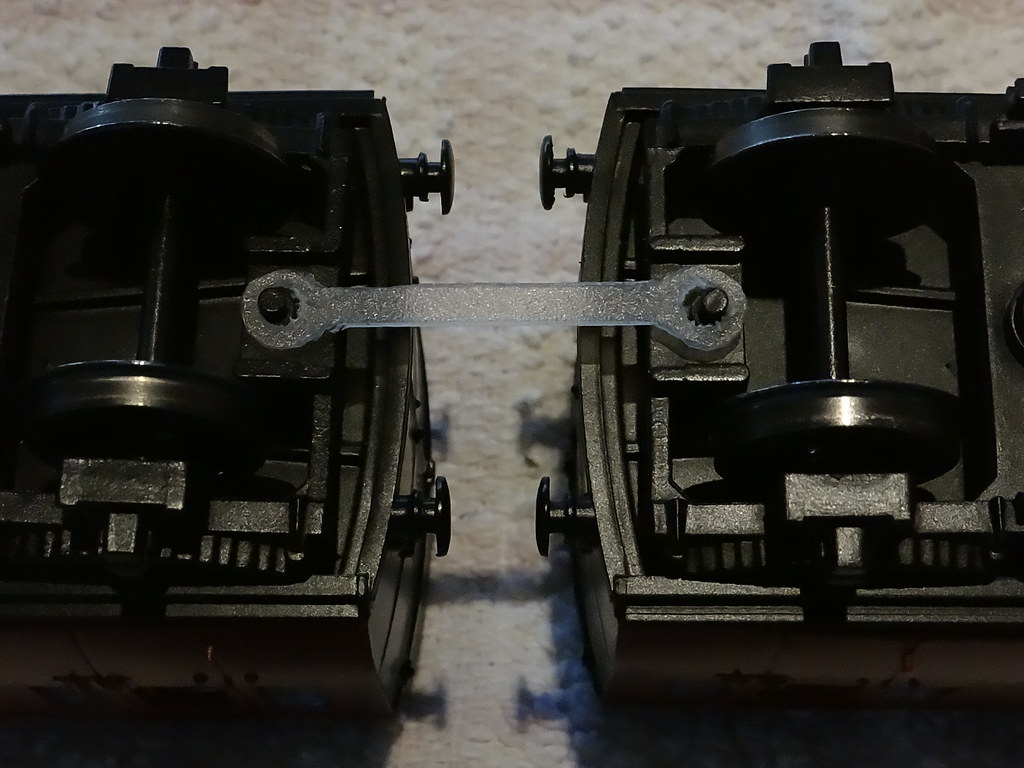
Keeper plates removed and bar placed over couplings pegs

The peg used to centre the Proprietary coupling has a diameter close to 3/32 inch but opening the holes out in the coupling bar to 1/8 inch provides a little extra tolerance if you have slipped when marking out the centres (or if the coach buffers are slightly protruding).

17147859147_9b27d71157_b.jpg

Ready for testing

All that remained was for the bars to be given a coat of black paint.

16735039983_d199aea792_b.jpg

Painting

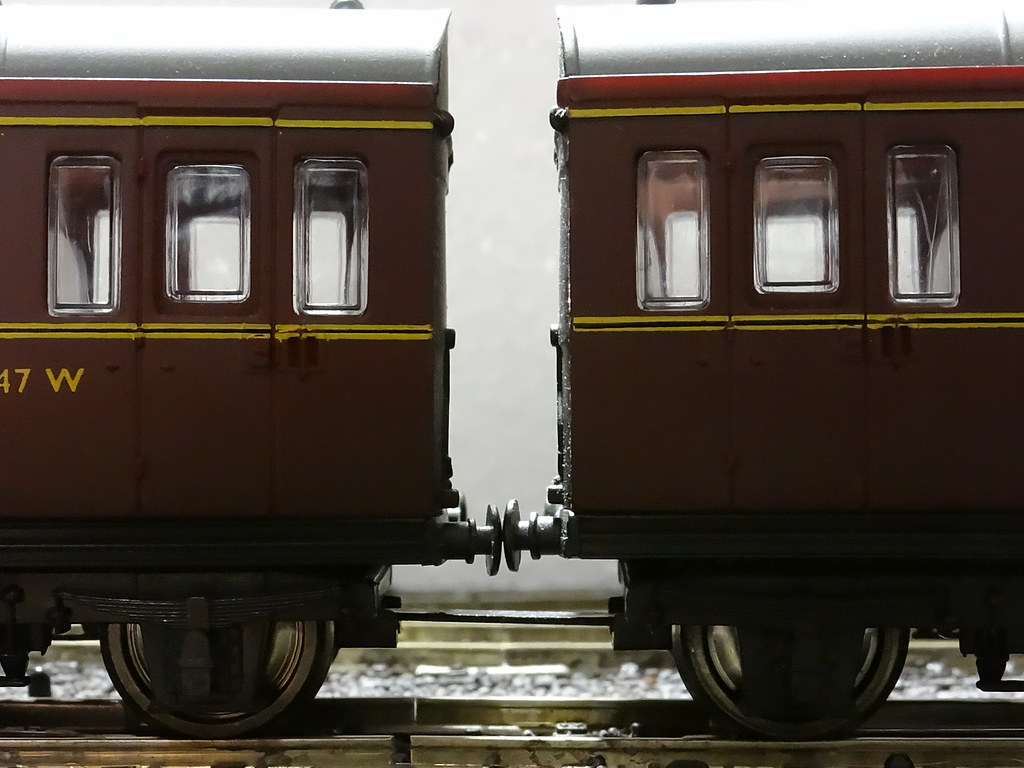
By a process of trial and error I deduced that the location on my layout with the tightest radius was where I had two Peco Medium Radius Left and Right points joined at the toe. The view below shows the buffer spacing at this location.

17167716240_7b9af82a3a_b.jpg

The proof of the pudding

As further proof I have loaded

.


http://youtu.be/MEGj-7QhrUM


Whilst searching for details for the prototype coaches I came across the official ‘British Railways’ image shown below.

17329301866_56522df92e_b.jpg

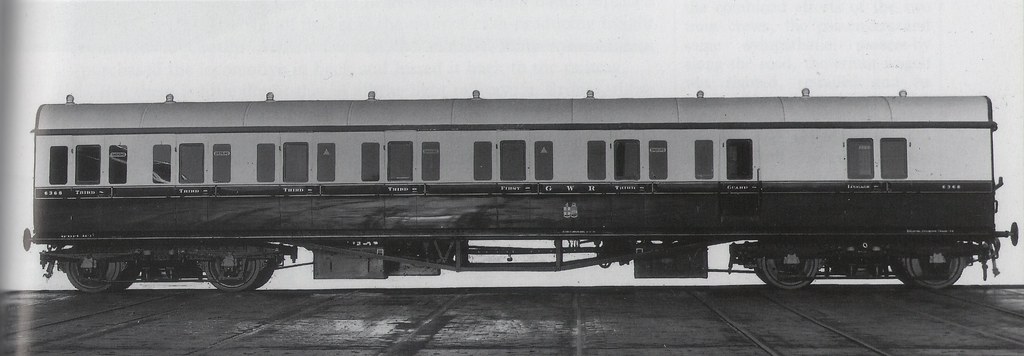
Official British Railways – Great Western Railway B Set image 1920 / 1930

The official images shows the brake composite fitted with short buffers on the inner end and long buffers at the outer end.

I also noted that there was only one First Class compartment, as modelled by Airfix and Mainline. Is the Hornby model with its two First Class compartments correct?

17169511780_155d68dd18_b.jpg

Another view of two completed sets, Mainline to the front, Airfix at the back

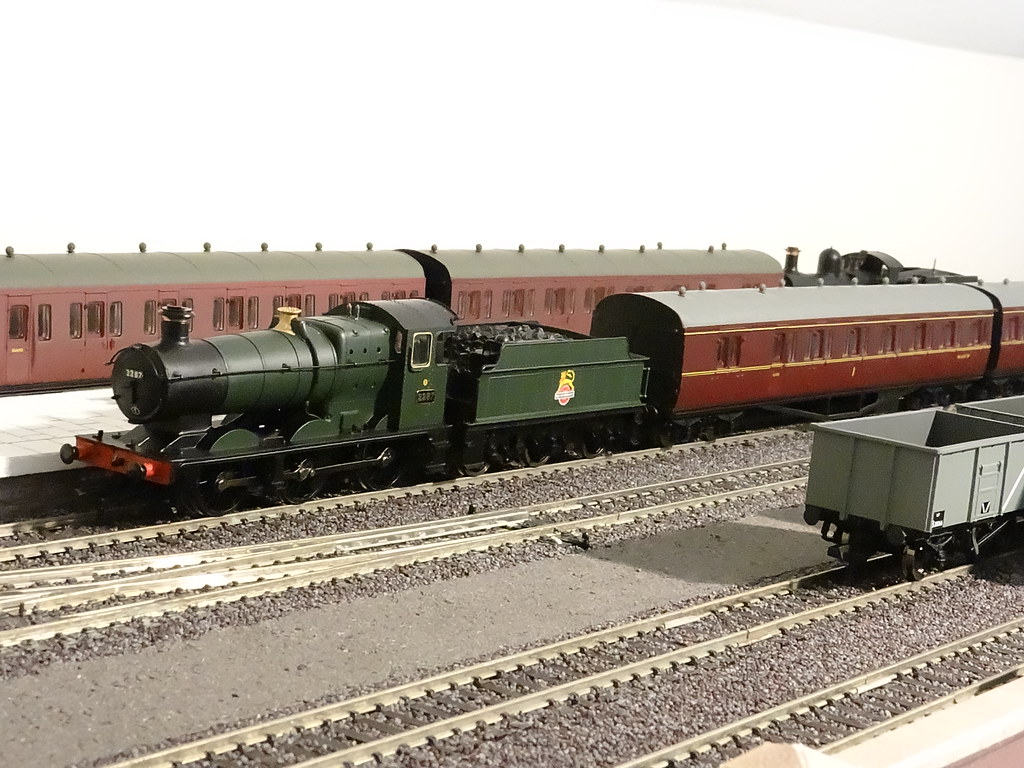
Finally another shot of two completed rakes. I am not too sure about the authenticity of a green early emblem locomotive and lined maroon coaches!

  • Like 11

10 Comments


Recommended Comments

Hi SS,


It might be of interest to you that in the prototype photo on the right, looks very much like the components that are used as the components that are used to couple a locomotive and tender. Did the carriage and wagon department nip over the road and take a few bits out of the loco stores I wonder?


All the best,


Castle

Link to comment

Thanks Castle


I love that idea.  I bow to your superior knowledge.


Hi SS,

..... looks very much like the components that are used to couple a locomotive and tender. Did the carriage and wagon department nip over the road and take a few bit out of stores I wonder?

Castle

Not a lot of point in reinventing the wheel - if the bar was strong enough to couple and engine and tender it surely would hold two B Set coaches together!


Regards


Ray

Link to comment
  • RMweb Gold

Good idea this. I've struggled with a reliable close-coupling solution for the B-sets which will also allow them to be propelled without buffer locking, though reverse curves and so on. The Keen system, which is my normal fallback, needs a bit more work to be used with the B-sets than with some of the other coaches.

Link to comment

No worries Ray - not superior knowledge but experience lifting the things!


Quite right about not reinventing the wheel - plenty strong enough I think!

Link to comment
  • RMweb Gold

A great post Ray, now with prototype photos too. But the highlight for me is your toothpick and bottle cork arrangement! I'm going to copy that. Very much in the spirit of the wagon and carriage dept too, using bits from other sections of the household!

Link to comment

Lovely comments Mikkel

.... the highlight for me is your toothpick and bottle cork arrangement! I'm going to copy that. Very much in the spirit of the wagon and carriage dept too, using bits from other sections of the household!

We have plenty of corks in other sections of our household!


Thanks Ray

Link to comment

Good work Ray.


Only one first class compartment in these coaches, the Russel book shows the wrong picture for a B set - leading to the erroneous labelling of compartments. It's all to do with the window spacing!

Link to comment

Thanks Tim

..

Only one first class compartment in these coaches, the Russel book shows the wrong picture for a B set - leading to the erroneous labelling of compartments. It's all to do with the window spacing!

Pictures are useful, peoples memories are not as reliable.


Regards


Ray

Link to comment

Great post. I did something similar with some bent wire, but your version is much more elegant.

Dean

Link to comment

Thanks Dean, relatively quick and easy to make so when you get one wrong you can soon make another!


Regards


Ray

Link to comment

Create an account or sign in to comment

You need to be a member in order to leave a comment

Create an account

Sign up for a new account in our community. It's easy!

Register a new account

Sign in

Already have an account? Sign in here.

Sign In Now
×
×
  • Create New...