

The Mainline Restaurant Buffet – Part Two, Close Coupling
.thumb.jpg.60c53fcbcaa34017b05b8919d1a9e6d2.jpg)
Entry posted by Silver Sidelines
2,373 views
My previous Post looked at some detail improvements to the old Mainline Restaurant Buffet including fitting Finecast Flush Glazing, wire handrails and simply filing the buffer heads.

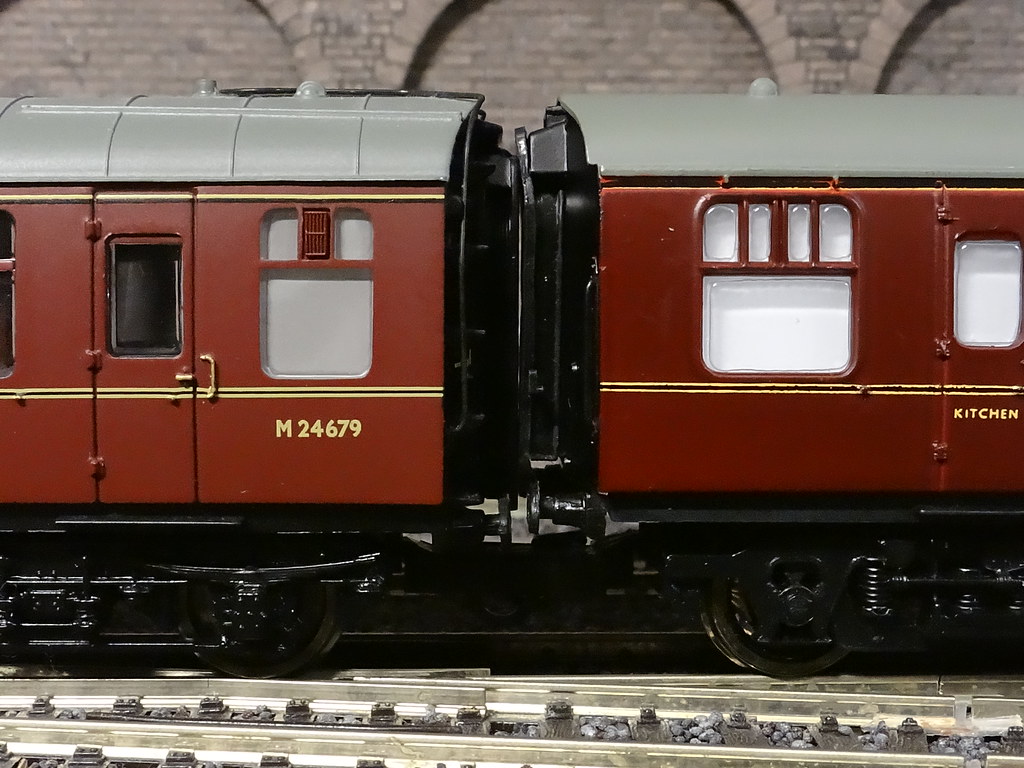
Mainline RB slotted into a rake of BR Mk Is all fitted with Hornby R8220 couplers
For me the most important improvement is the fitting of the Bachmann close coupling mechanism. This enables the coach to be unobtrusively slotted into a rake of Bachmann Mk Is – in my case all fitted with Hornby R8220 couplers.
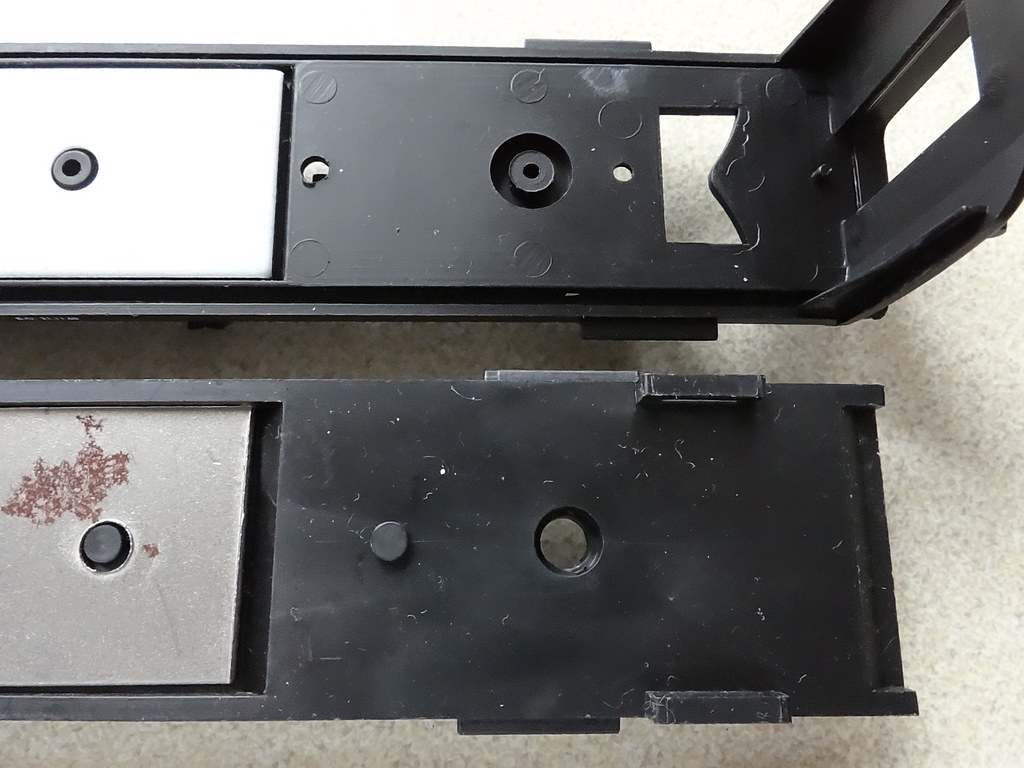
Bachmann RU top, Mainline RB bottom
My first plan for improving the Mainline Restaurant Buffet was to use a complete Bachmann RU underframe. Comparing the underside of the Bachmann 39-101 derivatives with the Mainline vehicle showed a great deal of similarity. The Mainline truss detail is perhaps heavier but when viewed from the side I don’t think there is much to choose between the two models. Either I would have to remove the corridor ends from the Bachmann underframe or carefully cut the ends out of the Mainline body shell. Neither seemed a good idea – and why ruin a perfectly good Bachmann RU?
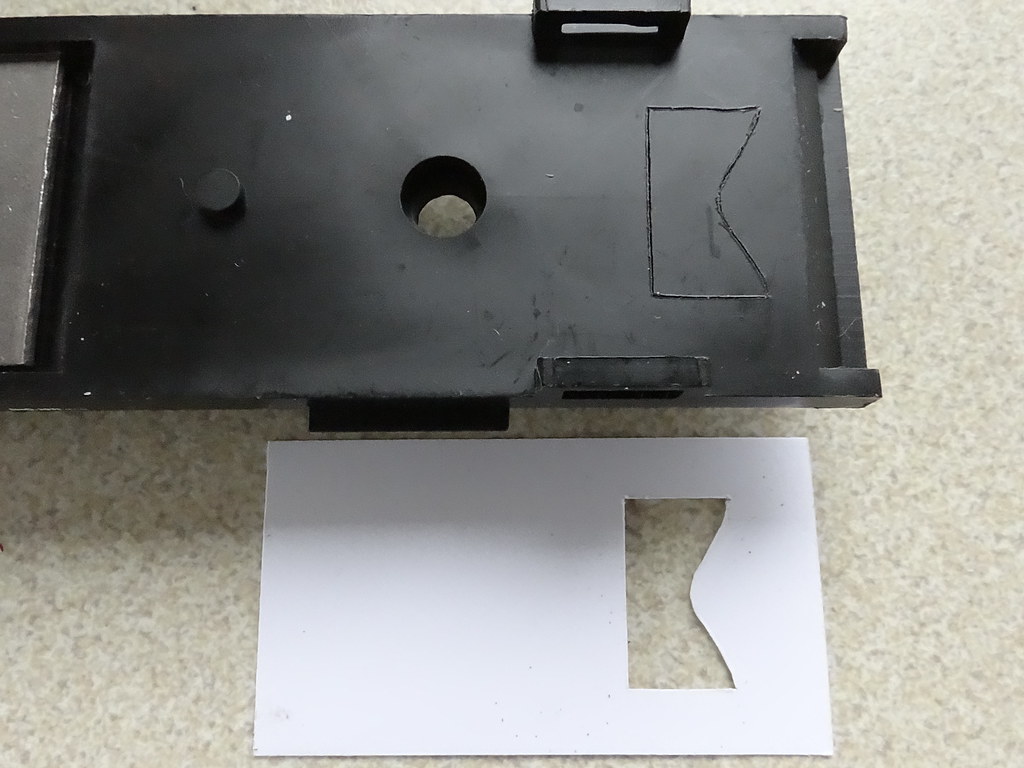
Transferring the shape of the opening
Plan B would be to use the Mainline underframe suitably modified to accommodate the Bachmann close coupling mechanism. The view above shows the template I made to transfer the slot size for the close coupling mechanism from the Bachmann vehicle to the Mainline underframe. The template lines up with the inside edge of the Bachmann corridor end so that it can be placed up to the open corridor end of the Mainline frame. I used the points from a pair of dividers out of my box of drawing instruments to mark the plastic.
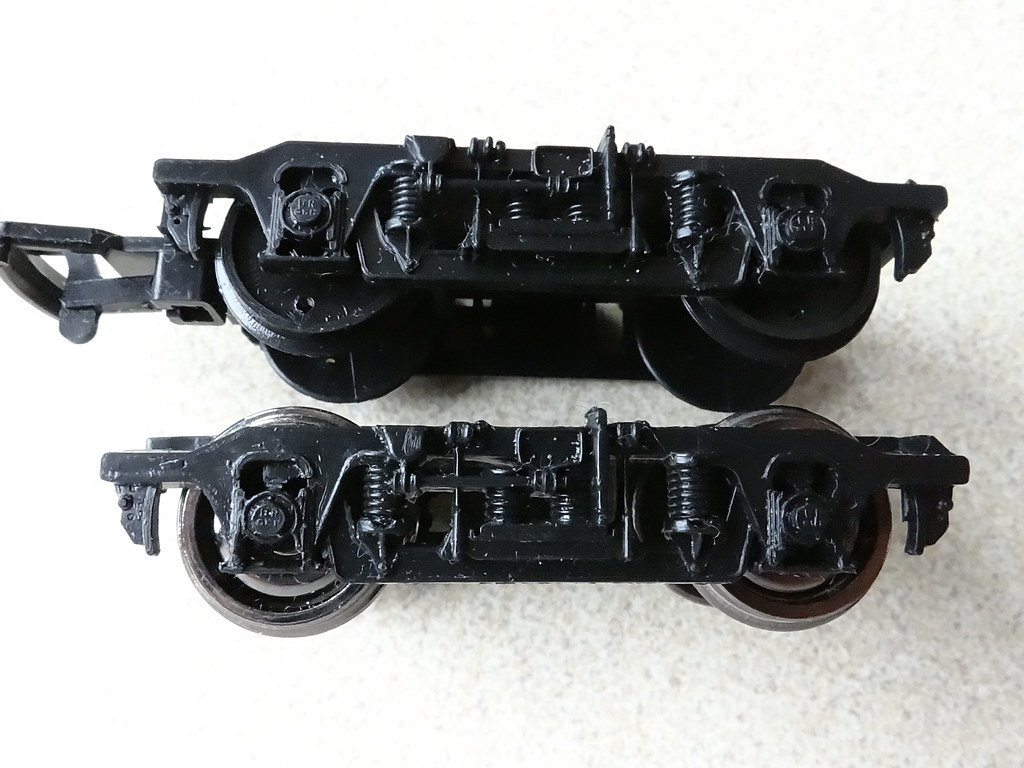
Mainline bogie top, Bachmann bottom
I had set aside a spare pair of Bachmann Commonwealth bogies for the project. However the detail on the original Mainline bogies is very good and when fitted with Bachmann metal disc wheels there is little to choose between the running qualities of the two bogie types.
Mainline left, Bachmann right
Viewed from above the Mainline fixing is completely different to the later Bachmann models. If I was keeping the Mainline underframe the only sensible option was to reuse the Mainline bogies!
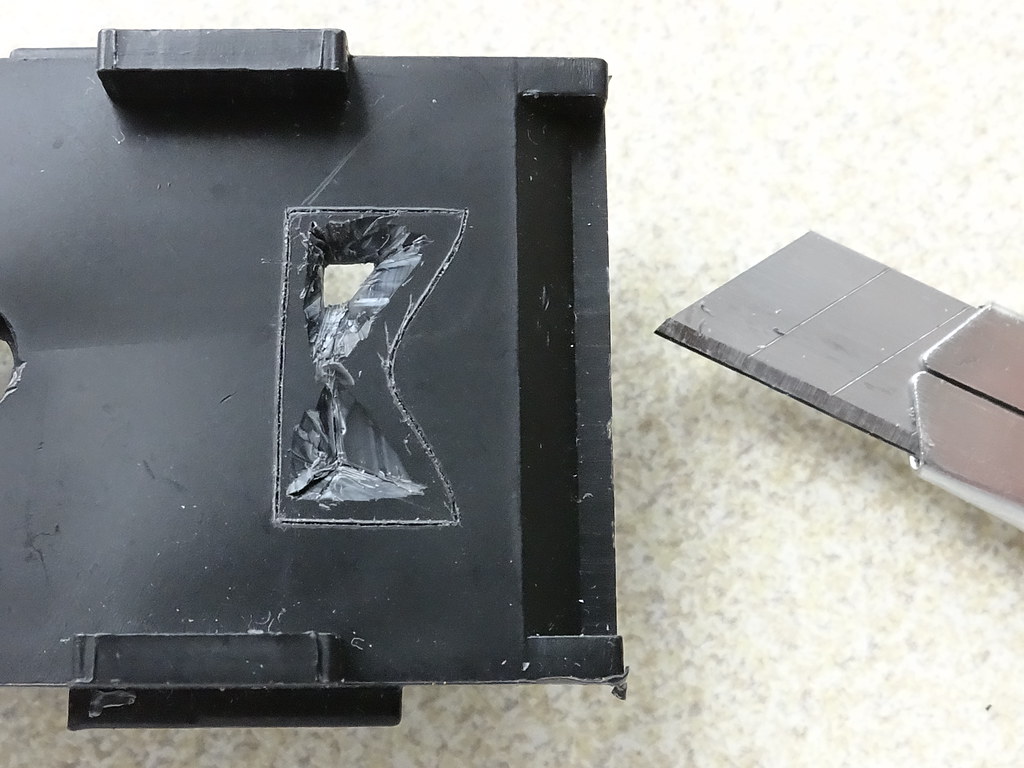
Cutting the slot for the Bachmann close coupling mechanism
Back to the Mainline underframe and I cut the slot for the close coupling mechanism by paring away the soft plastic with a ‘snap off blade’ type craft knife – finishing the edges off with a small file.
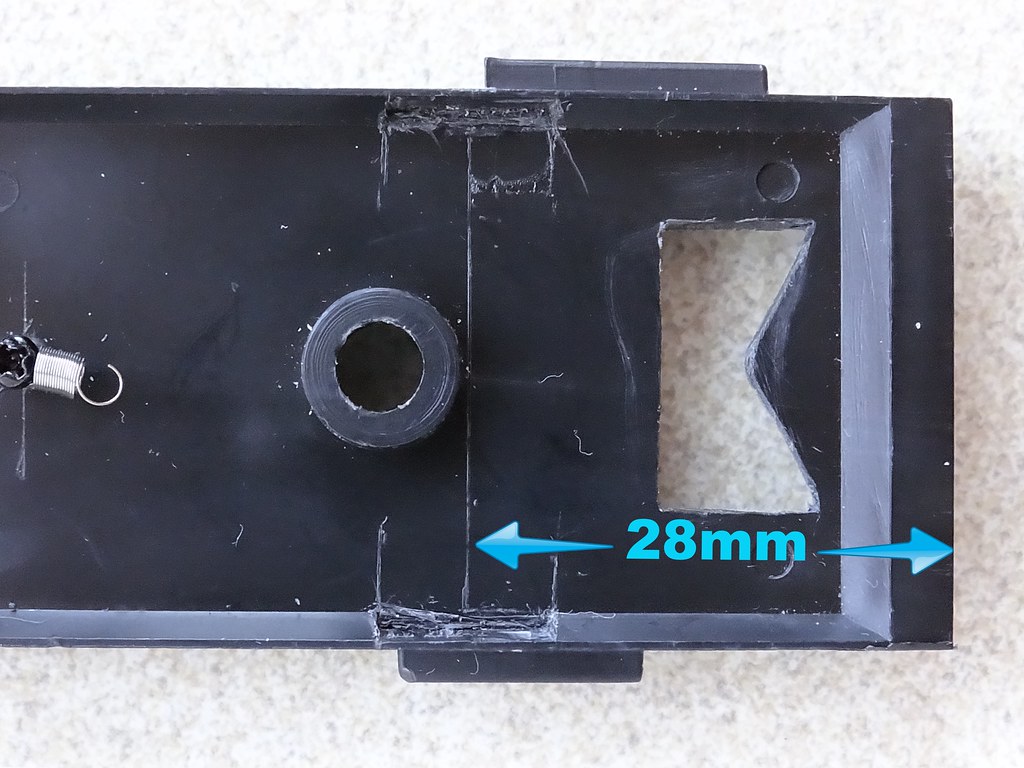
Pockets for pivot points
The same knife was used to hollow out pockets for the pivot points – taking great care not to cut through the outside edge of the underframe. I positioned the mid point of my pockets 28mm back from the end of the Mainline underframe, the pockets themselves being 10mm long. The pivot points were built up and shaped from two layers of CD case plastic 5mm x 10mm. These can be fitted in the pockets and tried for shape and ease of operation with the Bachmann coupling mechanism before fixing in place with Butanone. I also drilled a small hole for one of Bachmann’s tiny screws to attach the tension spring for the coupling mechanism.
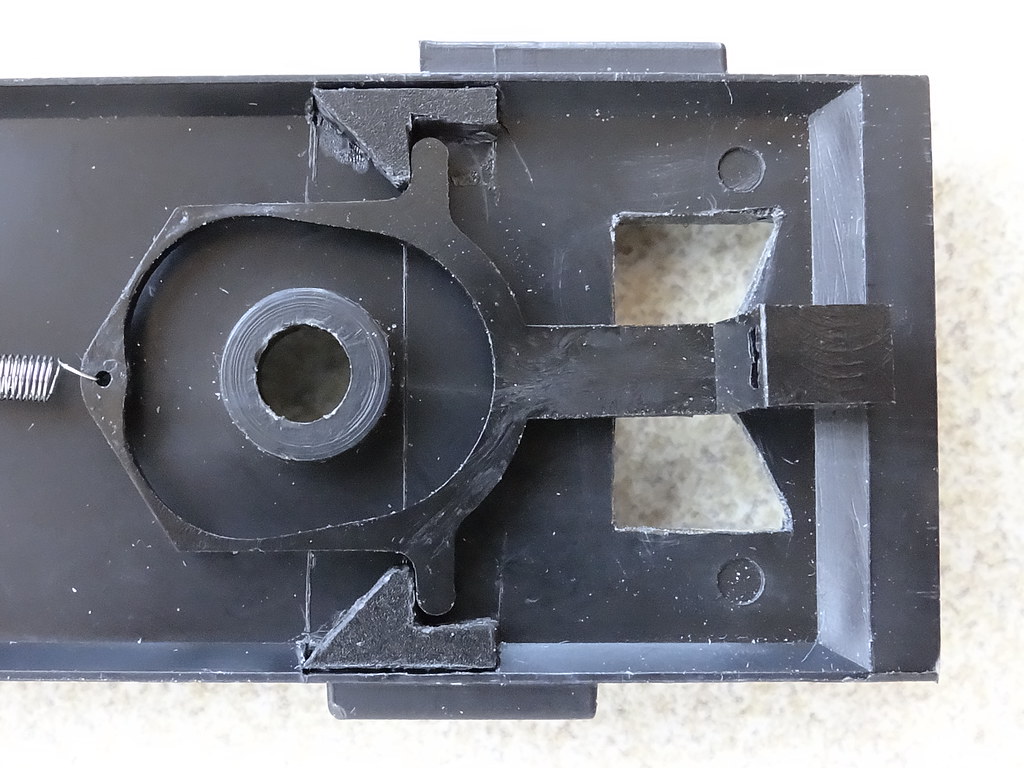
The finished mechanism
I didn’t have a spare Mk I coupling mechanism. Instead I used the mechanism from a Mk II coach. ‘Andrew’ at Peter’s Spares deserves special mention for sorting out my order when I failed to buy a pair and had completed the online payment procedure for just one coupling mechanism.
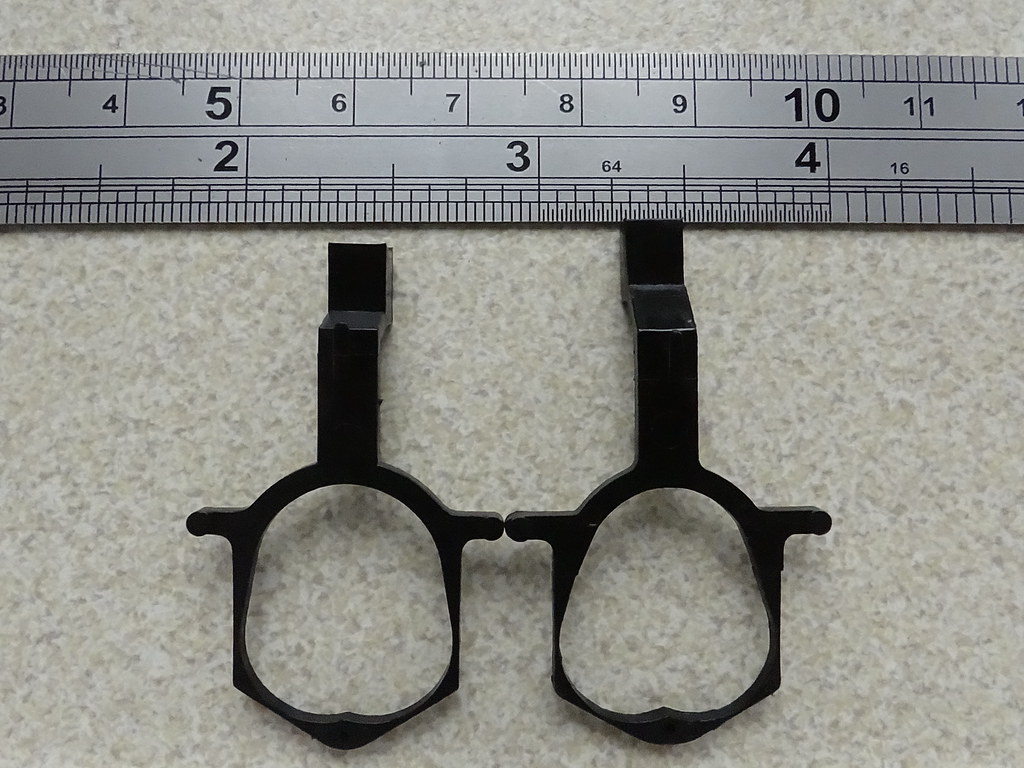
Mk II left, Mk I right
The Bachmann Mk I and Mk II coupling mechanisms are subtly different.
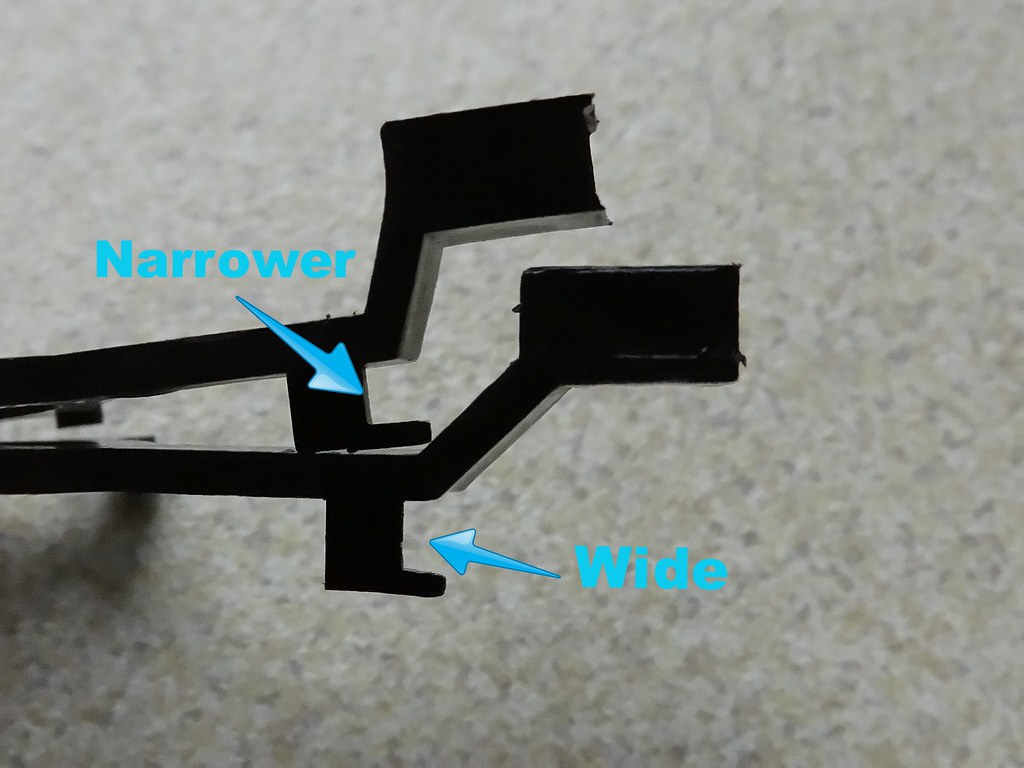
Mk II top, Mk I bottom
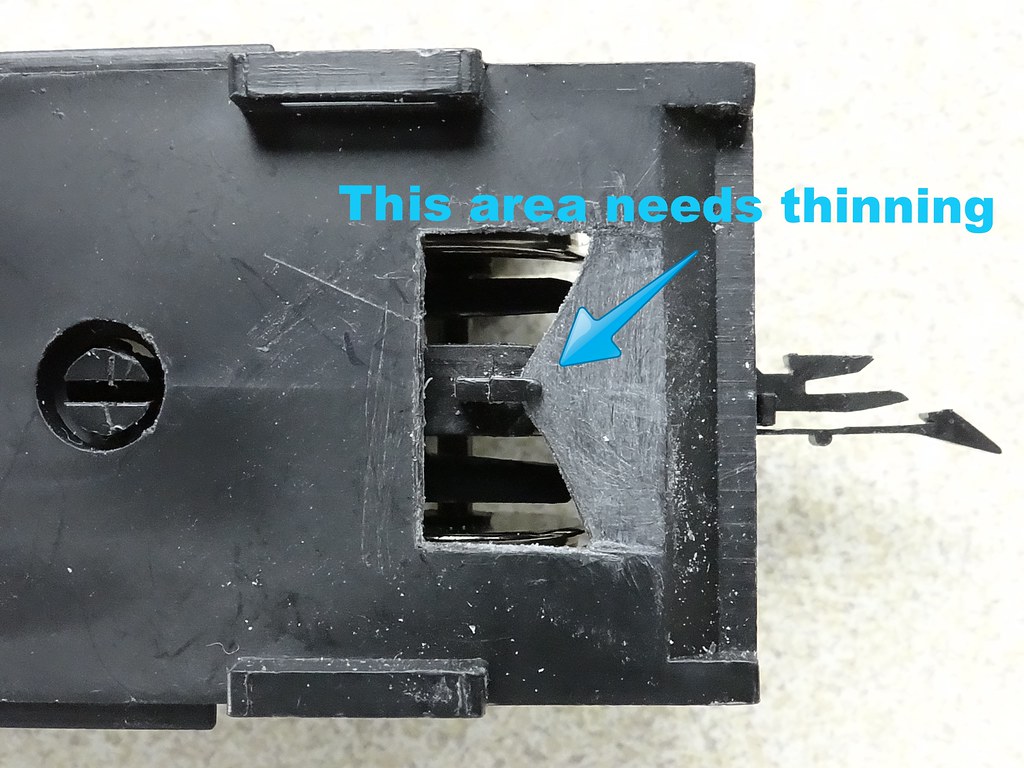
Significantly the Mk II coupling mechanism is designed to operate with a thinner floor. I used a combination of file and knife to thin the Mainline underframe / floor. This is very necessary for the smooth operation of the coupling and also assists in lining up the coupling pocket to the same height as for other Bachmann Mk I coaches. I have to admit that I also applied a little bit of bending to the coupling pocket to assist in this levelling process.
Finished
I had concerns that the seating unit would interfere with the close coupling mechanism so I cut a slot in the floor. In practice I think I was over cautious and only needed to file off a little of the plastic on the underside of the floor.
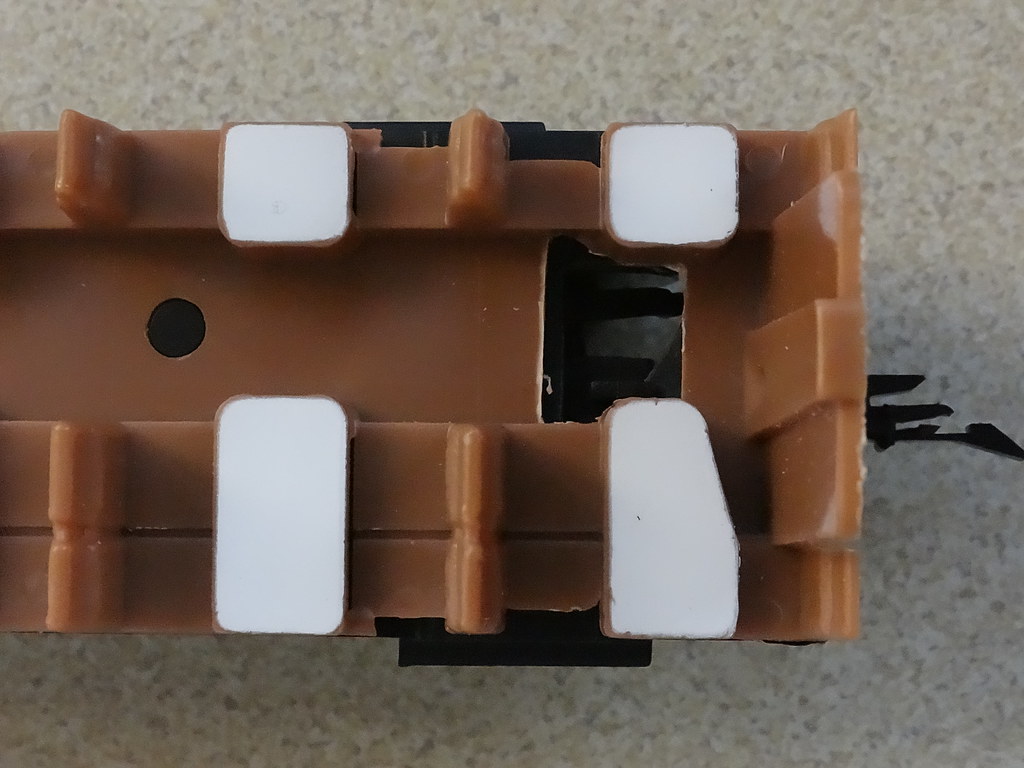
Slot cut in floor over close coupling mechanism
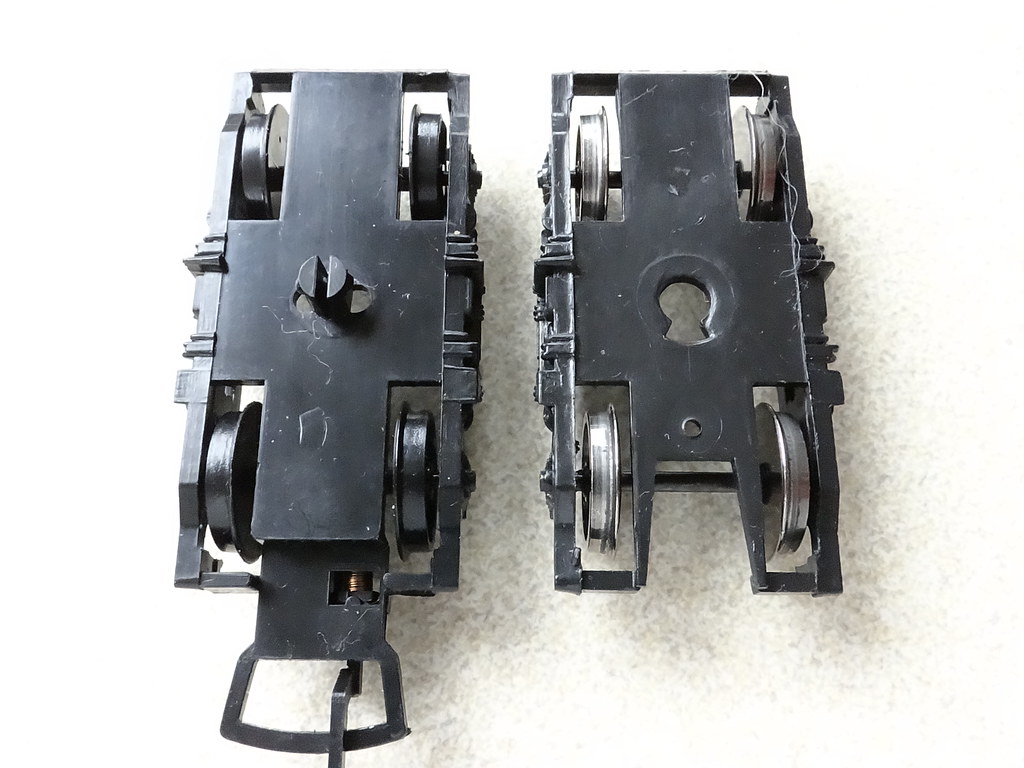
Finally I cut the Mainline couplings from the bogies and formed a slot to mimic the slot in the Bachmann bogies to accommodate the coupling mechanism.
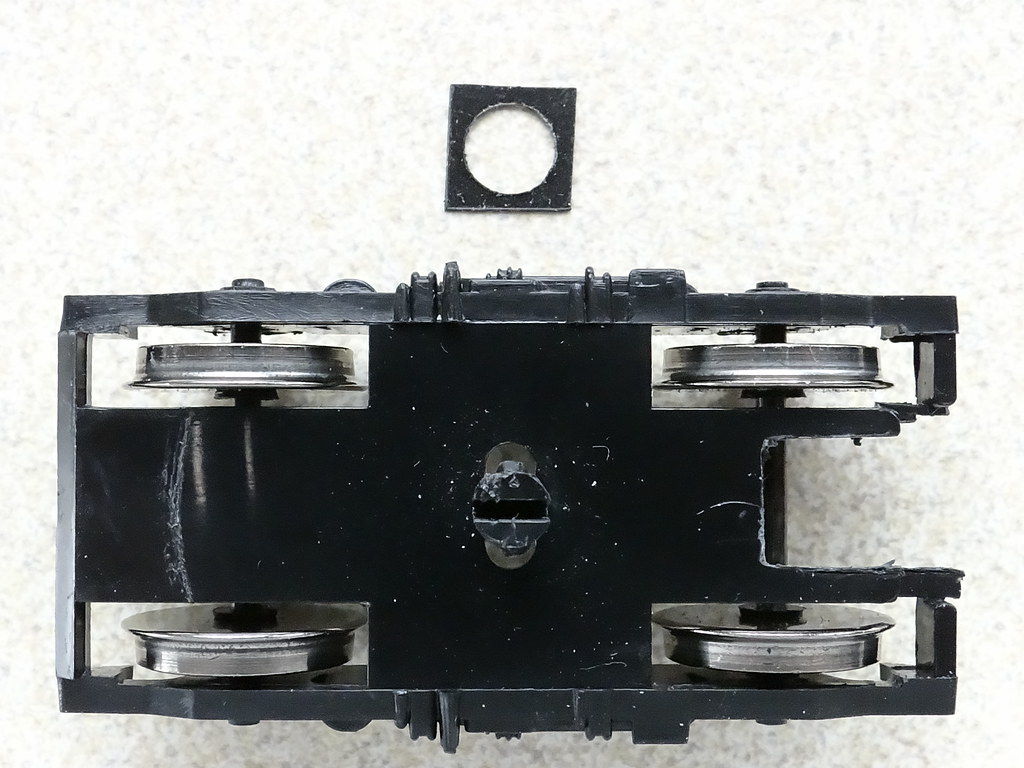
Mainline bogie adapted for use with Bachmann coupling mechanism
Again there is some trial and error to make sure that the cut edges on the bogie are smooth and allow free movement of the coupling mechanism.
I decided that the roof line on my model was low and I added a packing piece cut from a file divider between the bogie and the underframe.
The roof line is now fine but the buffers are a touch high – compared to Bachmann Mk Is. Life is a compromise.
Bachmann Mk I left, Mainline RB right
This was not a quick conversion. On the other hand it was all carried out on ‘the kitchen table’ with simple tools. I think a good outcome.
Addendum 25.07.15
After running the RB for a number of weeks I have now removed the packing piece that I had inserted between the coach and the top of the bogie. I guess it is all in the eye of the beholder?
-
 4
4

11 Comments
Recommended Comments
Create an account or sign in to comment
You need to be a member in order to leave a comment
Create an account
Sign up for a new account in our community. It's easy!
Register a new accountSign in
Already have an account? Sign in here.
Sign In Now