Jump to content
 
  • entries
    172
  • comments
    1,473
  • views
    376,453

So what size are yours - flagstones?


Silver Sidelines

6,527 views

The list of jobs to do is endless but finishing off the platforms must come near the top.


6890068752_cc8fb8381b_b.jpg


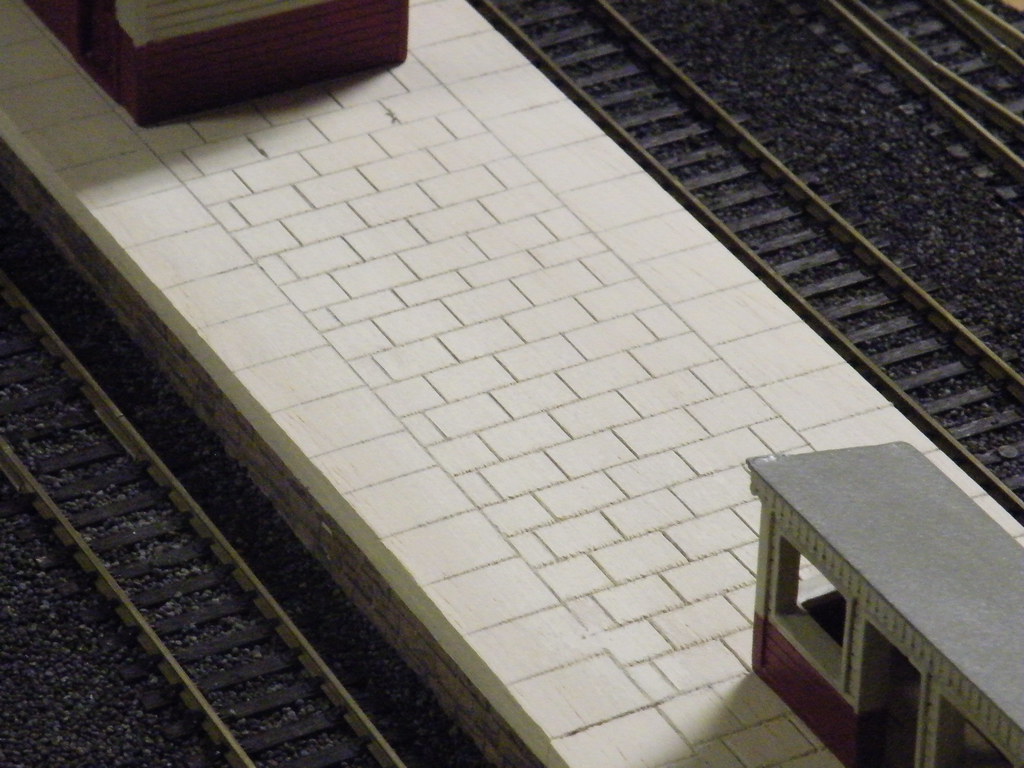
This could be quite a long task but first what size to make the paving? The British Standard suggests that paving stones should preferably be 900 x 600, 750 x 600 or 600 x 600 (mm). However my layout represents the late 1950s, early 1960s, long before metrication. In those days, and for some considerable time after, the standard size of paving stone was 3ft x 2ft equivalent to 12mm x 8mm in 00 scale. Perhaps not surprisingly this is the size modeled by Superquick for their station platforms.


7067241125_394b5d2b33_b.jpg


However the 3ft x 2ft pressed concrete slab is relatively modern and a lot of railway platforms constructed in the 1800s will have used natural stone, probably York Stone in the north of England or maybe Purbeck or Cotswold stone in the south of England. The decision to standardize on 3ft x 2ft for the new concrete paving seems to be based upon the commonly available sizes of natural stone which in turn is likely to have been related to the maximum size and weight of material that could easily be handled manually.


7067379655_bfbfc0737d_b.jpg


A search online indicates that natural stone paving is currently available in a range of sizes with widths up to 3ft. It would also appear that in addition to the standard 3ft x 2ft size, a larger 4ft x 2 ft slab is offered, perhaps as used above historically at Chester General Station?


7067379859_81ed0cd93a_b.jpg


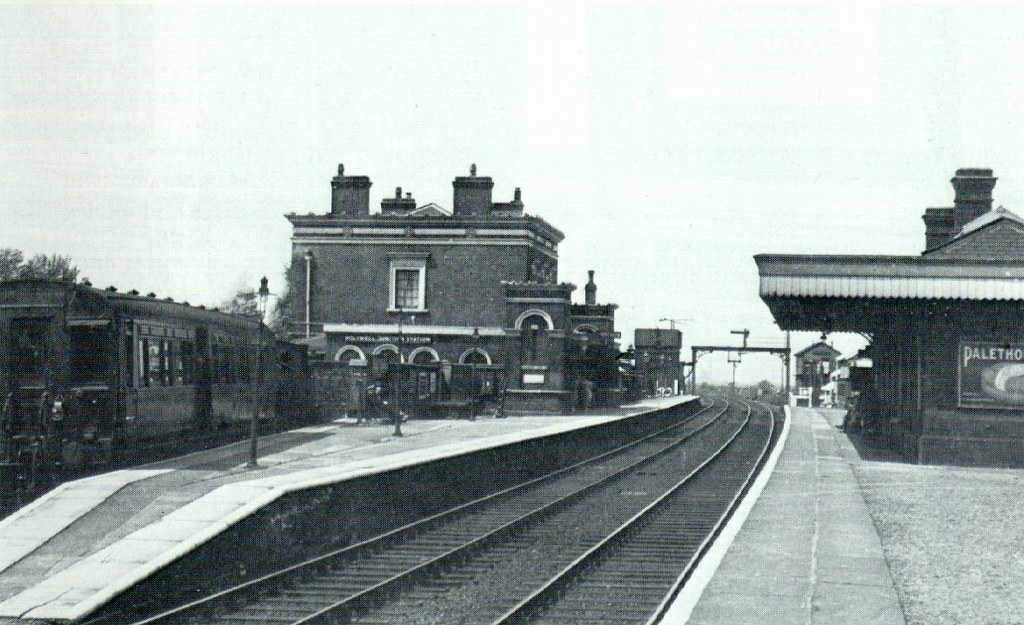
So much for what is currently available but what was used in the past? I guess those of you in the more populous parts of the UK will have the option to go and measure up some real station platforms. However for those others like myself, living in more distant and rural parts, this luxury is not available and it is back to searching through pictures in old books. The picture of Holywell above is good example of the type of view available and shows different patterns of paving for different areas of the platform.


6918493772_5905a159e5_o.jpg


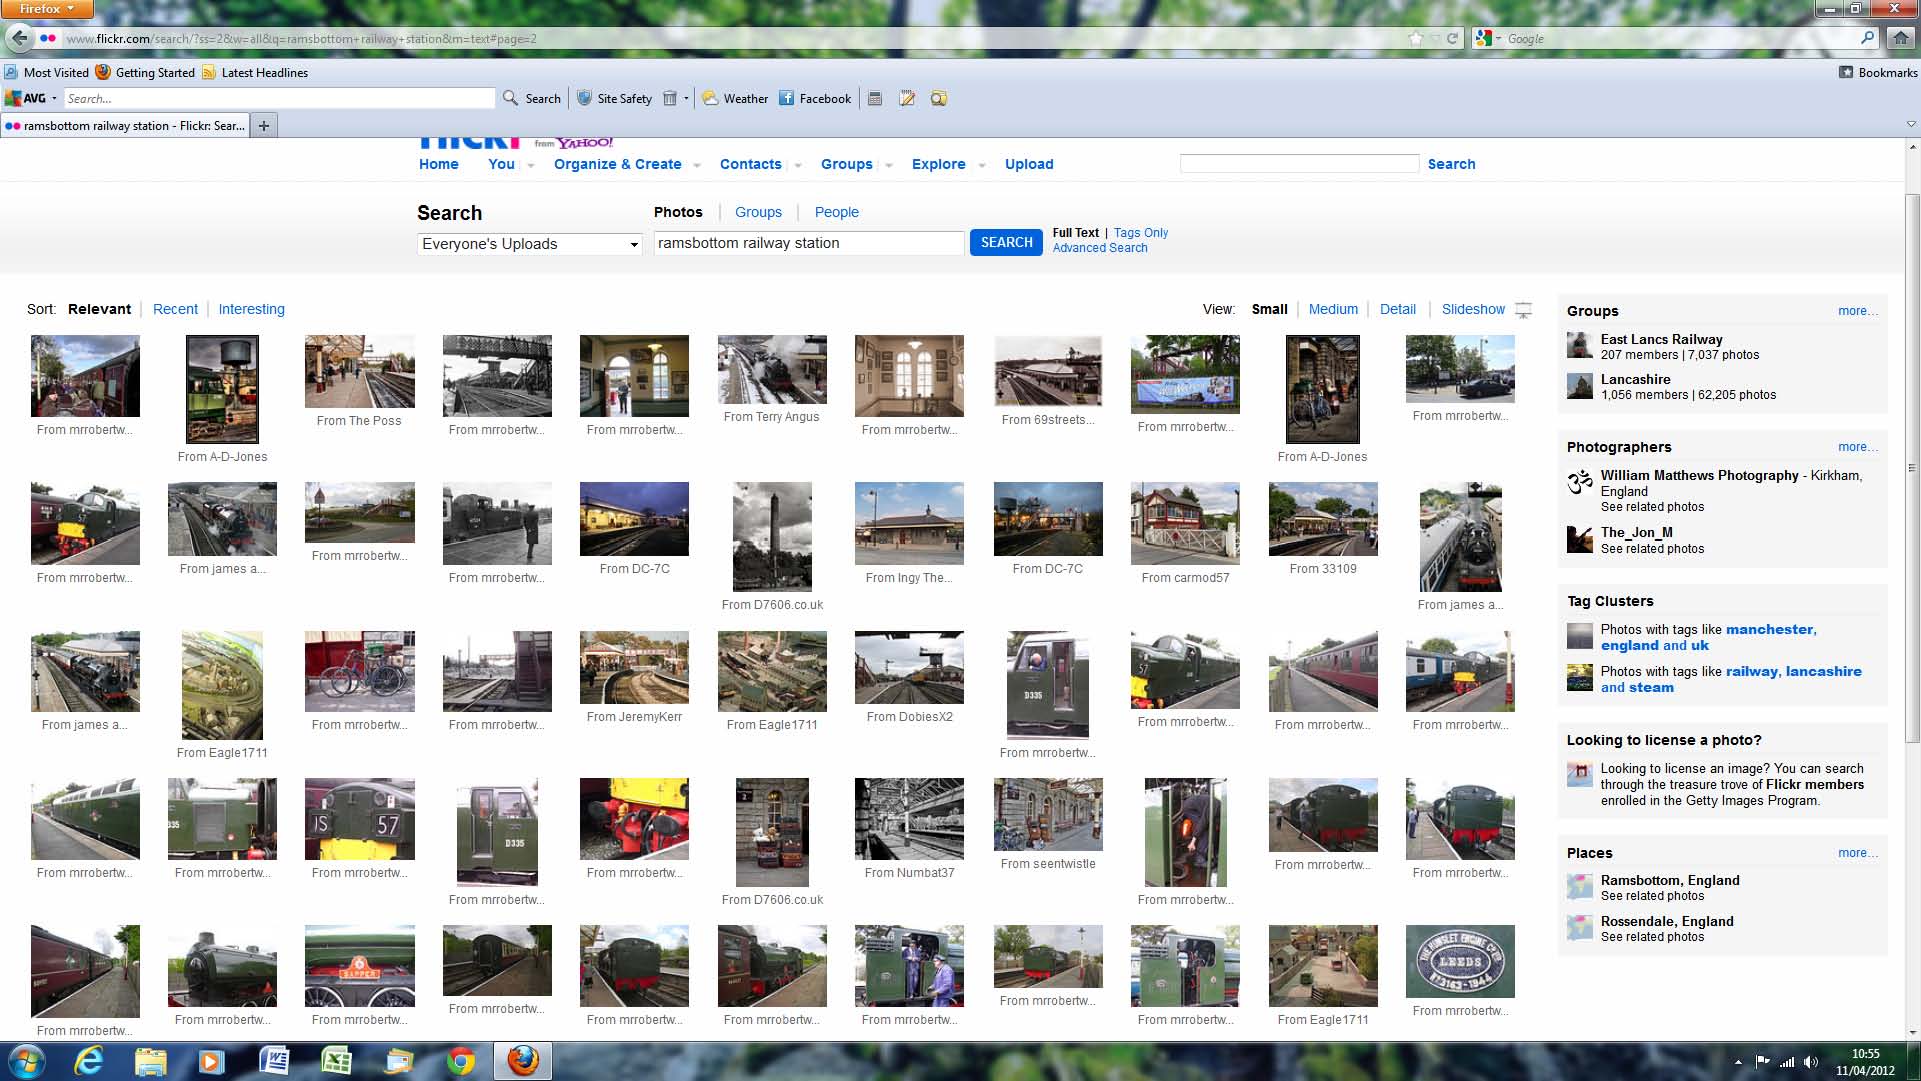
In addition to printed pictures there are vast numbers of images available on line. One of the most readily available sources must be that of the Flickr web site. The 'screen shot' above shows just one page of views obtained by typing 'Ramsbottom Railway Station' into the Flickr search bar. Just type in your favourite location and see what is available.


7067382067_018d3d8b2e_b.jpg


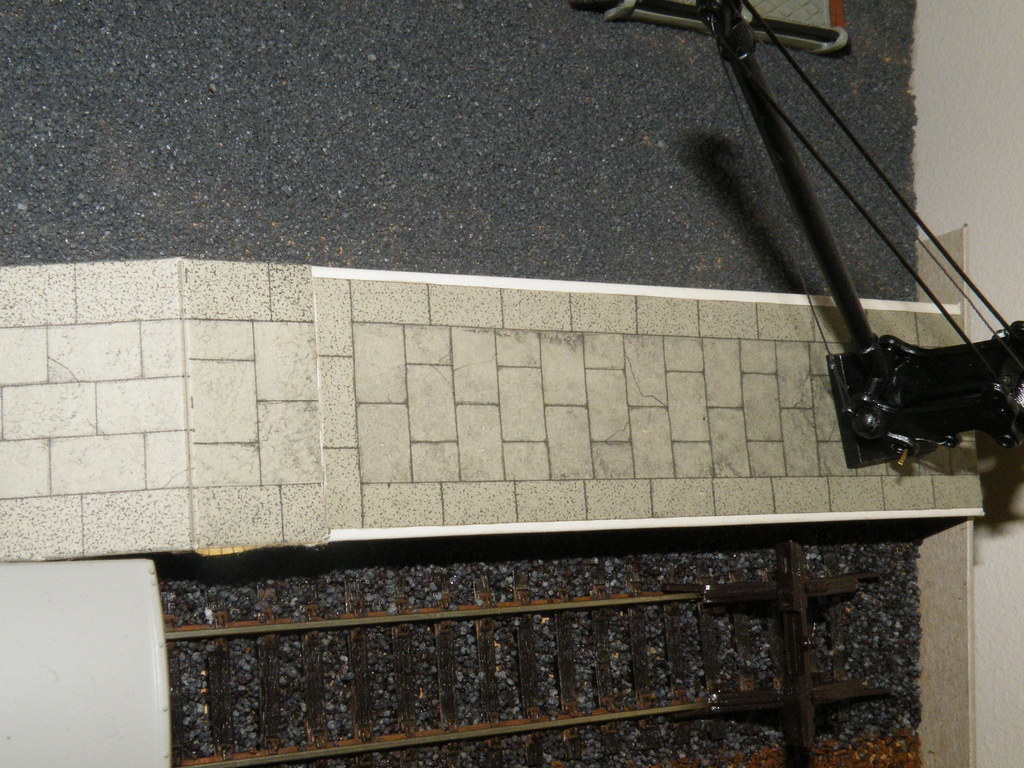
In due course I will have to mark out my chosen patterns of paving. This is likely to be a long and tedious process. Not surprisingly the view above of Coldstream station is one of my favourites. I like precedents and if you get tired of marking out individual flagstones, well how about using some cast in situ concrete.


7067383695_57ec990750_b.jpg


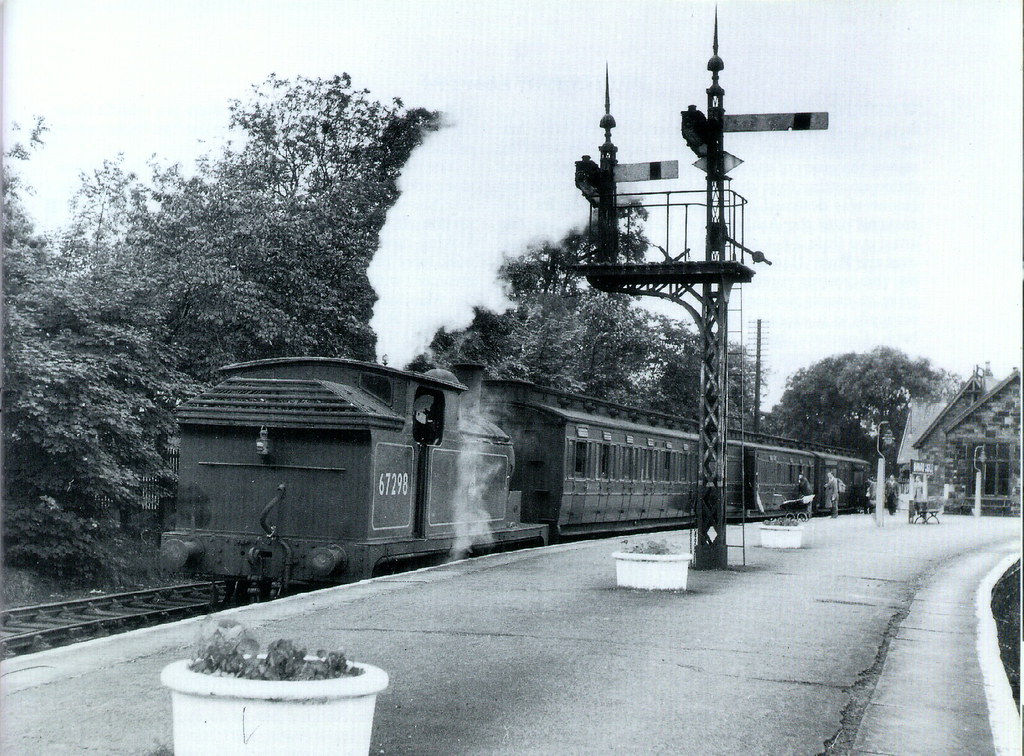
I also like the above view of Barnard Castle Station. I think the modern Codes of Practice recommend that the platform slopes back down from the platform edge to prevent prams and platform trolleys accidentally rolling on to the track in front of trains. None of this in the view above. The platform surface obviously falls down to the platform edge to allow easy drainage of rain water. I seem to recollect that in those days each platform trolley was equipped with a cast iron 'wedge' attached by chain for chocking one of the trolley wheels. I guess also that in those days no one ever left their pram unattended?


To be continued.

  • Like 2
  • Informative/Useful 2

16 Comments


Recommended Comments

Great pics and a wealth of information. I was wondering in regards to the 'in situ concrete', whether it was a light slurry of concrete over the existing gravel infil ?? Much the same could possibly be said about the bitumen infil at Barnard Castle. Looking at this photo, it seems that who poured the bitumen, left the pot plants in place !


Cheers, Gary.

Link to comment

Gary, good points. Slurry sealing is not a common practice in the UK. However I think you are correct that at Barnard Castle the planters were obviously too heavy to move when the old cinder surface was 'improved'. It looks like a rolled asphalt surface, rather than macadam and I would guess from the age of the picture that it would have been tar bound rather than bitumen as used today. Cement bound slurries do not have frost resistance and I would suggest that the picture from Coldstream shows a cast in situ concrete slab, probably containing some light steel reinforcement to reduce cracking and to save on concrete thickness.


Ray

Link to comment

Thanks for your extra information. I had never thought about the heavy frost etc, that you experience in regards to the use of concrete slurry and the effect frost can have on such surfaces. Much to be learnt yet !

Link to comment
  • RMweb Gold

Having just trawled Google for some ideas of sizes for flags, I happened across this blog post - perfect !


I shall be using these images for reference for my military loading bay on Treamble.


Thanks !


Stu

  • Like 1
Link to comment

The NERA reprint of the NER standards book of 1908/9 details platform copings (edge stones to us plebs) as being 3'0" wide by 4'0" long and 6" deep at the outer edge and 6 3/4" deep at the inner edge. These key together by means of a shallow point at one end and corresponding reccess at the other (approx 1") and are described as a cement cope (2.5:1 PC concrete, and "the surface to be stamped or checkered to roughen it in approved pattern"). It further details these as the outer edge being 2'3" from centre of the railhead and the top of the slab being 5'0" above it. additionally any over hang of these slabs should be 1'0" making the platform face 3'3" from railhead.


My site measurements from Broomielaw showed edge slabs measuring 30"W x42"L x 5"D (outer edge). These were perfectly rectangular concrete slabs replacing the original sandstone edging and overhanging only by as much as the radius of the curved edge of the slab. The main circulating area was indeed a tarred surface of some sort while the less used western end was left bare ash until closure. There was a slight slope to help move water off the platform onto the cess but its on a drawing somewhere not readily to hand.


Hope that slightly OCD effort helps and thanks for the decent sized Barnard Castle pic.


Steve

  • Informative/Useful 1
Link to comment

Thanks Steve

.......Hope that slightly OCD effort helps and thanks for the decent sized Barnard Castle pic.


Steve

I am particularly interested in the idea that concrete was sufficiently established in practice to be central to the CoP.  Six inches deep equates to 2mm in 00 scale, 'half' the thickness of my balsa.  Never mind,  I should think there will be a prototype somewhere.


Thanks again


Ray

Link to comment
10 minutes ago, Mikkel said:

A most informative post Ray, many thanks for posting this 7 years ago!


Thanks Mikkel, doesn't time fly when your having fun (busy)  Sadly scenery wise there hasn't been much progress in seven years - what an admission.  But we have harvested lots of stones in the garden.


Cheers Ray

Edited by Silver Sidelines
  • Like 1
Link to comment
7 minutes ago, Mikkel said:

You could cut the slabs from real stone then! :D


We have a lot to choose from!  https://www.flickr.com/gp/longsheds/09n3X3


A great sunny afternoon up here produced even more.  We have to empty and reline the pond and I have been digging a trench (one of very many) to hide the vegetation and debris from out of the pond before pulling out the old liner.


All good fun (and fresh air)


Cheers Ray

  • Like 1
Link to comment
  • RMweb Gold

That's beautiful work on the house Ray. You're essentially building the landscape into your home, I like the idea of that.

Link to comment
1 hour ago, Mikkel said:

.. You're essentially building the landscape into your home, ....

Thanks for looking.  The garden is what is known as a 'brown field' site.  The square area with fruit trees and vegetable patches was a huge cow shed.  The building was taken away and all sorts of 'soil' spread around.  We are gradually recycling the ground, sifting out the stones for paths to leave decent soil for growing - hence my description 'harvesting stones'.  Good exercise - very therapeutic.  Just a bit tedious - like ballasting?


Cheers Ray

Edited by Silver Sidelines
  • Like 1
Link to comment

Hi Ray,

I've just come across this researching the size of platform paving stones and copings, after finding a supplier who will cut reclaimed slate to order.


Narrow gauge stations could be earth or gravel, or if posh, a few flags to step onto from the carriages, but my railway welcomes tourists.  It looks like even contemporary UK narrow gauge rarely use larger stones, so I will probably go 3' x 2' (or 48mm x 32mm in 16mm to the foot scale).  Maybe my railway reclaimed some paving stones from a nearby disused standard gauge station.  The height of the platform doesn't want to come much over the railhead.  My plan is to use slate for the copings and then fill the void with either concrete with a dust of sand, or small stones or sharp sand set with waterproof PVA.


It's going to be a slow year for my railway because of work, but small steps...


Alun

Edited by YK 50A
  • Like 1
Link to comment
On 13/03/2021 at 14:20, YK 50A said:

Hi Ray,

I've just come across this researching the size of platform paving stones and copings, after finding a supplier who will cut reclaimed slate to order.


Narrow gauge stations could be earth or gravel, or if posh, a few flags to step onto from the carriages, but my railway welcomes tourists.  It looks like even contemporary UK narrow gauge rarely use larger stones, so I will probably go 3' x 2' (or 48mm x 32mm in 16mm to the foot scale).  Maybe my railway reclaimed some paving stones from a nearby disused standard gauge station.  The height of the platform doesn't want to come much over the railhead.  My plan is to use slate for the copings and then fill the void with either concrete with a dust of sand, or small stones or sharp sand set with waterproof PVA.


It's going to be a slow year for my railway because of work, but small steps...


Alun


Sorry, I missed your update coming in.  I am not the avid fan of RMweb that I used to be!  I have had to read your descripton two or three times.  In essence you are 7mm to the foot, so yes real stone (slate even better).  It does sound like punishement - harder than my poppy seeds.  We have red sandstone and red coloured concrete ridges to our slate roofs (prototype).  The portland cement pointing between the ridges and the slate drops out because the cement does not adhere properly to the slate (maybe a coefficient of expansion issue).  Sharp sand and waterproof PVA may well turn out to be a better bet.  I trust you to order the sunshine for this project.  We are suffering some very windy weather with icy showers.


Keep safe and keep warm.


Ray

  • Like 1
Link to comment
1 hour ago, Silver Sidelines said:


...I am not the avid fan of RMweb that I used to be! 


Funny you write that, I found this particular blog post via a Google search!


1 hour ago, Silver Sidelines said:


In essence you are 7mm to the foot, so yes real stone (slate even better).  It does sound like punishement - harder than my poppy seeds.  We have red sandstone and red coloured concrete ridges to our slate roofs (prototype).  The portland cement pointing between the ridges and the slate drops out because the cement does not adhere properly to the slate (maybe a coefficient of expansion issue).  Sharp sand and waterproof PVA may well turn out to be a better bet.


Although UK Standard Gauge O Scale (7mm to the foot or 1:43.5) trains will run on my track, I am actually Narrow Gauge SM32, which is 16mm to the foot or 1:19.05.


I had problems with my expansion joints, so I redid them before the winter set in, but I now have work to do to reinstate a complete loop.  A target for 2021 is to make at least one of the stations not look like an apocalyptic wasteland.


Great advice and I have read about DIYers struggling to get slate to adhere to concrete.  If I get the time, sunshine and slate, you'll see some Flickr progress in a month or 2 (or maybe 3 or 5).


Likewise, keep cosy and stay safe!


Alun

  • Like 1
Link to comment

Create an account or sign in to comment

You need to be a member in order to leave a comment

Create an account

Sign up for a new account in our community. It's easy!

Register a new account

Sign in

Already have an account? Sign in here.

Sign In Now
×
×
  • Create New...