

Platform Three
.thumb.jpg.60c53fcbcaa34017b05b8919d1a9e6d2.jpg)
Entry posted by Silver Sidelines
2,014 views
Ten days of continuous sunshine - must be a record for the west of Scotland. However the rains have set in again so back to normal and time for another platform update.
In my previous Blog entries I touched upon basic platform construction and gave some pointers as to the sizes of paving stones. This entry contains some reminders on techniques for marking out the paving.
Work commenced with a nice simple island platform with 'parallel' sides. First I marked out two lines with a steel straight edge parallel with the platform edges to delineate the edge paving. Then using a woodworkers set square pressed against the platform edge I marked out all the edge paving. The edge stones were nominally 4ft by 3ft (16 x 12 mm) - obviously 'flag stones' from the north of England. With the edges complete attention was then focused on the internal paving. Again it was a straightforward exercise pressing the set square against the platform edge and scribing parallel lines across the platforms. This internal paving was nominally 3ft by 2ft (12 x 8 mm) but because I was representing natural stone I introduced a few random courses where the spacing was increased to 30 inches or decreased to 18 inches (10 or 6 mm). Finally the individual stones were marked out using a long straight edge held parallel with the platform edges. This way a number of individual stones could be marked out at the same time using a system of 'mark one miss one'.
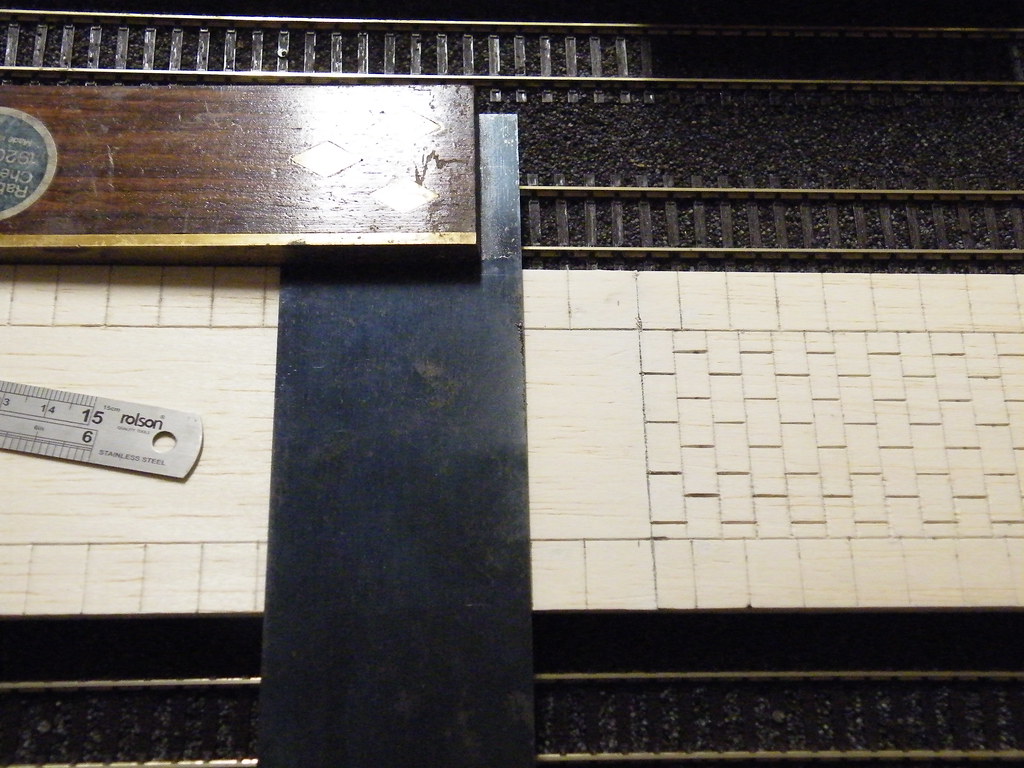
My next station had all curved platforms and the woodworkers set square was not appropriate. I think I must have given my flexi curve to one of our daughters for a school project and the curved lines delineating the edge paving had to be made up from a series of short straight lines. The individual edge stones were then marked off using the right angle end of a short steel rule held tightly against the curved platform edge.
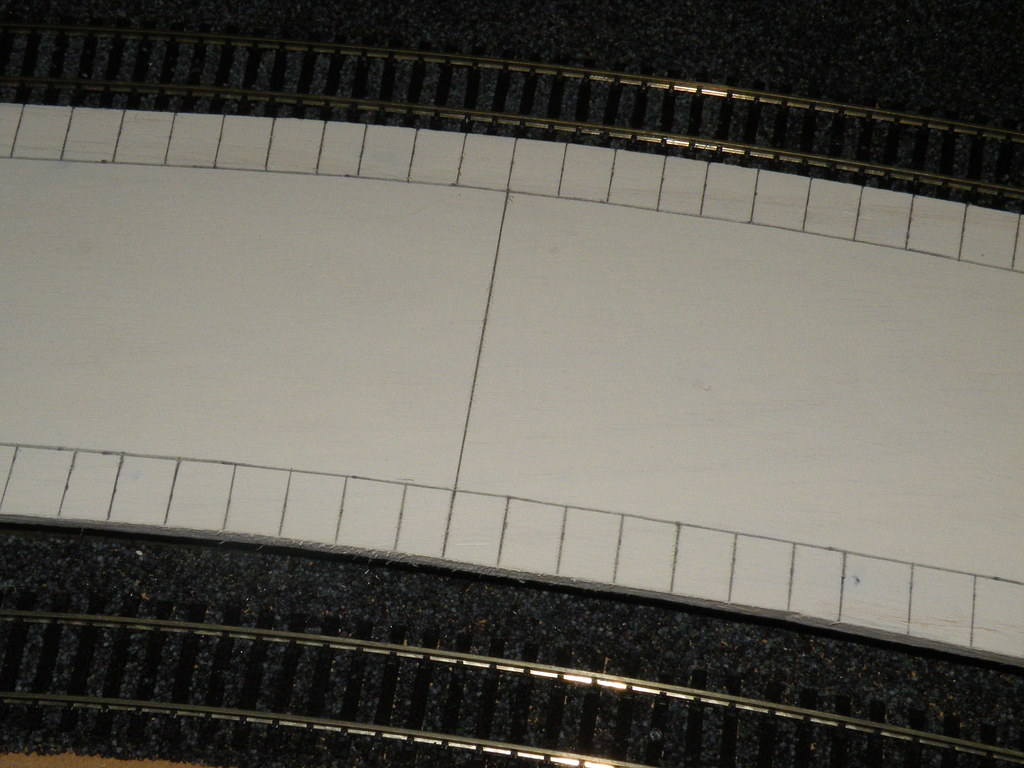
My station buildings were positioned in the middle of the platform where it was widest. Hence I made the decision to start the internal paving from the midpoint of the platform.
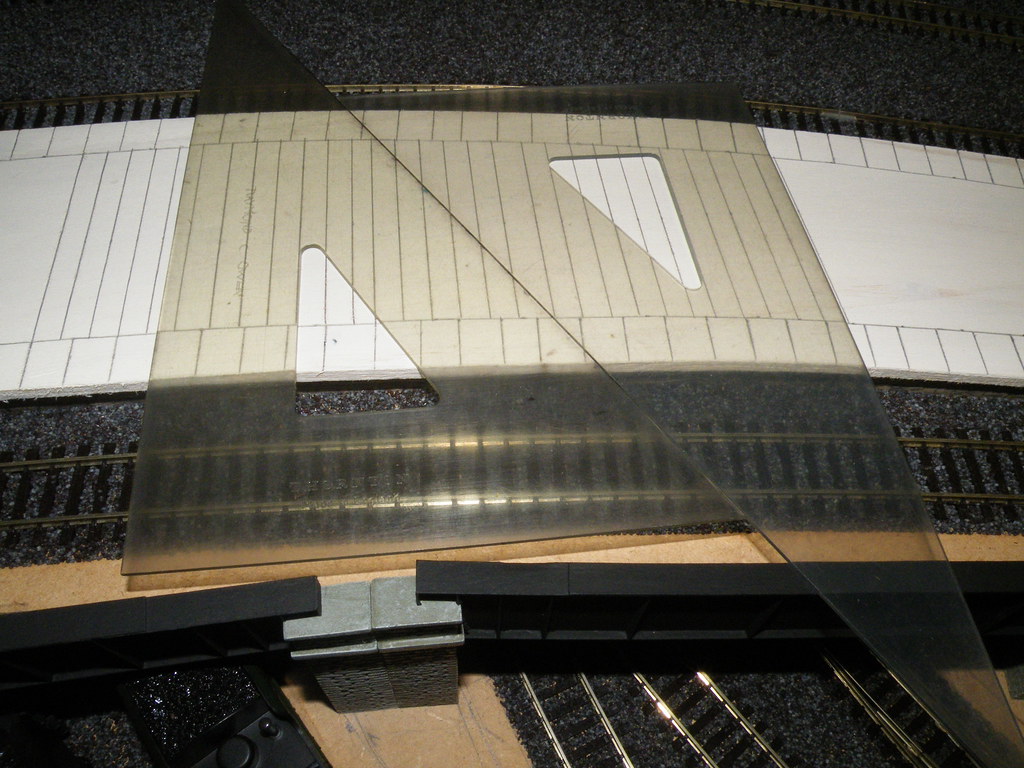
To mark out the internal paving I used a couple of Perspex set squares from out of my drawing instrument box. Holding one set square firmly against the initial line it is relatively straightforward to add a series of parallel lines simply by running the second setsquare up and down against the first. Because of the length of platform involved the set squares had to be repositioned and care needs to be taken to ensure that the resulting lines all stay parallel.
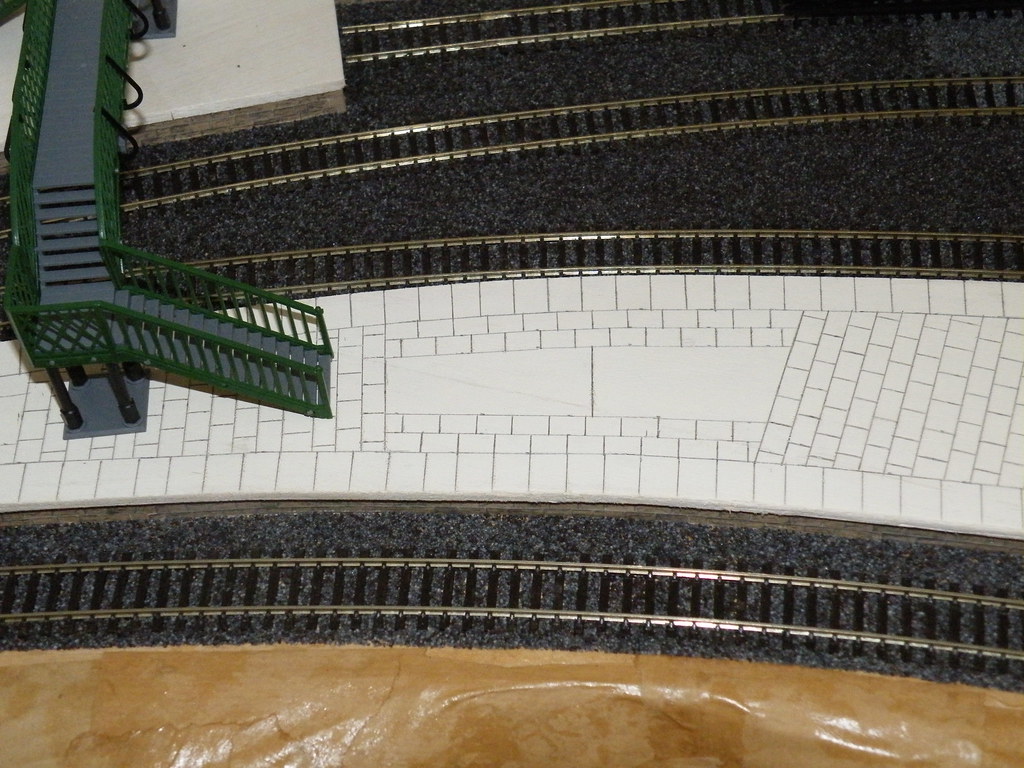
Towards the ends of the platform the angle of paving was in my opinion too acute. After viewing various prototype paving layouts I decided to introduce a section of 'concrete infill' bounded by some paving courses parallel with the platform edge. Historically it appears that the less used portions of platform were left unpaved and surfaced with cinders only to be covered over with asphalt or concrete when passenger numbers increased.

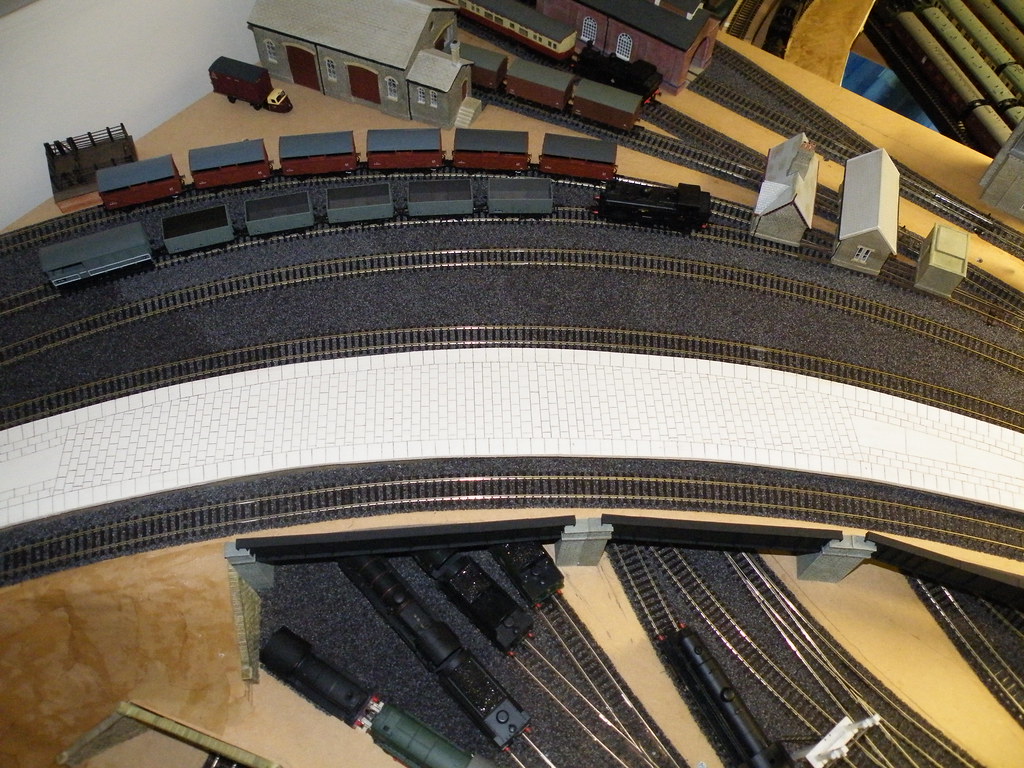
Finally a picture of the platform with the buildings reinstated - for the moment a mix of Scenecraft and Skaledale.
2 Comments
Recommended Comments
Create an account or sign in to comment
You need to be a member in order to leave a comment
Create an account
Sign up for a new account in our community. It's easy!
Register a new accountSign in
Already have an account? Sign in here.
Sign In Now