

(P4) - 57xx Ultrascale Conversion for Bachmann Example

Entry posted by Knuckles
1,804 views
Success!
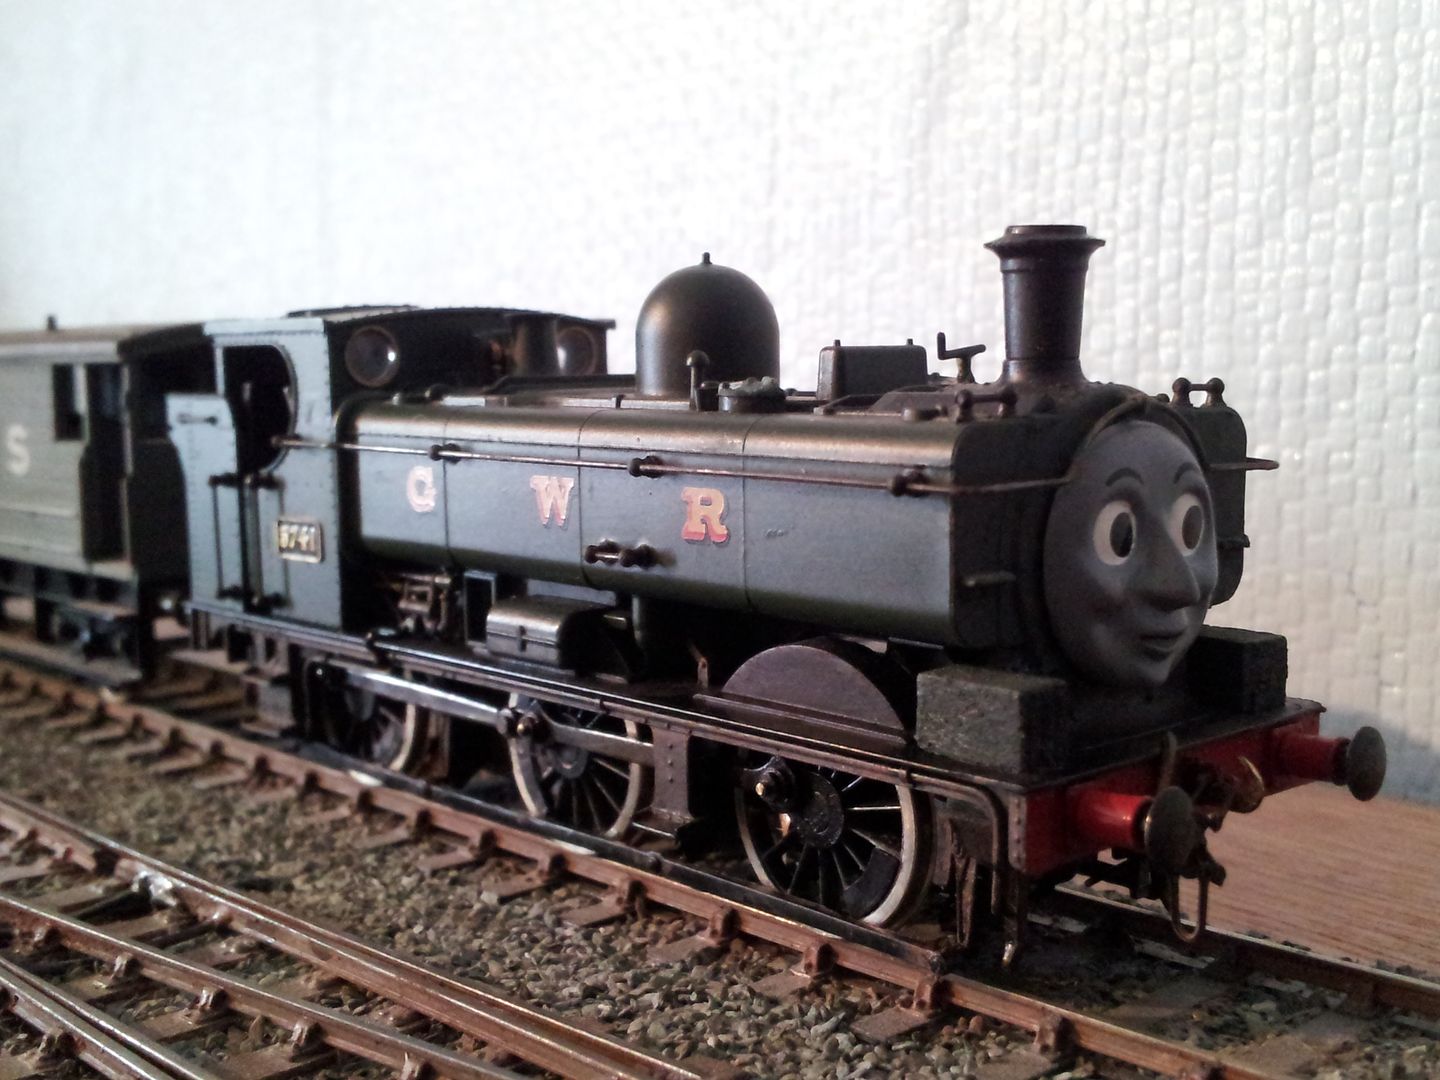
About 6 years ago I had a bash at converting a standard Bachmann 57xx into a RWS 'Duck', it was nothing more than a face addition, balsa wood sandboxes (Ugh, replacement ideas please?), a couple of paint tweaks, brass number plates...and that's about it. I have been looking for another pannier of the same part number to have another go with more accuracy and care, however it seems Bachmann have discontinued it as I can't find one anywhere. Hopefully they will re-release it. Anyway, I've had the Ultrascale conversion kit for a while but it hadn't matured enough in my draw for me to use it. Seeing as I'm not ready to tackle the E2 body's for that loco, I thought it an idea to get this one done instead, now that I have enough Dingham couplings on the wagons to test with.
So this is basically what I did.
I had a PDF that was very helpful and I followed some of it, but not all. Here is the link for it...
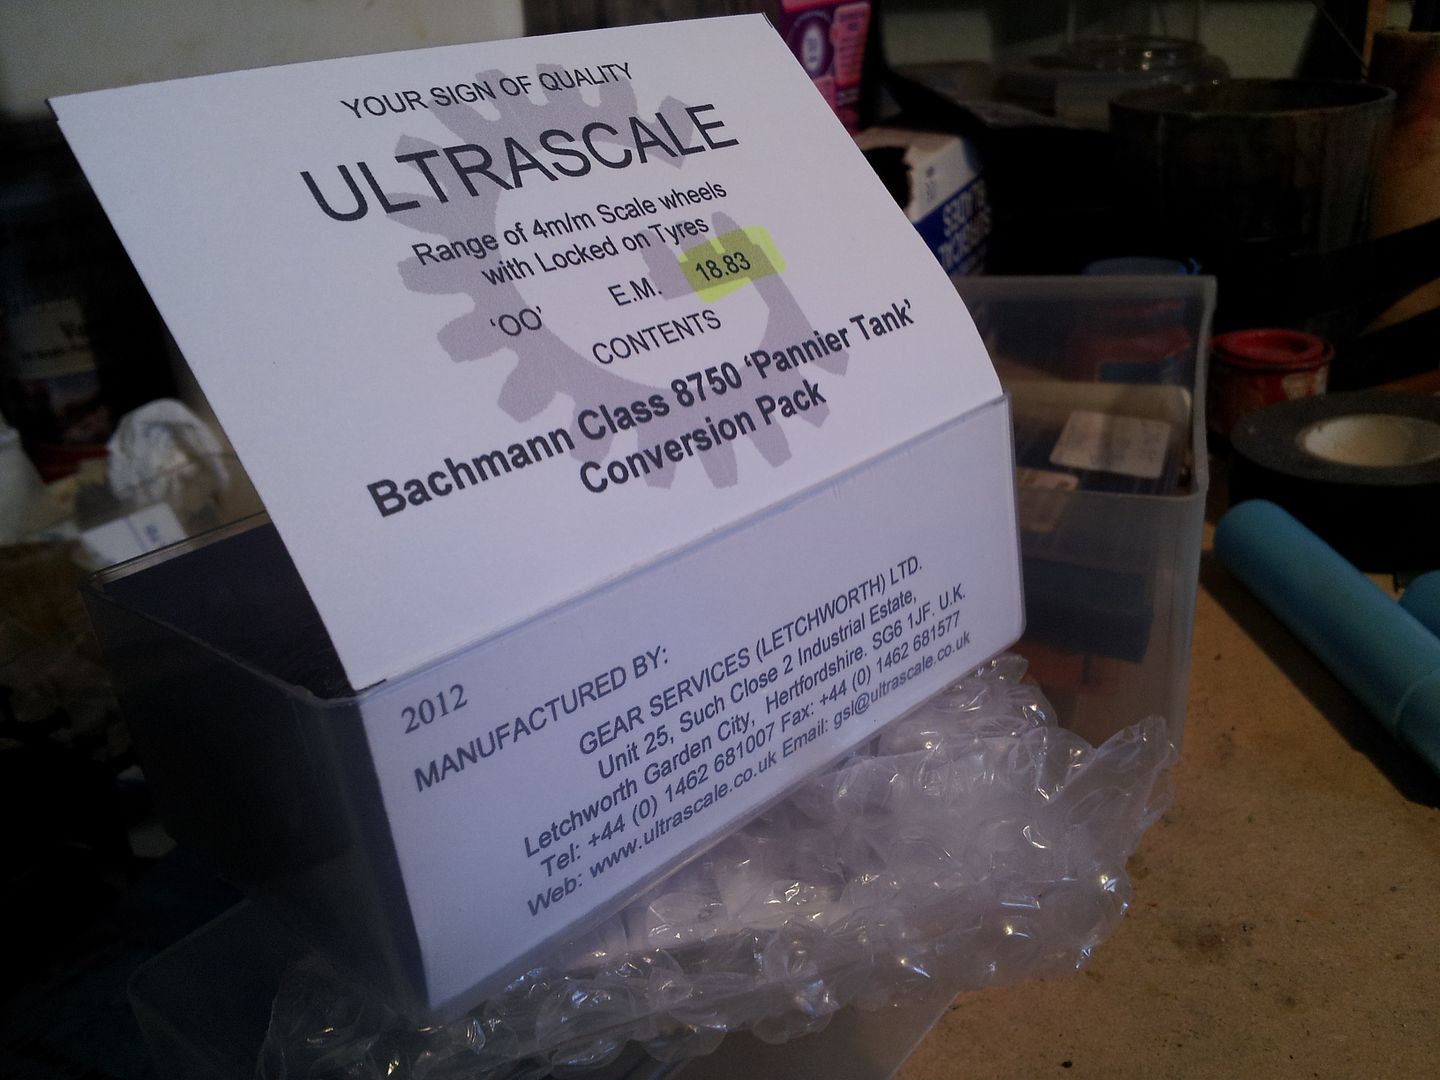
I think we all know now that Ultrascale cost a packet and take about 6 months to arrive, but whatever. They come in a nice little box, each wheel set is quartered on it's axle and 'back to back' set already. The gear is even fixed on for you. It says it is for the 8750 but it's ok for the 5700's also.
You just remove the two extreme ended screws to remove the body, then two inner ones to remove the frame and wheels. Luckily I managed to nab myself a Hornby crankpin screw driver and it works beautifully. I've struggled with tweezers and pliers rounding them off too many times. it's a shame the companies didn't supply these things easier, it's also a shame that buying only loco bodies from RTR manufactures is like persuading a cat to eat a stick of celery, but never mind. I didn't bother removing the plug as in the PDF as I didn't feel the need.
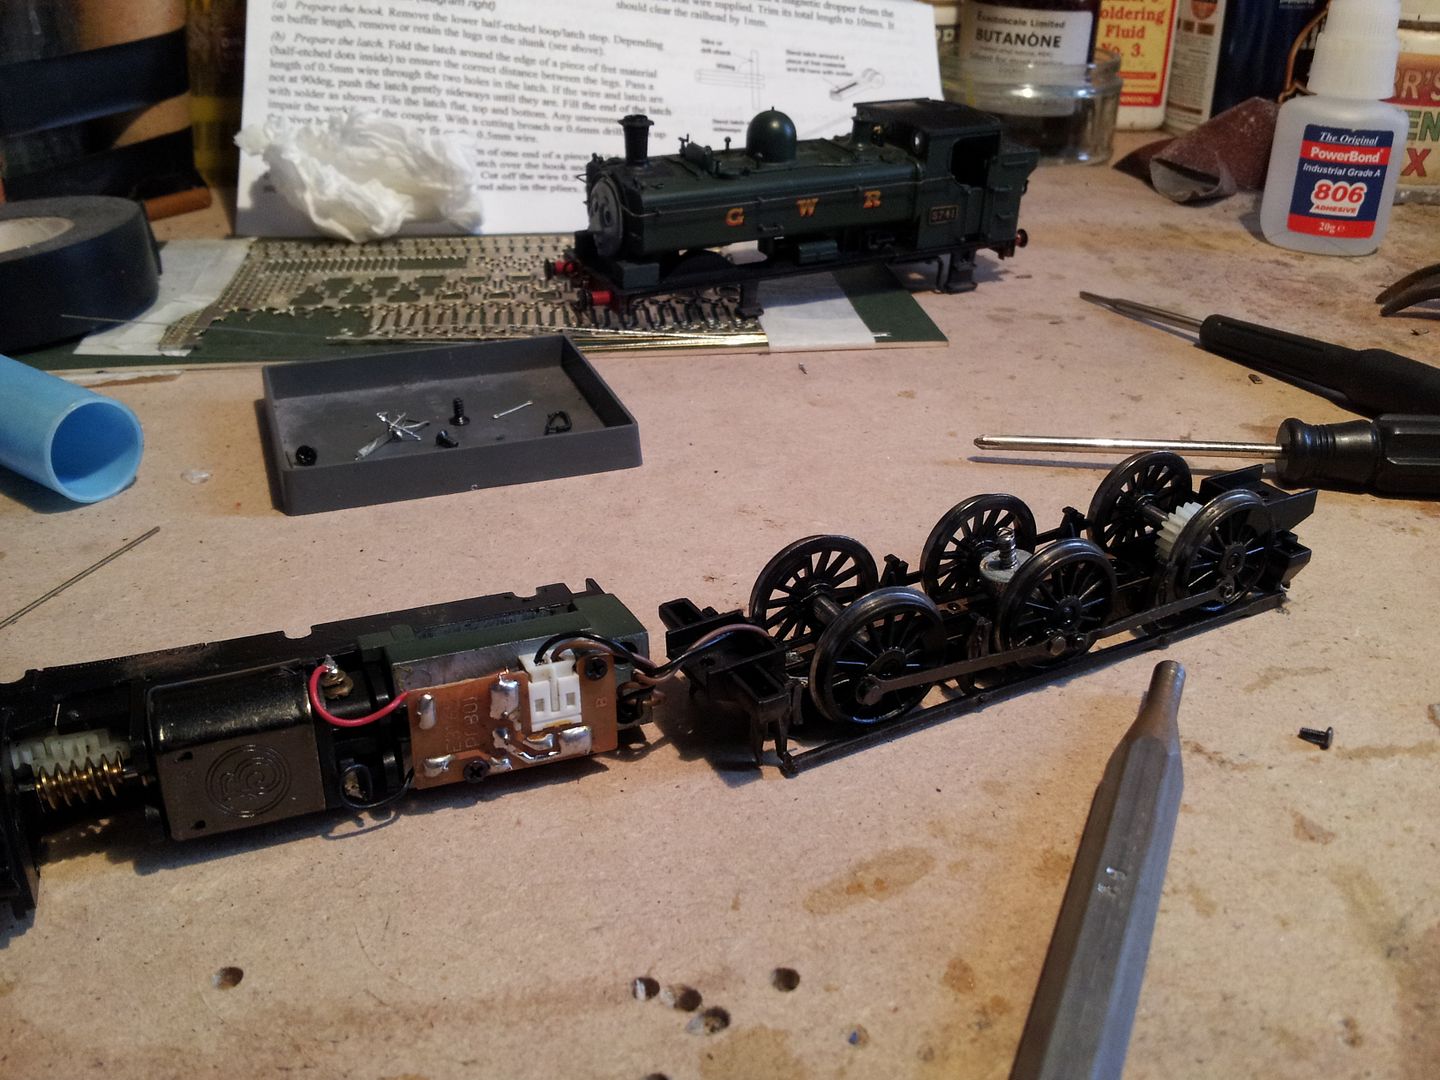
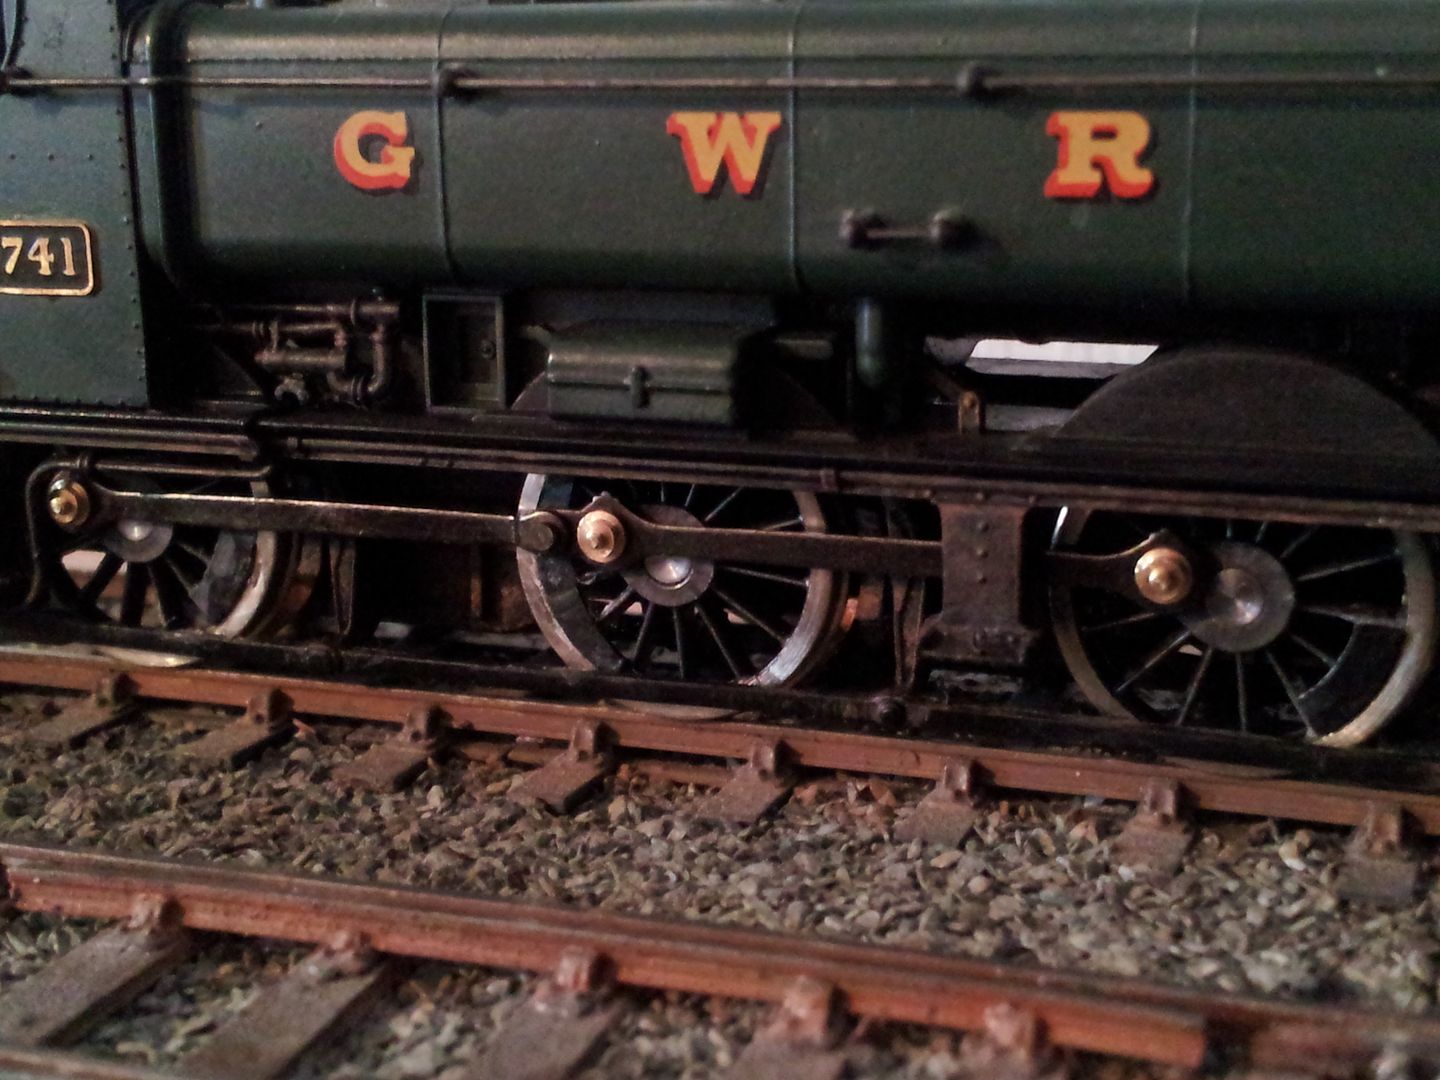
As pointed out in the PDF, the centre axle has a really neat way of springing things, it is I suppose you could say a 'half-bush' that hugs most of the axle with a spring on top. The 00 wheels against the P4 ones look odd.
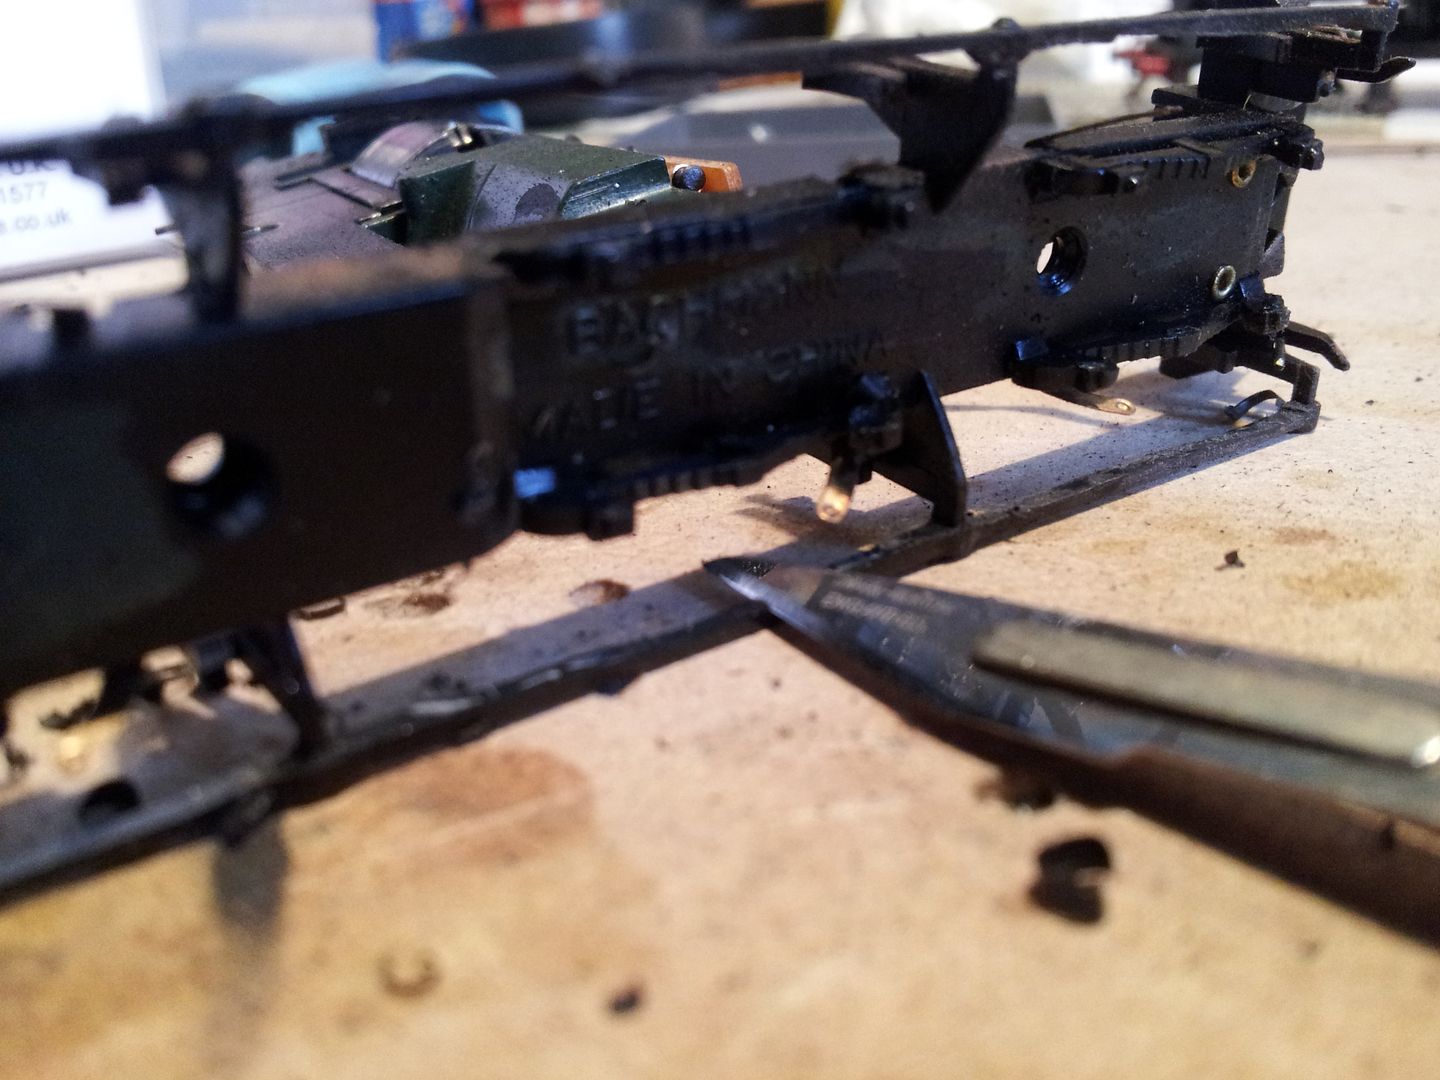
You have to either remove the brake pull rods and replace them, or thin them out as they are too fat. I chose to thin them.
Using a file at first I almost fell of my chair in boredom, so then I whipped out the mini drill and made a mess. Eventually I found the easiest way was to just lay the thing on its side and shave it with a brand new scalpel blade. The plastic flexes enough so that it lays flat while you go about it. The rear pipes also needed shaving, but again, this wasn't too much of a bother thankfully.
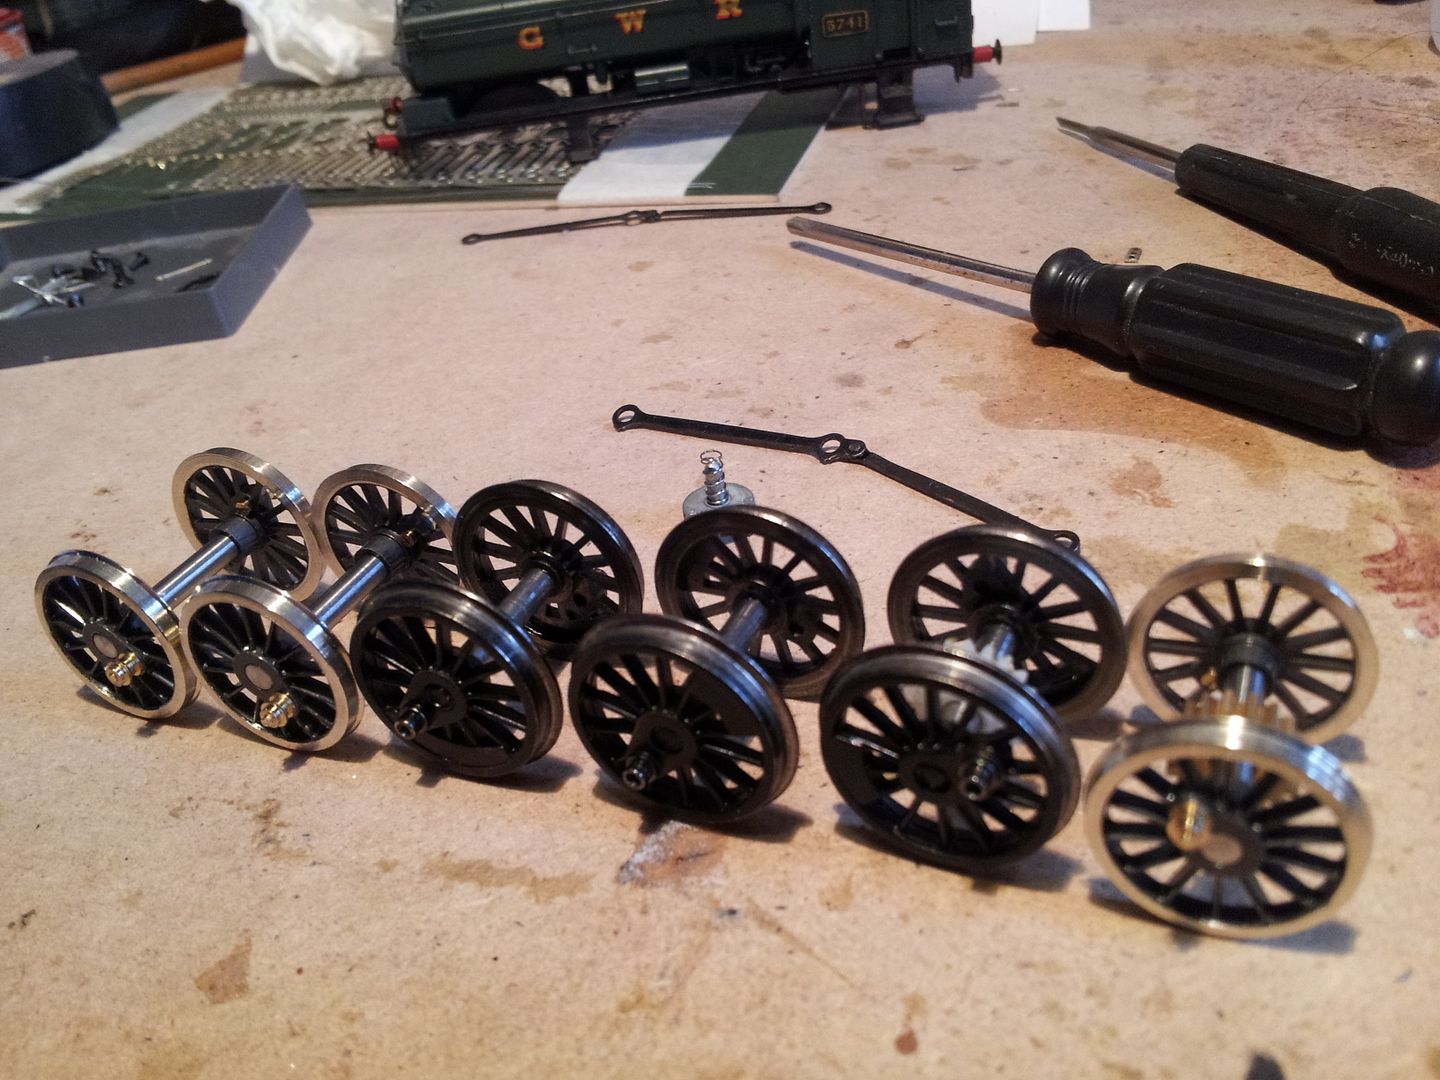
I failed to mention, the Ultrascale wheels also come with crankpins pre fixed and with a retainer already threaded on. Bonus. The standard Bachmann coupling rods fit the Ultrascale pin bushes perfectly. I can't say how they would be if you sourced replacement rods however. Balance weights also come with the package and for fitment positions I just referred to the original 00 wheels. It must be said, like the doughnut I am, I lacked the foresight to fit them before the conversion, so instead I had to struggle around things and struggle I did! Superglue probably wasn't the wisest choice but after I scraped away the 'bloom' they don't look bad at all. Maybe a bit of paint is in order. It might just be me and my bodging but I had to shave the weights slightly as they were fouling the clearances. All good now.
Done. (Any ideas how to re-instate the 'wheel handle thing' on one of the tank fillers? Snapped it didn't I.)
I've gave the wheel centres a touch of black paint, also the retaining screws paint also to hide the shiny brassy look, and hopefully will be sufficient to stop them un-expectantly turning into Frisbee's. I have Metal Black but am unsure how to use it to good effect, so maybe later.
I'm still thinking at a future date doing the whole RWS 'Duck' thing again, but it'll suffice for now. The chassis seems happy on the layout. Also I fitted a Dingham coupling to the rear of the loco, but not the front.
Hope that's alleviated some fears. As conversions go it has a reputation for being an easy one, and I'll agree to that, although it probably took me a couple or three hours, unsure.
Next task I guess is to start installing the electro-magnets on the layout.
What you think? 
3 Comments
Recommended Comments
Create an account or sign in to comment
You need to be a member in order to leave a comment
Create an account
Sign up for a new account in our community. It's easy!
Register a new accountSign in
Already have an account? Sign in here.
Sign In Now