

The brake van finally

Entry posted by altone
295 views
The Brake Van - Finally
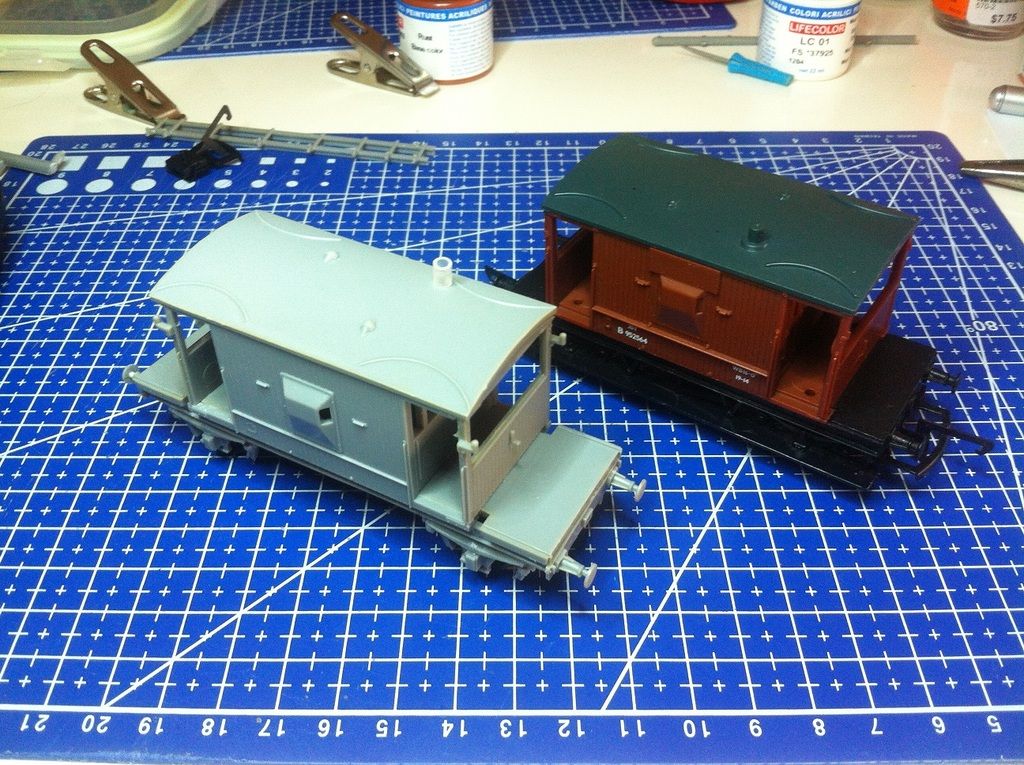
So here's the almost assembled unit, you might see a couple of rough spots but hopefully they'll be
sorted in the prep and paint.
I took a photo of it now as I'm going to paint the interior and undercarriage before adding couplers, footboards
and other details.
The Triang van alongside it shows how much longer and narrower the Dapol kit is.
I had issues with the brake shoe pins, and one warped solebar.
2 steel washers were glued to the wagon floor to give it a bit of weight.
(Yes I know, liquid lead - let me check the storage shelves.. nope, got some heavy washers though)
Because of the baby fish, I'm going to try to handpaint this one.
A bit of matt black, grey and bauxite, perhaps hilight the moulded rails with silver - easy as, right?
Additional tools I used on this model
Steel rule, good for checking straightness, can be used as a guide and heat sink if you warm warped plastic
parts to try and straighten them.
Also useful as a cutting guide and for measuring stuff.
Blu-tak - you can test fit fiddly items and press them into the blu-tak - lift the blu-tak with small
bits still in place, apply glue and fit back to larger item.
Stops them moving around or drooping as the glue sets.
Sticky tape - if clamps or blu-tak will not work - try holding stuff together with tape.
Small wagon component box.
As you may know, my work area is multipurpose, so I can't just leave unfinished items lying around.
I found this clip sealable container just sitting in a kitchen cupboard - ideal for keeping all those loose
and part finished kit bits together.
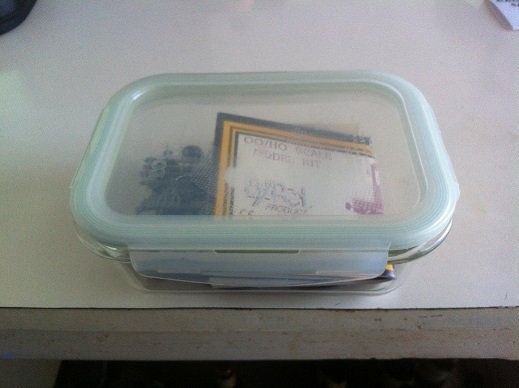
There's another in the fridge that would be perfect for larger projects, but it's full of cake
right now, so I'll have to re appropriate that one later 
Seriously though, any new folks who,like me, might not be able to complete a kit in one sitting,
put the whole lot in a container.
It's just too easy to lose that one little part ....
WARNING!!! If you use a superglue type adhesive, don't put freshly glued items in with clear components.
For those of you wondering why I'm including obvious things like blu-tak in this blog:
I have worked in IT for decades and so often I'll go to fix up a simple problem when the user asks how I got
that command level option to run, they'd read that this would fix it but couldn't get it to work.
The instructions they'd seen skipped the simple step of opening command as administrator.
Same here, nobody told me that blu-tak could help hold model stuff, I worked it out for myself.
I found that the applicator from a makeup compact is great for applying weathering powders, and if the make up
is dark enough, you can use it for weathering. I'm sure that's not totally obvious to everyone.
Obvious may not be that obvious to some, so I'm including all the stuff I use as I go on my merry way.
By doing so, I also might get comments saying "why use that when this is 10 times better/quicker"
So, learning new methods on the way.
Ok, next post, finished item and first fixer upper
-
 2
2

0 Comments
Recommended Comments
There are no comments to display.
Create an account or sign in to comment
You need to be a member in order to leave a comment
Create an account
Sign up for a new account in our community. It's easy!
Register a new accountSign in
Already have an account? Sign in here.
Sign In Now