

Entry posted by londonbus
430 views

One year ago, just as I was getting myself organised to make progress on the layout I was given a big work project. So work on Leicester has been intermittent to say the least. Travelling a lot is always good for scouring the online shops, Youtube, (Fle)Ebay. But i'm a little ashamed as I look back over the year on actual physical progress! A few weeks ago I decided that if I don't have the big blocks of time I need to get up in the railway room and actually start soldering, re-reading Digitrax instructions etc then I should get off my hind quarters at least do something on the miriad of little mini-projects i've bought the book, read the book etc.
I got the airbrush out and used it for the first time (on my wife's silver coloured scuffed shoes - but a start, I didn't want to ruin anything railway related).
I got out the paints, decalfix, thinners, mattcote, weathering powders and started to experiment (pictures below)
I finally made a start on installing 20 V4 Loksound chips all reblown by Bryan (@Howes). Some video's of that will be posted on youtube when the Round Tuit is delivered.
Also this blog was unburied from underneath the far more diligent and worthy contributors to this forum and dusted off. Here are some pictures at least. And I have August off, so looking forward to continuing my mantra of "Just do it".
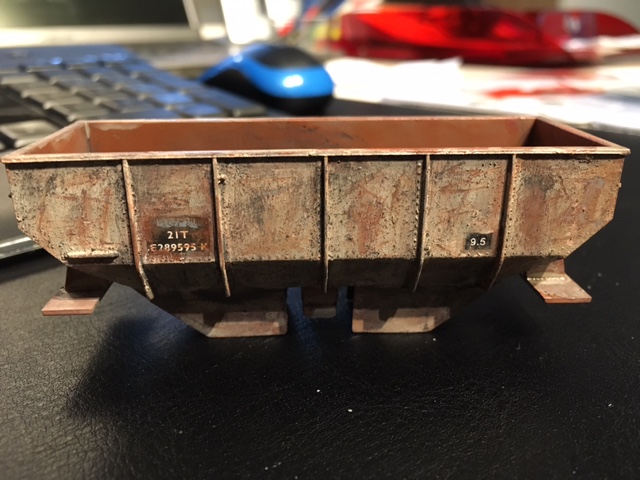
This was the result of the Humbrol channel research on Youtube - it's the first attempt,
In Summary:
- 50/50 mattcote / enamel thinners brushed onto the wagon
- dark earth, rust and iron oxide weathering powders randomly applied into the above mix while wet
- left to dry (mistake one)
- 50/50 acrylic paint (mistake two - 1st time round I used enamel) and decalfix. Paint over the whole wagon roughly (leaving the running number clear)
- wait to dry (mistake 3)
- wet and wait a few minutes
- scratch and score with something that has a not too sharp point to break the surface of the paint
- with some thinners break the surface more (this comes off easily as the decalfix in the acrylic paint has made it very easy to distress).
- The weathering powders should at this stage bleed out more and very fine, light, downward brush strokes should represent rust running down. (mistake 4 as i'd originally sealed the weathering poweders with enamel / decalfix - however using more thinners / scratching I was able to get down to the original weathering poweders, but in several places also the original plastic!)
Also the running numbers on the Dapol model also disappeared with thinners. However I detail all four mistakes above to demonstrate that I am but a humble beginner, however I have at least overcome my fear of having a go. I have at least another 20+ (and the rest) of these Dapol wagons, so should have honed my weathering skills a bit more by the time i'm half way through. I also will practice with the Maskol technique for larger areas of rust and dropping small amounts of weathering powders onto the finished wagons into mattcote.
I now need to get the track grime out to weather the running gear etc and match it in.
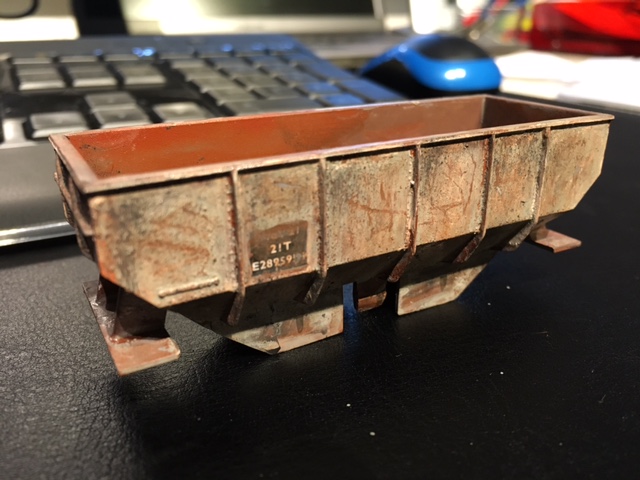
I was a little heavy handed at the end with adding some "smoke" weathering poweder, I think as the paint hadn't dried hard I was less able to tone it down. But i'm quite pleased for a first attempt.
Tremayne
-
 4
4

1 Comment
Recommended Comments
Create an account or sign in to comment
You need to be a member in order to leave a comment
Create an account
Sign up for a new account in our community. It's easy!
Register a new accountSign in
Already have an account? Sign in here.
Sign In Now