

Entry posted by londonbus
476 views

I haven't posted for most of 2017, not a great year and frequent unplanned trips back for parents, extensive work etc. Although not much more track went down I have made the following progress:
Airbrush out and lots of experimenting with weathering. Lots of trial and error, lots of blocked nozzles, but now at least i've got the hang of the right consistencies, my preferred media depending on the job at hand (enamel / acrylic) and have settled on Vallejo & Tamiya (acrylic), Humbrol (enamel). I have had quite a bit of success with blending Tamiya acrylics together with various shades and thinners on my hoppers to create one way of adding rust and general traffic dirt without an airbrush, i'll most likely write an entry with pictures going through how I did this. Also hairspray and various chipping media for exposing the rust underneath.
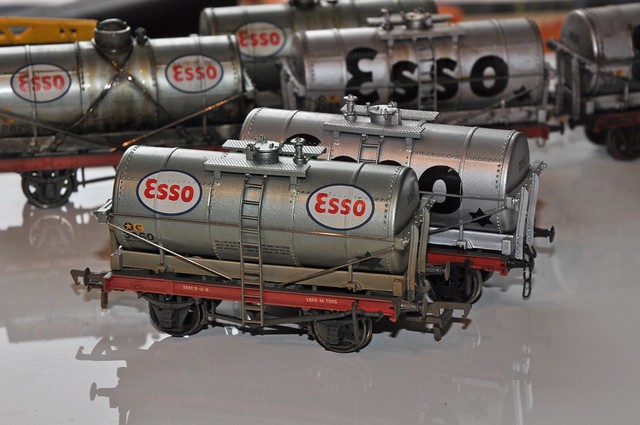
I have rather a lot of the old War Ministry oil tanks and want to rebrand them in Esso for the Abbey Lane sidings which are just to the North of Leicester Central. I had a number of the 3 pack silver "A" tanks but when I started working with them noticed that they are not painted but the plastic is pre-coloured and heavily tinted with blue. Although they were to be weathered anyway I was not happy that the blue came through so had an idea to strip them down, repaint them and then individualise them with home-made decals - results are shown below and I shall be detailing how I did this and what I learnt in a seperate blog entry.
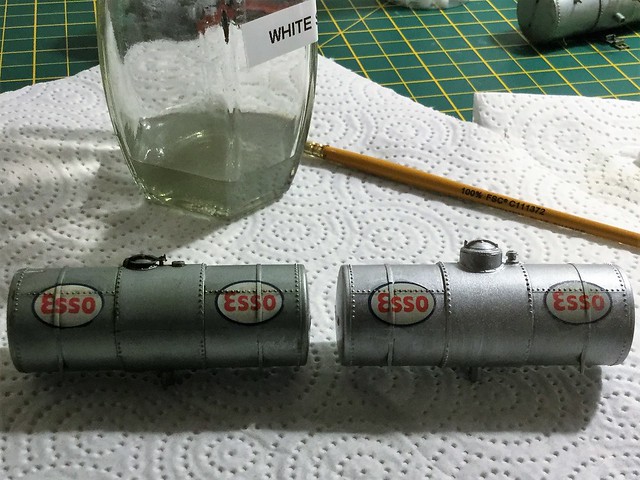
Below you can see the pre-coloured blue silver plastic (in front) compared to one which I consider to be the target colour (behind).
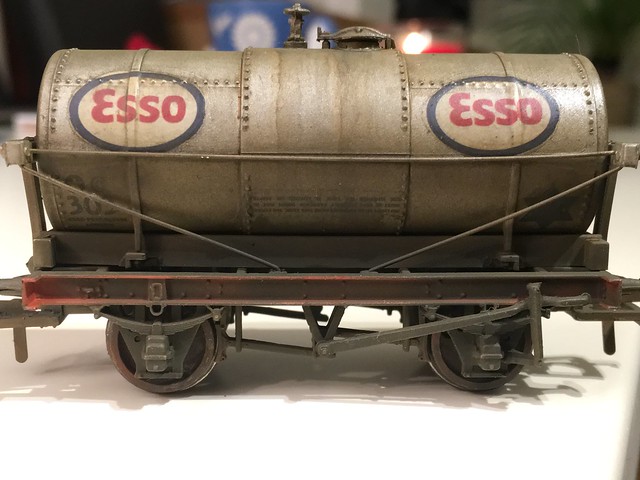
Even more pronounced below. Original left with factory decals, repainted with home made decals right.
This is the final result of with home-made decals - not enough decalfix on the left as the decals haven't moulded over the rivets well enough, however the right is better. To get the white background I have two seperate decals.
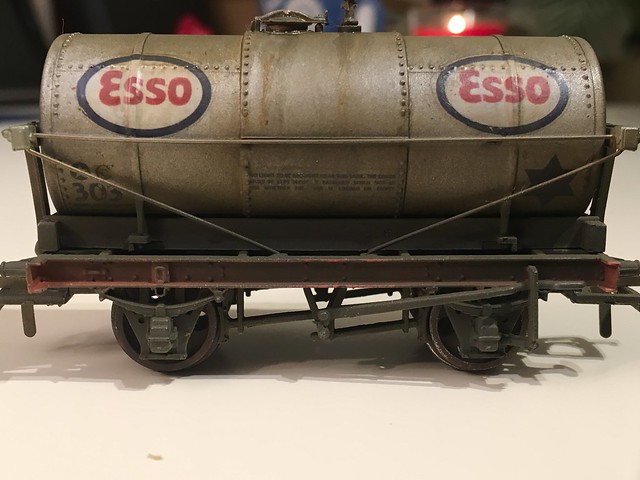
The weathering was a run with thinned enamels with the airbrush (humbrol matt leather & matt black) with some almost dry-brush thinners manipulation. I learnt that even when enamels are touch dry this was possible for several hours after application (compared to acrylic which is dry very quickly if airbrushed). dribbles of oil care of AK interactives / Vallejo Fuel enamels and also some bright orange humbrol which was then manipulated with some thinners after a while. The orange really added a nice touch, but had to be very small amounts.
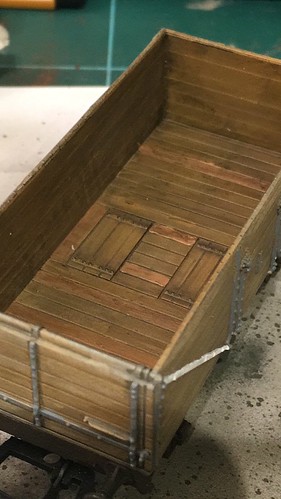
Manufacturers are bringing out a lot of Private Owner Wagons and I have been looking through quite a few old books and sites for ideas to create a late 1950's train of mixed coal wagons with faded PO liveried wagons and some that are unpainted. I got out the Vallejo paints and doctored up this old Dapol wagon as my first experiment with dirty but not yet decrepit natural wood. It still needs some decals and some weathering, i've also notice a fingerprint on the door.
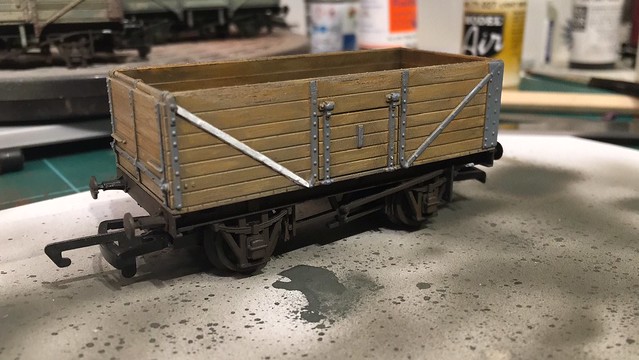
Some of the individually painted plans come out a bit too prominently here but I do like the effect of the dark wash I put on. A bit more practice and i'll be quite pleased.
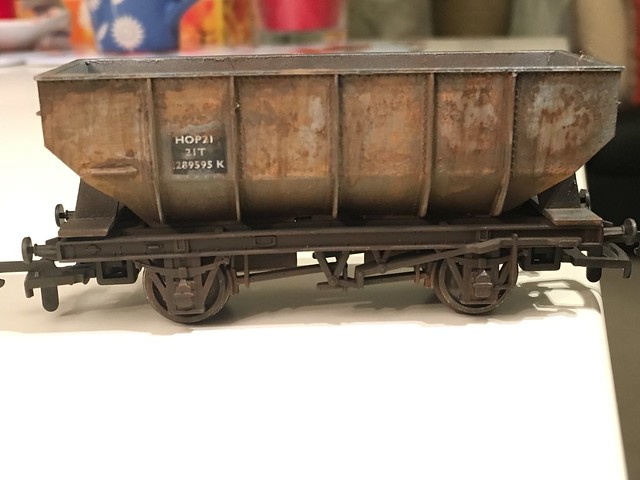
I'm still experimenting with my techniques on the 21T hoppers, but they're getting much better. The hopper below would be virtually impossible to replicate as it was one of the orginal experimental batches that I have tried virtually every technique on. Probably 4-5 different layers just painted over the previous attempt. In the end it was such an awful mess I took some paint remover to the lot and scratched away with an ear bud until I realised the result was actually quite good leaving some elements of every single different technique and also going back to the original plastic in places. Never give up, even when it's a complete mess!
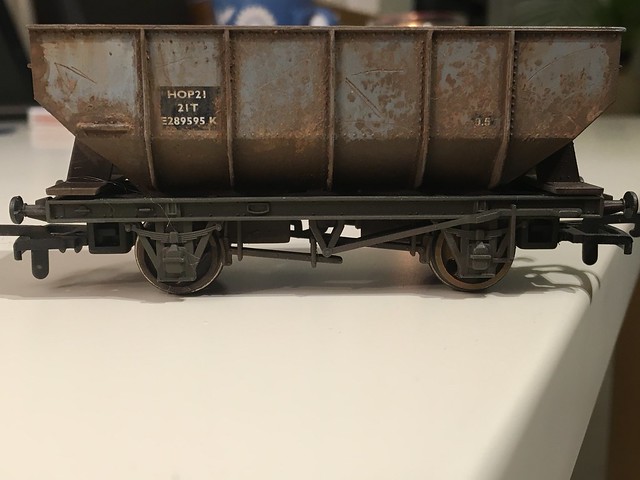
Again the decals need to be applied and the hoppers properly attached to the chassis.
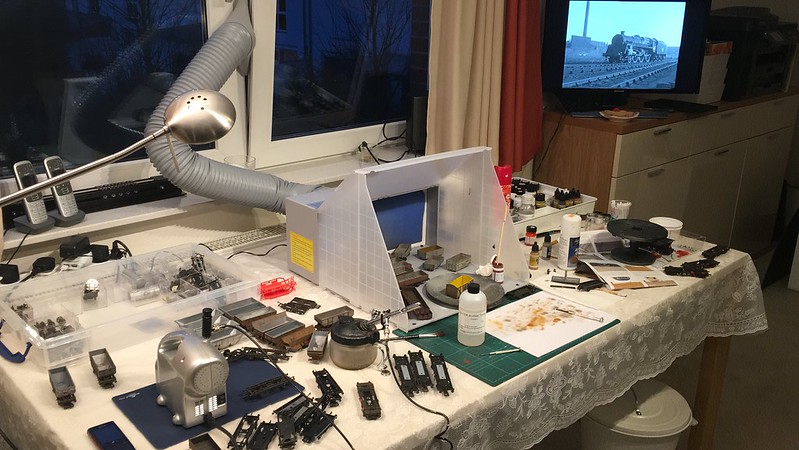
On the rare occasions when I have the house to myself I can clear off my work and get down to experimenting. This is the setup and on the table are the pipe wagons, some MGRs, various planked wagons and some of the Esso wagons in various stages of chaos.
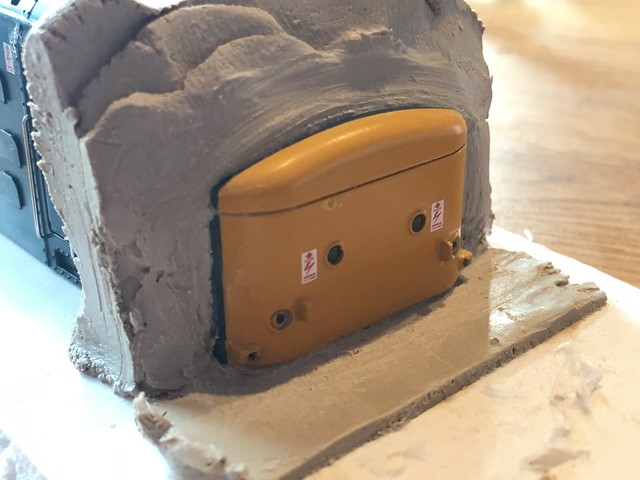
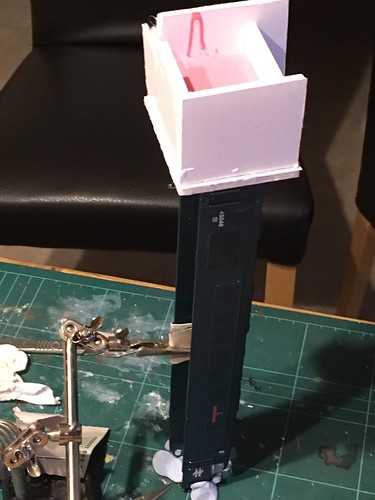
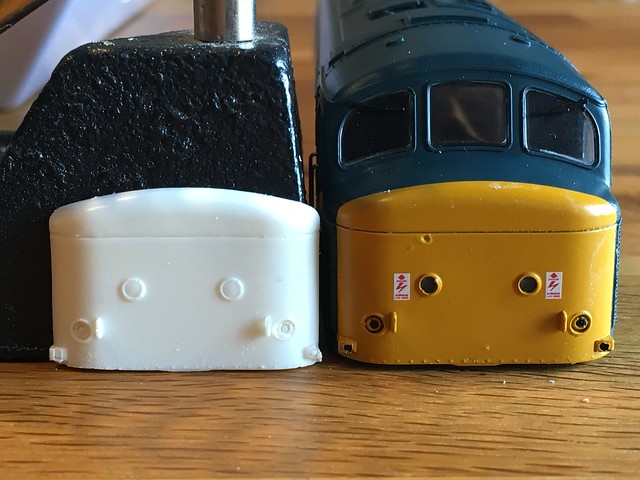
Something else i've been meaning to get around to for several years is resin moulds. Finally I had a stab at replicating a peak nose. This Bachmann nose is quite rare so I thought it would be a good first attempt. firstly I did the mould the wrong way around so the air bubble rose to the top ( as you'd expect) but settled under the nose leaving a heavily pock marked final mould. Hardly noticeable on the silicone mould, but very prominent on the resin cast.
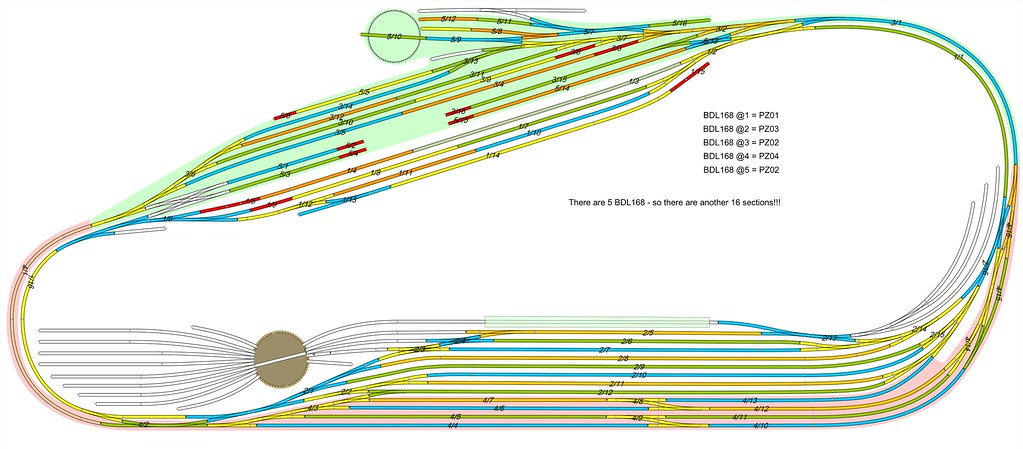
The track plan hasn't changed significantly but the engineering sidings and loco facilities / turntable area have been tweaked a bit. The different colours are the BDL168 zones to enable quite acurate stopping at the stations. Train Controller will handle reasonably accurate stopping in the storage sidings. Experiments have trains, even ones that haven't been calibrated, to stop within 1-3 cm of where they are supposed to. I have also wired the detections zone where I don't really need them to run trains automatically with Train Controller (points etc) as I intend to have a reasonably realistic Mimic Board and also for safety should a wagon / coach come off over a set of points.
So lots of small projects have been going on but not a great deal of actually building! 2018 now is looking far more predictable. So fingers crossed i'll get double line working and the station finished.
-
 3
3

1 Comment
Recommended Comments
Create an account or sign in to comment
You need to be a member in order to leave a comment
Create an account
Sign up for a new account in our community. It's easy!
Register a new accountSign in
Already have an account? Sign in here.
Sign In Now