

92061 - a working chassis

Entry posted by RichardClayton in Update
918 views
92061 has run under its own steam (as it were...) for the first time today. I didn't bother to check that it worked OK as an OO loco before taking it apart, so it is a relief that there aren't any fundamental problems with the chassis.
I drilled out the axles 1 mm using the jig as described in the previous blog entry. A couple of the holes were not central (inevitably perhaps), and looked poor. I fixed this by drilling them out using a larger drill, and filling the still offset hole with solder before trying again. However, the larger holed looked better, and a quick operation with a good photo and vernier callipers confirmed that the hole should be about 1.5 mm in diameter. The axles holes were then opened up with a drill in a pin chuck, and balance weights (Comet), and crankpins (Alan Gibson) fitted. A quick rub with Birchwood Casey gun blue, rinse and buff, and the wheels began to look like they belong on a 9F. Time for the interesting part to commence. The photo below shows a couple of axles in situ, along with spacing washers and a bearing from brass tube that will go in the big end of the connecting rod.

I have followed the advice given in the excellent conversion sheets that are written by Pete Hill and available on the Alan Gibson website (http://www.alangibsonworkshop.com/Conversion%20Sheets.html). Although there is not a specific sheet for the Bachmann 9F, the sheets for the Hornby Crosti 9F, and the other Bachmann engines tell you pretty much all you need.
Alan Gibson wheels are generally excellent, but there are a couple of lessons I have learned by painful experience. The first is that it is best to force fit the wheels once and once only to the axle, otherwise they tend to become a much looser fit, and this is a recipe for quartering woes. The second is that it pays to work out carefully how long the axle needs to be, and how many spacing washers are required, before any wheel fitting commences. I have an inexpensive vernier calliper, which makes this job easier.

I assemble the first wheel onto the axle using a pillar drill to ensure everything is square, the second wheel is then added using a GW Models wheel press and a suitable back to back gauge. This process should result in wheels that are both square and consistently quartered, but I usually end up with both wheel wobble and inaccurate quartering. Maybe this is my innate incompetence. One big advantage of re-wheeling RTR locos is that both of these problems can be easily rectified before assembling the wheels to the chassis. Wobble can be fixed by gently tweaking the wheel while keeping an eye on the back to back. Quartering can be fixed by looking through the wheel and lining up the wheel spokes by eye.
All went fairly smoothly. I remembered to add all the spacing washers before pressing home the wheels, and there were only minor issues with quartering. On one axle I had lined up the wrong spokes, and there were slight errors on a couple of others. The basic chassis runs very smoothly on DC, there appears to be plenty of adequate clearance for crankpins, and all that is now needed is to fit the return cranks. Any suggestions for a suitable DCC chip would be very welcome.

Once the chassis is finished it will be time for the body. Basically it looks very good, although the chimney needs drilling out (eek!) and the sandbox filler caps look a bit small. The pipework is OK -- in an ideal world I would replace it all with brass wire, but we will see how long the plastic lasts. Then there is the small matter of air pumps...

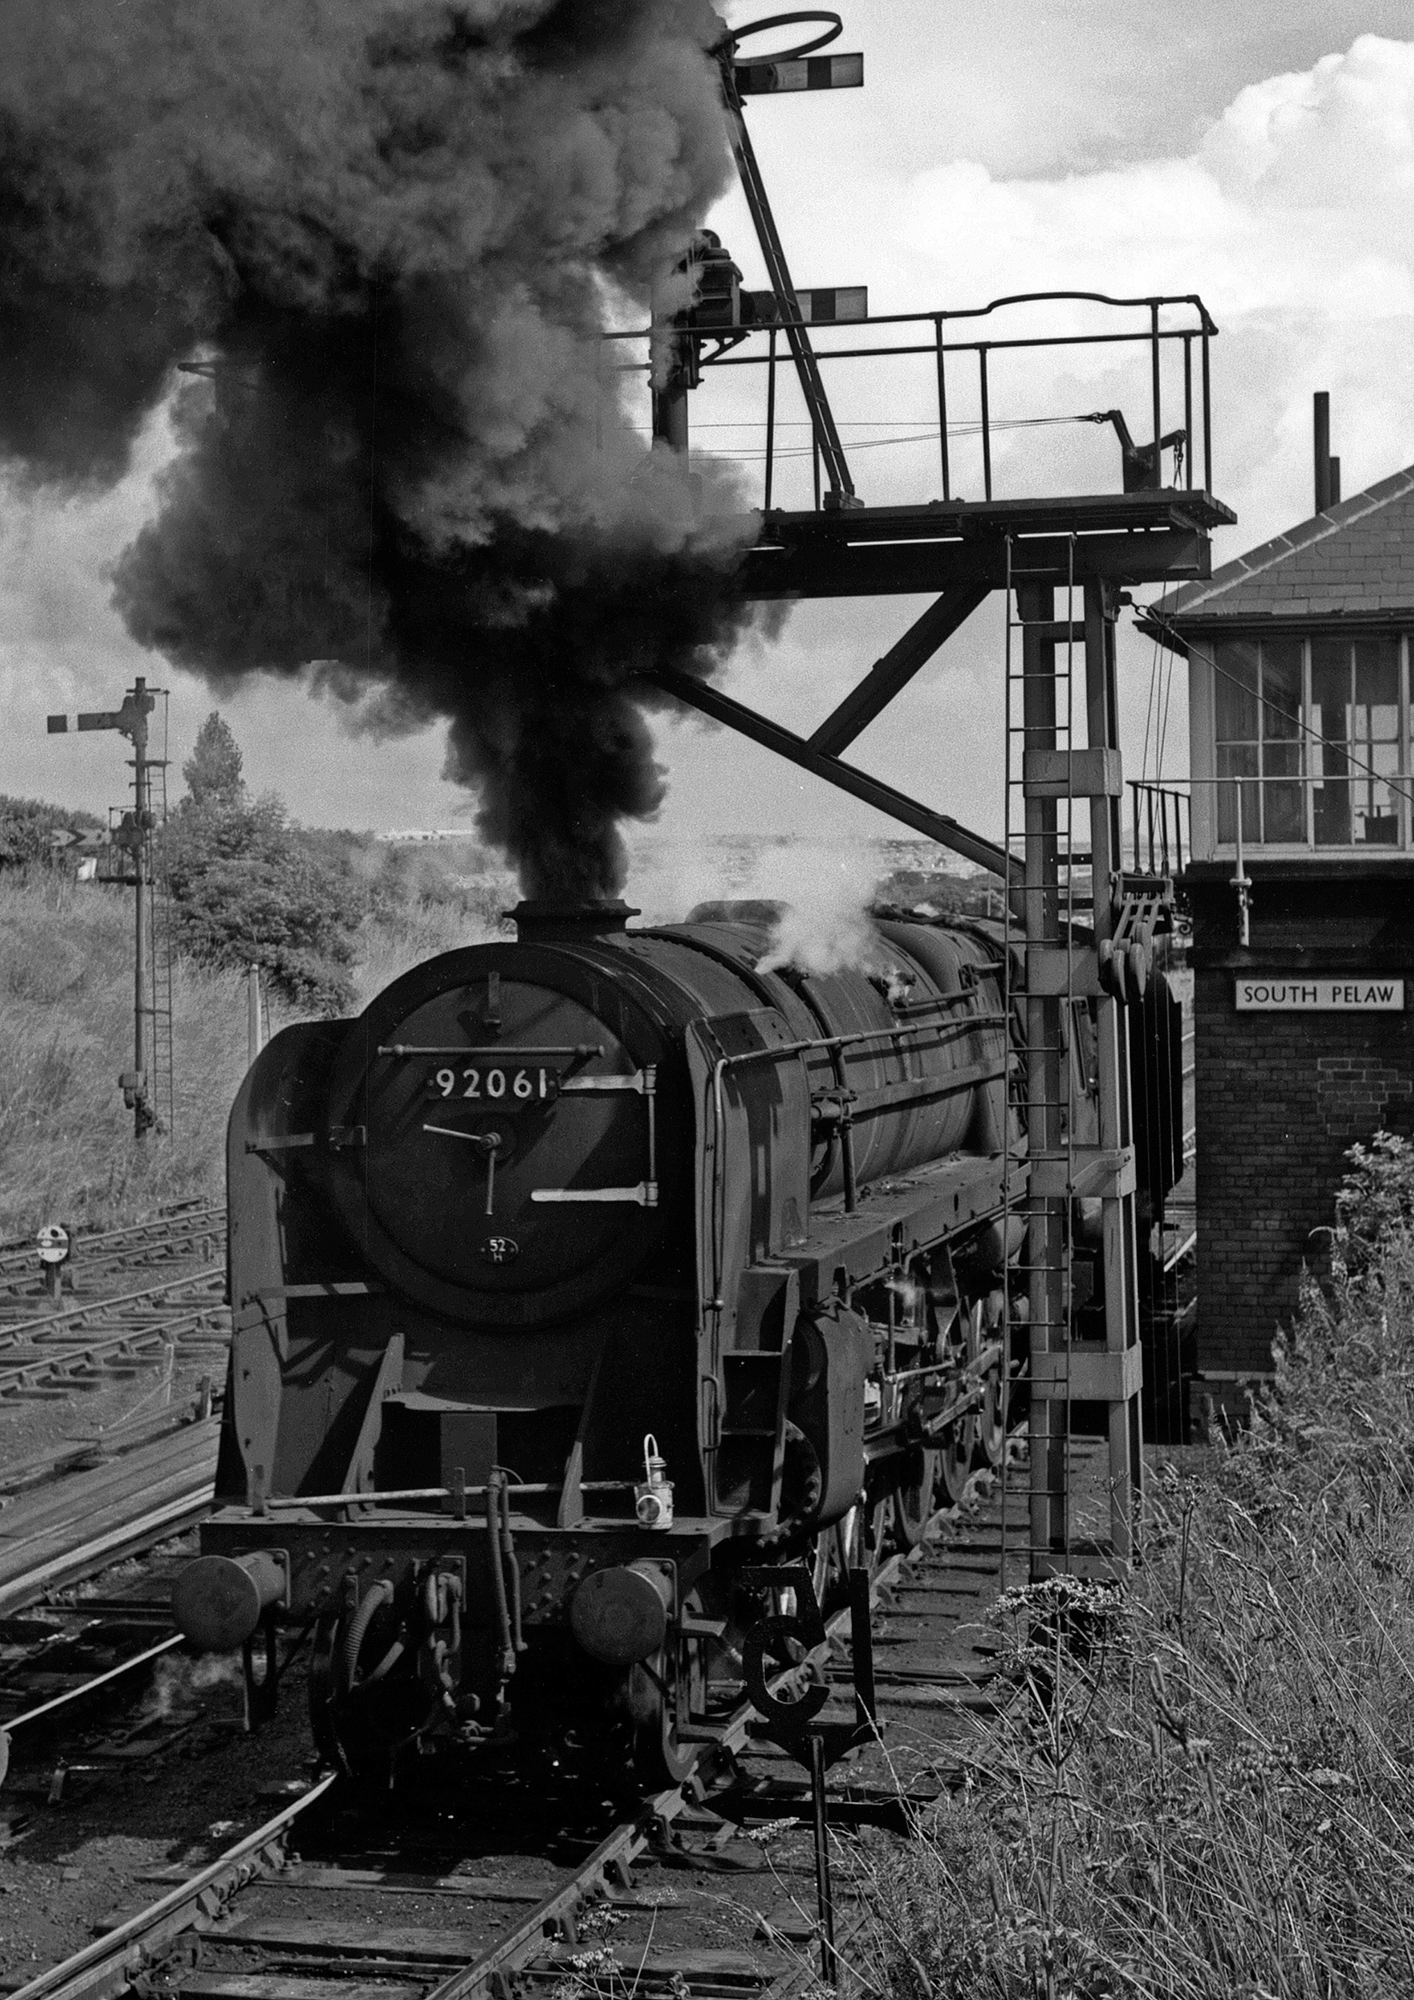
An as yet unresolved question is whether to model 92061 without cylinder covers, as in this photo on John Donelly's excellent web pages -- http://southpelawjunction.co.uk/wp/wp-content/uploads/2014/03/92061@southpelaw1.jpg.
Edited by RichardClayton
Replacing photos!
-
 5
5

3 Comments
Recommended Comments
Create an account or sign in to comment
You need to be a member in order to leave a comment
Create an account
Sign up for a new account in our community. It's easy!
Register a new accountSign in
Already have an account? Sign in here.
Sign In Now