
Baseboards

Entry posted by goldngreen in Marlott
466 views
5mm ply was selected for the baseboards. If offers enough rigidity for a micro layout but is also very light. The small layout size means that a shallow edge frame suffices to provide the necessary rigidity. Having made these decisions the ply wood was bought. The images show the boards upside down showing how the edge frames are attached.
No scenic sections are planned to be lower than the track so the baseboard covers the entire area. The baseboard for the fiddle yard uses the same approach.
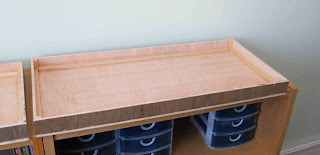
Construction is simple. The frame is glued to the baseboard around the edges using Evo-Stick Weatherproof Wood Adhesive. Strengthening is provided by a beading around the inside.
The boards sit square with no rocking motion on the flat shelf surface below. There is no movement in them.

The scenic baseboard was finished off with a layer of foamboard to reduce engine noise from vibration. It was glued on using the same weatherproof PVA, held down until dry with large heavy books.

Edited by goldngreen
-
 4
4

3 Comments
Recommended Comments
Create an account or sign in to comment
You need to be a member in order to leave a comment
Create an account
Sign up for a new account in our community. It's easy!
Register a new accountSign in
Already have an account? Sign in here.
Sign In Now