
grounded carriage Sandy Shores - Scratchbuilt Grounded Carriage
Entry posted by SouthernRegionSteam
682 views
Being my dream scenario, there were certain things that I was super keen on including on the layout (aside from the general seaside theme). One of these was the lighthouse, another was a grounded railway carriage. To understand why, indulge me for just a second whilst I show a plan I once had for a garden office for myself:

Above: Those who know me know that I love to design garden offices and tiny houses in my spare time. I had originally planned to try turning an old railway carriage into a tiny house, but after a plan to do up our garden, I decided to instead convert one (virtually) into a small office. When Sandy Shores was started, I saw the perfect opportunity to include a grounded carriage, although this time in its original guise as a tiny house. So now you know the backstory!
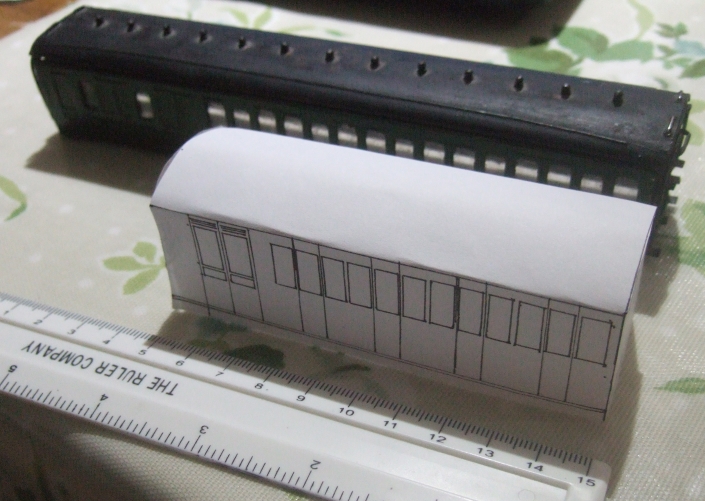
Above: Many years ago I was given this grounded carriage (no idea what kit it is, but it's of metal construction). It was exactly what I had in mind, except for the fact that it was far too long for the site I had chosen. A normal person would probably go for one of two options here:
- Cut and shut the metal grounded carriage
- Use some propietary components (like Ratio plastic coach sides) to form the basis
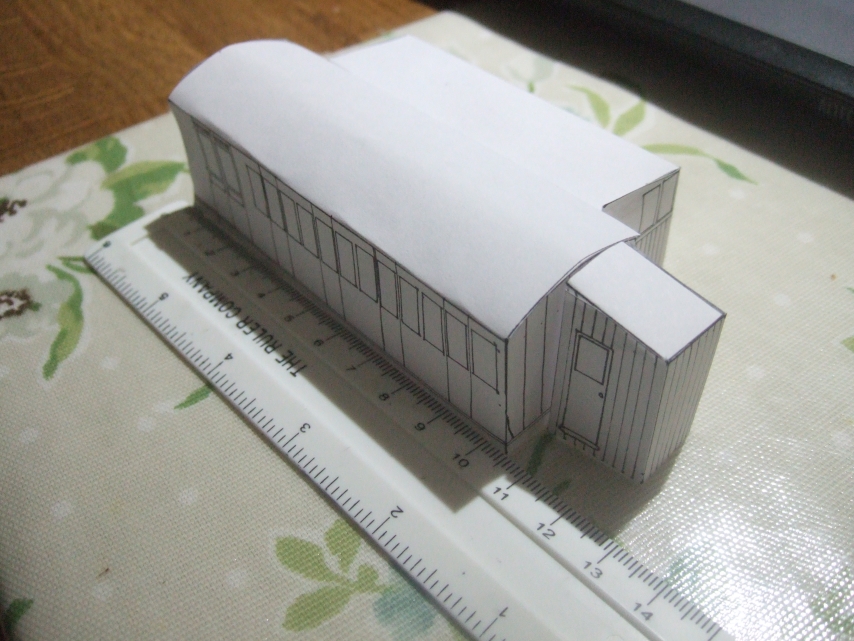
Above: I eventually settled on the above design. Even with my desire to preserve as much of an original building as possible, there was no comfortable way to fit an entire 1 bed accomodation within a short six-wheel coach. The answer was to add a series of lean-to extensions; helping not only to expand the structure, but also add more intrigue and plausability to the carriage being used for living in. A rear extension was chosen (likely to house a bathroom and kitchen), and a porch added onto one end.
As you might've guessed by now, I don't tend to make life easy for myself, so I decided that I would make my own entirely from scratch. The question was, with what? Well, nothing looks more like wood than... you guessed it; wood! To that end, some balsa was bought, and the basic shape formed from a few sections. What ensued were 8 hours of cutting and scribing; let's take a look.
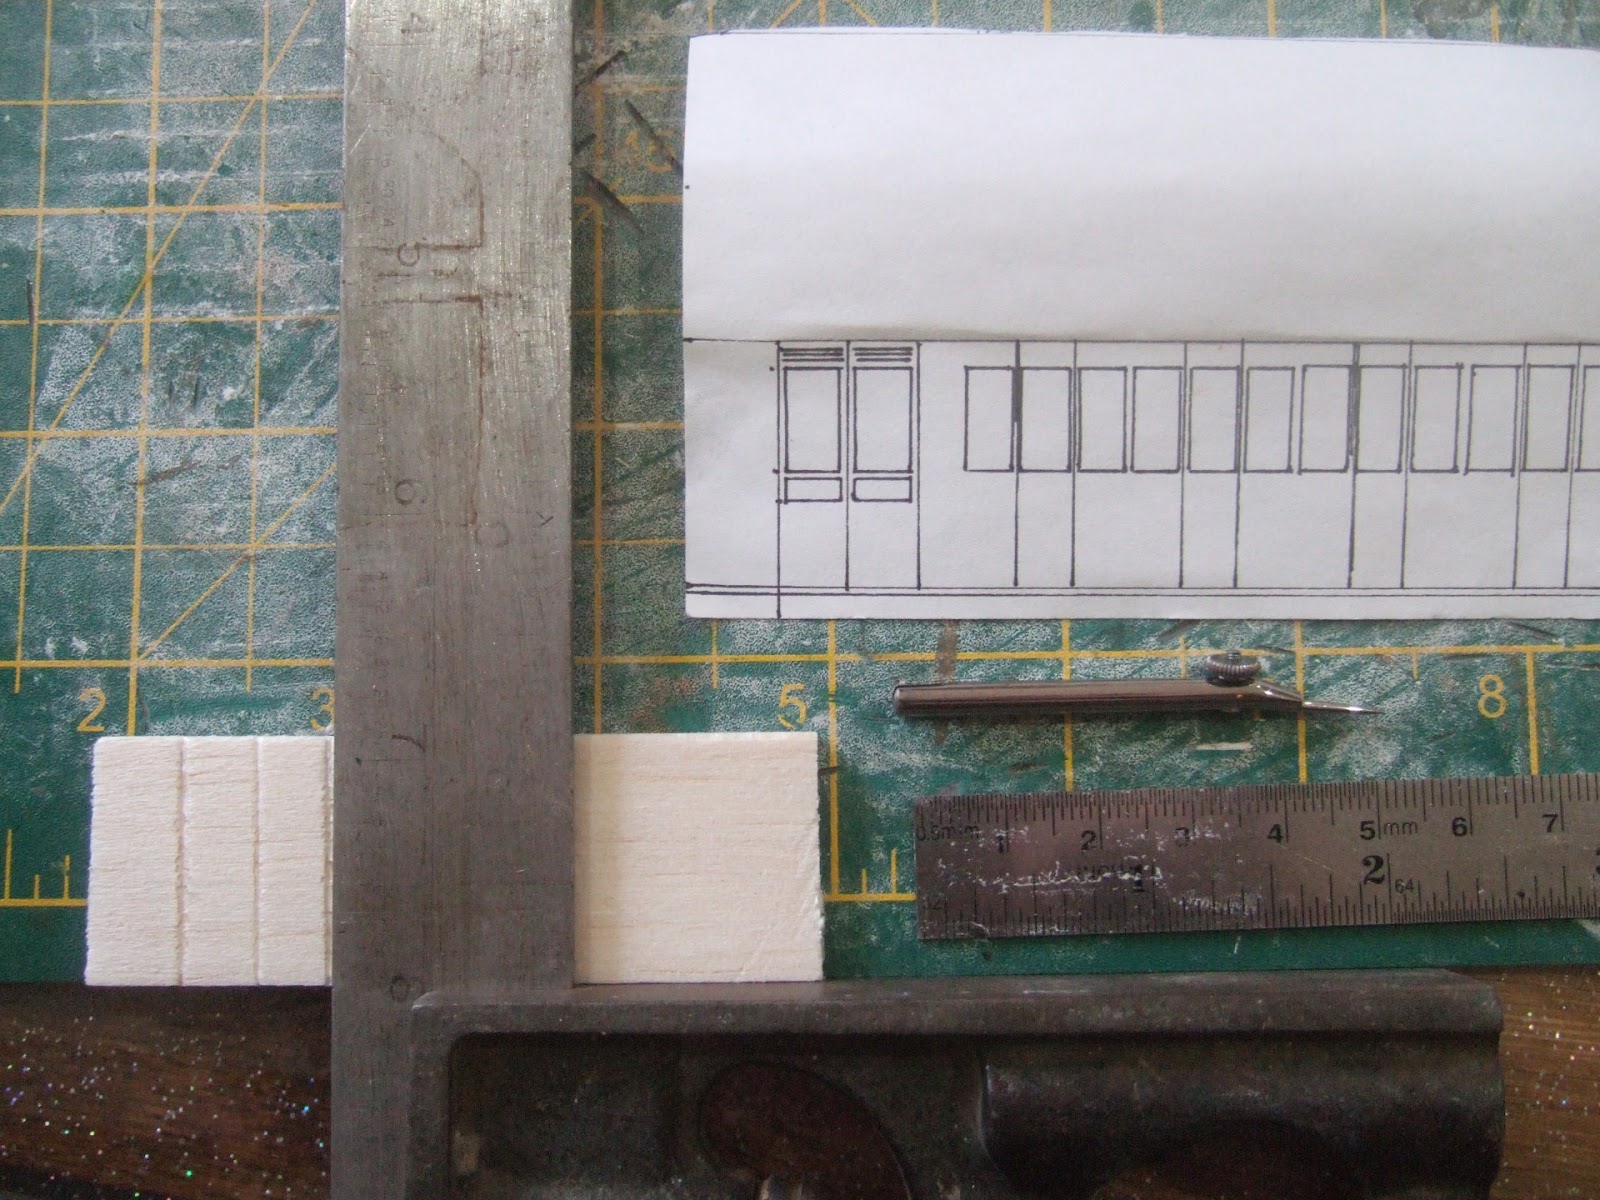
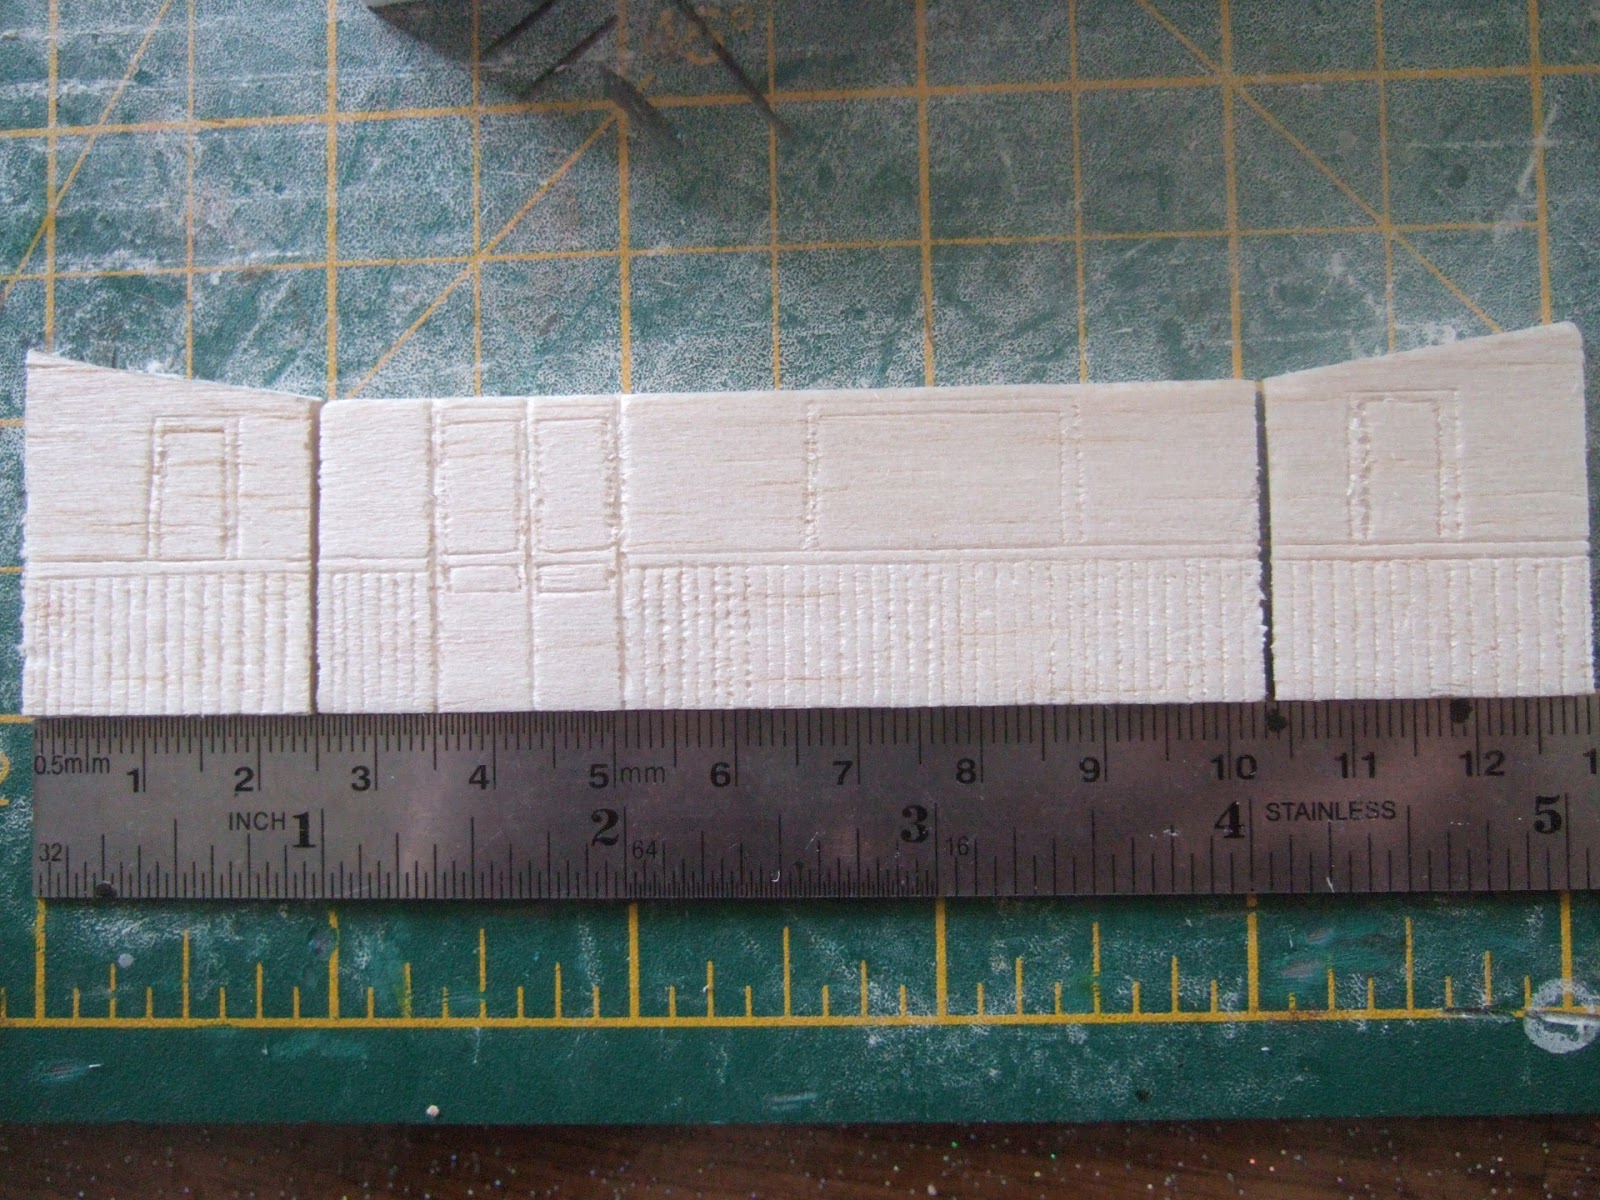
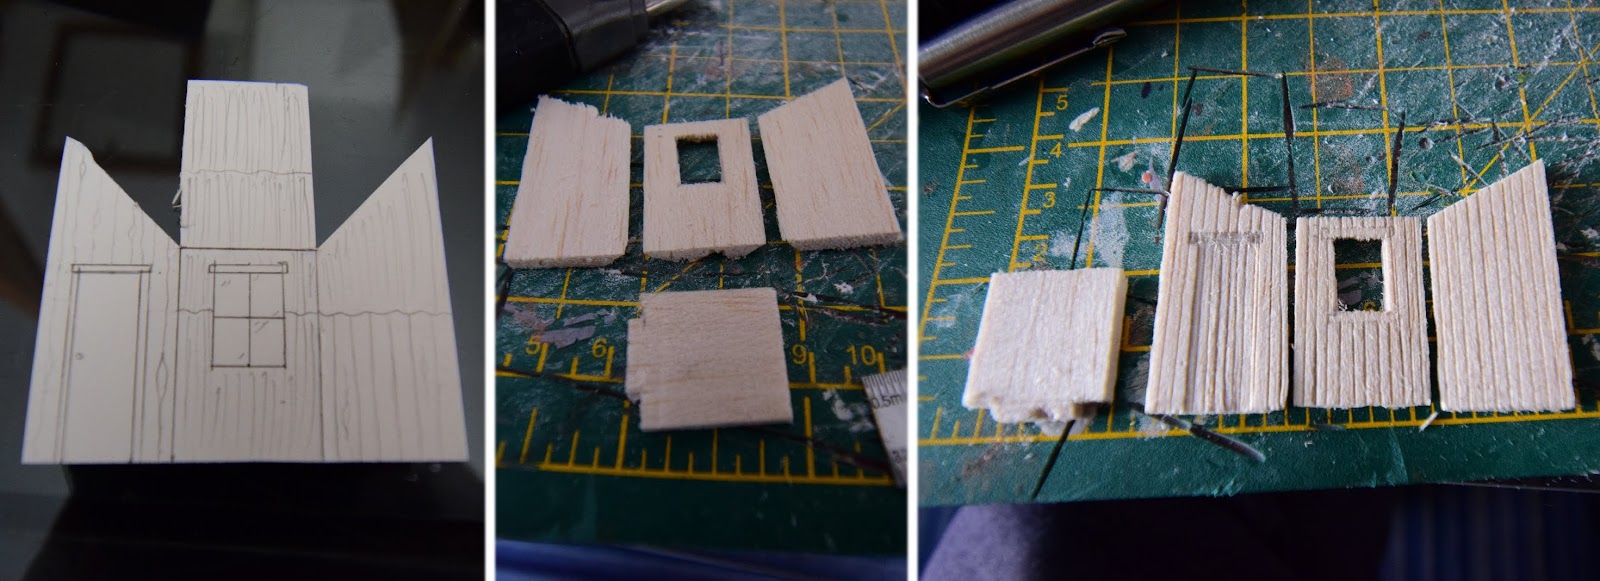
Above & below: Once the components were cut out, it was time to try and scribe them. First though, I wanted to practice on the sections hard to see from most angles. The rear extension was therefore done first, using a square and a spare compass point to scribe the door/window frames and lower planked section. The photo below was the result of 90 minutes work (yes, really!).
The scribing was a success, but how would I form the recessed panels in the doors? First thoughts were to try and be gentle with a cutting attachment on the Dremel:
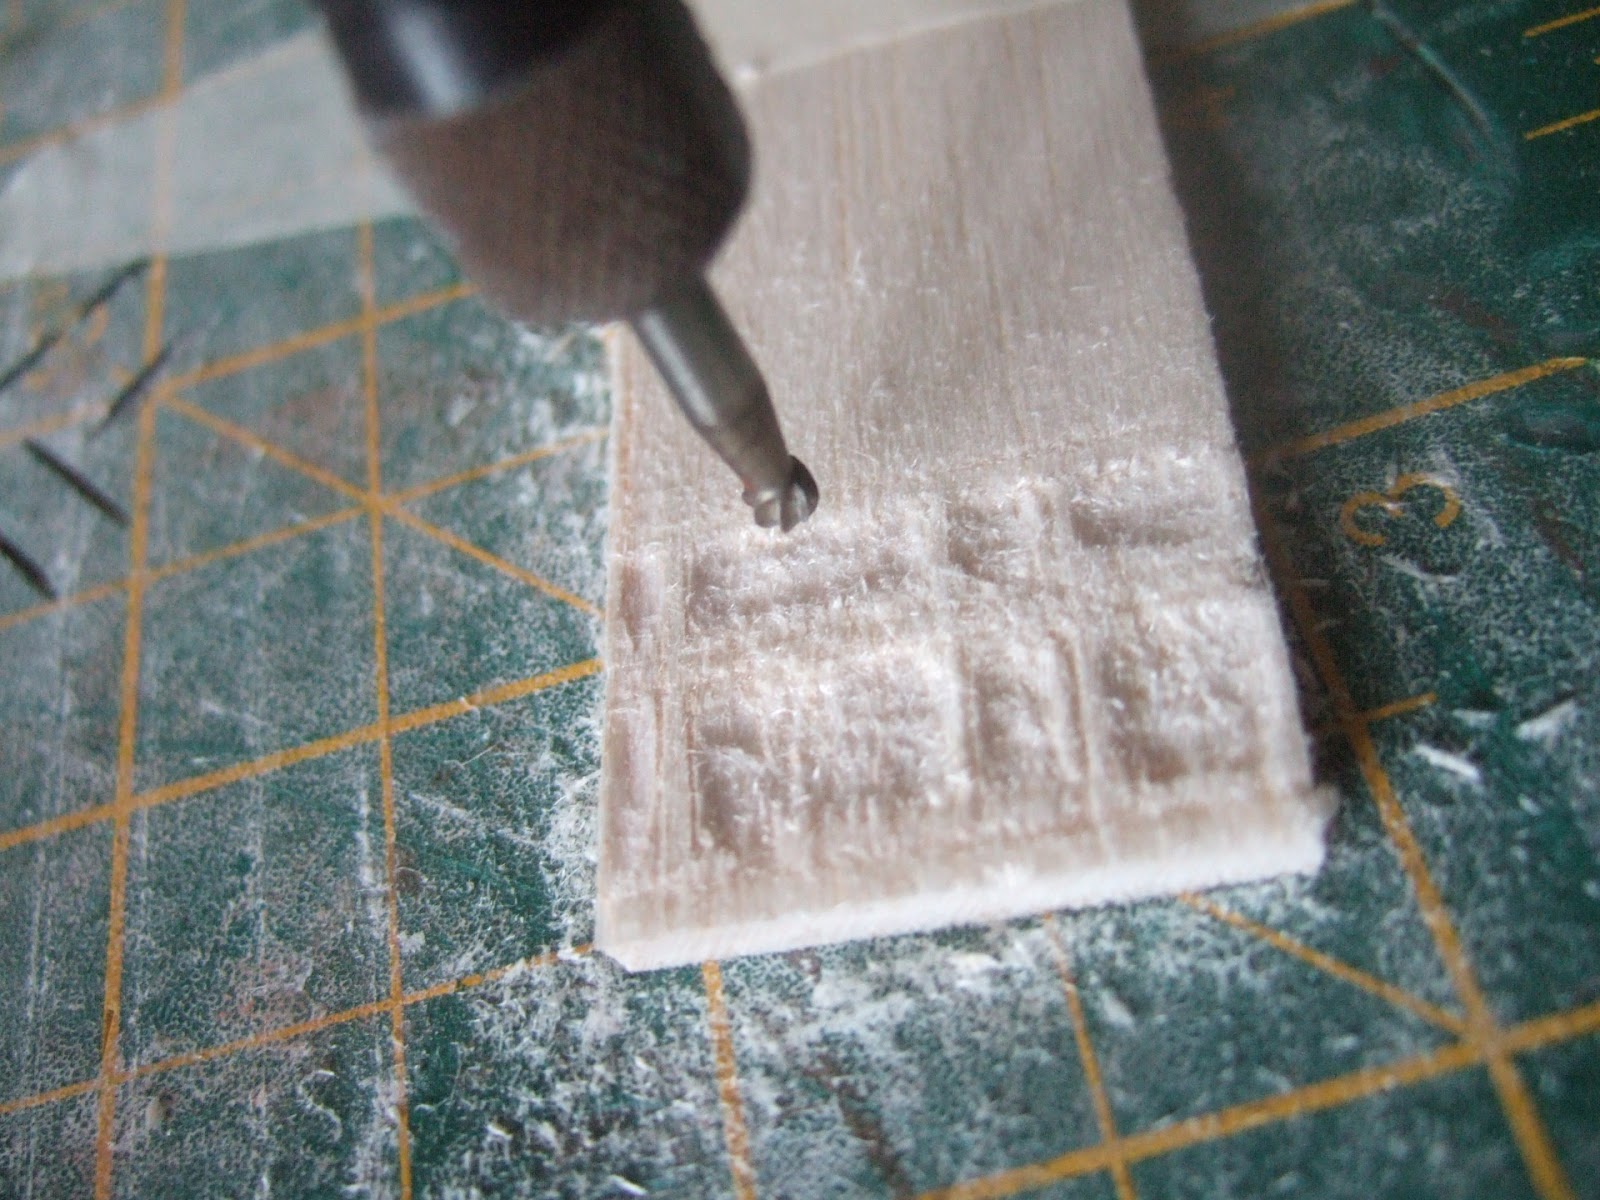
Above: Results were messy to say the least, and it was incredibly difficult to tell how deep I was actually cutting due to the soft nature of the balsa. As would be expected, it would also prove impossible to get into the corners and make them neat right angles.
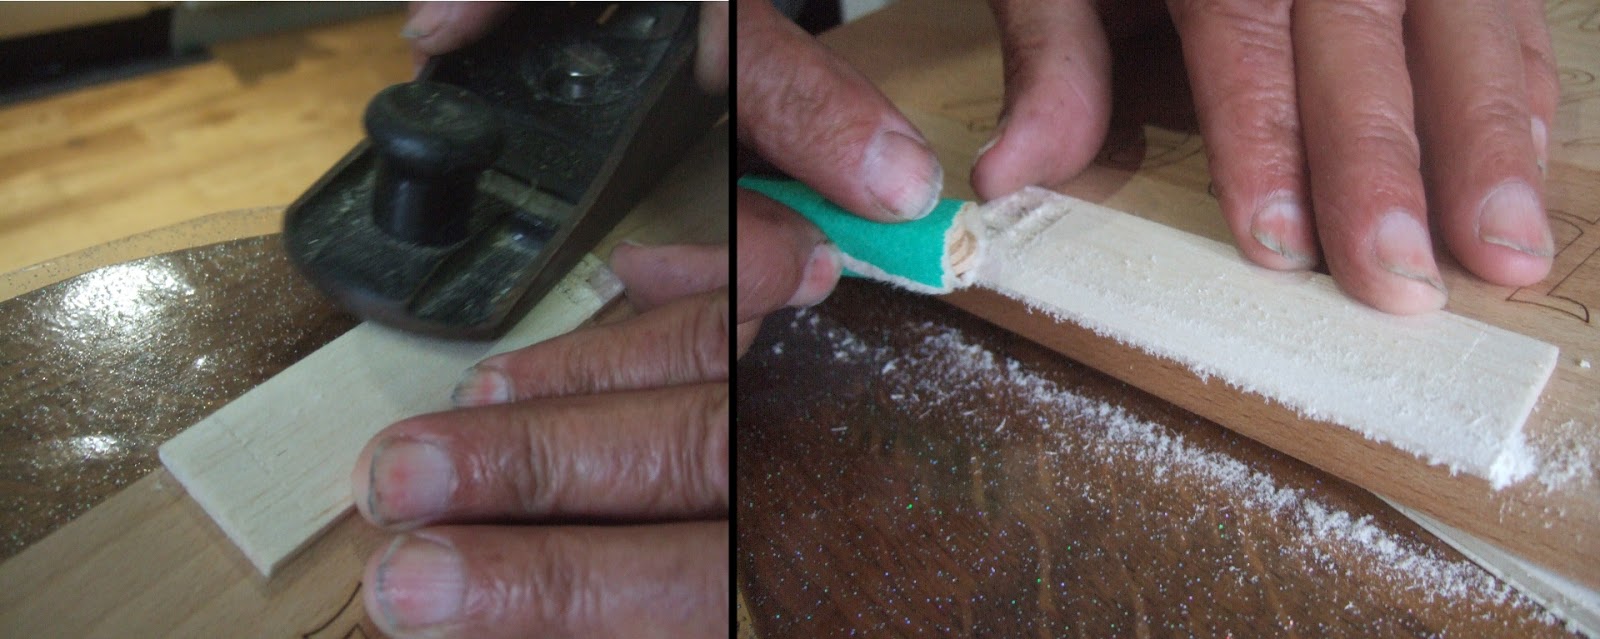
Above: Attention turned elsewhere whilst I pondered my options. My Dad offered to plane and then sand the bottom of the two coach sides; to form the curves often found just above the solebars.
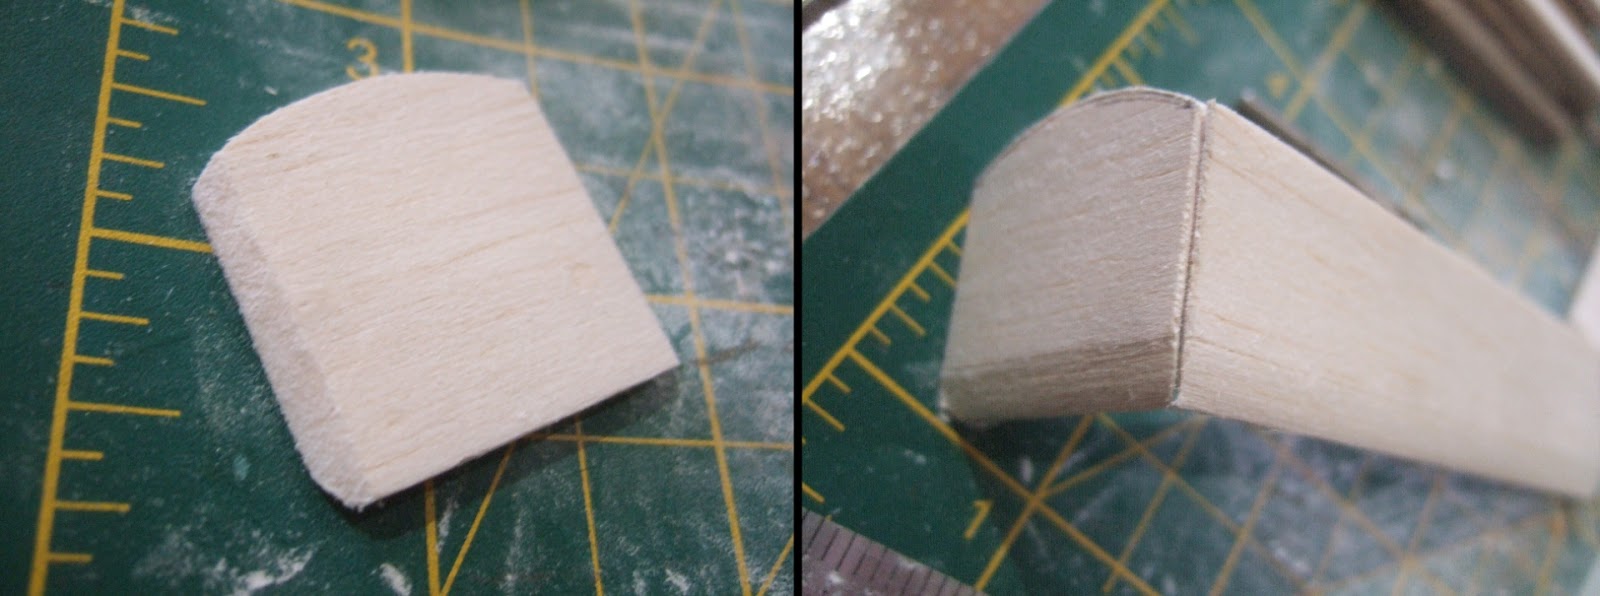
Above: The corners were also mitred with sandpaper at 45 degrees, so that they form relatively neat corners. It's not perfect, but it's not far off.
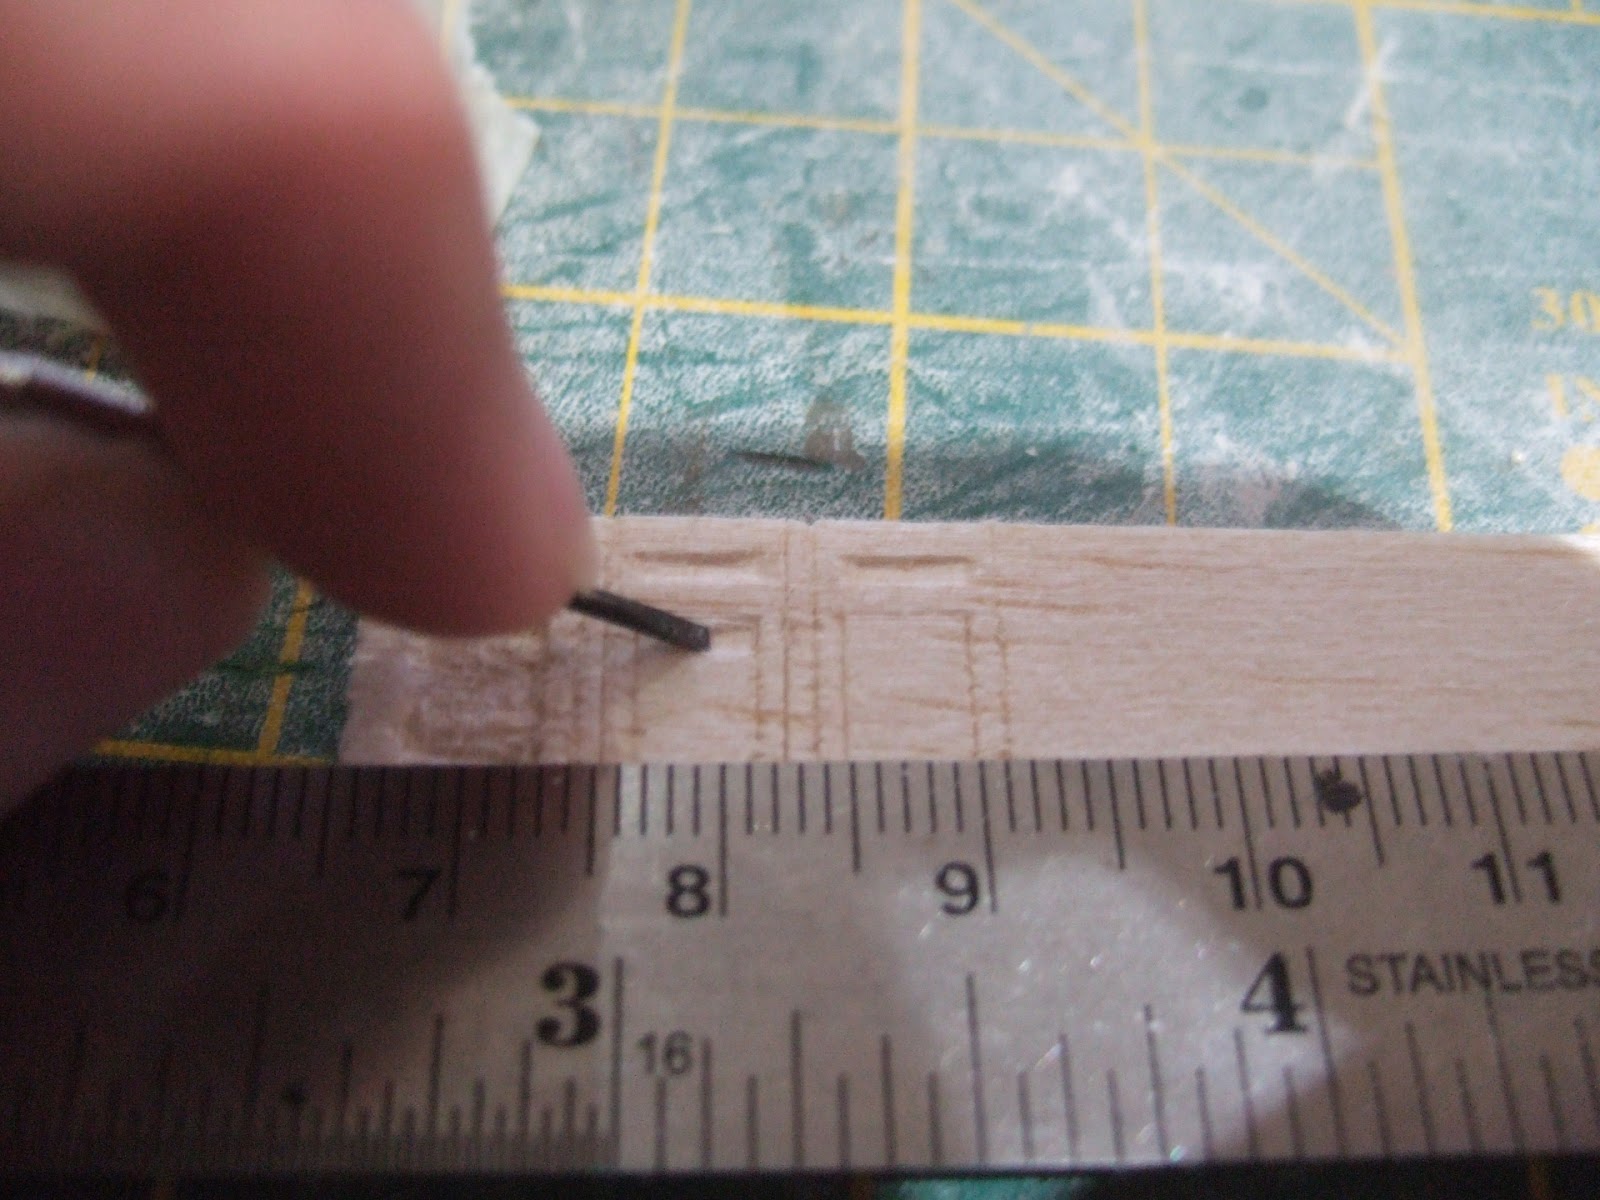
Above: It was then time to work out a way of producing neater lines, and decent recessed panels. A sharp craft knife helped with the former, and after a bit of experimentation, I realised that I could use the softness of the balsa to my advantage. My solution was therefore to use some small flathead precision screwdrivers; first I tried using them like a chisel (but it was too easy to take off big chunks), but I soon realised that by pressing and dragging the screwdriver tip into the balsa, I could form neat recesses. This was done only in the direction of the grain, and very carefully as you might imagine!
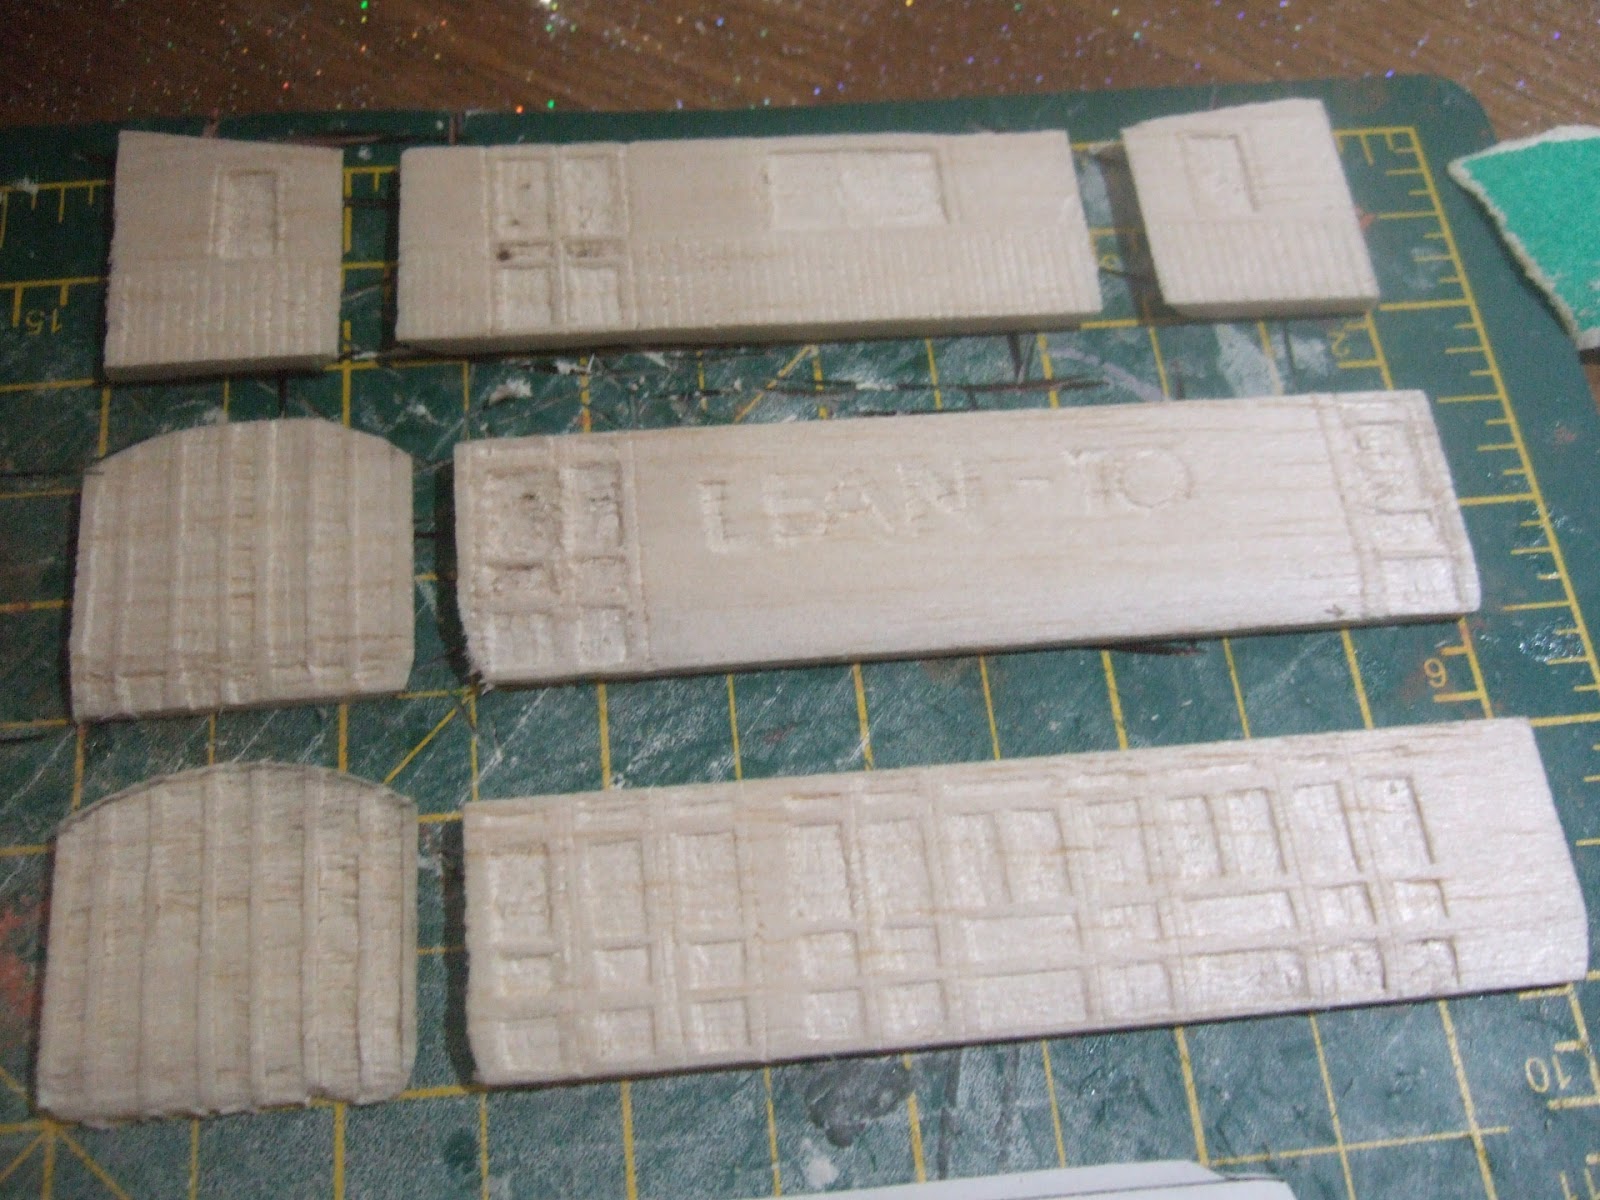
Above: After many hours work, the carving was complete; a labour of love most certainly, but absolutely worth it! I'm very happy with the results, and whilst it might not stand up to close scrutiny, from normal viewing angles it's very effective.
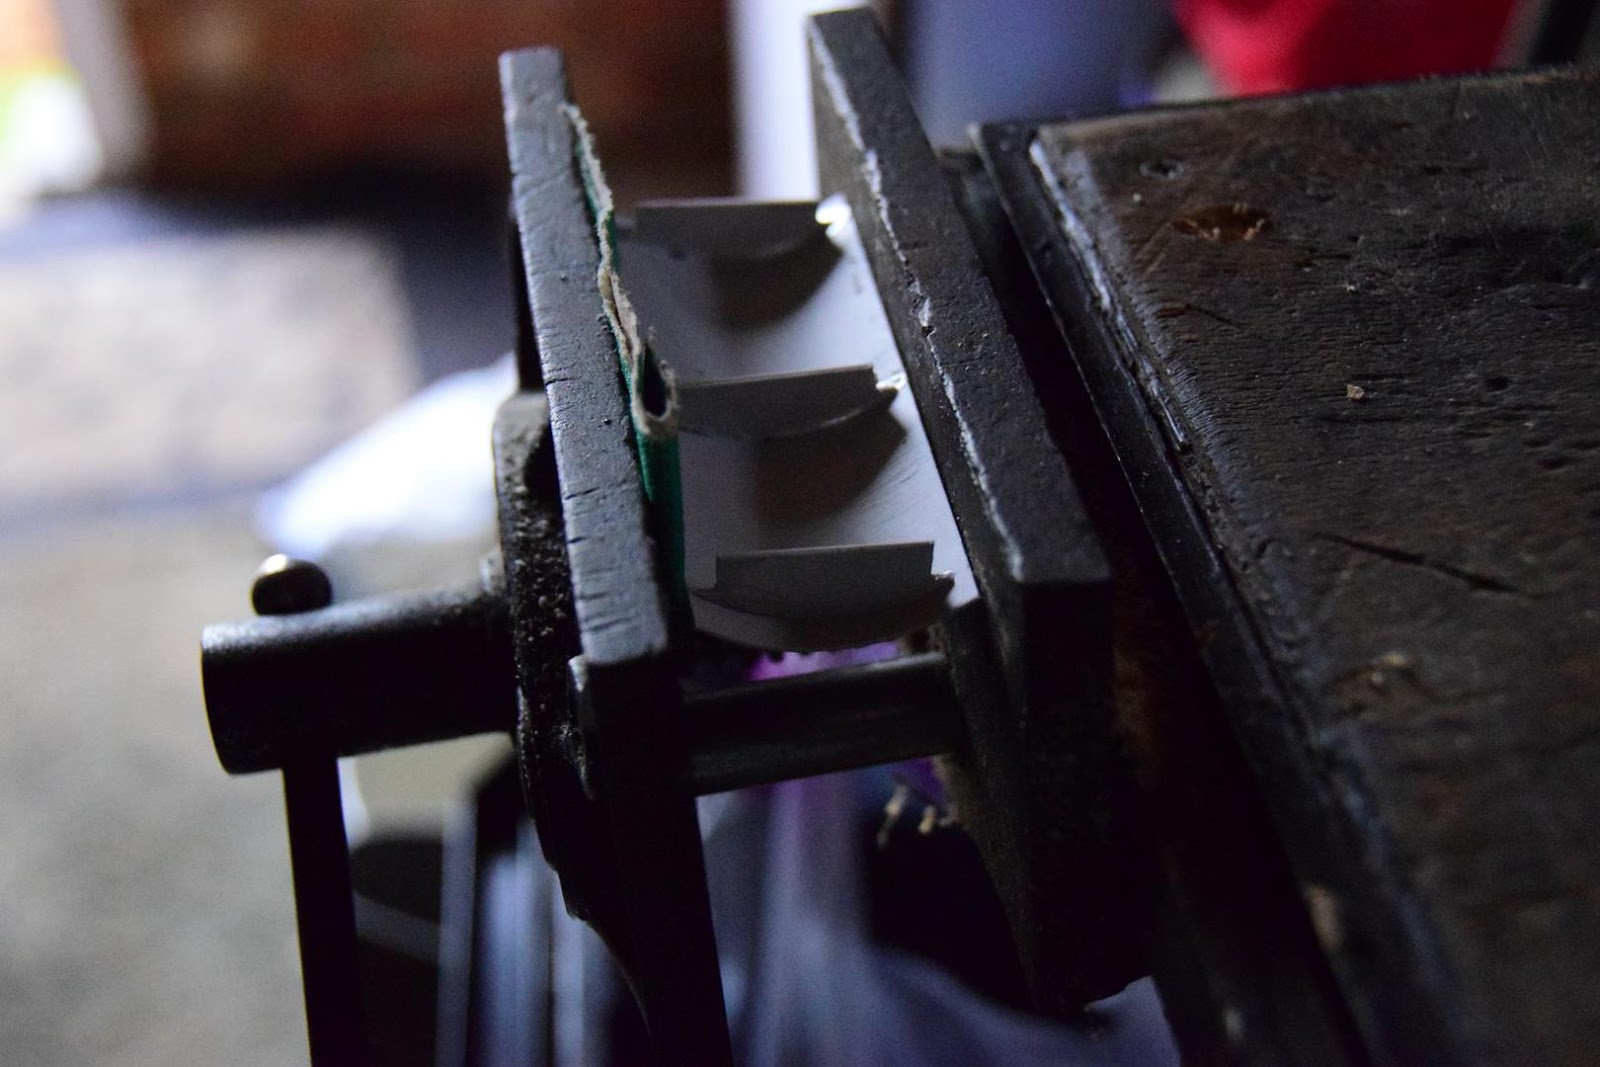
Above: After it's inaugral outing, attention once again turned to the grounded carriage. First, I decided to tackle the roof; which was made from plasticard. I tried various methods of bending the plasticard, none of which worked. Eventually I settled on pre-bending it by hand, and leaving it glued up in a vice overnight. What I should've done in hindsight is wrap the roof around a cylindrical object of suitable diameter and immerse it in hot water, cooling it quickly to help it set in place. Either way, the vice did the trick in the end!
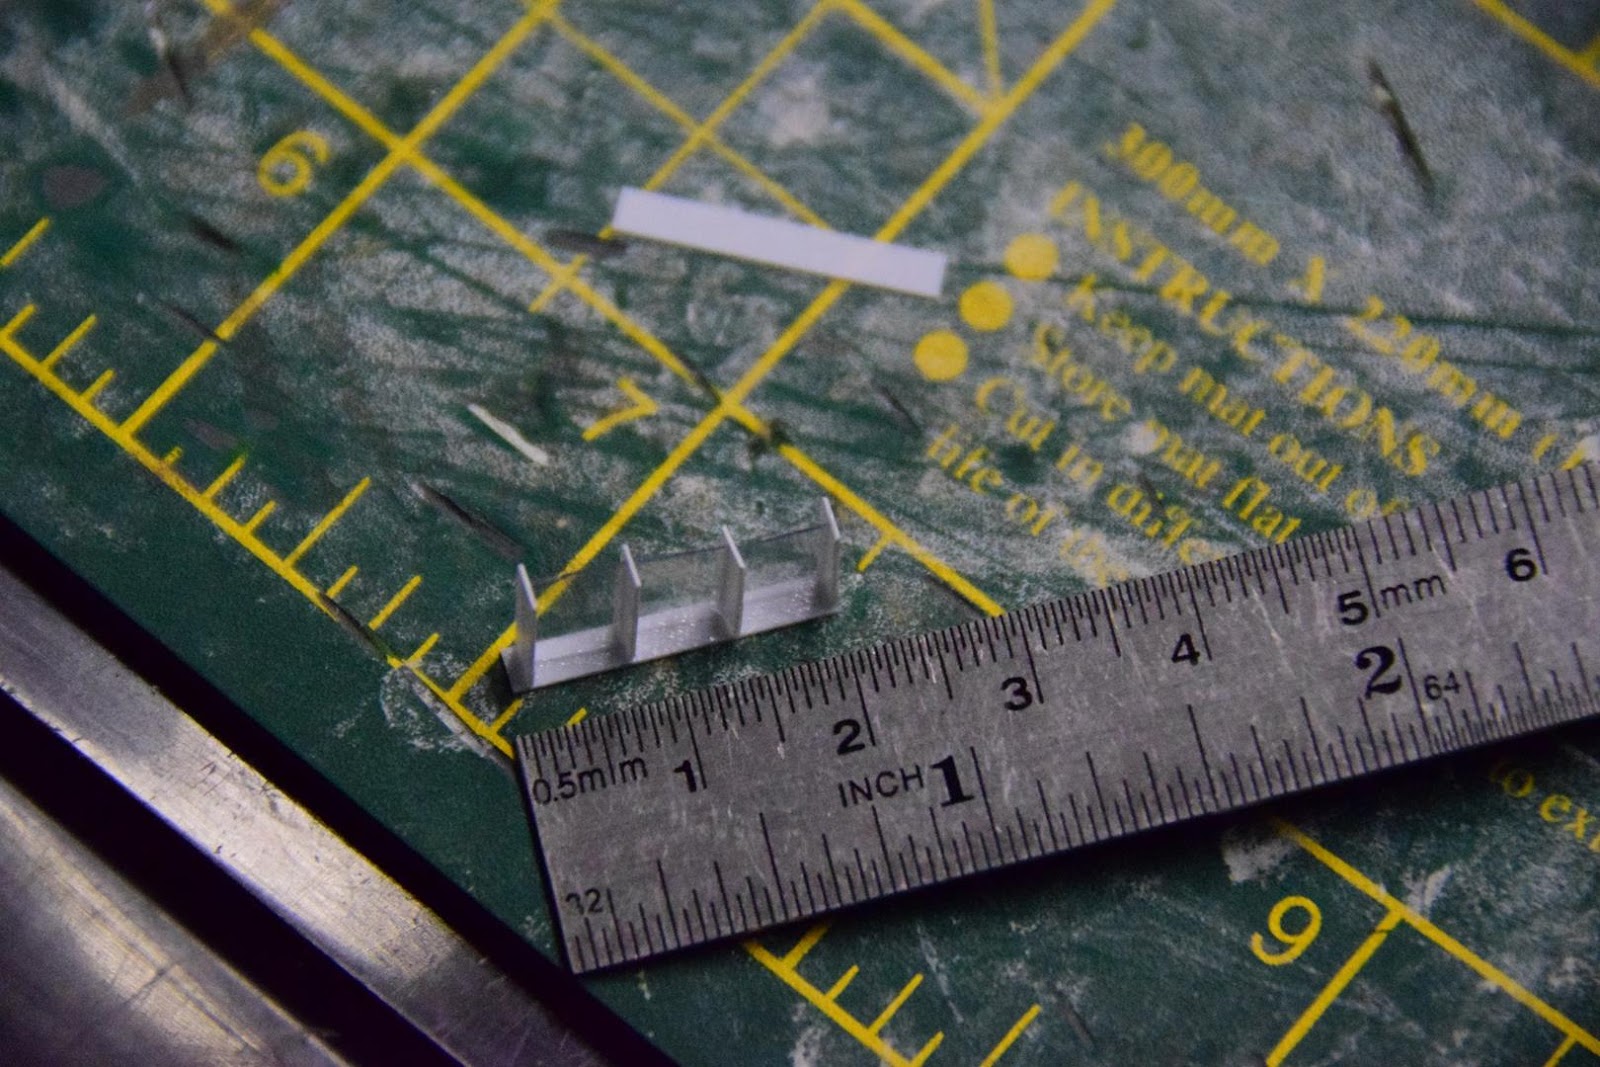
Above: Not making my life any easier, whilst that was curing overnight, I moved onto the windows; which I made out of tiny bits of plasticard and clear packaging (from Wills blister packs)! Usually I would've just used self-adhesive labels to form the glazing bars, but by doing it this way it was possible to get nice thin frames, with more depth than with the labels. Considering some of the windows are only 5mm x 10mm, and are made of 5 components; I'm pretty happy with the results!
Above: The windows seem to have arrived by rail on a wobbly flat wagon (how, I've no idea!), and the roof has had a quick splash of grey; ready for the next step.
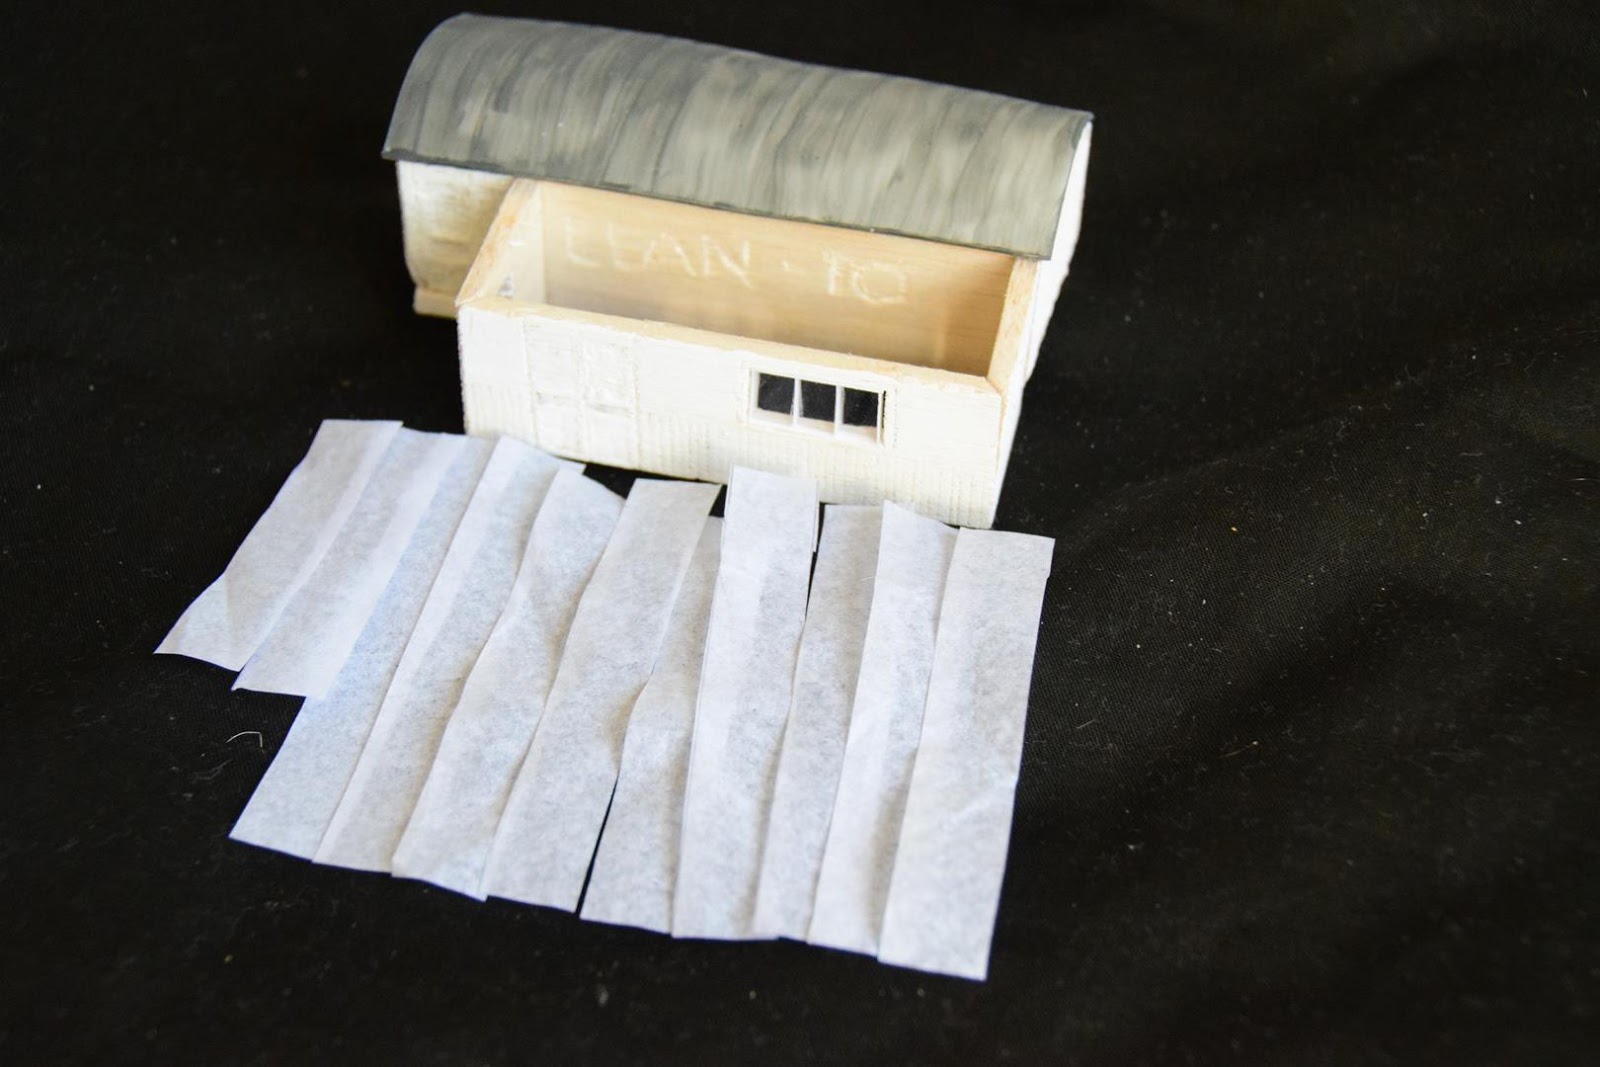
Above: To produce a felt roof effect, tissue paper was cut into prototypical felt widths...

Above: ... with PVA brushed onto the plasticard roof. The tissue paper was then very carefully laid on top, and any edges could then be cut and folded over the ends to make it a bit tidier.
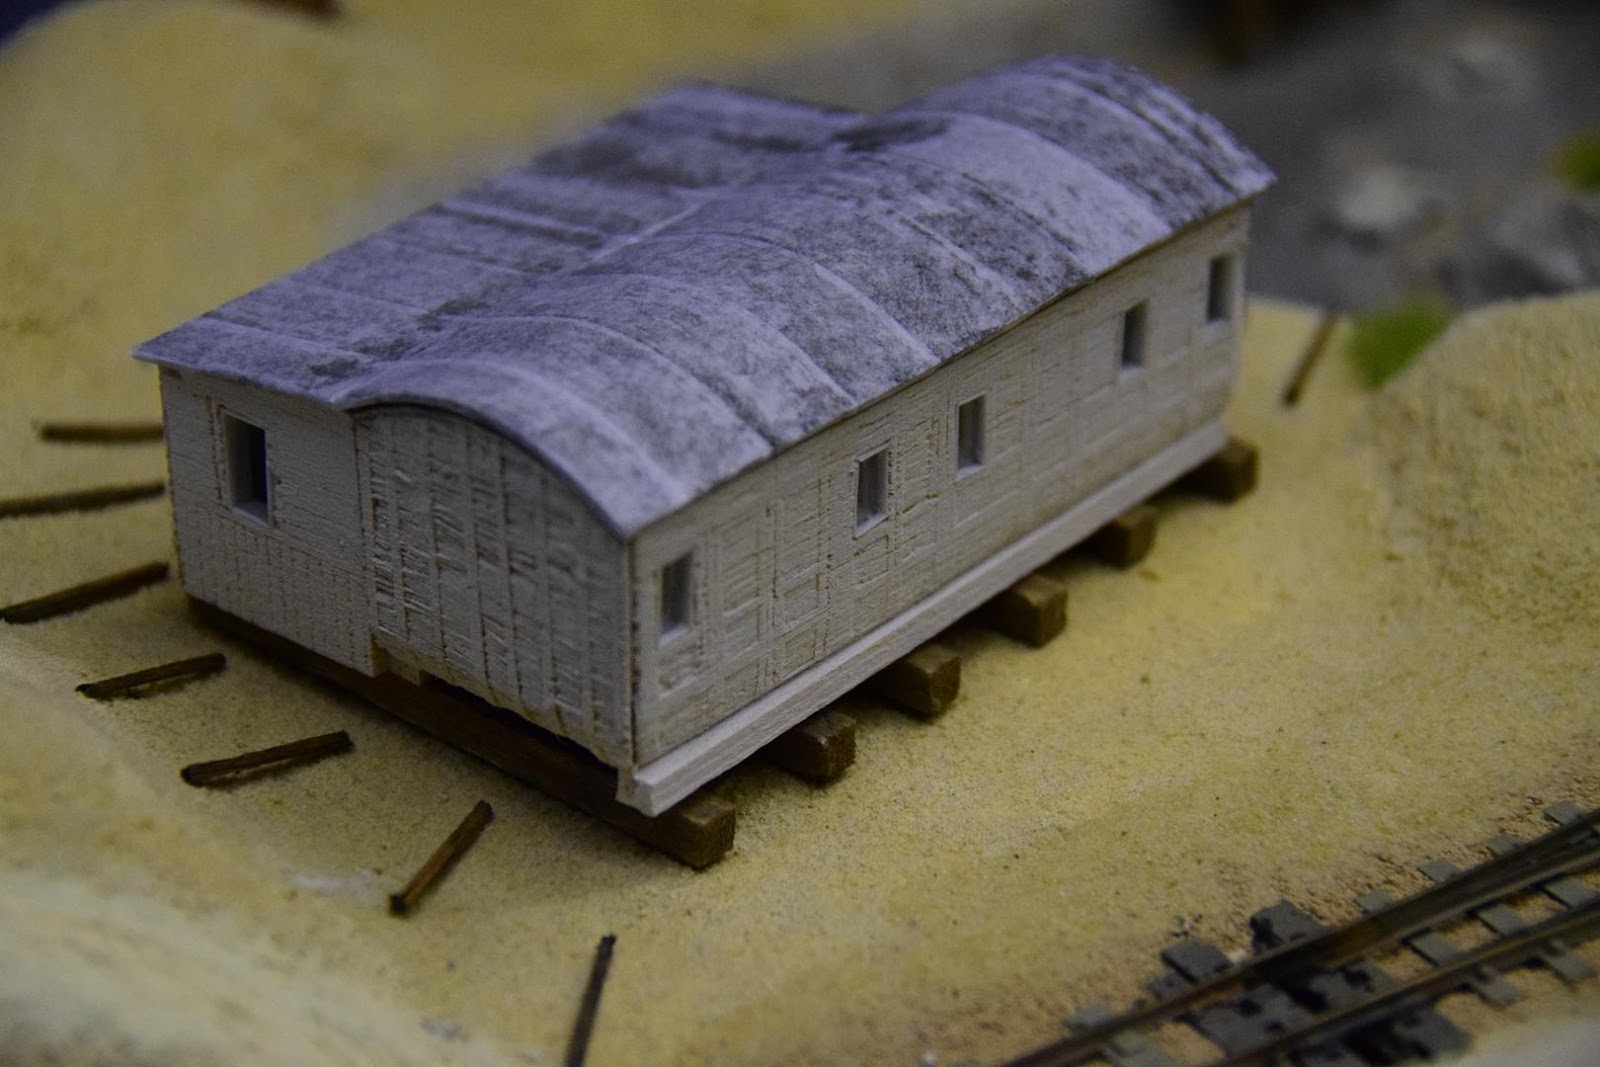
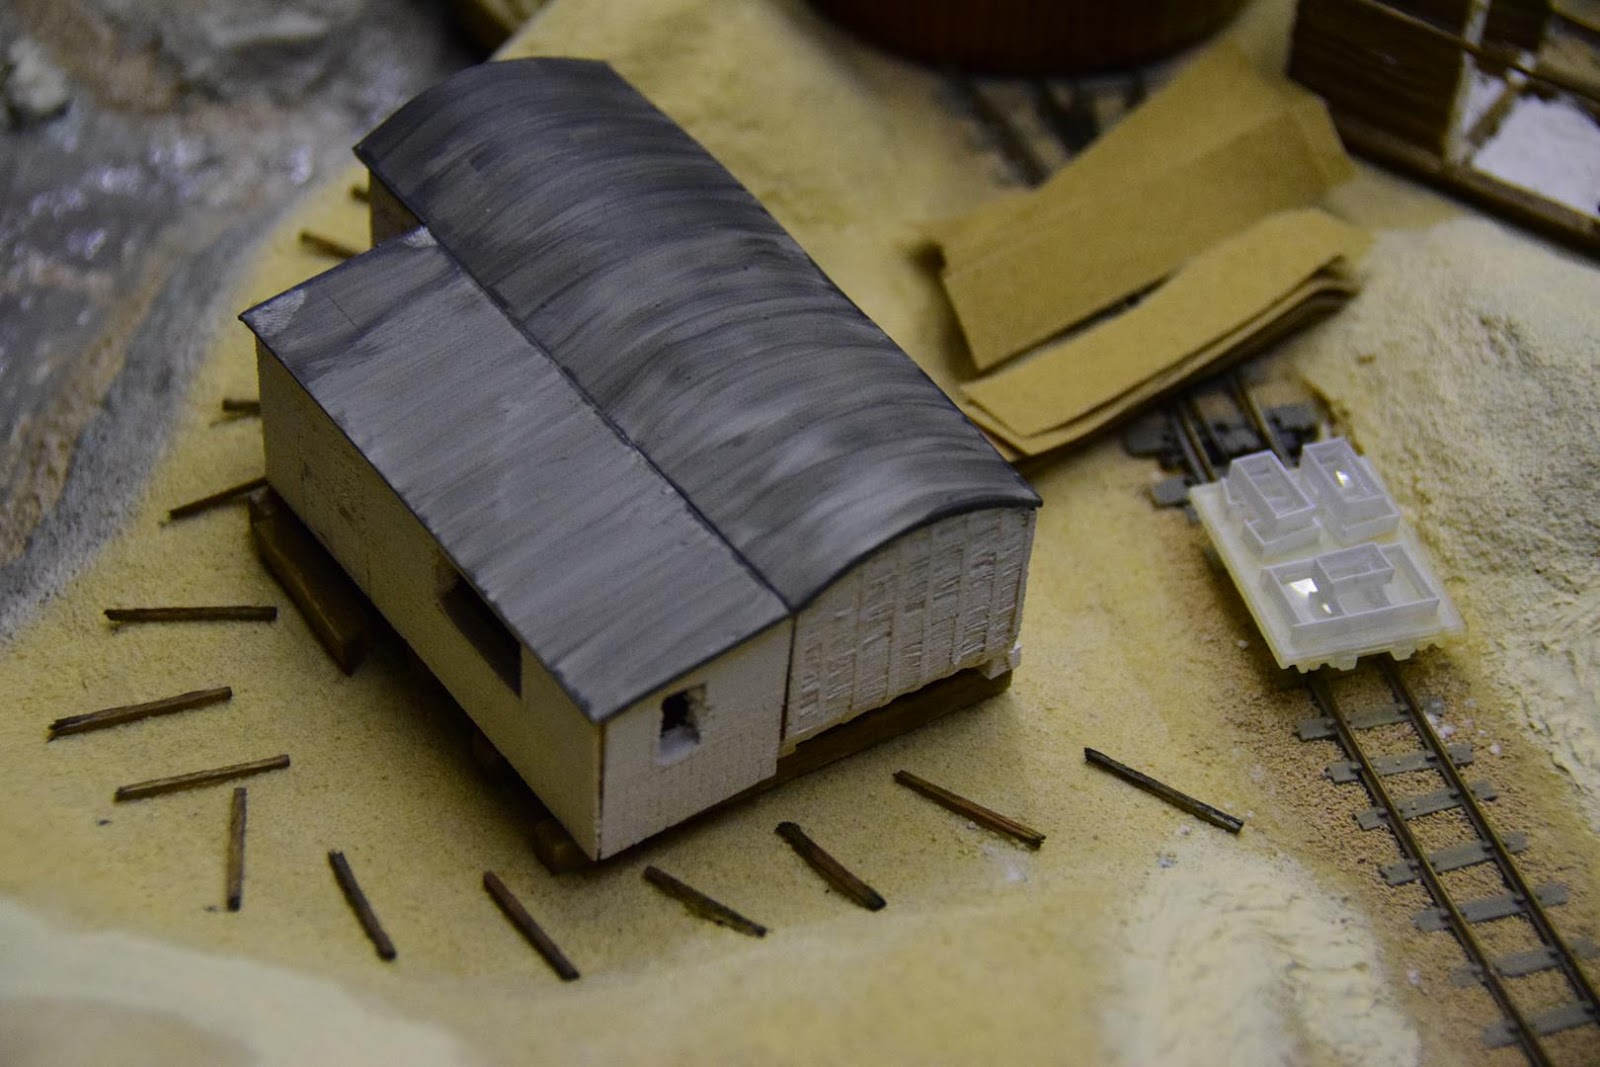
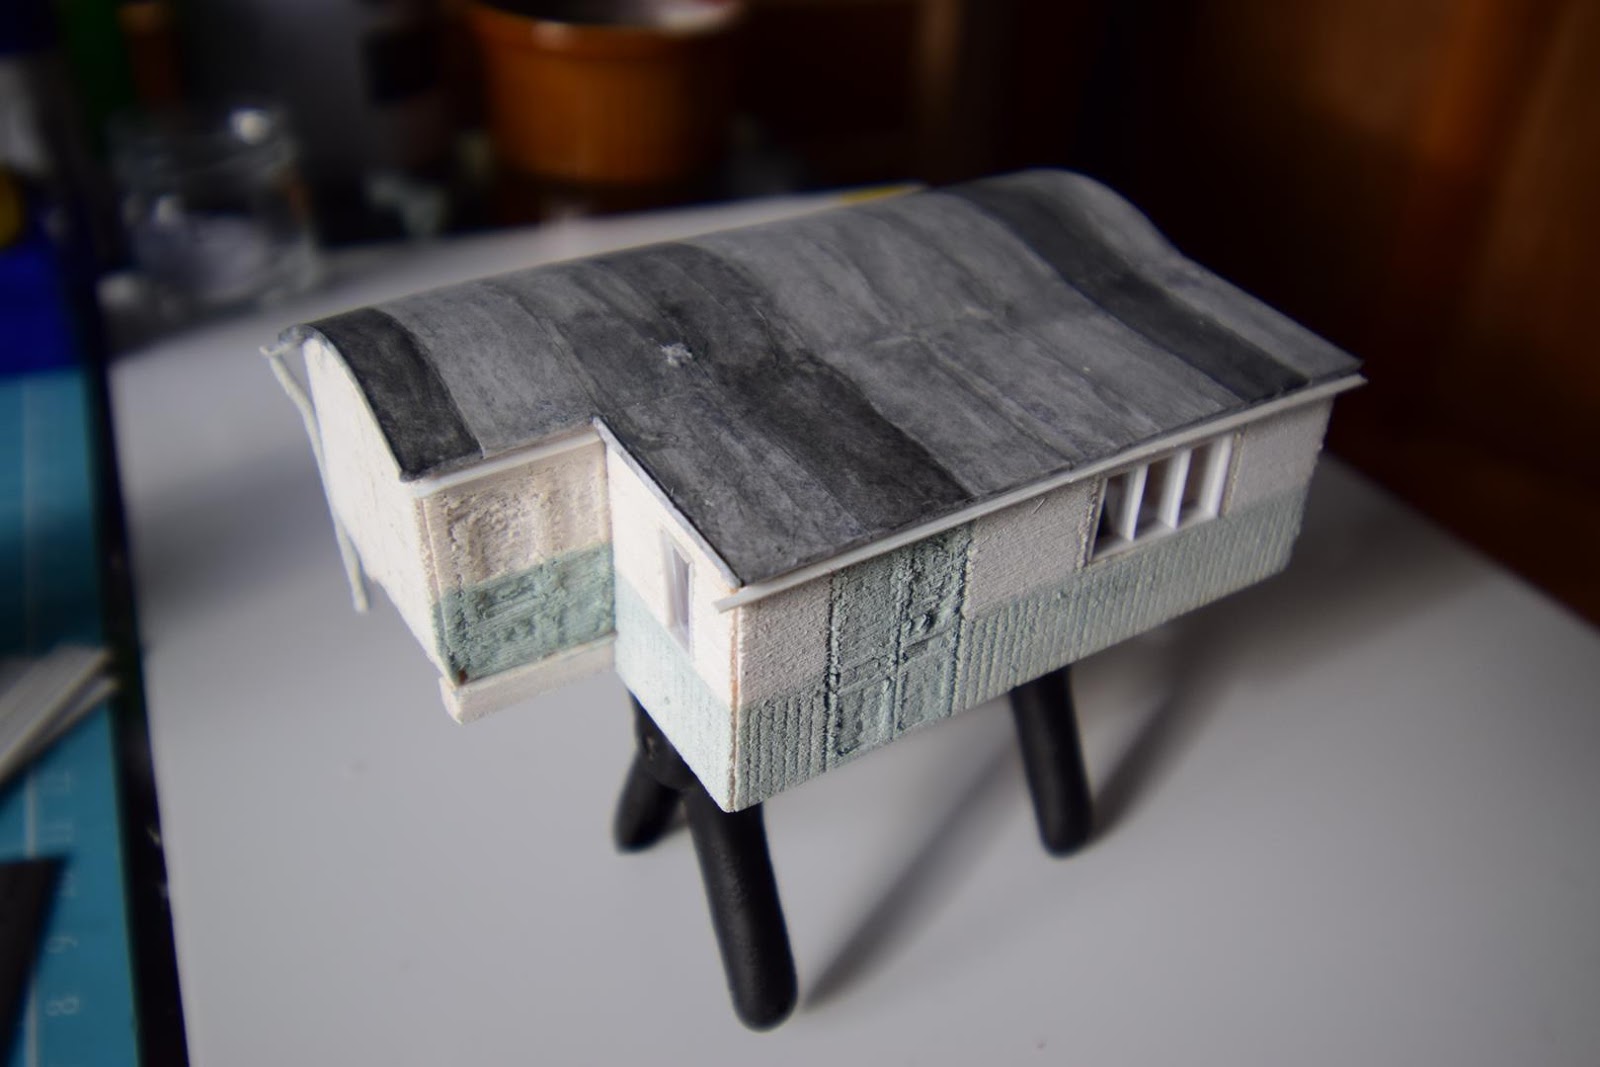
Above: The benefit of painting the roof grey first is that due to the tissue paper being slightly transparent, it allows some of the grey behind to show through. Note also that by this point I had painted the shell of the carriage with a few washes of white paint.
Above: After a break of a few months, I came back to finish the carriage. First on the agenda was to produce the little porch. This was made with the same methods as the main carriage; the planks and lintels were scribed, and the door was recessed much in the same way as the panels were.
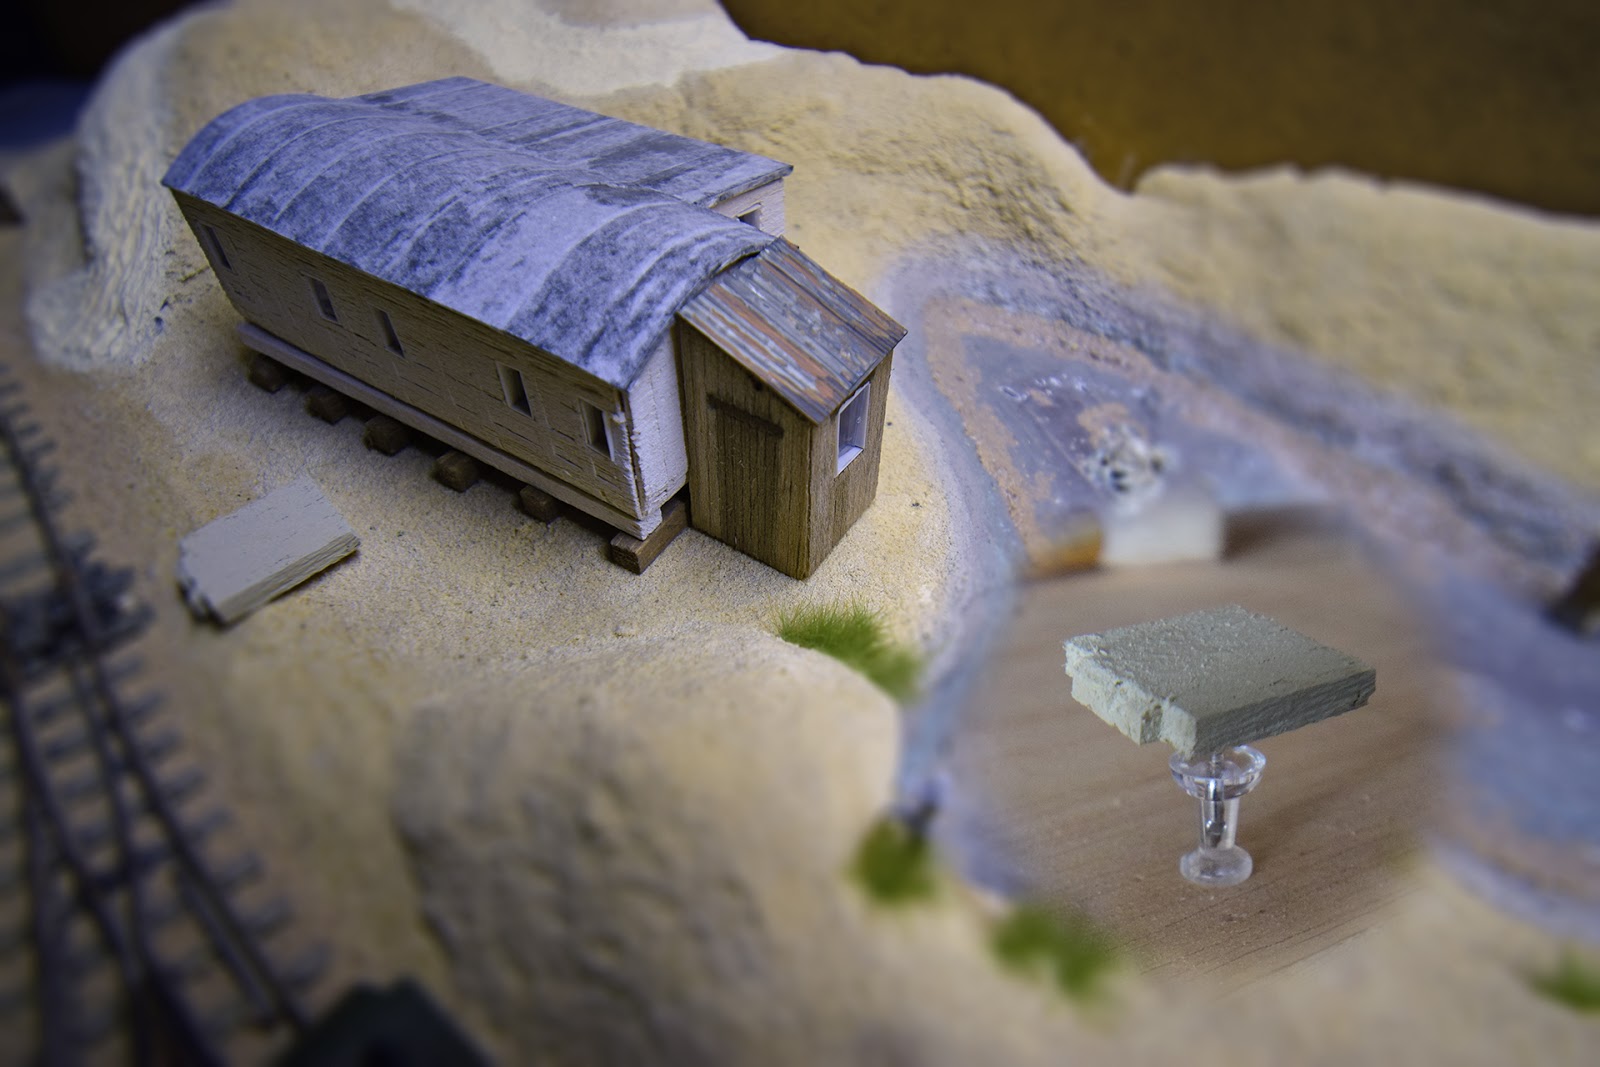
Above: I wanted this to look like a later addition, so I chose to model the roof with corrugated iron, and put the porch on a concrete base. The later was painted using the same base colour that I used on the lighthouse, and the corrugated iron was painted much in the same way as the one on the loco shed. The woodwork was painted first with a thin layer of brown paint, which the balsa seemed to take well to. The walls (minus the door and the odd plank) were then given a wash of white paint to tone it down a little; and thus make it look a little sunbleached.
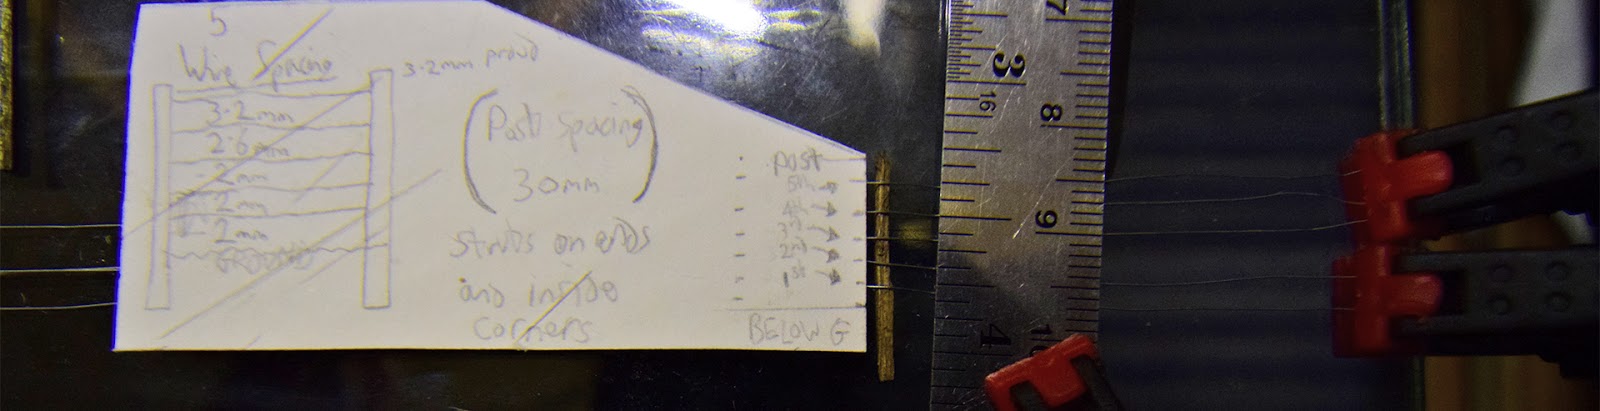
Above: The carriage may be complete, but I wanted to really make it look as if it had been in the dunes for some time; and thus make it look lived in. As part of this, I decided a fence would be needed to demarcate the property boundary. I didn't have anything suitable in the spares box, but I did have plenty of lollipop sticks and some beading wire. I looked online for some typical wire spacings, and as you can see I made some card templates. The posts were cut from lollipop sticks in the usual fasion, which just left the wire to attach.
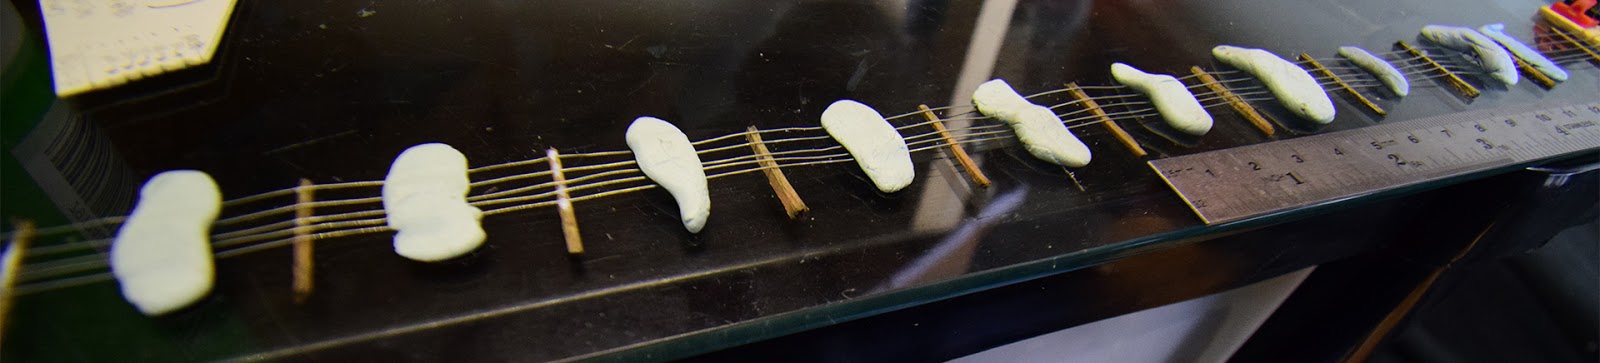
Above: The only quandary was how to attach the wire, as I did not have a chuck suitable to grip the tiny drill bits required to produce small enough holes (I really should get around to buying one for the Dremel!). As most of these fences have their wires held in place with galvanised U shaped staples, I decided that whilst I had no hope of modelling them, I could use standard PVA to attempt to glue on the wires. With Blu Tac pressed between each post, I left it to cure for 24 hours, and much to my surprise they all held! Not the strongest fence, but being well protected away from the edge of the layout, they were good enough.
Above: An often overlooked yet simple way to make buildings look right on a model is to bed them into the terrain. As this carriage will be sitting on large timber baulks, this meant gouging out the space underneath each one. As you can see, the leftmost one in particular needed a lot to be taken off; so doing this has also made sure that the building sits level.

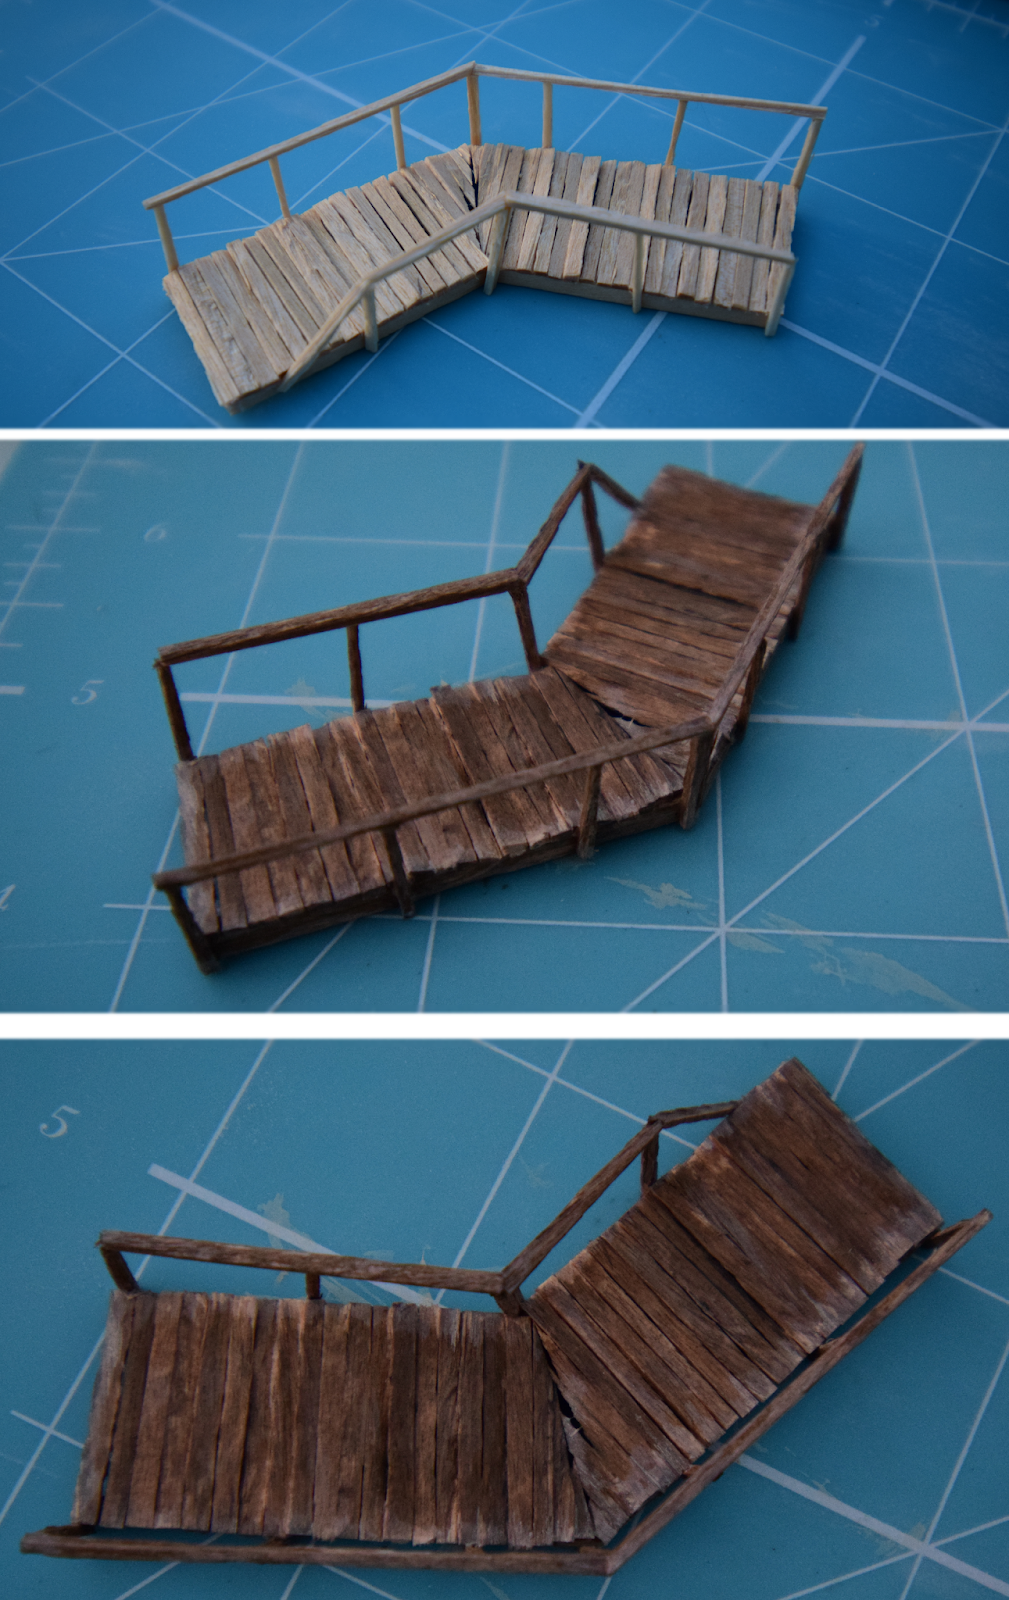
Above: Those of you that saw my article in August 2019's BRM will recall that I showed you how I built the various boardwalks; and indeed this photo sequence can also be found there. I quickly realised that access to the grounded carriage would never be allowed via walking on railway land, so instead a boardwalk was constructed. The lowest point in the dunes at the back made the most sense, so I built a simple boardwalk bridge over the pond/slack so that there was access to the property. Of course, construction was with my trusty pack of lollipop sticks and the guillotine cutter; with the same painting techniques as used earlier on the water tower. Note the whitewashed edges of the planks that suggest subleaching.
Above: Of course, this also needed bedding in, and the two ends had material cut away underneath to allow it to sit properly. Note the handrail that drops down at the back; as the backscene gets dropped into place behind here, I could imagine that there was a likelihood that these handrails would get damaged all too easily!
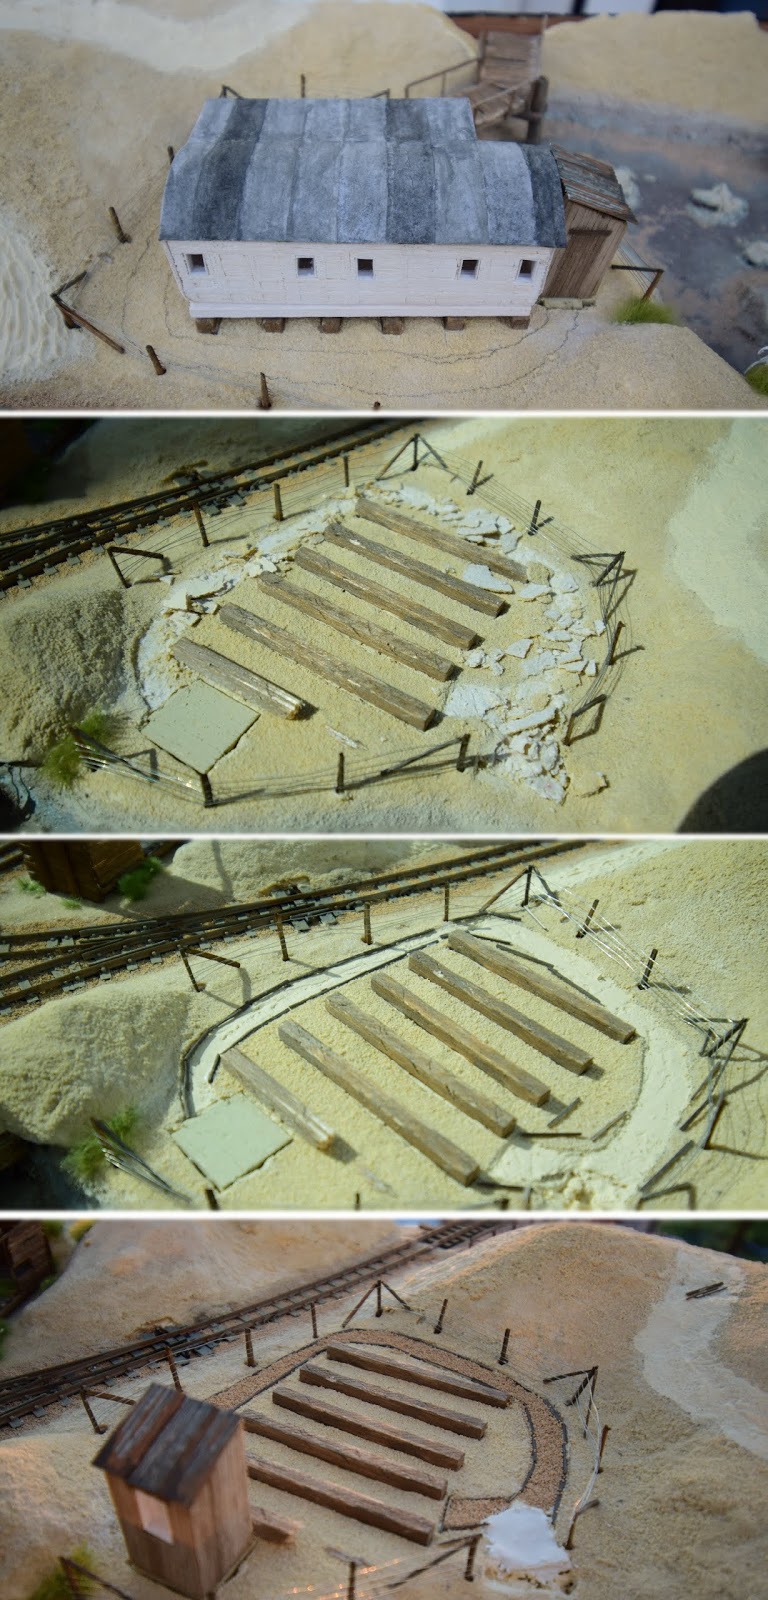
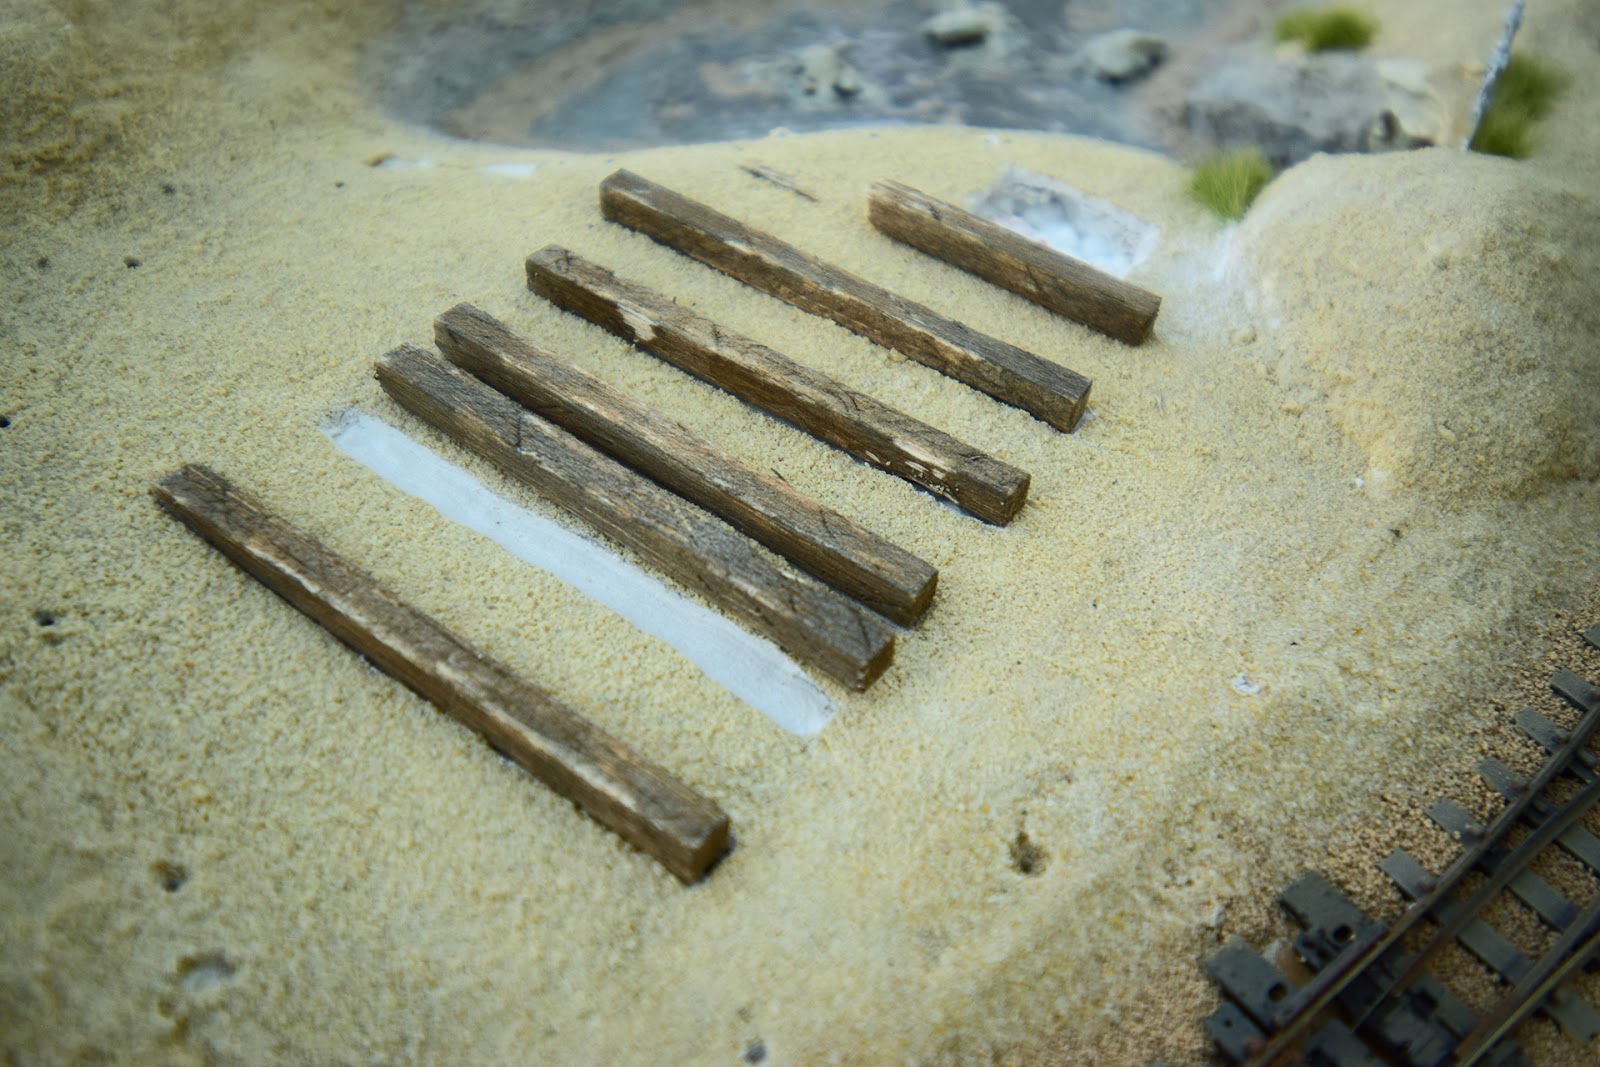
Above: Of course, now that we had an access point, we needed some sort of path. I didn't want a boardwalk all the way around, so I settled on a gravel path, with some wooden boards helping to keep the gravel in place; the sort of thing you'd likely find at places like Dungeness. This photo montage shows how it was done (and yes, the boards are also finely chopped lollipop sticks!). The top layer of clay was broken off where I wanted the path to be, the planks added, and the gravel put in place and glued (the same way as you would ballast track).
Above: There were now only the little details to add; a coat of paint to the lower portion of the carriage (and the rear doors), and a bit of guttering. For the former I chose a nice subtle sage colour, which actually sort of makes it look deckchair-ish! The guttering was simply done with V section styrene and thin round strue sections!
.jpg.ae63a65a332e163b7926ffc1bad2255e.jpg)
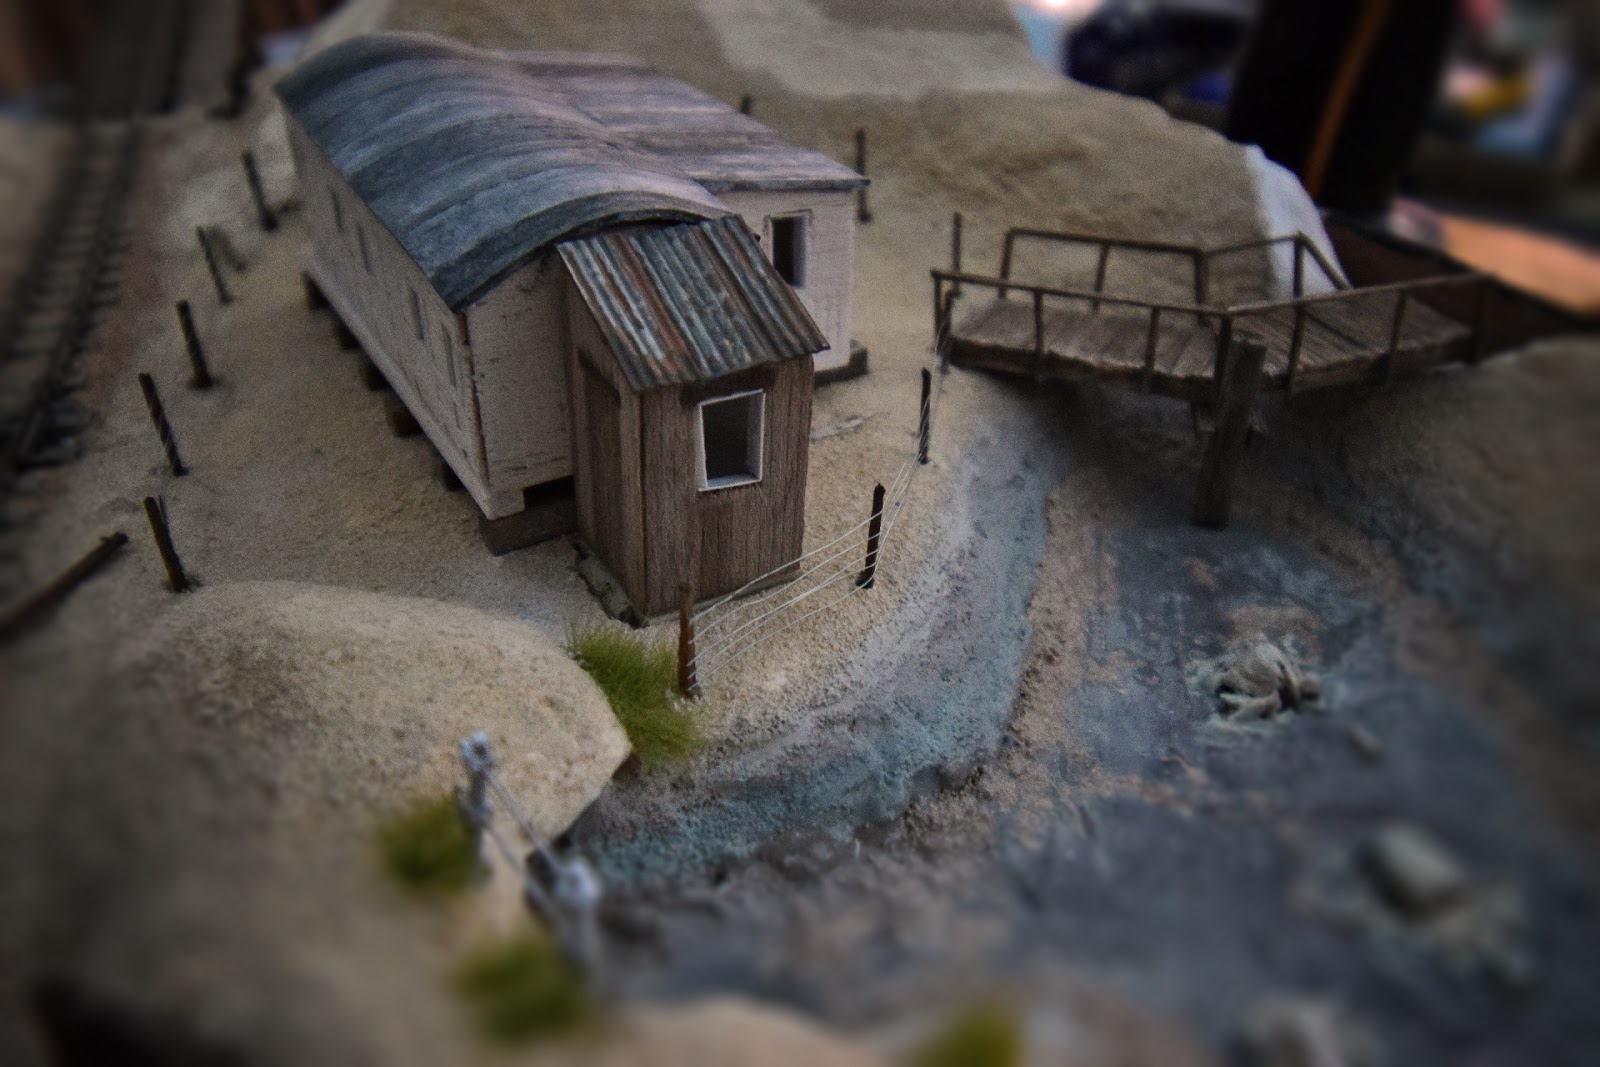
Above: Fast forward to the layouts (almost) completion, the grounded carriage can be seen here, surrounded by marram grass, with a ladder on the roof ready to replace some of the roofing felt!
And there we have it; a nice focal point for the layout; and perhaps my dream place to live!
As always, if you have any questions, thoughts, or suggestions; do pop them in the comments below. And if you enjoyed this entry, feel free to vote it up!
Till next time,
Jam/Jamie Warne
-
 11
11
-
 4
4


10 Comments
Recommended Comments
Create an account or sign in to comment
You need to be a member in order to leave a comment
Create an account
Sign up for a new account in our community. It's easy!
Register a new accountSign in
Already have an account? Sign in here.
Sign In Now