

1. The Begginning-Track Plans, Baseboards, and The Shed.

Entry posted by John Geeee
746 views
The OO Garden Shed
by John Geeeee
original page on Old RMweb
Just setting up my old RMweb layout thread by copying it over using Martins transfer utility. Thanks Martin
Now I will try and tidy up the copy of the old RMweb thread to make it a bit easier to read. This will involve removing some of the older general comments and the addition of more detail and pictures from the early scenic work. I will try and give the blog a bit more of a chapter feel to each stage of my progress. I hope whoever reads it finds it interesting. My appologies to anybody whose previous comments I may delete during the process but If they were questions about the layout I will leave in the answers to help others.
__________________________________________
??? posted on Fri Mar 21, 2008 1:42 pm
Hello to everyone at RMweb.
I have been watching and learning for the last 18 months and I am now brave enough to post some pictures and receive comments, from the more experienced modellers out there, on my OO layout that I have been putting together since about November 2006. I have a thread on a similar forum for beginners so I appologise if the pictures are familiar to some of you, if you don't want to see them again then please tell me to go back where I came from, I promise not to be offended ![]()
I am 44 years young and this is my first ever layout. Don't ask me why I left it so long, all I know is that I have now got the bug and I can't help myself!At the moment most of it is constructed from the usual well known kits, I have not braved any scratchbuilding as yet. It is not based on anywhere in particular and I run whatever trains I like the look of, mostly steam but I also have a small diesel collection as well. I wanted to build a layout that would let me run trains whilst also giving plenty of shunting. All locos and wagons are fitted with Kaydees. Its a DC system, all the points are electrically operated, there are two motorised turntables, and the layout is divided into 4 sections, each can be operated by a 4 way controller using CAB.
So here is a selection of my favourite pictures so far. There are many more available going back to the point when the shed was first cleared out, but I will not bore you with all of them unless requested ![]() I am always changing my mind and trying to expand wherever possible, usually after much negotiation with 'er indoors! Some parts I have still to decide what to do with so this is very much a work in progress for a few years to come.
I am always changing my mind and trying to expand wherever possible, usually after much negotiation with 'er indoors! Some parts I have still to decide what to do with so this is very much a work in progress for a few years to come.
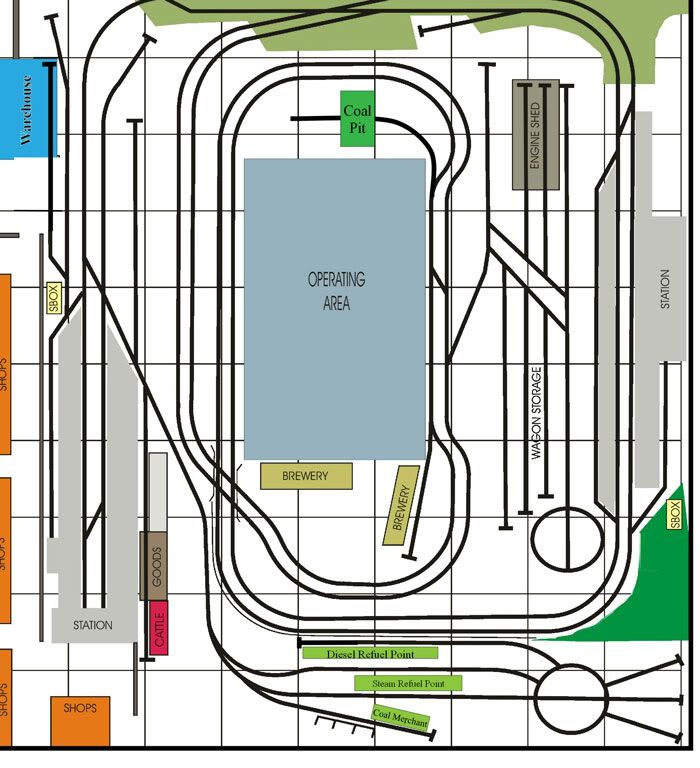
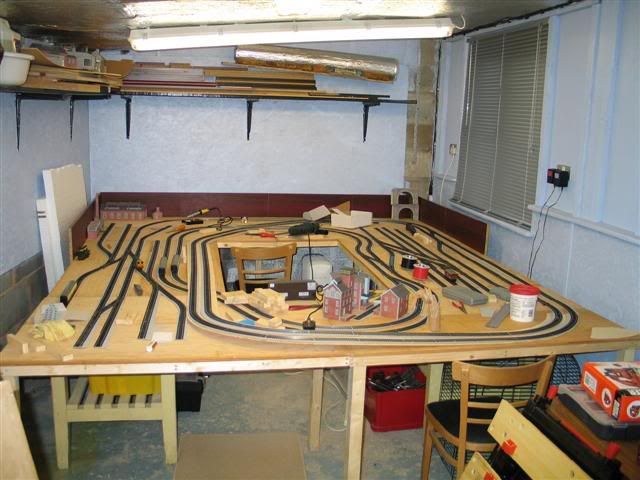
Firstly the Trackplan for the layout which is about 9ft by 10ft at the moment Updated 20/10/2009:
 ">
">
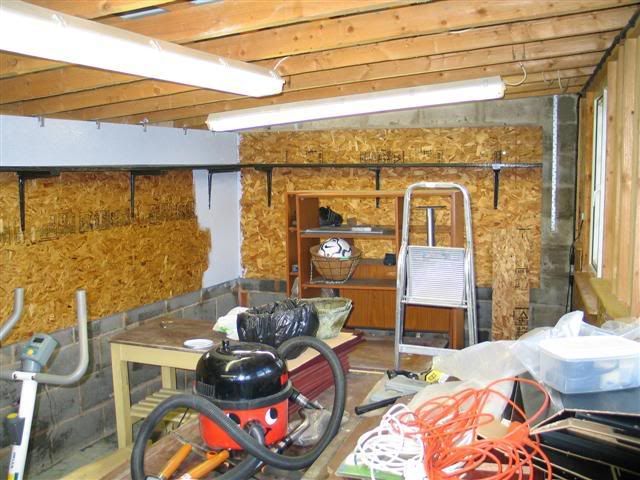
The Shed: The view from outside. Total size is 22ft x 9ft. Only the front has wood for external appearance, the other three sides being brick and breezeblock. The windows are PVC double glazed. The roof is precoat aluminium. Therefore the layout takes up about half the interior at the permission of 'er indoors  .
.
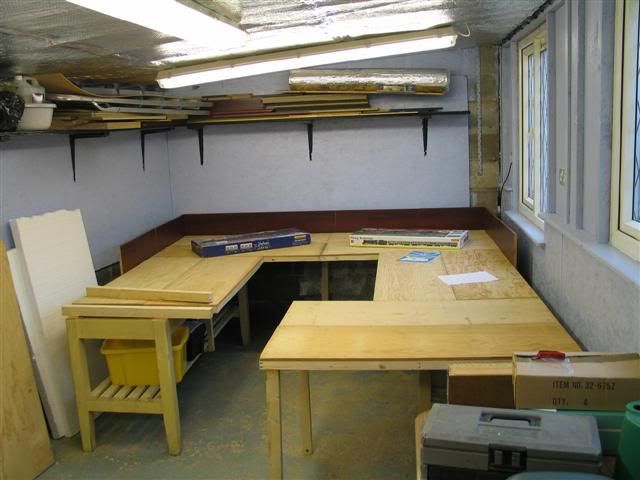
The Early Days: The inside of the shed had to be prepared before layout construction could begin. Some serious tidying up was needed becuase it was becoming a store for unwanted items. There was a bit of damp in some areas of the floor in the corners. The concrete floor was first sealed with a sealer and then repainted. The damp has now dissappeared. The walls which are lined with chipboard were then painted with a light blue emulsion. The roof had to be insulated to prevent condensation so the roof beams were lined with foiled bubble wrap which has also worked a treat and stopped any condensation forming and dripping onto the layout.
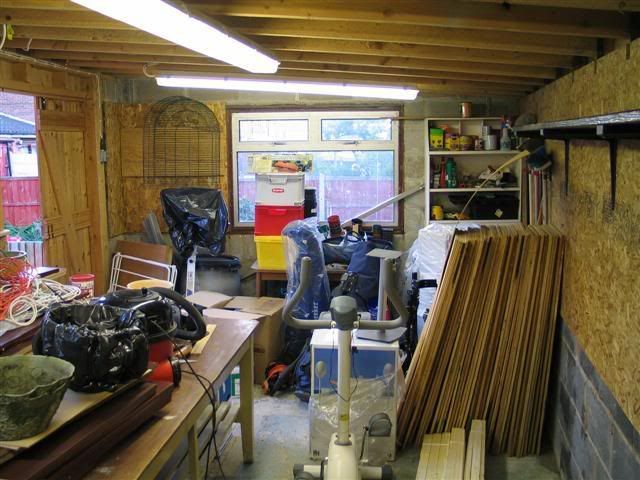
I was lucky in that the previous house owner had left a lot of 12mm 48"x18" sheets of plywood which seemed ideal for nice strong baseboards. So I selected the best boards that were flat and damp free and started to add 2"x1" battons to the edges etc to prevent warping. It seems to have worked well with no warping in three years since they were put together. There was two sturdy work benches in the shed already so all I did was remove the tops and use the bases for the legs and support of the boards.
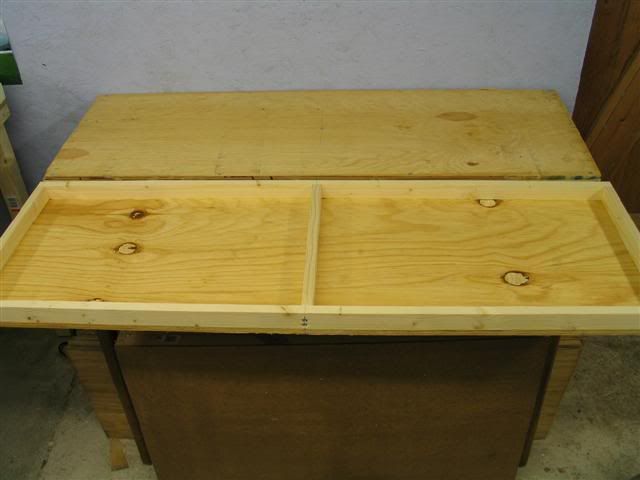
The Boards are held together with coach bolts and extra 2"x2"legs added where required. I initially had a raised border around the edge but over time this was removed to gain a bit of extra width for scenery. Unfortunately I was not brave or experienced enough to fit a removable section for access to the central operating section, so its a case of crawling under. As the layout developed a bit of extra board was added to the left side to create the high street and two extra boards were added across the front to create the goods yard and turntable area.
I obtained a few lots of track from Ebay. even though I ended up not using a lot of it because of its second hand condition, it did prove useful for trying out various ideas for the track plan. After throwing a few ideas around and with some help from members of another forum I more or less ended up with the basic layout below. I wanted a layout that would let me run trains and also provide some interesting shunting potential. I did my reaearch by getting hold of as many railway modelling manuals and track plan books as I could in those first few months. I now own quite a collection of very old and modern railway modelling books for reference. So I came up with the "inverted 8" loop to give the continuous running, with a terminus attached to the outside of the running lines and a wagon marshalling yard/ loco shed inside the running loop. I also had space to add sidings for a brewery and "somethin else" later to become a small coal pit. There is a through station on the right hand side running lines. I later decided to add another loco MPD with a turntable at the front of the layout which was reached via the terminous line to the goods shed. There is a cross over point on the running lines so there has to be an incline which is just high enough for my tallest steam engine to get under.
Once the plan was settled on, then track laying could begin.
In Phase 2, I will explain the track laying, electrics and the control system.
Cheers
John Geeee
0 Comments
Recommended Comments
There are no comments to display.
Create an account or sign in to comment
You need to be a member in order to leave a comment
Create an account
Sign up for a new account in our community. It's easy!
Register a new accountSign in
Already have an account? Sign in here.
Sign In Now