Jump to content
 
  • entries
    73
  • comments
    494
  • views
    77,700

Wagons Roll


richbrummitt

386 views

After a frustrating Easter weekend trying in vain to produce TOUs to any design that might have the necessary pre-requisites I eventually figured something out. This has allowed me to get on with track laying. I'm not convinced that Easitrac is any quicker than soldered construction. It is undoubtably easier if you are scared of a soldering iron and will probably have improved appearance compared with solder blob chairs. However I am in no doubt that Versaline is the current daddy where appearance is paramount.


4504598403_0804b1ded9_b.jpg


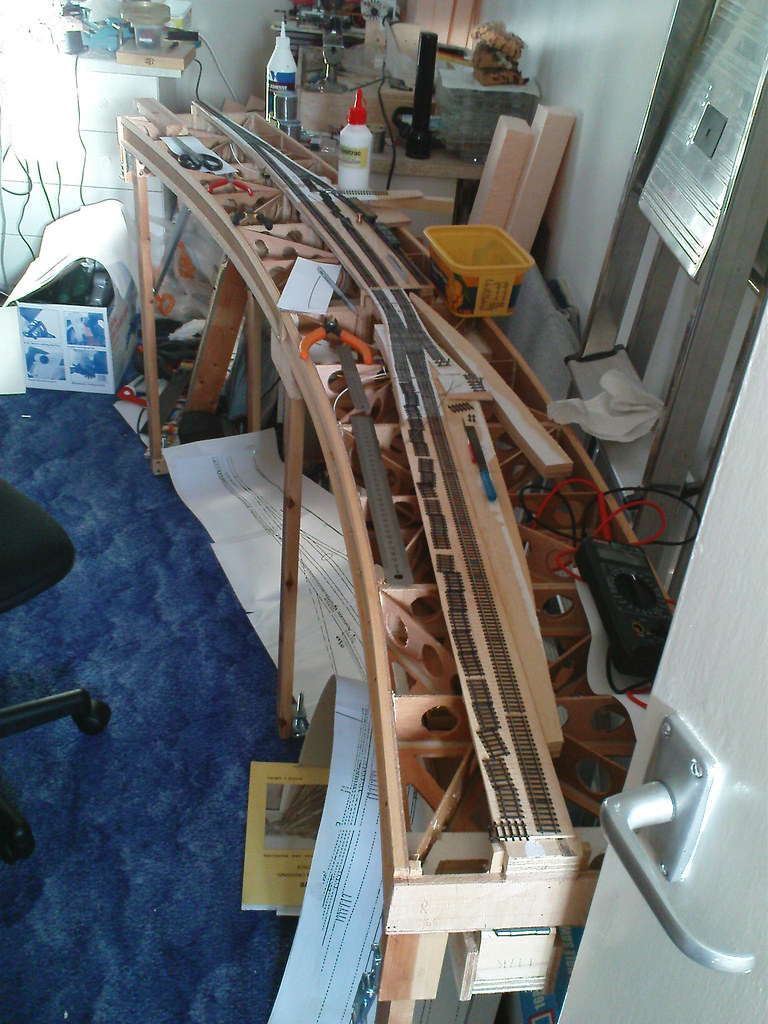
This insight into the hobby room shows the mess as it currently stands. The project has consumed a whole 10m coil of bullhead rail and you will see there are still some areas needing rail. (The sand siding on the near left hand side, and the remainder of the back siding onto the near board). The whole of the main line is laid so wagons can indeed roll. Wiring and a control panel are next on the agenda whilst I await a delivery of rail.

6 Comments


Recommended Comments

Hello Rich :)


You are right, that is a mess :P The thing is, is it possible to model and NOT make a mess?


Its nice to see it comming together, I bet you cant wait to see something working though?


Missy :)

Link to comment

Hello Richard,


It's looking good - I'm glad I'm not the only one with a messy hobby room!


I think it's just the turnouts where there isn't any time advantage in using Easitrac - it's got to be better than soldering up metres and metres of plain pcb trackblink.gif


Did you find a way to represent bridge rail in your sidings ?


Andy

Link to comment
  • RMweb Gold

If you start adding chairplates to improve the soldered track it does tend to slow progress down. I bet you get quicker with easitrac the more you do.

I see I'm not the only one who uses the layout as an additional toolbox! At least you know where to find them.

The curved baseboards look good I think it will work well.

Donw

Link to comment

Haha. That's the tidy bit. I daren't show you my workbenches (just out of shot to the left).


Andy, I didn't represent bridge rail in the sidings. Firstly because it's not available despite the fact large quantities could be used to construct fencing and cattle pens! Secondly after reading through source material again I suspect most of the yard was laid/re-laid after the conversion to standard gauge.


Something will move soon Missy (and you can guess what ;) ). I've boxed the controller and started wiring in anticipation.


Link to comment

If you start adding chairplates to improve the soldered track it does tend to slow progress down. I bet you get quicker with easitrac the more you do.

I see I'm not the only one who uses the layout as an additional toolbox! At least you know where to find them.

The curved baseboards look good I think it will work well.

Donw


I have just spent some of my weekend threading up 3 metres of easitrac ( using the straight 500mm lengths of bullhead) and I did get quicker as I developed techniques - about 30 mins a 500mm length.

I have also had a go at an easitrac turnout, and yes threading those tiny chairs ( and working out where the different ones go) is a bit of a pain. My first effort is not fantastic but it works and I have learned from it.

I wonder whether I should try soldering one up, as it can't take any longer?

Are the association's copper sleepers the same depth as easitrac?


Sorry Rich, didn't mean to hijack your thread!!

Look forward to seeing your layout develop.


Regards,

Chris

Link to comment

I have just spent some of my weekend threading up 3 metres of easitrac ( using the straight 500mm lengths of bullhead) and I did get quicker as I developed techniques - about 30 mins a 500mm length.


I found it was easier to do shorter lengths. My rail is off a coil and I was cutting 2-3 44'6" scale lengths.


I have also had a go at an easitrac turnout, and yes threading those tiny chairs ( and working out where the different ones go) is a bit of a pain. My first effort is not fantastic but it works and I have learned from it.


Fully de-burring the rail is paramount to easy chair threading. You have to make sure to get them the right way around too! (The fat part goes to the outside, the more sloped part inside.) I cut them from the sprue first and bagged them according to type so that I could have just the few chairs I needed for each piece of rail at once. I found that the easiest way to thread was to hold the chair down with a small file or the butt of a pair of tweezers on the base of the chair behind the chair jaws. That way it is held quite securely and you can ease the rail gently through the chair jaws up to the holding tool. After that it is easy to slide the chair down by hand and thread the next one.


I wonder whether I should try soldering one up, as it can't take any longer?

Are the association's copper sleepers the same depth as easitrac?


Probably quicker to solder, if you aren't scared ;) Sleepers with chair plates are the same depth so I am told. I quite like the look of Easitrac compared to my previous soldered track.


Sorry Rich, didn't mean to hijack your thread!!

Look forward to seeing your layout develop.


Regards,

Chris


Don't worry. If you don't ask you may never know.

Link to comment

Create an account or sign in to comment

You need to be a member in order to leave a comment

Create an account

Sign up for a new account in our community. It's easy!

Register a new account

Sign in

Already have an account? Sign in here.

Sign In Now
×
×
  • Create New...