

And So It Starts

Entry posted by Chinahand
1,276 views
Well it's been at the planning stage for more years than I care to think about but, having now settled in China and completed my domestic duties (shelves & pictures to put up etc.) I've finally made a start.
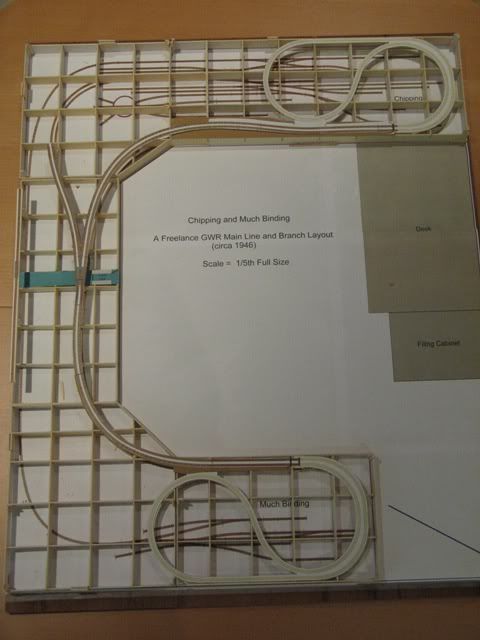
The layout is N Gauge and runs around 3 sides of my Railway Room/Study with an overall size of 3.0m x 3.5m. It will, hopefully, depict my memories of post WWII steam operations, being set in 1946; though this might extend a little to the time of nationalisation so that I can run some BR liveried trains as well as GWR. The design is completely freelance though it does contain elements of some actual locations. It combines a good length (about 20 metres) of twin track continuous running on a folded dog-bone plus two terminus stations; one main line terminus (Chipping) and one branch line terminus (Much Binding). I've always liked end-to-end terminus layouts for the operational interest they provide but, still being a kid at heart, I do love to sit back sometimes and just watch the trains go by. With this plan I can do both.

Those of you who have read my 'About Me' entry will know that before moving to China I was living and working in Dubai though the plan was to retire at the end of 2009. In the 2 years before retirement I set out to gather together everything I would need to build and operate my model railway and this was accomplished by means of a combination of internet buying and hand carrying the more delicate items when visiting the UK on leave. However, I became frustrated at not being able to get started on the build so I decided to build a 1/5th scale 'Model of the Model' so to speak. The chosen material for the model was artists board as it almost exactly corresponded with the scale thickness of the 12mm ply the boards would eventually be constructed from. Here's a shot of the low level boards with the track bed in position. The plan was that the two ends of the dog bone would be hidden beneath the two terminus stations but that changed slightly. More on that later.
 ">
">
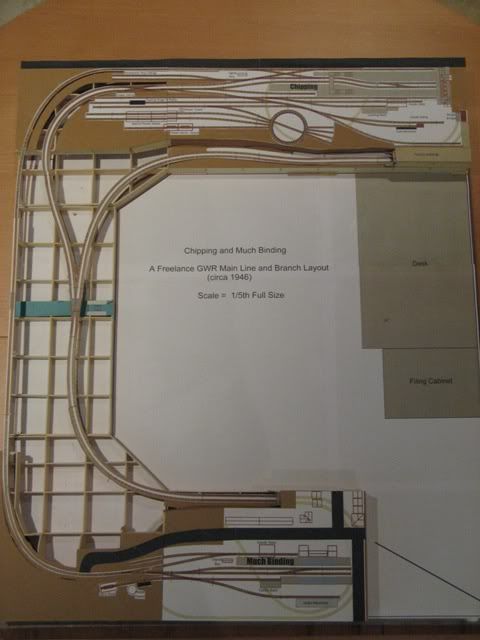
Then came the upper level boards which would be home to the terminus stations.
 ">
">
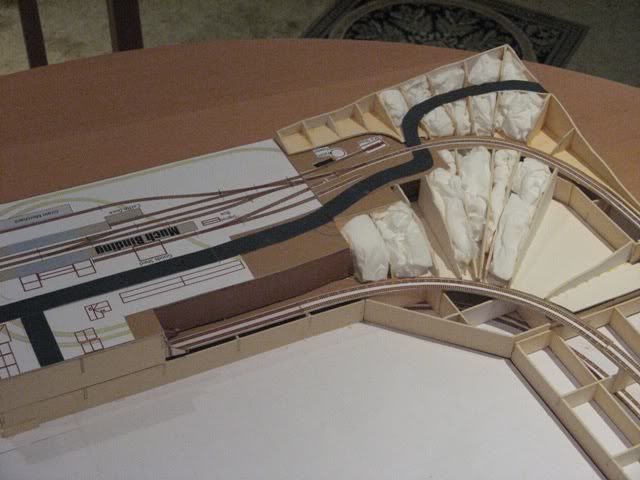
Having modelled the basic track plan the next task was to model the topography. This had actually been the purpose of the model in the first place as, although I had the landscape mentally visualised I needed to see it in the flesh to be sure that it was both achievable and realistic. Using the tried and tested medium of papier mache onto formers I started with the corner of the layout between Much Binding station and the long (1.5m) 19 arch viaduct that crosses the canal and valley. First the formers were cut and shaped from more of the artists card and crumpled up tissues were packed into the spaces between the formers to give better shape to the papier mache. This was the resulting area.
 ">
">
You will note that, at this stage, I planned to have a level crossing carrying the road over the railway lines just after the station throat. It became apparent, however, that this simply would not work visually as the rise of the ground after the track would just not look right. And so the level crossing became a road overbridge. This sort of change was exactly why I was building the model so it was definitely a result as far as I was concerned.
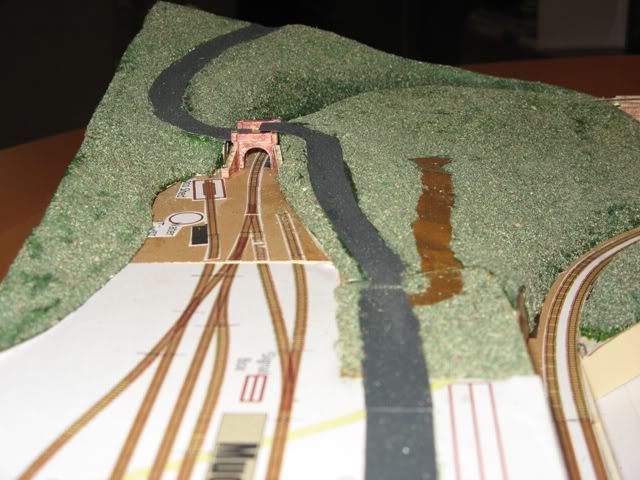
Having made that decision, the papier mache was appliied and, just to add a touch of realism, some fine green scatter was added. Here's that same area when completed. The road overbridge is again a scaled dow Scalescenes kit.
 ">
">
The bridge, in conjunction with the railway cutting now provides the necessary scenic break between Much Binding and the viaduct.
The same techniques were used to landscape the Chipping side of the layout and the result was this.
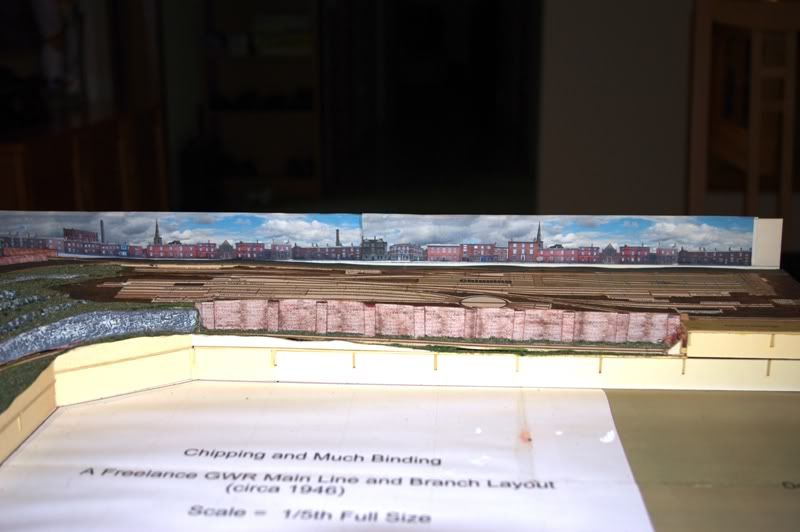
The retaining wall is the Scalesces kit suitably scaled down to match the model. The rock face was made with modelling clay and painted.
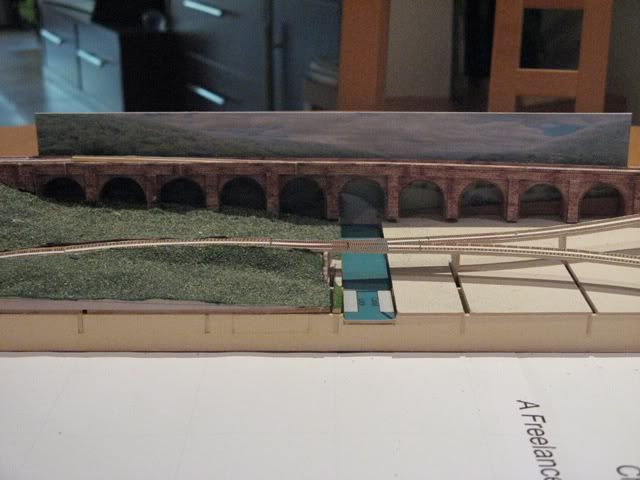
Having mentioned the viaduct I should, perhaps, explain that its' inclusion had always been my intention based on my mental image of what I wanted to achieve i.e. a valley area containing a canal with the main line carried over it by a steel girder type of bridge and with the branch line at the back of the board crossing the valley at a much higher level by means of a viaduct. The model of the viaduct is again a Scalescenes kit which I reduced to 1/5th N Scale. That's a scale of approximately 1/730th. Anyway, here's how it turned out.
 ">
">
I think that's enough about my 'Model of the Model' but I hope you will appreciate that I gave me the necessary confidence that my mental concept of the topography would actually work.
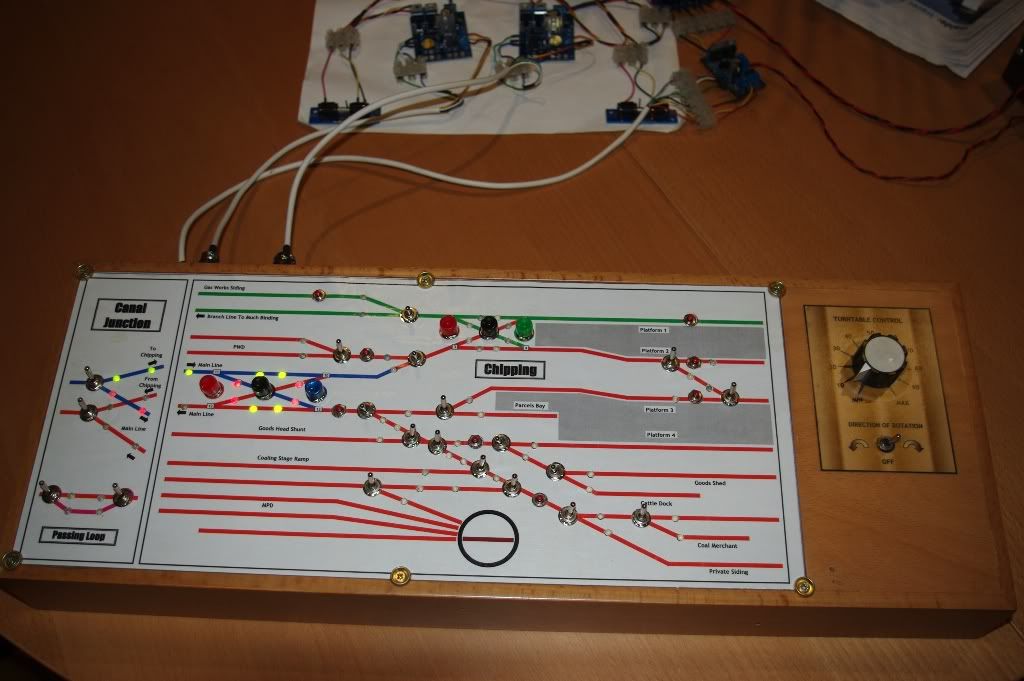
Time was, however, still dragging so I decided that, although the layout will be principally DCC with locos controlled by my ESU ECoS, points would be controlled in the more traditional 'mimic panel' method so I started putting together my control panel for operating the 46 points contained in the layout. I had already decided to use Seep PM1 point motors which would be controlled via MASTERswitches (Produced by DCC Concepts) which considerably simplified the wiring and provided connectionns for frog polarity change and for bi-colour LED indicators on the control panel.
This is the larger of my 2 control panels during construction and testing.
 ">
">
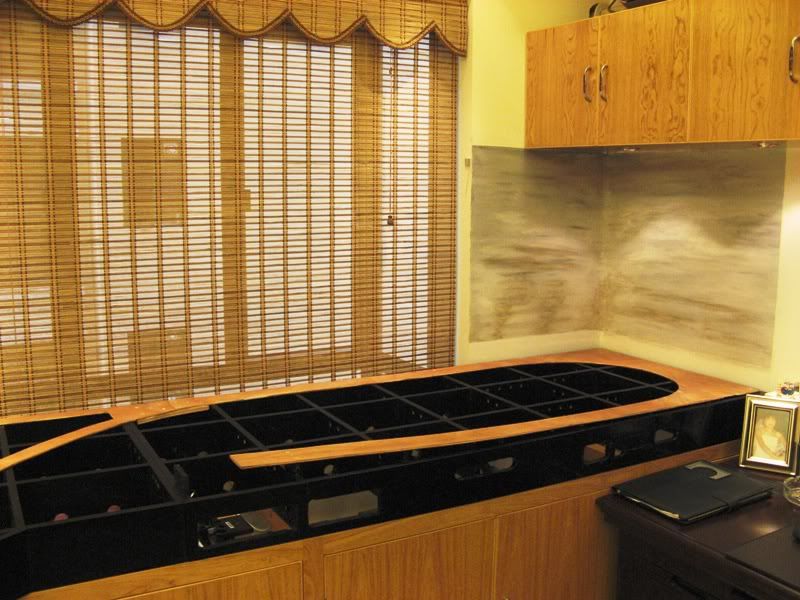
Having entitled this Blog entry as 'And so it Starts' I suppose I should now actually show how it did start. First a shot of my Railway Room/Study. To support the layout (and to provide additional storage in our apartment) I employed a local Chinese joiner to build some cupboards around the 3 sids of the room that the layout would sit on. This was the result.
 ">
">
So now we get to the actual start of construction.
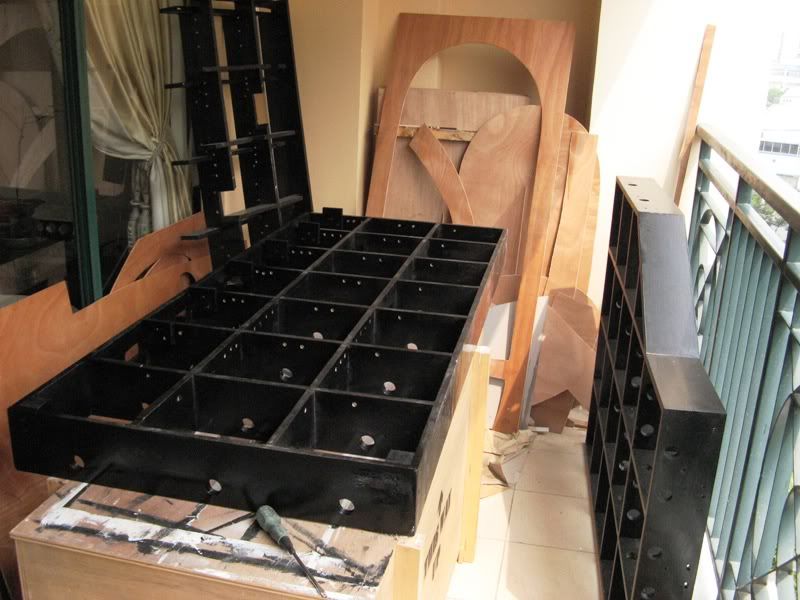
As you may have gathered, my wife and I live in an apartment and, being on the 7th floor, I can't just pop outside to build my baseboards in the shed/workshop or some other such space. The balcony has therefore become my workshop and here are some shots of the baseboards under construction. As you can see, working room is tight.
 ">
">
All of my boards are constructed of 12mm plywood with formers at 250mm centres and joined together with halving joints. They are not designed to be portable and are pretty much bomb proof. The track bed is 6mm plywood with gradients supported on 12mm plywood risers.
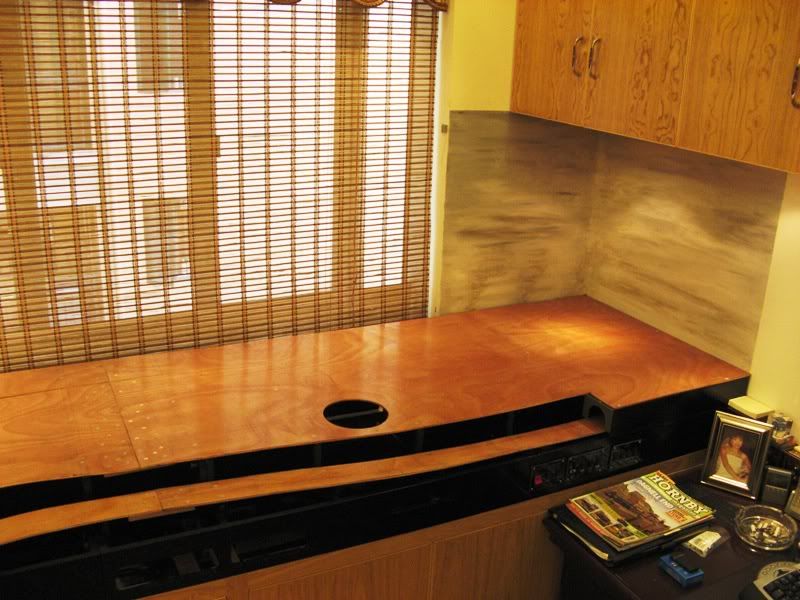
As a few final photos for this particular part of my blog here are some of the boards in position on the Chipping side of the layout.
First is the hidden loop which you may notice has become somewhat larger than originally planned. This came about when I discovered a 'pinch point' between the hidden loop and the visible gradient in front of the upper board.
 ">
">
Now with the upper board in position. The twin track main line seen in the foreground rises at a gradient of 1 in 58 to meet the twin track spur from Chipping Station.
 ">
">
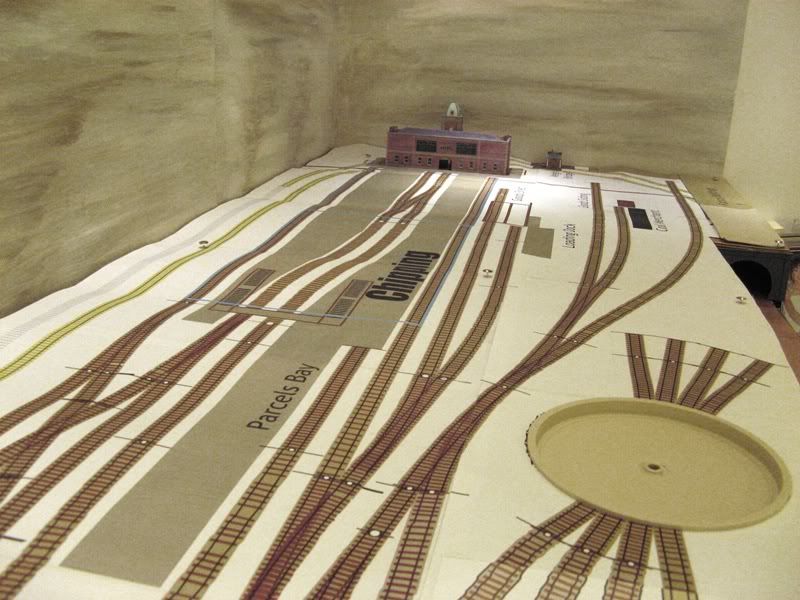
And finally a shot looking down the length of the Chipping Terminus with my Winrail track templates in place. I've even started painting the backscene for this area which will basically be a dirty industrial sky.
 ">
">
And that's about where I'm up to at the moment though there are a few things happening 'off layout' but more of that in the next episode.
Any and all constructive comments or suggestions are welcomed.
7 Comments
Recommended Comments
Create an account or sign in to comment
You need to be a member in order to leave a comment
Create an account
Sign up for a new account in our community. It's easy!
Register a new accountSign in
Already have an account? Sign in here.
Sign In Now