

Adding to the electrics
.thumb.jpg.60c53fcbcaa34017b05b8919d1a9e6d2.jpg)
Entry posted by Silver Sidelines
1,175 views
Following on from extending the board and laying the extra siding it has been necessary to add a couple of additional switches to the control panel - bottom right:
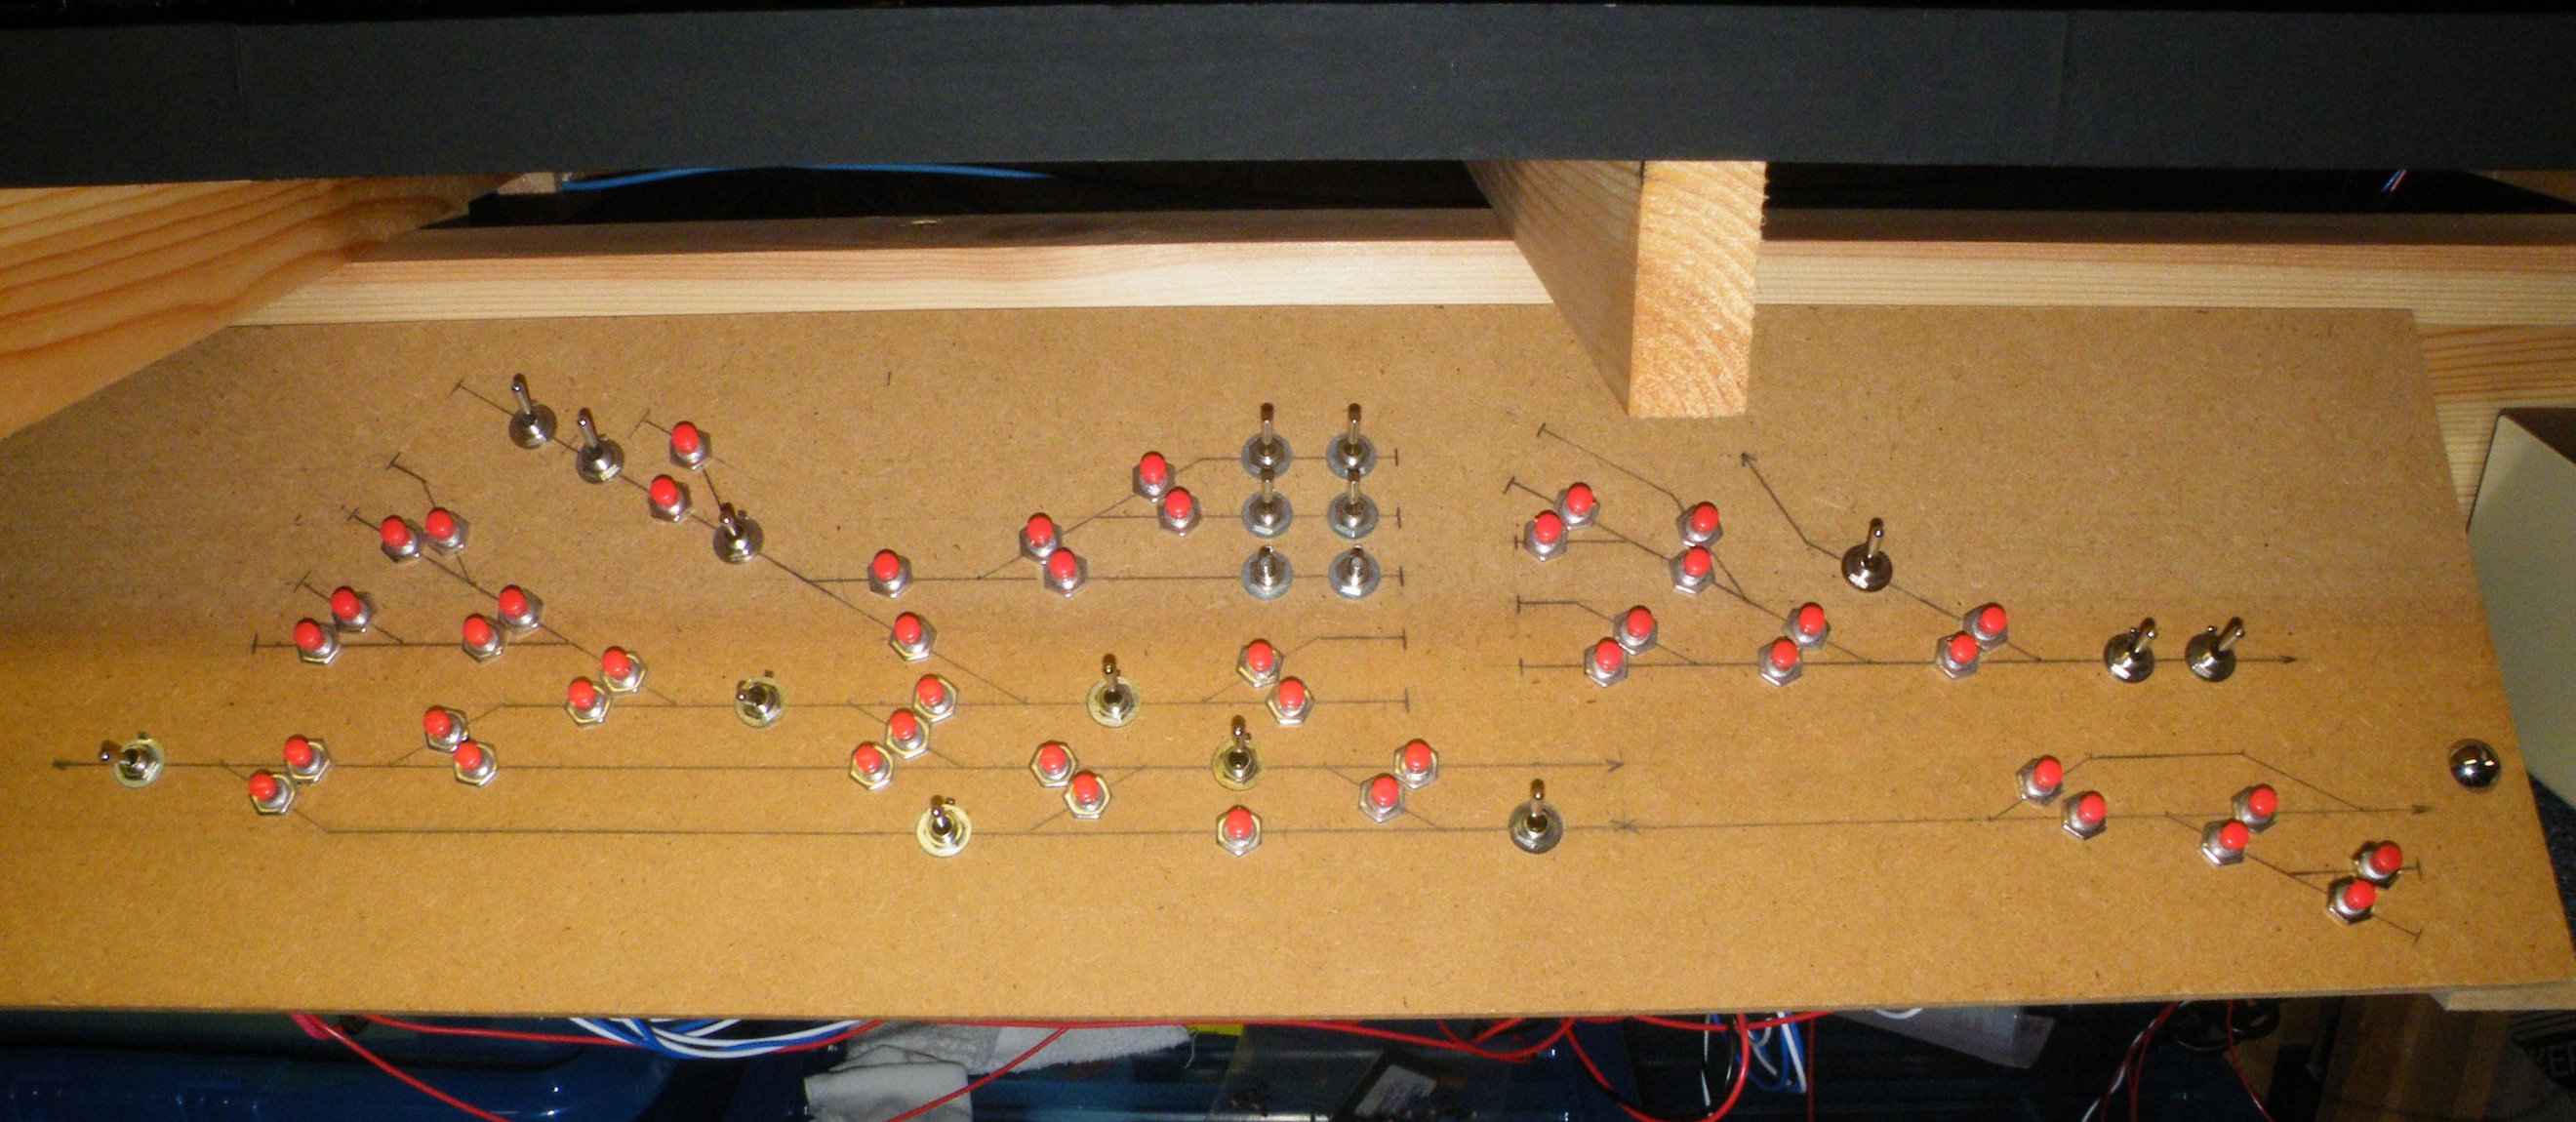
The panels are made from 3mm thick high density fibre board, hardboard as I used to know it. After drawing the line of the new siding on the front of the panel the next task was to drill two pilot holes where the new switches were to be located.
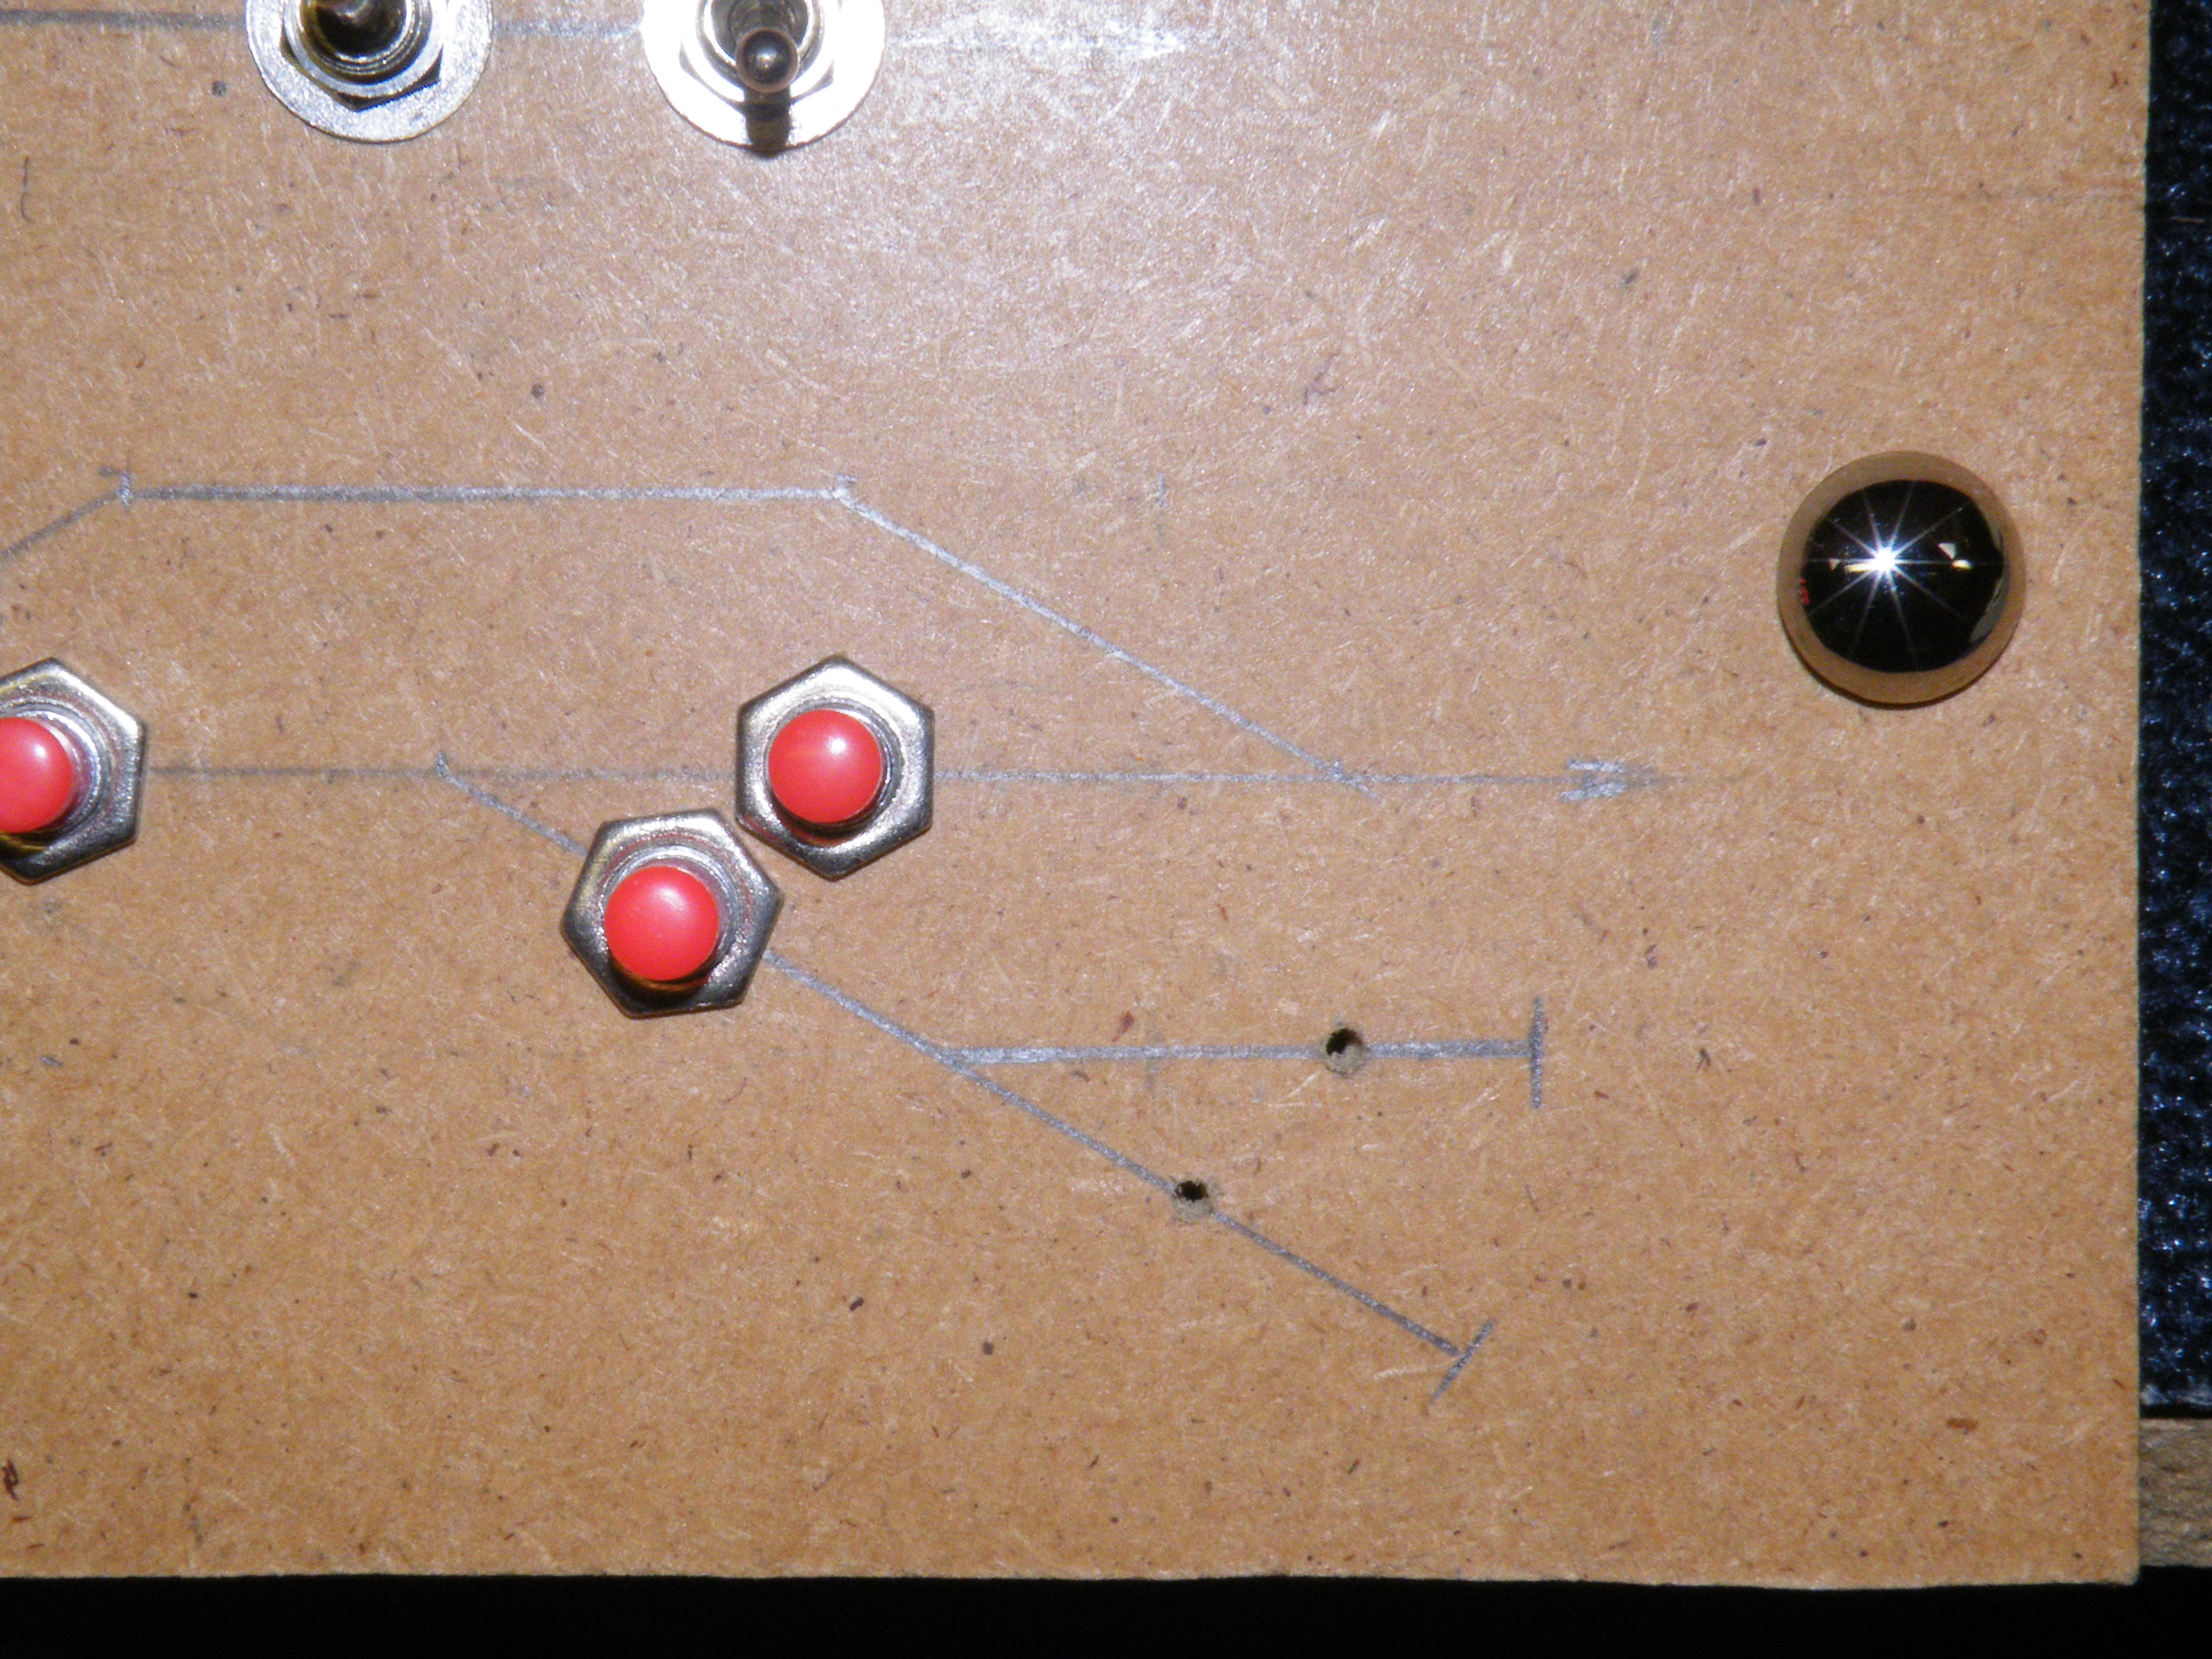
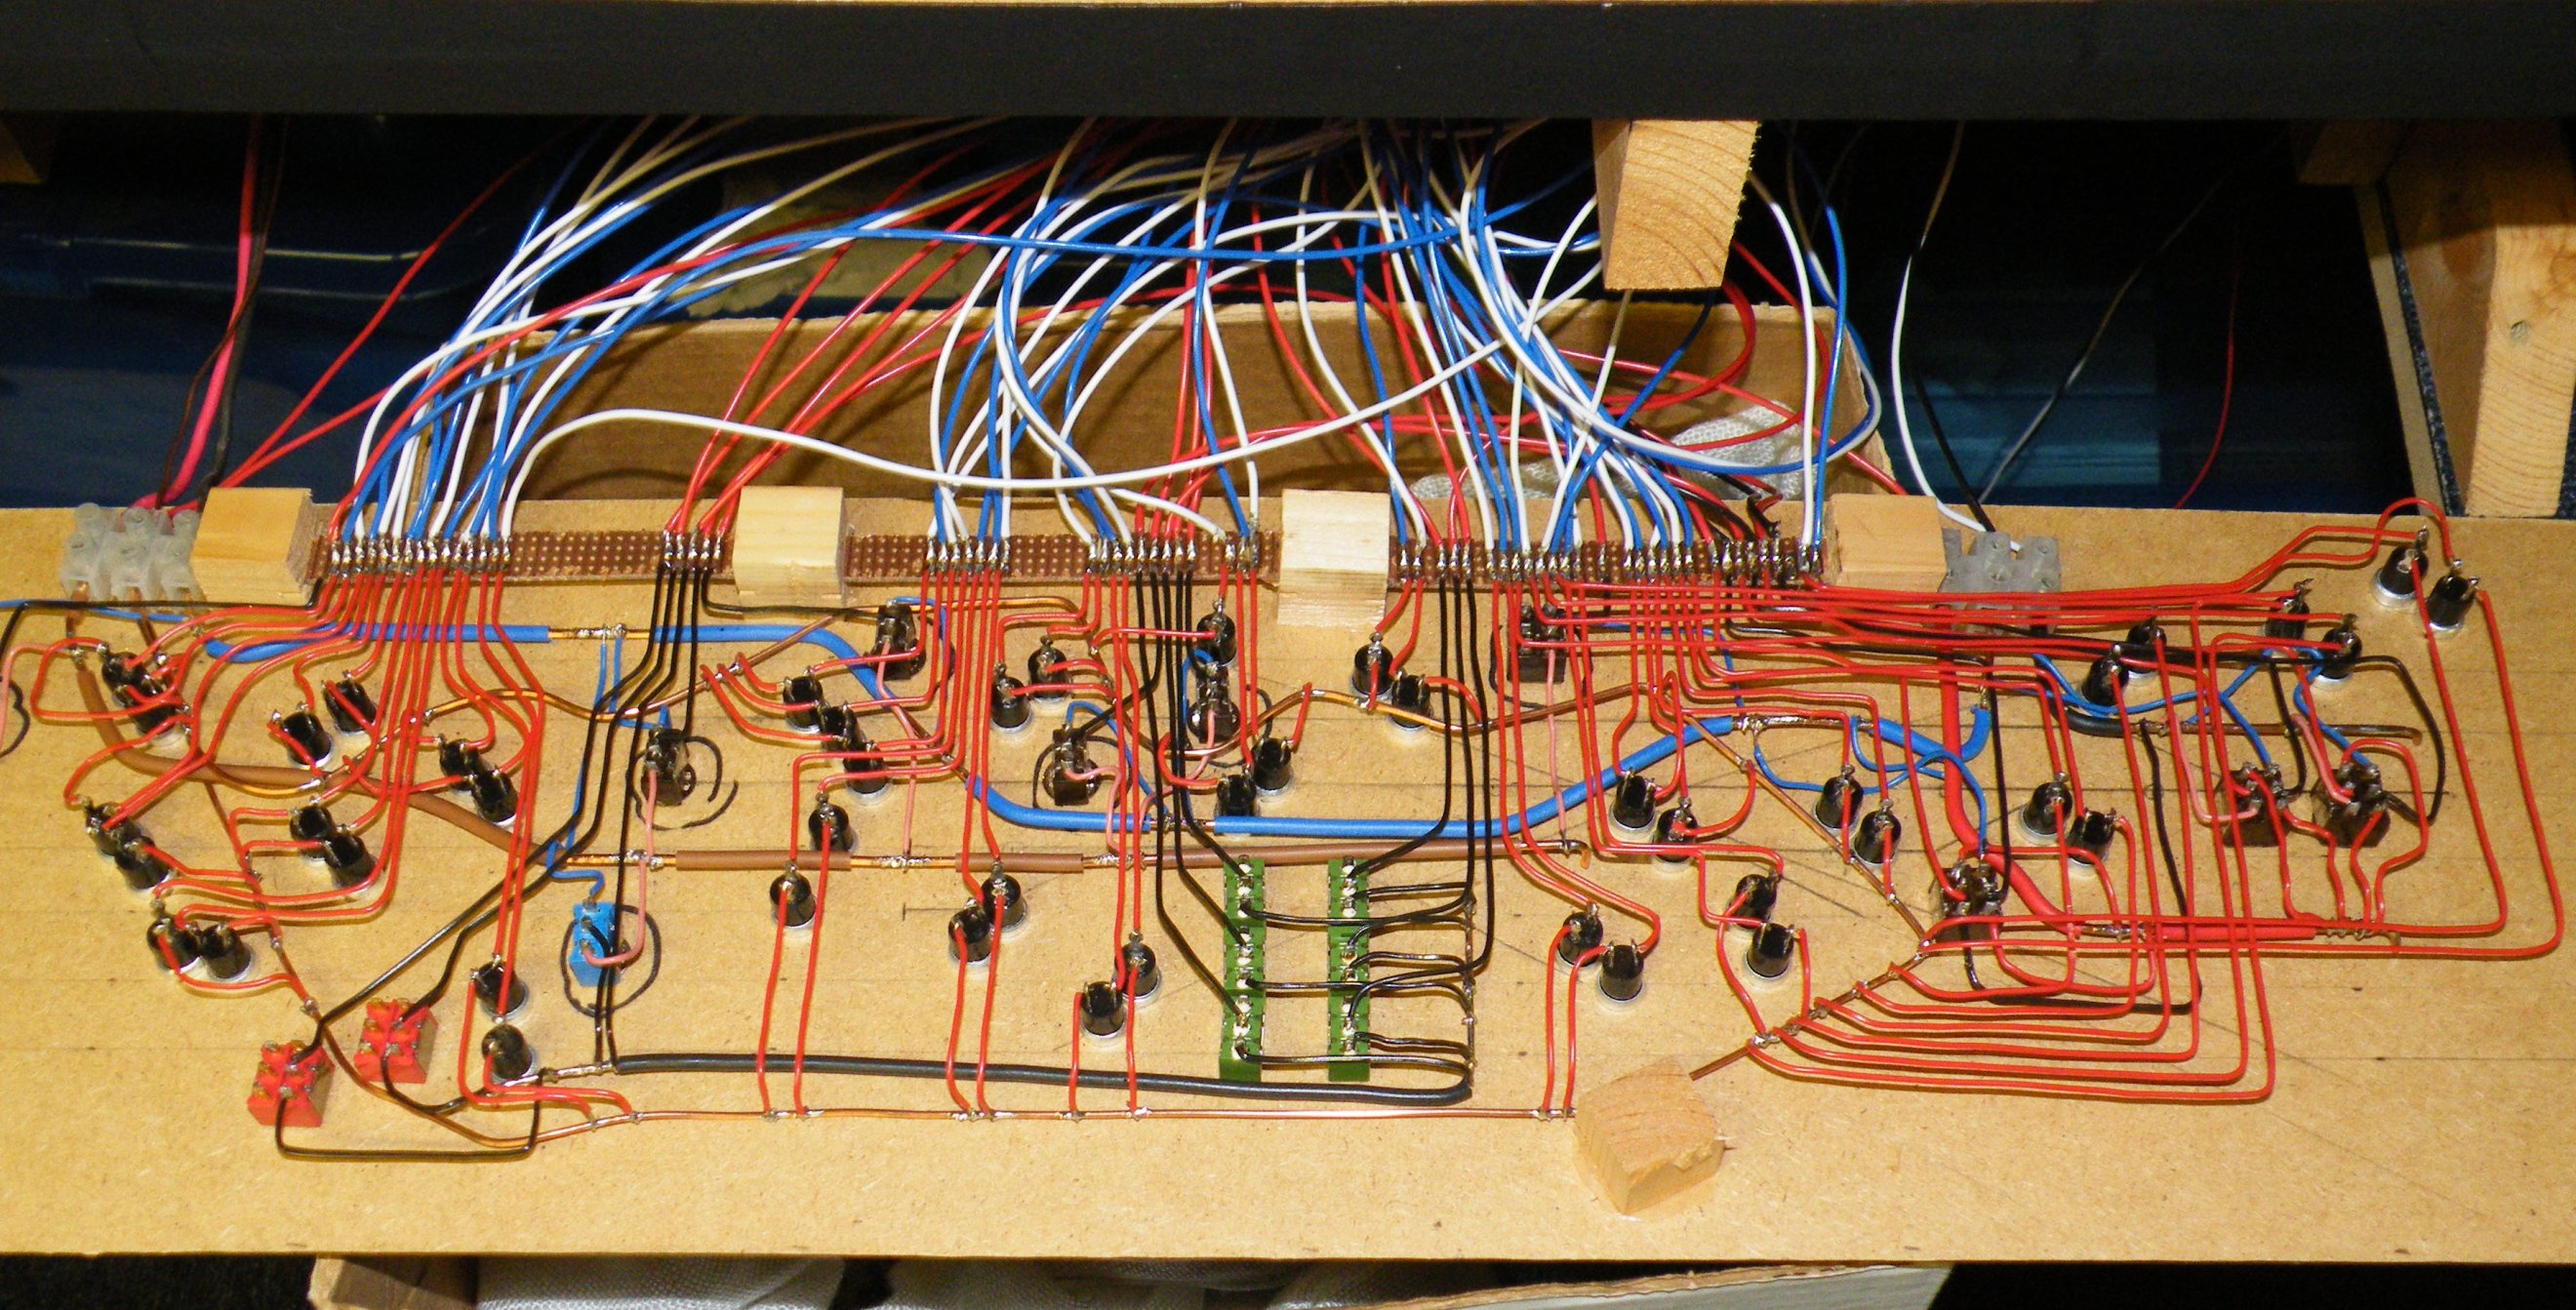
These initial pilot holes were gradually opened out using ever bigger sizes of drill bit, up to 7mm as required for the push button switches. Having positioned the switches it was then necessary to work on the underside of the panel and to connect up the AC supply to each switch:
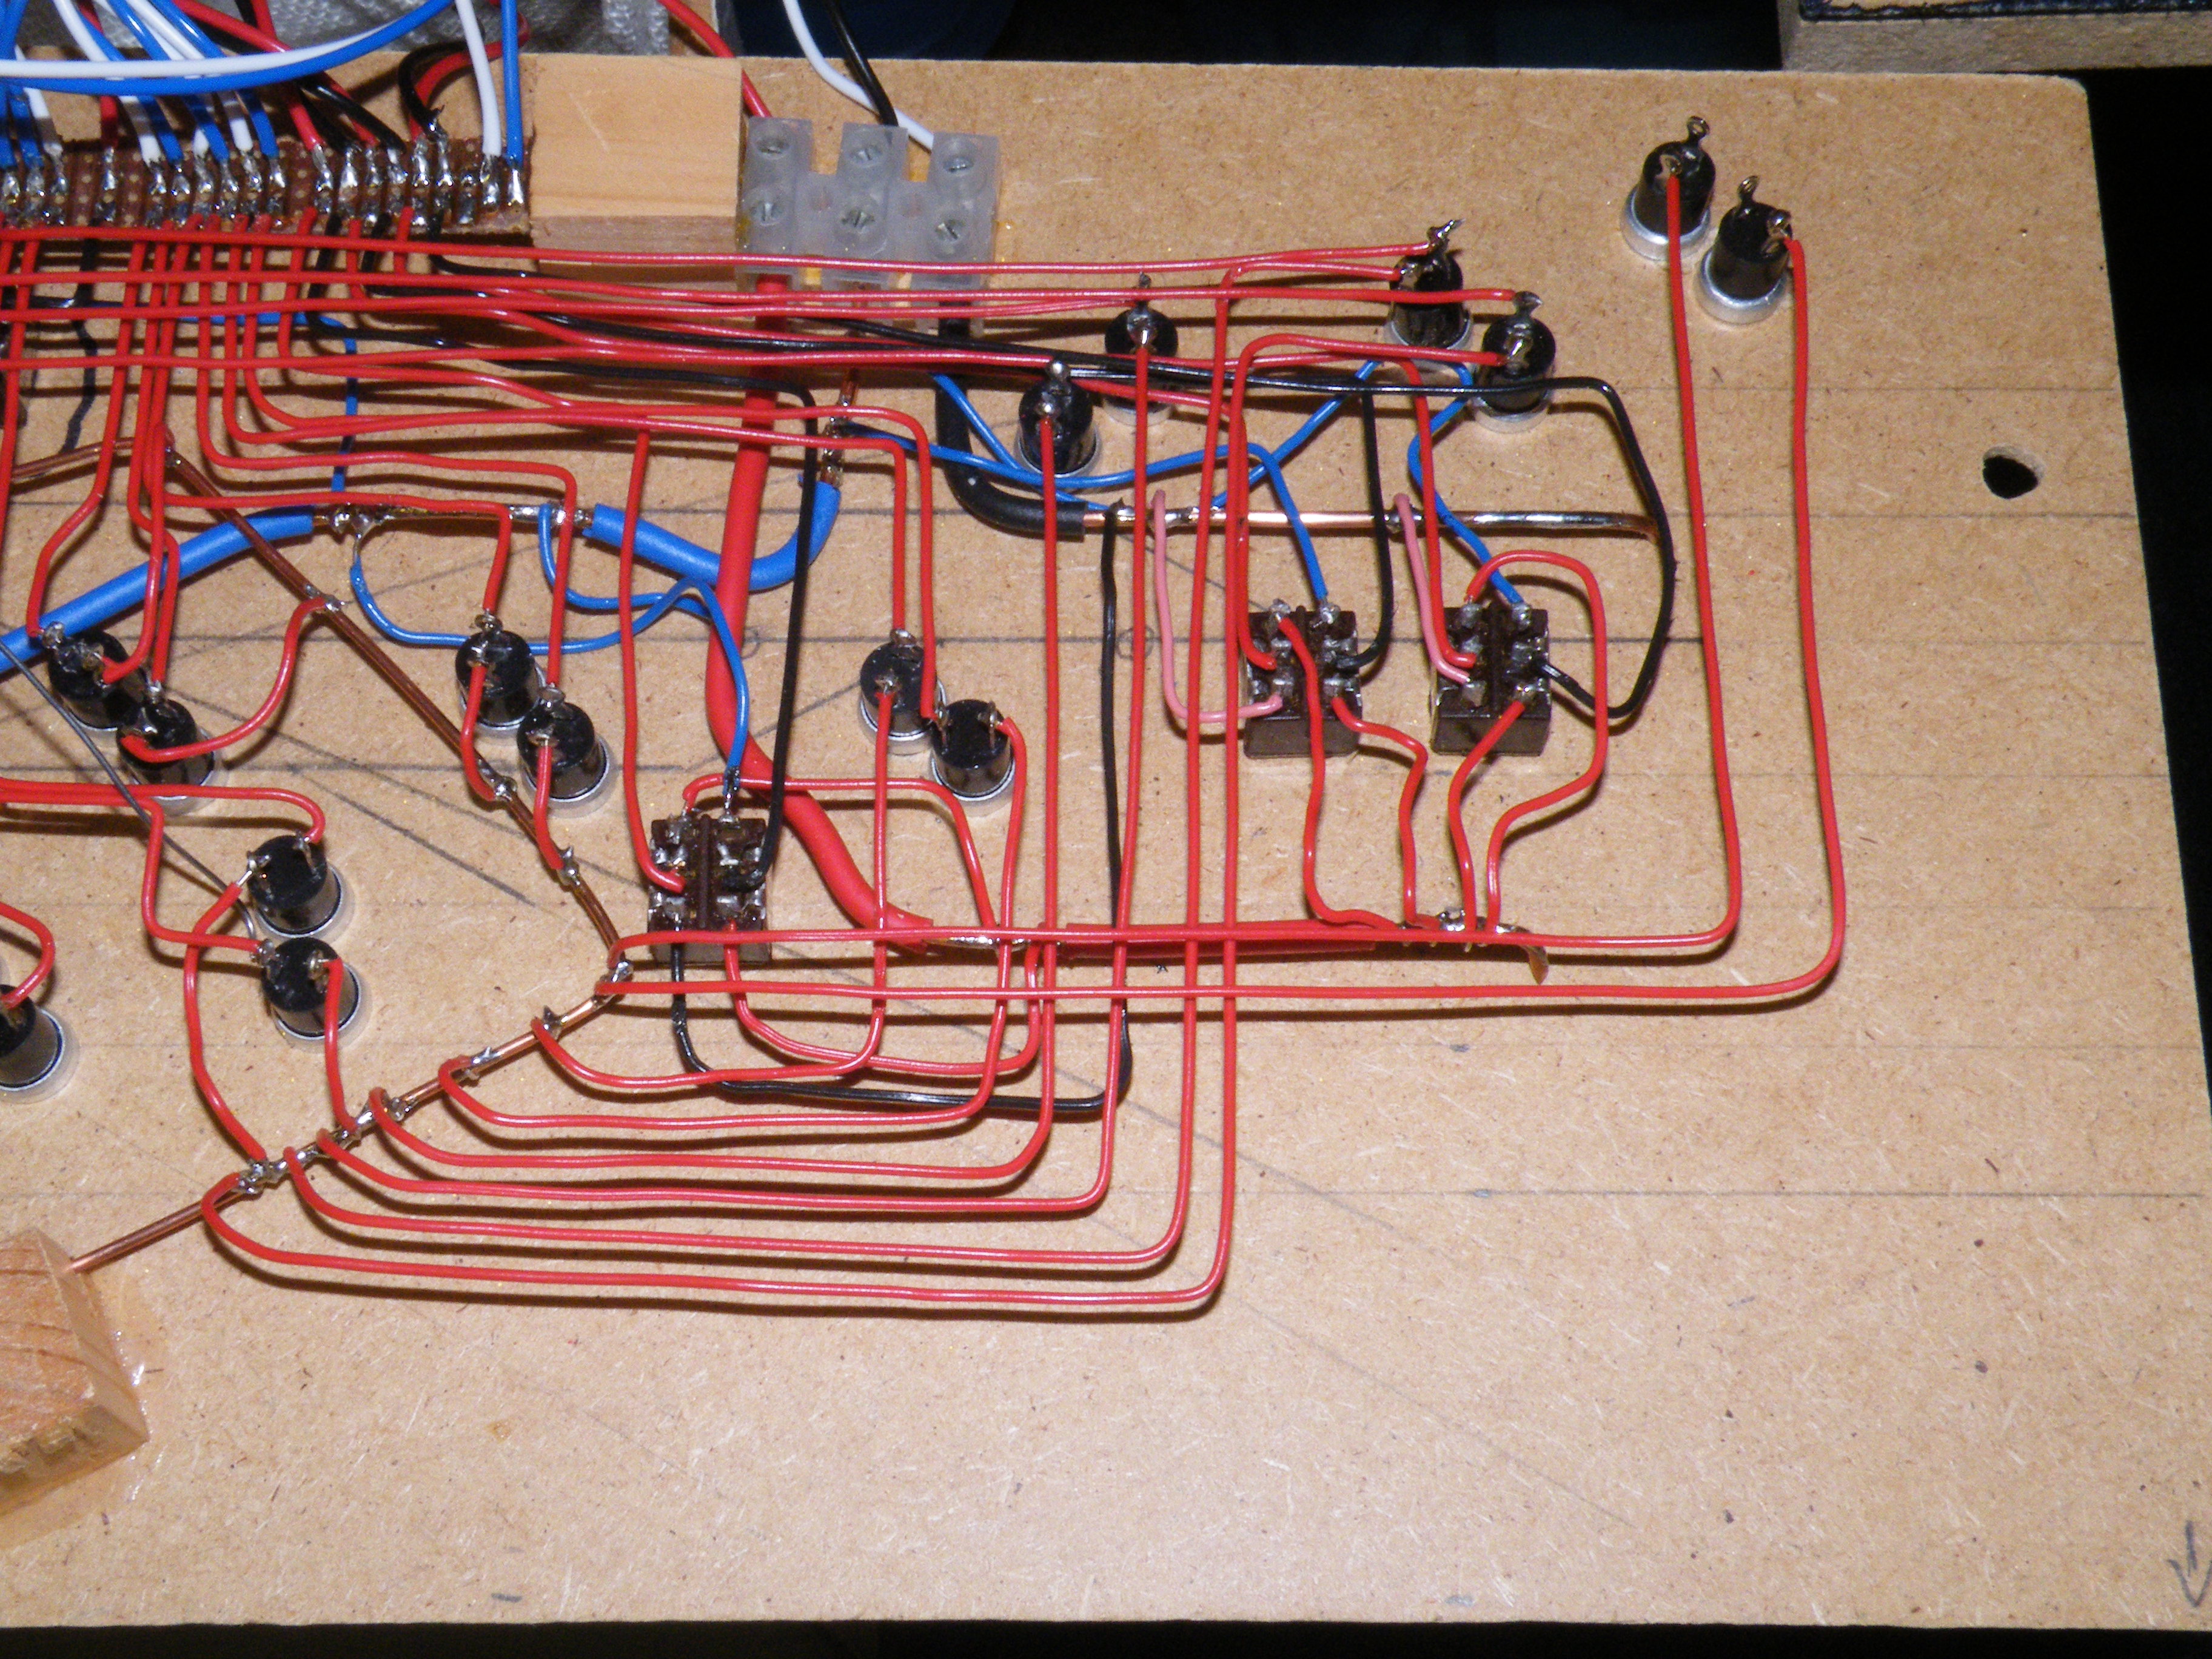
I used to be a civil engineer not an electronics engineer. I do like things to be tidy. All my panels are constructed around three feeds made from the copper conductors stripped out of 30amp (2.5mm) power cable used for ring mains. I then use small diameter wire with a single core so that it can be bent to shape to fit between the main conductor and the switch. I use the brown and blue conductors to supply the two feeds to single pole double throw centre off Section Switches for 'cab control'. I use the uninsulated copper earth to feed the push button switches for the point motors. This is perhaps seen more clearly in the view below which shows the underside of the completed panel with the two new switches at the top right finally connected up to the blue and white wires at the top of the picture that go off to feed the point motor. This panel is 'special' because it incorporates the Section Switches for one of the reversing loops. These switches have to be double pole double throw type switches and as well as feeds from the two cabs, there has to be a feed from the 'common return' which I have sheathed here in red. Just to add to the confusion one of the 'cabs' for the reversing loops comes from another panel - hence the black covered copper connector.
-
 2
2

6 Comments
Recommended Comments
Create an account or sign in to comment
You need to be a member in order to leave a comment
Create an account
Sign up for a new account in our community. It's easy!
Register a new accountSign in
Already have an account? Sign in here.
Sign In Now