Jump to content
 

GWR W2 Cattle Van (in loving memory of the Wright-Marillier partition locking bar)


Mikkel

5,760 views

Everyone knows how the “standard” GWR cattle vans looked, but I’ve always fancied the earlier W2 vans with outside frames. So I dug out an ABS 4mm kit and brought it with me on the family holiday. These were "medium" sized cattle vans, with the option of adding a partition and thereby making them "small" if the customer so required. I've always wondered why this was worth the trouble, as the difference in space seems minimal !


IMG_1514.JPG


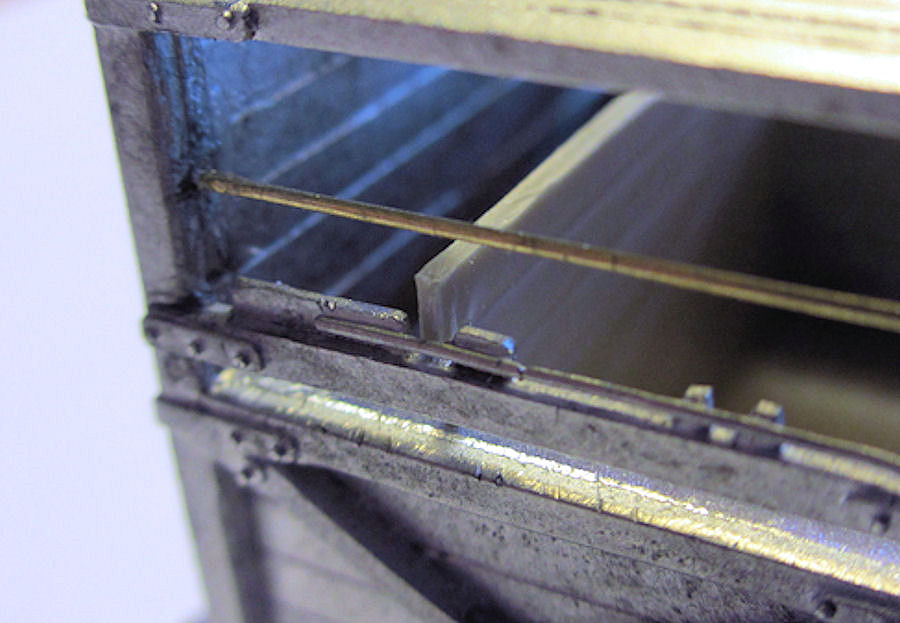
I decided to build the kit as supplied, which is in the post-1905 condition with oil axleboxes, an updated locking mechanism for the doors, and the Wright-Marillier partition locking bar.


IMG_0910.JPG


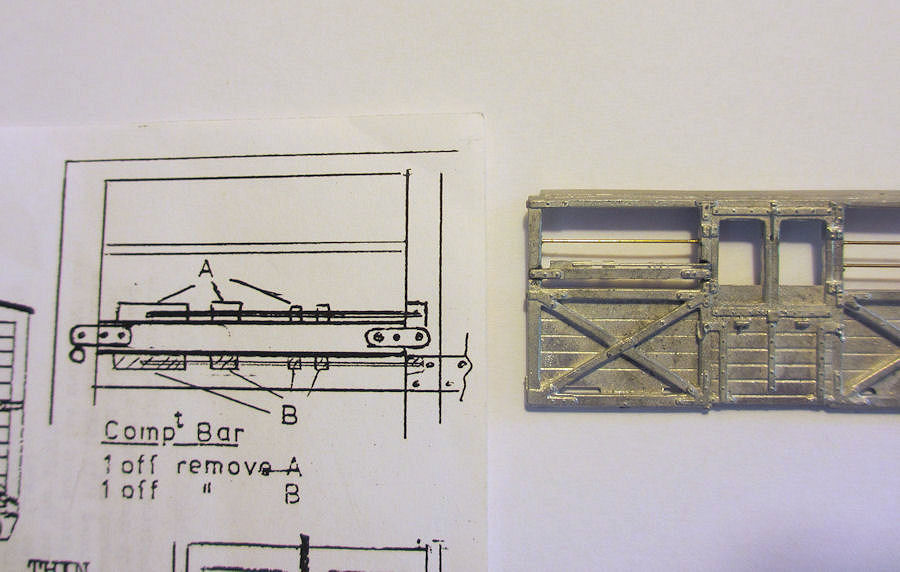
And we all know what a Wright-Marillier partition locking bar is, don’t we! A regular household word it is. “Good morning dear. Wright Marillier partition locking bar?”. “Oh yes please, and two sugars”. Well, above is the 4mm version of such a mechanism, as supplied in the kit.


IMG_1006.JPG


It seems that in the early 1900s the GWR was having problems with farmers who paid for only part of a cattle wagon, and then moved the partition to increase the space when noone was looking. So in 1903 Messieurs Wright and Marillier of the GWR’s Wagon & Carriage department invented a locking bar that would help prevent this. Not quite Nobel prize stuff, I suppose, but a good example of practical engineering for everyday railway operation.


IMG_0933.JPG


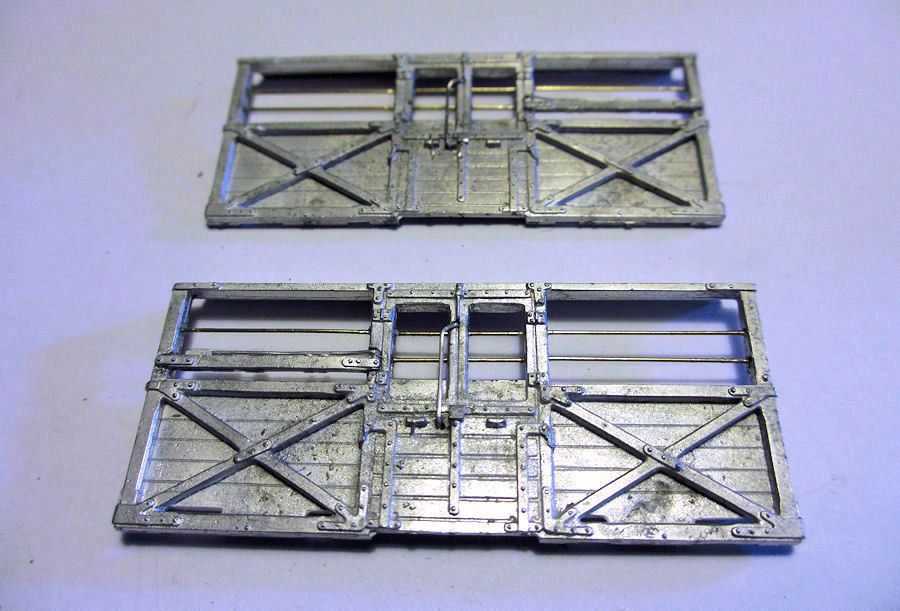
The sides require a bit of preparation. Apart from fitting the locking bar, a door latch must be fashioned from wire and the main bars fitted.


IMG_0987.JPG


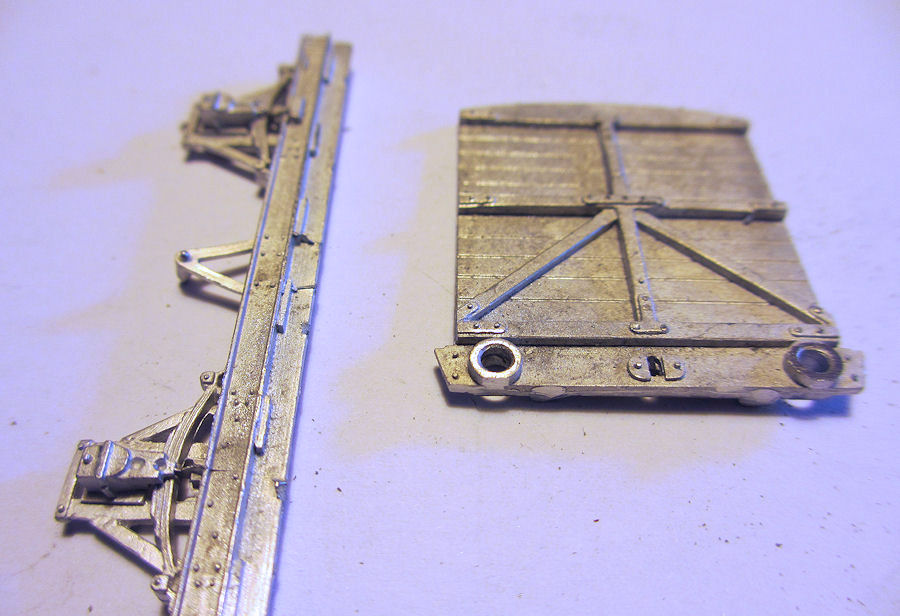
The W2s were built with “bulb” section solebars (where the upper lip is wider than the lower one), and an early distinctive type of round buffer housing. Those lugs on the casting above the solebar caused me a lot of headscratching. They don't seem to serve a purpose and get in the way of the assembly. In the end I simply removed them. I hope I haven't missed some vital point!


IMG_0991.JPG


Poor man's brass. I've finally realized why I get on better with whitemetal and plastic than with brass. They are much more forgiving materials, eg I can file and tweak and fill in to correct all my mistakes!


IMG_1204.JPG


Modelling in the wilds of Denmark. A fly of the genus Wotsit inspects the roof bands. Actually it may have a point: I think the bands should have been a tad flatter and wider.


IMG_1503a.jpg


Standard grey and a bit of lime wash. I forgot to add the small "M" and "S" to the livery (now corrected, see the first photo). I know that the lime wash was often more pronounced in reality, but I find it can look a bit odd in 4mm scale. So I prefer this understated look. I haven’t finished the lettering on the ends as I am not sure how it should be. The photo in "GWR Goods Wagons" (Atkins et al) shows an experimental livery on the ends which was not carried forward. The kit instructions indicate the “GW” as seen here, but also with tonnes and tare in italics on the left hand side. But I thought that the standard end livery should be “GW” , running number and “Medium”?


IMG_1497bn.jpg


When the GWR introduced the large "GW" on goods stock in 1904, they ran into problems with the outside framed vans. There simply wasn't enough room between the frames. The solution was to use smaller, non-standard letters. I did the same. Photos from the early 1900s also show that on some wagons, the cross-bar on the “G” differed from the later standard style. The HMRS transfers have the later style (bottom right), so I modified them with a lick of paint (top left).


IMG_1445.JPG


The W2 in the bay siding. Surprisingly, the photo in Atkins et al shows it with screw-couplings, so I have added an (overscale) set of these until I work out if that was standard.


IMG_1473xbc.jpg


Mr Wright and Mr and Mrs Marillier inspect their invention on the W2 at Farthing. What the world does not know is that the concept for the locking bar came from a clasp on Mrs Marillier's corset. What Mr Wright and Mr Marillier do not know is that they both got the idea from the same clasp.

Edited by Mikkel

  • Like 26
  • Funny 2

29 Comments


Recommended Comments


In this case I envy you. Seeing the possibilities which wagon building could give to me.

But I have learned to accept the limited possibilities I can use for modeling.

So with a good mood (temperature is down) I can go on with Northall Dock, and I enjoy waiting  your next entry.


Beautiful model and scene. 

Link to comment
  • RMweb Gold

Fabulous modelling Mikkel.I particularly like the 'Farthing' lettering and how you got the transfers to sit down nicely,something I struggled with on a Coopercrap cattle wagon I built.How long did this diagram last in service ?

Link to comment

Very nice, Mikkel. It is a good little kit and I remember enjoying building one a few years ago.


I wonder if the small section beyond the partition is sufficient for a calf or two? The rules say they must be separated when travelling with adult cattle.


The end lettering is a bit of a problem and I've not seen any pictures to show how they were actually painted. There's a photo in Russell's appendix of a rake of W1/3/5 that shows 'Large' and the number under the G, and 'To carry ...' and 'Tare ...' under the W, but they all have three end panels. On my W2 I put '8 Tons' and 'Tare 6-4' in the upper triangle under the G and the number under the W. It probably should be the other way round and also needs 'medium'.


Just when I'd learned that a whatsit/wotsit was a metal cup that covered the spring hanger bush (see Wenlock's blog) you've gone and confused me by introducing a Danish wildlife form.


btw where did Mr Marillier get the idea for the instanter coupling...


Nick

Link to comment
  • RMweb Gold

Really beautiful modelling Mikkel. Something different then the standard Coopercraft offering.


The understated limewash does certainly look more realistic-especially when scale is taken into account.


Cheers,


Mark

Link to comment

Mikkel,


As usual, lovely modelling and another suberb tale to go with it.  Now the but...


I'm not convinced about the transverse strapping on the roof, my belief is that this was used on steel rooves (or more modernly roofs) to cover the joins between the panels.  The photos that I've managed to find of outside framed cattle wagons tend to show a plain roof with no rain strips which I take to be wooden planks covered in a tarpaulin of some sort. 


Rather annoyingly, I came across a photo of an end of an outside framed cattle wagon the other day in the 1904 livery but I'm damned if I can find it again now! (I've just searched through the 3 books that I know I have been reading in the last week or so to no avail).  Unfortunately, I cannot remember what lettering was where on the wagon although it was one of the Large sized wagons rather than the Medium that you're modelling but I suspect that the lettering positions would be the same.  I will endeavour to locate the offending image to let you know though.


Ian

Link to comment
...I'm not convinced about the transverse strapping on the roof, my belief is that this was used on steel rooves (or more modernly roofs) to cover the joins between the panels.  The photos that I've managed to find of outside framed cattle wagons tend to show a plain roof with no rain strips which I take to be wooden planks covered in a tarpaulin of some sort...


Good point, Ian. I read somewhere (GWW I think) that transverse strapping was only used on iron roofs. It can be seen on the photos of the old W4 of 1888 and the one-off iron bodied van of the same dates in Atkins, et al. Unfortunately in my copy the photo of W2 is over-exposed and no roof detail is visible. Perhaps surprisingly, strapping is shown on the Swindon diagram of W3 (and the VoR cattle wagon W9) but not on any of the others. To add confusion, strapping is visible on the roof of a W1 and a W8 in Russell's appendix (figs 210 and 211), but the underside of the roof of the W8 appears to be made of wooden planks.


I hope you can find that photo as I think I'l have to redo the end lettering on my W2.


Nick

Link to comment
  • RMweb Gold

I wish we had a multiple quote function and a thanks button here in the blogs!


Job, I understand your situation and admire how you find innovative ways to pursue your modelling despite it. Things have cooled down here too, and lots of rain today - the plants really needed it!


Rob, that Farthing lettering (which is on an AA3 brake van) was time consuming but fun to do. I use the HMRS pressfix transfers. Contrary to what people say I find they can be shifted slightly if necessary before setting in (with a little water), and fixed down quite well with Vallejo's matt varnish. The Atkins et al tome passes unusually quickly over these wagons, but the kit instructions state that a few lasted into the 1930s (at least 12 lasted to 1930, the last one went in 1935).


Nick, yes probably room for a few calves behind the partition. But still! I suppose these days we have forgotten how much even a small saving meant. Thanks for the info on the end lettering. I think I will wait and see if I can find any photos. And I really don't want to think how the instanter coupling came about! :-)


Mark, glad you think the limewash works. Some people may not like this way of doing it, but as you say when these things are seen from a distance (as our models usually are) strong colours tend to appear more hazy/toned down.


Paul, thanks. As you've just said over in your own blog, it's nice when we are able to keep our focus on a particular modelling project/task, rather than straying into all sorts of other tasks which is what usually happens :-)

Link to comment
  • RMweb Gold

I'm not convinced about the transverse strapping on the roof, my belief is that this was used on steel rooves (or more modernly roofs) to cover the joins between the panels.  The photos that I've managed to find of outside framed cattle wagons tend to show a plain roof with no rain strips which I take to be wooden planks covered in a tarpaulin of some sort. 


Hi Ian. Yipee, another question to resolve. I'm not joking, I do like these problems - who needs to build layouts when there's a whole world to discover in a single wagon? :-)


I did consult your research on these wagons in your blog, but hadn't noticed the lack of strapping. I'd be happy to redo the roof, but:


On page 413 and page 423 of GWR Goods Wagons (1998 edition) there are photos of two different rakes of cattle wagons, of which many (all?) seem to be medium/outside framed. I had assumed these were W2 vans. Most of them have roof strapping - in fact several seem to have 5 or 6 straps, and only a few have no strapping.


The kit drawing indicates 4 straps (may be wrong of course). As Nick says, the Swindon W3 drawing in Atkins et al is also shown with 4 roof straps, as is the prototype Beetle in the photo on p 423.


Thanks very much for looking for that 1904 photo, would be interesting to hear what it says if you find it.

Link to comment
  • RMweb Gold

I've not had the most stress-free of days, but I can honestly say this has put a smile on my face. Quite wonderful.

Link to comment

Well done Mikkel - particularly the last line!  My laugh was picked up by SWMBO who has just been enlightened as to the 'Wright Mariller Locking Mechanism' & where the idea came from....


Regs


Ian

Link to comment
  • RMweb Gold

Hi Al and Ian, thanks, I searched Google to find out if there was a particular word for a clasp on a corset. Afterwards I realized that my search history won't look very good if my family comes across it! :-)


In case anyone is interested, here are a few other models of medium and small GWR cattle wagons I've come across on RMweb (there may well be others of course). It's tempting to have a go at kitbashing a W3.


Ian's 3D printed W2 in 2mm: http://www.rmweb.co.uk/community/index.php?/gallery/image/45132-w2-complete-non-brake-side/

Pete's W3 in 7mm: http://www.rmweb.co.uk/community/index.php?/topic/56859-gwr-w3-cattle-wagon/

Gingerbread's W3 in 2mm: http://www.rmweb.co.uk/community/index.php?/blog/748/entry-8179-cattle-train-gwr-2mm-fs/

Dave's W3 in 7mm: http://www.rmweb.co.uk/community/index.php?/blog/1131/entry-9715-cattle-trucks-revisited/

Link to comment
  • RMweb Gold

Can you undo the Wright-Marillier locking mechanism with one hand out of interest?

Link to comment

I think the reference both Nick and Ian are scrambling for looking for is also in Goods Wagons (1998) p.43 which says:

"The roofs of some vans with wooden bodies were iron, characterised by bands across the top of the wagon at the joins in the plates."

Question for the knowledgeable bods - might there have been a change in the roof construction between Lots; some canvas-covered planks without bands and others with banded iron plates? Nice van BTW  Mikkel - I like the grey/off-white/cream colouration of the lime which suits the scale. Were screw couplings fitted to avoid brained and pur

Link to comment

Mikkel / Buffalo,


Managed to locate the image I was looking for.  It is of Bath Goods Shed on page 350 of "A Pictorial Record of Great Western Architecture" by Adrian Vaughan.

Bath Goods Shed


It shows the GW occupying the top 3 planks of the available end, on the plank immediately below G is LARGE, and on the plank below that the number (xx921).  Immediately below the W is the tonnage (8 Tons), and below that is the tare weight I think.  As for the wagon itself, it would seem to have a one side lever brake, and open slats between the bottom two deep planks on the end for dispersal of the lime wash.


Apologies for the quality of the image, I do not have a scanner so took a photo of the book.


Hope this helps,


Ian

Link to comment

Nice pic, Ian. I think it confirms that the G and the W on the end should be somewhat closer to each side than depicted by Mikkel.


On the limewash, I like the way it has been toned down in colour terms, but it does seem to be that where a wagon is in regular use, the limewash appears to be very obvious in application, i.e. it is not the same as a weathering 'mist'.

Link to comment

Nice pic, Ian. I think it confirms that the G and the W on the end should be somewhat closer to each side than depicted by Mikkel.


I think that Mikkel's positioning of the G and W is fine.  Closer inspection of the Large version, shows that the diagonal framing extends all the way to the framing below the roof line.  However, on the Medium wagon, the diagonals converge half way up the end.  Effectively there is more room on the Medium wagon for the lettering. 


Ian

Link to comment
  • RMweb Premium

Brilliant as usual. There's no flys on you and certainly no fly spoiled the ointment during construction. However can't say the same for Mr Marillier!

Link to comment
  • RMweb Gold

Not sure if the lock can be undone with one hand (I laughed out loud at that!). Incidentally, as I understand it the trick was that the lock could only be undone by opening the top of the doors, which meant any attempts to tamper with it would have been visible to station staff. 


Good point BJ about the screw couplings, that does seem a plausible reason. I must admit I'm a bit confused about the roof straps, so will leave them on while looking for more evidence.


Thanks again Ian for that wonderful photo! Apart from the mex there is a lot of atmopshere in it! Miss P, I agree that on the large vans the letters should be more towards the sides, but as Ian says there is more room on the medium type. The kit instructions indicate the middle position, and I was hoping they might be basing it on a photo (well, hope springs eternal!).


Mike, we've had so many of those flies this summer that I've had to take extra precautions that they didn't get stuck in wet primer on wagons! This one was just very sluggish though, the type that doesn't move until you grab it by the wings!

Link to comment

Thanks for finding the photo, Ian. As it happens, I still had a bookmark in that page from when we discussed the Newbury goods shed. As expected, I think it confirms that my lettering is the wrong way round. I'll just have to claim that it was painted like that in the livery trials and never corrected, at least until I get around to fixing it.


Nick

Link to comment

I too laughed out loud at your account of Mrs. Marillier's corset being the inspiration, and at the "one-hand" query.


Your modelling and research leaves me in despair of my puny efforts. A superb model, and a well constructed master-class. Thank you!


I really wanted to click several of the "comment" icons!

Link to comment
  • RMweb Gold

Thanks Don, but your modelling is definetely not puny efforts! I really enjoyed your Hockley Goods - any plans for something similar?

Link to comment
  • RMweb Gold

Hello William.


To my knowledge they are now only available directly from the following address (found at the supplier.txt website which is well maintained).


ABS Models
(Adrian Swain)
39 Napier Road
Hamworthy
Poole
Dorset
BH15 4JX
tel: 01202 672 891


Please note that the kit I had was labelled as "Fourmost Models" manufactured by ABS. I am not sure what the business relationship was there, but I assume ABS still have it available (I bought mine 3-4 years ago when ABS was available from the now defunct Keykits website).


I hope people will correct me if my info is out of date!

Link to comment

Splendid model and accompanying story!  I think your fly is what we call the Marmalade Fly in England (Episyrphus balteatus).  You probably know the photo of cattle wagons at Leamington in 1904 livery : http://www.warwickshirerailways.com/gwr/gwrls237c.htm


They are not the outside-framed type but the layout of the end lettering looks the same as in the Bath photo.  The lime is a lot more prominent than on your model;  remember, they did things differently from in the 21st century!

Link to comment

Create an account or sign in to comment

You need to be a member in order to leave a comment

Create an account

Sign up for a new account in our community. It's easy!

Register a new account

Sign in

Already have an account? Sign in here.

Sign In Now

×
×
  • Create New...