Jump to content
 

GWR 1854 Saddle Tank (2)


Mikkel

4,217 views

29648484144_8491cccc30_o.jpg

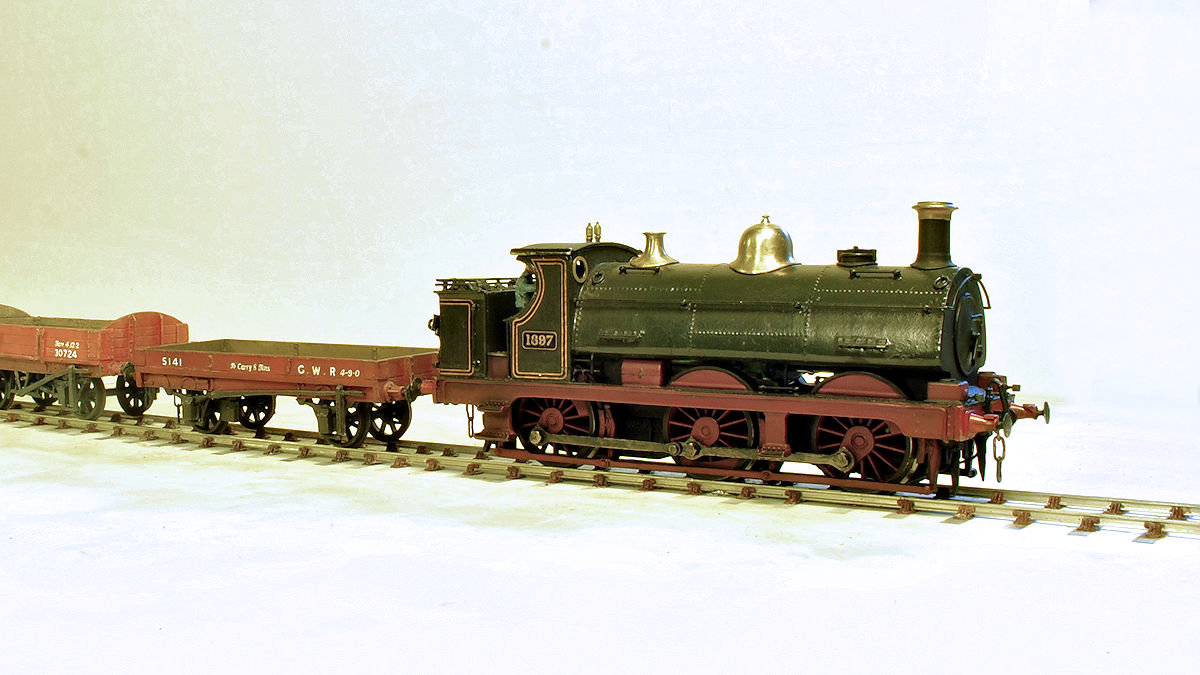
My GWR 1854 ST is now done. To recap, this is a much modified Finecast body on a Bachmann chassis.


30193702091_563b0f1485_o.jpg

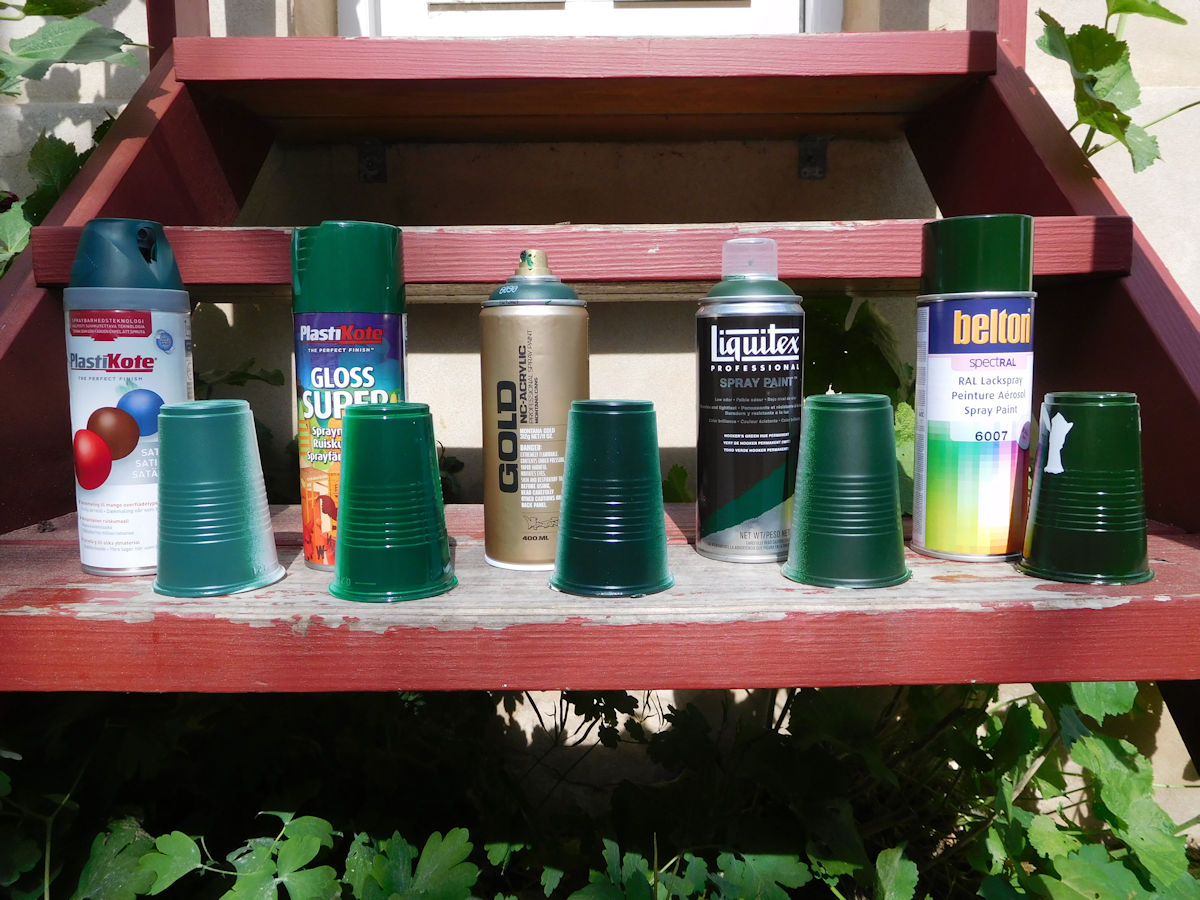
My original plan was to find an acrylic spray paint that gave a suitable representation of the pre-1928 green. When that failed, I was recommended the Belton bottle green which has the RAL code used for landrover green. However, while this and some of the others looked fine outside in the sun, they all looked wrong under my layout lights.


29648939683_a5b5d4b1c3_o.jpg

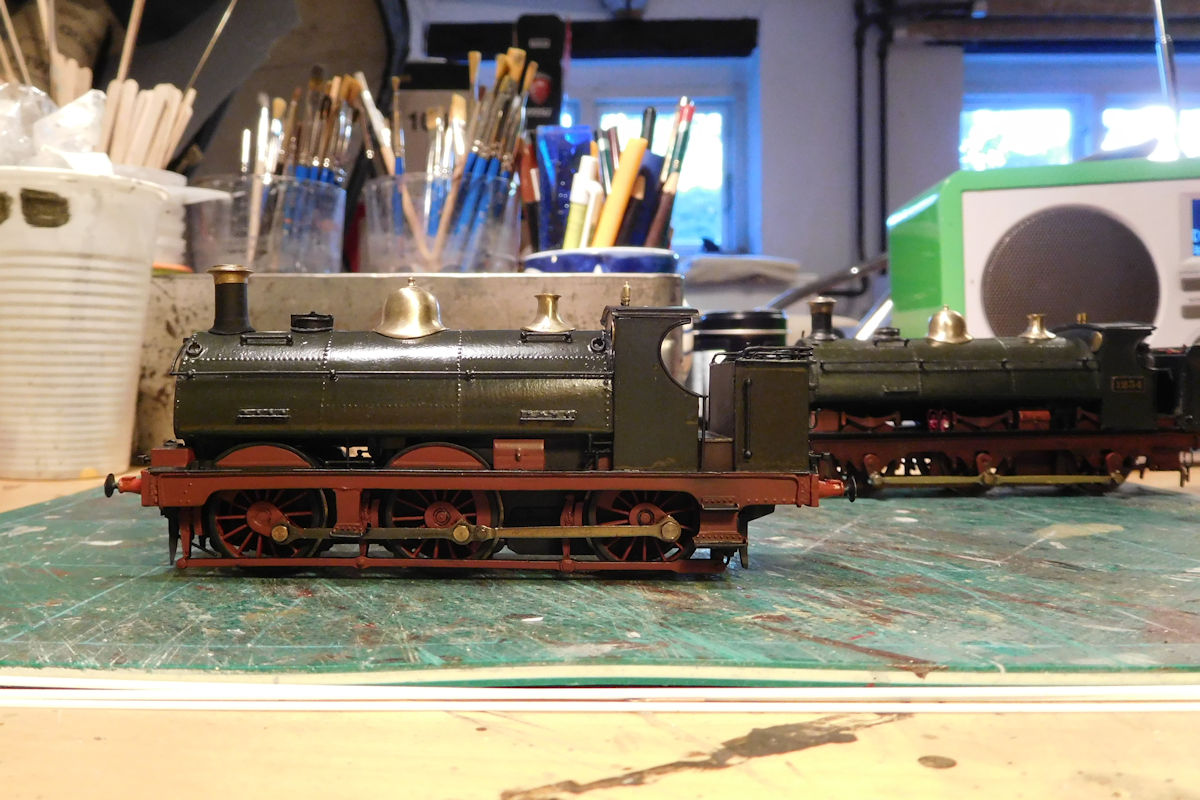
So in the end I reverted to good old brush painting. Not my best effort but I can live with it.


29648941433_6f14907759_o.jpg

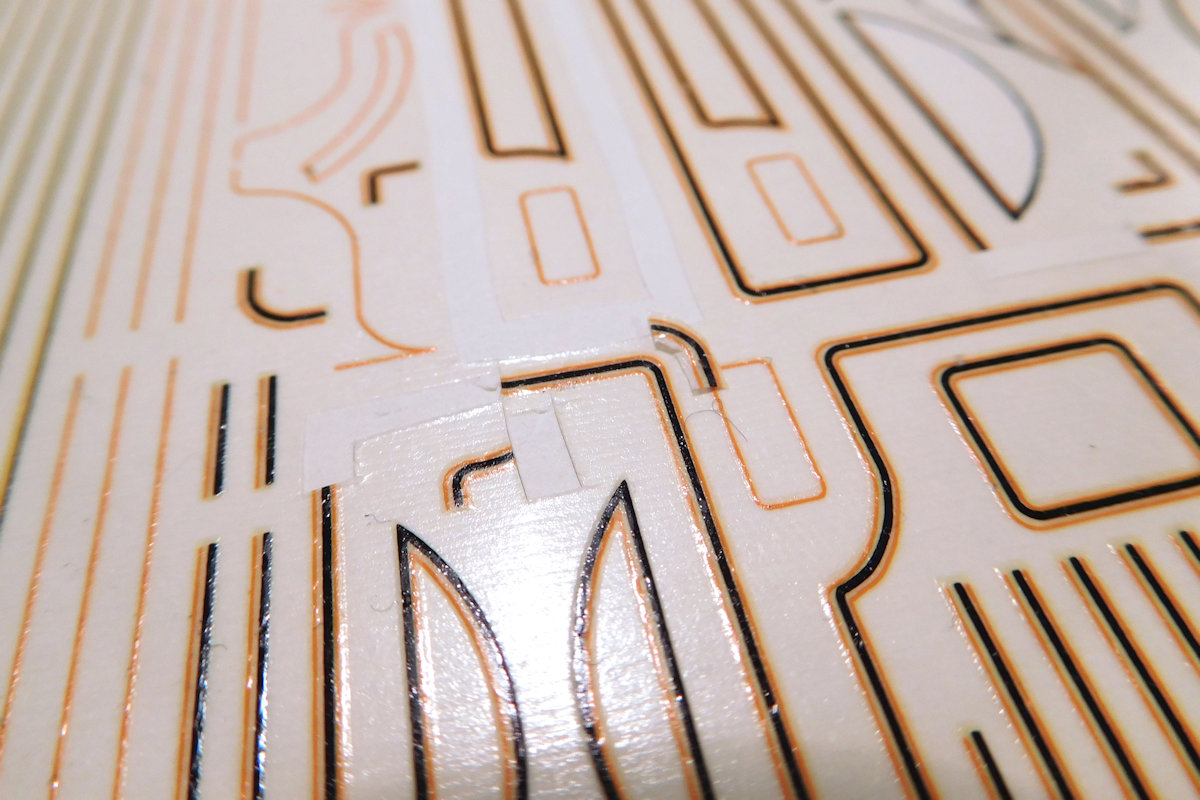
Lining is HMRS Pressfix. I never use the preprinted shapes as they rarely fit. Instead I cut out individual bits and piece them together.


30244187936_1e091e1885_o.jpg

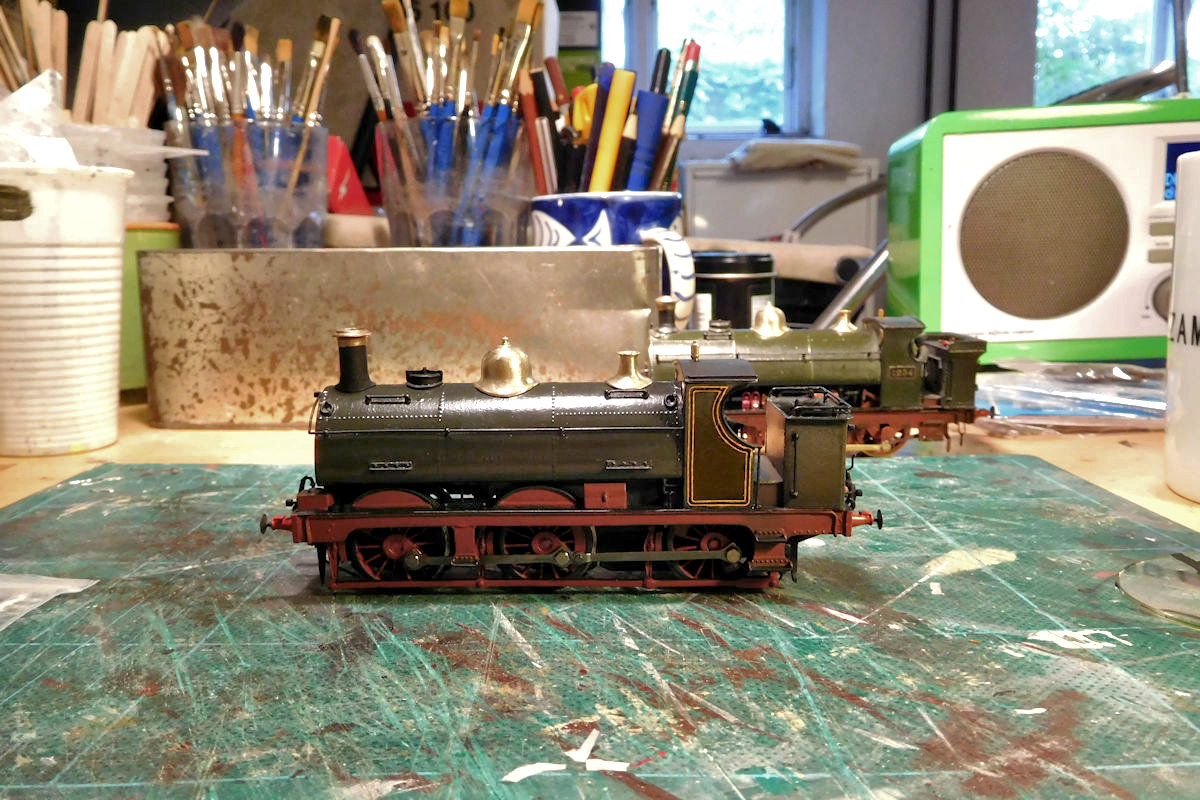
I know some people do not like Pressfix. Personally I feel that it gives good flexibility and leaves no traces of film.


30193703221_2af005de62_o.jpg

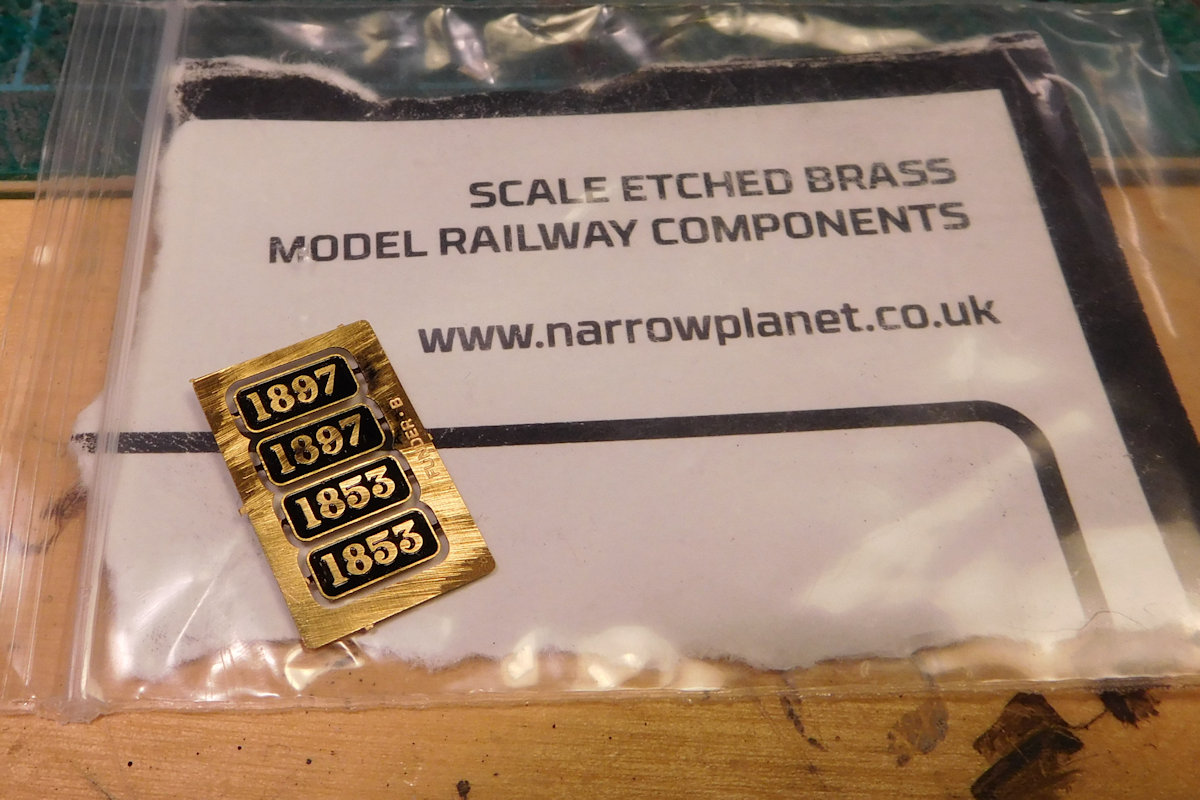
The number plates are from Narrow Planet. You enter the number you need on their website and receive the plates pre-painted. We have it easy these days. No. 1853 is for a future model of an 1813 class.


30200833051_18f41dbdba_o.jpg

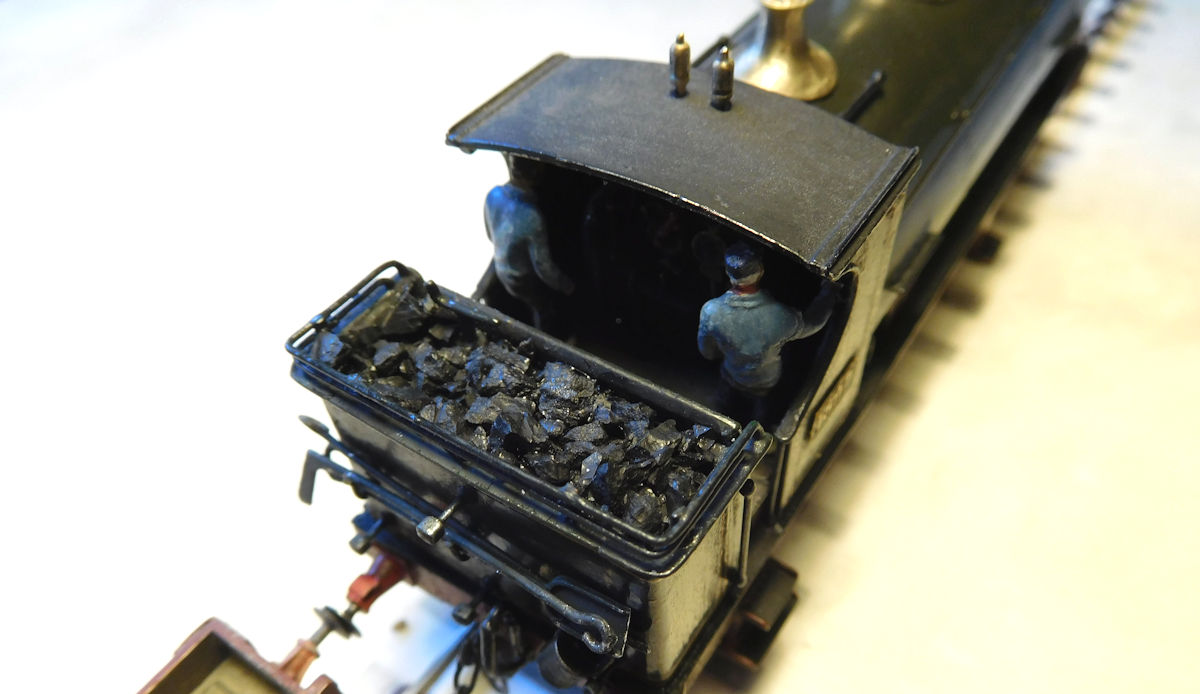
I was going to fit a cab sheet, but on the photos I have of 1854s none actually have a cab sheet, so unless further evidence turns up I’ll leave it off. The fire irons are the Springside set for tank locos.


29654918684_96307a4f07_o.jpg

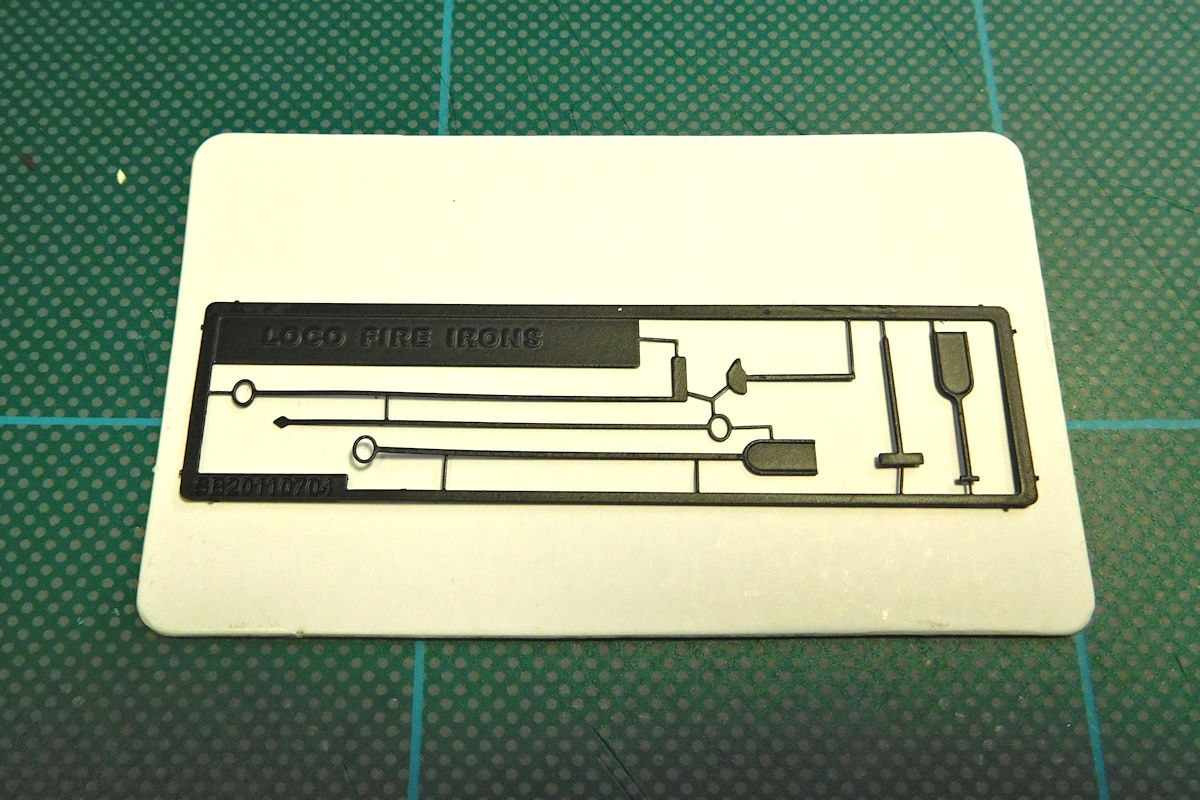
Incidentally, I saw this nice fire irons fret by DJM on Mark’s blog, and ordered some from Kernow. They turned out to be a bit too long for this particular loco, but will find use on my 3232 class.


30279240955_b24f2b3f59_o.jpg

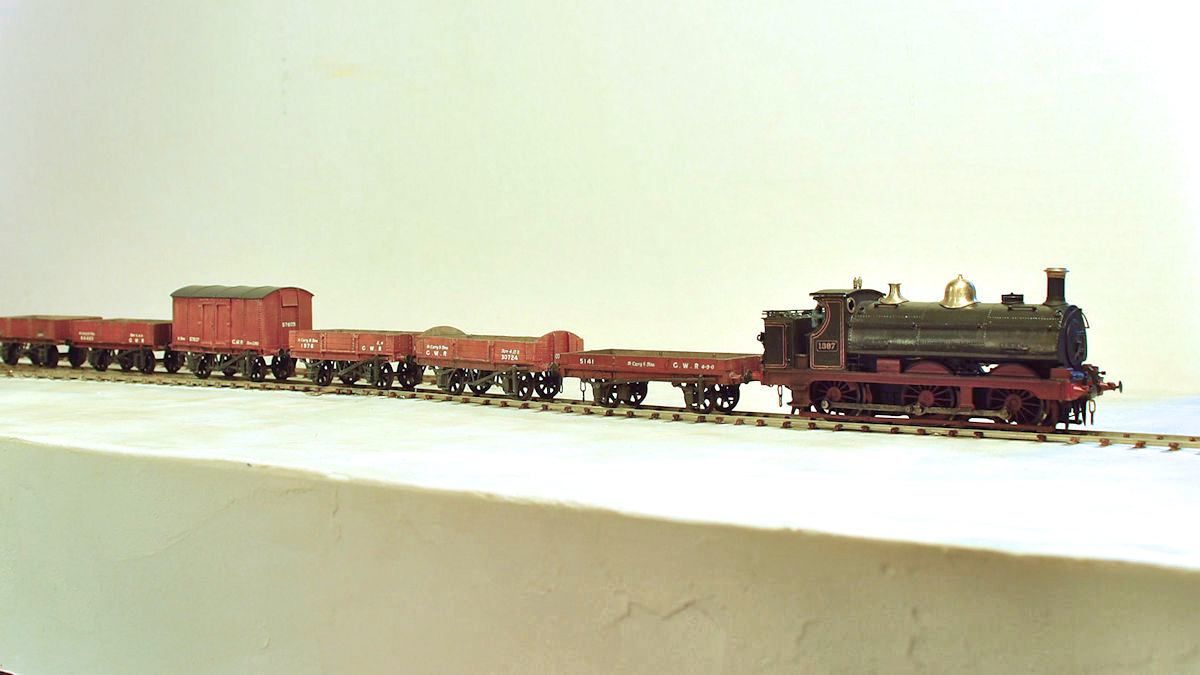
So here she is messing about on the new layout. In my defence, there is progress at the other end of it!

  • Like 24

22 Comments


Recommended Comments

  • RMweb Gold

I couldn't find those fire irons Mikkel, can I have a link please. Superb modelling btw.

Link to comment
  • RMweb Gold

Excellent Mikkel!  I think the green looks spot on.  Did you use Railmatch enamel or is it from the Precision range?  I use a cocktail of the two brands on my 7mm stock, the Precision is a little dark for my taste but it covers really well.


The red wagons really compliment the Indian red frames on the loco, a lovely assortment of freight stock. I particularly like the curved ended wagon, I need to find a 7mm version of one of those! :-)


Looking forward to seeing No 1853


Best wishes


Dave

Link to comment

A lovely looking loco now she is finished Mikkel, especially with those red wagons behind.


It just makes me realise how much work I still have ahead of me yet, ah well I'll get there eventually.


It sounds as if you need to invest in an airbrush too, it does make life a lot easier and I remember my first one, a cheap Humbrol one powered by a compressor from an old Dentists drill, things have moved on a bit since though.


Jim

Link to comment
  • RMweb Gold

A lovely piece of modelling Mikkel.  The finish on the loco has a nice patina and depth.  I wonder if there's a paint in the Revell or Tamiya range that would work for pre-1928 GWR green in a spray can?


Stephen at NP always provides an excellent service and the plates are good value.  My Dukedog is to receive a set eventually.


Agree with Dave about the red wagons complementing the loco nicely.


You've reminded me to order some more DJM fire irons as well. 


Cheers,


Mark

Link to comment
  • RMweb Gold

Fine work as ever, Mikkel - and makes me hanker after a similar saddle tank.


Coincidentally I've been fitting some Narrow Planet plates myself tonight. As you say, we really do have it easy.

Link to comment
  • RMweb Gold

I couldn't find those fire irons Mikkel, can I have a link please. Superb modelling btw.


Hi Rob, they are here: http://www.kernowmodelrailcentre.com/p/35731/K9001-DJ-Models-Fire-Iron-Accessory-Pack


Beware that there is a 2mm Dapol version too, which many traders have. Kernow seem to be the only ones that have the 4mm one.


Excellent Mikkel!  I think the green looks spot on.  Did you use Railmatch enamel or is it from the Precision range?  I use a cocktail of the two brands on my 7mm stock, the Precision is a little dark for my taste but it covers really well.


The red wagons really compliment the Indian red frames on the loco, a lovely assortment of freight stock. I particularly like the curved ended wagon, I need to find a 7mm version of one of those! :-)


Looking forward to seeing No 1853


Best wishes


Dave


Thanks Dave, I mixed up my own green from standard colours - the same as on my 517 class. I'm glad you like the shade of green. The whole issue of how different kinds of interior lighting affects the look of model liveries isn't much discussed. Maybe I should do some experiments.


The round ended 3-plankers are also one of my favourites. I'll be interested to know if there is a 7mm version. Another option could be to build new ends for the Coopercraft 3-planker kit. You have built one of those, so I take it that kit is acceptable?


A lovely looking loco now she is finished Mikkel, especially with those red wagons behind.


It just makes me realise how much work I still have ahead of me yet, ah well I'll get there eventually.


It sounds as if you need to invest in an airbrush too, it does make life a lot easier and I remember my first one, a cheap Humbrol one powered by a compressor from an old Dentists drill, things have moved on a bit since though.


Jim


Thanks Jim, yes I am definetely warming to the idea of an airbrush. Spray cans have helped me get some experience in spraying but I am realizing their limitations. A couple of those pictured above had truly awful nozzles (especially the "Gold" type which seems to be all the rage among grafitti artists).


I look forward to seeing trains running on Hemyock, but meanwhile the landscaping you are doing is extraordinary!

Link to comment
  • RMweb Gold

A lovely piece of modelling Mikkel.  The finish on the loco has a nice patina and depth.  I wonder if there's a paint in the Revell or Tamiya range that would work for pre-1928 GWR green in a spray can?


Stephen at NP always provides an excellent service and the plates are good value.  My Dukedog is to receive a set eventually.


Agree with Dave about the red wagons complementing the loco nicely.


You've reminded me to order some more DJM fire irons as well. 


Cheers,


Mark


Hi Mark, I did have a look at the Revell and Tamiya ranges and a couple of the Tamiya greens were on my list. But then I lost my patience :-)


Glad you like the red wagons. Seeing them together with the loco and its red wheels etc made me wonder whether I should surrender to logic and paint the "underframes" of my wagons red too...


Fine work as ever, Mikkel - and makes me hanker after a similar saddle tank.


Coincidentally I've been fitting some Narrow Planet plates myself tonight. As you say, we really do have it easy.


Hi Al, thanks very much. A saddle tank would look great on your layout, crossing the river on the summer module. Or a Welsh one to go with your Rhymney vans!

Link to comment

Hard to imagine the time when shunting engines looked as smart as this.  That last photo made me think it might have strayed to 'Little Point' :)

Link to comment
  • RMweb Gold

excellent work as always


Nick


Thanks Nick, it took a while but was an enjoyable project. I'm sure Bachmann will bring one out in RTR now!


Hard to imagine the time when shunting engines looked as smart as this.  That last photo made me think it might have strayed to 'Little Point' :)


Ha, yes I see what you mean Mike. Little Point is one of my big favourites on here, but even so I really need to get the ground cover coloured... 

Link to comment

Excellent work. I think to give them some personality they need some weathering. Martin Welch has discribed very good in his book "the Art of Weathering".

Link to comment
  • RMweb Gold

Hi Job. Ah yes, I am a bit ambivalent about weathering my stock. The locos I think were mostly very clean during my era.


For the goods stock the picture is a little less clear. I do actually weather the wagons, but only with a bit of light dry-brushing, followed by light powder from above, and some darker grey from below.  I also try to use slightly different shades of red in the first place.


I could go further, especially if the theory is correct that GWR red weathered to grey - but I am reluctant to take that extra step as long as our knowledge on that point is limited.

Link to comment
  • RMweb Gold

Thanks Duncan. In locomotive terms the next project will be either 2021 ST that we've discussed - if I can see any way forward with it - or the 1813 T.

Link to comment
  • RMweb Gold

Nearly wrote this the last time I was here but did not, and it may be completely spurious.  I read somewhere, and it must have been pre BR who never cleaned anything, that express locos were cleaned daily, secondary passenger, twice a week, and goods locos once a week.  That could have been relating to between the wars when wages were relatively higher though.  If however, a loco only had one driver, (is there a thread on that or have I read about how the practise was discontinued elsewhere?) then they would have taken a pride in keeping it clean.

Link to comment
  • RMweb Gold

Hi Chris, that's interesting, hadn't heard about those cleaning schedules before and how they differ for loco classes. This is where my ignorance comes in though, as I don't have a clear picture of how a goods loco looks when it hasn't been cleaned for a week?


On the drivers, I know the LBSCR had dedicated footplate staff, but I can't actually remember what the GWR did there. I think they stopped that practice fairly early?

Link to comment
  • RMweb Gold

I read an article, I think, unless it was in a book, about the practise of drivers having their own engine, but I cannot remember when I read it or what in.  I have had a quick look in my magazines that I have and cannot find it.  However, it was dying out if not almost completely gone by 1905, so maybe not important.


A loco that has not been cleaned for a week, I would think a light to medium weathering, just not pristine.  Then there are stories of goods trains being held in a lay by siding all day, not from the GWR of course, where the only thing the crew had to do was clean their engine.

Link to comment
  • RMweb Gold

Thanks for that info Chris. As my layouts are (normally!) set somewhere between 1900-1914, the info on drivers having their own engines is certainly relevant for me.


Light to medium weathering sounds good to me. I will experiment with some powders.

Link to comment

Where did you get the curved end wagons kits or are they scratch built ? What does your brake van look like on that train ?

Link to comment
  • RMweb Gold

Hi Brian, the curved end wagon is a three-planker from one of David Geen's whitemetal kits. I described the build here:

http://www.rmweb.co.uk/community/index.php/blog/75/entry-6024-3-plank-open-in-gwr-red/


His website hasn't been touched for ages but he does still respond to mail order. There's a new e-mail for him here: http://www.rmweb.co.uk/community/index.php?/topic/96826-david-geen-kits-positive-announcement-of-future-kits/


The brake van in my case would be this one (scratchbuilt second-hand item, but there was a kit by D&S once, hard to get but sometimes appears on ebay):


P3236149.jpg


It seems that GWR brake vans were painted grey before the wagons. Atkins, Beard & Tourrett state: "a light red colour had been adopted for the wagon stock with white lettering, but the goods brakes were grey." 

Link to comment
  • RMweb Gold

Hi, the primer is grey Plastikote, sprayed on. The paint is Vallejo acrylic paint, mixed fairly thin with water and applied in 4 thin layers applied with a broad flat brush in careful downward strokes. The first couple of layers look a bit messy but the next two build up the colour. For the varnish I tried something new (for me) this time, namely mixing a bit of the paint colour into varnish. Maybe that's what has given the sheen, which I agree looks fairly nice.


I hope that makes sense and is of use. I'm not entirely happy with the finish though, normally I can get a completely smooth finish, but in this case a few of the brush strokes can be seen under certain lighting conditions. I was a bit impatient if I remember correctly. Still, it's so hard to see that I'll leave it as it is.

Link to comment

Create an account or sign in to comment

You need to be a member in order to leave a comment

Create an account

Sign up for a new account in our community. It's easy!

Register a new account

Sign in

Already have an account? Sign in here.

Sign In Now

×
×
  • Create New...