

Musing over La Meuse... Part 2
Entry posted by James Hilton
1,125 views
Well I don't seem to have posted on here for a very long time indeed and several large scale projects have come and gone in the last 10 months. On top of those (all detailed on my G-scale blog: http://ejklr.blogspot.co.uk) I have also been working on a variety of 009 kits (most featured on my 4mm scale blog: http://paxton-road.blogspot.co.uk)...
However for those of you regular readers of my infrequent blog who have not seen what I've been up to, and inspired a touch by Jon's magnus opus entry on his P4 Class 47 I thought I'd try and summarise progress on my Neil Sayer La Meuse kit.
(My first entry is here: http://www.rmweb.co.uk/community/index.php?/blog/10/entry-10281-musing-over-la-meuse/)
I've mentioned milestones in my modelling in the past, but at the start of this project I honestly felt like I'd surpassed them all and conquered something that has put me off kit building steam engines for a very long time... This was back in October...
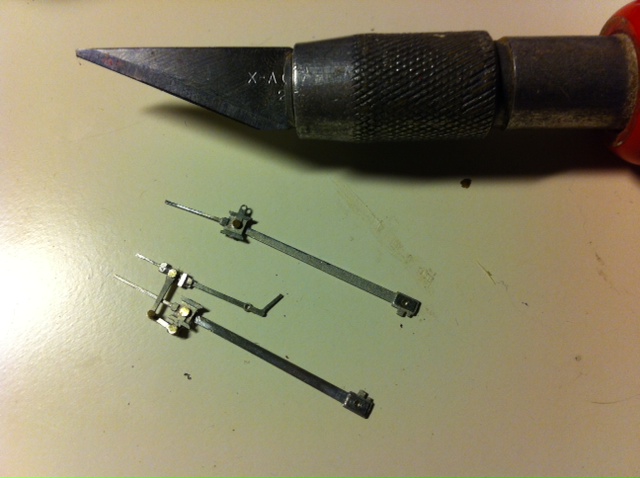
I assembled the connecting and piston rod, cut out, cleaned up, reamed out, soldered up and pinned together the valve gear for one side of La Meuse. My word it's a test of my eye sight and incredible fiddly, but it's worth it, it looks superb! I can't believe the machines or workers in China/Taiwan who put this stuff together for a living, they must have some incredibly strong magnifiers, patience of a saint and good work tools.
However, if I'm honest my progress was slowed by the lovely but daunting valve gear. By February I had nearly finished one side, with just the link that connects it all to the chassis to fit...
Then came the moment of truth, before I fitted the final pin in the valve gear on the first completed side I wanted to test out the chassis. At this stage the second side was not fitted. Apart from needing a drop of retainer on the return crank pin it all worked smoothly...

It wasn't then until the end of April when the second side of valve gear was finished off. This marked the end of hot sweats, blue air and burnt fingers...

After all the trials and tribulations of the first side (where I had to re-do assembly a few times due to my own mistakes) I actually finished all the second side assembly in one go with only one tricky moment when I soldered the reverse link solid!
And to prove you don't need any special tools my selection of snips, pliers, tweezers etc...


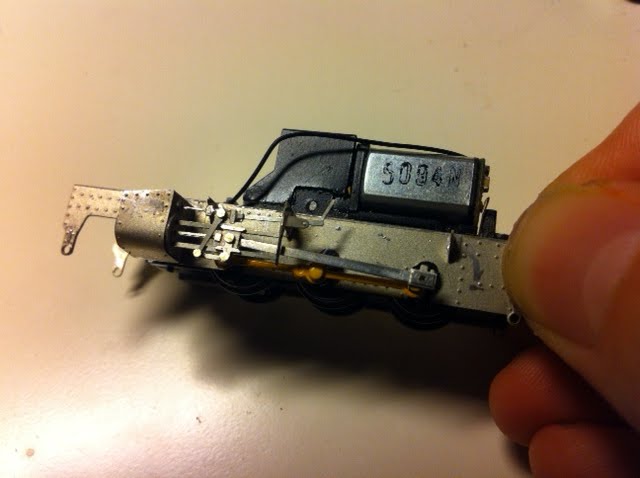
I was worried about how the body would go together - the etched parts seemed very fine, much smaller and neater then kits I'd assembled in the past. However, the thought of seeing the potential of the finished model was enough encouragement to start so I assembled the footplate, buffer beams and got my first view of the finished models proportions...

The model yet again proved to assemble very easily, it was great to add the boiler and side tank weights and do some running too. At this stage I am still not 100% happy with the performance of the Graham Farish chassis, I need a rolling road so I can get it run in properly. It runs a lot better backwards than forwards, which suggests a gear issue rather than the assembled valve gear.
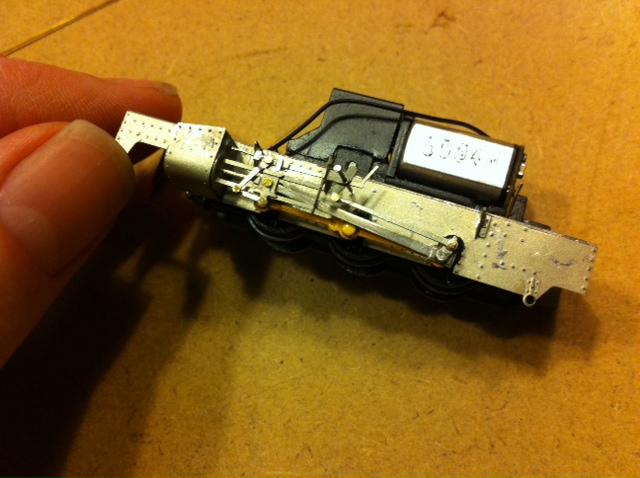
The body is detailed by adding half etched thin sheets over the carcass previously assembled above. I was initially concerned about how to solder these together and did consider glue - however I took a few months off the project and started this again earlier in July. I used plenty of Carr's Green Flux and low melt (145degC) solder - carefully applying a touch along all the edges. The solder flowed into the join easily and only needed the smallest amount of tidying up...

At this stage, the model is beginning to look finished but there were still quite a few detailing bits to add to the cab before the etches were empty of parts however. So that brings us up to the present, and tonight despite spending the same amount of time again on the body it feels like there is less to show for the effort!

The rivets along the roof line have been added from half etched parts, and the window frames carefully fitted. I've also added the side tank weights and the tank foot steps.

I'll leave you with this side profile - a photos I find very exciting as it shows the lovely proportions of the prototype and with half a squint I can being to see the finished article emerging. Some people have asked how big the model is so I've posed it alongside a 50p piece, which goes to show how delicate the valve gear is on this model!

-
 9
9

2 Comments
Recommended Comments
Create an account or sign in to comment
You need to be a member in order to leave a comment
Create an account
Sign up for a new account in our community. It's easy!
Register a new accountSign in
Already have an account? Sign in here.
Sign In Now