Jump to content
 

GWR horse-drawn trolley


Mikkel

4,918 views

blog-0059966001391358834.jpgHere’s another horse-drawn vehicle for my goods depot, this time a scratchbuilt light trolley in the GWR’s “Birmingham” style. The model was built from styrene and bits in my spares box, with wheels bought in from Langley.


Drawings and photos suggest that there was a bewildering amount of detail variation within this basic type. I based my model on a drawing on page 241 of P. Kelley's "Great Western Road Vehicles", which was built in several lots. Another almost identical version can be seen on page 243 of the same volume. Various photos of the trolleys in action at Hockley can be seen here, although my particular version is closer to one depicted at Slough on page 38 of "GWR Goods Services" Part 2A.


Img_2610.jpg


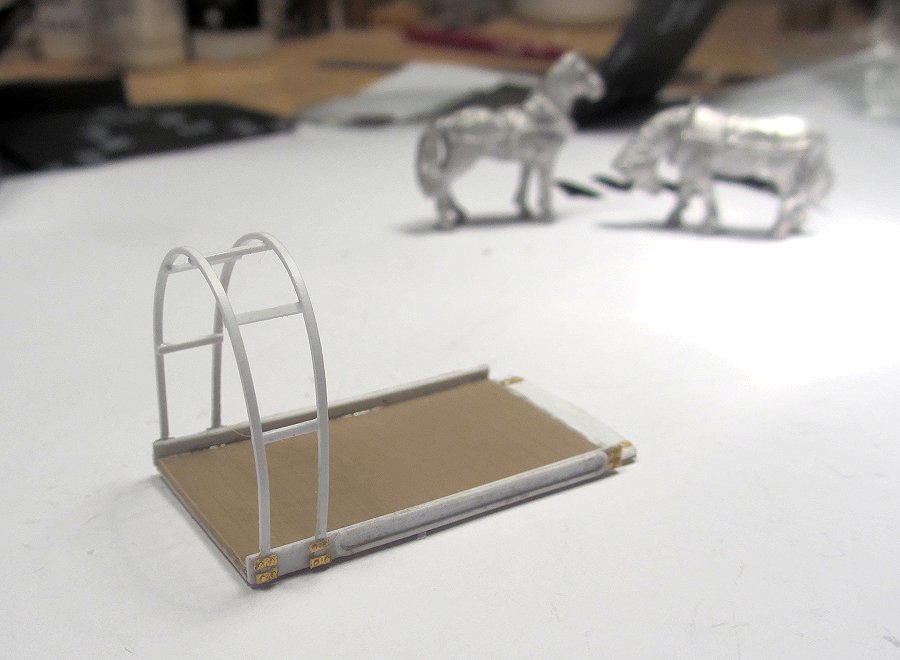
The vehicles had a protective canvas cover over the driver which could be extended backwards over the load in wet weather. The canvas was held by hoops over the seat, which – unlike many other goods delivery vehicles – seem to have been permanently fitted. In typical old-world fashion, these otherwise mundane vehicles had moulded panels along the sides. I fashioned the latter from strips of Evergreen - could've done with a Silhouette cutter there!


Img_2644.jpg


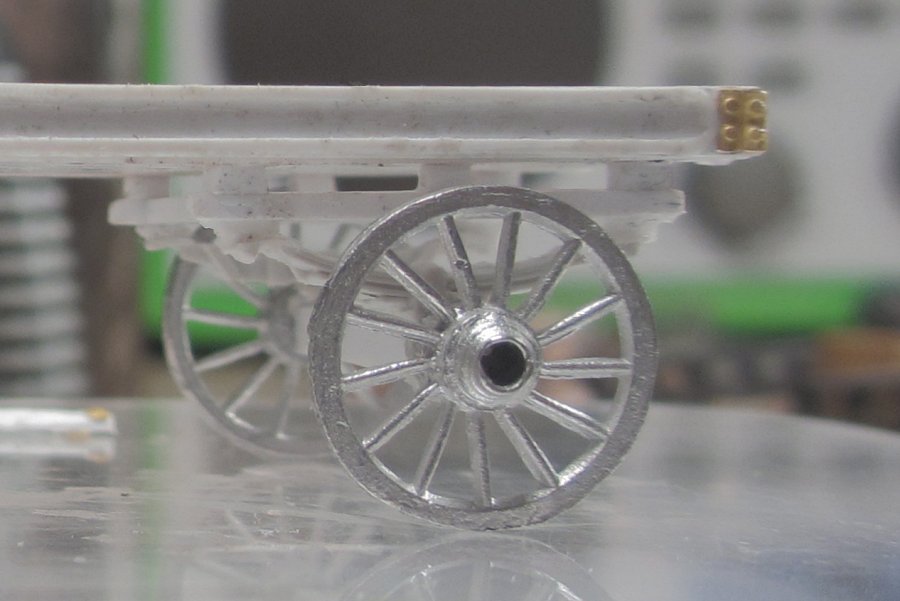
The wheels were a bit of a problem. The closest I could find were Langley’s 12mm wheels. These are 0.9 mm too small and have 11 spokes where they should have 12. In the end I compromised and used them. If I find better wheels I'll replace them. The springs are modified leftovers from Coopercraft wagon kits.


Img_2631.jpg


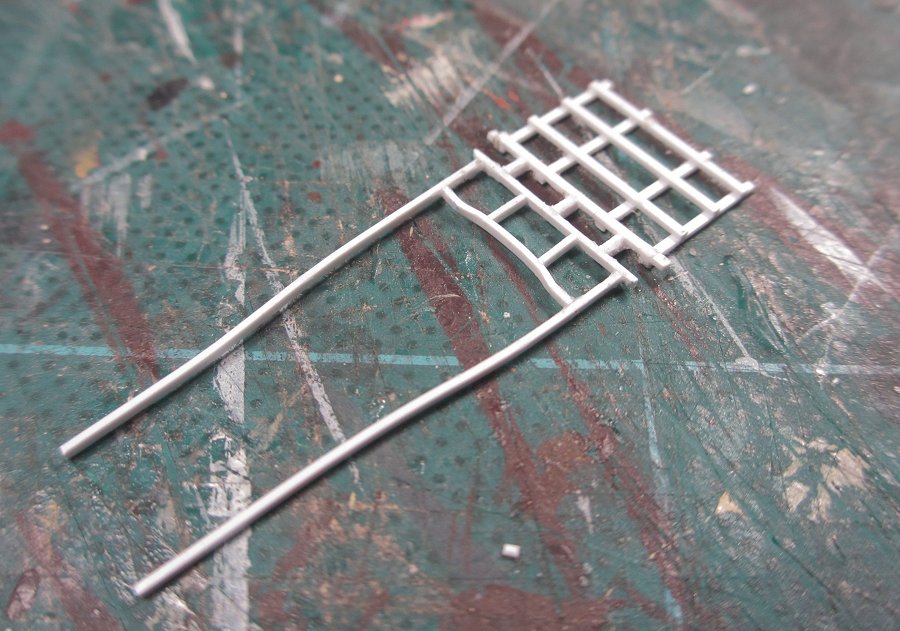
The fore carriage and shafts were a nice little puzzle to build. The drawing does not clearly show the type of shafts used. The GWR used several varieties, with designs becoming simpler over the years. To cut a long story short, I chose the graceful “curvy” style of the earlier types.


Img_2692.jpg


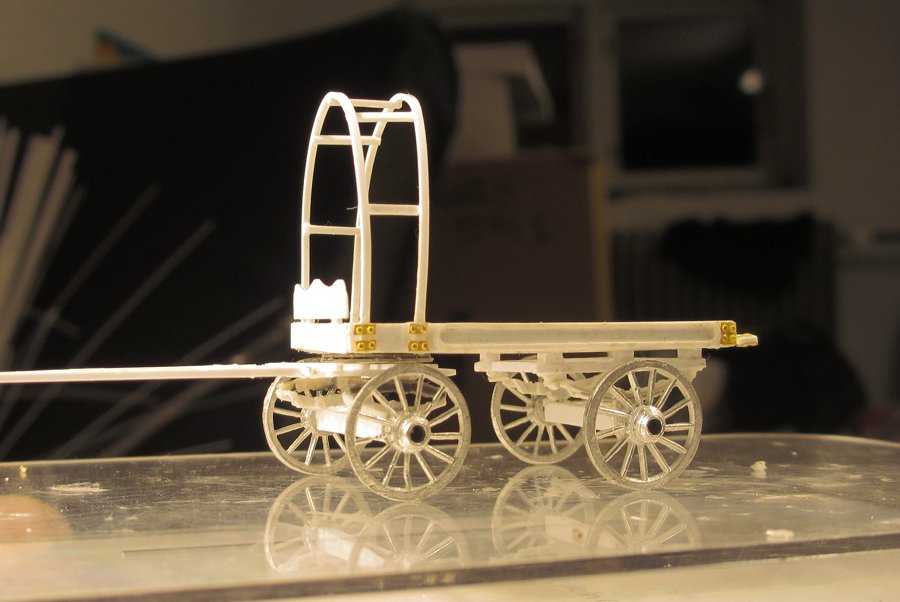
Main parts assembled and ready for painting.


Img_2710x.jpg


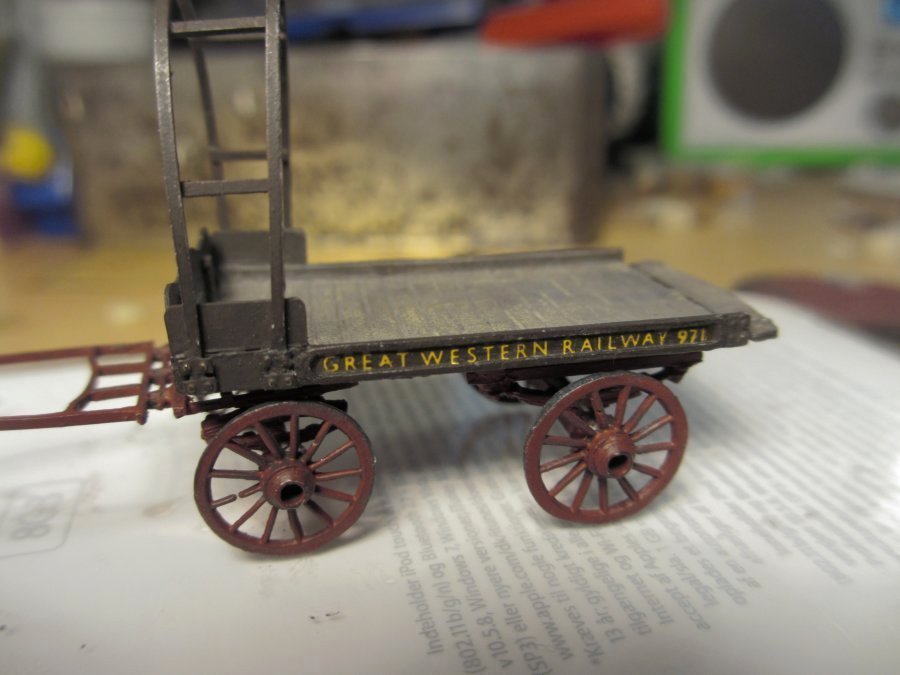
Lettering presented the usual problem when you need non-standard sizes. Photos of trolleys from the 1900s show some with serif lettering, some with sans serifs. Some have numbers at the front, others at the rear. I eventually used HMRS Hawksworth coach lettering (!), which is a compromise but not too far off for sans serif lettering. I've only just noticed the broken spoke - a fault in the casting it seems.


Img_2766.jpg


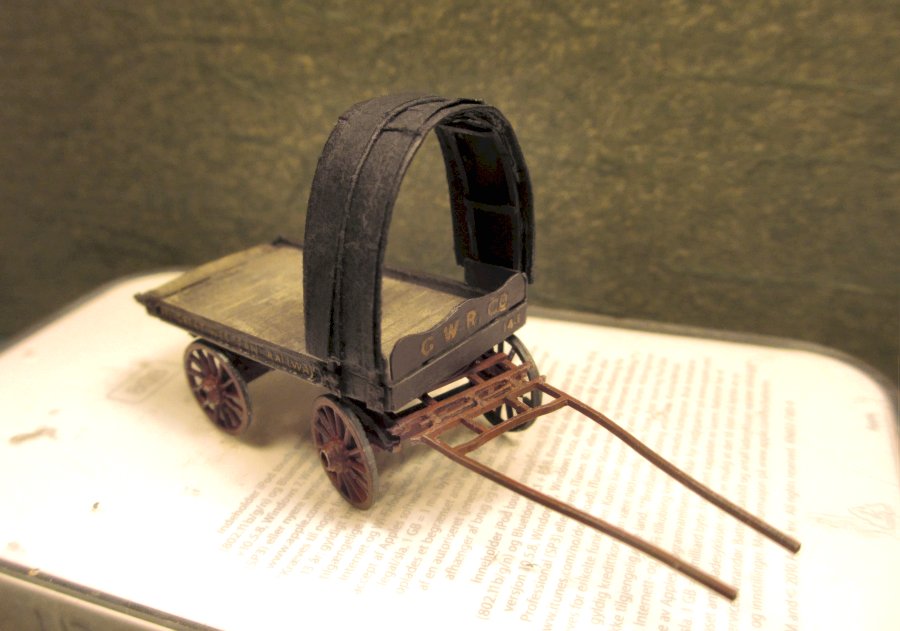
The weather sheet fitted. Again there was variety on the prototypes. On some vehicles the sheet extended all the way down over the sides, on others it stopped short above the deck. The sheet was fashioned from a wagon tarpaulin from the Smiths range, turned over to hide the lettering.


Img_2725.jpg


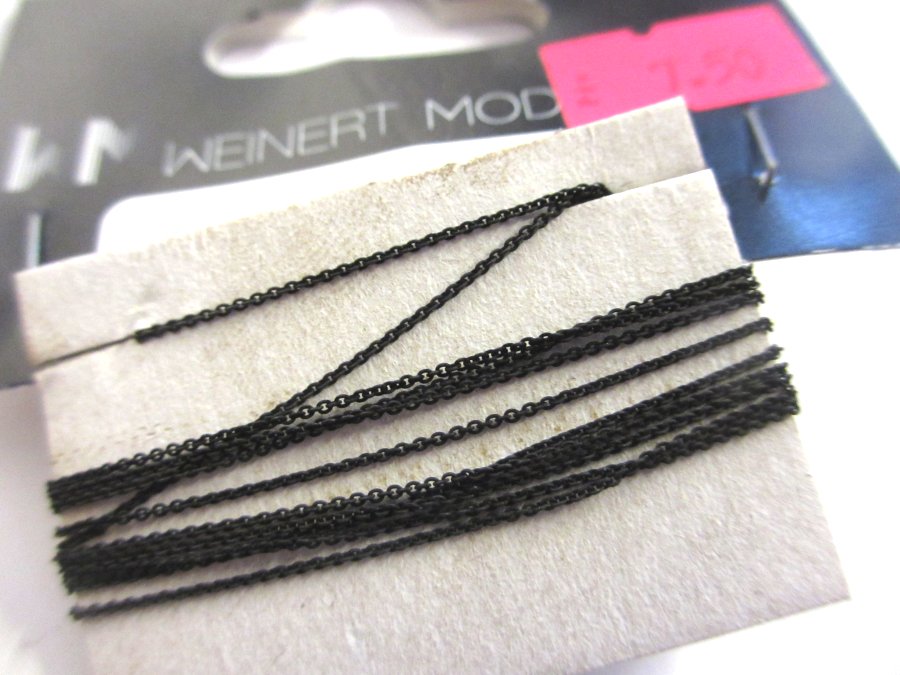
Final detailing included adding a few bits of this fine chain which I've only recently discovered. It is imported by Cambrian Models and has the great advantage of being pre-blackened. It is 33 links per inch, and can be obtained from Cambrian themselves or by internet order from H&A Models (I have no connection to either).


Img_2655.jpg


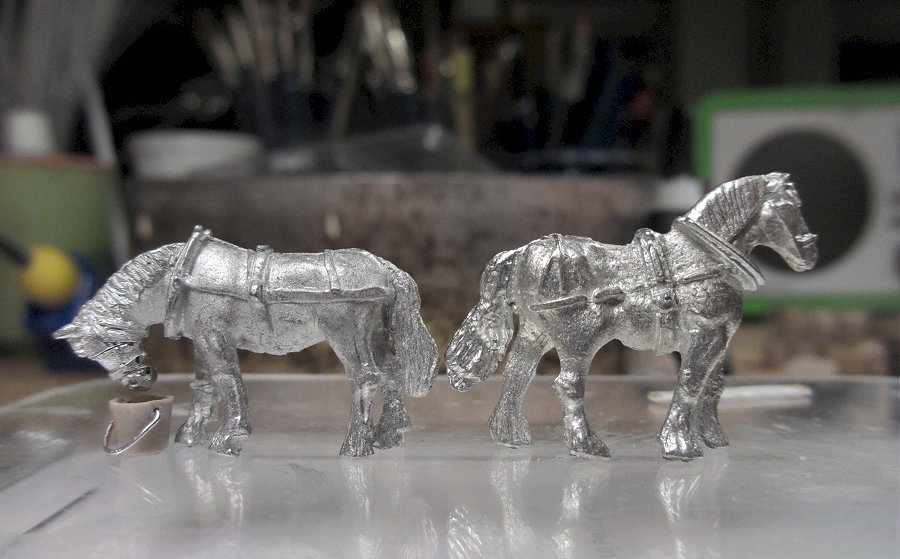
For horse power, I chose the recently introduced "feathered" Vanner from Dart, seen here on the left together with a mate from Shirescenes for comparison. As always with figures, I prefer relaxed/calm poses - and I liked the way the Vanner was bending its head down. The bucket was fashioned from bits in the spares box. Keeping draught horses in good shape was taken very seriously, and photos show them both feeding and drinking while waiting at goods depots (eg here).


Img_2752.jpg


So that's about it. It's been interesting to scratchbuild this vehicle and thereby learn about the design of these vehicles. Sometimes doing a small project like this can bring as much satisfaction (and challenge!) as a whole layout, I think.


Img_2751xx.jpg


For a couple of other scratchbuilt GWR horse-drawn vehicles, see Jerry Clifford's lovely little vehicles, and Beachcomber Bob's dray here on RMweb.

  • Like 13

54 Comments


Recommended Comments


  • RMweb Gold
Brilliant perhaps you should convert to N gauge and manufacture a few of these marvellous models and perhaps a few spares might end up on a layout quite close to me


Hi Paul, Ok then, when do you want them? At my speed, would 2025 be Ok? On a more serious note, I wonder if the components for a vehicle like this could be 3D printed for N/2mm?

Link to comment
  • RMweb Gold

I can't add much to what's already been said but it's a real credit to you.Your modelling skills are outstanding.

Thanks Rob, you're very kind but it really is more about putting in the time. And there are several compromises and shortcuts, like the wheels and lettering.

Link to comment
  • RMweb Gold
Lovely work Mikkel. I always look out for your posts. Inspirational.

Trevor.


Thanks Trevor, glad if there's something of use. I saw in another post you were planning to start a thread on something Western - sounds good and look forward to seeing it.

Link to comment
  • RMweb Gold

Great little model, but where is the driver's seat ? The GWR board looks to thin to sit on comfortably.

Link to comment

I'd like to show a photo but I can't seem to get good photos of the layout at the moment. Something to do with the lighting, I think. I have changed to energy-saving bulbs and they give too much contrast and strange colours in photos. Changing the white balance doesn't help much. Must sort that out.

Lighting for model photography is a subject in itself.


I have a couple of old150w halogen security lights that I use but they do get very hot!  I replaced them in their original function with 10w LEDs and, as these are getting much cheaper, I think they are the future for lighting model railways.  They emit negligible heat and provide a good bright white light - better than the compact fluorescent type.

Link to comment

I think that you have caught the style of the GWR wagon beautifully, and your construction notes are a lesson to us all.

I was about to comment on the lack of a seat too... Stubby beat me to it.! Although I doubt either of us could produce evidence of the actual design / shape, and whether there were two seats to accommodate a mate.

On the subject of wheels, try contacting Etched Pixels of this parish, he seemed unfazed by my request for a sheave, and your requirement is not a million miles from mine! Alternatively try Dazzler Fan. My bet would be that 3D printed wheels would be cheaper than Langley's cast ones. (See PM)

Link to comment
  • RMweb Premium

Hi Mikkel,


lovely model and another great piece of detailed and well researched workmanship.  Think the way the horse is feeding from the bucket is a touch of genius.  Just brings the piece immediately to life.  Know exactly what you mean about the satisfaction in making the small things sometimes - it's a great hobby for that.


Great trip down memory lane for us.  My wife's family originally came from Brookfield Street which was just South of the Hockley Goods Yard - overlooking the bottom canal basin arm.  They managed to 'get out' to the leafy suburbs of North Birmingham in the 60's.  Her Dad often talked about the frantic activity around the area in the pre-war years when he had been a child.  Probably very exciting place to grow up in.  It was a real transport hub - road, rail and canal.  Maybe a future canal basin for Farthing!!


I too started off working life in Hockley in the Jewelry trade in the late 70's.  Ironically no money in it though (apprentices were often poorly paid) so I left at 21 and ended up in construction.  I'd often have my lunch in the big Graveyard which was just East of where the Yard was.  A fascinating place (as Graveyards go!) because it was where all the Birmingham 19th C 'big wigs' ended up with their fine monuments etc.  


Always a delight to read your blogs - very informative and always so much stuff in there apart from the great modeling.


Mike

Link to comment
  • RMweb Gold

Great little model, but where is the driver's seat ? The GWR board looks to thin to sit on comfortably.


Hi Stubby, you are spot on. I can't for the life of me understand how drivers were seated on these vehicles. The drawing does not indicate any seat. I've pored over all the photos I have found but none of them show anything clearly - or any seated drivers. Indeed most photos seem to show nothing in particular behind the board!


That said, on some photos there seems to be a shadow to one side behind the board, as if there was a box seat there. I seem to remember reading somewhere that carters had a personal chest or box, so maybe that is it?


It's also possible they sat on the board, and I may have modelled it too thin - but still it doesn't seem to be a very comfortable position?


Some photos of other types of horse-drawn vehicles with similar boards at the front show carters standing (eg here), but would that really have been the expected way to deal with it? 

Link to comment
  • RMweb Gold

Lighting for model photography is a subject in itself.


I have a couple of old150w halogen security lights that I use but they do get very hot!  I replaced them in their original function with 10w LEDs and, as these are getting much cheaper, I think they are the future for lighting model railways.  They emit negligible heat and provide a good bright white light - better than the compact fluorescent type.


Hi Mike, that's interesting. But don't the LEDs give a very concentrated light? I tried some but they had an almost spotlight effect. Maybe I chose the wrong type...

Link to comment
  • RMweb Gold

I think that you have caught the style of the GWR wagon beautifully, and your construction notes are a lesson to us all.

I was about to comment on the lack of a seat too... Stubby beat me to it.! Although I doubt either of us could produce evidence of the actual design / shape, and whether there were two seats to accommodate a mate.

On the subject of wheels, try contacting Etched Pixels of this parish, he seemed unfazed by my request for a sheave, and your requirement is not a million miles from mine! Alternatively try Dazzler Fan. My bet would be that 3D printed wheels would be cheaper than Langley's cast ones. (See PM)


Thanks Don, those are good tips, I'll check the PM and get touch with Etched Pixels and/or Dazzler Fan. The 12 spoke 3 ft wheels were a starndard GWR size for trolleys etc, so I could do with a batch of them.


And it's time I tried some of this new fangled 3D stuff anyway :-)

Link to comment

Mikkel,


I've just looked at a few of the photos of Hockley showing the type of wagon you've built and I tend to agree that there doesn't appear to be a seat ( http://www.warwickshirerailways.com/gwr/gwrhd745.htm ) shows clearly a box, the slightly dim and distant wagon also doesn't show anything clearly, if the part wagon on the right is of the same type it obviously doesn't have any seat/box at all.  I suspect that no seat was provided, but drivers would employ a suitable box/chest when available, or just stand.  This image ( http://www.warwickshirerailways.com/gwr/gwrhd749b.htm ) shows two from the rear, one is plainly devoid of any seat, and the other shows a box.


Ian

Link to comment
  • RMweb Gold

Hi Mikkel,


lovely model and another great piece of detailed and well researched workmanship.  Think the way the horse is feeding from the bucket is a touch of genius.  Just brings the piece immediately to life.  Know exactly what you mean about the satisfaction in making the small things sometimes - it's a great hobby for that.


Great trip down memory lane for us.  My wife's family originally came from Brookfield Street which was just South of the Hockley Goods Yard - overlooking the bottom canal basin arm.  They managed to 'get out' to the leafy suburbs of North Birmingham in the 60's.  Her Dad often talked about the frantic activity around the area in the pre-war years when he had been a child.  Probably very exciting place to grow up in.  It was a real transport hub - road, rail and canal.  Maybe a future canal basin for Farthing!!


I too started off working life in Hockley in the Jewelry trade in the late 70's.  Ironically no money in it though (apprentices were often poorly paid) so I left at 21 and ended up in construction.  I'd often have my lunch in the big Graveyard which was just East of where the Yard was.  A fascinating place (as Graveyards go!) because it was where all the Birmingham 19th C 'big wigs' ended up with their fine monuments etc.  


Always a delight to read your blogs - very informative and always so much stuff in there apart from the great modeling.


Mike


Hi Mike, and thanks for these little memories from Hockley. Brings it to life!


Your father in law must've had quite an exciting childhood neighbourhood. But you seem to have experienced some very interesting things yourself along the way. Lunch in the graveyard next to Hockley goods yard for example!


A canal basin for Farthing? Hmm, the place seems to be growing by the day :-)

Link to comment
  • RMweb Gold

Mikkel,


I've just looked at a few of the photos of Hockley showing the type of wagon you've built and I tend to agree that there doesn't appear to be a seat ( http://www.warwickshirerailways.com/gwr/gwrhd745.htm ) shows clearly a box, the slightly dim and distant wagon also doesn't show anything clearly, if the part wagon on the right is of the same type it obviously doesn't have any seat/box at all.  I suspect that no seat was provided, but drivers would employ a suitable box/chest when available, or just stand.


Ian


Hi Ian, ah yes I had forgotten that photo. I'm thinking maybe that might be the "carter's box" that I mentioned in the reply to Stubby above.


But the design of that vehicle is a little different - the front board (does it have a proper name, I wonder?) is lower than the one in the drawing I used. It would be easier to balance on that board.


I tend to think you're right: On these types of vehicle the carters probably just had to find their own solution.

Link to comment

Mikkel,


I have a set of 2mm scale Worsley Works coaches - diagrams T51, S9, U4 & T47 (just body kits), for which I have taken delivery of a set of 19'0" and 18'0" wheelbase under frames that will suit produced by a 2mm Scale Association member.  I have been trying to find some suitable photographs (especially of the brake thirds - a U4 (compo) and S9 (all third) have both been preserved at Didcot).  I have also begun scouring my library ;-)


Ian


They're in Russell but you have to hunt them because they aren't in the index (one of the worst points of these books). From memory one or two of these are suitable for a 6w underframe. I was pondering doing it but couldn't remember which ones could have had it. Finally I concluded that the extra axle would have been removed by 1920, most likely along with the lower footboards? I do need to re-check the wheelbases before I commit the chassis - I have four 18' ones at the moment :-/


Mikkel,


Printing some wheels shouldn't be a hardship. If you send me some dimensions I can produce the files for you to go to shapeways with. PM me.

Link to comment
  • RMweb Gold

I can't remember either which 4-wheelers also had a 6-wheel version, will find the books tomorrow and have a look.


Richard, many thanks for that offer! I'm looking at various options and will get in touch via PM shortly.

Link to comment

 I can't for the life of me understand how drivers were seated on these vehicles. The drawing does not indicate any seat. I've pored over all the photos I have found but none of them show anything clearly - or any seated drivers. Indeed most photos seem to show nothing in particular behind the board!


If you look at the video with all the flat carts in Glasgow that you posted earlier, most drivers are sitting on the load, or on a box, or just dangling their legs over the front corner - or they are walking with the horse!  One is sitting right at the back of the cart with long reins!


We soft 21st century types expect our creature comforts but, as you also commented before, in those days men were men!  seat!!! pah!!!

Link to comment
  • RMweb Gold

Hi Mike, yes I think you are right. I actually took notes on carter's positions from those videos, and especially liked the one who is sitting at the back of the cart as you say. What a balancing act! The most common position in those videos seems to have been on the left hand front corner. But those are mostly simple designs without much of a front board.


The "Paddington" patterns of goods delivery vehicles do include the seat of course (as per my 5 ton goods delivery lorry). But my theory is that there was a very practical reason for that: With all the London traffic, it would be an advantage to sit high up so you could look ahead, especially when handling a large heavy vehicle with 2 horses or more.

Link to comment

The most common position in those videos seems to have been on the left hand front corner. But those are mostly simple designs without much of a front board.

There's a photo of a TVR horse lorry with a front board in 'Great Western Way' (p237 - 1st ed. 1978).  The driver seems to be in the usual front-left position, rather uncomfortably perched on the front board.


Mike

Link to comment


I can say little regarding this first class model that others haven't already said. I do know what you mean about a small project giving you satisfaction way beyond its apparent relevance within the layout as a whole. What you are doing could be described as radical - even anarchistic - compared to the traditional layout, but it does allow you to exercise your stunning eye for detail and the choice of how and where to go forward that is very special.


Tony.

Link to comment
  • RMweb Gold


There's a photo of a TVR horse lorry with a front board in 'Great Western Way' (p237 - 1st ed. 1978).  The driver seems to be in the usual front-left position, rather uncomfortably perched on the front board.
 
Mike


So there is! Finally a photo that shows it clearly. And in a street setting too, so presumably not artificially posed. Thanks a lot for that find Mike! I have a couple of carters and will try to put one in this position on a dray.
Link to comment
  • RMweb Gold

I can say little regarding this first class model that others haven't already said. I do know what you mean about a small project giving you satisfaction way beyond its apparent relevance within the layout as a whole. What you are doing could be described as radical - even anarchistic - compared to the traditional layout, but it does allow you to exercise your stunning eye for detail and the choice of how and where to go forward that is very special.Tony.

Thanks very much Tony, much appreciated! I know that many will see this as a diorama, but the plan is to add some operational interest through the off-scene fiddle yard, so it becomes an Inglenook concept. I haven't built the fiddle yard yet because I've been toying with the idea of designing it so it can also be used for the next layout in the series. Still a bit undecided though, but it's a decision that can't be put off much longer as I'm itching to shunt some red wagons around :-)

Link to comment

They're in Russell but you have to hunt them because they aren't in the index (one of the worst points of these books). From memory one or two of these are suitable for a 6w underframe. I was pondering doing it but couldn't remember which ones could have had it. Finally I concluded that the extra axle would have been removed by 1920, most likely along with the lower footboards? I do need to re-check the wheelbases before I commit the chassis - I have four 18' ones at the moment :-/


Mikkel,


Printing some wheels shouldn't be a hardship. If you send me some dimensions I can produce the files for you to go to shapeways with. PM me.

Richard,


All of the photos that I've managed to find showing these diagrams of coaches show the U4, S9 and T47 as 4 wheel stock.  I have a copy of "Model Railway Constructor Annual 1981" which has John Lewis' article on recognising Dean period coaches which contains the image of Swindon "Dump" with the coaches awaiting conversion to Narrow/Standard Gauge, John identifies a couple of T51 coaches as narrow bodied coaches on Broad Gauge under frames - the one that shows the under frame clearly is a 6 wheel coach.  Whether the they retained 6 wheels after conversion is questionable - I'm still hunting for photographic evidence :-)


Ian

Link to comment
  • RMweb Gold

Ian I think you are right that the U4, S9 and T47s always had 4 wheels. I haven't be able to find any diagrams/photos that had the same body but 6 wheels (but I may have overlooked something of course).


As far as I understand, the R1 and S1/S2 single arc roof four wheelers had some almost identical brethren with 6 wheel underframes - but the latter were a bit longer and had separate diagrams (R2 and S3/S4).

Link to comment

By 1920 these kind of coaches were already reaching the point where the company seemed to be scrapping or converting to suit differing needs as evidenced by record cards so I should probably stick to 4 wheels?

The R1 will be a U8 once finished - though I'm building from the Shire Scenes kit so will need to modify the ends (they are 3 centre). This needs a 16' u/f. S9 has 18'- although I wonder how different the S7 and S8 dias looked (listed as 19' u/f), U4 should be 17'?, T47 should be 19'. T51 was originally 6w 20' or 22' u/f (I wonder what the two converted to S14 looked like - I bet the etch won't be suitable for a coach that gained two lavs). Fortunately I have etched parts left over from my own kits to make new u/f s from. These I bought are near useless! I can use one under the V5 maybe.


Apologies to everyone else for massive thread hi-jack.

Link to comment
  • RMweb Gold

Richard, those sound like interesting builds, never seen a U8 before, I think. Look forward to seeing them.


Don't worry about thread hijack, this blog comment format is a bit of a mess anyway.

Link to comment

Create an account or sign in to comment

You need to be a member in order to leave a comment

Create an account

Sign up for a new account in our community. It's easy!

Register a new account

Sign in

Already have an account? Sign in here.

Sign In Now

×
×
  • Create New...