Jump to content
 

74xx Injectors Part II


alanbuttler

453 views

In the last entry I was trying and failing to get an injector built with the soldering iron. I had some good advice about using 188 deg solder combined with 145 deg to build up the injector without it melting into a lump, I'll give that a go when I'm back home in Brighton. In the mean time I've retried the process using super glue. It's been pretty successful, except I've not been able to make it small enough - without the pannier body to give it some sense of scale, it looks ok but it still needs to be about 20% smaller to fit between the running plate and the tanks!


15540651799_fb69d2b136_c.jpg

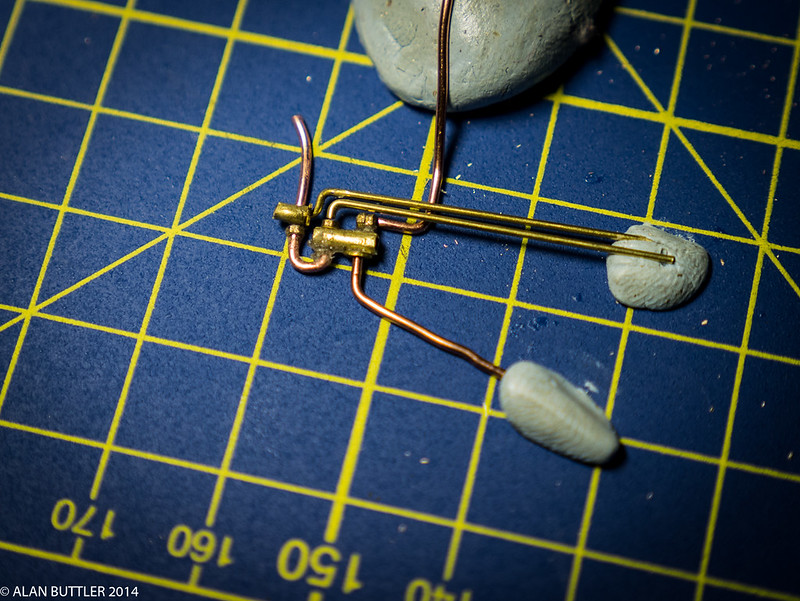
74xx Injector scratch build test by CAMBRIAN AL, on Flickr


For the time being I'll put this little side project to one side, there is still much to do in Illustrator to get the works ready for the laser cutter. Once the 3D printer is up and running it will be a good test of its abilities.

Edited by alanbuttler

  • Like 3

6 Comments


Recommended Comments

I find superglue very successful for small parts (and, sometimes, for larger ones, too!) 


The main thing is to be very careful about surface preparation.  Unlike soldering, there is no flux to dissolve away surface oxides, so I always polish surfaces immediately before gluing.  And don't expect it to reach full strength for some time - best not to move it until after an overnight curing.


Your injector looks splendid - I'd almost expect it to work :)

Link to comment

Thanks Mike, it does like quite authentic I guess in brass and copper :-) Cheers for the tip re cleaning, I'll do that on part III, it will be a little easier at home with the rest of my tools. I'm thinking for the next one drilling guide holes into the capillary tube for the brass and copper wire, it will be more rigid and much easier to assemble. With some tigher curves I think i can get it nearer to scale. Thank God I've only got 2 to make...

Link to comment
  • RMweb Gold

That really looks good, Alan.


Personally, I'd be tempted to persevere with the soldering (would a different tip on the iron help?), purely for the (maybe unfounded) feeling that this imparts greater strength over the longer term?

Link to comment

That really looks good, Alan.


Personally, I'd be tempted to persevere with the soldering (would a different tip on the iron help?), purely for the (maybe unfounded) feeling that this imparts greater strength over the longer term?


Thanks Tim, once I'm home where I've a few more tools to employ I think drilling small holes for the wires into the capillary tube will be the answer.  I used a broach on the 14BA nuts to be able to thread them onto the copper wire, I think with this plan when it comes to soldering it will stay together as it heats up.  And as you say should be a lot stronger!


Thanks for the feedback, I just hope I can bring the rest of the 74xx up the same standard :)

Link to comment
  • RMweb Gold

Only problem with it visually is that you've got a right angle bend in the operating rod from the water valve in the cab.  Easily solved by using a straight piece of wire and moving the actual valve higher (as it would in any case be seated on the bottom of the tank).


Having gone to a lot of trouble making it I think it would be a shame if  it didn't look totally right and everything else looks spot on.

Link to comment

Your completely right, that was a compromise after I started threading the wire I realised the valve was too low! I really appreciate the feedback as a lot of the enjoyment I get from trying something new like this is understanding how the real thing works and making it look right.

Link to comment

Create an account or sign in to comment

You need to be a member in order to leave a comment

Create an account

Sign up for a new account in our community. It's easy!

Register a new account

Sign in

Already have an account? Sign in here.

Sign In Now
×
×
  • Create New...