
loco shed Sandy Shores - The Loco Shed
Entry posted by SouthernRegionSteam
545 views
I hope everyone is having a nice festive break; I've finally got a quiet hour or so to write up another entry, so here goes!
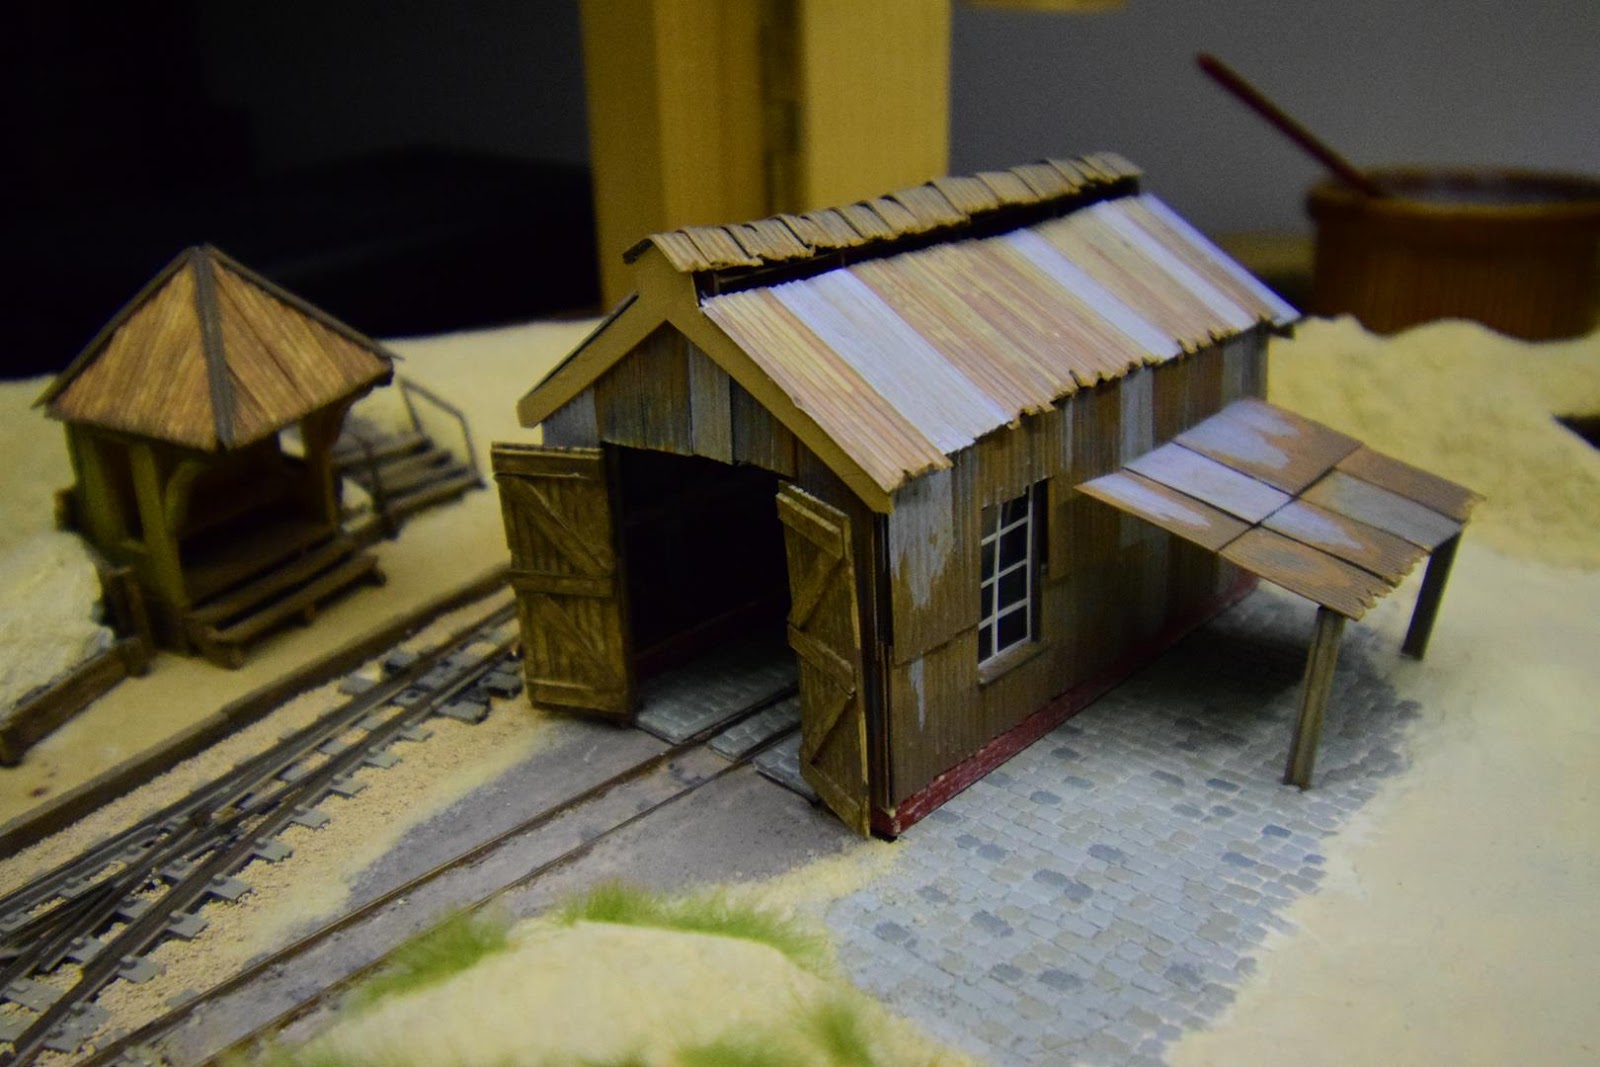
A railway isn't complete without a loco shed, and even Sandy Shores needed one to house one of its engines. Indeed, at the time of building, there was only one steam loco at the SSLR, and that wasn't (and still isn't!) in operational condition. Anyway, the beginning of this build was actually in March of 2015; some 8 months before the layout was even conceived. That's because it was originally destined to become the smaller steam loco shed for the refinery layout that has been in hibernation ever since work began on Sandy Shores. Those of you who followed the progress on NGRM, or saw my layout article in BRM know that Sandy Shores was never intended as a layout, but a tiny scenic diorama to test out some scenic techniques. Whilst the loco shed now sits on Sandy Shores, it actually sits loosely atop a foundation (more on that later). This means that the loco shed will still be used for both layouts (and for what it's worth, I do intend to resume work on Old AGWI Rd somewhen this year.
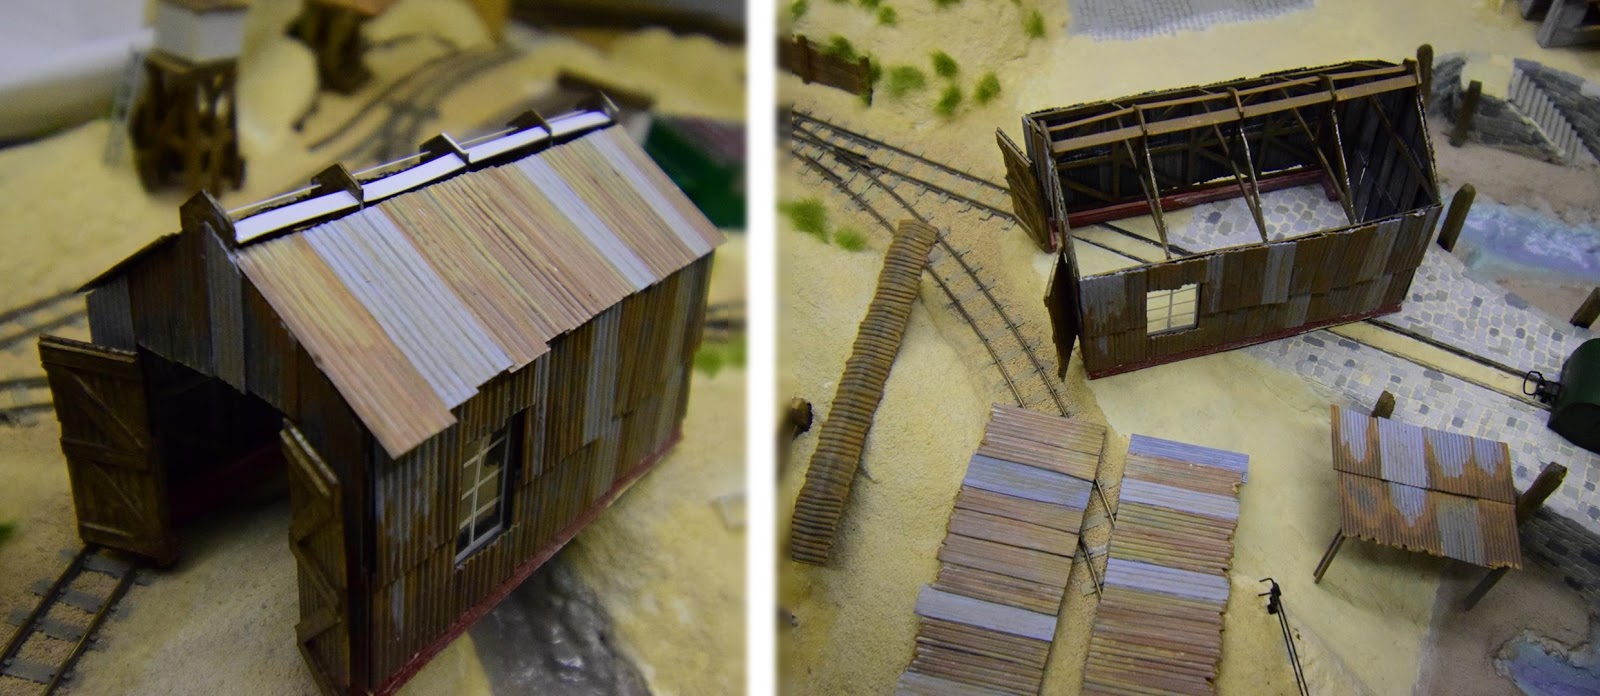
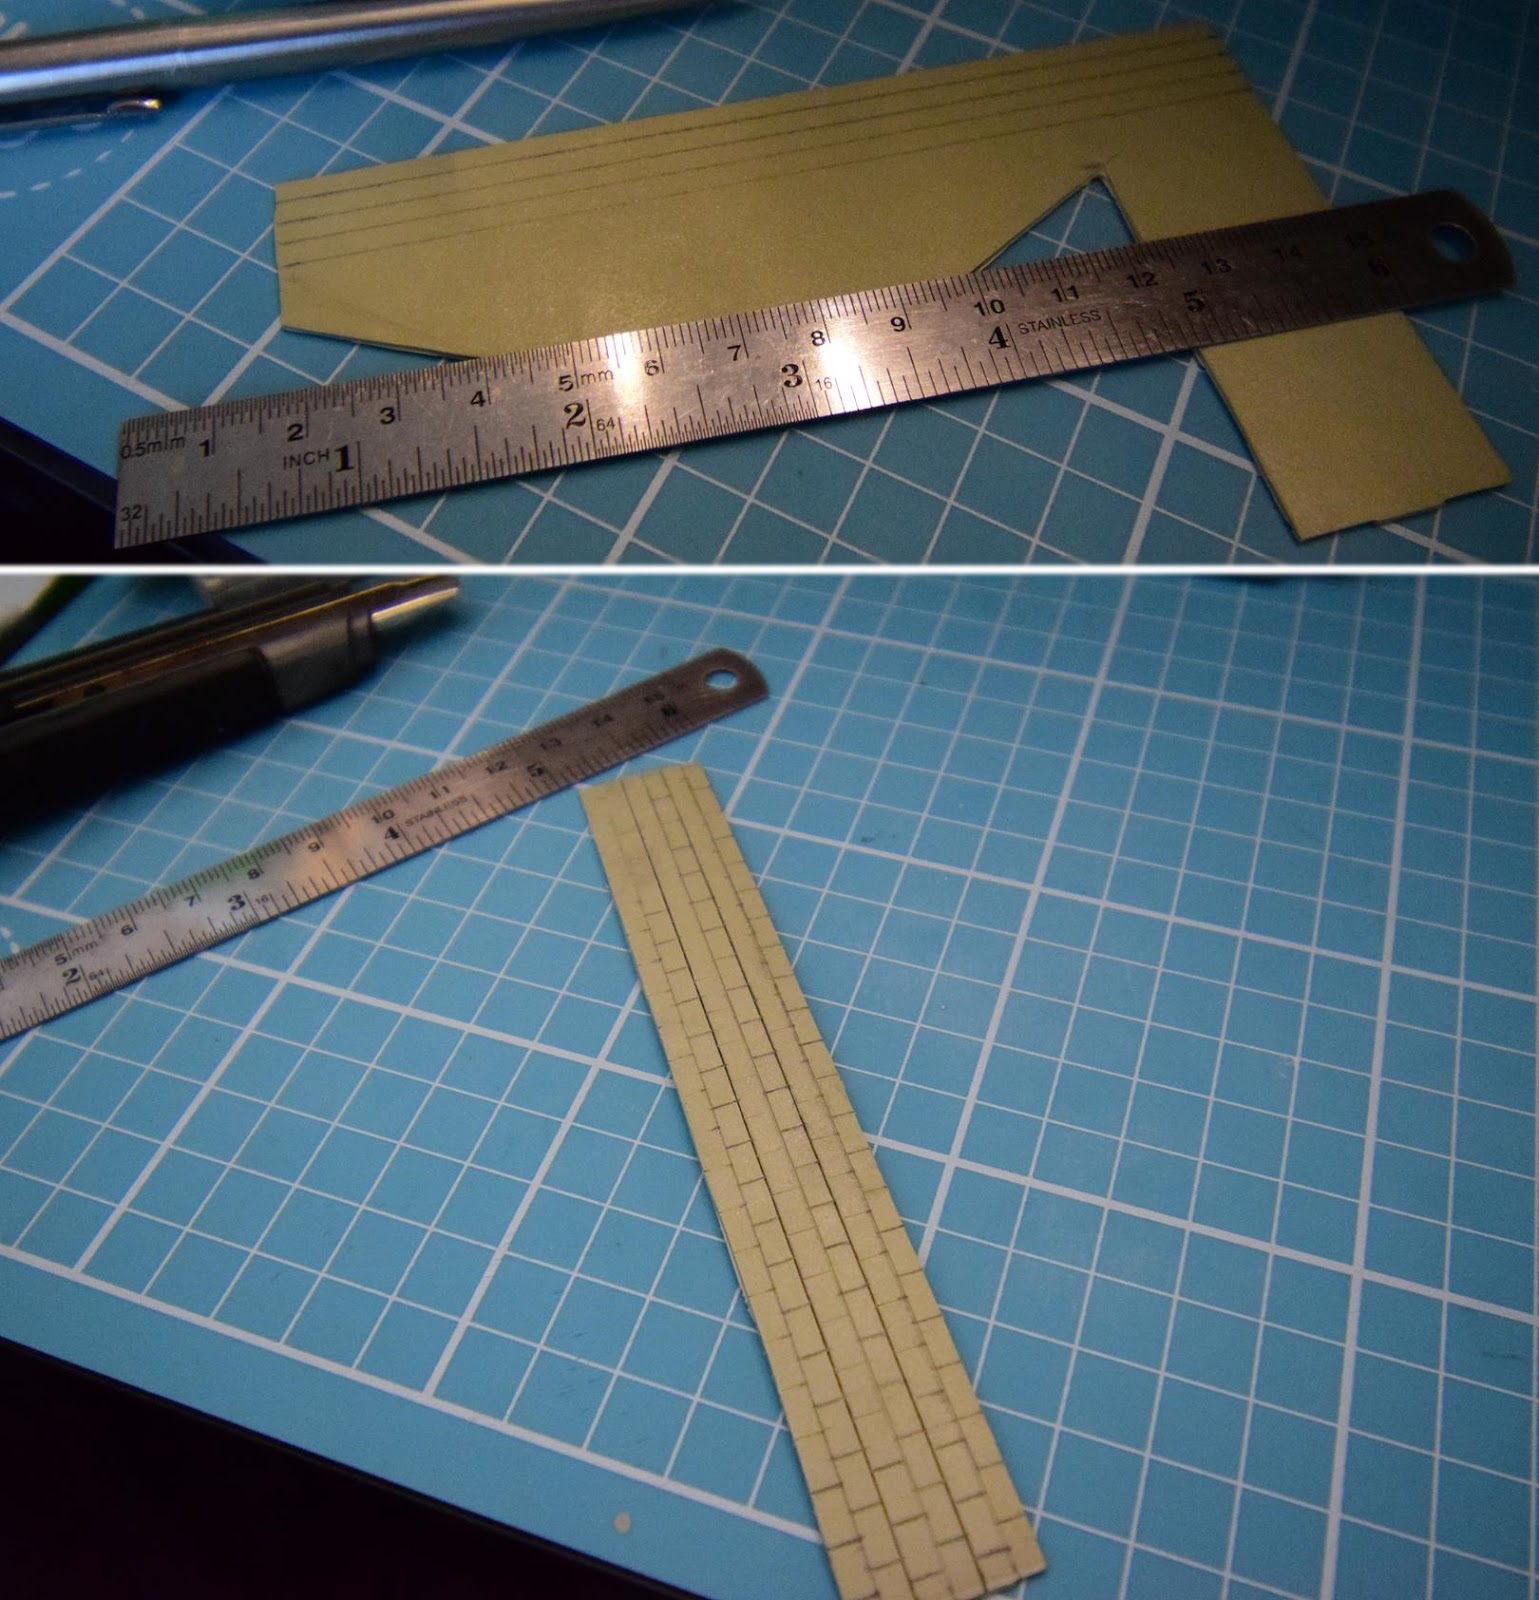
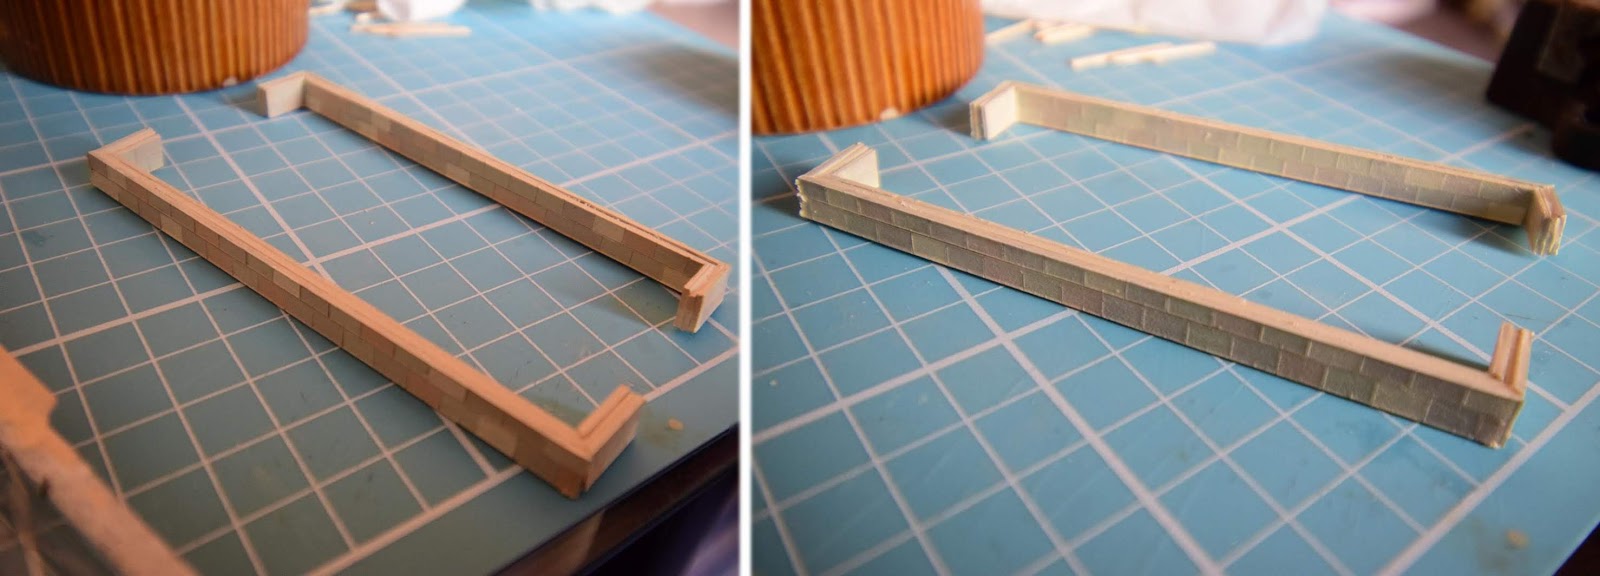
In what might've been a moment of madness, I decided that, despite there being little room for an interior, and only one of the walls on the inside being visible from most angles, that I would fabricate a complete interior framework shell. This meant 8 hours spent carefully cutting a plasticard sheet (sorry, I don't remember the thickness) to have full framing; including uprights, horizontal members, cross-struts, and trusses. It really was overkill, but at least I know the detail is there!
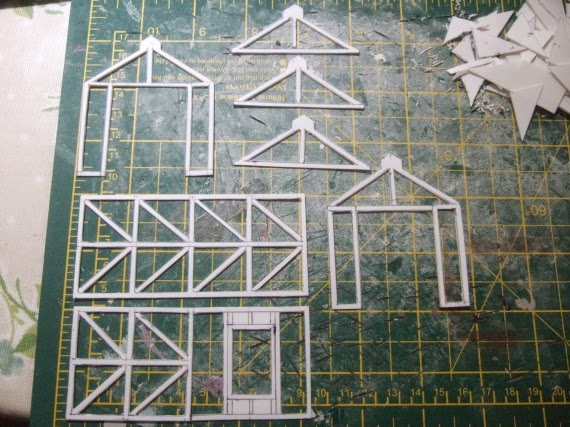
Aside from gluing those components together, it was to be a whopping 3 years before any more progress was done on the loco shed; firstly due to copious amounts of progress on Old AGWI Rd, and then the beginnings of Sandy Shores. So, fast forward to March 2018, and the loco shed gains some corrugated iron cladding. For this, I usually (unless strength is required) use South Eastern Finecast vacuum-formed sheets. They are much thinner and easier to cut than the Wills alternative, and are generally just nicer to work with. Once cut to scale width and length, the panels are glued to each other (using Revell Contacta) before painting and gluing them onto the framework. The painting itself was done in four main steps:
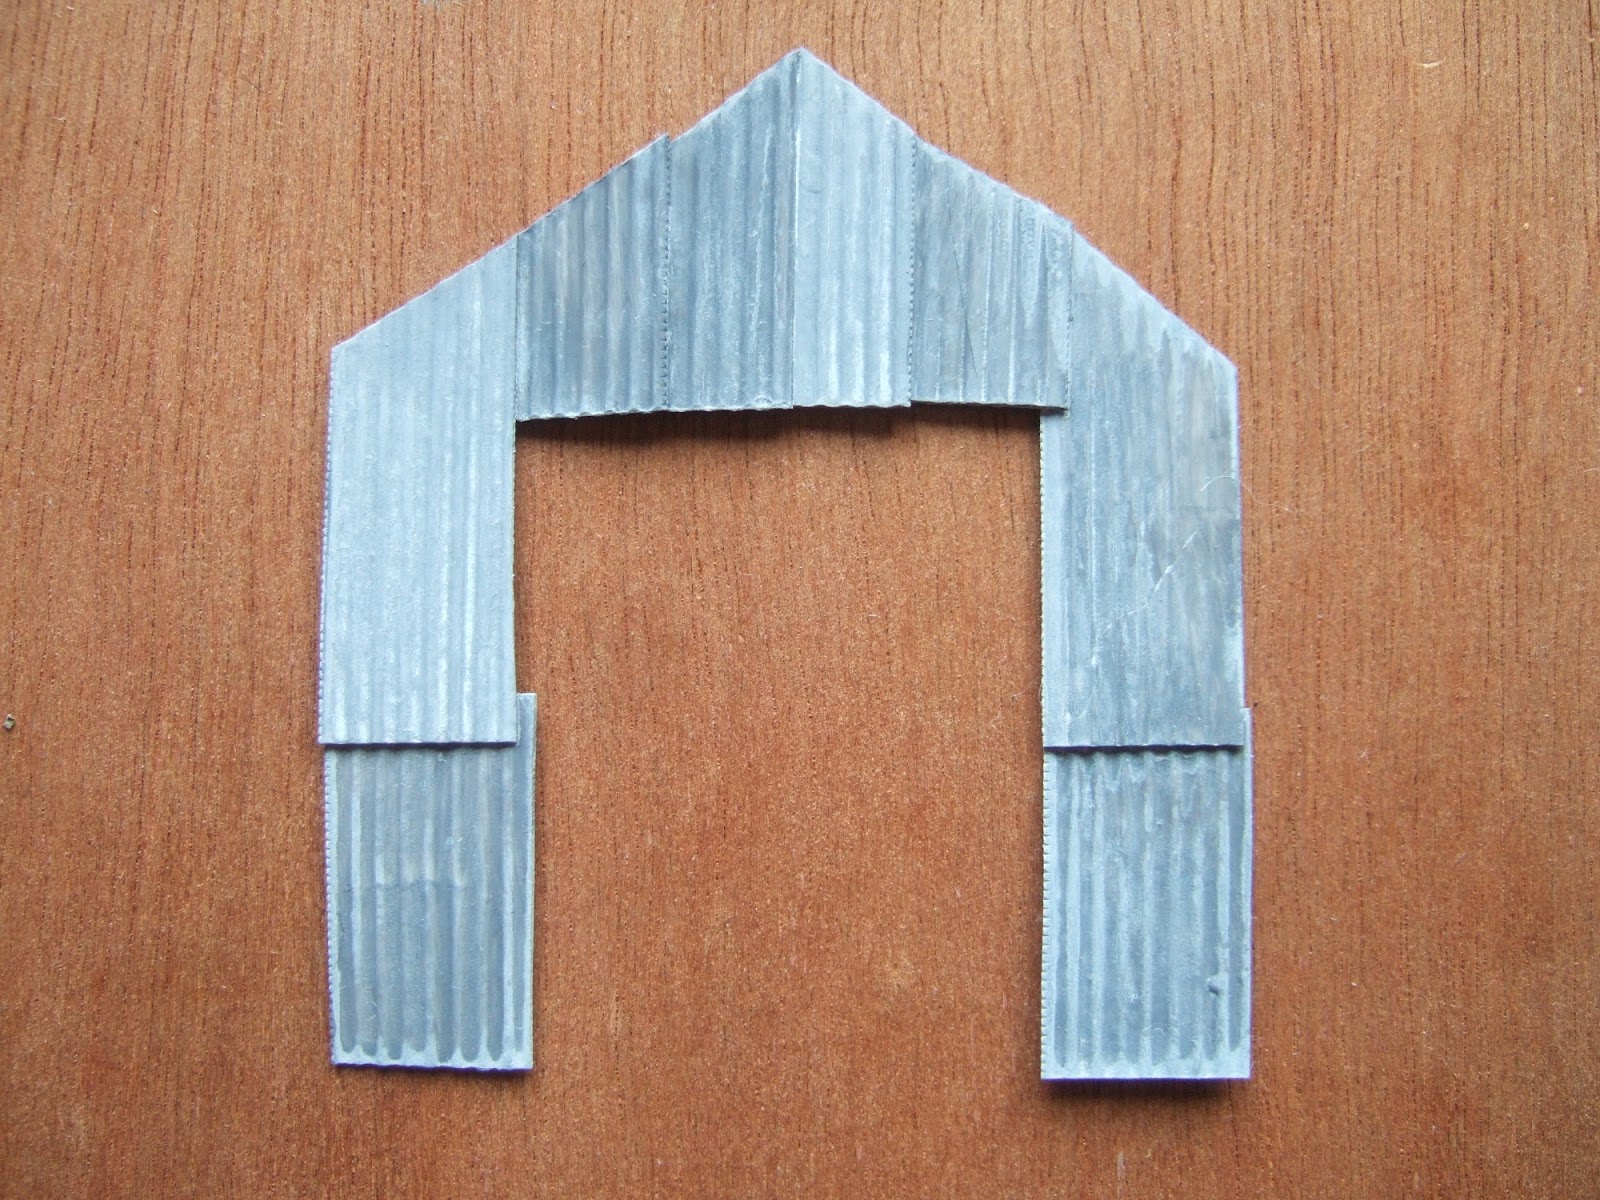
Above: Firstly, panels were randomly painted in one of two shades of grey (and yes, it does appear a bit on the blue side - I've never had much luck with grey paint!)
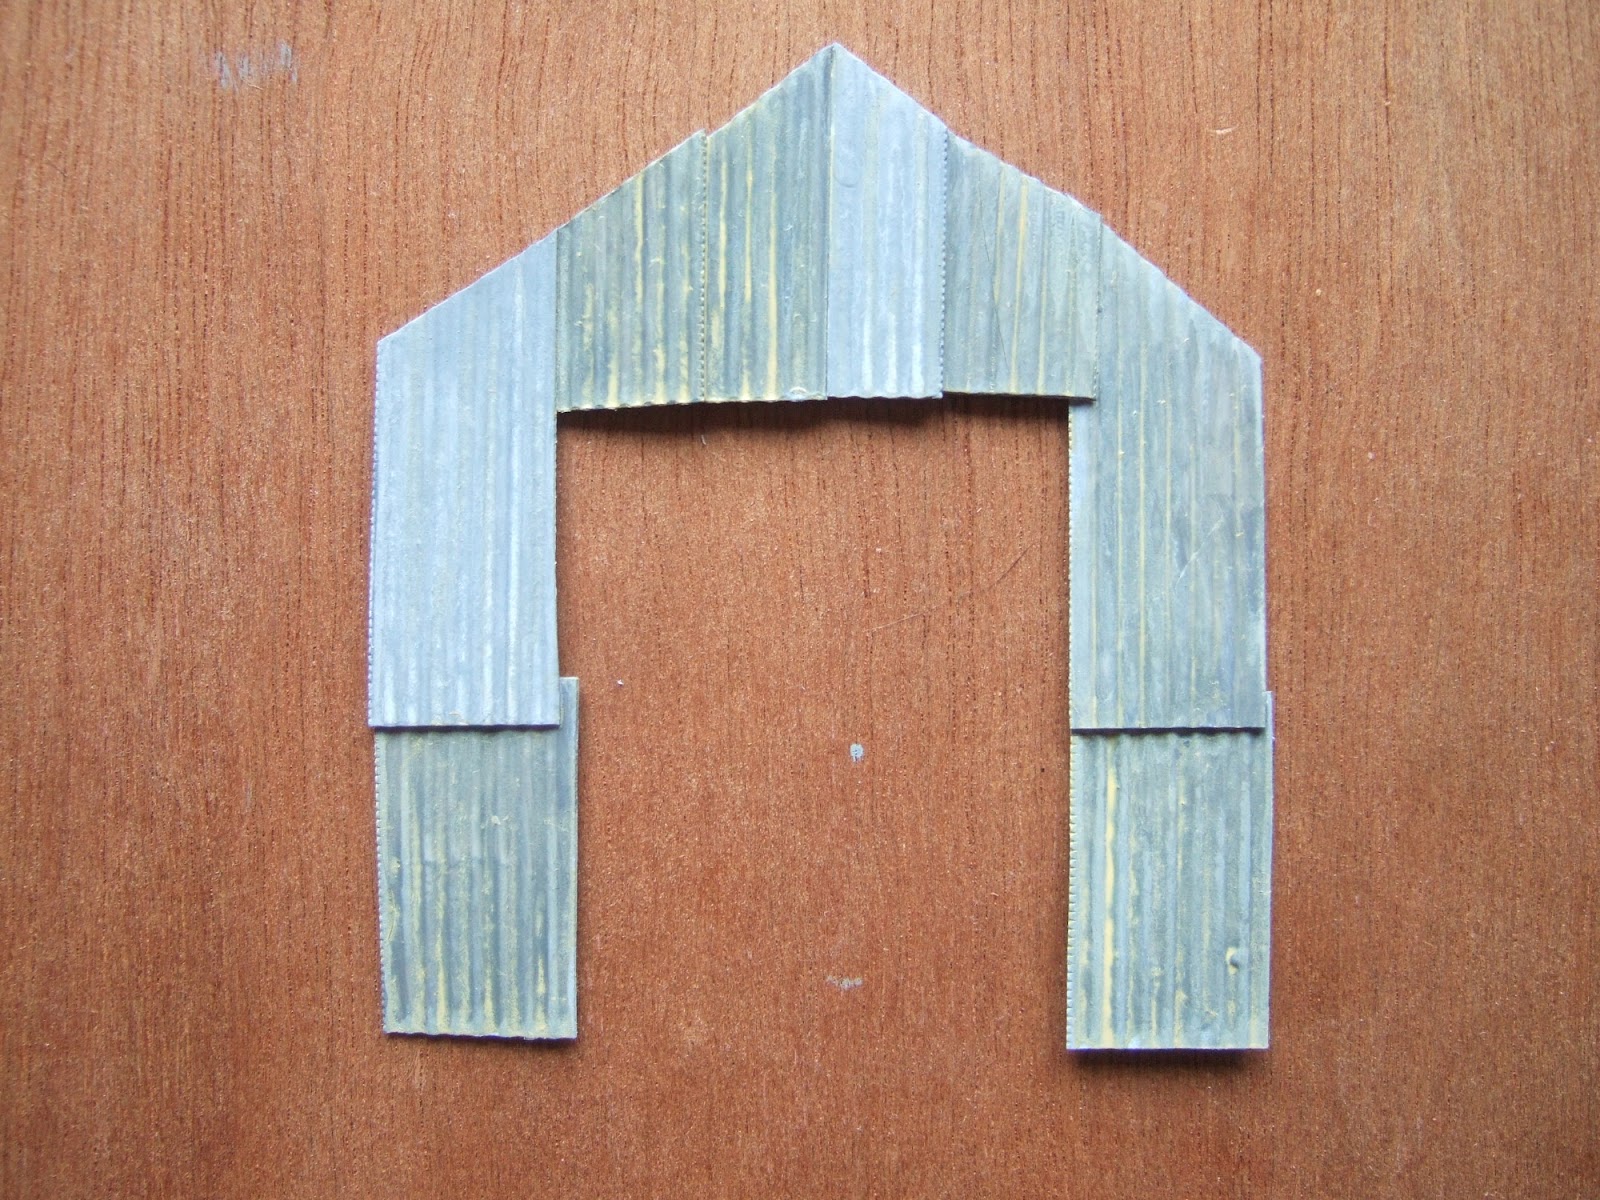
Above: They were then given a wash of various colours. We can see a slightly creme colour wash here, but I also usually use a dark grey/black wash which is instantly removed to leave paint into the recesses.
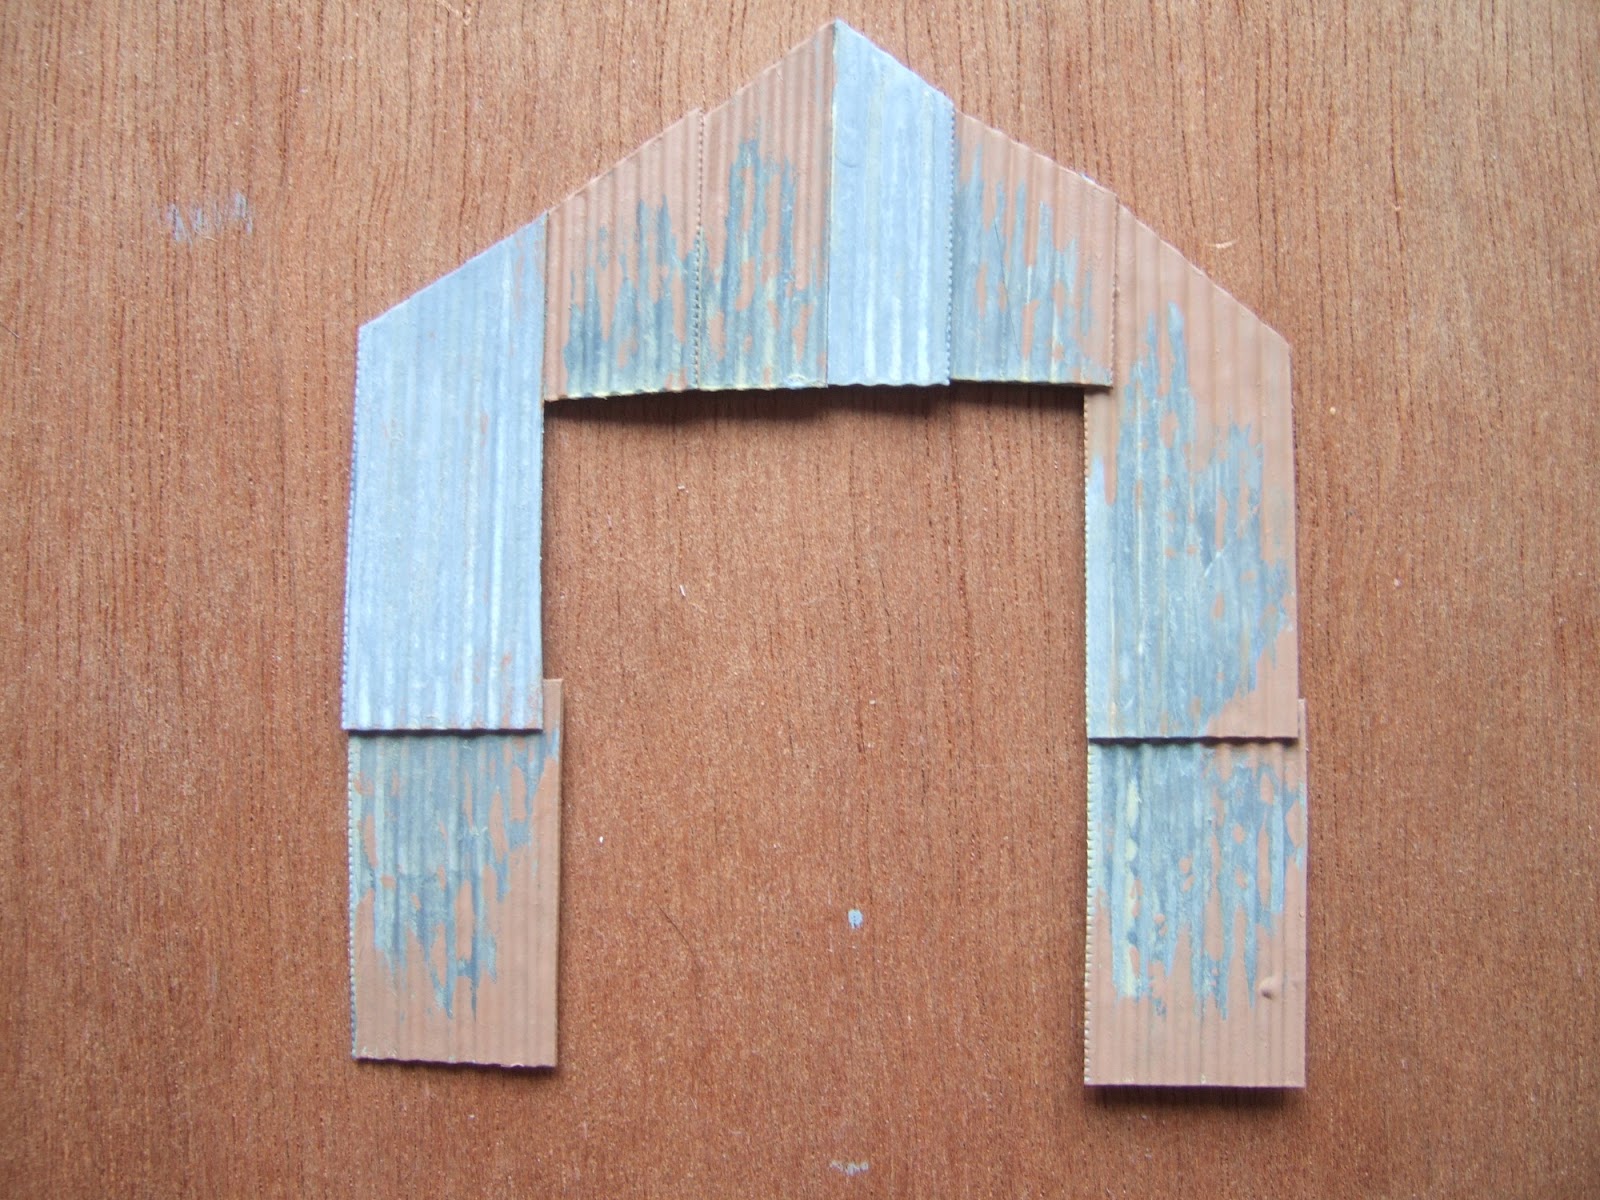
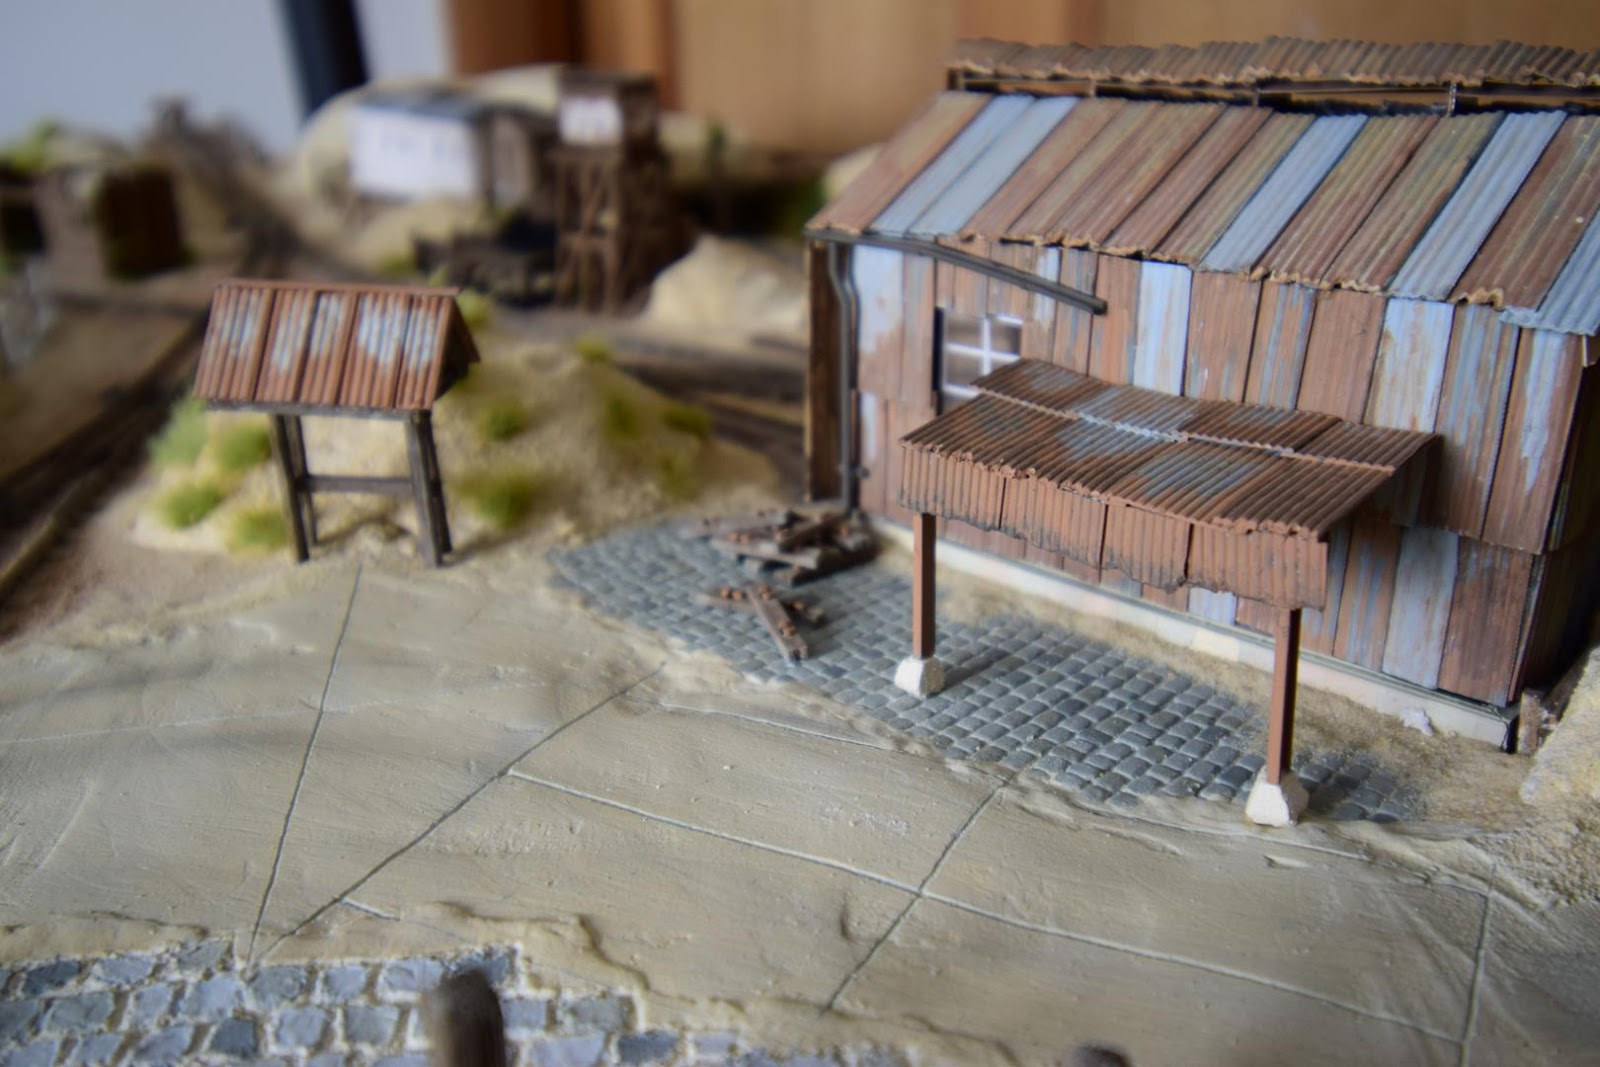
Above: As this is going to be a loco shed built on a coastal location, the corrugated iron is going to be heavily weathered, as any metal left in these salty conditions will not last long if not properly maintained! Following prototypical photographs, I chose all but a couple sheets to have their most exposed edges covered in a fairly light rust coloured paint. Note how there are heavy patches around the edges, and random splodges on other areas.
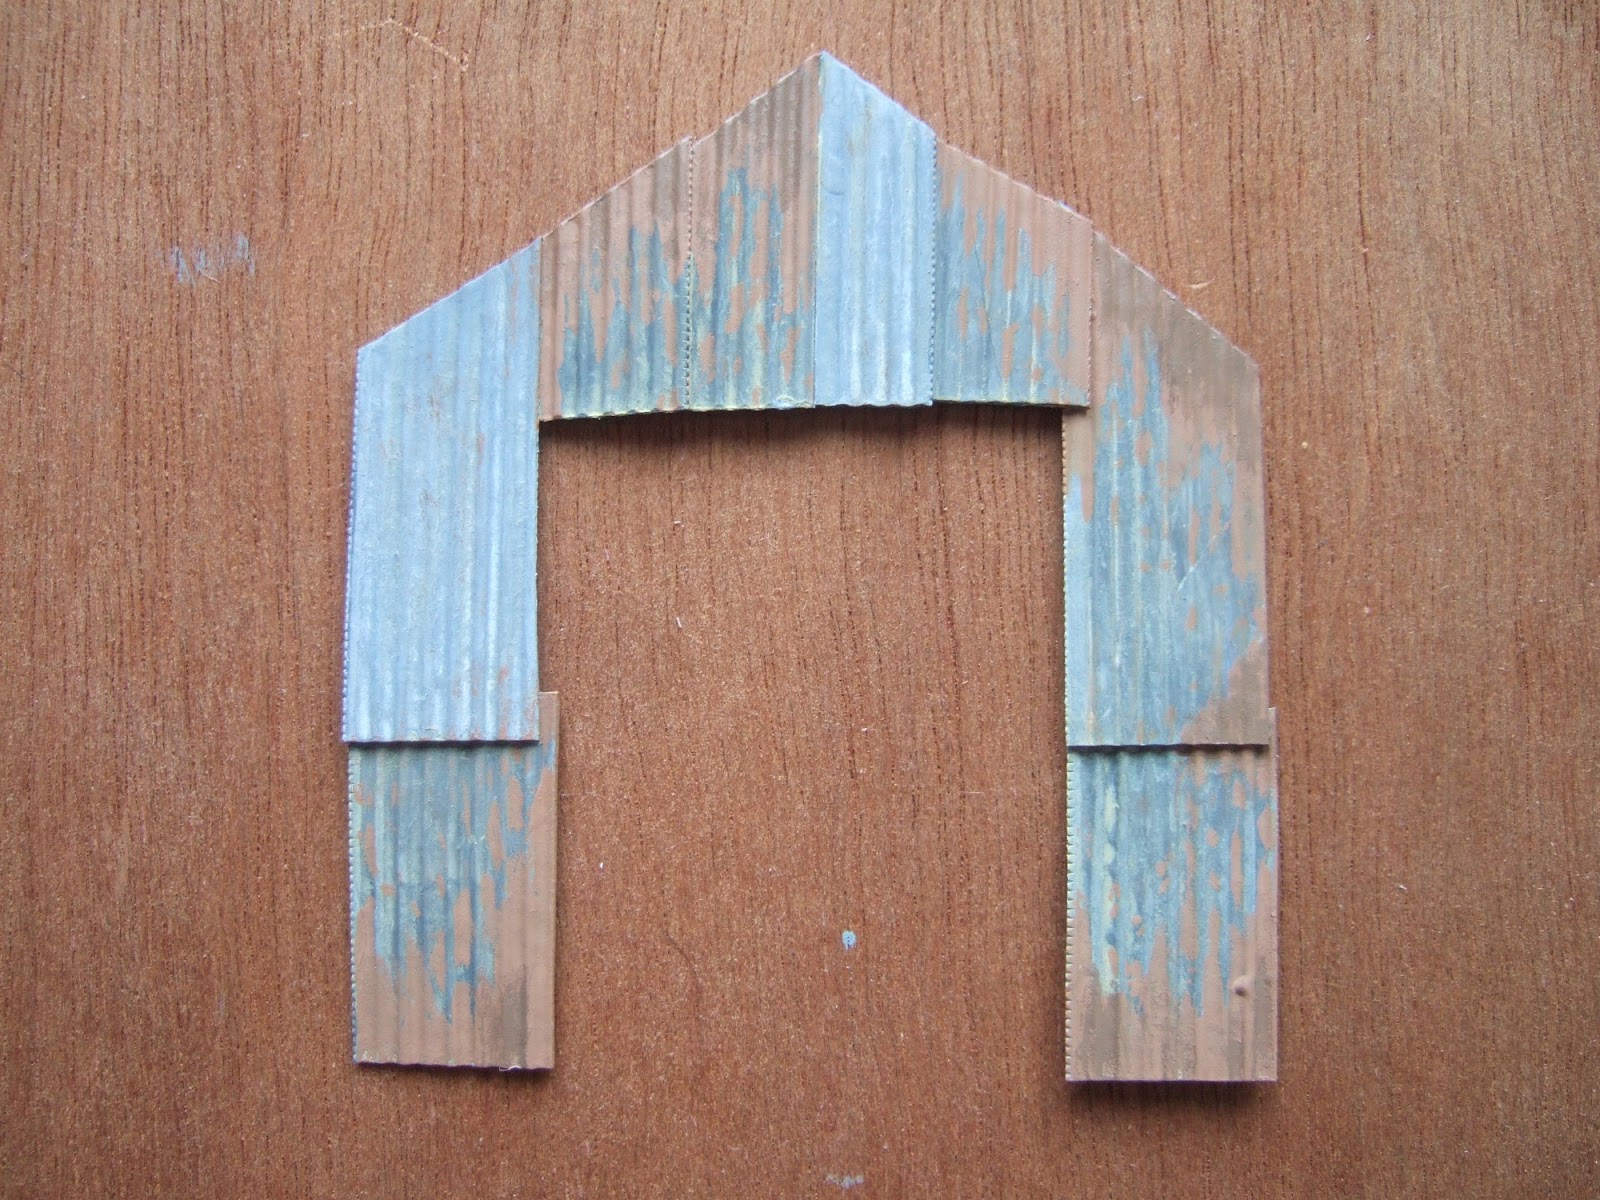
Above: The worst affected areas were then given an additional weathered treatment, with a darker shade of rust. I think the building was actually repainted partially since these photos were taken, but the technique is still the same.
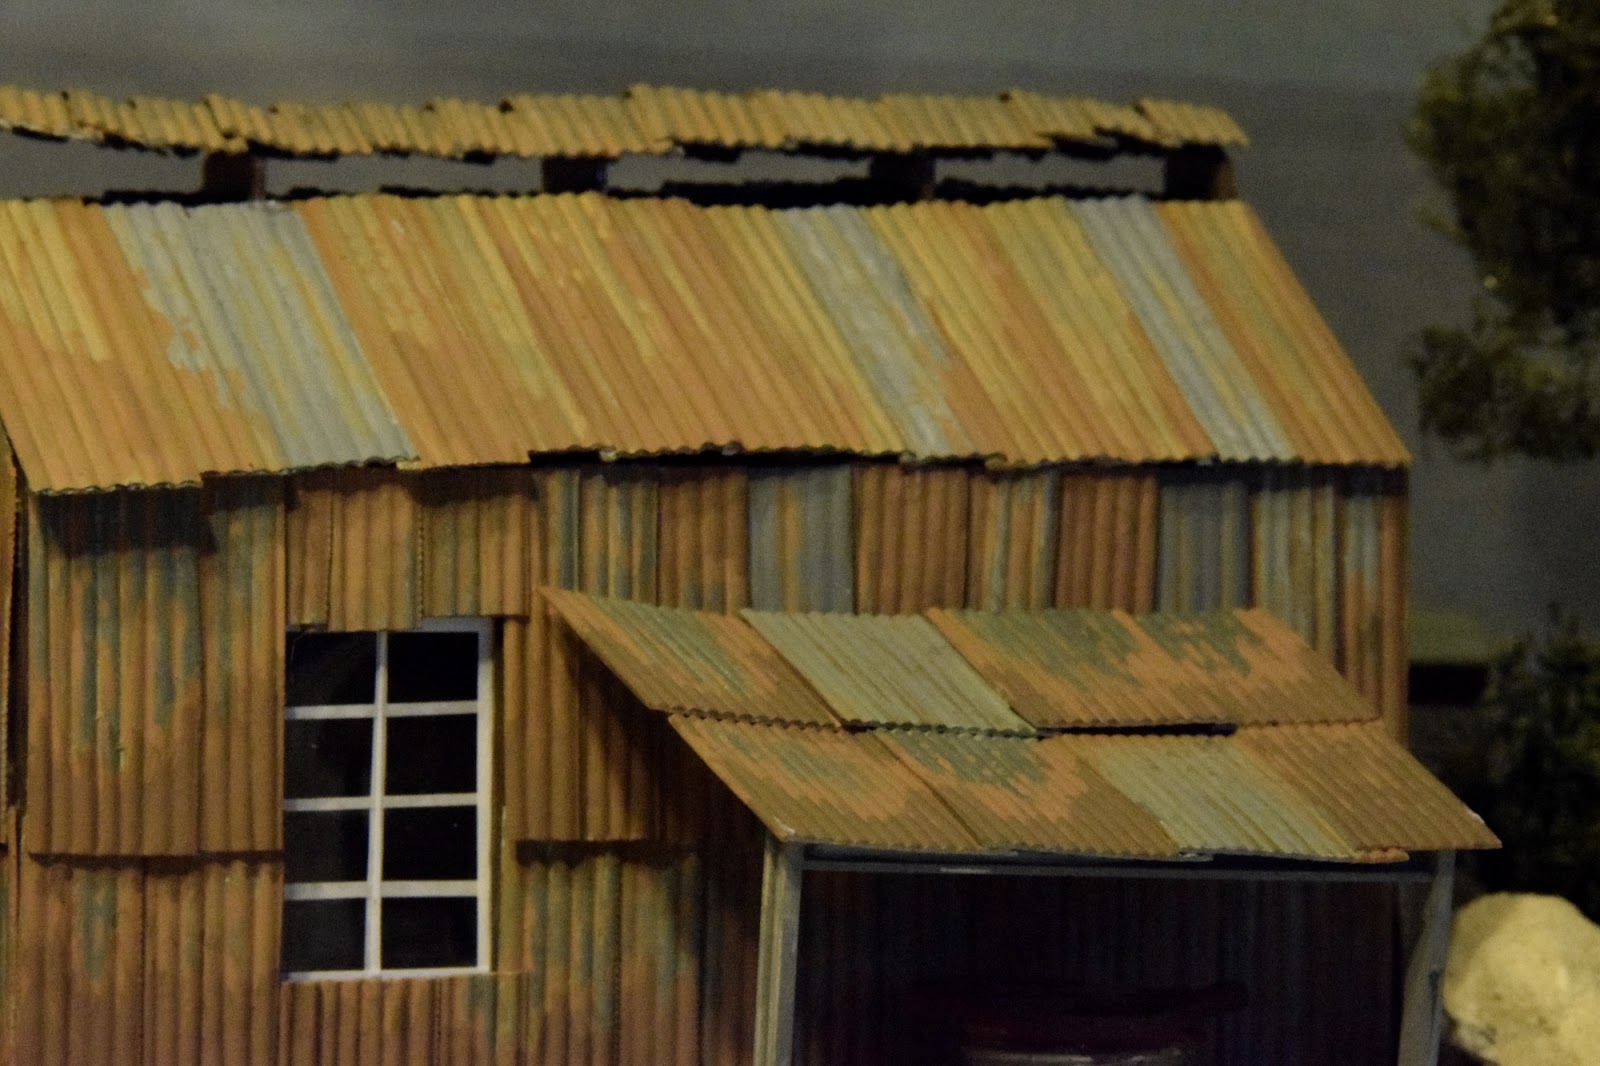
With the parts painted, they were glued onto the framework shell (once that had also been painted). Note how the roof is made from sheets of random lengths. I seriously doubt with a railway on such a shoe-string budget that they would bother (or have the cash) to keep things maintained to a high standard. The lean-to (to this day still) needs a proper lead or similar flashing to join it properly to the loco shed wall. Speaking of which, the lean-to itself was constructed from only 2 uprights (pre-moulded C section styrene), and an I section crossbeam. There are no other supports underneath holding the corrugated cladding in place as they simply won't be seen (i.e. I was too lazy this time!).
Unfortunately, I couldn't find any photos of the window being constructed, but it was simply produced from clear plastic packaging (I bought tons of various Wills materials for Old AGWI Rd, and kept all the plastic packaging!), and self adhesive label cut into thin strips. Ideally, the glazing bars would be made from Microstrip or something else much finer, but it doesn't bother me enough to change it!
Whilst I also don't have a photo of the doors being built, I do have one of a similar set of doors being built for the larger dual gauge loco shed on Old AGWI Rd. They were similar built (if a bit fiddly) from various bits of plasticard; the wooden planks having been scored on, and then bracing added to the rear in a double Z format. Hinges were perhaps a little overscale, but were made from the same material:
.JPG)
Up until this point, the clerestory was missing any form of louvres. This was a job I put off until March 2019 (yup, another year!), as I deemed it to be too fiddly of a task. I wasn't wrong! Partly due to the small nature of the louvres, and also due to the bendiness of the roof trusses, it was difficult to glue one set in without another popping off. Determination payed off in the end, as although the louvres are wonky in places, it all helps to add to the overall run-down aesthetic I was after. Thankfully, the clerestory was small enough to only need one layer of louvres... I don't think I could've coped with more:
You may have also noticed that whilst the various roof panels were taken off to aid installation of the louvres, I took the opportunity to attack the worst rusty panels with a wire brush attachment in the Dremel; which produced a rather nice rusted-through effect on the ends of the panels. I think it was also around this time that I repainted some of the panels, and added further washes of colour.
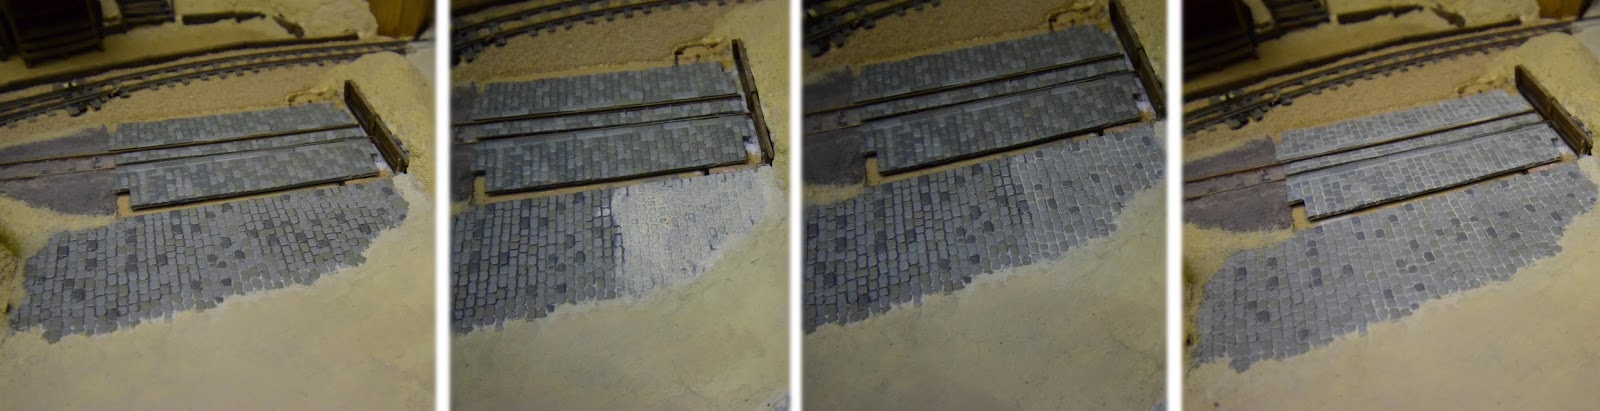
Work then turned to the foundation of the loco shed, which was originally the brick plinth as seen above, as well as printed cardboard setts (that looked out of place with the rest of the quay). First, the sets were replaced with some of the Wills style ones. Usually I prefer to make my own from DAS clay, but as there were some existing Wills cobbles around the shed, I stuck with the simple option for once!
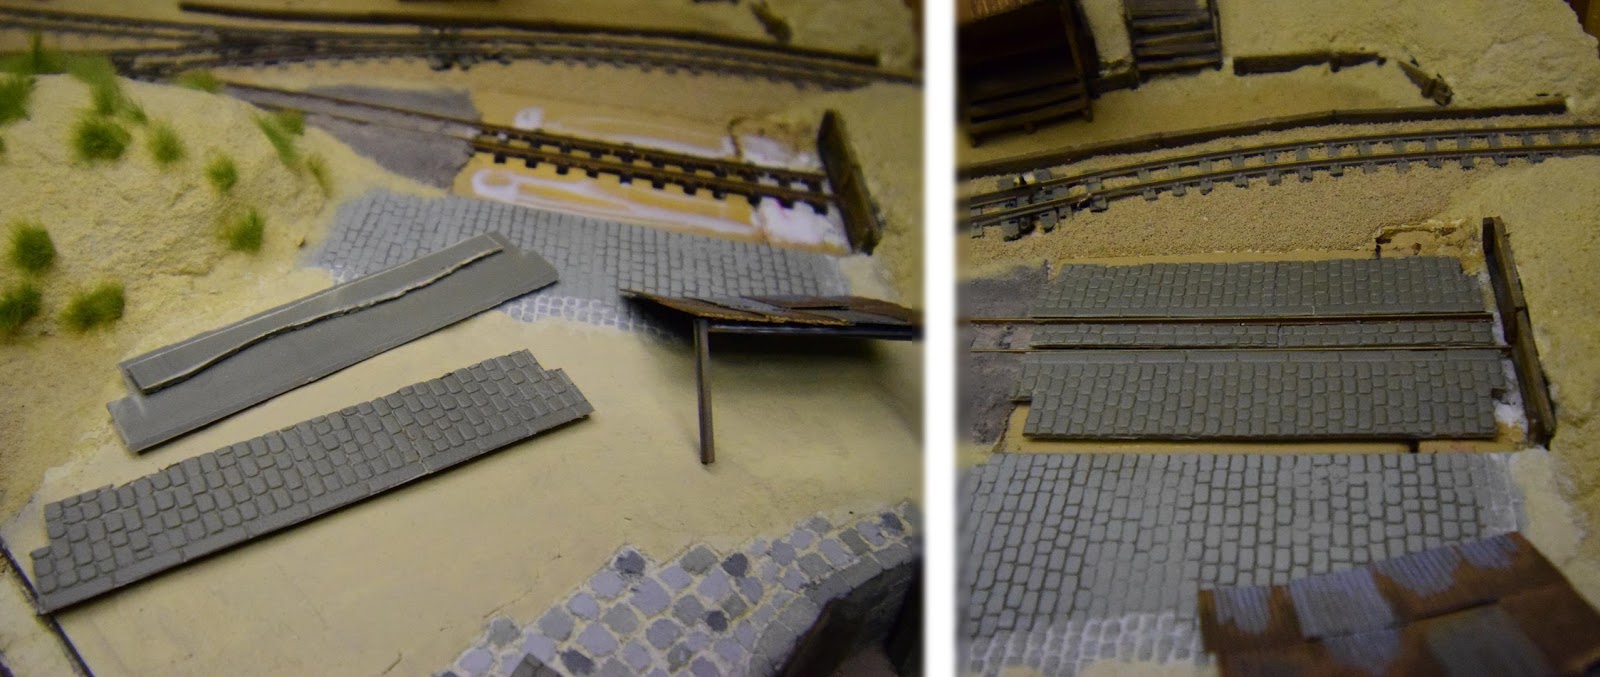
These were then painted (along with the existing cobbles) to better blend them in with the hand-scribed cobbles found on the rest of the quay. I've skipped ahead a bit in the photos below, but the first step is to give them an overall cover so that there is a base colour to work from. The next step is to pick out random cobbles in various shades of the same (or similar) colour. I try and only mix in one or two colours to keep the effect coherent and subtle.
Once this is done, and the paint dried, I then gave the whole lot a quick watery wash of a colour. In this case, a sandy colour to match the other DAS cobbles on the layout. The process is shown below. I work in small sections whilst applying the wash, then immediately dab it with a paper towel and wipe it to try and remove as much of it as possible. This allows a little to remain on the surface which helps tone it down, but also allows the paint to stay in the cracks to produce a light colour for the mortar. The end result of this is stonework that more easily blends into the rest of the layout:
I also took this opportunity to add some more details to the loco shed. Firstly, a set of bargeboards were long overdue onto the gable ends, and helped to hide any unsightly gaps. The window was also fitted with a window sill on both the outside, and the inside:
And to bring you right up to date, during April of 2019, the loco shed saw yet more changes and additions. I was never happy with how the brick plinth looked, and felt it completely out of place to the rest of the scenery. I knew the brick plinth would be suitable for Old AGWI Rd, so I decided to keep it for that layout, but build a new plinth which would be permanently attached to Sandy Shores. Having looked in my spare plasticard pile, I found some remnants of a sheet of Wills cement render; perfect, a nice subtle colour! As I wanted it to imitate breeze blocks, these were marked with a mechanical pencil, and then scribed:
Before gluing the foundations down to the baseboard, I painted them much in the same way that I painted the lighthouse (and in similar shades):
Which just left them to be glued down, and bedded in properly. Thanks to a suggestion by a NGRM member, copious amounts of sand helped to disguise any gaps; suggested to have been blown there from the sea/various adjacent sand dunes. Oh, and yes, concrete foundation blocks were added underneath the legs of the lean-to (as well as a small section of corrugated sheeting to the shore side), and a broken gutter affixed to either side of the loco shed. If you look carefully, you may just see the staining on the wall of the shed, where the gutter ends!
And that completes a brief look at the the loco shed; not just for Sandy Shores, but also for Old AGWI Rd. I apologise for the lack of complete constructional photos, but I hope it's been a relatively simple build to follow!
As always, do post any comments or questions down below!
-
 7
7
-
 3
3


2 Comments
Recommended Comments
Create an account or sign in to comment
You need to be a member in order to leave a comment
Create an account
Sign up for a new account in our community. It's easy!
Register a new accountSign in
Already have an account? Sign in here.
Sign In Now