

Calshot MkII v.3
Entry posted by SouthernRegionSteam
1,086 views
I suddenly had an idea today, pretty basic, but it's given me some ideas for half of the layout. (Stop laughing at the back!) "Why not copy from the prototype?" OK, it had occurred to me before today, but suddenly it all seemed to fall in place.
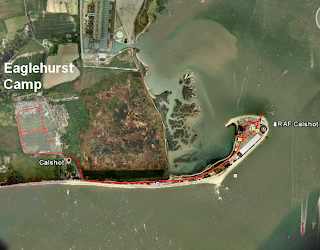
The top screenshot shows the location of the Calshot RAF Narrow Gauge Railway and shows its route (red line) along the spit across to Eaglehurst camp. Now let's zoom in a bit:
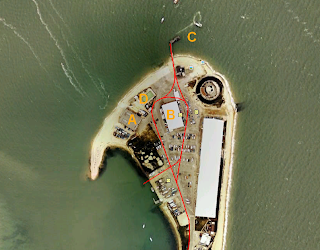
Looking north towards the end of the spit we can see a jetty (marked C). There were at one point, I believe , two tracks here (although I'll need to double check that!). Running southwards, the line reached a triangle. Trains did not use this triangle to turn round, otherwise they would be travelling boiler first up the ascent to Eaglehurst Camp. Straight ahead you can see the letter B, this is hangar F (or F shed). The railway ran either side of this hangar, narrowly skirting the south-eastern wall. There was a junction soon after where a line went onto the Powerhouse pier (now demolished) and the main line continued along the spit. There were a series of sidings and passing loops along the spit itself.
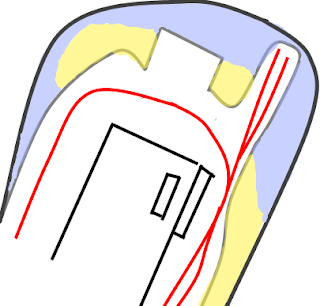
Anyway, back to my earlier point, following the prototype (ish) we can see letter A on the aerial view. This is hangar D (or D shed) which was in its later years used as a workshop and store. I have modelled a low relief version of this hangar and was used on Calshot MkI. Now, I have been thinking about magically relocating hangar D to where hangar F is (moving A to B, effectively!) Now, let's see what I'm proposing for half of the layout:
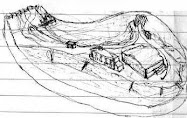
Which is very similar to this one: (which I still rather like!)
4 Comments
Recommended Comments
Create an account or sign in to comment
You need to be a member in order to leave a comment
Create an account
Sign up for a new account in our community. It's easy!
Register a new accountSign in
Already have an account? Sign in here.
Sign In Now