Jump to content
 
  • entries
    95
  • comments
    385
  • views
    42,614

The construction of Calshot - Part Five - Sluice and quays


SouthernRegionSteam

526 views

Well another day into my summer holiday and another bit of progress to share.

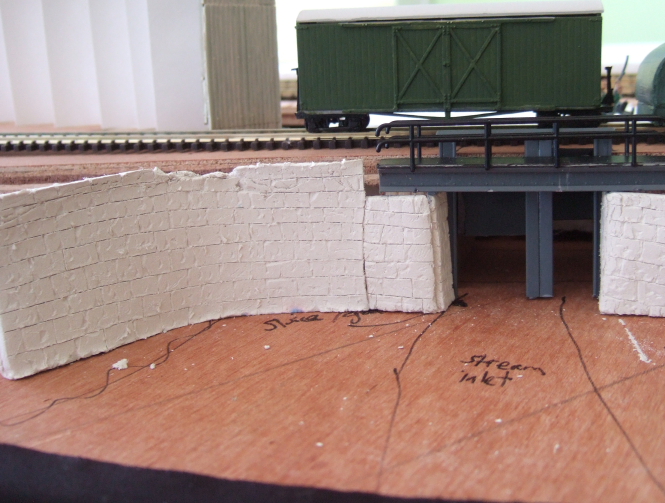
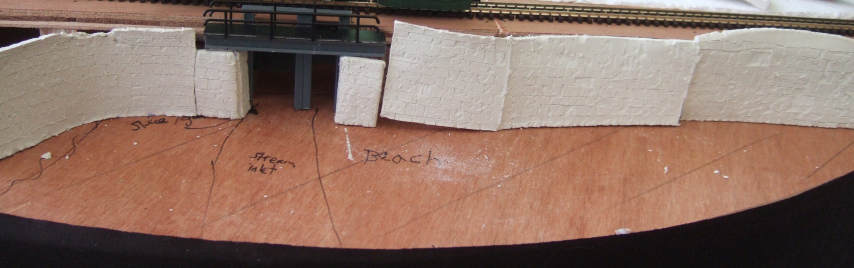
This is my first proper attempt at making quay walls out of DAS modelling clay and they look pretty decent if I may say so. The reason they are all at funny angles is because they have not been glued due to obvious reasons. These photos aren't very good, but they are adequate for now. I have tried to recreate worn looking stones with some stones missing and cracks appearing. I am pleased with the results so far, but I've still got another metre or so to build - this little lot has taken me 3 hours already! Despite what people say, I am not finding it too tedious - rather enjoying it. I expect that mindset will change with time. It certainly shows my creative aspect! Painting will come once I have learnt how to...

On with the photos:

post-6776-127962867737_thumb.png

post-6776-127963501699.png

stonewall+and+sluice4.png

stonewall+and+sluice5.png

sluicethreads.png

6 Comments


Recommended Comments

That's looking quite promising isn't it :) I look forward to seeing it with a wash! How is the track laying coming? Had a train move on Calshot yet?

  • Like 1
Link to comment
  • RMweb Gold

Thanks James. Should all look a lot better with a bit of paint. The sluice will be in an abandoned, rusty condition with the valve handles missing. The track layign will start when I've told John what I want, and made sure clearances are there for the point motors and wiring. I have had a NG train running for a yard, but that's it so far laugh.gif.

Link to comment

Nice work so far. Hope you don't mind me making a couple of observations.

Try and make sure the stonework matches on both sides of the corners around the sluice gates so it looks like a complete wall and not two sections joined together.

The sluice gates and the tunnel behind them will have a tide mark from where the water is at its highest, a sort of greeny-black colour. I've spent a fair few hours playing around sluices in a kayak...

Hope that helps.


Paul.

  • Like 1
Link to comment
  • RMweb Gold

Thanks Paul. smile.gif

I appreciate your observations - any help in improving my modelling is a bonus!

The stone walls will be mitred on the ends to help gain continuity across the join.

I hadn't however thought about hide tide marks, I will have a look online for some suitable references and go from there.

Link to comment

Glad to be of help. The best way, I feel, of getting reference material for the sluices is to go out and find some as the weathering and high water marks are going to be quite subtle. The place where I used to play in my kayak is about 130 miles away otherwise I'd go and take some photos for you. Another thing often found around sluices is wood (twigs and small branches) taken down with the current and caught on the sides, very easy to overdo in model form.


Paul.

Link to comment
  • RMweb Gold

Thanks again Paul. I know of a couple which are about half an hour away so it could be possible to visit it and take a few photos for reference.

Link to comment

Create an account or sign in to comment

You need to be a member in order to leave a comment

Create an account

Sign up for a new account in our community. It's easy!

Register a new account

Sign in

Already have an account? Sign in here.

Sign In Now
×
×
  • Create New...