Jump to content
 
  • entries
    95
  • comments
    385
  • views
    42,615

The construction of Calshot - Part Six - Quay basics done


SouthernRegionSteam

536 views

Are you getting bored yet? wink.gif


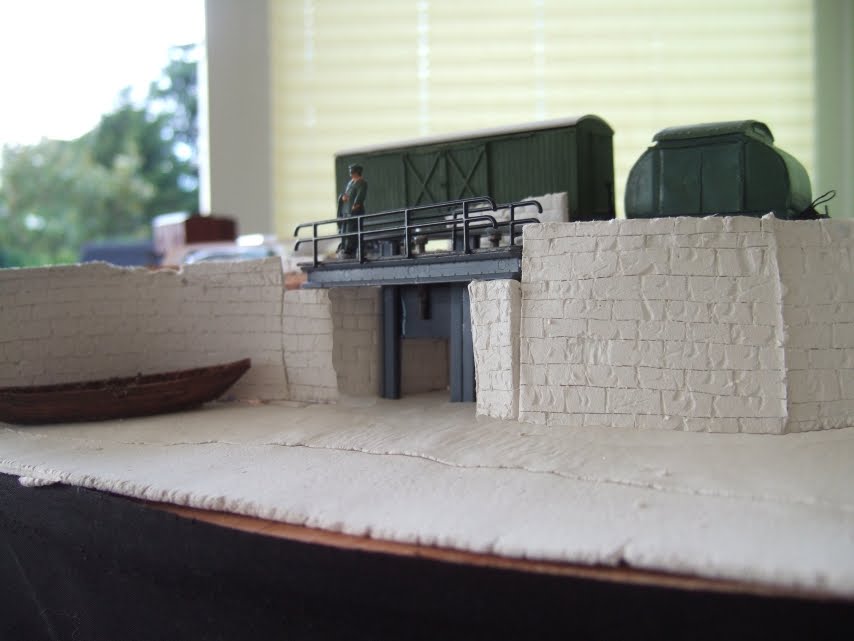
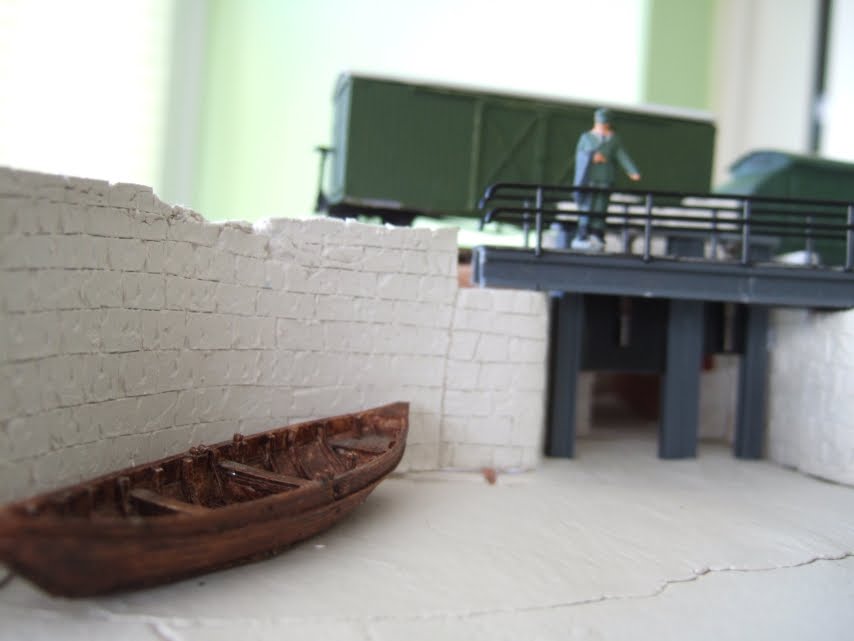
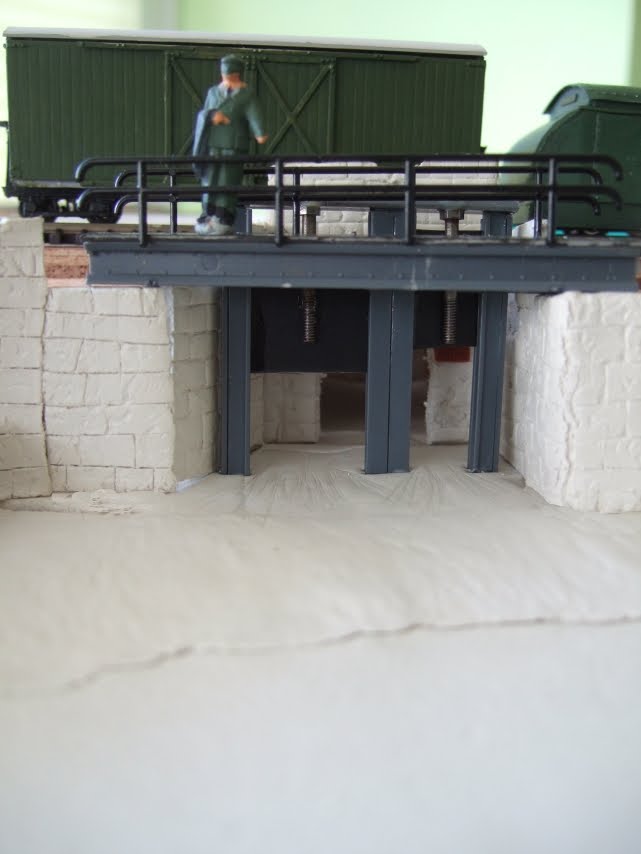
Another few hours worth of work sees the quay starting to take shape. All this is removable including the sea bed in readiness for wiring the layout. I will need to cut some access holes underneath the baseboard as the pins on the point motors are just that little bit too short to fit underneath the ply base. Hopefully all goes well and there is enough access to put the point motors in and the wiring.

I have also made a culvert (hard to see in these photos) behind the sluice gates. I admit to photoshopping the bottom of the walls to remove the unsightly gaps as none of it is glued down (again, for obvious reasons). However, I am really pleased with how it is looking so far. Scribing looks much better when the clay has dried whereas when soft the scribing is more rounded and not suited to ageing stone. The culvert and tunnel have also been scribed as well as the culvert wing walls.

Hope you enjoy this set of photos.

DSCF3351.JPG

DSCF3346.JPG

DSCF3347.JPG

11 Comments


Recommended Comments

Are the bolts part of the sluice gates? And where did you get that really nice boat from?


Paul.

Link to comment
  • RMweb Gold

Yes they are, but a lot of people aren't convinced that they look right so I may use something else.

The boat is a mystery - it came with a layout I was given by a friend who moved house. There is no makers name anywhere on it and a lot of people have asked me about it but I simply do not know where it came from. The only thing I can think of is that it came from a model ship of some sort...


Just painting a first layer of rust on the sluice paddles which has given it a slightly better look. I will need to buy some weathering powders at some stage though.

Link to comment

Personally, I think you should ditch the bolts and either use chain to lift the gates or threaded rod, something like 12BA or 14BA. Sorry to sound negative but I do think that as it stands it won't match the standards that you've set for the rest of the layout! Please take this constructively.


Paul.

  • Like 1
Link to comment
  • RMweb Gold

Not at all - everyone has said the same thing.

I might just have had an idea - some were raised by a rack and pinion type arrangement - I am having trouble finding anything small enough for the cylindrical threaded rod, but what I could do is use some thin plastic to make a rack and then fashion a little gear or some such. I'll try and rustle up a prototype now.

Link to comment

The ribbed middle section from a plastic cable tie could possibly be used to represent a rack. Might be a bit difficult to paint though...


Paul.

  • Like 1
Link to comment
  • RMweb Gold

Hmm... possibly.

I would've thought it would be too wide? Not sure, will have to search one out. I haven't managed to find anything else, but I have found something I could use for a rod. Will try it first and see if it is any good and report back.

Link to comment

The worn appearance of the quay sides is very convincing and you're right, carving in dry material will give you a better finish as it doesn't move as you score into it. I agree with Paul (and others) about the bolts not looking right - and I think the cable tie idea is a great one! I'm sure you could cut along the length with a sharp blade and metal rule.


The standard you're setting yourself looks very high - excellent work. My only constructive comment I guess would be, would it be worth filling and re-scriping some of the stonework as in the pictures it looks a little wonky in places, where I guess in reality these stone pieces would be perfectly rectangular and in line?


I look forward to seeing the next steps - looks like you're really enjoying the summer holidays :)


  • Like 1
Link to comment
  • RMweb Gold

Thanks James. smile.gif

I'm tired of accepting second best (which is probably why the other layout wasn't such high quality!) so now I realise if I am to progress I will have to raise mine and everyone else's expectations so that people like you can tell me how to improve.


I will have a look at the stonework and see which bits need adjusting. I should have really used the metal rule to scribe the horizontal lines but I didn't. Mind you I'm sure there is a prototype wall somewhere!


Speaking of next steps, that is exactly what I will be building next - steps!


Also, I have just found a cable tie right in front of me and actually it looks like it might be the perfect width after all. Thanks Paul!

Link to comment

Wills have released the sluice gates and water wheel from their mill kit as a separate item. For the sake of a fiver, it might be worth having a look - it seems to have all the mechanism details you need - and you could always sell the waterwheel to a friend!!


David Gander

Link to comment
  • RMweb Gold

Thanks David.

I had realised Wills did that kit. However, I thought if I could make a fair representation for free than I might as well go for it. At least it is something to fall back on to.


However, a picture of the kit has given me the easiest mechanism possible for the top of the sluice, so thank you.


The rack has now been glued down.

Link to comment

Create an account or sign in to comment

You need to be a member in order to leave a comment

Create an account

Sign up for a new account in our community. It's easy!

Register a new account

Sign in

Already have an account? Sign in here.

Sign In Now
×
×
  • Create New...