


Entry posted by Will Vale
771 views
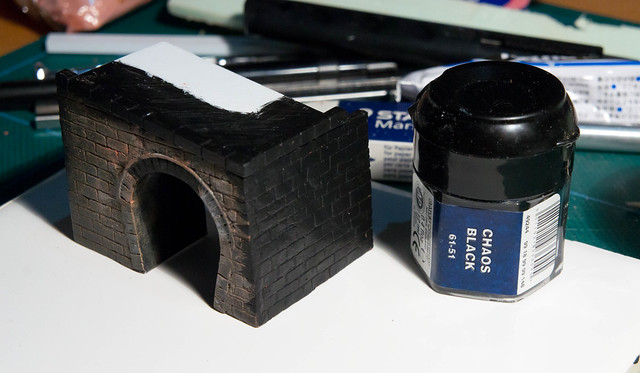
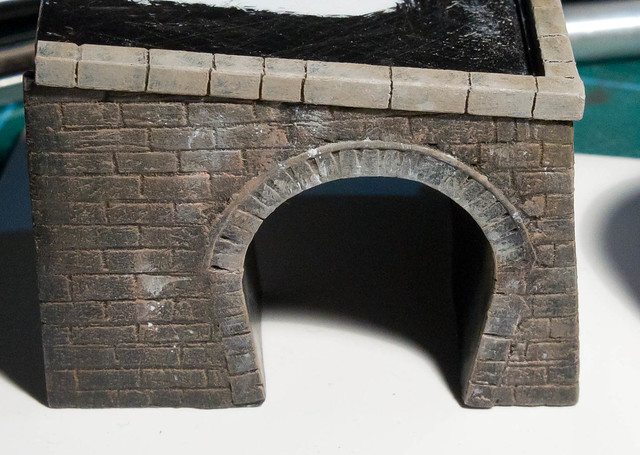
Step 1 by Will Vale, on Flickr
I thought I'd try and put a step-by-step up for this, because when I went back to the earlier entry on this tunnel portal to try and duplicate the painting onto the second wall, I found I hadn't listed the paint colours. So this is partly for my benefit. But maybe it'll be useful. It's always tricky to remember to put the brushes down and take pictures between steps. Usual disclaimer - I don't think this is an exemplary result - it looks good from six inches away, but it's a bit weird at 100% magnification. But it was very quick and easy to achieve.
Step 1, as seen above, was to undercoat the new surfaces with Games Workshop Chaos Black. This covers well, but has an annoying sheen to it. Luckily this will get killed by the painting steps. I painted out the places I'd applied more clay to the finished side with black at the same time.
Step 2 is to drybrush the wall liberally with brown - in this case Graveyard Earth. Working mostly from top to bottom and from the corner inwards. I was pretty sloppy here and didn't worry too much about all the usual "remove the paint from the brush until you can't see any at all" advice - the idea here is to add a lot of colour quickly.

Step 3 is to do the same (with a bit less paint this time) with a warmer brown called Calthan Brown to get some variation in tone.

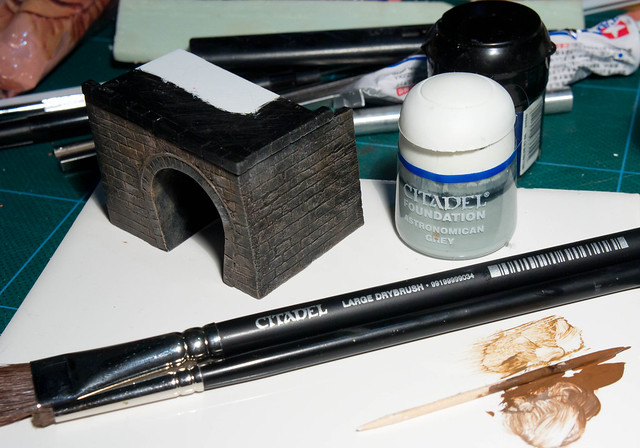
Step 4 attempts to age the browns and bring them towards neutral using a light blue-grey called Astronomican Grey. I love the names, they're so silly. For this step I varied the pressure on the brush, and used the smaller brush as well, in order to get a mixture of drybrushing and vertical streaking.
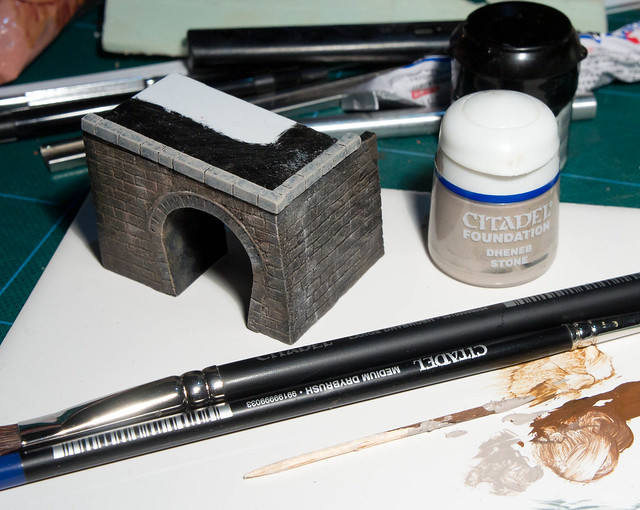
Step 5 uses my favourite GW paint colour - Dheneb Stone. It's a warm light grey and is very useful for concrete, stonework, and any time you want to lighten colours without introducing white. I drybrushed with this fairly gently, and also stippled it onto the copings which are made from a much lighter stone. Note that the black still shows through a bit - I think this is OK.
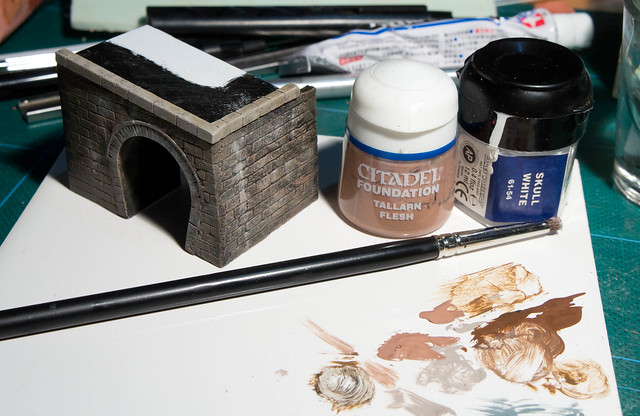
Step 6 is more work on the copings. I warmed them up by drybrushing and stippling with the Graveyard Earth I started the walls with, and then drybrushed more Dheneb Stone to re-highlight the edges. I think without this the colour is too cool.

Step 7 is where I did three steps and forgot to take pictures, sorry! I drybrushed the blocks with a skin tone called Tallarn Flesh to push them towards the pink tone seen in the prototype pictures. I probably put a bit too much on to be honest - I like the result on the portal wall better than on the wing wall. I also got the black and white paints out. White to very gingerly highlight the copings, and less gingerly to make some bloom marks on the stonework and sharpen everything up. If you find you put too much on, smudging it with a finger usually rescues things.
I mixed the black with one of the browns - Graveyard Earth I think - and used this to re-touch the edges of some blocks on the corner of the two walls. When drybrushing you automatically end up highlighting corners and raised detail, and while this is good in moderation I think it was too strong here. I did keep a bit of highlighting, just not all of it. Compare the corner above with the corner below - I think the lower one looks more natural.
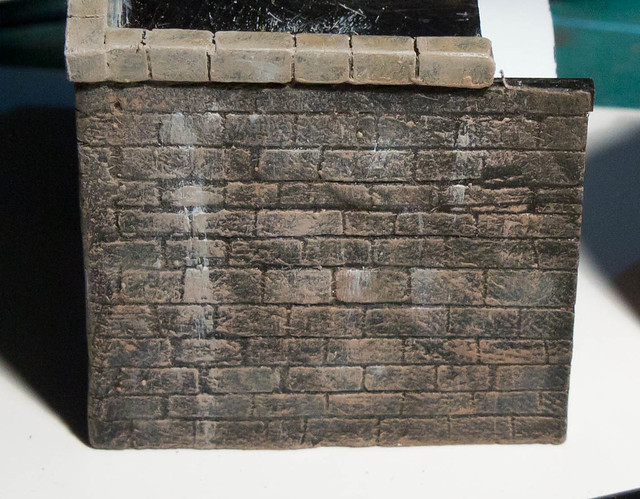
And that's it. To show how messy this looks in detail, have a look at these painful close-ups. I think the diagonal pattern in the lower pic is my thumbprint captured in the clay... The thing which annoys me about the result is the saw cuts I thought I'd lined up in the copings are rather mis-aligned. Hopefully I can stuff greenery into those gaps and hide it all when I bed the portal into the scene. I'll also look at adding some green algae staining at that point since I'll know where the plants are.
I think one remaining job is probably to rub some powders into the new wall - I think I did that for the old one, it certainly looks a bit more coherent than the new one.
Hope this was interesting! If you follow through this far, step 8 should probably be to apologise to your brushes for all the nasty things you did to them.
-
 1
1

5 Comments
Recommended Comments
Create an account or sign in to comment
You need to be a member in order to leave a comment
Create an account
Sign up for a new account in our community. It's easy!
Register a new accountSign in
Already have an account? Sign in here.
Sign In Now