

Plinths or Planters
.thumb.jpg.60c53fcbcaa34017b05b8919d1a9e6d2.jpg)
Entry posted by Silver Sidelines
3,861 views
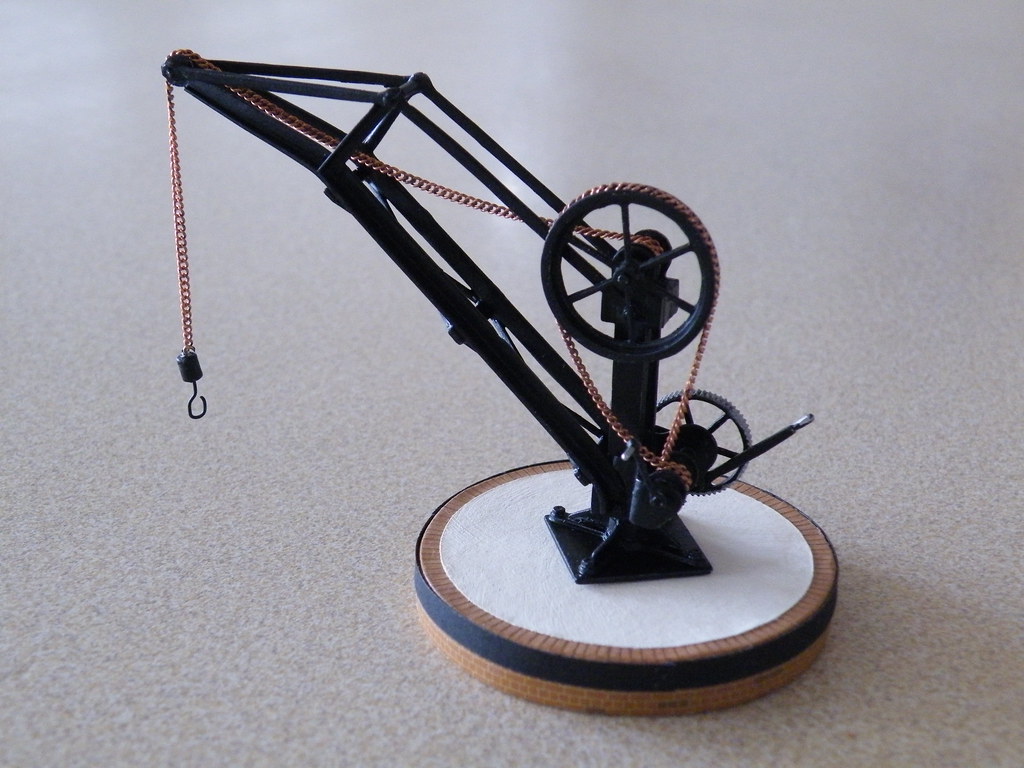
This week I am sharing some thoughts on the excellent kit from Mike's Models for the ex GWR Medium Yard Crane.
I had a full set of instructions for constructing the crane but there was no mention of how to model a base for the crane. A Google Search highlighted a couple of results in this Parish but both acknowledged that the cranes had been assembled without instructions. There was a suggestion that the base should be circular.
A search of my own books showed that the cranes at Lamborne and Tetbury had what looked like circular brick bases infilled with concrete. The brickwork for the Tetbury crane also had a circular steel band to hold the brickwork in place.
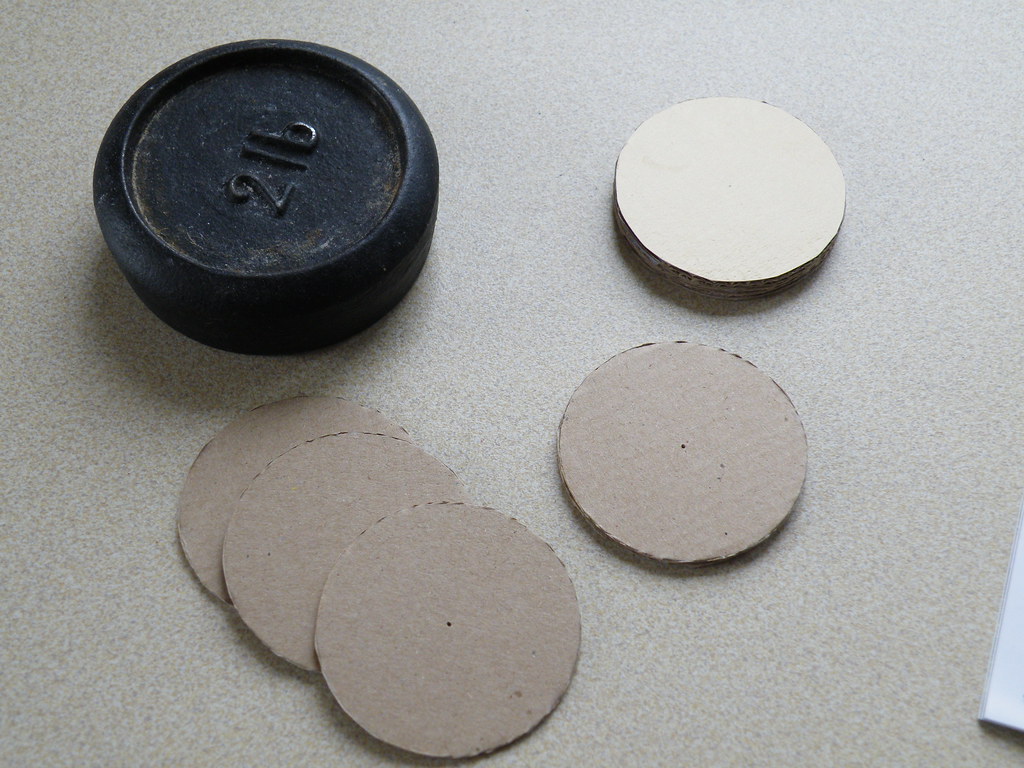
My first attempt was to use two circles cut from 5mm thick balsa wood:
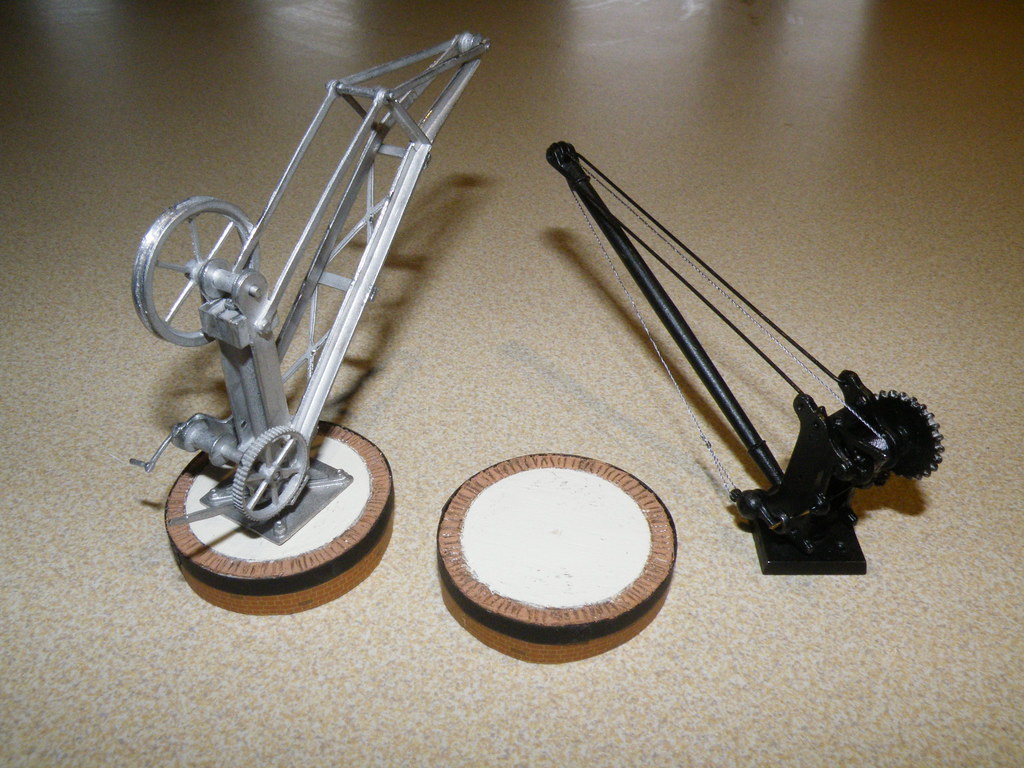
Besides being rather untidy, my attempts at scaling from photographs was obviously wrong and these 40mm (10ft) diameter plinths were too small. Even when used for the little GEM crane there was nowhere for the 'operator' to stand.
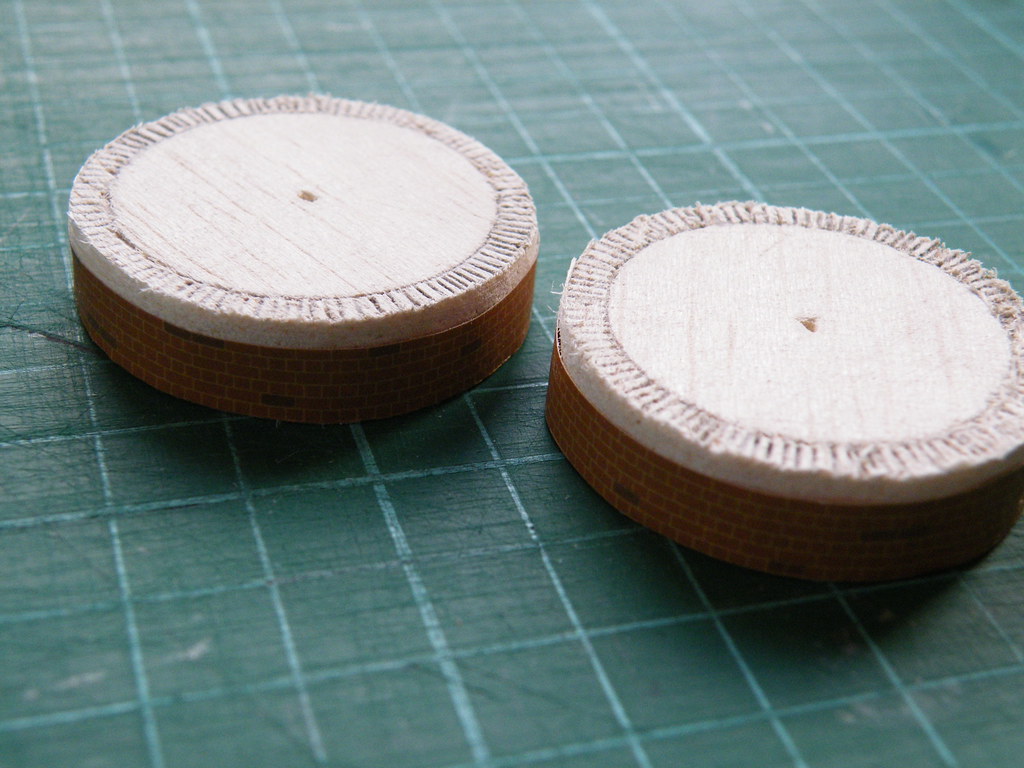
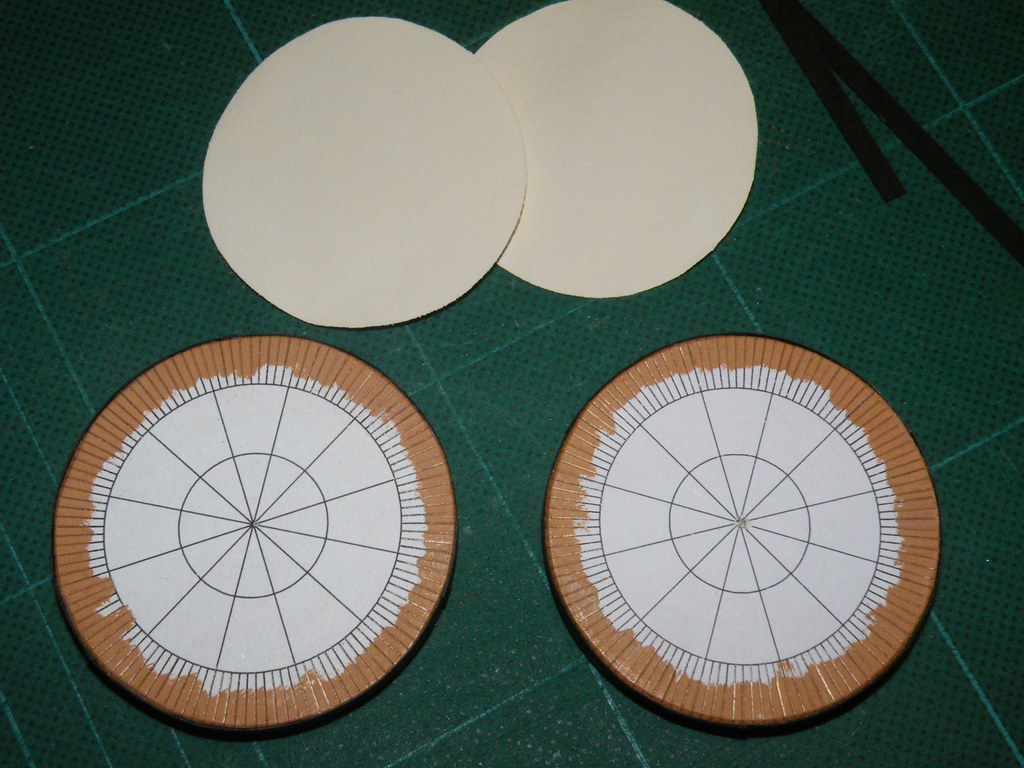
Reinterpretation of various photographs suggested that a plinth 60mm (15ft) might be a more suitable size. Instead of balsa wood I made up a 8mm (2ft) sandwich of thin corrugated card.
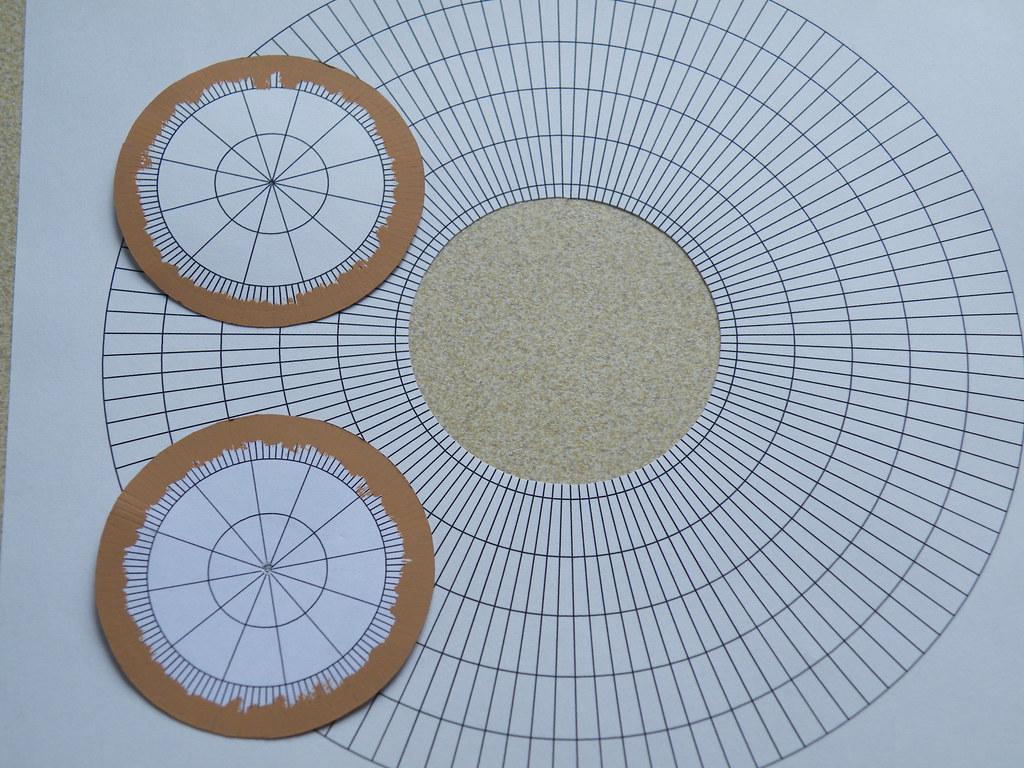
Wives can be very useful and whilst searching the web for craft ideas my wife had come across the web site http://incompetech.com which offers a range of free specialist graph paper. Polar Graph Paper was ideal for setting out the brickwork around the top circumference.
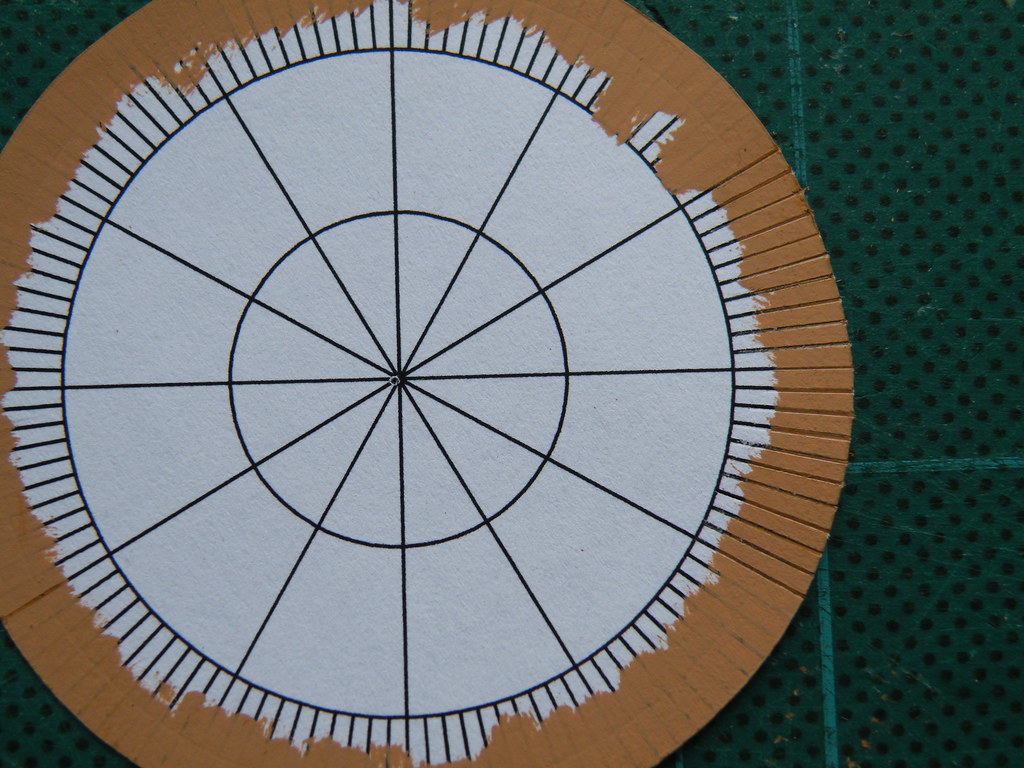
I mixed my own shade of Humbrol paint and as soon as it was touch dry I scored out the joints in the brickwork. This was made easier by leaving some of the printed lines uncovered. The concrete screed for the centre of the plinth was made from a separate disc of paper coloured Magnolia. The steel banding around the outside was made from 4mm (1ft) strips of black cartridge paper suitably indented at one end to simulate rivets or bolts.
I should point out that assembling the crane and making the base seems like child's play compared to rigging the crane.

The problem can perhaps be part explained by an old 'Boys Own Annual' trick. If you take a strip of paper and glue the ends together to make a circle, taking care to put a twist in the paper, and then cut the strip along its middle, you will end up with two paper circles linked together. In order to rig the Medium Yard crane and keep the linkage flat over each of the pulleys it is necessary to a put a twist in the linkage - easier said than done.
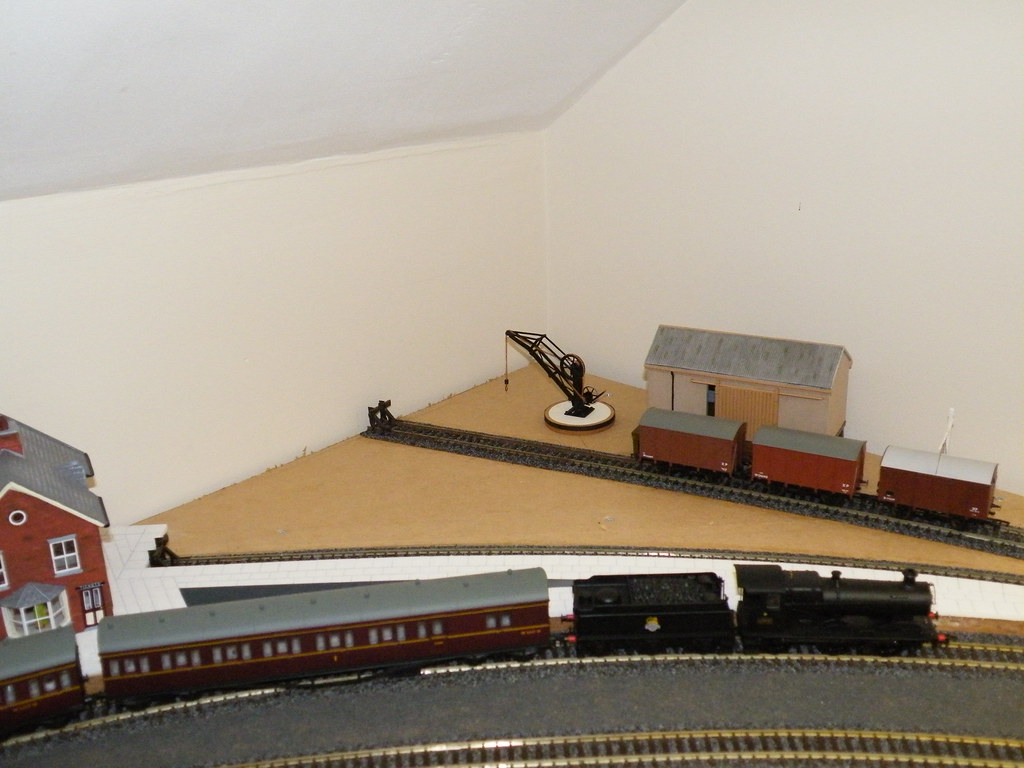
The view above is a taster of where the crane might go. However now that we are having summer it could be some time before there is further progress in this particular corner. 'Planters or Plinths' - well the first pair of small diameter plinths may just end up as Platform Planters.
-
 4
4

1 Comment
Recommended Comments
Create an account or sign in to comment
You need to be a member in order to leave a comment
Create an account
Sign up for a new account in our community. It's easy!
Register a new accountSign in
Already have an account? Sign in here.
Sign In Now