


jonhall
-
Posts
3,582 -
Joined
-
Last visited
Content Type
Profiles
Forums
Blogs
Gallery
Events
Exhibition Layout Details
Store
Blog Comments posted by jonhall
-
-
 7 hours ago, brossard said:
BTW, using CA to attach fiddly details is not a crime in my book.
After the soldering has finished I absolutely agree.
9 hours ago, Barry Ten said:I presumed that's why Tim said he'd do it outside!
I've inadvertently heated up cyano once or twice and err... (checks pulse) I'm still here! Probably not a good thing to do too many times though.
Tim didn't actually say that until after my post, and I had the impression he is a relatively novice etched brass builder, so I thought the evolved fumes ought to be mentioned .
So have I, but I think there is a difference between accidentally doing it, and it being part of the plan!
Jon
-
3 hours ago, Tim Dubya said:
You're right about the glue. I've resurrected the first side and cyano'd in the drop lights and taped them up for soldering tomorrow (or not).
Cyano and solder - that's a VERY bad idea, the fumes evolved are not exactly good for you!
Jon
-
 1
1
-
-
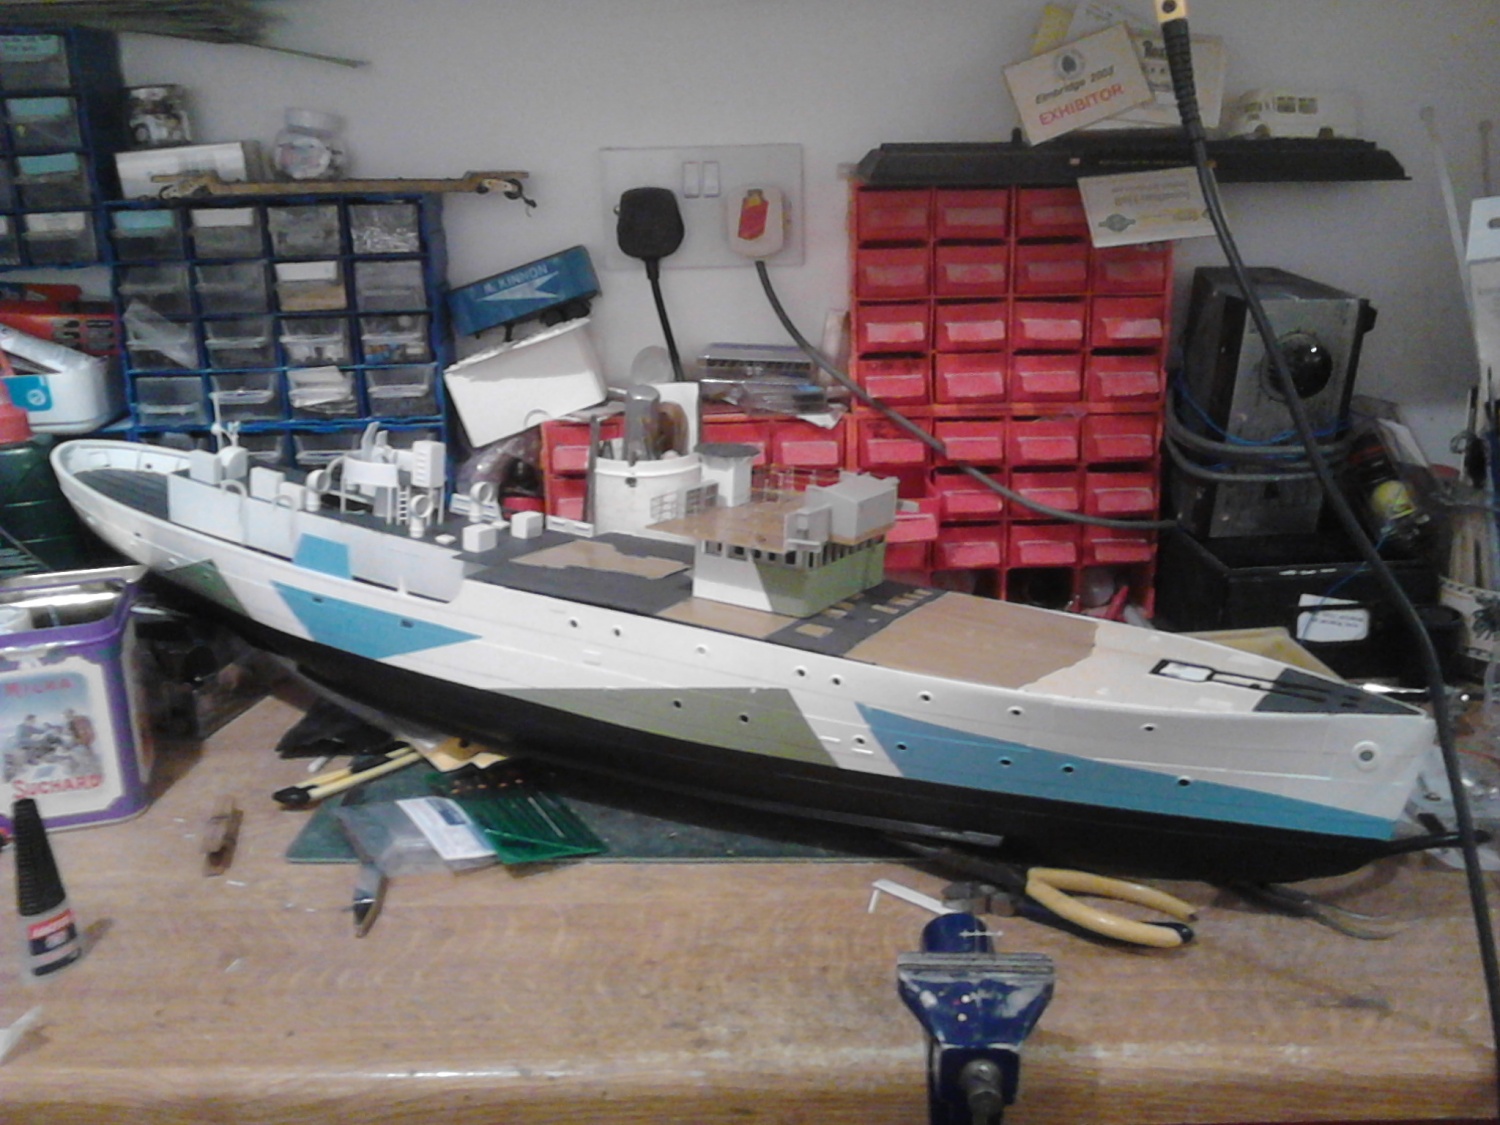
Gaarrrggghh, HMCS Bluebell took up dry dock all over my workbench much of last year - I bought a slightly started original Matchbox kit from the Bluebell railway swapmeet for the princely sum of £15, it had lost the stand, and had the portholes glued in (badly) and the four quarters of the hull glued together.
I bashed out the portholes and eventually replaced them with laser cut acrylic
Filled the bottom of the hull with resin then de-keeled the hull - its not often you go at a plastic kit with a surform!
Deck mostly de-planked, and plate scribed
all the ventilators were thinned at the exposed edges
the funnel had a plasticard wrap with the correct rivets
all the handrails were whitemetal and thread
gun emplacements had anti-slip flooring ribs.
the nameboards were laser cut Mahogany veneer.
the whaler boats all gained inner hull framing
By the time I'd finished it had cost me £100 in parts, and I had no space at all - I had to sell it in the end because it took too much space - alas I seem to have not taken 'finished' photos


-
 3
3
-
 1
1
-
-

What is the origin of that kit?
Jon
-

Nice!
I did a resin body shell that is occasionally available after a resin casting demo http://www.rmweb.co.uk/community/index.php?/topic/81789-poa-blackadder-scrap-wagons/
Jon
-

Or drop a small ball bearing into each 'shell' void before you put the resin in the mould and it ought to remain at the bottom and encapsulated?
Jon
-

You should probably paint the ends brown, and if you can, remove the 'Procor' lettering as none carried this.
Jon
-
 1
1
-
-

Great work - I like your method for getting the wheels in.
I wonder if the contact area where the bogie is pivoted, might be a bit small? You could find the wagons on top will tend to wobble with such a small area?
Jon
-
looking forward to seeing the test print results

J
-

Looking good!
-

What wheelbase is required? I got so fed up of the bogies for the Cambrian Sealion, that I did my own etch, but that's for the cast type, not platebacks.
Jon


Starfighter!
in Aussie National
A blog by D6150 in RMweb Blogs
Posted
The Museum at Speyer has several Starfighters, I'm sure thats where I first heard the German joke 'How do you get your own Starfighter?' to which to punchline was 'buy a plot of land and wait for one to crash on it' (it may be lost in either the translation or my telling! )
If you were painting inn the German livery, the view from above might have been useful - but just look at all those tanks hanging underneath!
The skeletal one has a couple of close ups - Lockhead had the advantage of being able to write their assembly instructions on the plane - in this case how to bolt the wings on!
Jon