

Introduction & construction

Entry posted by Mark Forrest
3,382 views
Back in 1997, after a few years away from model railways, I joined the EM Gauge Society with the intention of building myself a small layout. Having previously modelled in 00 gauge, EM seemed like a logical progression as I wanted the closer to scale track and it would allow me to retain some of my 00 gauge stock (once this had been suitably modified). A few years of armchair modelling followed and it wasn't until 2004 that I found myself with the time and space to make a start on a layout.
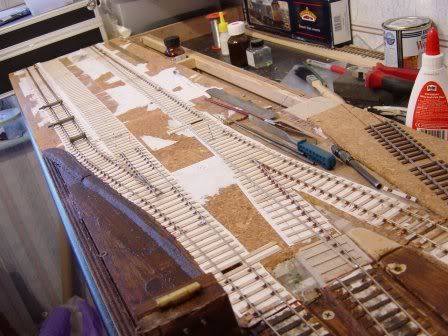
The main purpose of the layout was to allow me to practice the ???black art??? of track construction and to experiment to see how I got on with modelling in EM gauge. With this in mind the layout was kept small and simple; measuring just 2m x 0.35m overall (that's approx 6'6" x 14" if you prefer measurements in pre-TOPS) and with a track plan consisting of six turnouts. The reason the boards were kept so narrow was so that I would be able to fit them in the passenger side foot well of my MG Midget. The track plan is based on the "Timesaver" shunting puzzle. Using Y turnouts has allowed a lot of track work to be squeezed into a small space. A downside of this has been that it has resulted in some fairly tight curves which does limit what locos can be used - diesels with long wheelbase bogies (such as Peaks) struggle through some of the trackwork!
All of the track and turnouts have been constructed using parts from C&L Finescale, EM Gauge Society and SMP. These were built in situ on templates printed using Trax2 layout design software. The templates were glued to cork tiles on the top of the base boards; individual plywood sleepers and crossing timbers were cut to length and glued into position. I then threaded plastic chairs onto the rail and then glued these to the sleepers. This method of track construction is very time consuming, but quite a relaxing and satisfying task nevertheless.
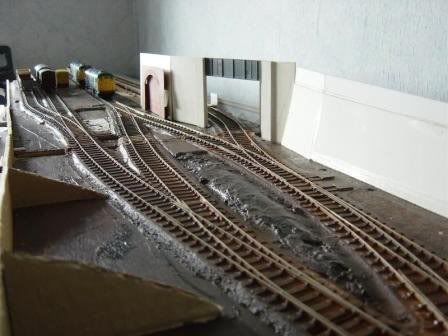
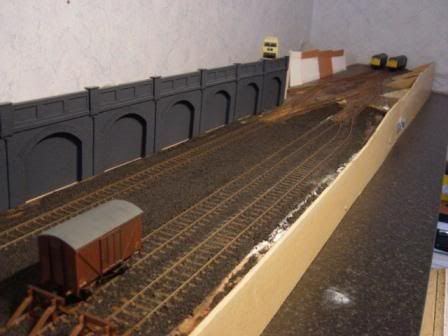
To begin with progress was slow and because I wasn't working to a plan there were a number of false starts but eventually (and very much due to the advice and support of members of this forum) the layout began to take shape and scenery started to appear on my test track.
-
 2
2

0 Comments
Recommended Comments
There are no comments to display.
Create an account or sign in to comment
You need to be a member in order to leave a comment
Create an account
Sign up for a new account in our community. It's easy!
Register a new accountSign in
Already have an account? Sign in here.
Sign In Now