


janw
-
Posts
9 -
Joined
-
Last visited
Content Type
Profiles
Forums
Blogs
Gallery
Events
Exhibition Layout Details
Store
Posts posted by janw
-
-
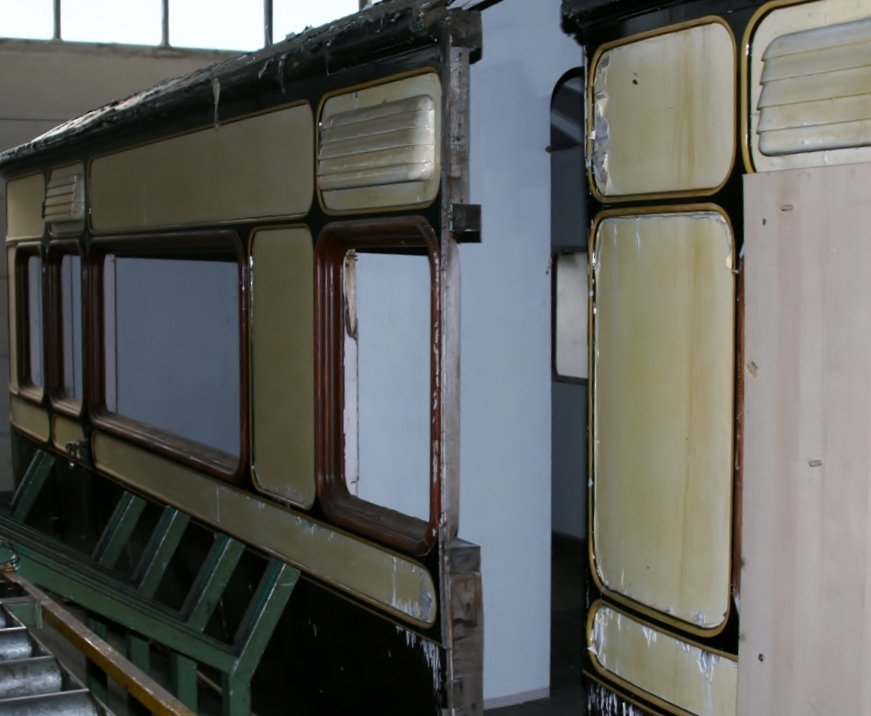
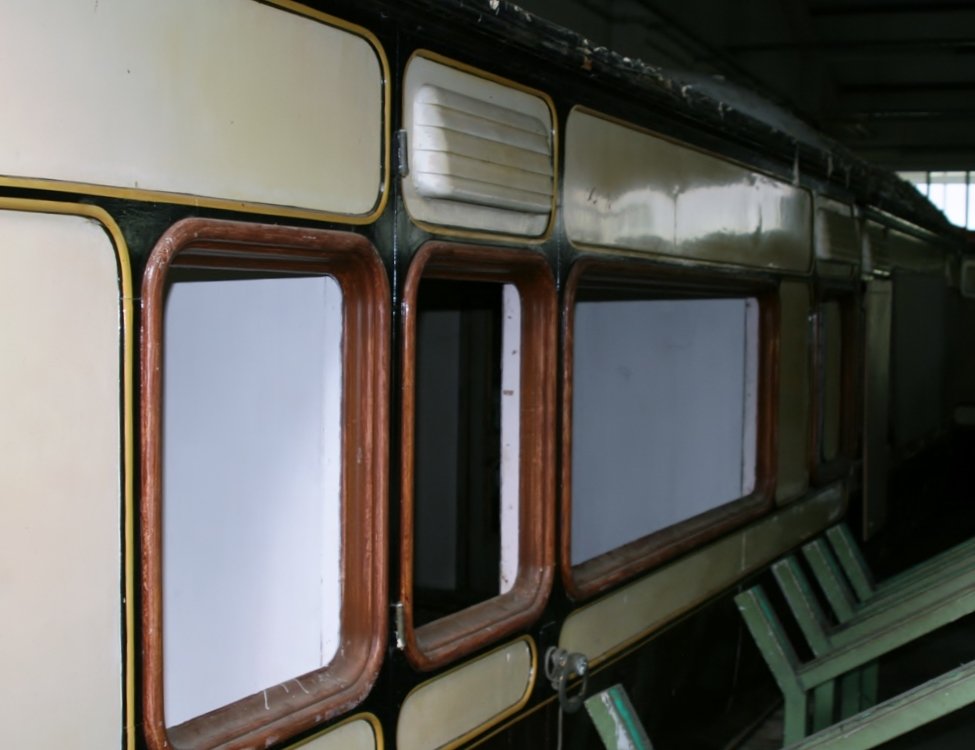
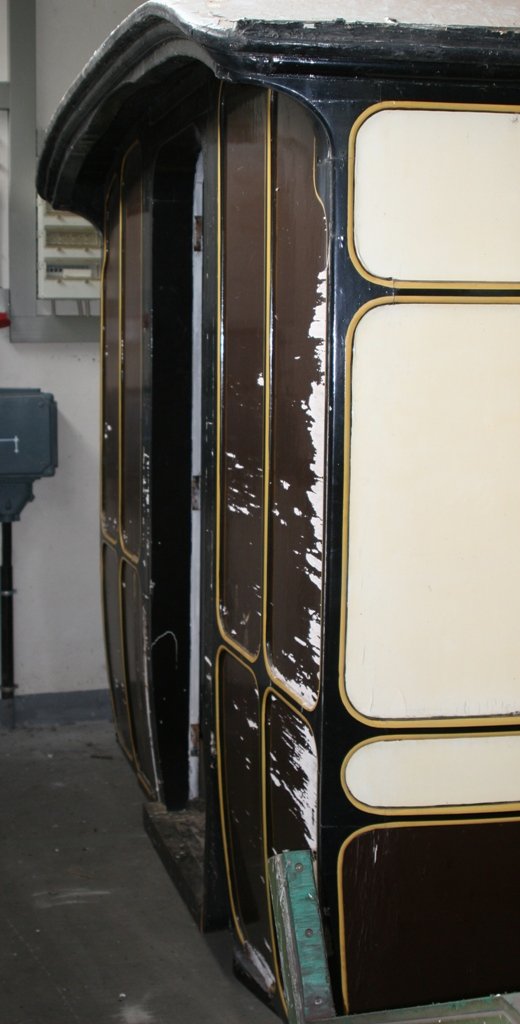
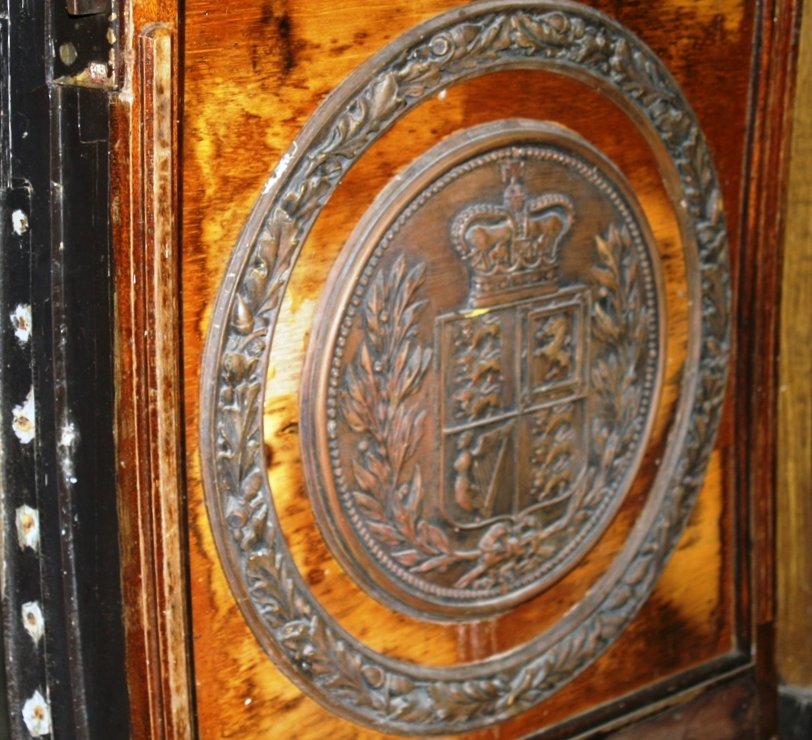
A recent thread on the Dutch railway enthusiasts' forum Beneluxspoor.net shows what looks like a former royal carriage from the UK that is part of a collection in Germany.
https://forum.beneluxspoor.net/index.php?topic=90382.15
I don't know the exact location, but apparently this coach (and others, see thread) are located somewhere near the Dutch border in western Germany.
The color scheme of the coach seems to suggest a GWR origin. The bogies are on p. 1 in the thread.
What is this coach and its history? Maybe someone here knows more about this?
The photographs are by Hans Reints who recently visited this location.


-
 2
2
-
-
A short video of the model running on the H0-layout of the Hague Modellers Club, the Netherlands. No third rail but overhead power lines and the fourth coach is a repainted Triang R749, not a correct combination. But it moves.
-
2
-
-
@Bécasse and Nearholmer -- Many thanks for that information. I conclude that I should leave the resistor as it is; the brightness of the head code is indeed comparable to that of a steam loco oil lamp (an original that is, not a modern model one (-: )
-
My inspiration to experiment with this model was one of 'Mike's Movies' on youtube:
where I was impressed by the smooth running of the old motor and the genuine, vintage image of the whole. Just a joy to watch.
Here you can also see what a game-changer a simple good paint job already is for this model.
And obviously the 'Frankland' layout on this forum was another main impetus. What fantastic inspiration that is!
-
1
-
-
My main intervention was to lengthen each of the bodies by one compartment; an old suburban composite coach was slaughtered for the purpose. This seemed to have the exact same profile as the other coaches but in reality the center coach has a slightly different profile from the driving bodies and the composite. So on the center coach the fit isn't perfect. To minimise the number of cuts, back ends were exchanged between cars. This operation was finished surprisingly quickly, not more than two afternoon sessions including the roofs. Two of the discarded buffers are installed as centre buffers on the center coach, as per the prototype.
The lenghy work was the detaling and painting that followed.
Apart from many scratch-built parts, I installed replacement driving wheels from Tony's Store, a dummy driving bogie and buffers from the Hornby Brighton Belle, Bachmann Bulleid bogies (center coach still to be done), headcode stencils from Roxey Mouldings. The green is Humbrol Rail color Southern Green acrylic (but I had a hell of time spraying it, the result has an orange skin, this is the best I could do with it). Decals are self-printed. The lamp is replaced by a led but I will reduce the resistor as the present light seems a bit dim (any one know of a photo where you can see how bright it should shine?) New interiors were built in card and detailed with the old Peco Kitmaster card kit (scans of these abound on the web) -- the colors aren't precisely right but it looks nice and I can live with it. Flush glazing is from South-Eastern Finecast; fitted slightly un-flush because as intended it made the bodies look more like the post-war EMU generation, too smooth for the pre-war types. This was done by inserting strips of thin card between the edges of the glazing and the coach body, so that the glass surface on the outside recedes a little. The door and front windows have just plain flat plastic glass.
Obviously the model is still a mixture of types, as much as the original Triang was. To have some sort of guidance I took the South-Eastern units of 1925-26, no's 1496-1524 as reference, as they seemed to come closest in appearance. Several of these served as de-icing units after their passenger lives. The main differences are the number of compartments (8 not 6) and the tumblehome which is more pronounced on the model than on the real units (making the model more elegant than the real thing, in my opinion).
I left the motor in place since I find it a piece of historic mechanics in its own right, with a charming way of running that suits the image you want for these antique units. I suspected however the magnet had lost some its force; I don't have one of those re-magnetising machines but attaching a couple of strong neodynium cube magnets for a while (bought cheaply from China) had a noticeable positive effect too. I expect I will have to repeat this every once in a while. The running direction had to be reversed to comply with the modern standard, which was more work than you might expect (and involved drilling the hole in the bogie body visible in the picture, to insulate the pick-up from the body).


-
2
-
-
- Popular Post
- Popular Post
here's my attempt, recently finished:


-
16
-
 1
1
-
 6
6
-
 1
1
-
Many thanks for these ideas. My impression so far of the motor itself is not at all bad, and I like saving some of the original character of the model, so I wanted to try improve the running by changing the worm+gear only. I will contact Ultrascale to find out how this conversion is done.
-
Why not just detail the chassis and keep the X04. Very reliable and go on for ever. If you want to, Ultrascale do replacement drop-in gears of a different ratio. And you could add pickups to the tender.
Stewart
Dusting off an old topic; I am working on an L1 too and looking into how to get it running slower and better. A new gear set looks like a good idea, many thanks. Could anyone tell more? Which worm + gear set? The 40:1, type 2 listed here? https://www.ultrascale.uk/eshop/products/CAT015#RTRRG
But how 'drop in' is this operation? You will have to remove a wheel from the driving axle? How is this done? And how do you remove the old gear and worm? And then put the wheel back and get the quartering right?
Jan


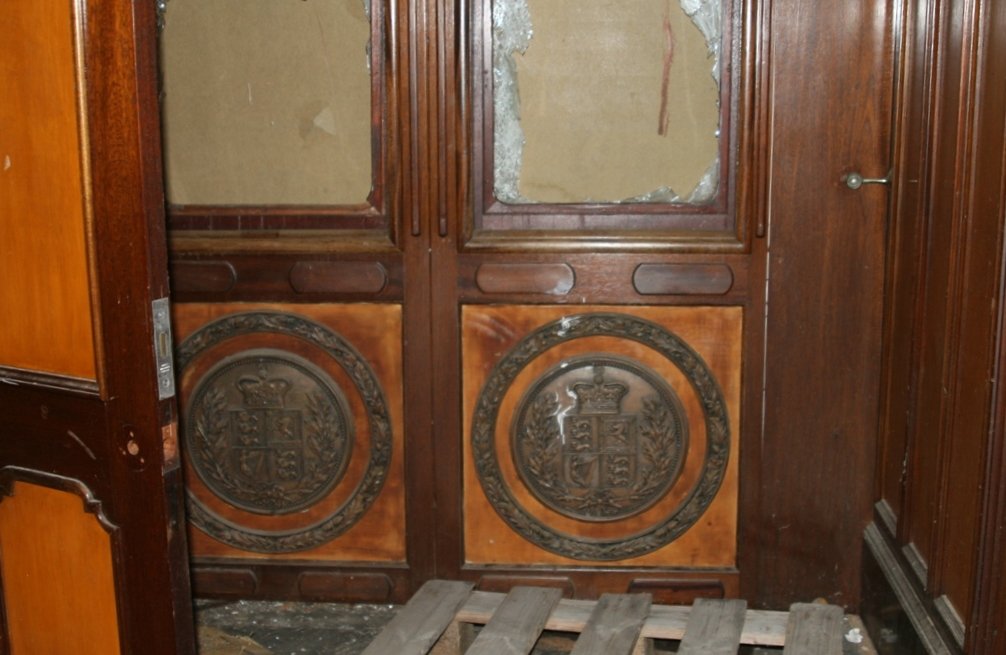
British royal coach on the continent?
in UK Prototype Questions
Posted · Edited by janw
Aha...! Many thanks. "looks like" was actually the right word then.
But on that Flickr page I read: "It is not known what happened to the replica coach."
it seems we have an element of the answer here, no?