


bluemattersoda
-
Posts
92 -
Joined
-
Last visited
Content Type
Profiles
Forums
Blogs
Gallery
Events
Exhibition Layout Details
Store
Posts posted by bluemattersoda
-
-
Hi everyone, I've got photos of the painted model over at 3D printing threads http://www.rmweb.co.uk/community/index.php?/topic/113998-sbb-twindexx-intercity-n-scale-spur-n-echelle-n/&do=findComment&comment=2904722
Probably be selling these on Shapeways this week!
Thanks all,
Alan
-
That ain't 'alf bad.
How's the bevel drivetrain coming along?
Thanks, and sorry for the loooong delay replying! I've sort of given up on the drive train idea...unfortunately at N scale the gears and 3D printing them is too finnicky and fragile. I've gone back on relying on Tomytec chassis. HO scale on the other hand my be more suited!
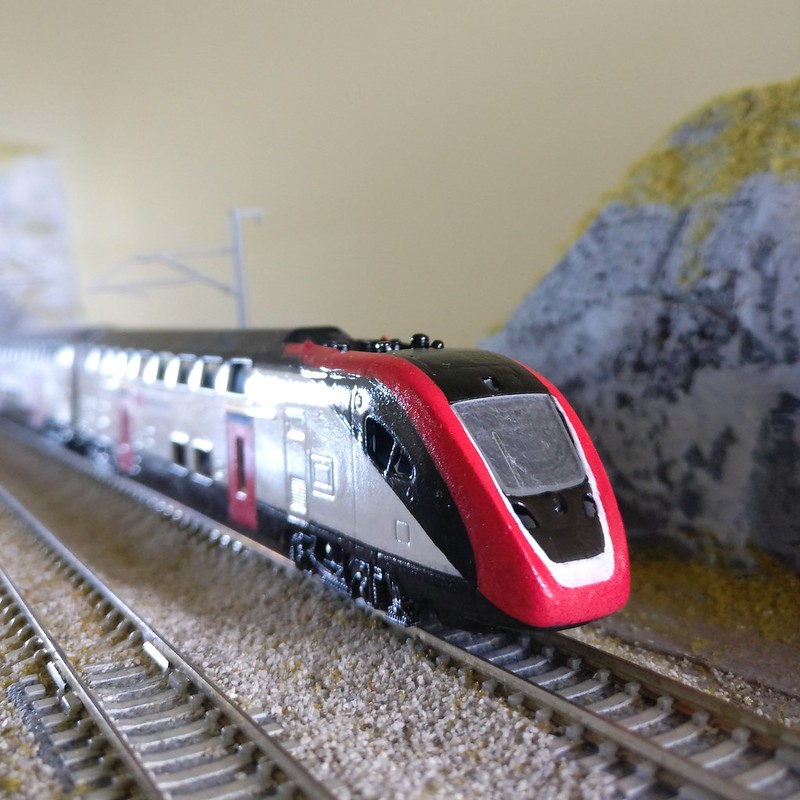
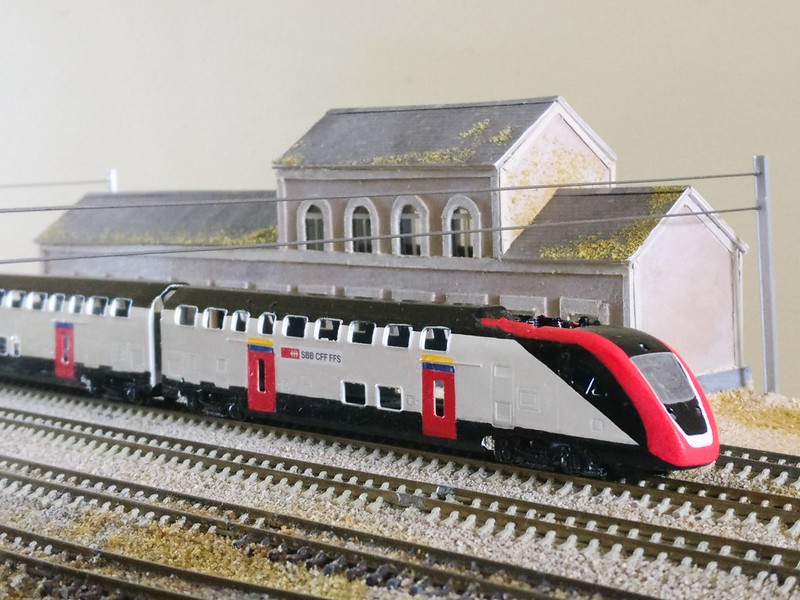
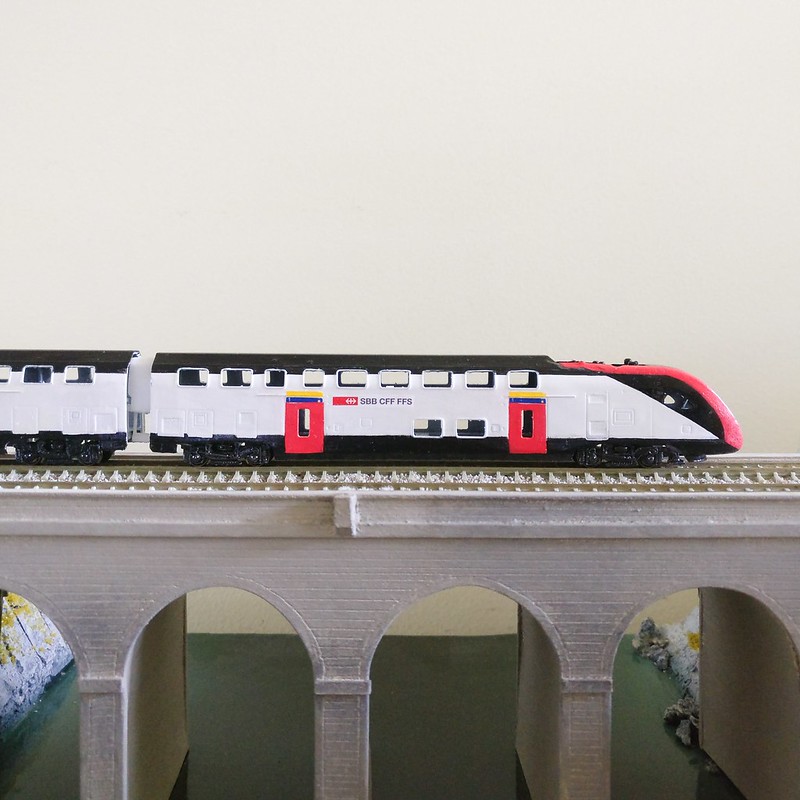
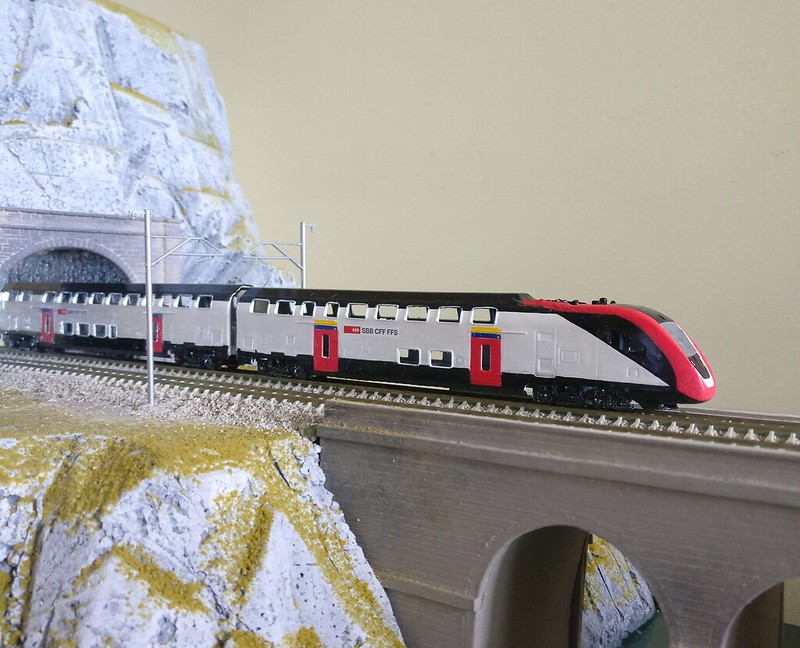
Hi all, it definitely has been a long time since I updated this thread. The first RABE 502 started passenger service spurred me to finish painting the test prints, so here they are! Soon to be available on Shapeways.
I've also started an Instagram account @platformtrains since the last I updated - feel free to check it out!
Thanks for viewing,
Alan
-
 3
3
-
-
These look great Alan - and the photos too! What do you think it would take to rework the models for Z gauge? Could they be simply scaled somehow? (I'm not particularly familiar with 3D modelling but would certainly be happy to roll my sleeves up to do things like this!)
Hey sorry for the looooong delay to responding - completely slipped my mind! Z gauge is definitely possible though unfortunately don't have any plans at the moment. However I am planning a HO version in full color sandstone, depending on the success of the test prints
Cheers!
-
Out of interest, when were these units introduced and what routes do they run? I think I recognise them from around Zurich but can't recall noticing them elsewhere.
Hi, they aren't in passenger service yet, still in testing around Switzerland. i think they are slated for service this year
-
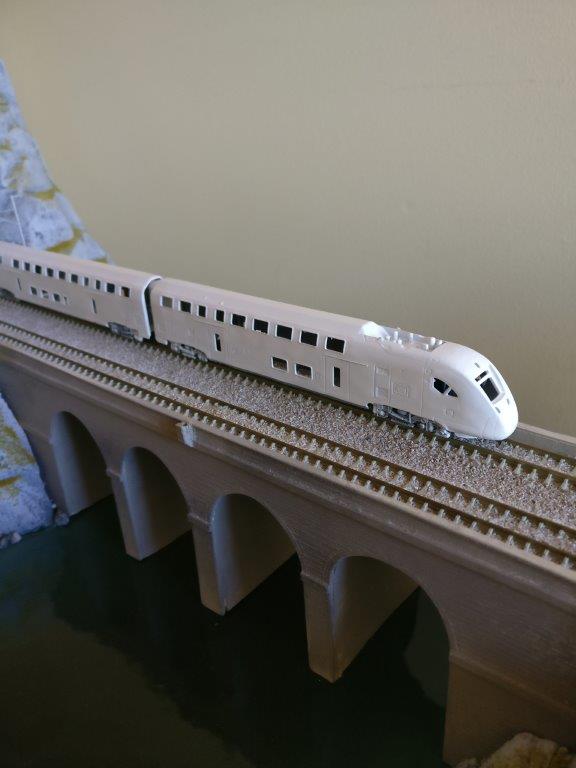
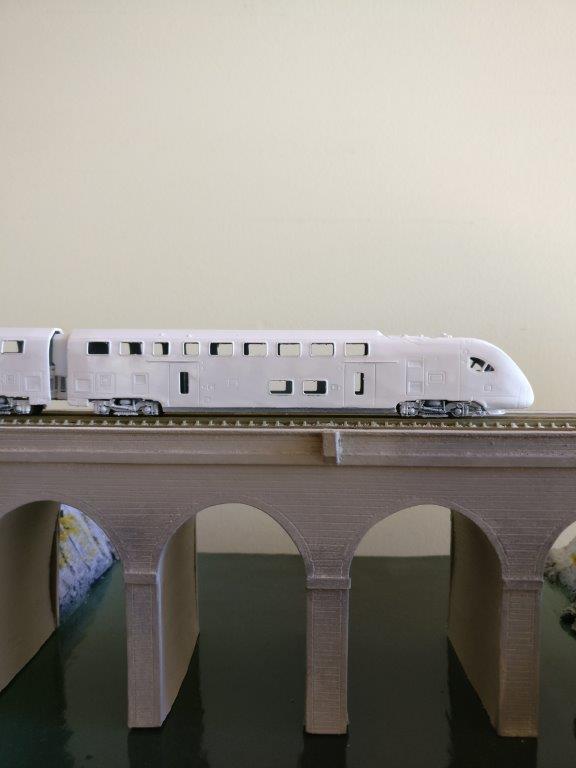
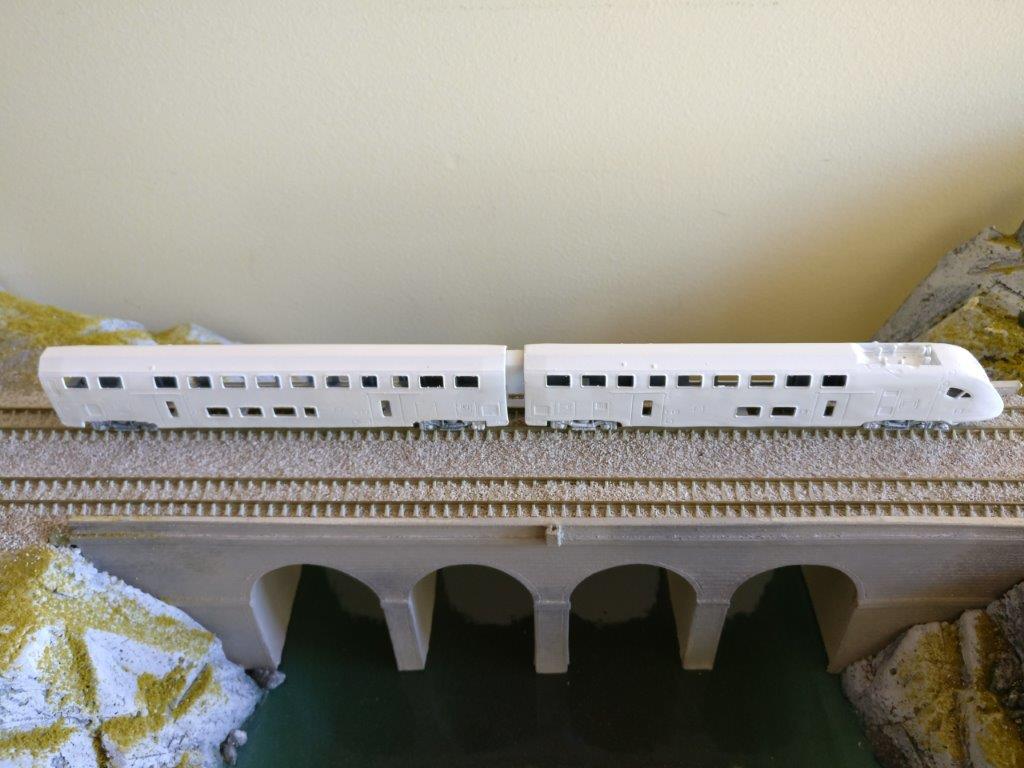
Hi all, long time no post. Here's the updated print. I've decided to use decals for the livery rather than paint. I'm still making the decals at the moment, and the white undercoat isn't as good as I hoped.
-
2
-
-
Hi all, long time no post. Here's the updated print. I've decided to use decals for the livery rather than paint. I'm still making the decals at the moment, and the white undercoat isn't as good as I hoped.
There are more photos in the 3D printing forum: http://www.rmweb.co.uk/community/index.php?/topic/113998-sbb-twindexx-intercity-n-scale-spur-n-echelle-n/?p=2889606-
2
-
-
Hi Simon, I think I agree that the minimum wall thickness is a problem. It will be difficult motorising using Tomytec chassis in n scale for example, cos there won't be enough room. It's something I will be playing around with though!
Thanks JDW for your support! I think I'll make a detail plastic version for those looking at a smoother finish. Cheers!
-
Huh, that's quite a clever method to make windows in N scale! I've been doing a glazing sheet which fits on the inside of the body shell using transparent detail...and it's very expensive! This looks like a good method. Do you guys think it'll work in HO scale?
-
Thanks for sharing your techniques - I've been experimenting with coloured sandstone recently (here), and have been considering converting some of my N scale trains on Shapeways to coloured sandstone. Could you explain how you did the windows in a little more detail? did you have an acrylic sheet behind before adding the "krystal klear" (by the way, what is it?). Thanks!
-
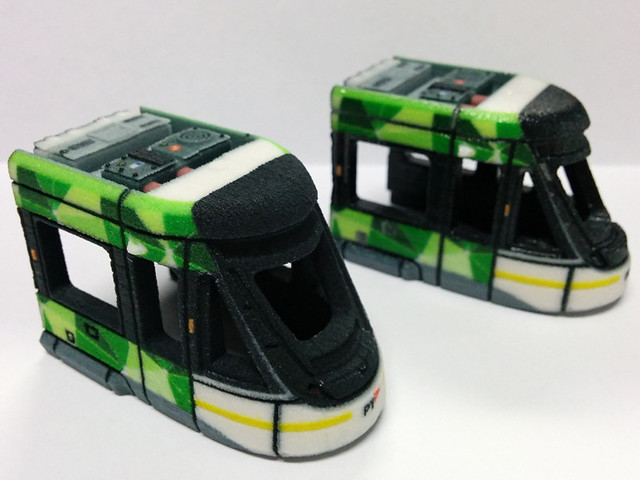
E1 class tram, suitable for cars 6001 - 6050. Cars 6051 upwards have a redesgined front and cab area to reduce glare and are class E2.
Thanks, I've already been down to the Brunswick terminus of Route 96 to get some images for a future E2 model. Tramtracker's very helpful for showing the tram number so you know when the E2's coming!
Have you tried polishing the Transparent Detail as Shapeways recommend?
I haven't tried that yet, but it may be difficult with the embossed windscreen wiper!
Sorry to me this is futile done in such a "Fluffy" texture. Compared to FUD or the Black HDA this as rough as the proverbial Badgers whotsit. A reasonably smooth body shell is prerequisite especlally when you can't even contemplate sanding etc. it down as its precoloured. Today producing a transfer for the side etc. from a reasonable dead broadside photo isn't a big job and not beyond many peoples Computer kit with no metallic colours involved equally in the UK we have some people ( like TramAds) able to do it by a printing process anyway to deal with gold etc. numbers or lining. I'd be very interested in a decent Melbourne E body that was in a proper material but not something in material more suited to a scenic item of Dawlish Cliffs . I suppose the clue is in the material name Sandstone! When I compare these photos to the Black HDA Blackpool Glasshouse I was handed on Saturday I just want to weep. So disappointed.
Mate, I really don't know why you're so upset over me experimenting with materials. Of course it's got a rougher surface - that being said the prints are less rough than I had been expecting.
I'm perfectly aware of different methods to colour, see below previous n scale work with decals. I also haven't ruled out making the E1 models available in FUD or HDA.
-
6
-
-
Hi everyone,
Lately I've been experimenting with full colour sandstone 3D prints. I have noticed a lot of people are turned off buying 3D printed trains because of the painting - especially modern liveries with complicated graphics.
This is the new E Class trams running in Melbourne - modelled in HO
So here are the renders of the 3D model, in Rhino:
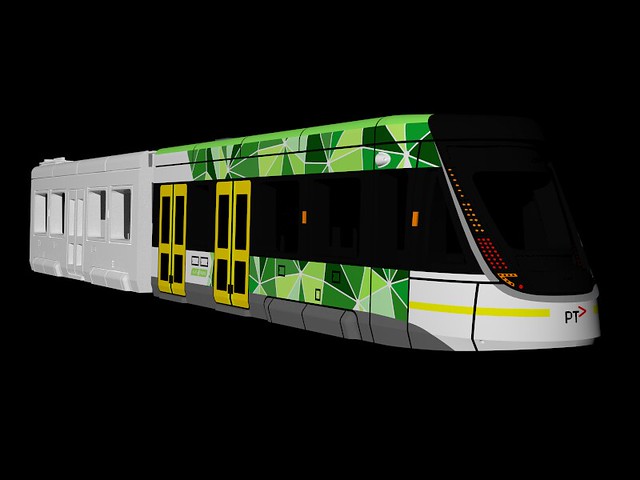

And here are the test prints from Shapeways. I had two test sections done, one in standard Colour Sandstone, the other Coated. I think the uncoated version looks better. The Transparent Detail Plastic windscreens are a bit of a disappointment...more frosty than transparent. Also, the indicator lights didn't come out in the colour, so I will be revising in the model. The roof details are looking sharp though.
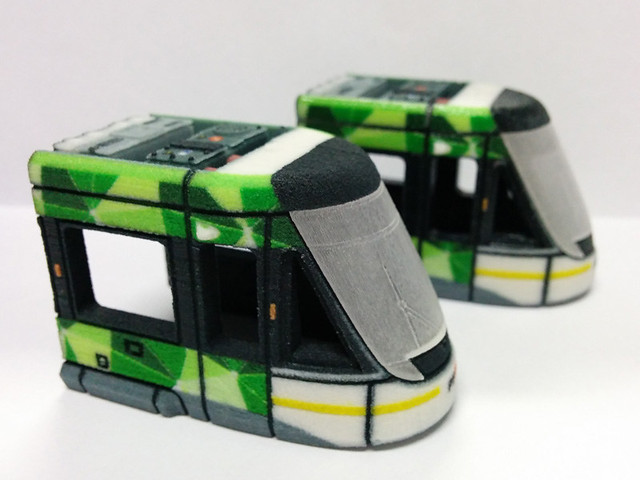
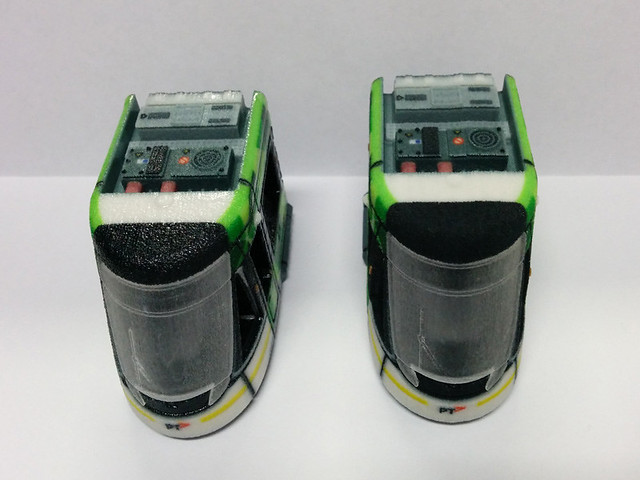
I'll be revising the colour in the panel joints - as you can see they are bleeding onto the white. I also need to finalise how the chassis will work, but i'm happy with how this is turning out.
-
5
-
-
Time for a quick update! Again, I must apologise for the long time between updates. This will be a quick update again - hoping to have a more substantial update with painted model to show soon.
Anyway, did a quick trial fitting of my 3D printed gears. Good and bad - it seems I get very close to getting it work, only to have something jam it all up.
Here was the revised chassis model

To summarise:
- Flexible Motor Shaft (WSF) - got the right balance between strength and flexibility so that it can help the universal joint turn (printed in WSF)
- Universal Joint (FUD) - FINALLY got this to work! Though I will need to up the size of the connected gear wheel.
- Wheel gears and Bogie Drive Shaft (FUD) - these mesh well and appear to turn correctly.
The problem now is the WSF bogie frame. Seems that the fit is too tight to allow the gears to turn smoothly. I suspect this to be a scale tolerance issue - I've encountered this before in Shapeways WSF which may be smaller or bigger than what you design. This means everything is jamming up. The FUD parts are also very fragile - don't know how long they will last.
I'm considering now if I should abandon this whole idea of making my own gears, and following the tried and true path of modifying a store bought chassis. While I'm close to making it work, it is always just beyond reach. Assembling the pieces is also very finicky, and in cost it works out about the same as buying a Tomytec chassis and modifying it. I'll give this some more thought.
Until the next update!
-
3
-
Alan, That is very impressive. Back in the 1990s I made some attempts at Belgian couchette cars with a variety of different arrangements from complete photo-printed sides to added livery elements. The first three have no interior detail just blackened windows. In service you would not notice, especially as they run predominantly at night.;-)
Thanks Mike. I think I'll make the black detail plastic available for the windows. That said it should be OK that you don't see any seats through the transparent plastic. I've placed the order for the test print so will know soon!
-
1
-
-
Hi everyone,
I've update the model as suggested by Ben A - please check out the thread over at 3D printing: http://www.rmweb.co.uk/community/index.php?/topic/113998-sbb-twindexx-intercity-n-scale-spur-n-echelle-n/?p=2647678.
Here are some images:


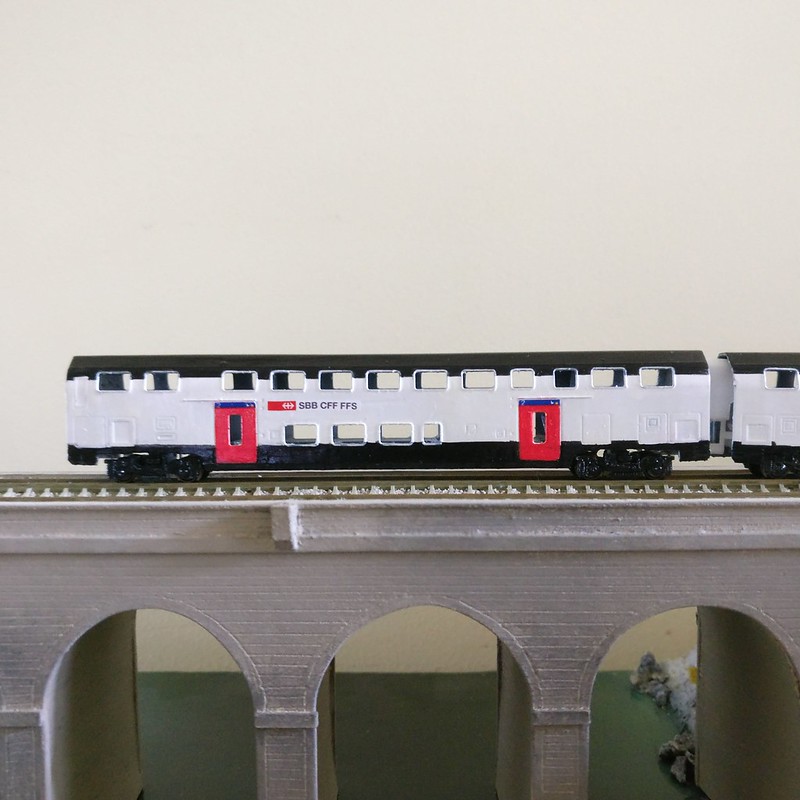
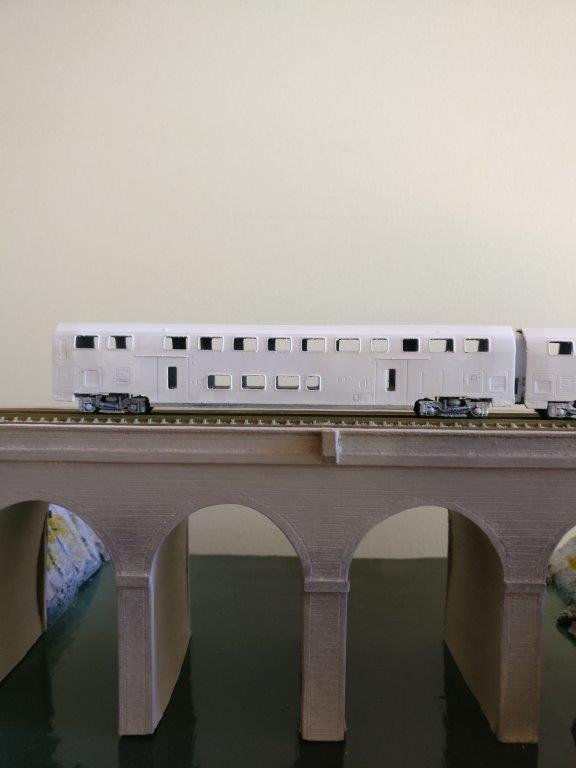
And the Second Class trailer (first class is also done):

Anyhow, please let me know what you think. I hope to do another test print soon and will post photos when that's done.
Alan
-
1
-
-
Hi everyone,
I've been very busy at the moment, so I've only now just finalised the revision to the original design as suggested by Ben A. Here's the revised cab - turns out the biggest problem was with the window and light positions. The shape of the nose has been slightly changed. I've also revised the motorised bogies (not shown),


To save costs I've reduced the need for a WSF chassis - see the Second Class trailer carriage below. The downside is that there are no interior details - no seats, etc. I figured at N scale you can get away with this. First Class trailers have been completed as well.


Anyhow, please let me know what you think. I hope to do another test print soon and will post photos when that's done.
Alan
-
5
-
-
Hi there,
I am not familiar with the prototype but are you working from drawings? Comparing the photograph you have posted to the CAD suggests that the front end proportions might want a little more finessing.
To me the headlight clusters on the CAD look too narrow/tall and too close together, compared to the photograph of the actual unit, and the windscreen looks a little narrow too.
I appreciate this might be a parallax error or simply caused by distortion in reproduction but I know from experience that it is possible to get too "close" to a project and a second pair of eyes can sometimes help.
Cheers
Ben A.
You may be right Ben, it was very hard to get the front right. The frustrating thing is that I had several drawings from the internet and I used a front elevation to help with the front...I'm starting to think it was an early design sketch...
I may try again soon
-
Hi everyone, here's an update with photos as promised - Bombardier SBB CFF FFS RABDE 502 Twindexx in N Scale / Spur N / Echelle N


I have to say I'm very impressed with the details in Shapeway's High Definition Acrylate - highly recommended by me for models. As you can see the details are crisp and angles sharp, plus it's cheaper than FUD and doesn't require cleaning. I've discovered that putting HDA into hot water to straighten out bowing can cause the plastic to become too soft. so be careful using that method.


On the left is the glazing in transparent detail. I may reconsider cos they're somewhat finicky to install into the body shell, and are quite pricey (AUD$10 each carriage). On the right is a new thing I'm trying - optional paint masks to help paint some of the finer colours accents, especially on SBB's livery for this train.

The motorised bogies need more work. Even though I've left the required clearance for moving parts, they were really stiff and caused parts to break when I tried to free them. Not shown are the universal joints which broke off. Good news is that the gears are meshing properly.
Stay tuned for more!
-
2
-
-
On the "wrong shells" issue, that sounds to me like they did an extra set of prints and then selected the wrong cars to send to you, not recognising the subtle differences.
Hmm, could be...
-
Hi everyone,
To keep everyone updated, I have received the first batch of prints from Shapeways. I'll be uploading photos over the next few days. The HDA shells are looking great! The bad news is the test print has revealed some major issues with the design of the gear system, and this will need some re-designing.
On another note, has anyone been experiencing problems with Shapeways quality control lately? They've sent me the 2x body shells as per my model, but seem to have deleted one and duplicated the other without realising they are slightly different! I've reached out to get a reprint...but I've had to get reprints the last few times I've ordered with them due to them misreading/misinterpreting models (which shouldn't even be a problem considering that there's not interpretative work on their end). Shapeways US does the manufacturing for Australia, and they seem to be a bit slack on the QA front. I have to say I've never had issues when they were sending me stuff from the Netherlands...
-
If it works, would you consider making bevel gears available for 4mm scale drivetrains as well?
I'd wait to see if they work first!
-
Oooh, do I see bevel gears?
Yep, the axles connect via bevel gears to a drive shaft which is then connected to the first universal joint over the centre point of each bogie, with another universal joint at the motor to compensate for the second shaft's angle. The second shaft is a spring for tolerance. I'll see if it works!
-
The digital model of the Cab cars is almost done and should be ready for a test print this week. For those who are interested, progress shots are being posted over in the 3D printed section! http://www.rmweb.co.uk/community/index.php?/topic/113998-sbb-rabde-502-twindexx-intercity-n-scale-with-gears/
-
Hi everyone,
It's been a while but I've been working on a new model. I'm hoping to have the model ready for a test print this week. This will be my second attempt at having the motor chassis 3D printed - the last attempt was close but in the end didn't work.This time round I'm using two universal joints per bogie rather than the traditional worm screw. In the meantime, here are the renders:


I'm working on making the masks for painting. This came about after the finicky-ness of painting on previous designs. I'll post more photos when the prints arrive, and when I finish the carriages of course! I'm planning on putting this up on Shapeways for sale soon.
Cheers,
Alan
PS: check out my previous models here; http://www.rmweb.co.uk/community/index.php?/topic/109915-3d-printed-trains-victorian-vlocity-sydney-waratah-sncf-tgv-edited/
-
3
-
-
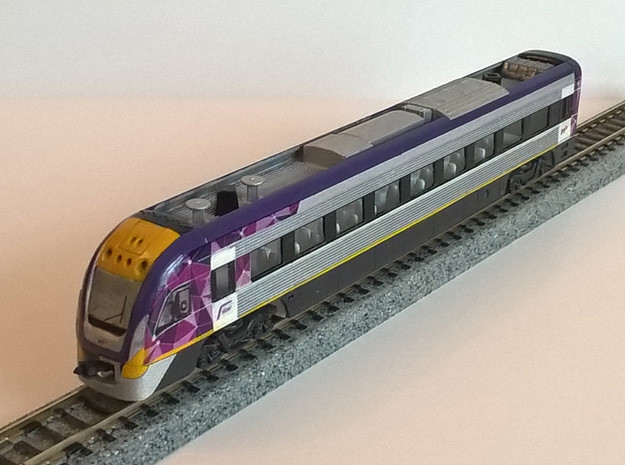
Well done on the FLIRT - looks great! Can't wait til it's painted!


SBB Twindexx in N scale - Updated -
in Swiss Railways
Posted
That's good, guess I still beat them then. I actually prefer the multiple units, on aesthetics!