


Mirmic
-
Posts
61 -
Joined
-
Last visited
Content Type
Profiles
Forums
Blogs
Gallery
Events
Exhibition Layout Details
Store
Posts posted by Mirmic
-
-
Good evening,
As in previous post, sorry for small progress in building this engine but still I have not so much time. Fortunatelly if I have some spare I built a little bit.
Now I work over the "altar" of the crew.
To tell the truth fingers after "lazy" time not won't so accuracy to operate small elements but...
The result of two evenings:


-
 5
5
-
-
Dear visitors,
Very sorry for delay in continuation this topic, I promise that will be continuated. Now I have very busy time and it is a true reason..
Regarding Photobucked I was unpleasant surprised, promise replace pics and load them to RMweb server.
Cheers
Mirek
-
5
-
-
Hi,
The Johnster, paper or cardboard is the same good material for modelling as another. Needs only take into consideration that is much weaker. Generally what we observe? There are full metal model, from mixed material (metal, plastic) and from another. It depends of their functionality. As a static model cardboard loco has sense but motorized? Rather no.
In my case I like process of built. Later model can stay on the shelf. Metal model or cardboard model on the shelf will be the same good.
-
Hmm, it would be great shame if the photos of Mimics stunning modelmaking vanished into the photobucket hole. They really should be available to inspire modelmakers of the future.
( That also goes for a lot of very impressive models previously available via RM web and referenced to photobucket, but too many to list all of them)
Hi in New Year!
Phil, rockershovel, thanks.
Now I'd like to show you indicators, gauges for control pressure of steam, pressure of compressed air, volume of water etc.
My first idea was use pics for dials.

Because effect was rather poor and didn't satisfied me I drew they in CAD:

After shrinking they to diam. around 4 mm. they looked as follow:

Assembly rest of elements and painting gives result as below:


You could evaluate if my effort had sense

Rgds
Mirek
-
2
-
-
Hello everybody!Many thanks, Jonathan, Steve and Mark!The end of this year coming very quick, fortunatelly I had some spare time then I have spent it with my loco.In the last week I built back side of boiler with element of stocker and firehole door. Elements aren't so big then it was struggling with my fingers and thinking how catch element to save him against loosing.What I've been able make you can see below.
Back side of boiler:


Firehole door and part of stocker:


after painting:


and on the back side:

cheers
Mirek
-
2
-
-
Hi,
Jonathan, Phil, nice words as always.

Continuation of ashbox,
This part is little complicated and require some space under boiler and cabin. I little woried about this space and afraid if another elements won't be with it in colision. Fortunately everything gone well.
Raw state:

after painting:

Under boiler:

Side view:


Cheers
Mirek
-
3
-
-
Good evening,
Dear visitors, thanks a lot for your interest!
Recently, generally I haven't too much time for relax so the steps in building this loco are like for a small child.
But... construction still going ahead.
Recuperator of energy on the top of boiler:


In the near future I would like assembly boiler but earlier I need prepare ashbox. In this loco this element is little bit complicated

That's all for today.
Rgds.
Mirek
-
1
-
-
Hello,
Jonathan, John, thank you very much for your interest!
I'm OK. Sorry for long period when I didn't answer. Unfortunately I had some urgent things.
Construction slowly going ahead.
How it looks now you can see below.


Cheers
Mirek
-
6
-
-
Hi Andy,For holes over 10 mm I use OLFA cutter CMP-1, below, extra sharpened punches and below 1 mm punches made of injection needles. For ellipses like on last photos I use chisel with blade 0.7 mm. The last method is similar as in Silhouette cutter but made hand. Needs to have a plenty patience.
 .
. Cheers
Mirek
-
Hi trainmaster247,
If you would want, why not?
rgds
Mirek
-
1
-
-
Horsetan, fantastic link! Thanks!
rgds
Mirek
-
Hello,
PhilH, BSW01, bescotbeast, gordon s thanks a lot. Horsetan, unfortunately smokebox door will be welded
 Welded by glue...
Today I would like to show paper kitchen for elements which will be painted later.
Chimney:


Energy recuperator for used steam:


Dome with tank for sand:


and how elements will be located on boiler:


Cheers
Mirek
-
Hello,
Hm, what a discussion!
trainmaster 247, to tell the truth, I built models for my own pleasure. Many colleagues in Poland push me to publish this loco in paper form. Now I don't exclude it.
I'm working over boiler and its equipment, how is progress you can see below.
Boiler:

Smokebox door:

and after painting:


Cheers
Mirek
-
1
-
-
Hi rockershovel,
The rivets are made of cardboard with thickness around 0.3 mm. They are cut by punch of injection needle like on attached pics.


The most important is to have good quality cardboard, resist against stratifying. I use Canson product.
Later they are sticked by BCG transparent glue.
Hope it is enought clearly explained by me.
Cheers
Mirek
-
Hello,
PhilH, rockershovel, Phil Howe, stevejjjexcow, Mike thanks for your compliments.
Coming time for up-date.
In the last time I prepared front footplate with smoke deflectors.
How is the progres you can see below.


Now I'm working over boiler.
Cheers
Mirek
-
1
-
-
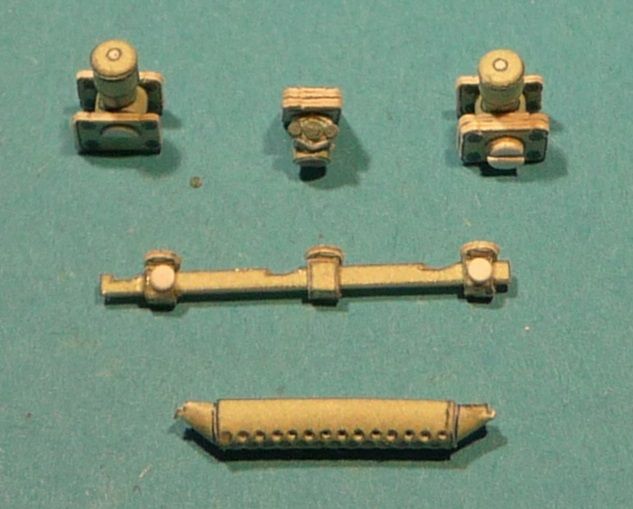
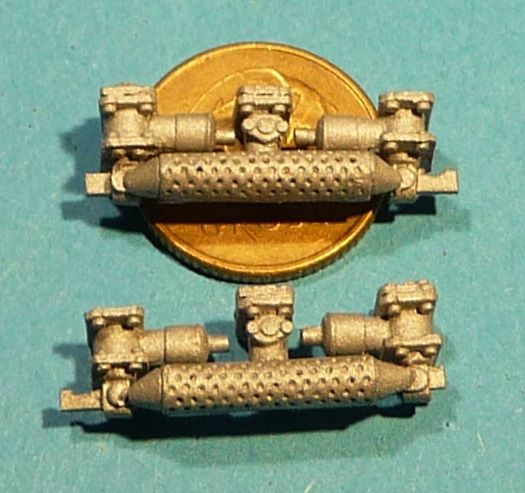
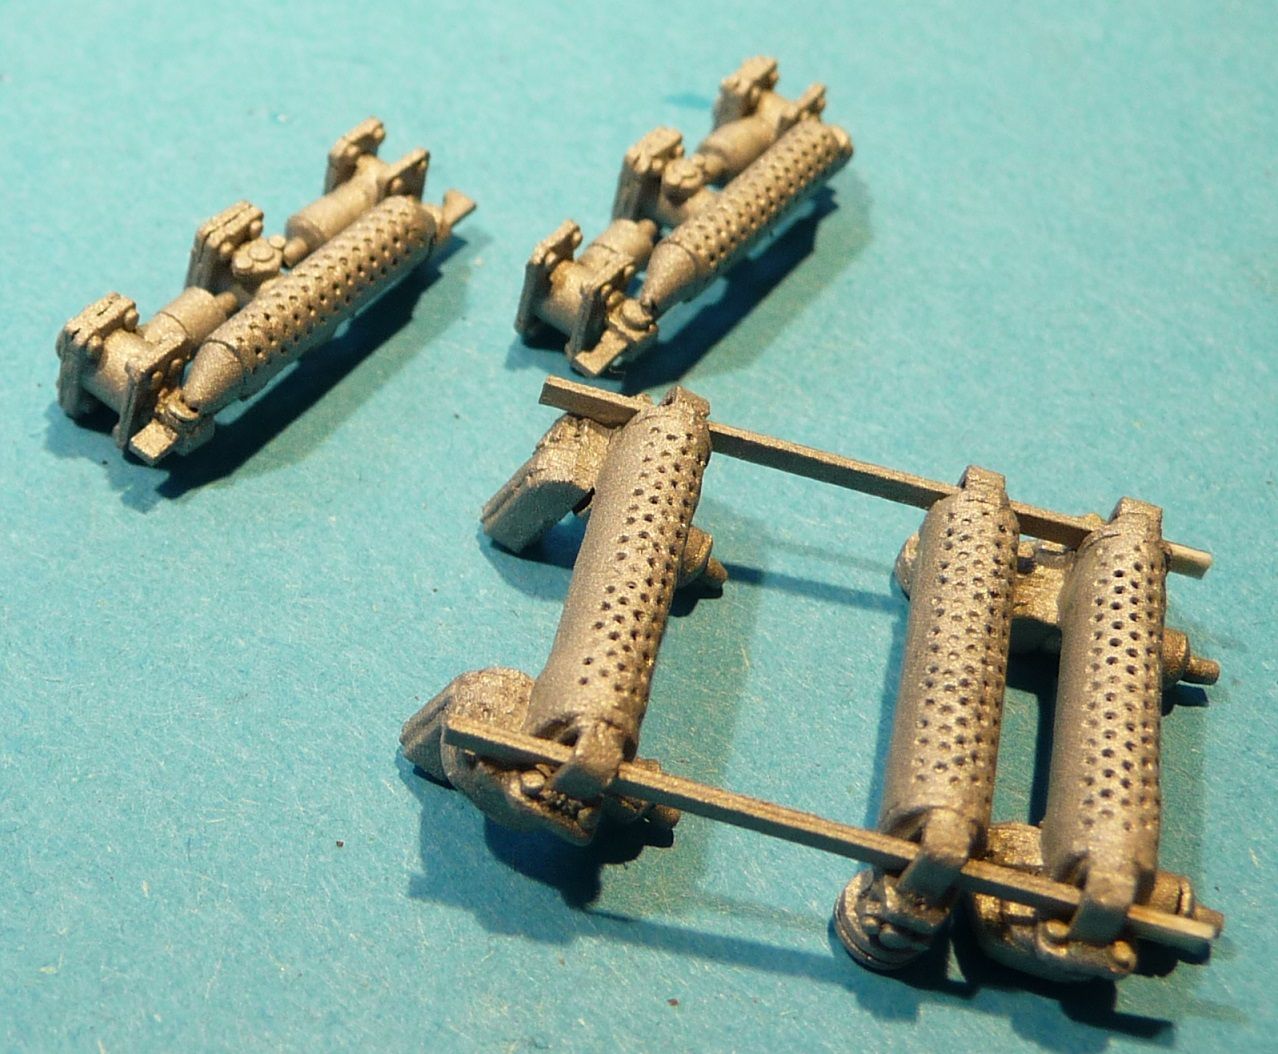
Hello,
today air compressor, located at the front of loco. It will be visible then I made it with little bit more details.
Below some pics of this element.
Paper base,


and with coin for comparison

cheers
Mirek
-
1
-
-
Hello,
Brian, Jonathan, thanks!
Tim, the building of this Mountain loco is educationally especially for me. When I try to recognize shapes, mechanisms, I learn this engine, how was designed. It was very interesting when I touched frame, elements of bogie, I had imagination how stiff are the elements despite they are only of 2, 3 layers of cardboard. It is really very interesting trip.
cheers
Mirek
-
Hello,branchie, ColinK, thank you.ianLMS, I don't know what to say, regarding time, indeed, needs to spend some
 next pics of construction.

cheers
Mirek
-
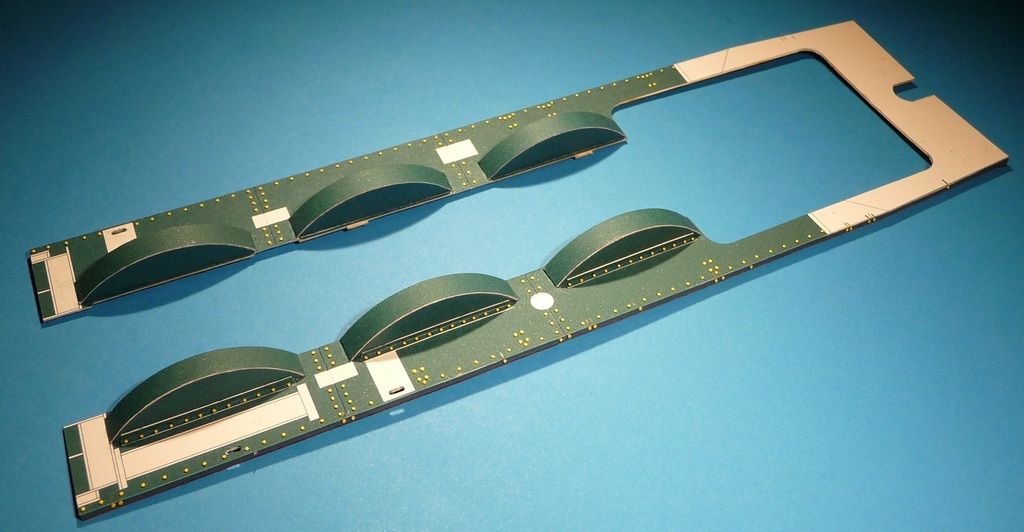
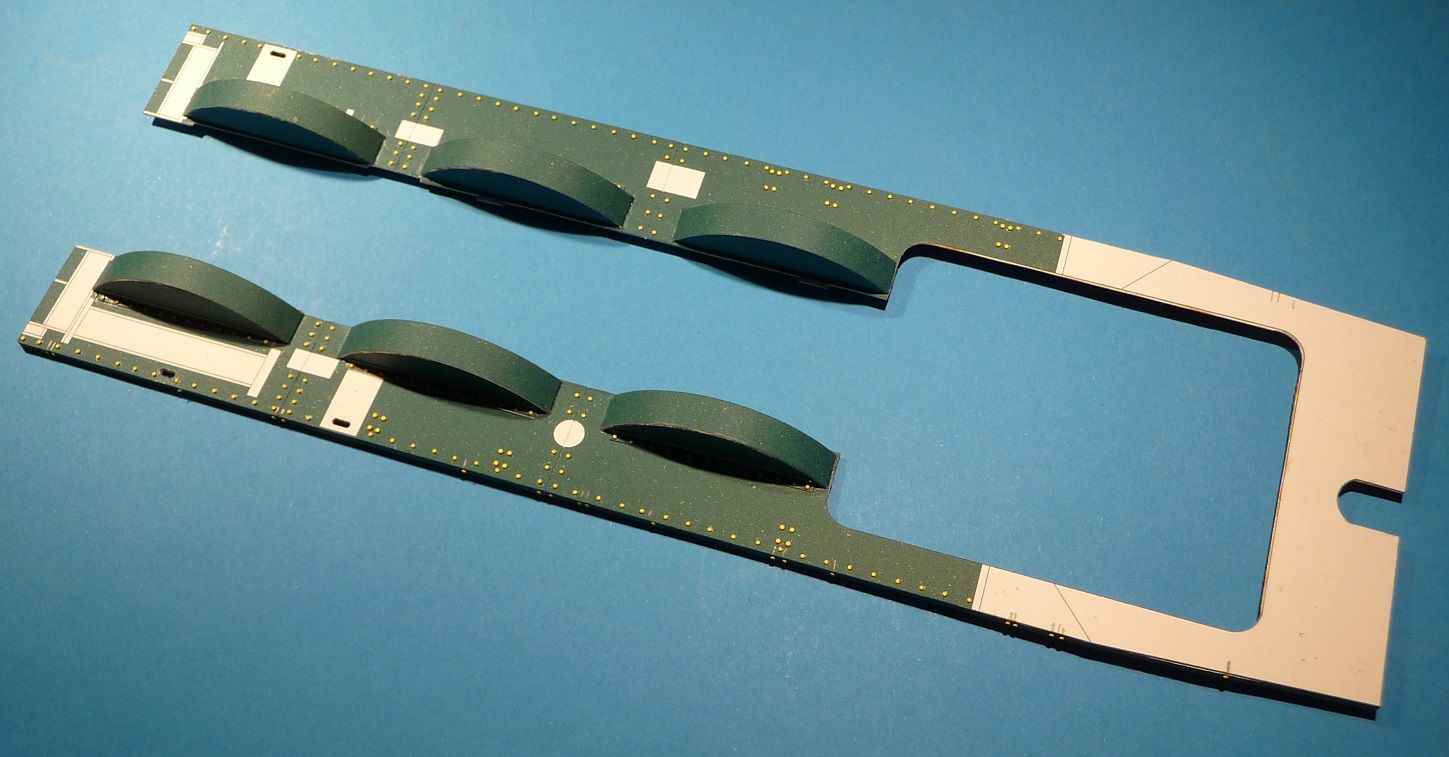
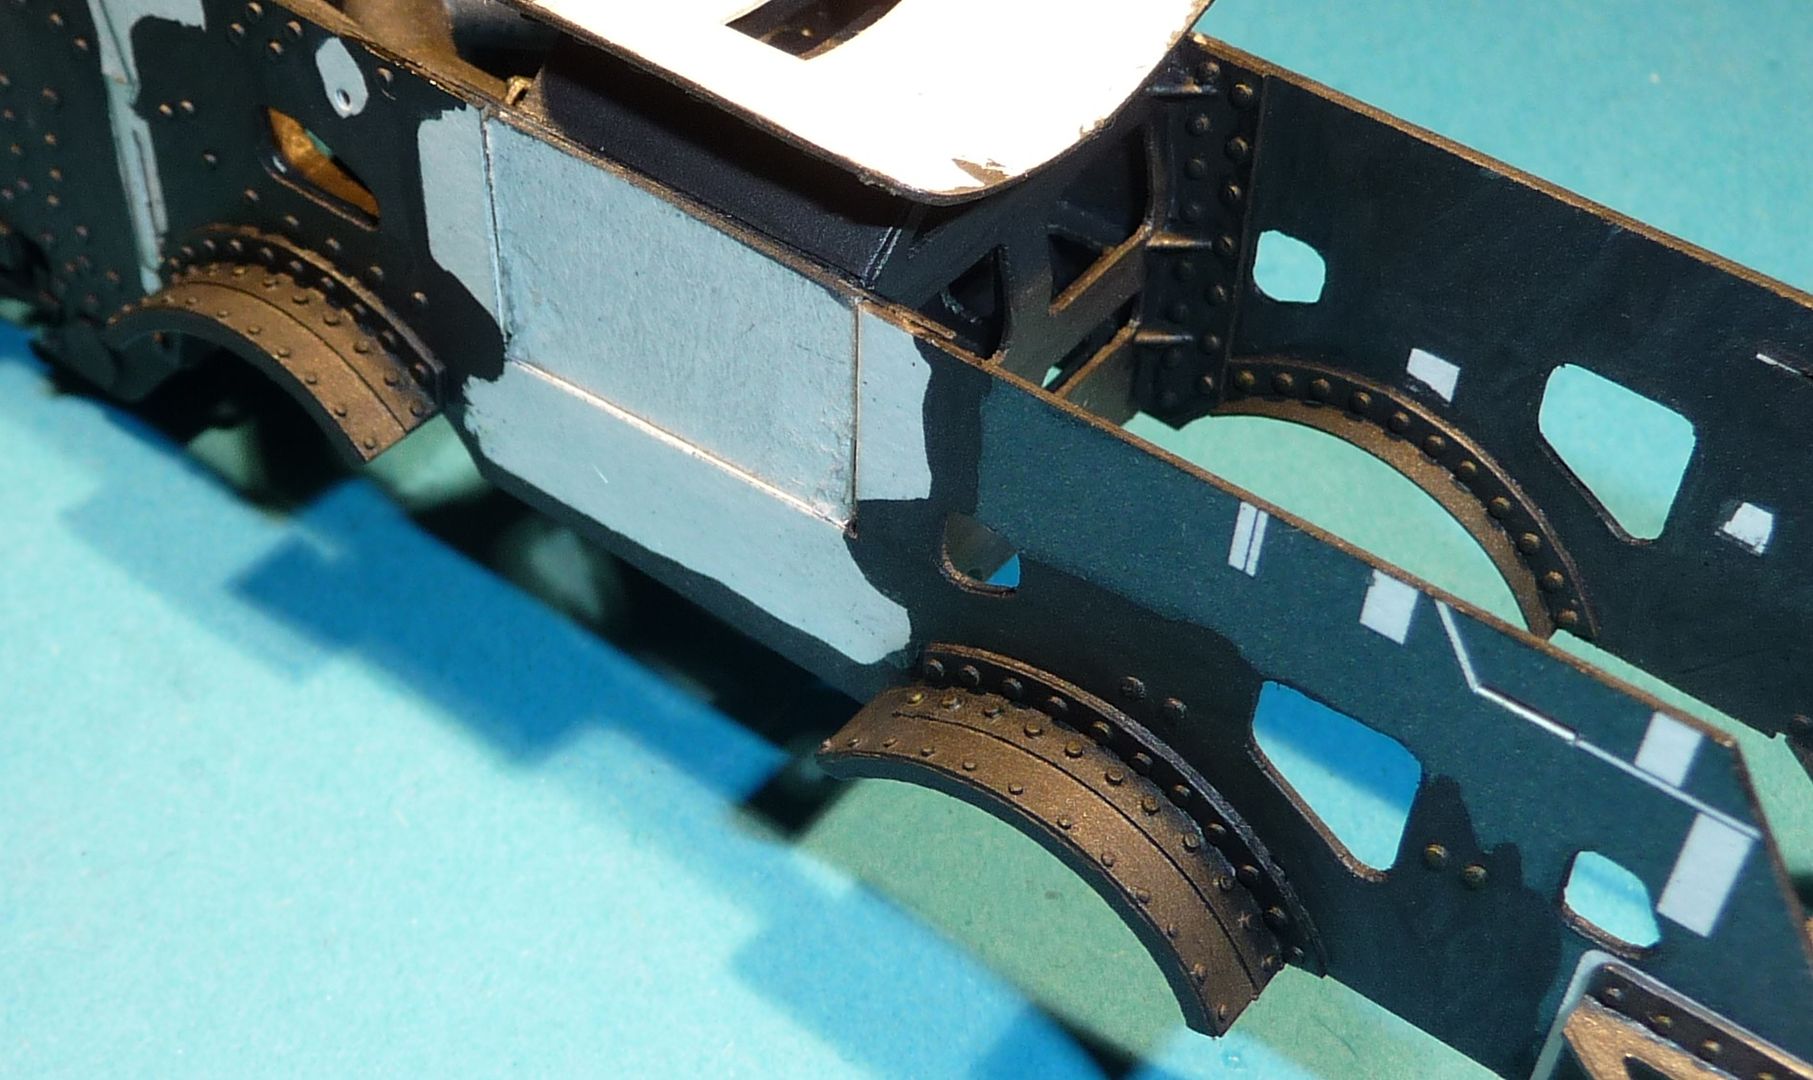
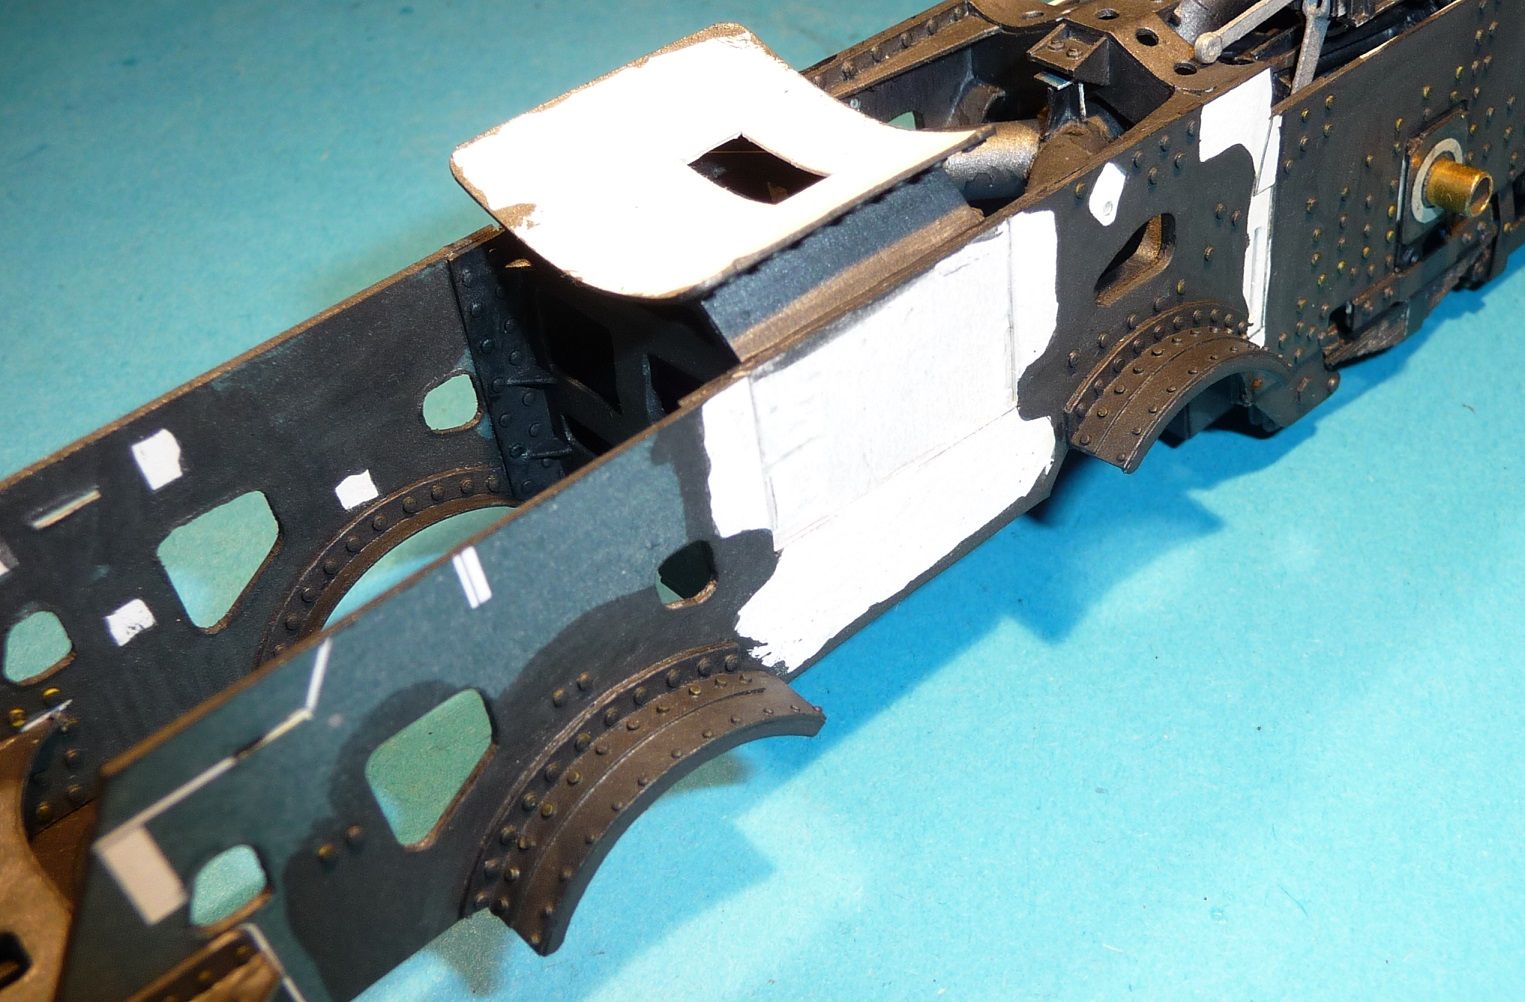
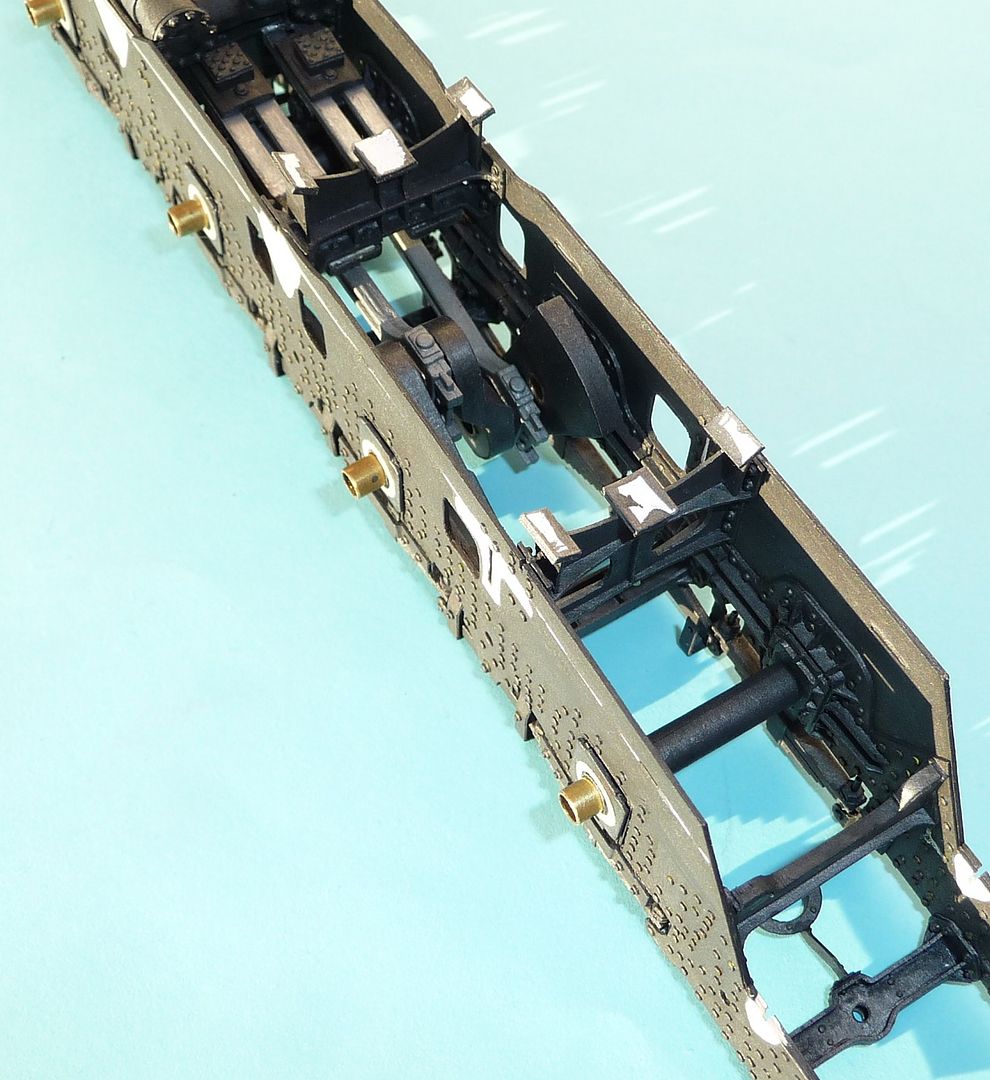
Hello Dear All,
Ed, Jonathan, thanks!
Phil, I don't know what will be with visit in England. Usually I go only on exhibition in cities close to my site, Zywiec, Bielsko..
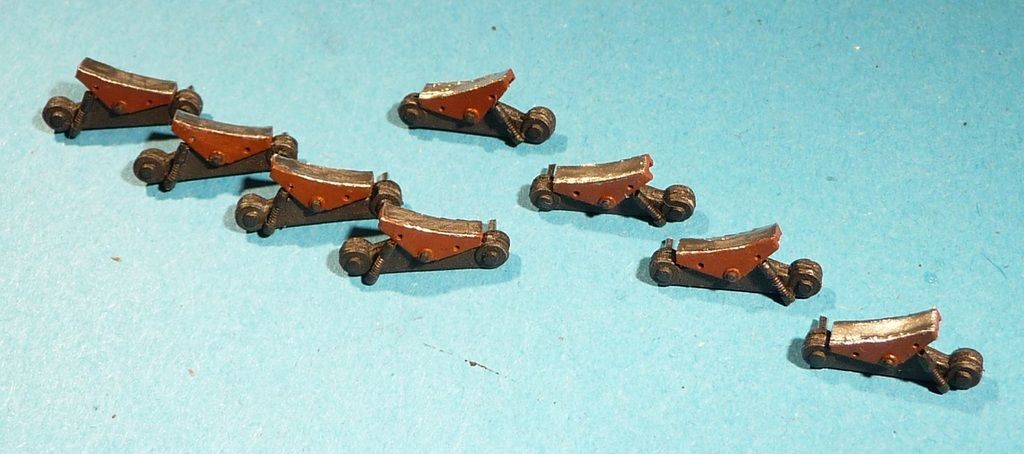
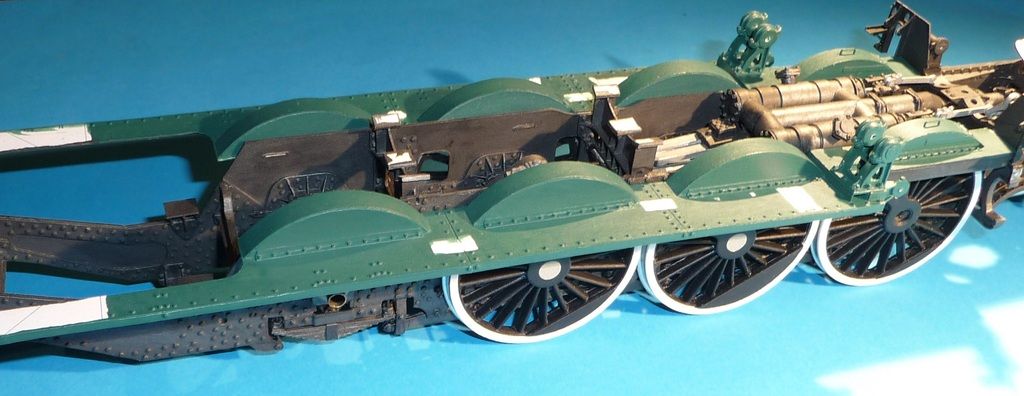
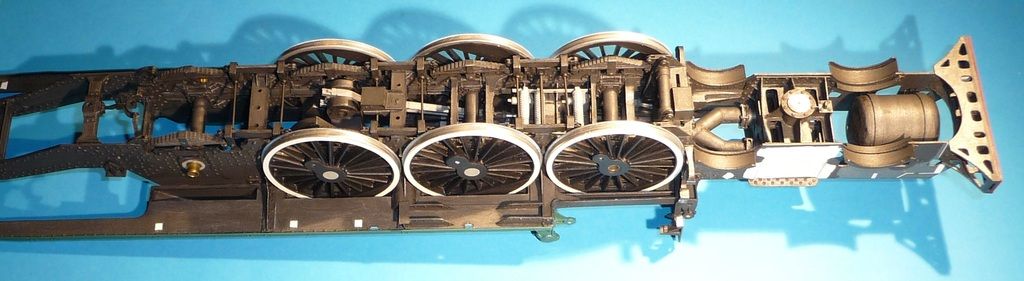
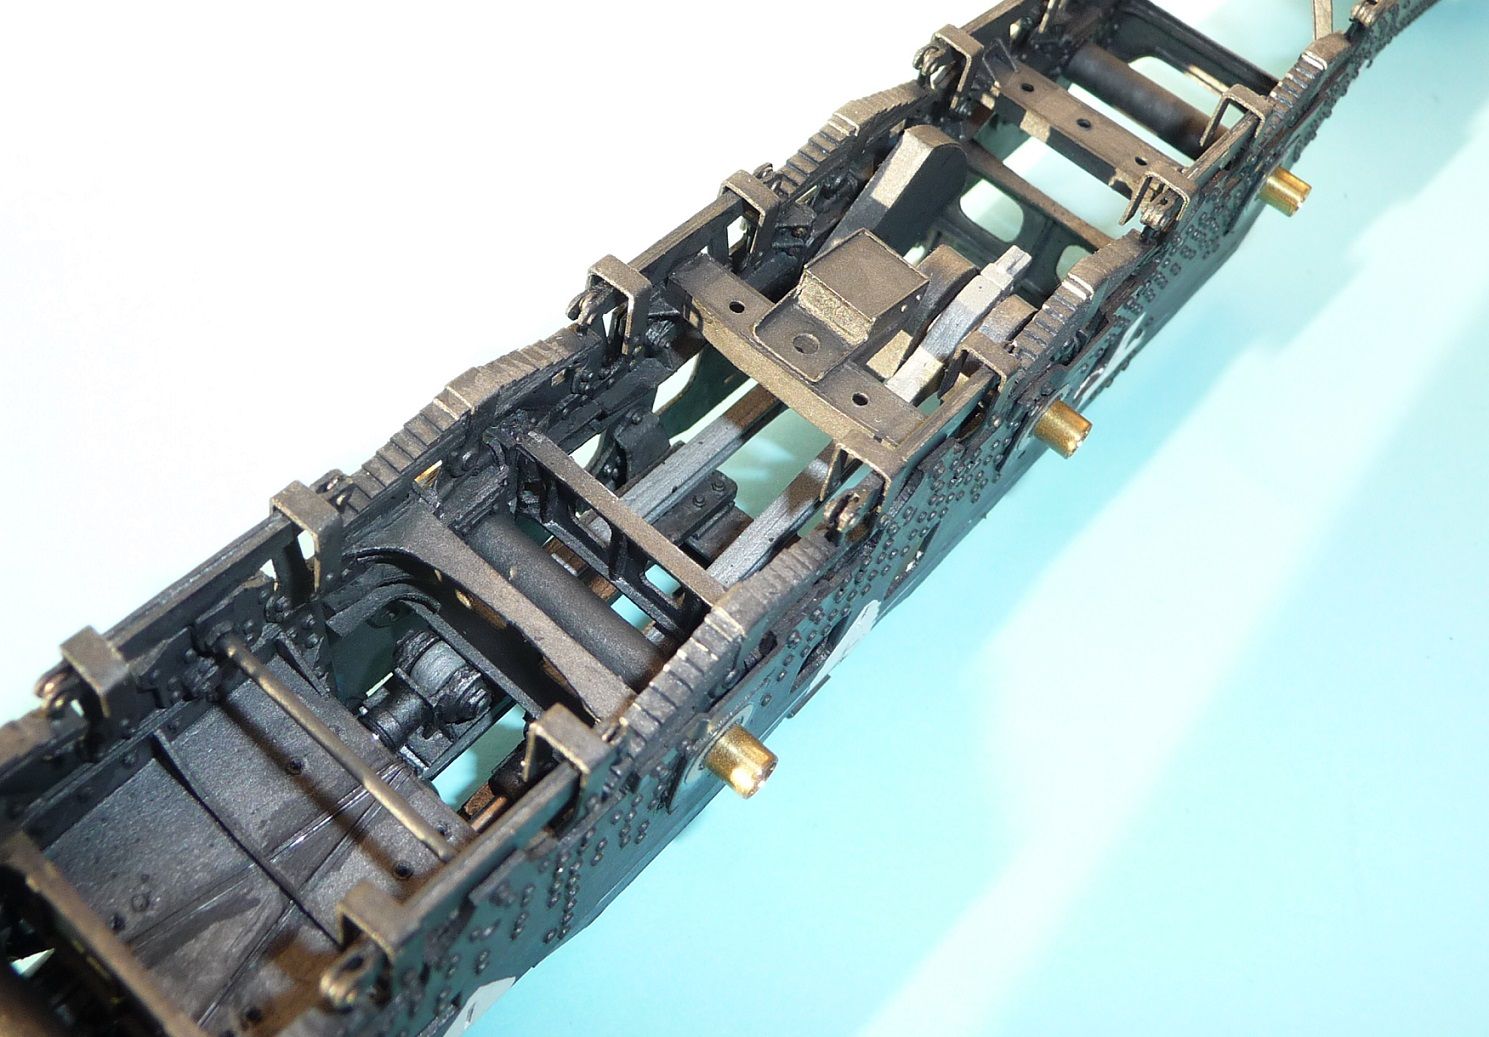
Today some pics of progress of construction of model.
Eccentric rods:
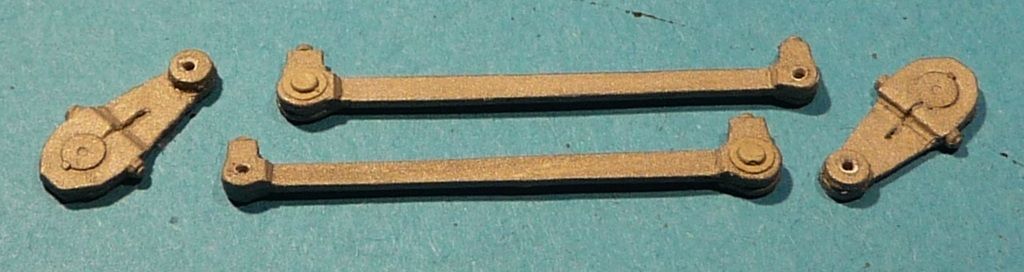
Connection rods:
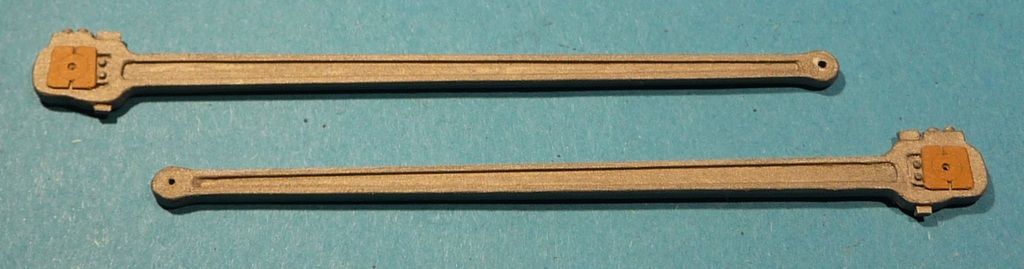
Coupling rods:

Brake hangers with blocks and block adjusters:
General view for frame with foot plates.
cheers
Mirek
-
1
-
-
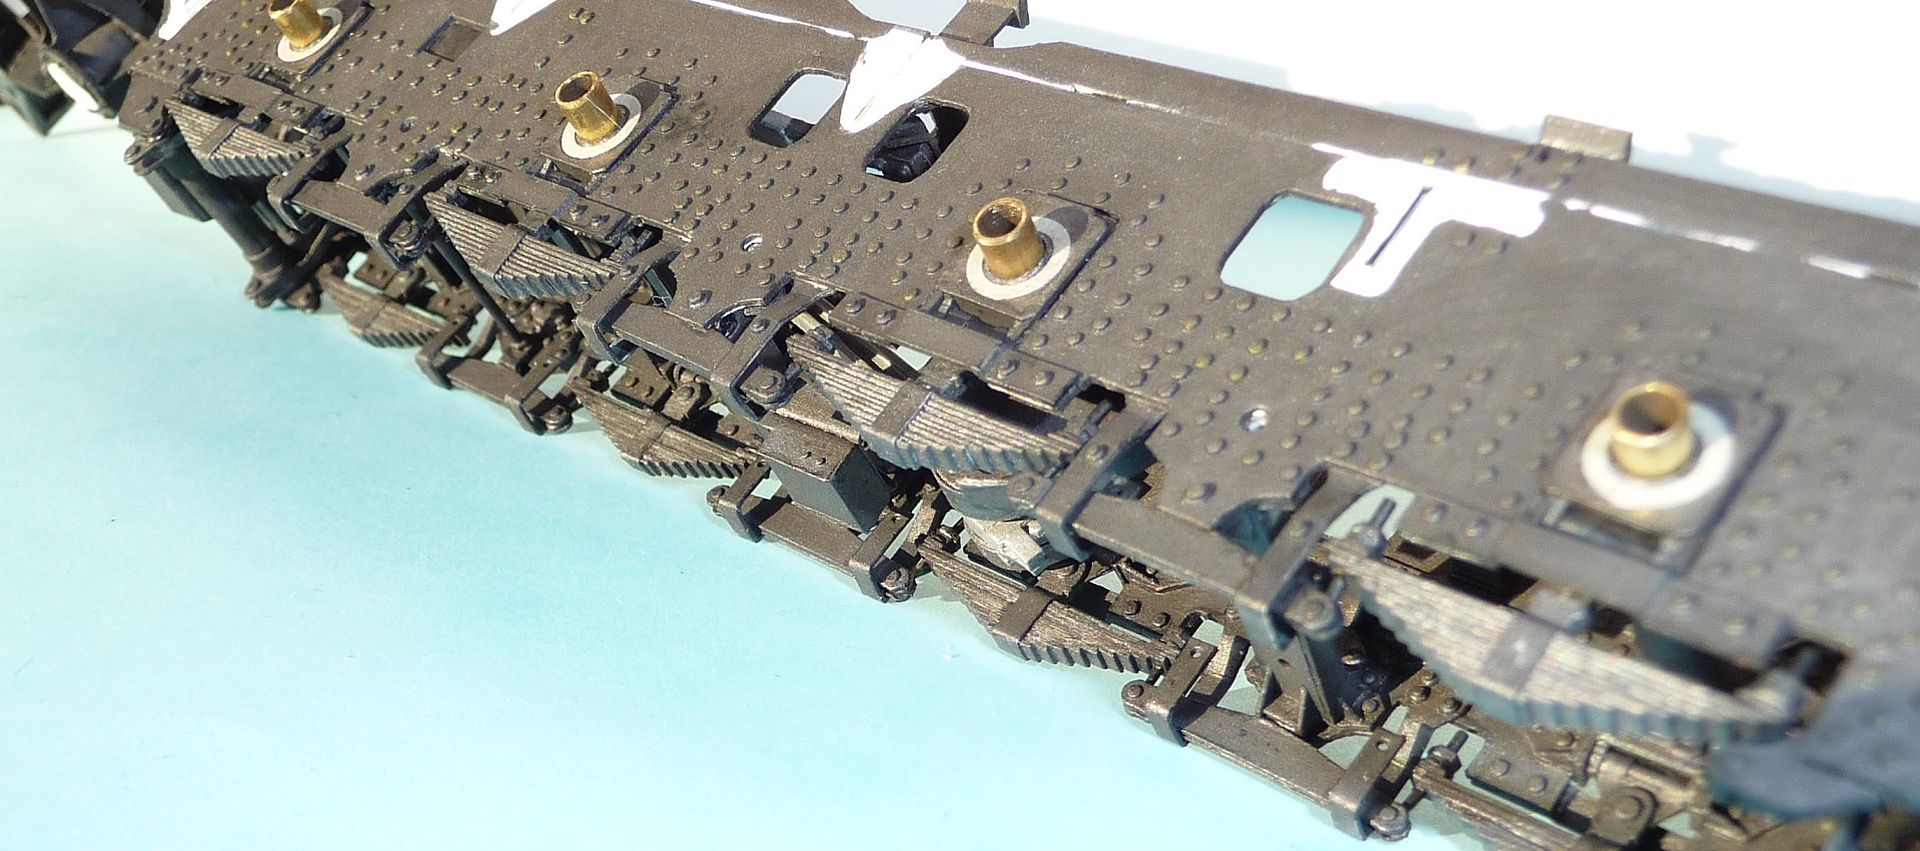
Hello,
RAFHAAA96, PaternosterRow I don't know what to say. I think, you overestimate me.
 But in the other side it is quite nice.
Last time wasn't so good, work gone not so quick.
Today Internal gear of Walschaert and back part of foot plate.
Rgds
Mirek
-
1
-
-
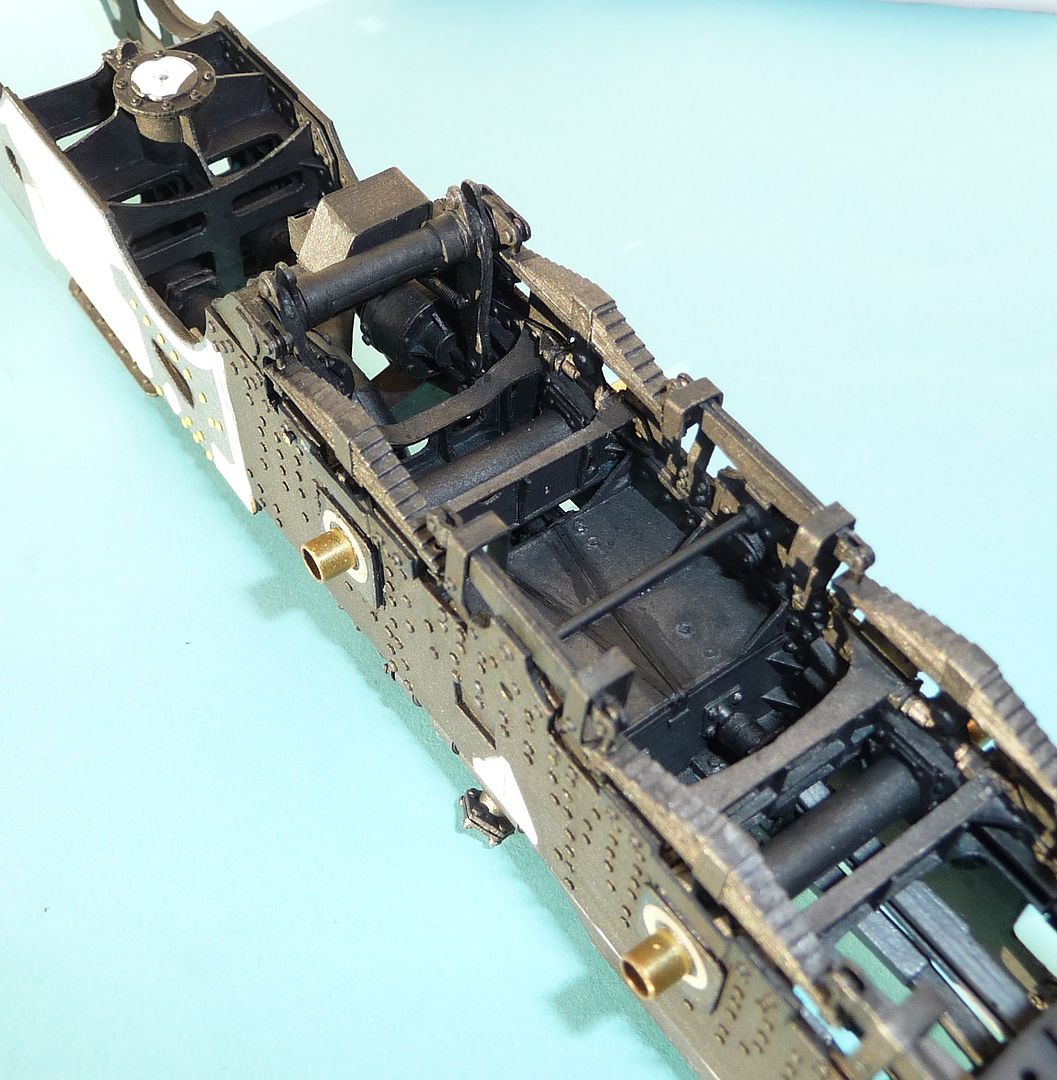
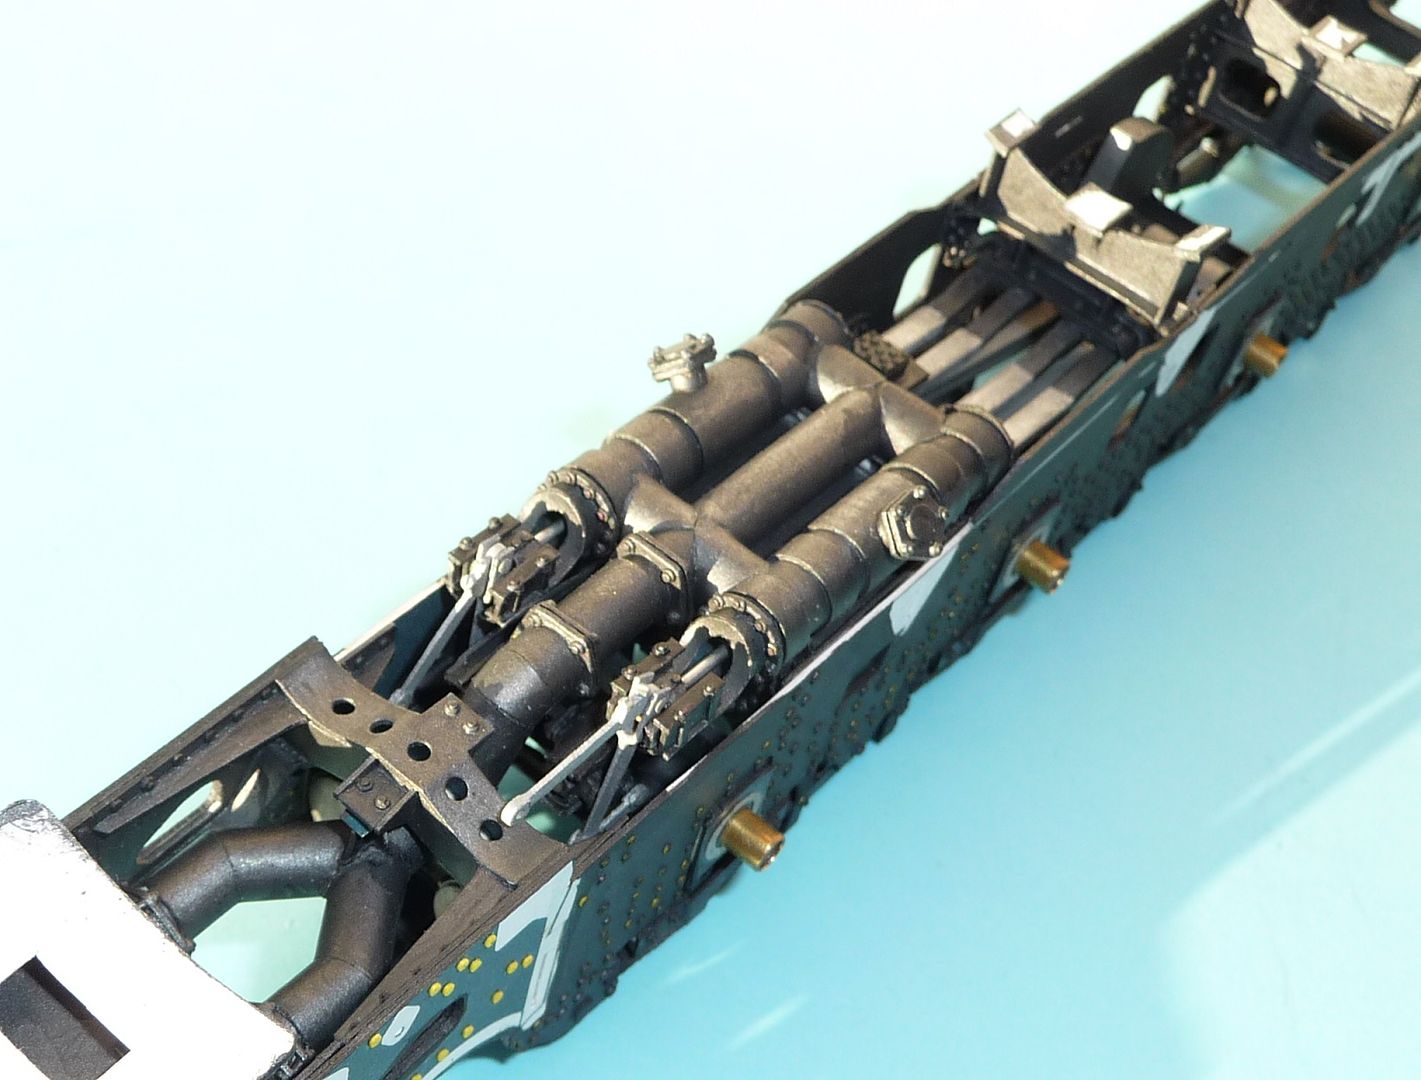
Hi,
John, Duncan, Brian, thanks a lot!
Today not too much.
Drain system for inside and outside cyinders.
Drain cocks for outside cylinders:
All drain cocks:

and "fenders"
 over wheels of leading boogie.
Cheers
Mirek
-
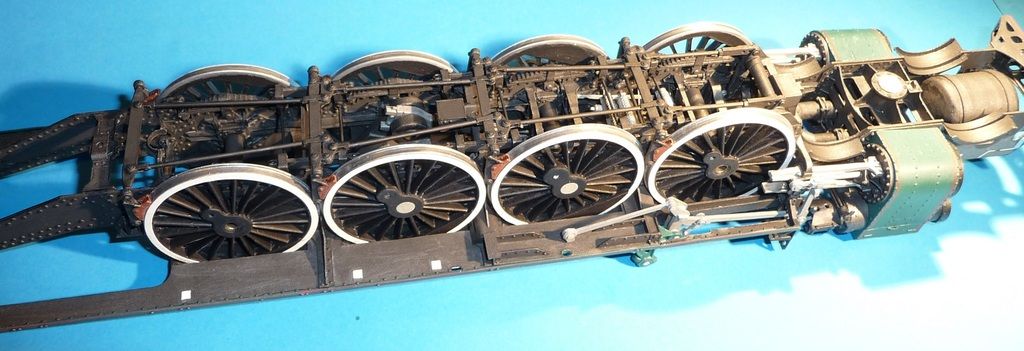
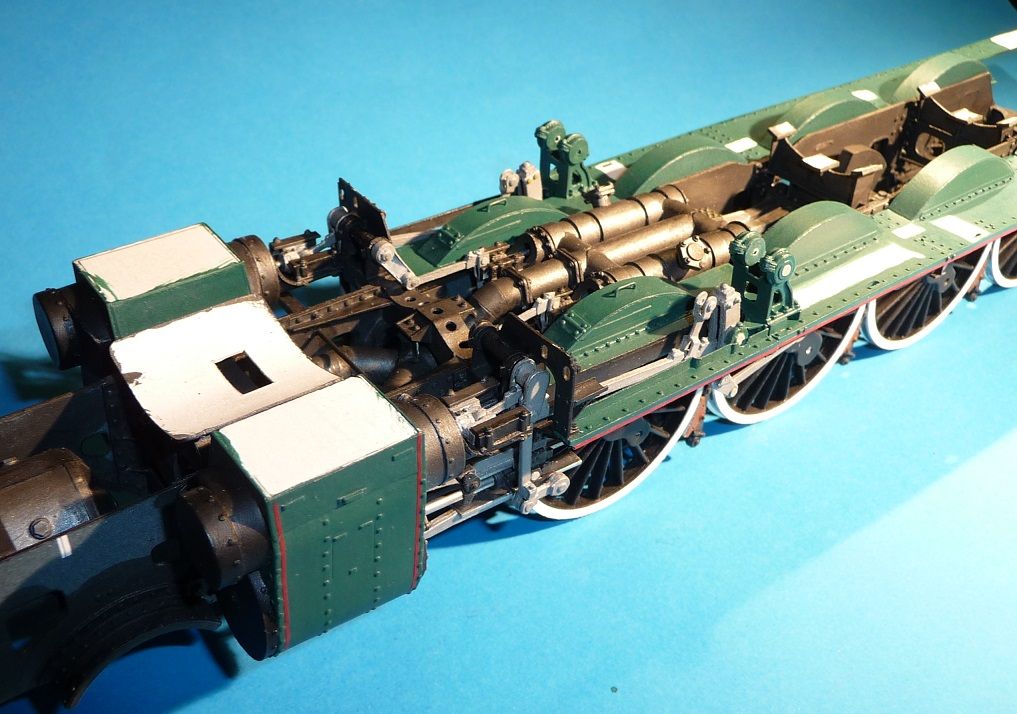
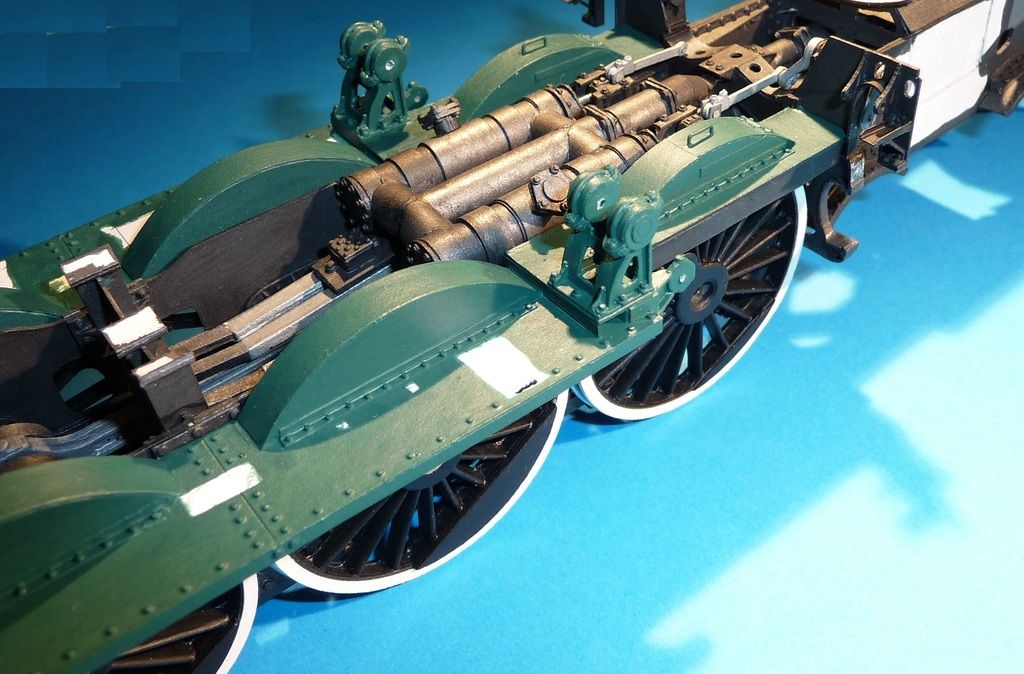
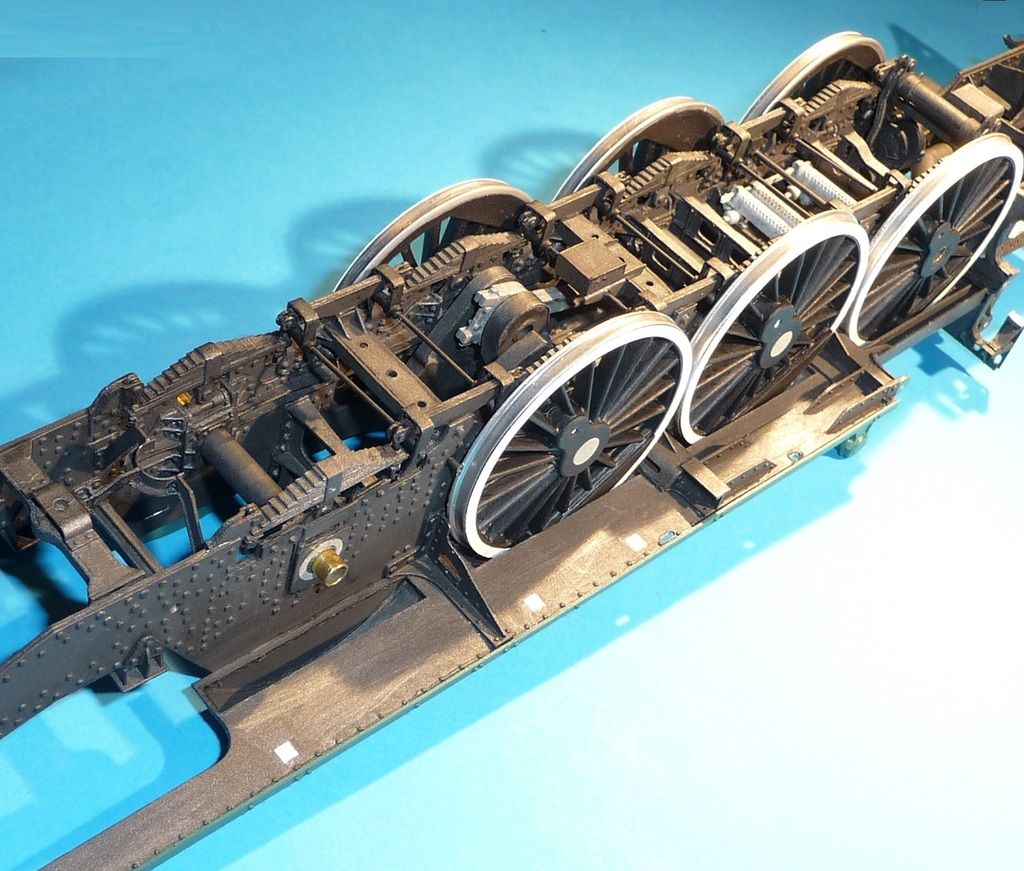
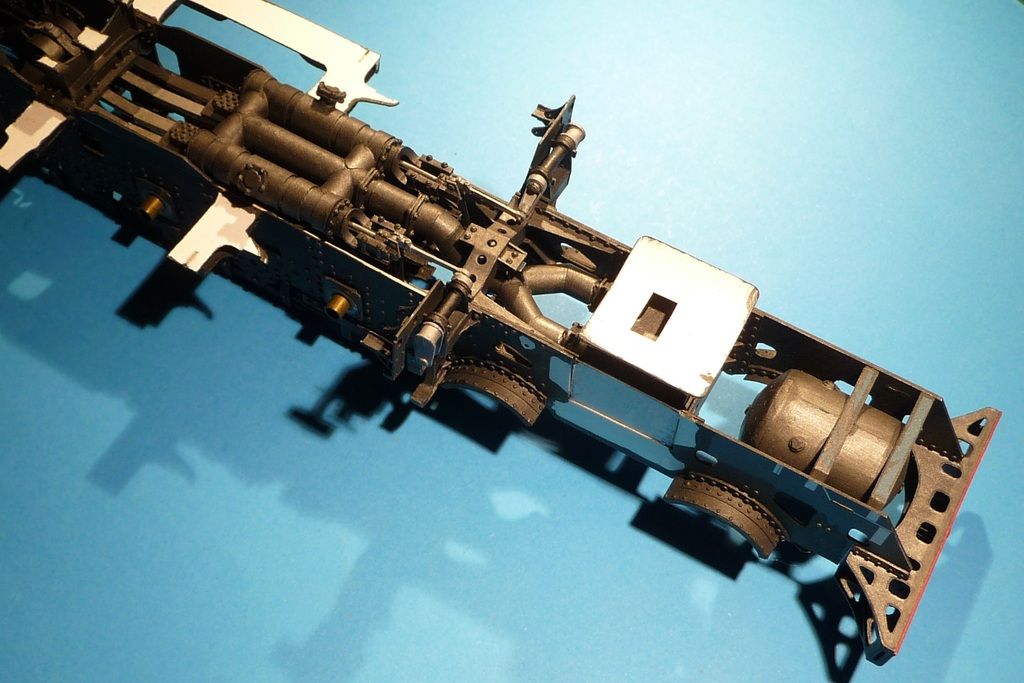
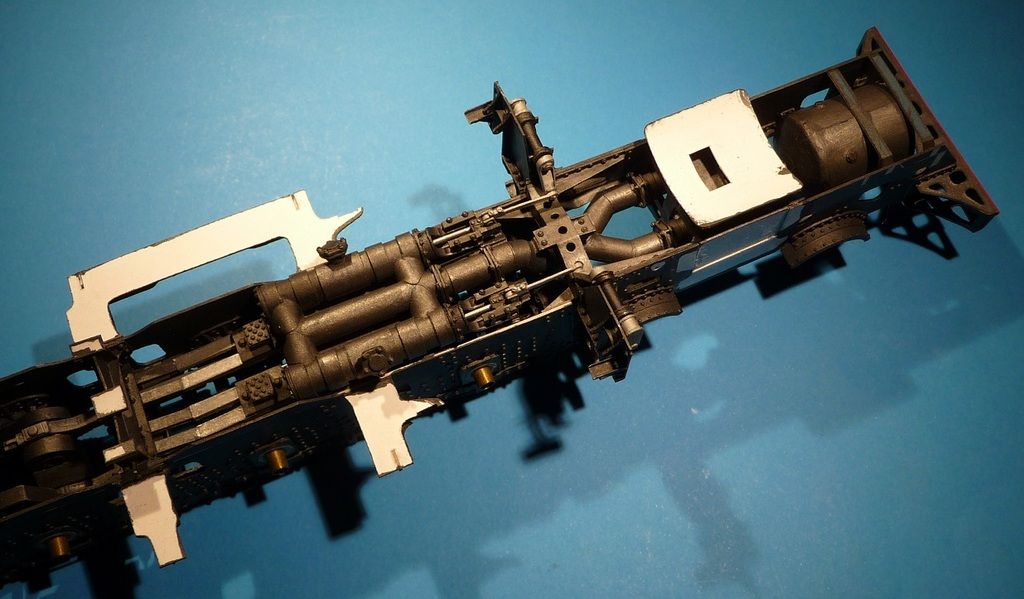
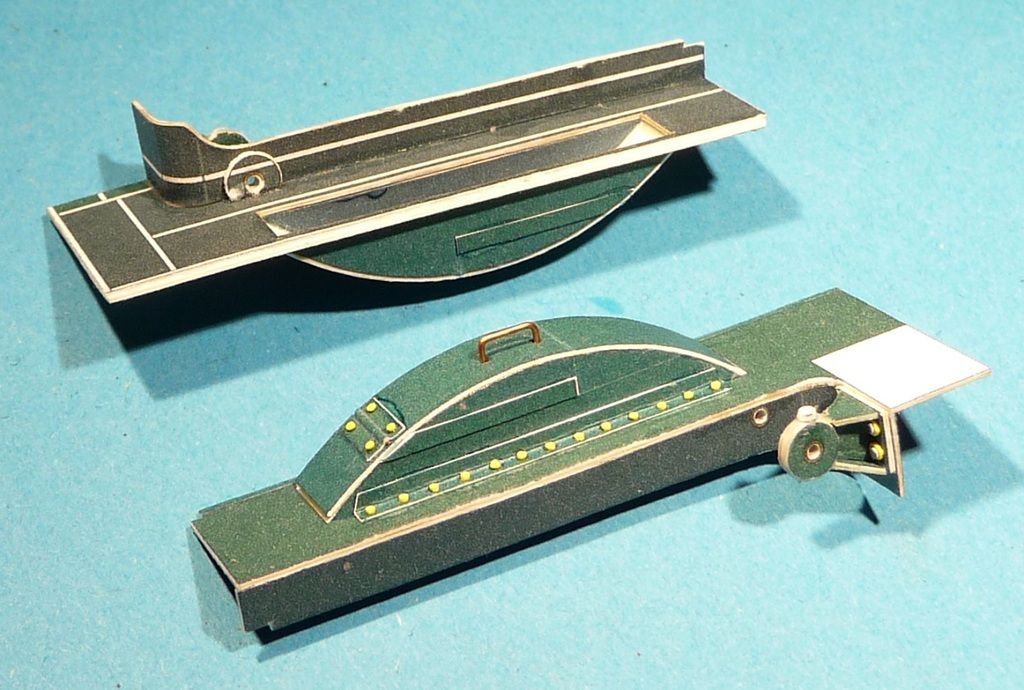
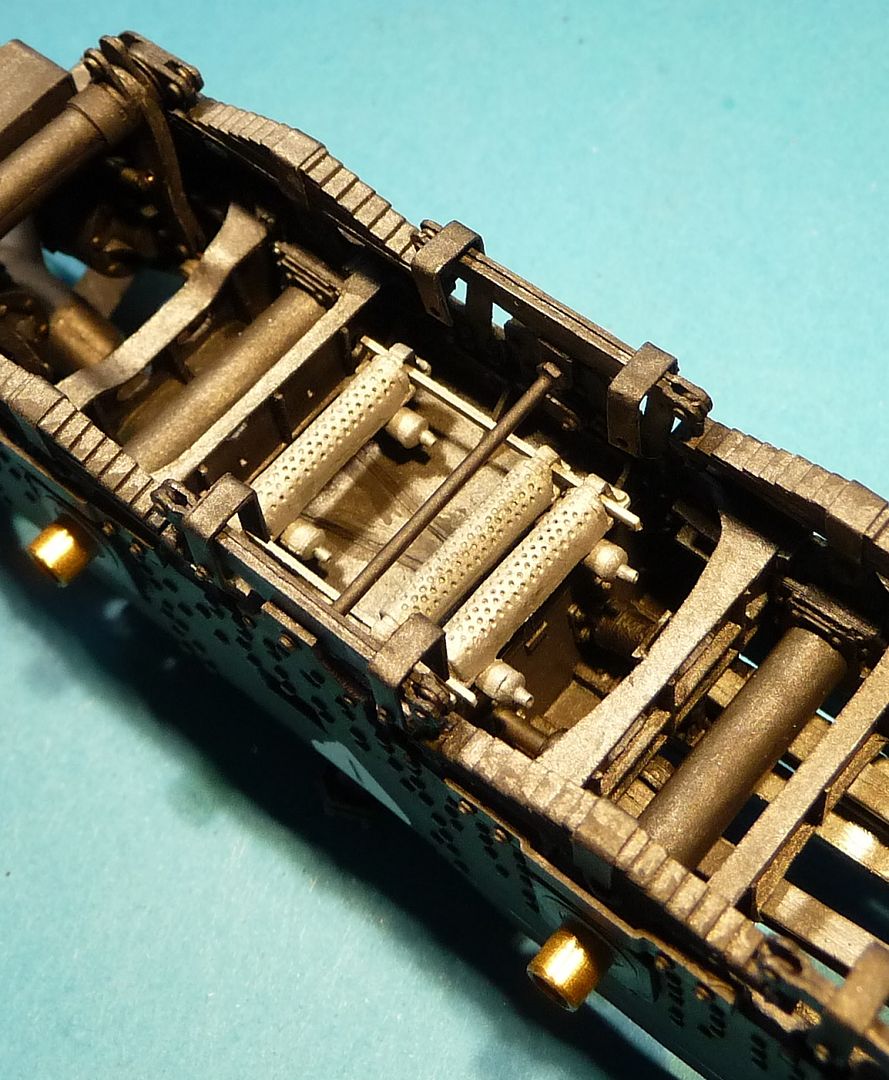
Hello,
John, Phil, thanks a lot!
Most of elements inside frame were ready then I made assembling of them.Of course still is missing some small parts but they will be filled later.What is current state you can see below.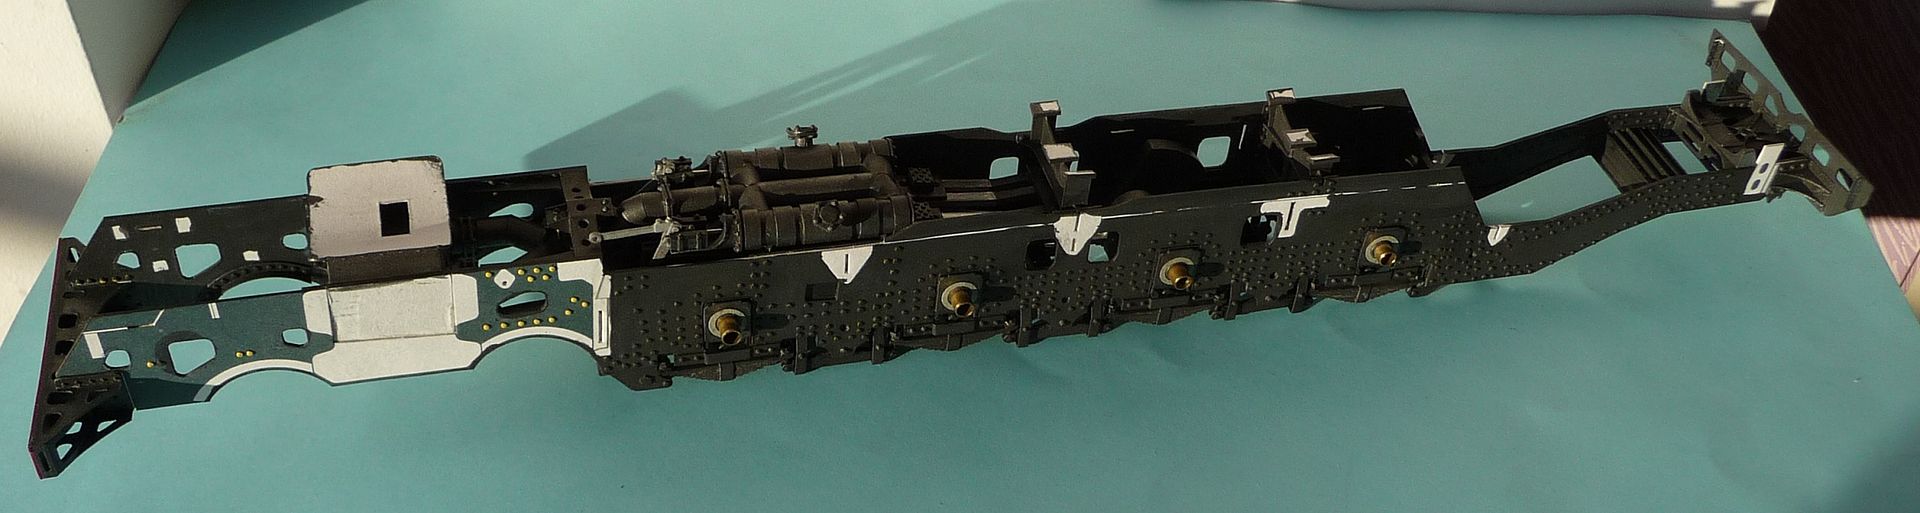
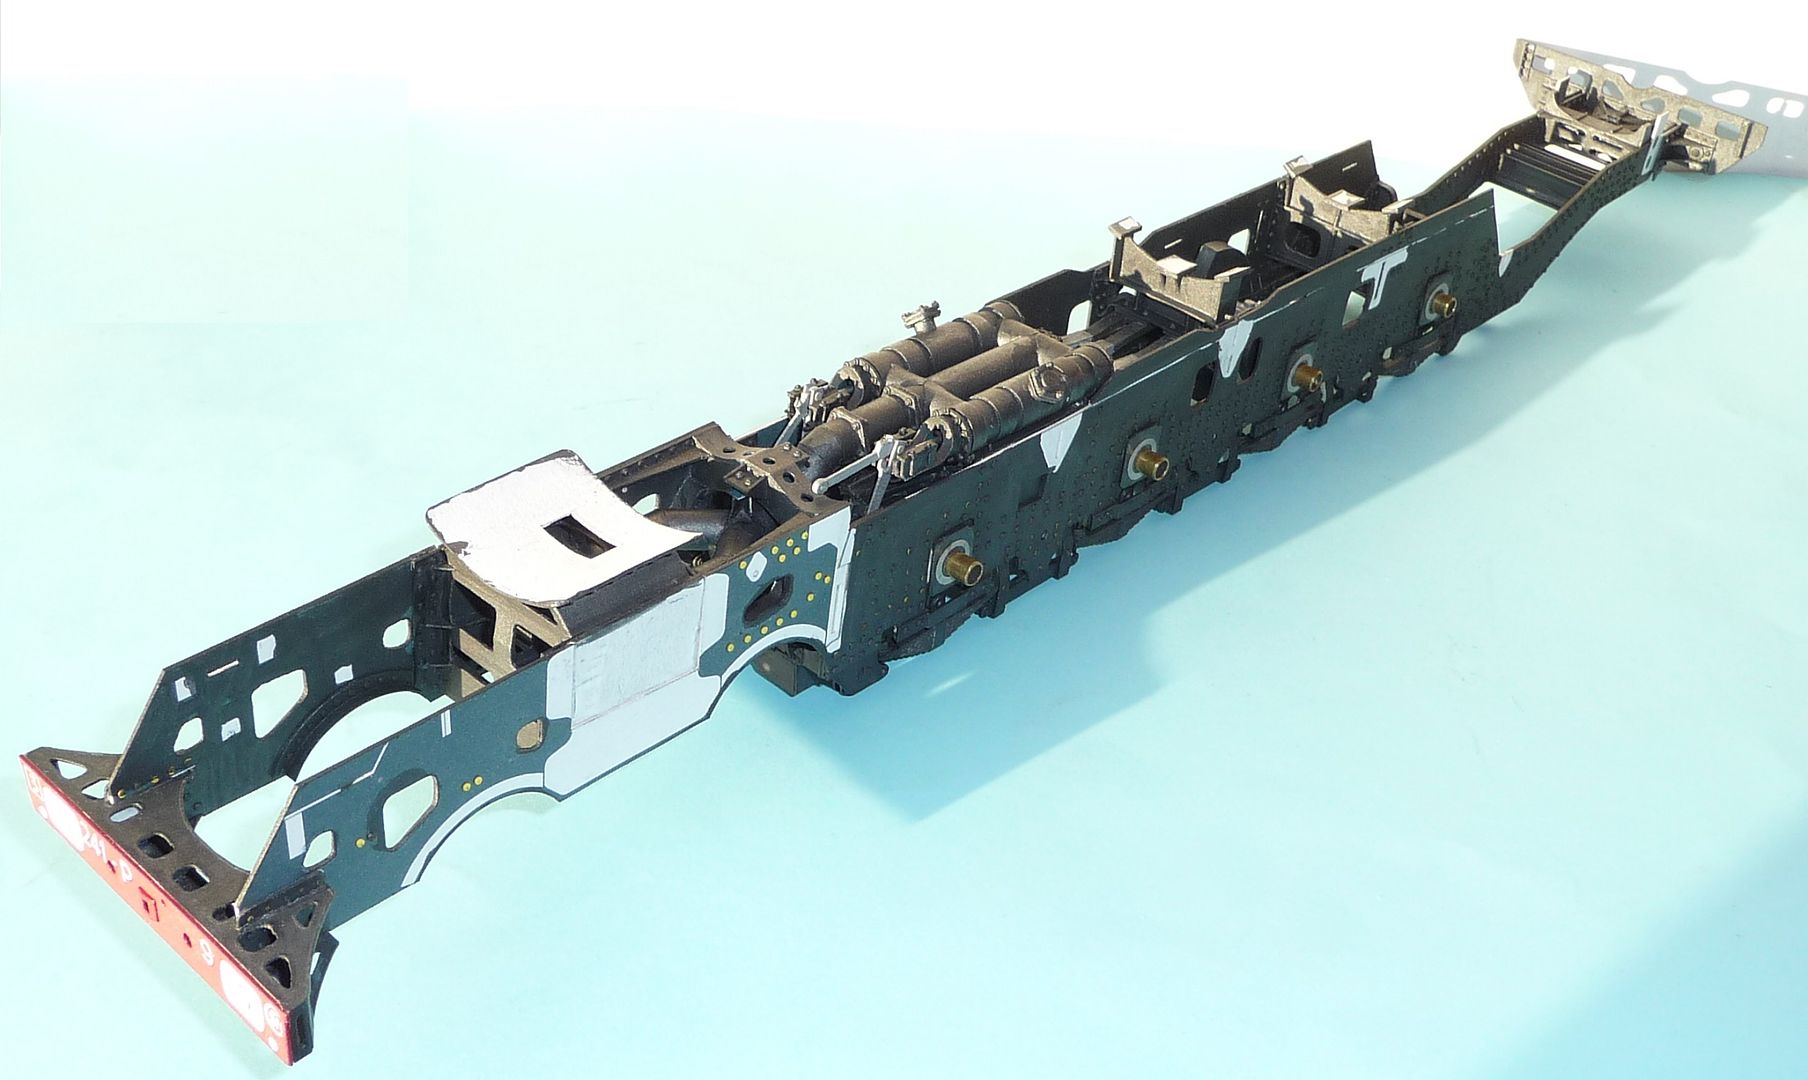
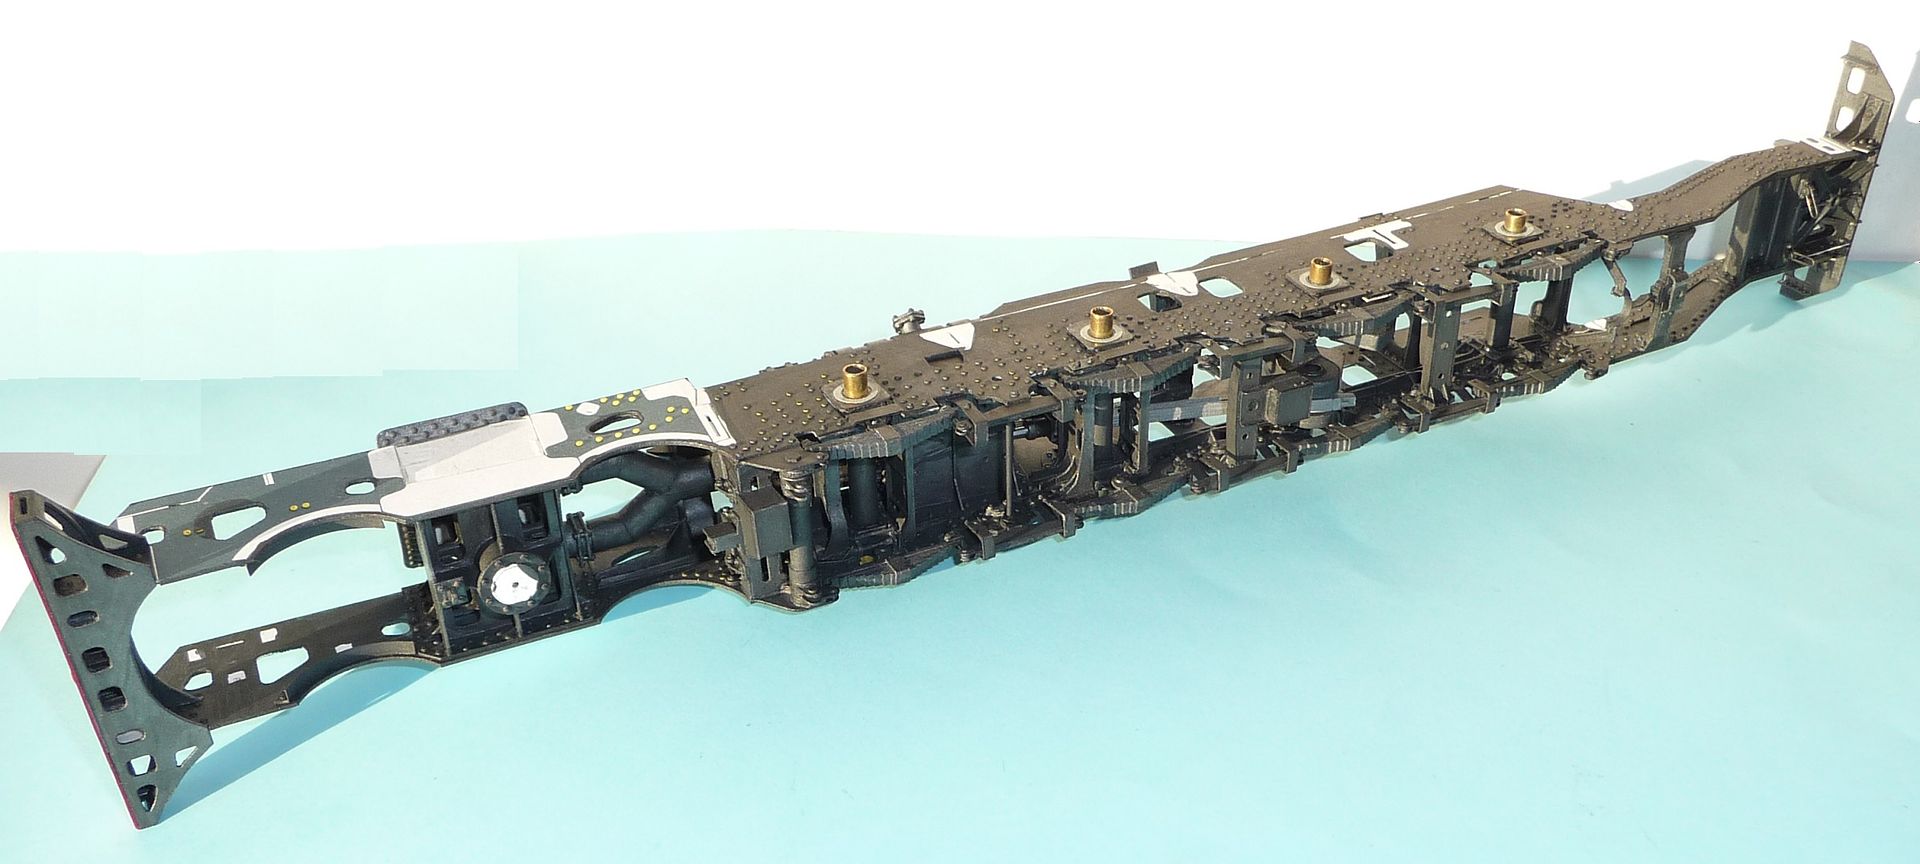

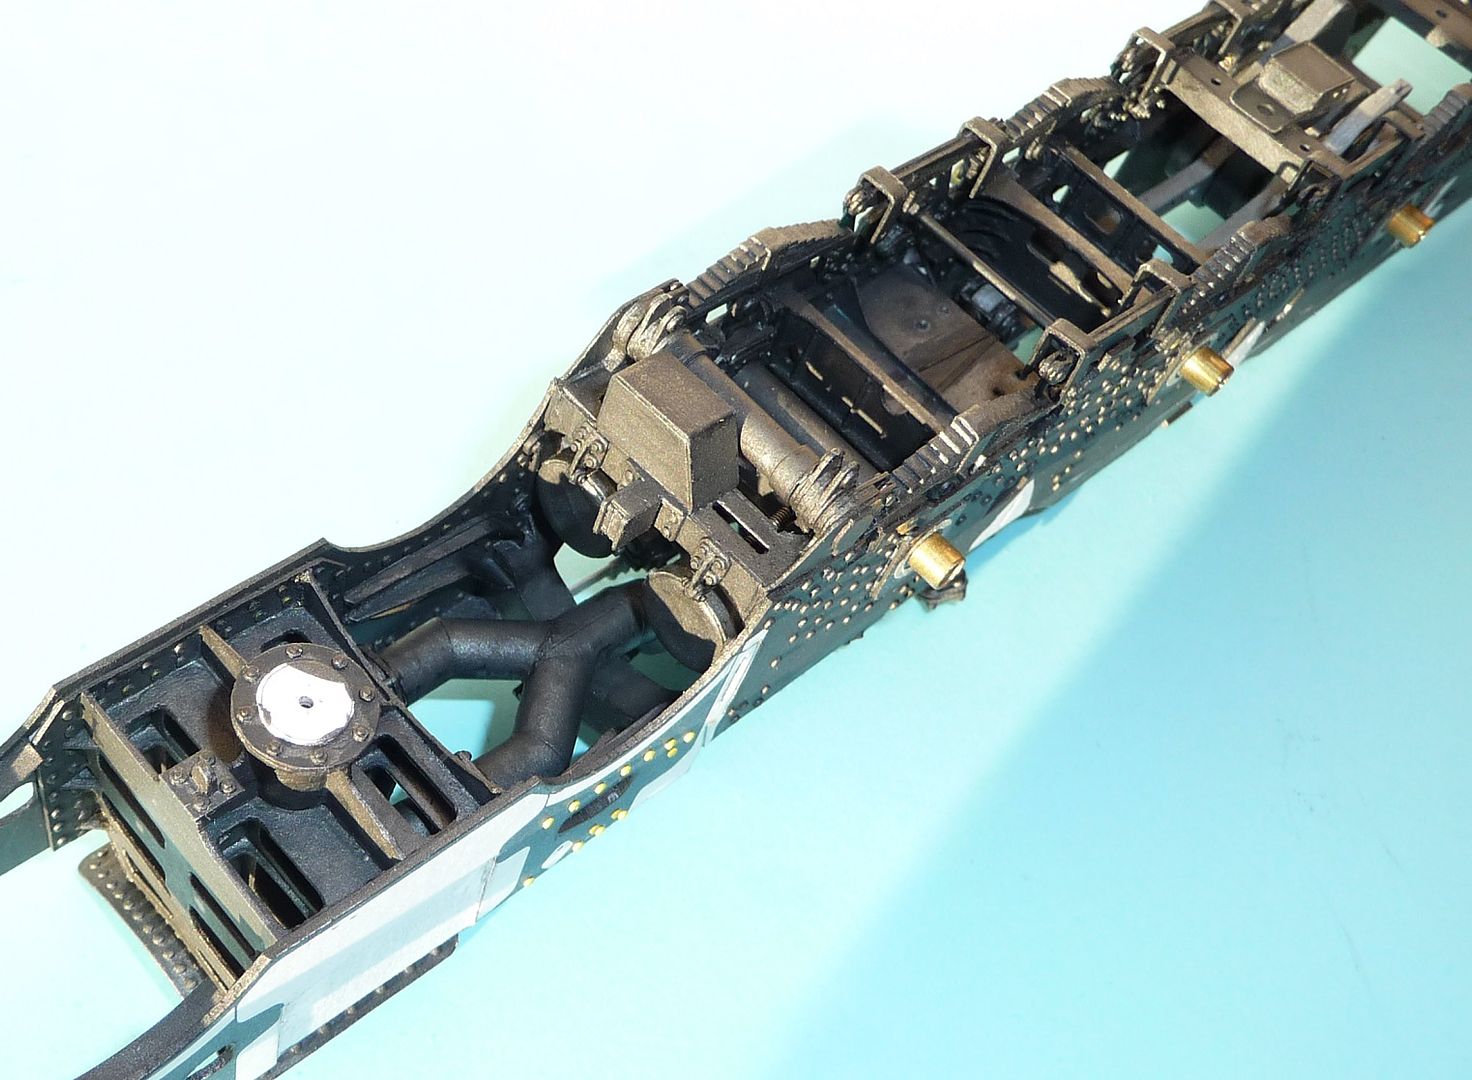
 CheersMirek
-
1
-
-
Good grief! Attach that to a steam supply and I'm sure it would work!
Hi Jonathan,
OK, I'll connect it to the kettle, will see how long it will work

cheers
Mirek
-
1
-
-
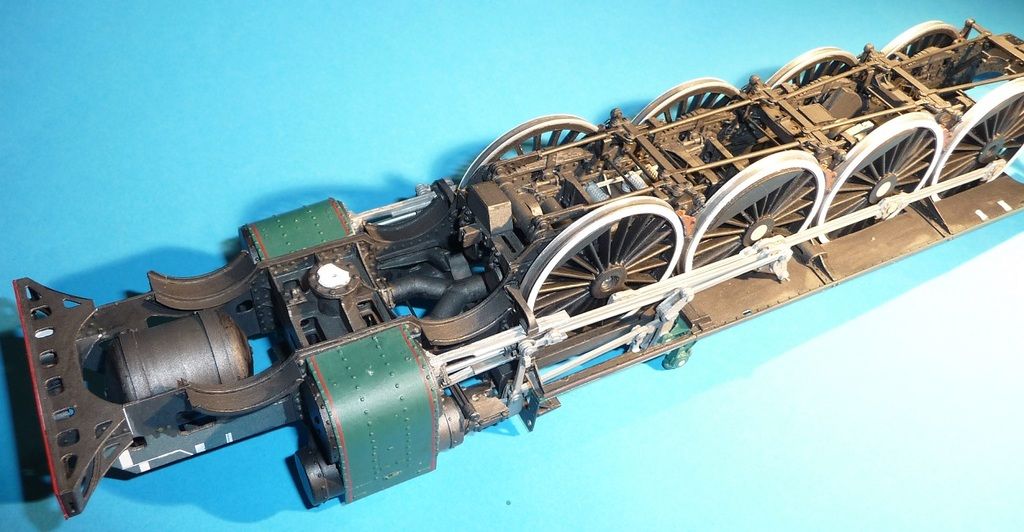
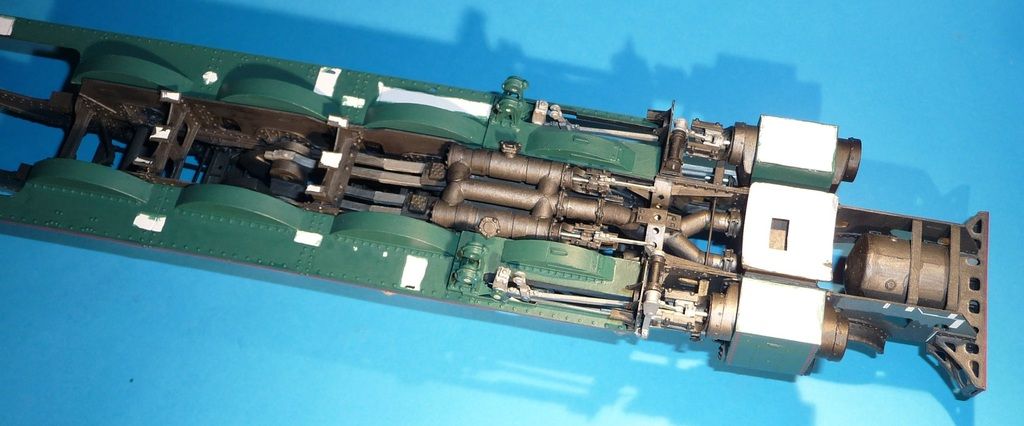
Hello,
Phil -
Ian, thanks a lot!
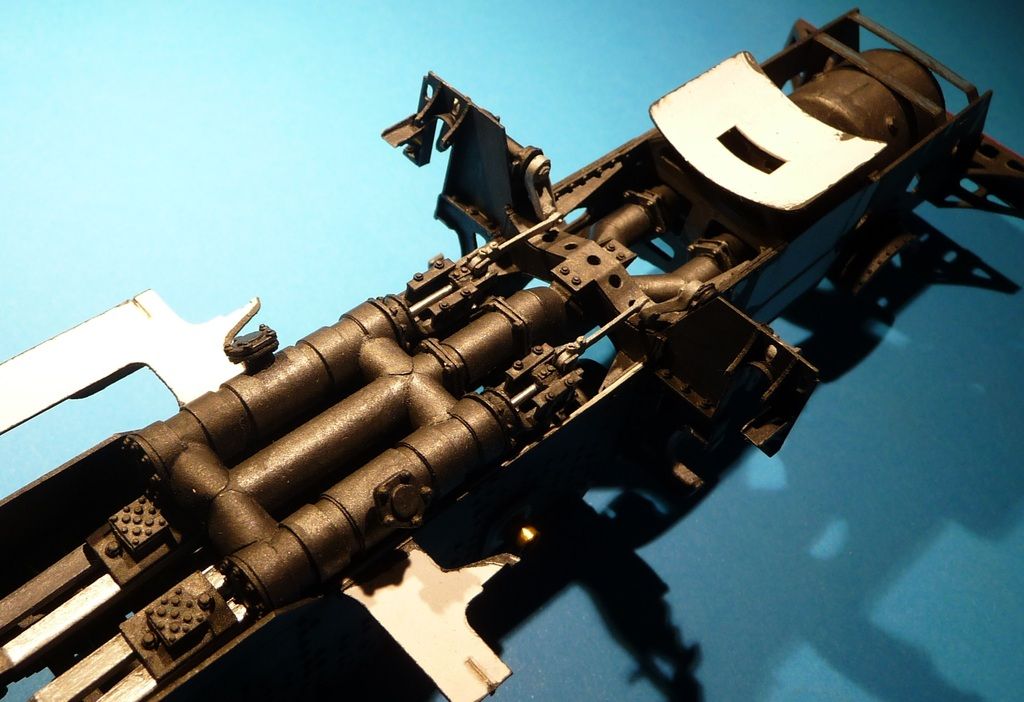
Today steam bus between high and low pressure units:


I have finshed final form of frame's sides.

Now, I'd like start assembly of all elements which I prepared up to now.
Cheers
Mirek


"DUCHESS OF SUTHERLAND" of cardboard
in Card structure modelling forum
Posted
Steve, dear Visitor,
some posts ago I've promised continuation this topic and and I'm going to keep my word.
Work over engine is going terrible slowly. I have no time for my hobby.
Since the last post I've made only few elements.
What I've made you can see below.
Best Regards
Mirek