


Northwick Group
-
Posts
111 -
Joined
-
Last visited
Content Type
Profiles
Forums
Blogs
Gallery
Events
Exhibition Layout Details
Store
Posts posted by Northwick Group
-
-
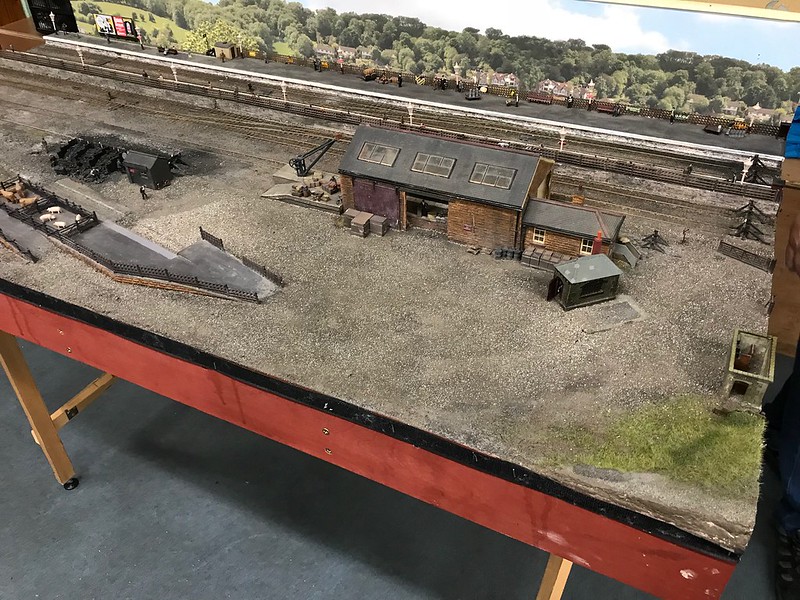
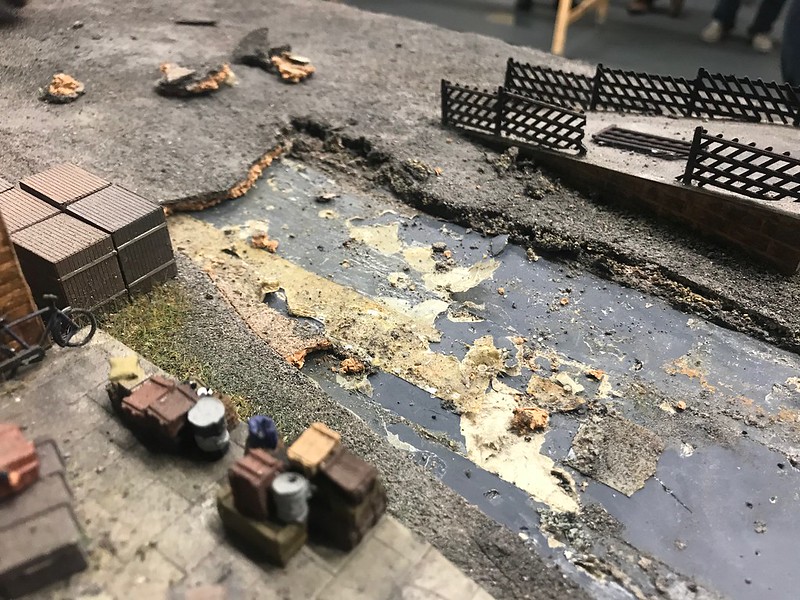
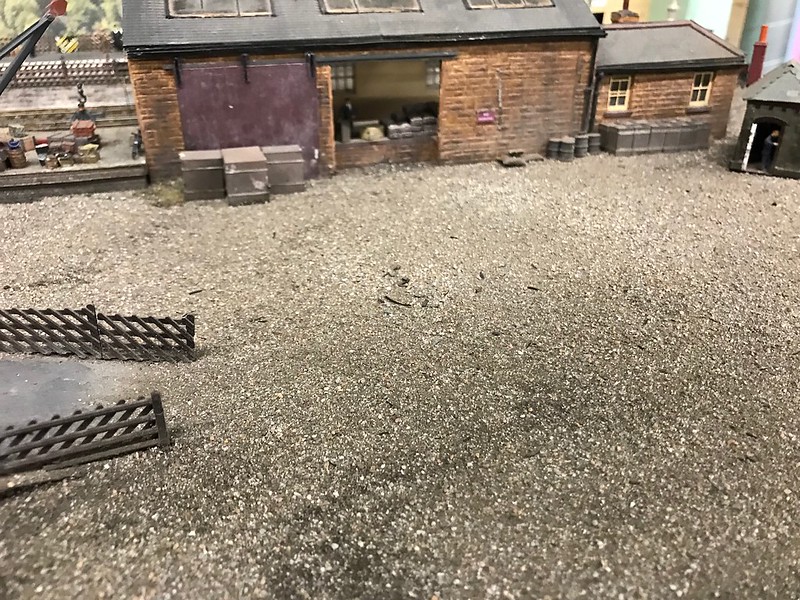
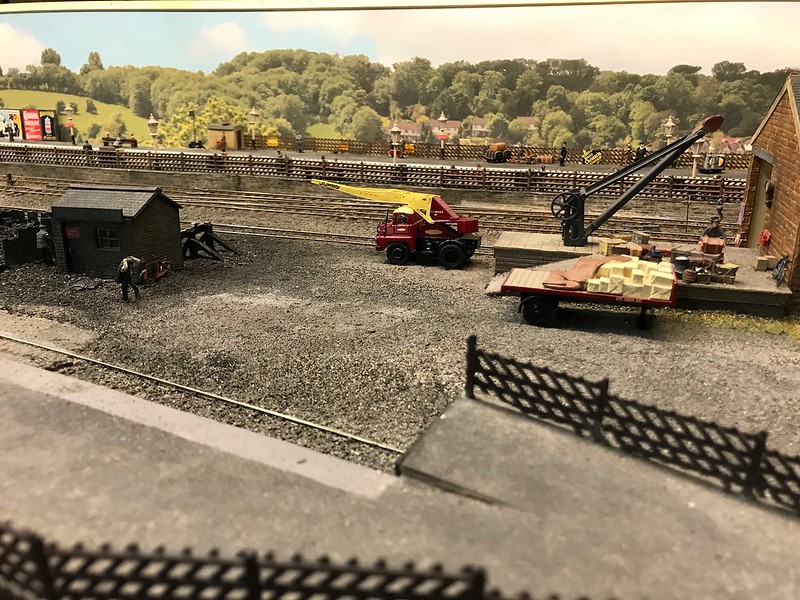
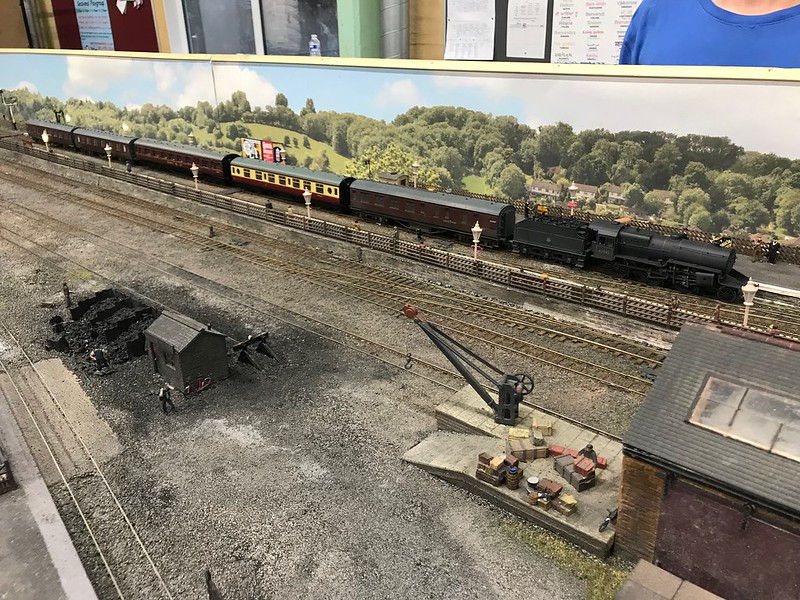
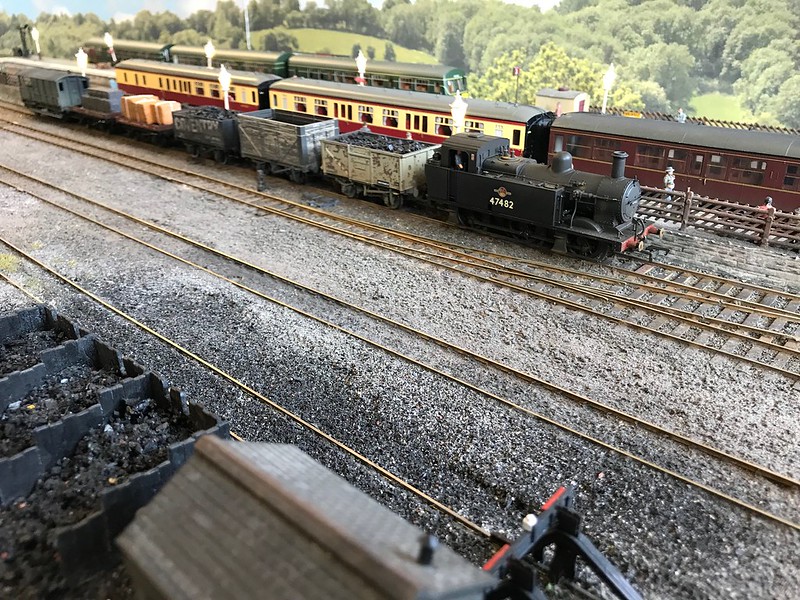
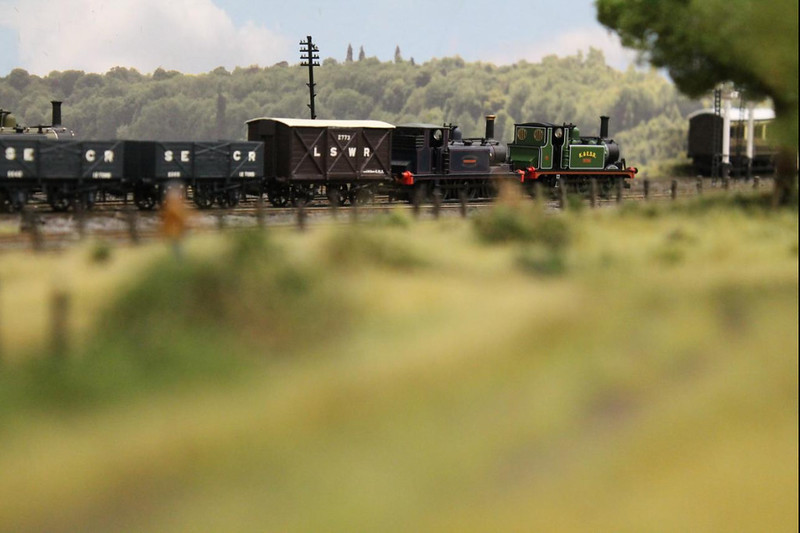
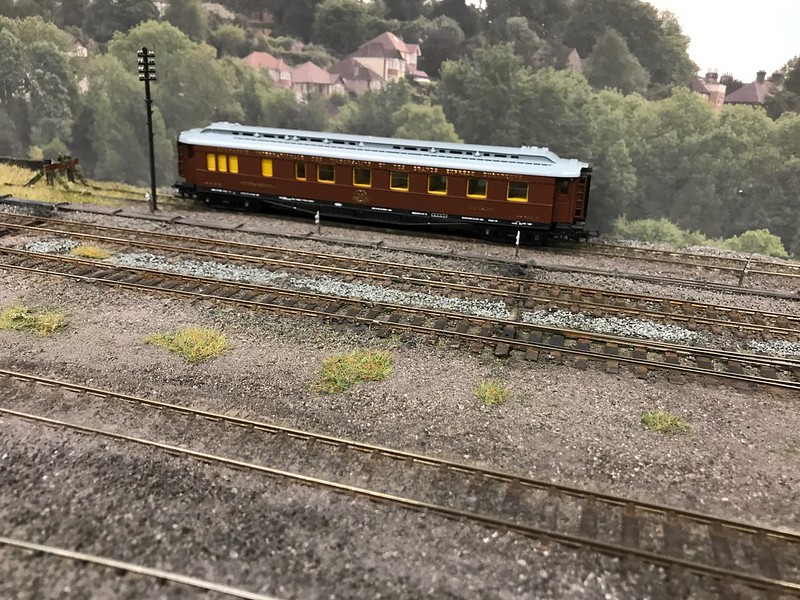
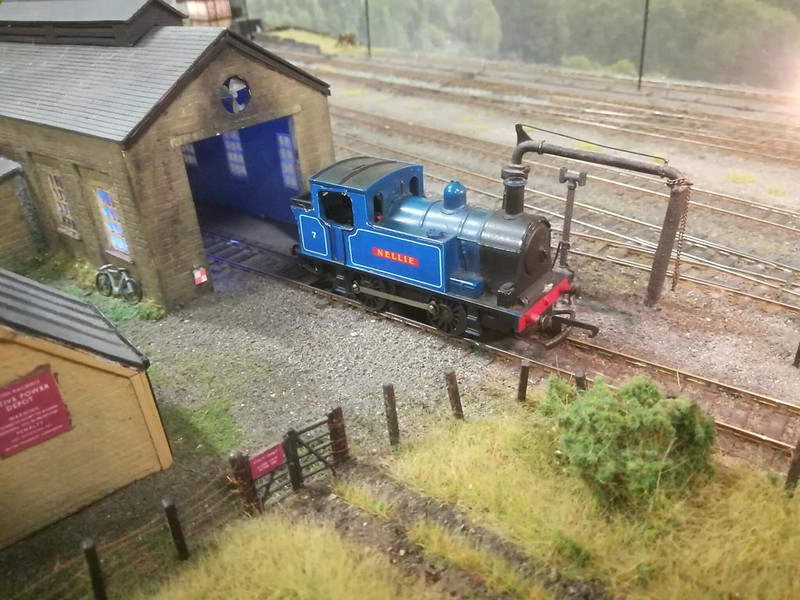
Since the last update things have been moving quite quickly, first up is a picture of how the goods yard looked after the glue had dried and the excess hoovered off.
The main focus of the group has now been to make a start on relaying the track work on board 3 which is the first step for the re-wiring of the layout which will also be started soon, this was first mentioned in post #42!
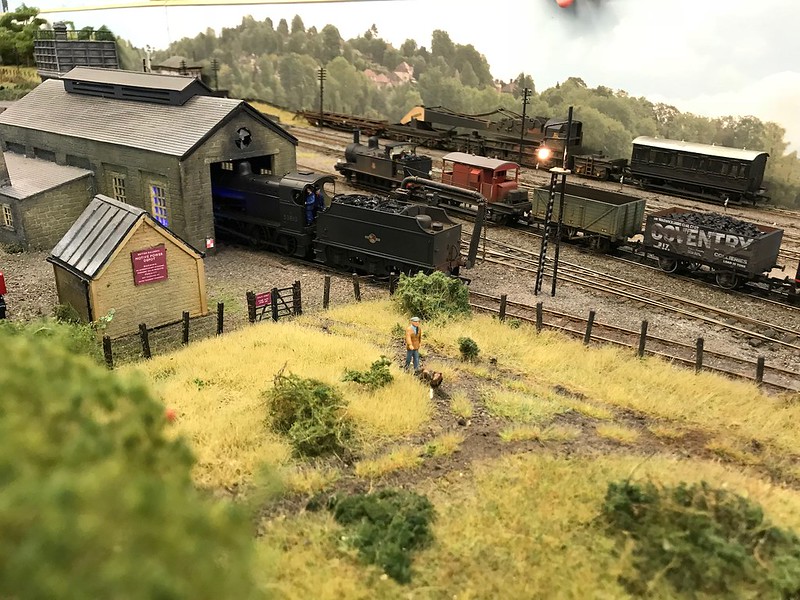
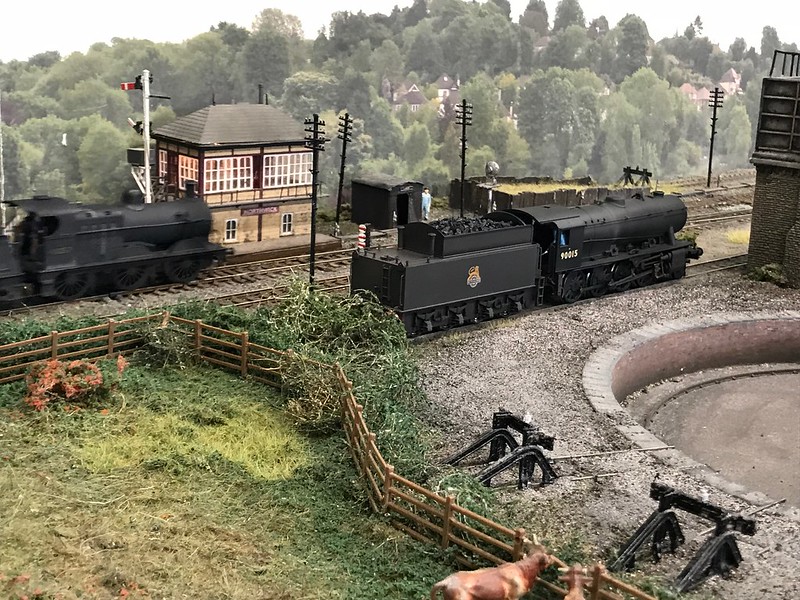
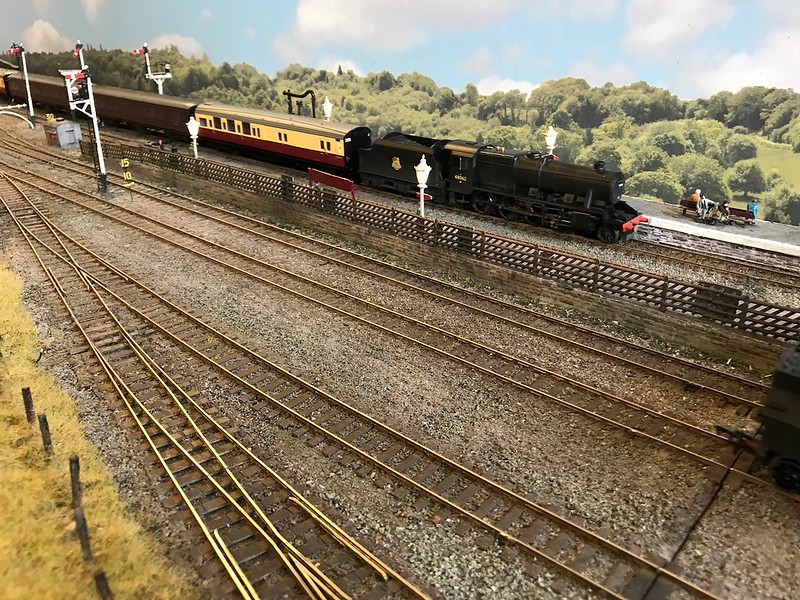
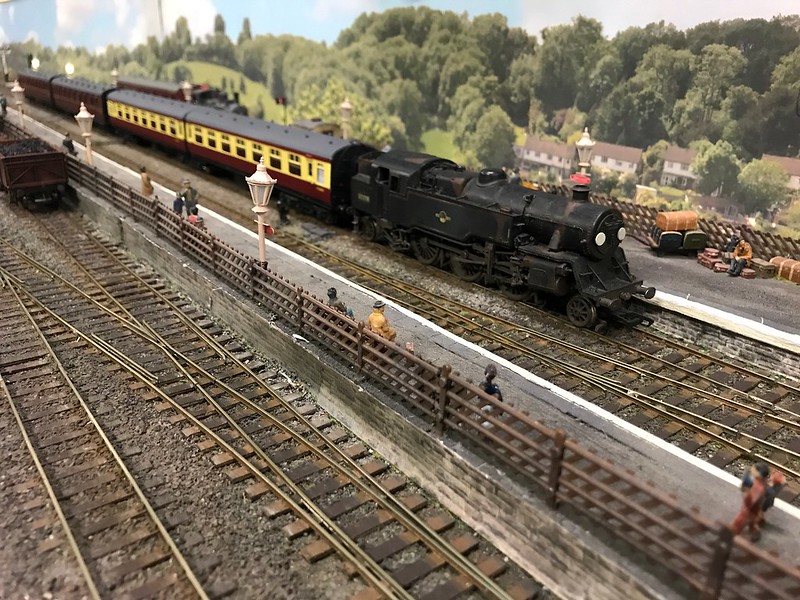
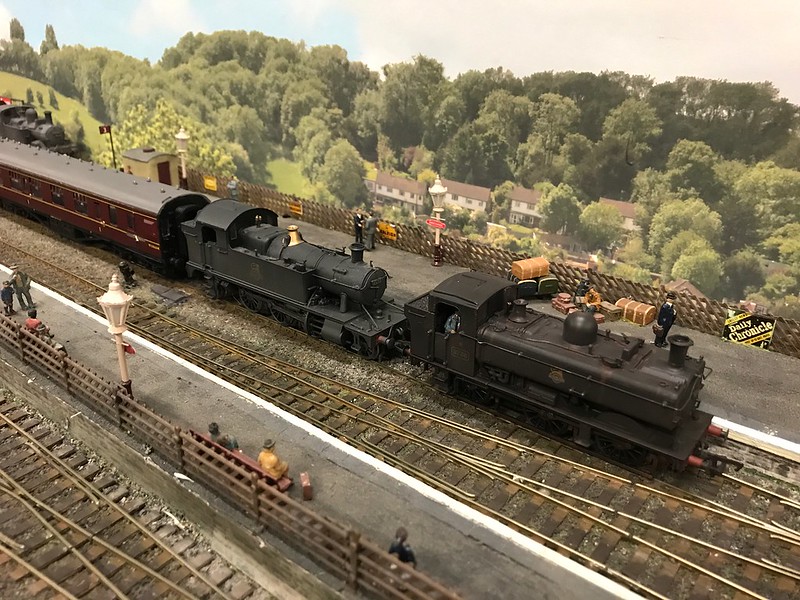
Since the last post we have been busy coming up with ideas on how to redesign the route which the locomotives take from their platforms to the turntable. We have decided to do this because at the moment it takes too long to turn the locomotives and it also causes bottlenecks within the goods yard because the locos currently use part of the goods yard on the route to the turntable. Below is a sequence of layout diagrams showing the route which the locomotives currently take once the train has arrived at the station and the loco has uncoupled and pulled forwards to the buffers.
1. The loco reverses from platform 2 to the shunt signal outside of the signal box
2. The loco goes forward from the signal outside the signal box to the goods receiving road
3. The loco reverses from the goods receiving road to the shunt signal in a goods pilot siding
4. The loco goes forward from the shunt signal in the good parts siding to the goods yard entrance
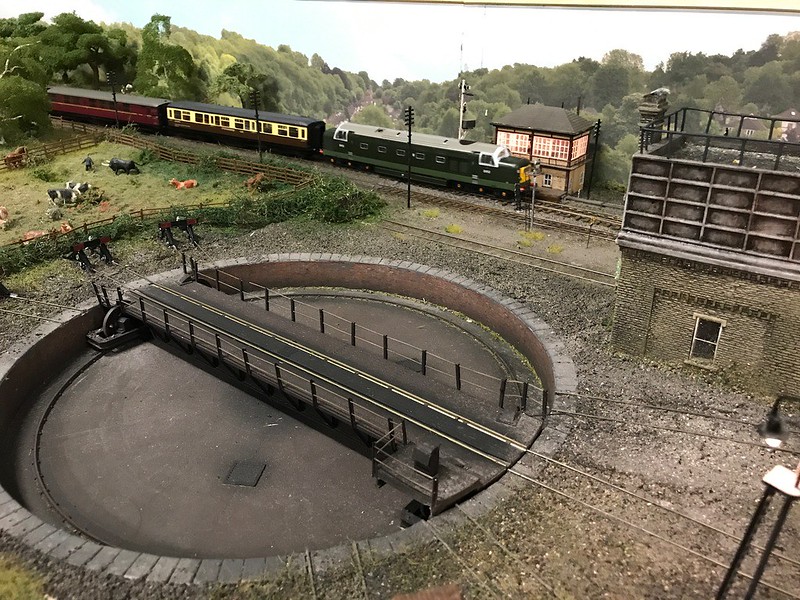
5. The loco reverses from the goods yard entrance to the turntable and gets turned.
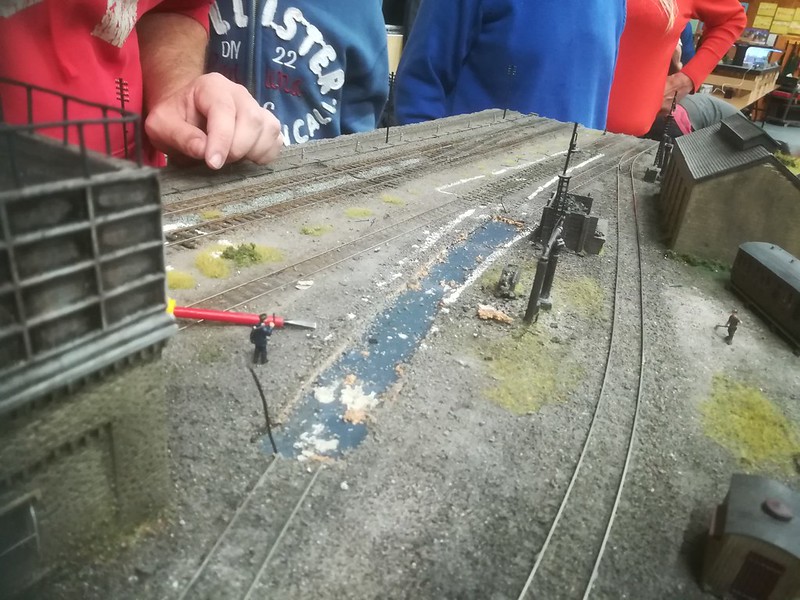
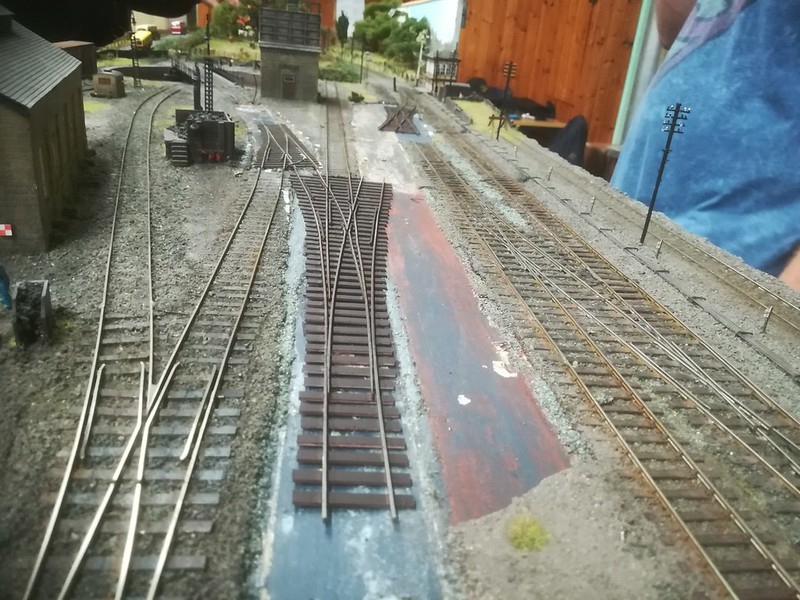
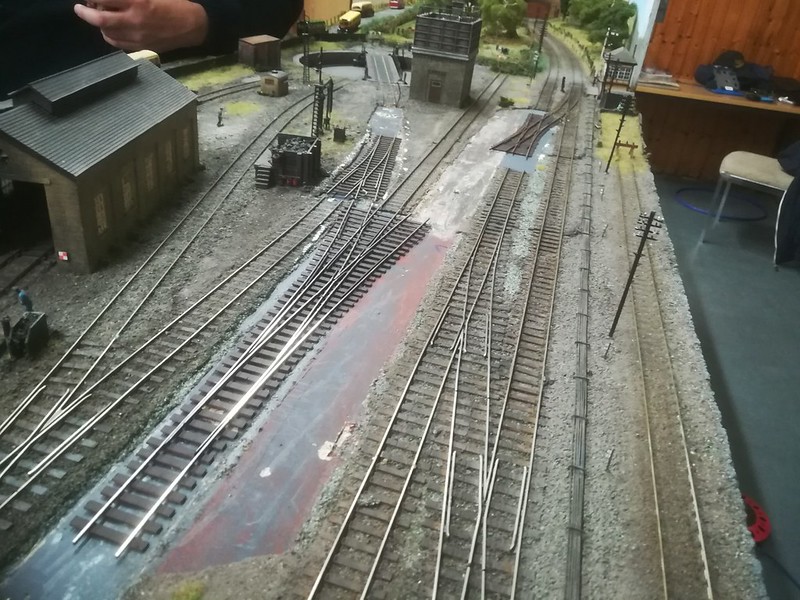
Below is a diagram of the current version that we are thinking of using the new track is highlighted in blue, the trackwork that is going to be removed is highlighted in red, during the brainstorming session we decided it would be a good idea to create a new siding for the station pilot (highlighted in green) as this will stop potential bottlenecks being created in the bay platform as the station pilot is currently stored in the carriage siding that comes off of the bay platform (location circled in red), it will also be one less manoeuvre for the station pilot to pick up the carriages in the platform.
Here is a list of the points which are going to be used with corresponding numbers on the diagram.
1. Double slip - we are using this so that you still have access to all the platforms from the downline as well as the goods yard.
2. Asymmetrical three way point.
3. Right-handed A5 point.
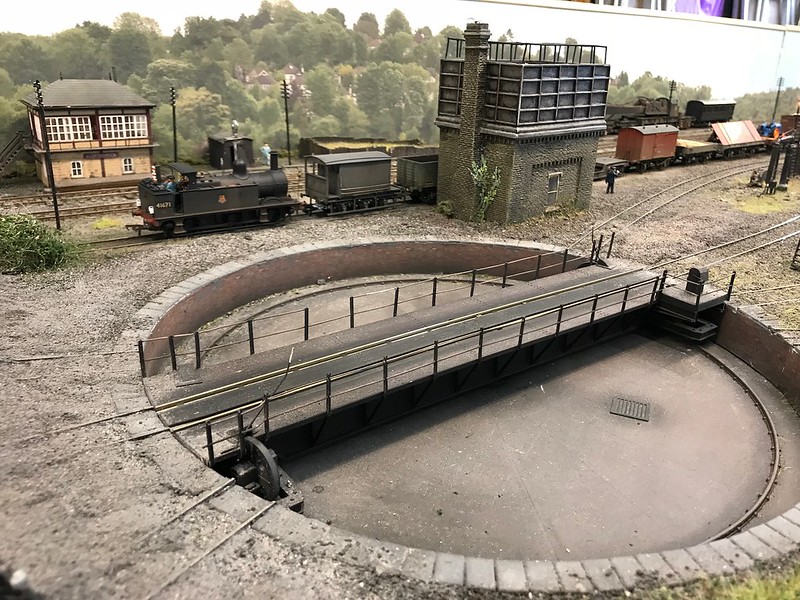
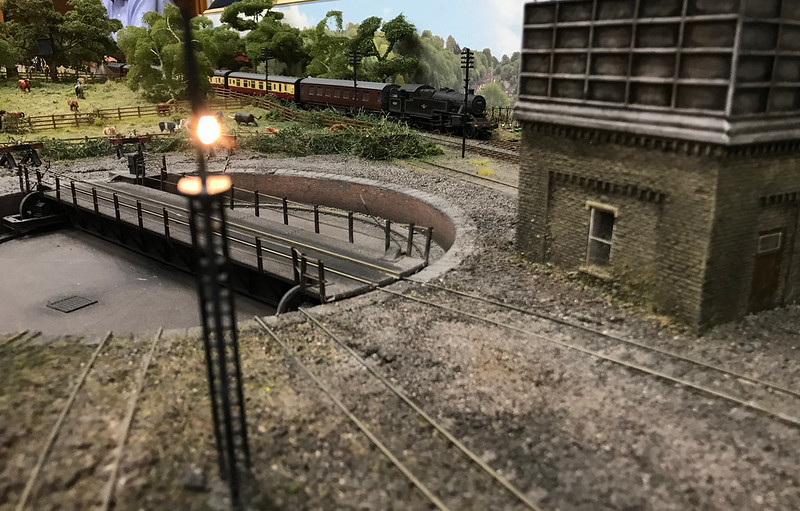
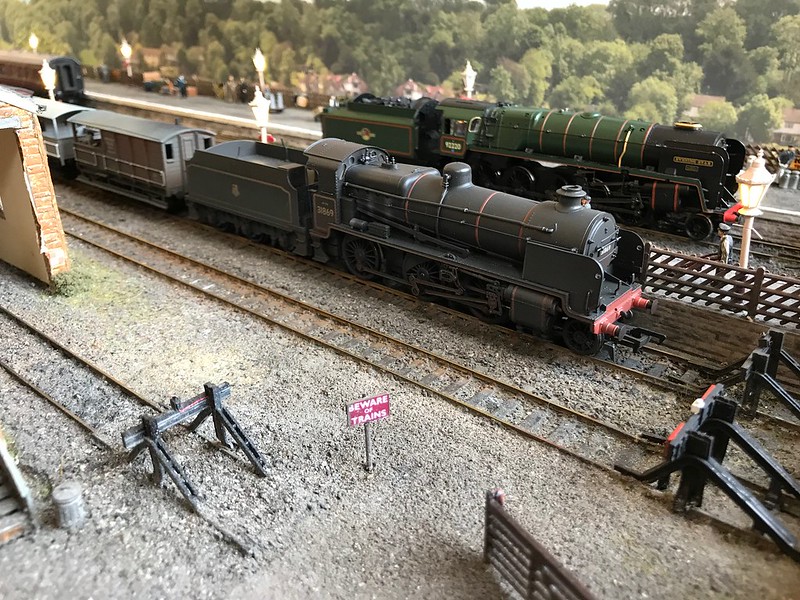
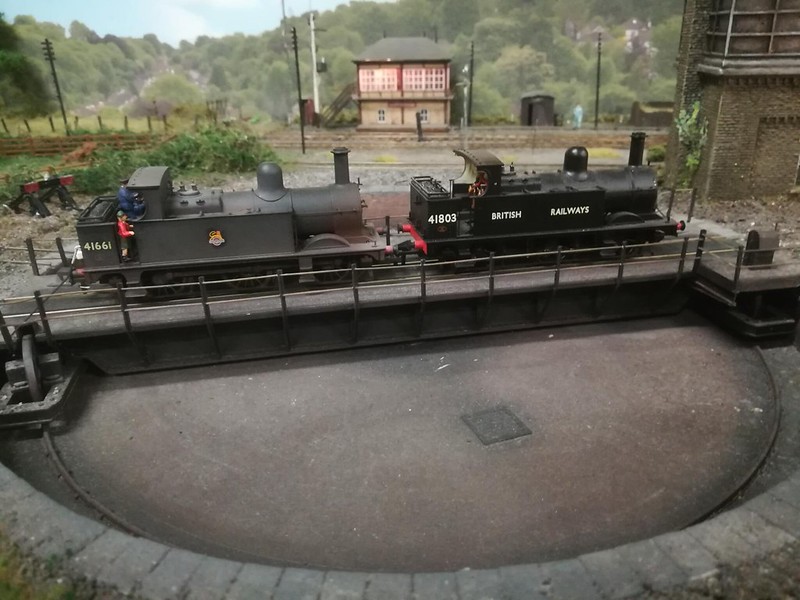
This will result in a new shorter route for the locos to be turned whilst also keeping the operations within the goods yard and the engine yard separate. Below is a set of diagrams showing the new route that the locos will take to the turntable.
1. The loco reverses from platform 2 to the shunt signal outside the signal box.
2. The loco goes forward from the shunt signal outside the signal box through the double slip and the three-way point to the engine yard entrance.
3. The loco reverses from the engine yard entrance to the turntable and gets turned.
Please let us have your thoughts and ideas if we can improve this further.
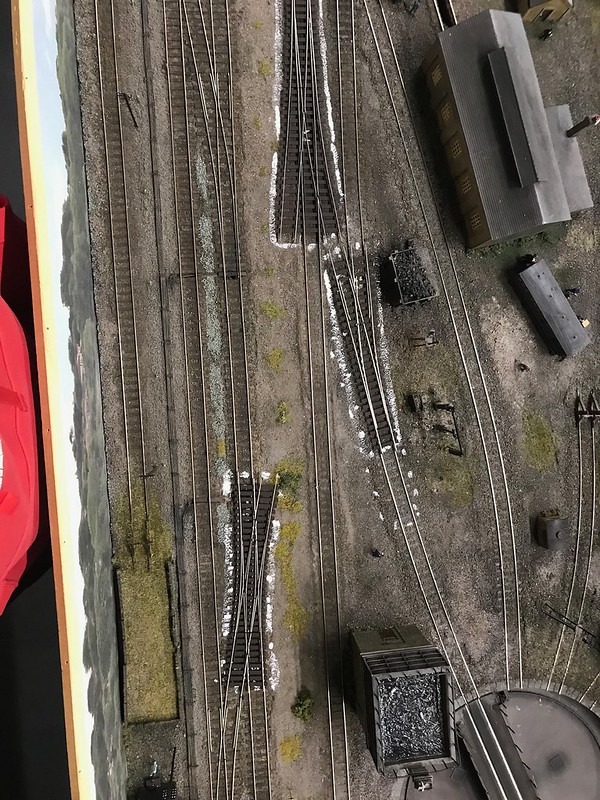
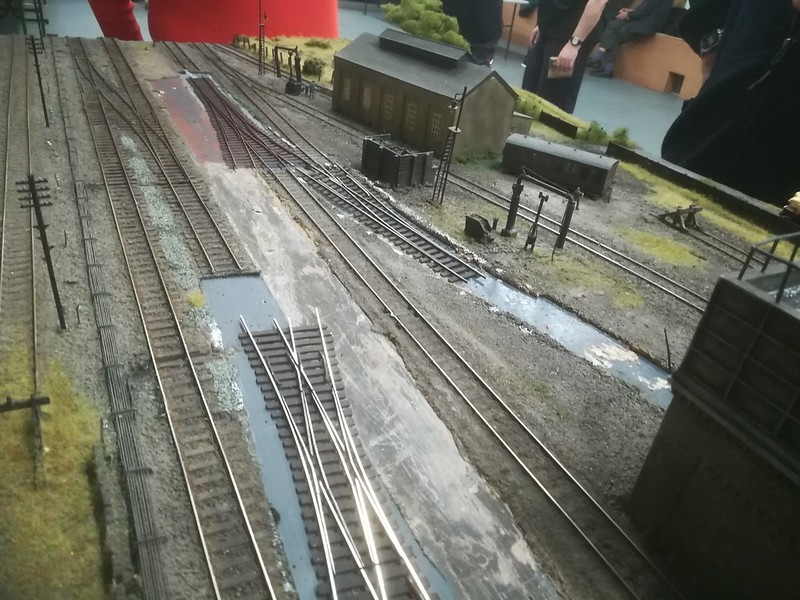
Since then all of the points that would be required for this have been built by Tim & Steve B and can be seen in their positions in the picture below ready for the lines to be drawn around them so that we could make a start on removing the existing track work.
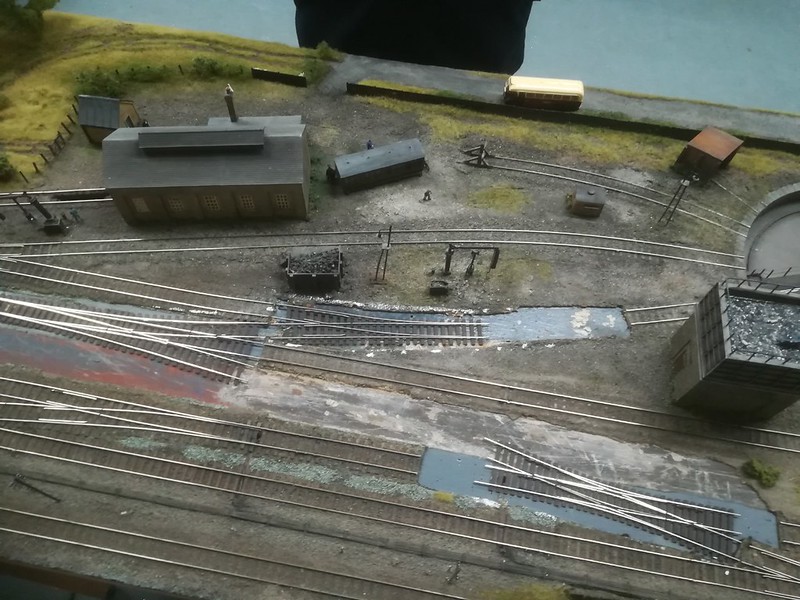
Removal of the existing track then started we decided to remove everything right back to the baseboard as we knew that we would come across roofing felt as underlay for the track which has caused us plenty of problems previously when we adjusted the track work and left the roofing felt in the past.
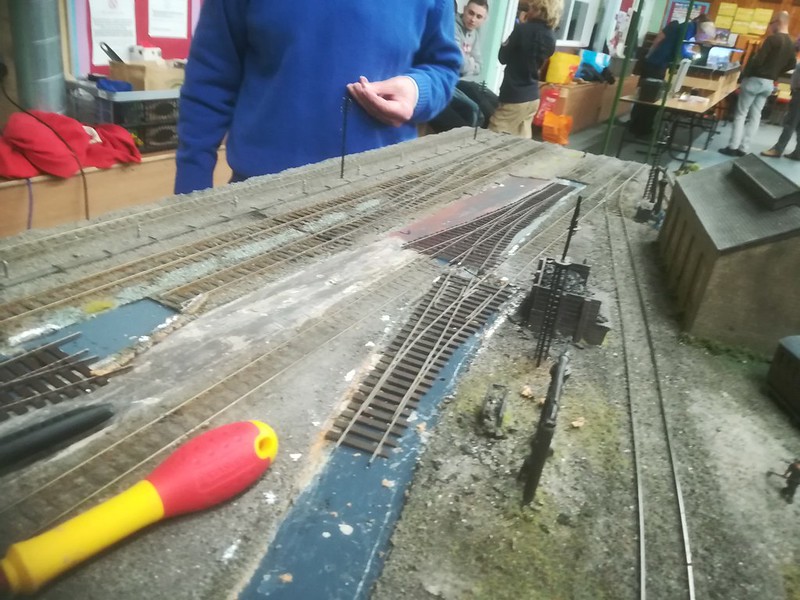
Once the existing track work was removed along with the roofing felt underneath it we placed the new points in their positions to make sure that everything was lining up like we intended it to.
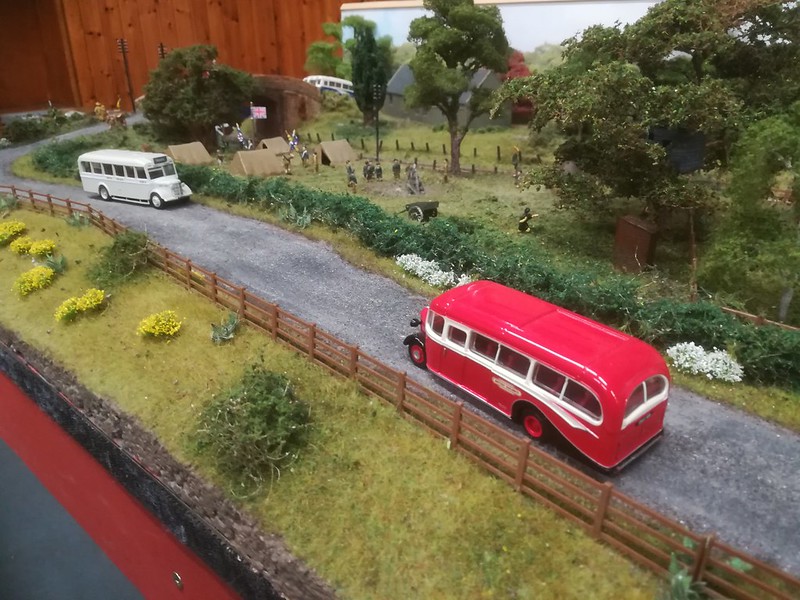
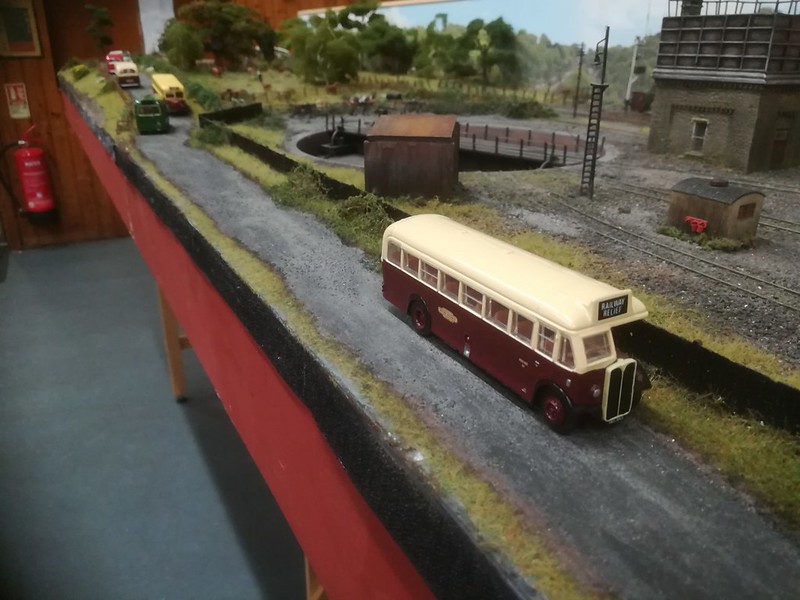
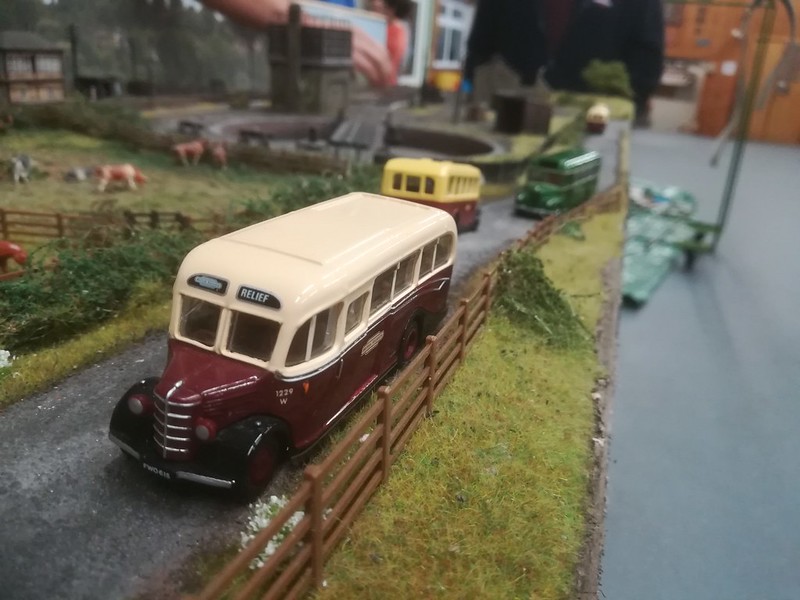
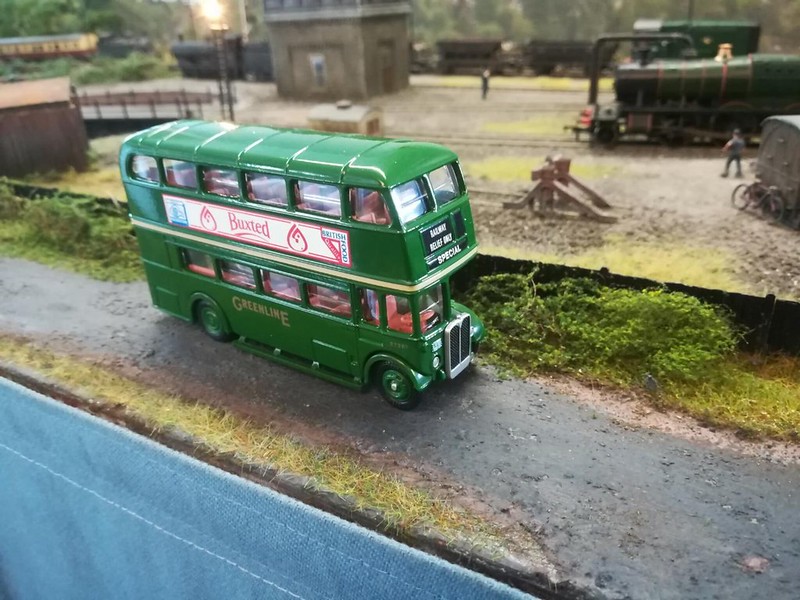
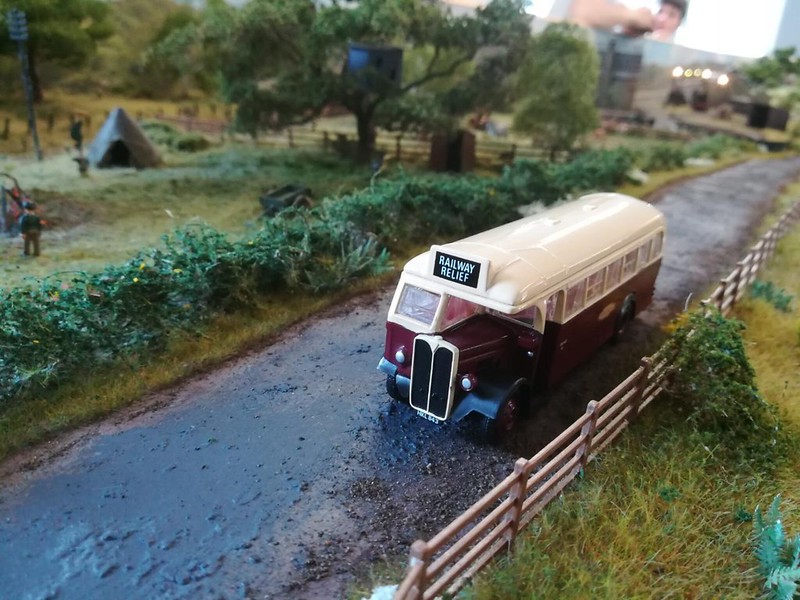
Whilst the permanent way department have possession of the track a bus replacement service was implemented to ensure the passengers could still get to their destinations.

-
 3
3
-
-
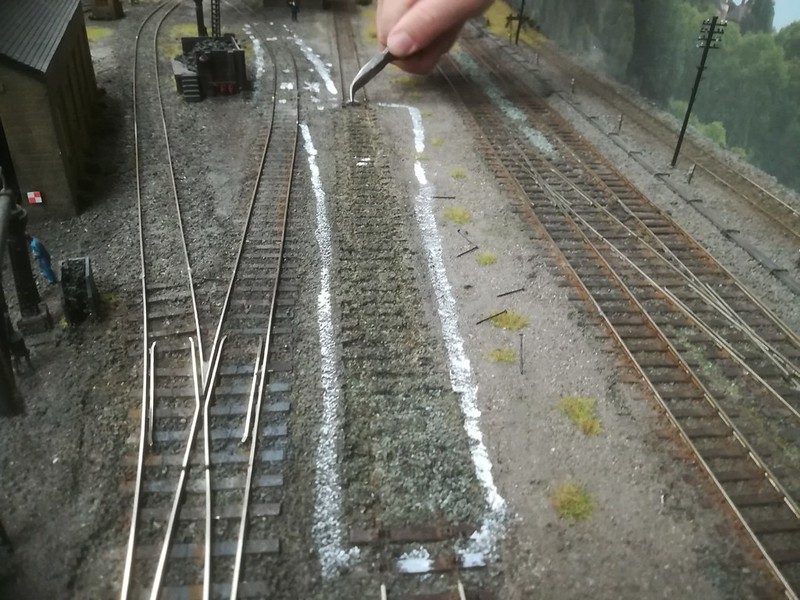
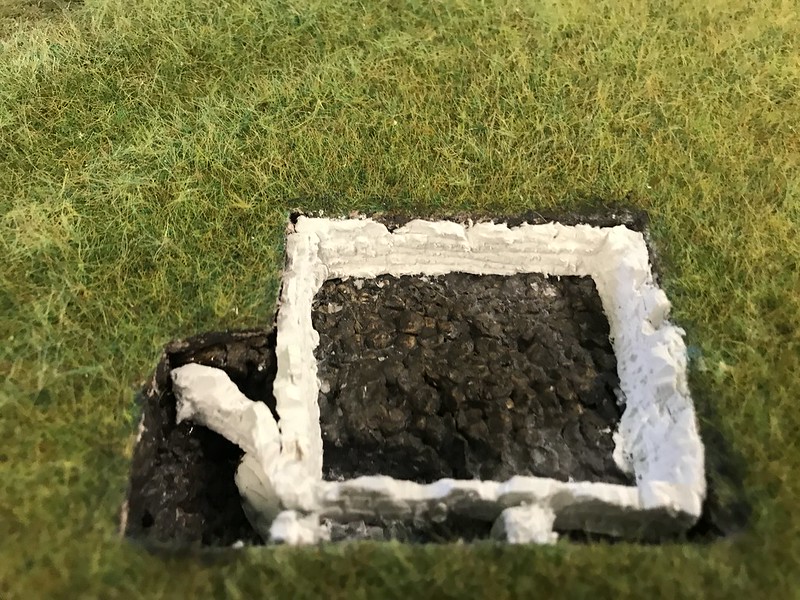
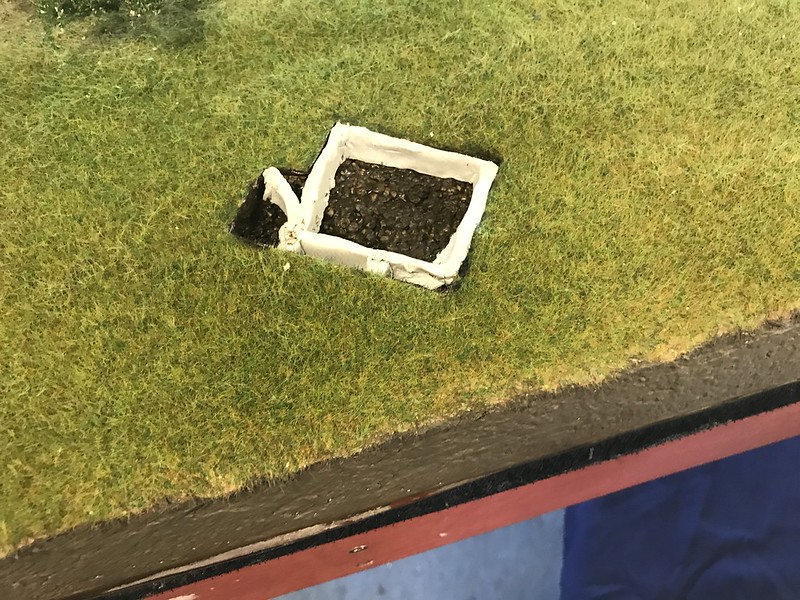
It has been a while since the last up date but we have been busy rectifying the issue that we have been having with the goods yard and that is that the surface has been continually lifting in places over the past couple of months so we decided that it was time to take the plunge and strip back the affected area right back to the base board and start again.
The first step was to start excavating where the worst of the raised bits was and we soon discovered the cause of the problem and that was there was roof felt at the base which had become detached from the base board and so was causing the rest of the area to lift, you should be able to see the roof felt in the center of this picture.
So we then set about removing all of the areas that were loose ready to start again.

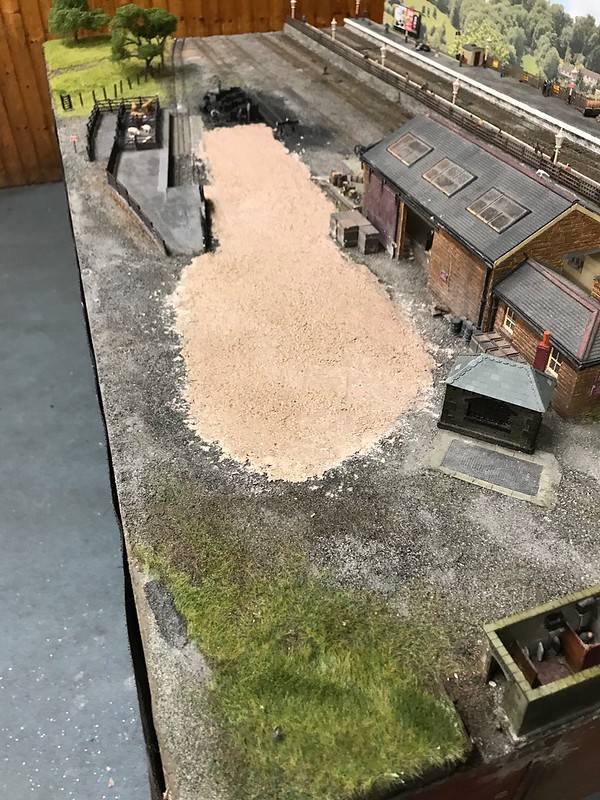
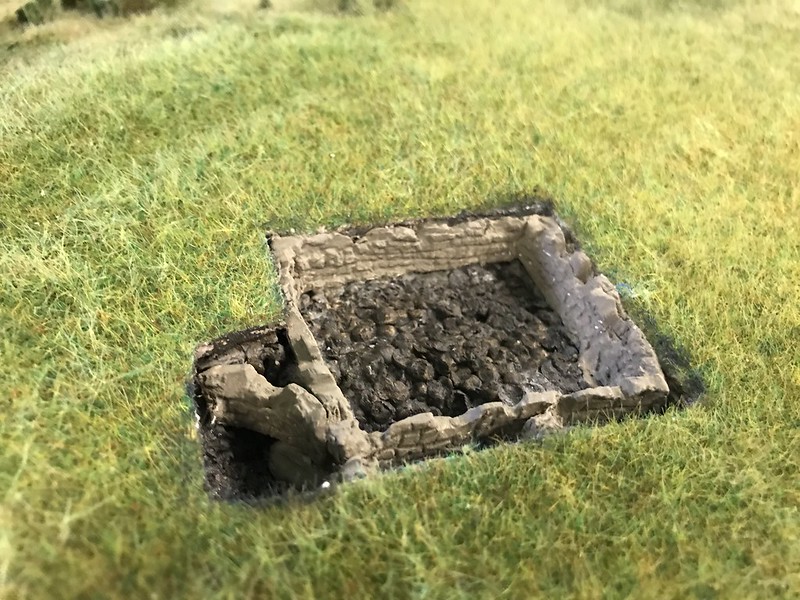
once this had been done we then started the process of reconstructing the goods yard, the first step was to add a layer of the vermiculite, art mache, water and paint mixture that we used on the hill sections of the layout, this was done in 2 layers so as to allow each layer to fully dry before adding the next.
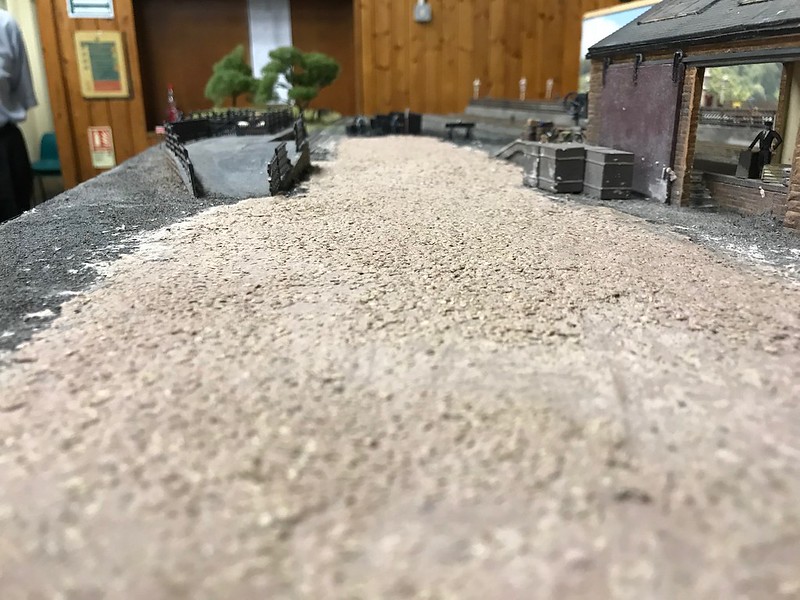
Whilst the second layer was drying we took a low level picture to show how level it was.
When the second layer had dried we then sanded the mixture back so that it was level with the original surface.
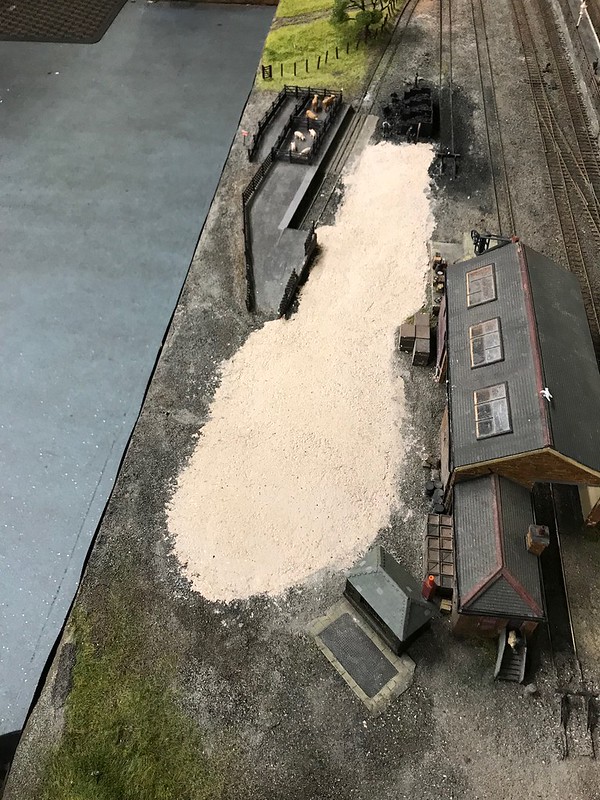
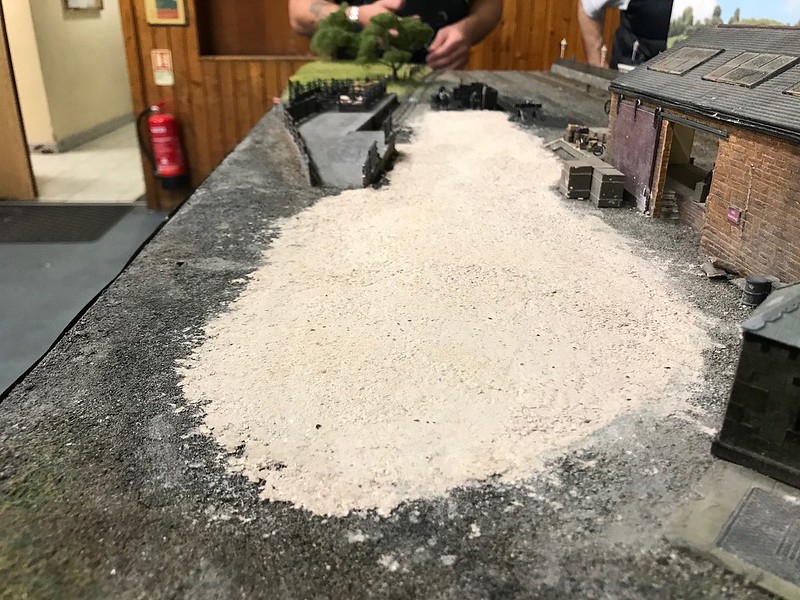
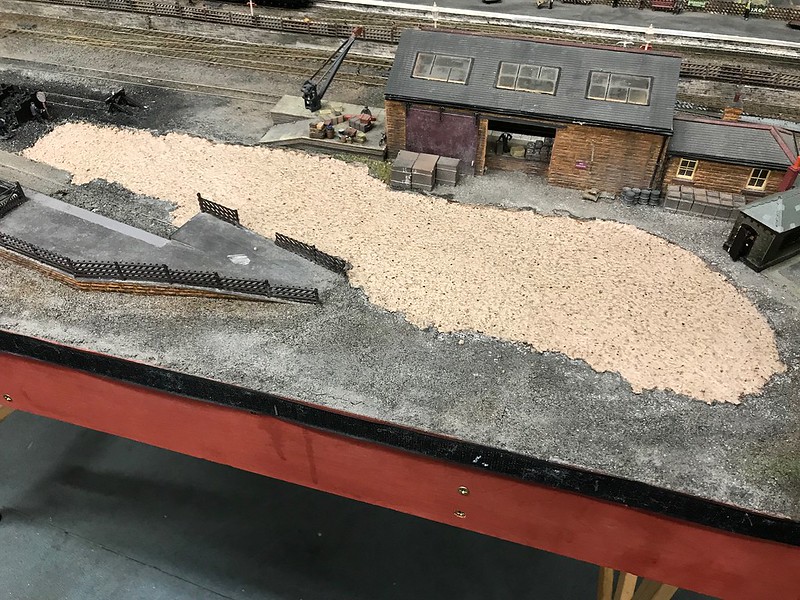
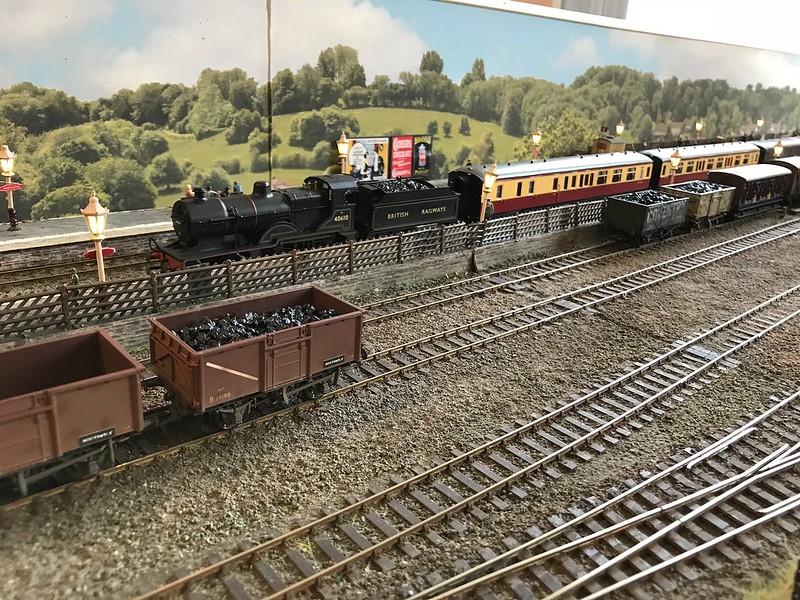
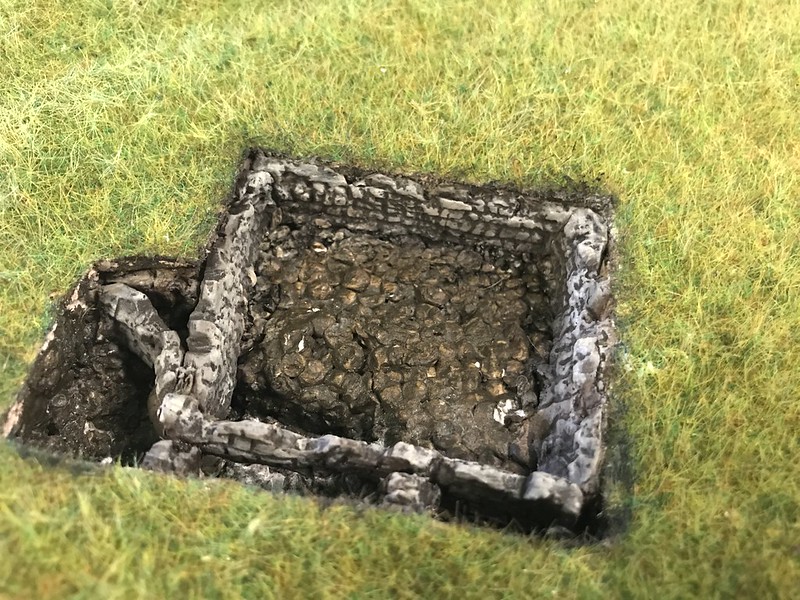
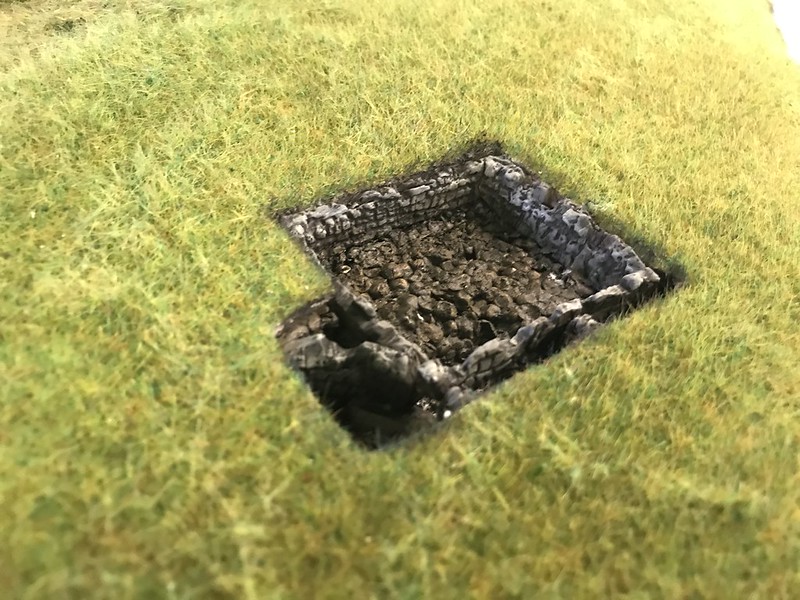
As we needed to "cover up" the fact that we had been there we decided that we would take the opportunity to change the colour of the goods yard surface from a dark grey ash colour to a brown dirt with stones in it as after much consultation it was decided tht this would be the more prototypical surface for a goods yard, to achieve this we first painted the new section a mixture of browns and blacks for a base colour and once dry we applied PVA to the surface and created a mixture of soil, ash, coal, and various colour and grades of ballast to put over the PVA. here is how it looked whilst it was still drying.
-
2
-
-
Last Saturday Northwick was up and running at the clubs annual open day, if you came along we hope you enjoyed seeing the layout running and if you did not have the chance to come and see it then here are some pictures from the event.
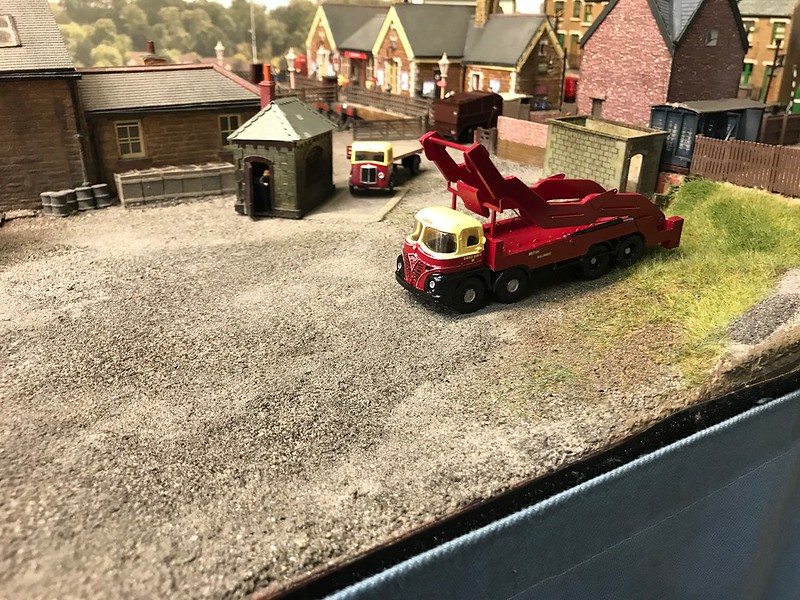

Even the archaeologists arrived in time for the open day
-
2
-
-
Here are a couple of pictures from last Fridays running session to wet you appetite on what to expect to see this Saturday on Northwick at the club's open day

Hope to see you there
-
1
-
-
Why not come and see Northwick in action in the flesh at Twickenham MRC's open day?
July 21st (10am to 4pm)
Kerswell Hall, Wills Crescent, Hounslow
TW3 2JF
For full details see www.tdmrc.org.uk
Hope to see some of you there!
-
It has been a while since the last post, recently Northwick went to Twickenham Library for the annual event that Twickenham & district MRC and is aimed to showcase what the club gets up to. this year Northwick was set up in its entirety and was operating, here are some pictures.
-
3
-
-
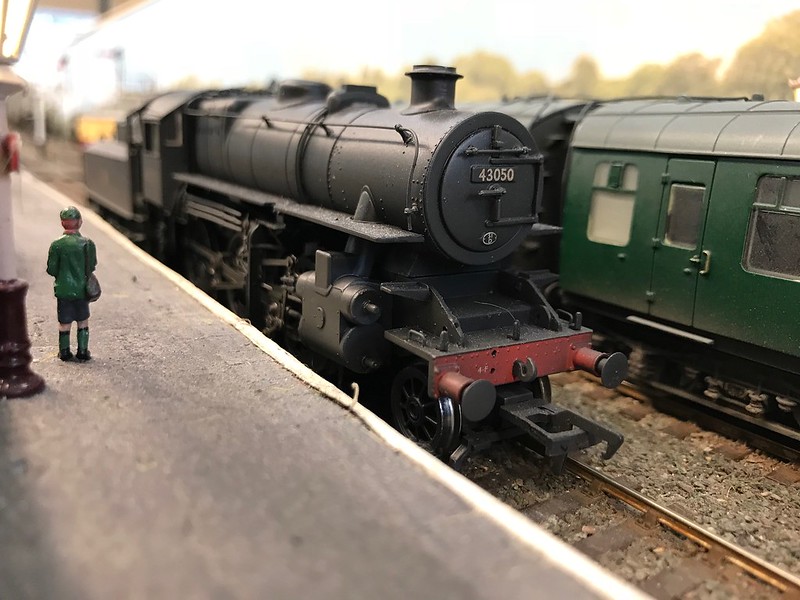
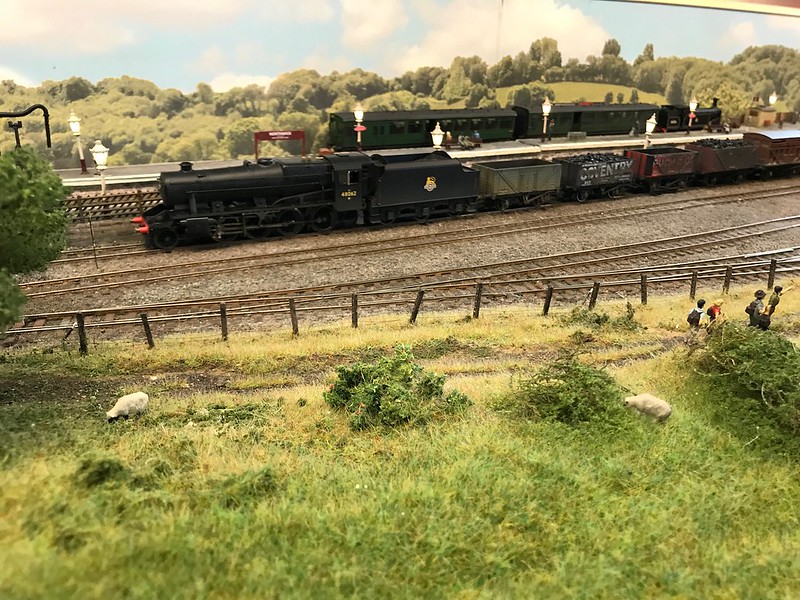
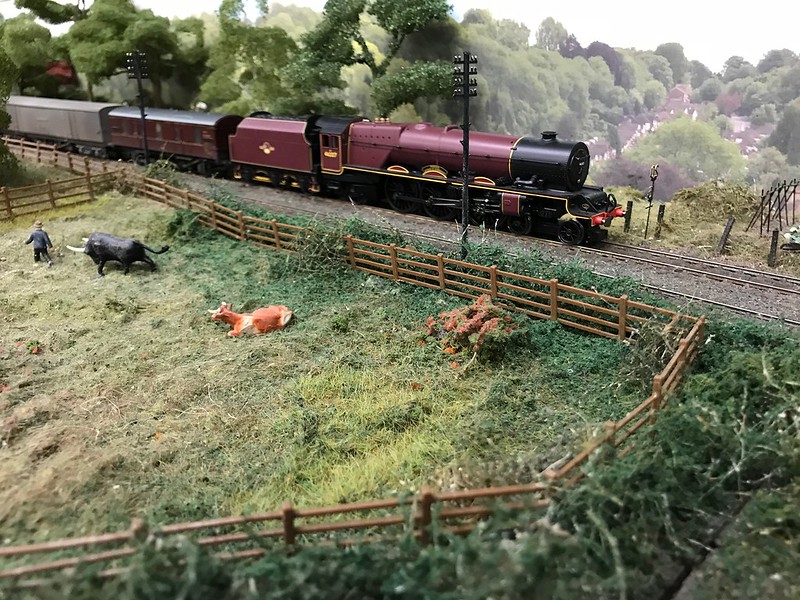
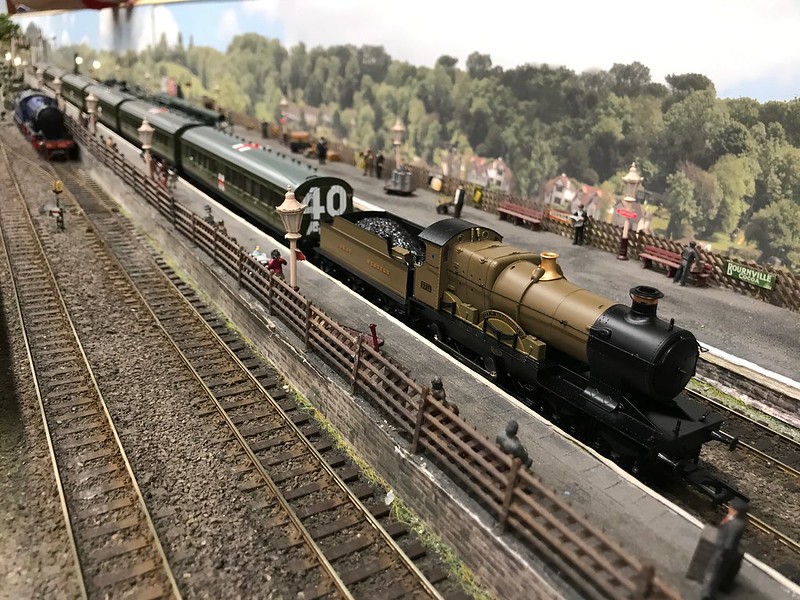
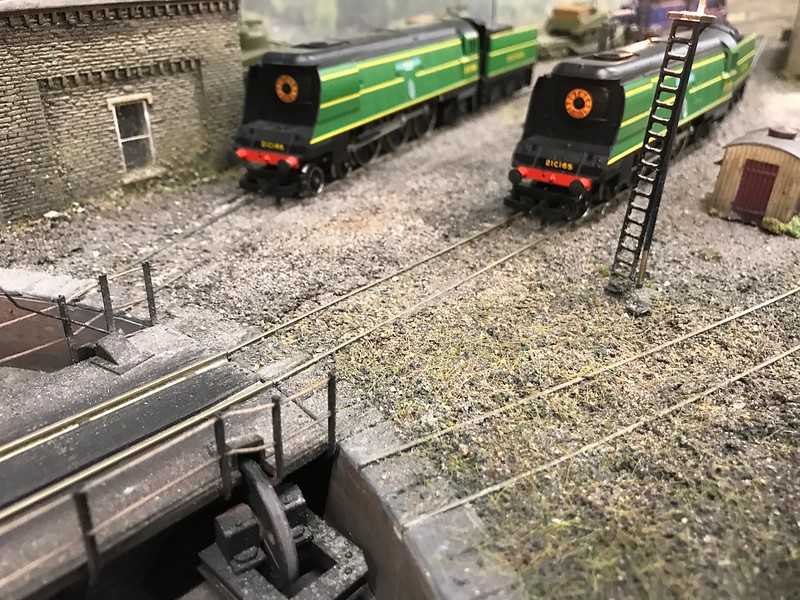
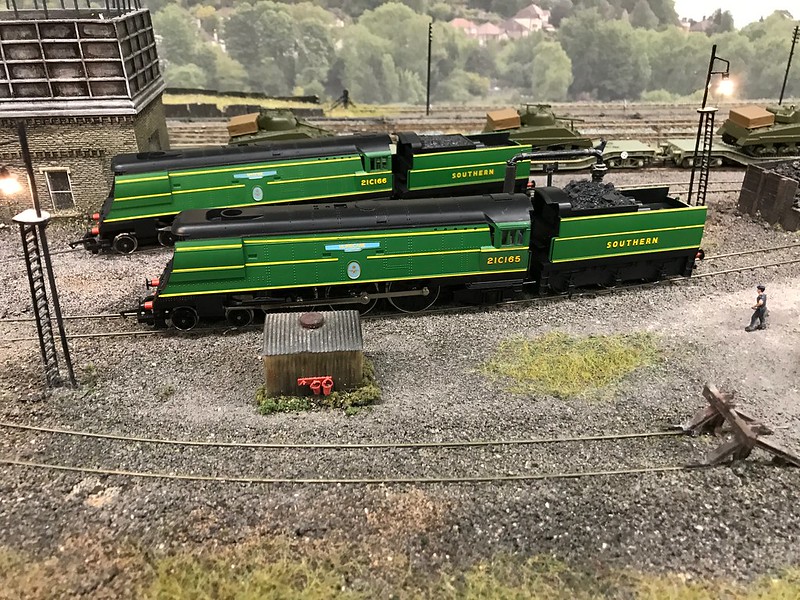
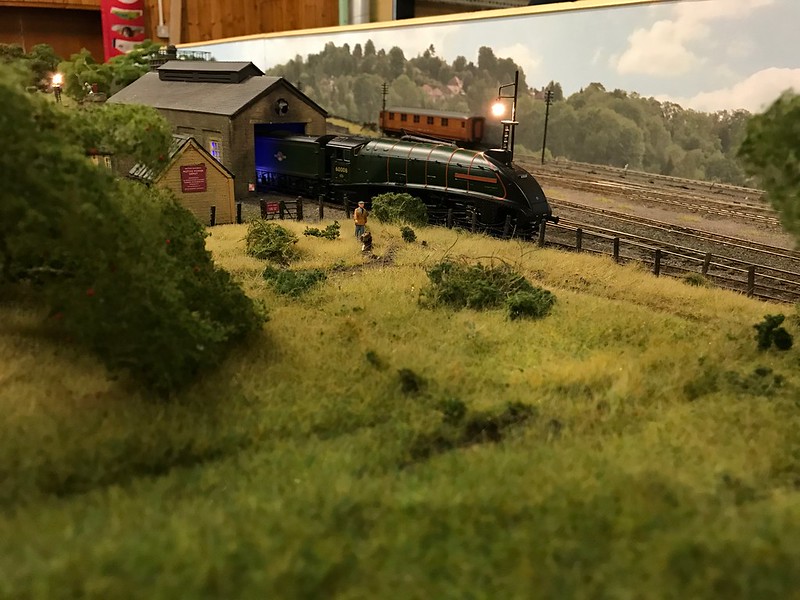
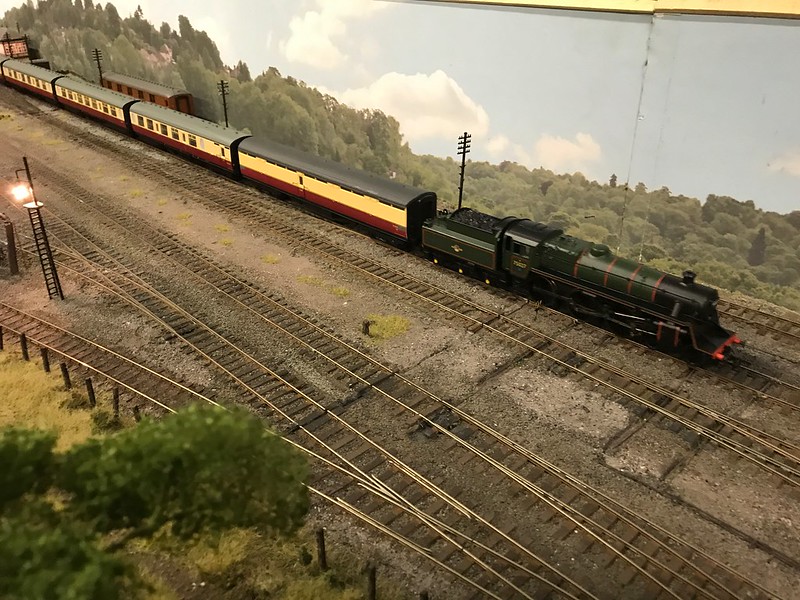
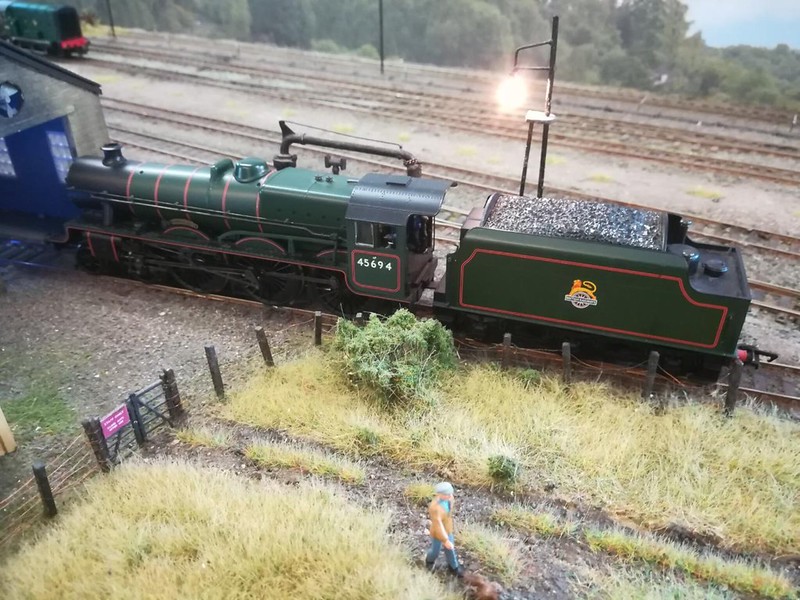
It has been a while since the last update so I thought that it was about time that I did one. Recently we had another one of our themed running nights and the theme was Pacific class locomotives, here are some pictures.
First 2 trains were hauled by Tornado and bittern.
BR Standard Class 6 Clan Bucannan arrived with the next train
Br Standard Class 7 Britannia also made an appearance.
LMS Princess Royal Class Princess Arthur of Connaught arrived with the parcels.
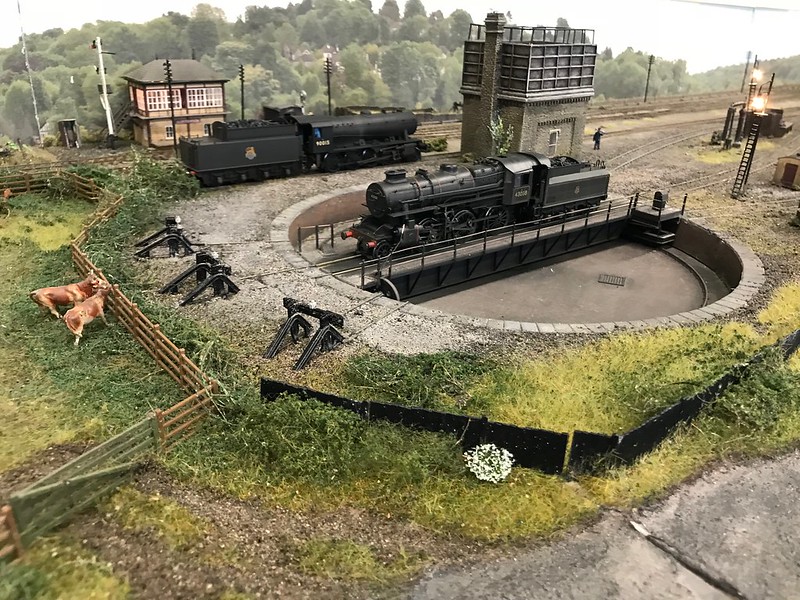
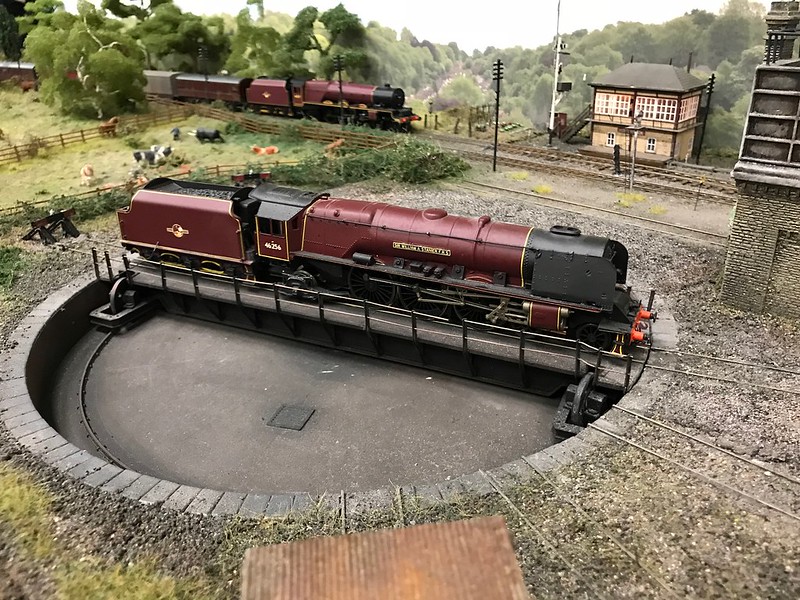
LMS Duchess Class Sir William A Stanier FRS is turned on the turntable
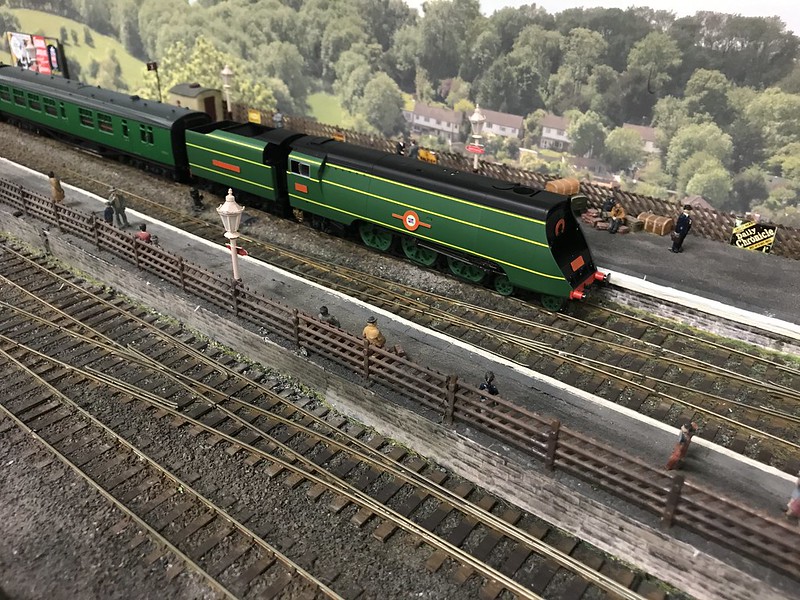
SR Merchant Navy Class Channel Packet pulled into the station with its train
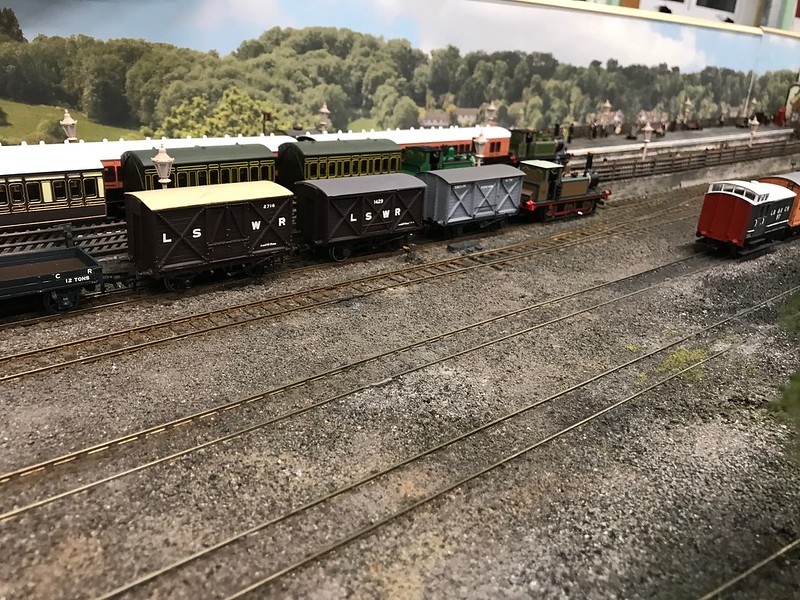
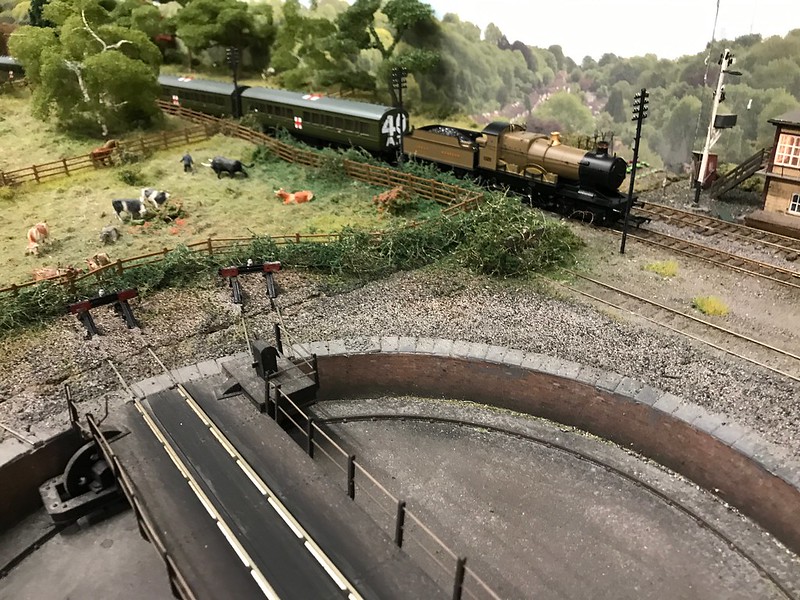
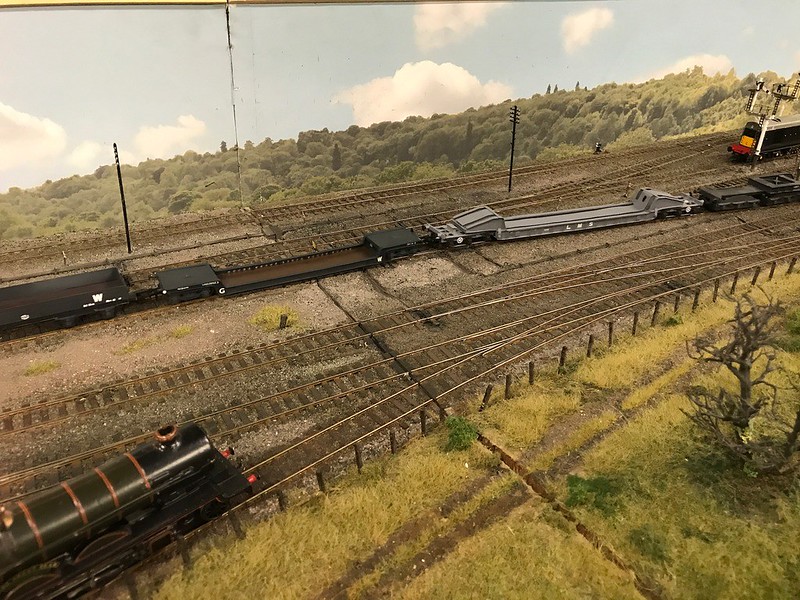
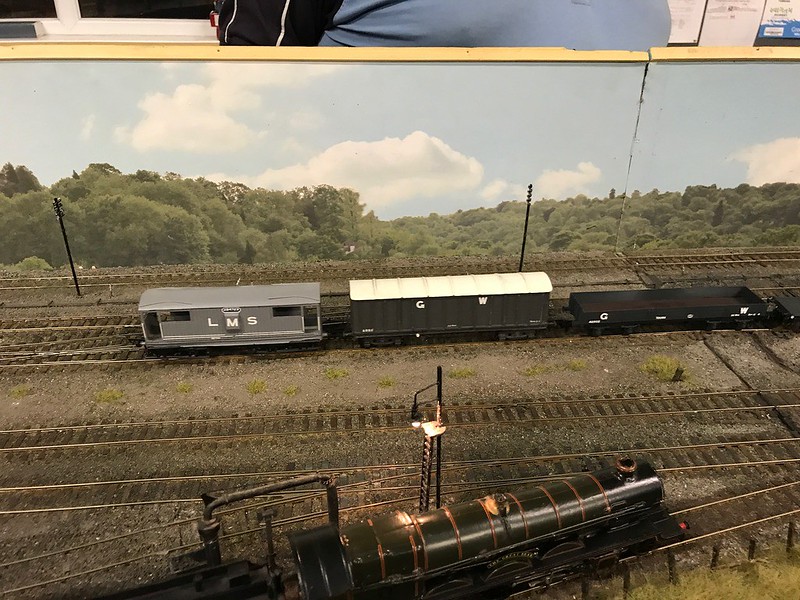
There was also an unusual freight train that arrived on the layout, this was the LNER cantilever set that has been scratch built by Tim, this consists of 5 wagons 2 Protrol B's (one at each end) 2 Flat Q's the next 2 wagons in form the ends (the ones with the cantilever armes on top) and the large well wagon in the centre is a Weltrol N the 2 cantilever arms attach to the weltrol N to enable it to carry heavier loads
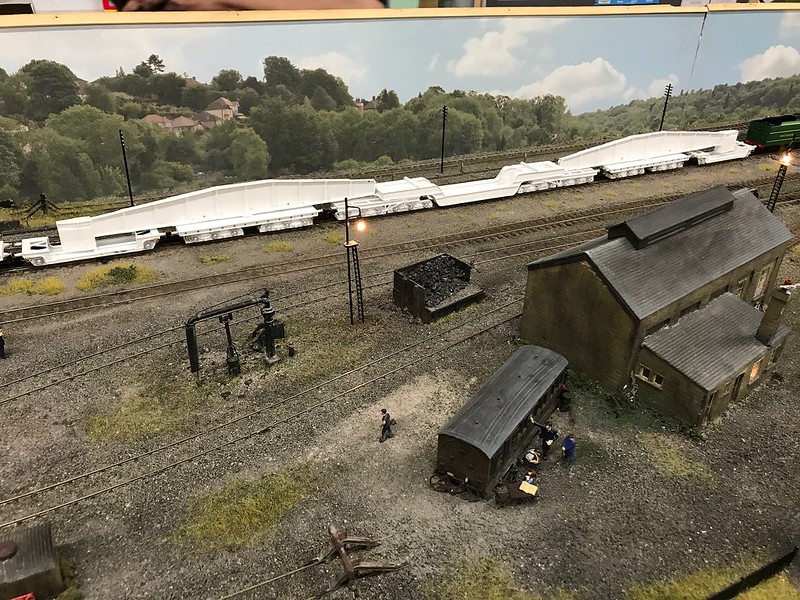
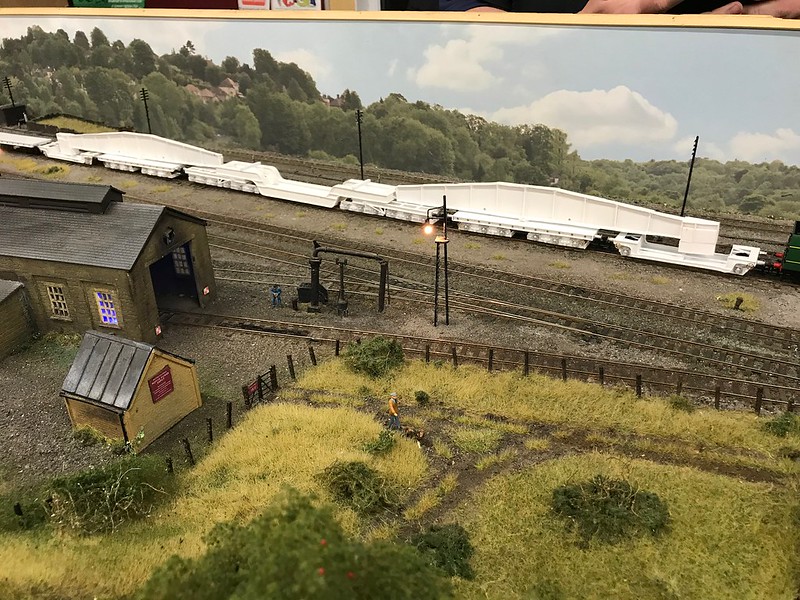
There were also 2 other wagons attached to the back of the cantilever set the first being a Flat U which is a 8 axle flat wagon
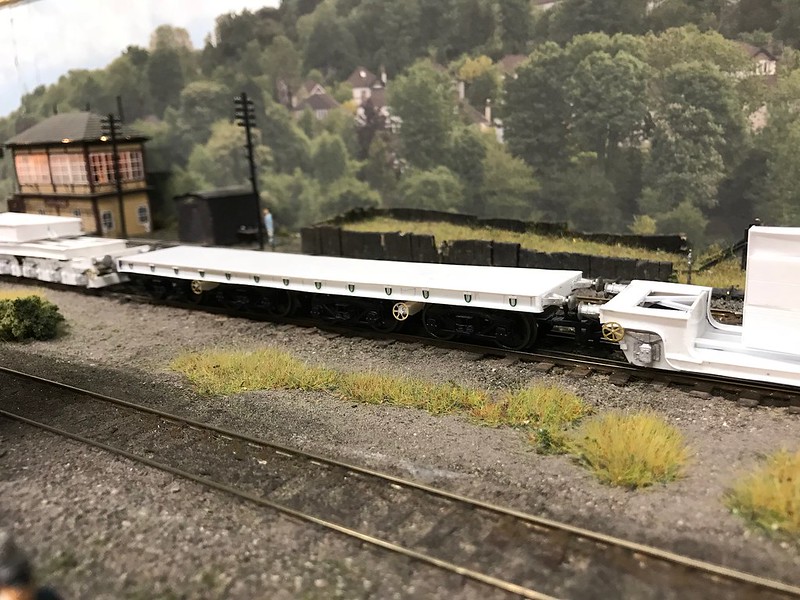
The other wagon being a Flatrol AA that can go in the cantilever set instead of the Weltrol N
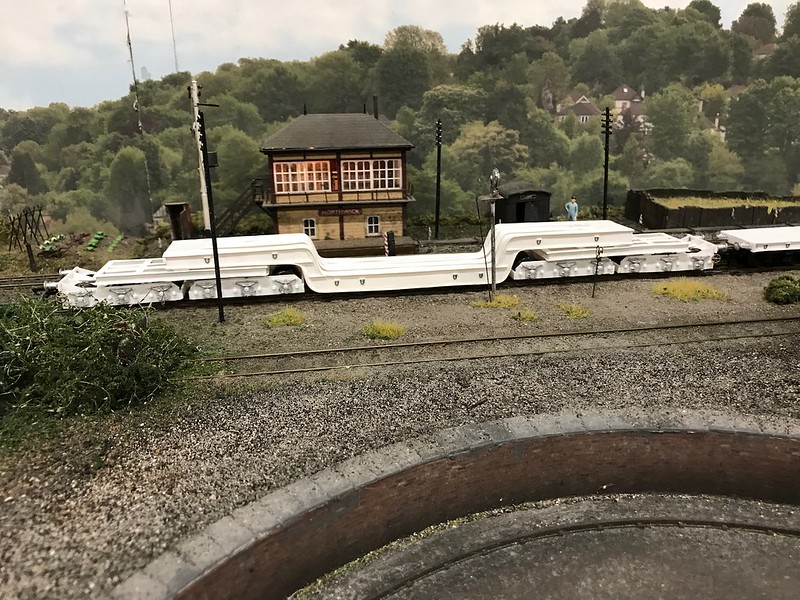
The set of 7 wagons are almost 5ft long from 1 end to the other and haveof 48 axles or 96 wheels in total!
-
1
-
-
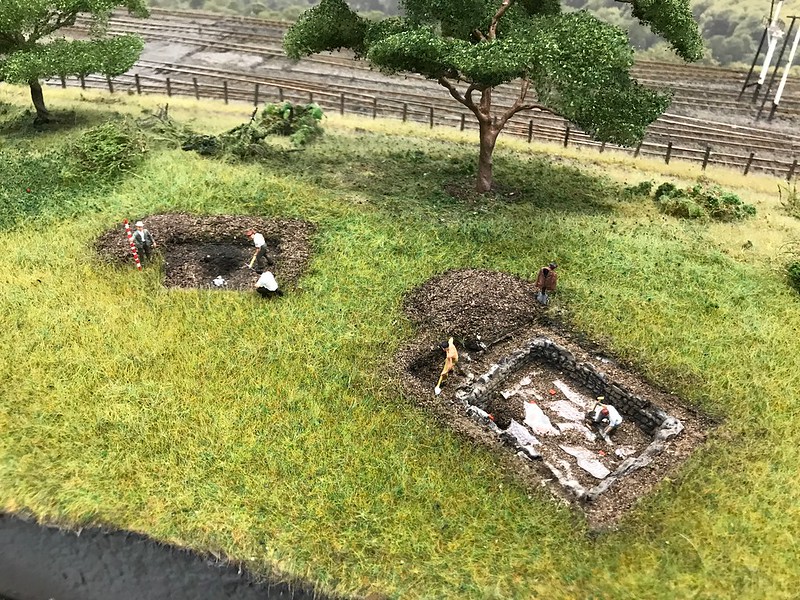
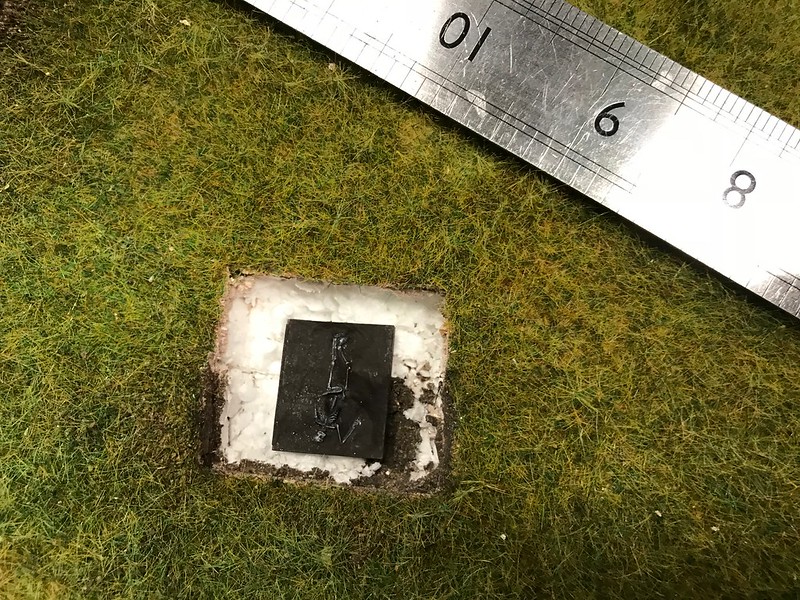
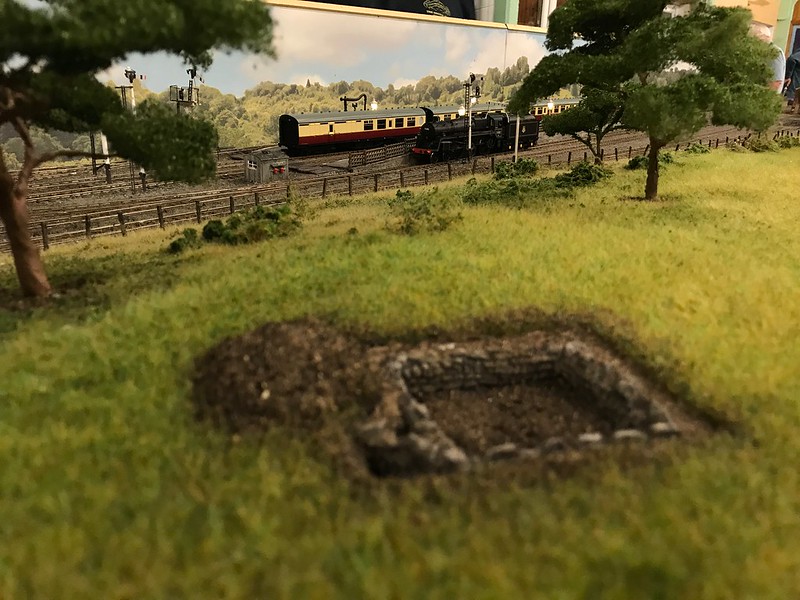
over the past couple of weeks we have been busy adjusting the second trench as we have now got a find to put in the bottom of the ditch, this will be a skeleton that is being uncovered. this resulted in the whole of the previous trench being dug up and then widened so that we could insert the skeleton, as pictured below.
it was then time to build up the surface so that the skeleton would be buried in the ditch, this had to be done in 2 steps due to the thickness of the vermiculite mixture required.
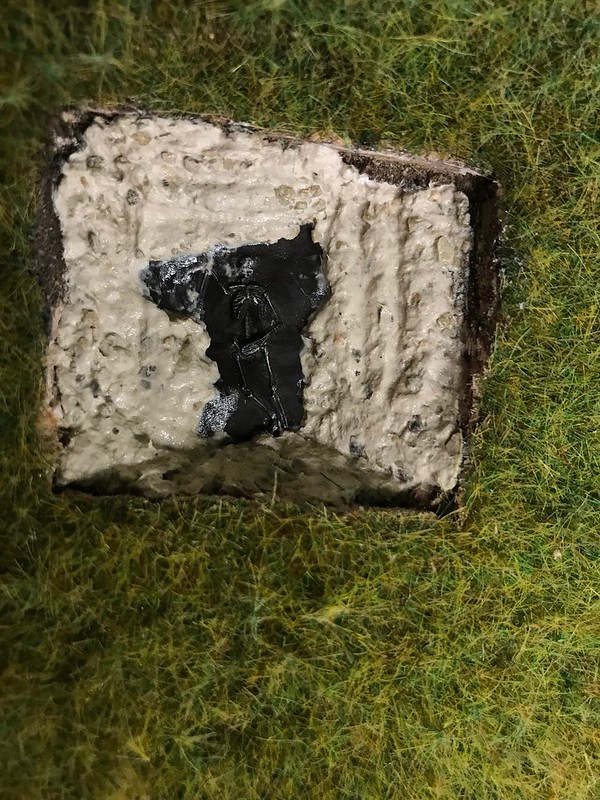
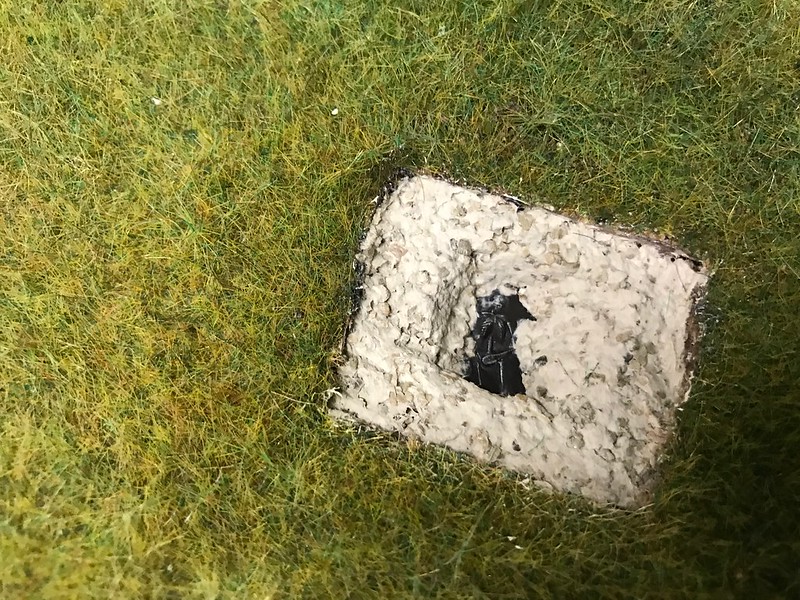
The first layer of soil has now been added, a second layer will be required to cover up any remaining patches that may show through, after this the area that the ditch is will be darkened down so that it will show up like it would in real life.
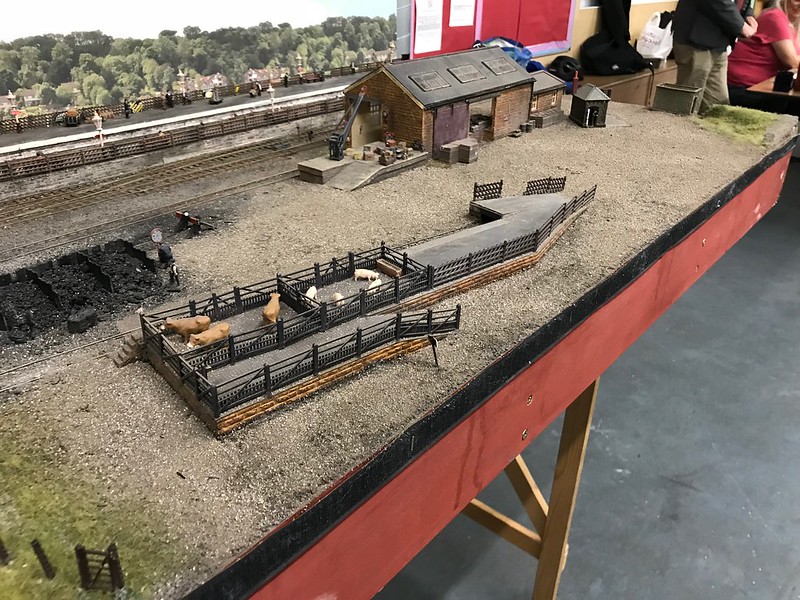
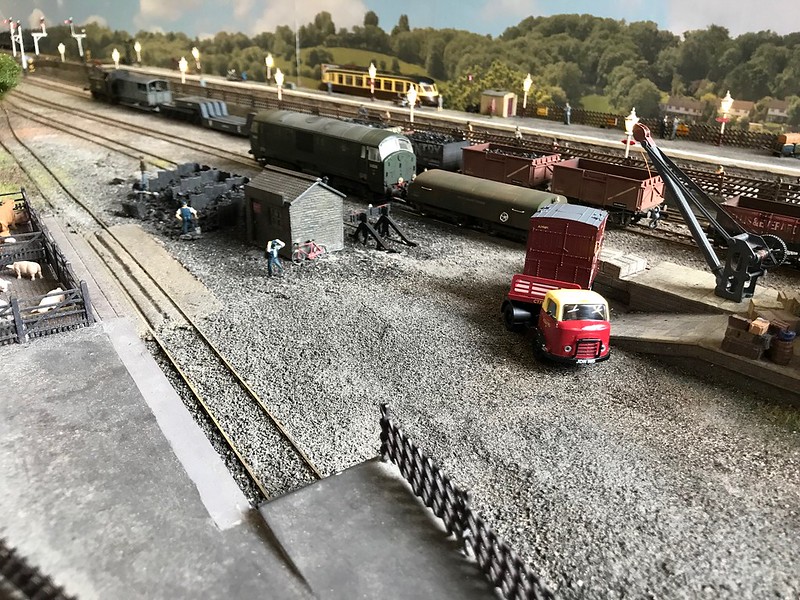
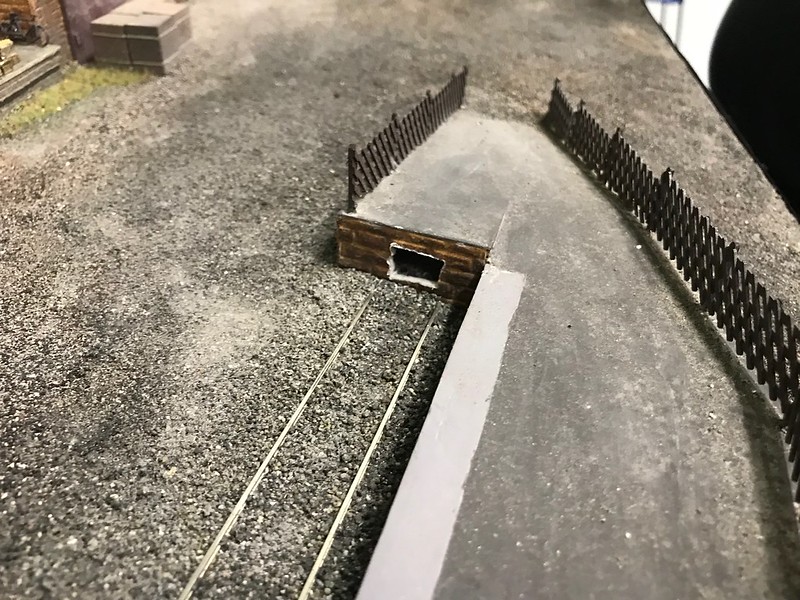
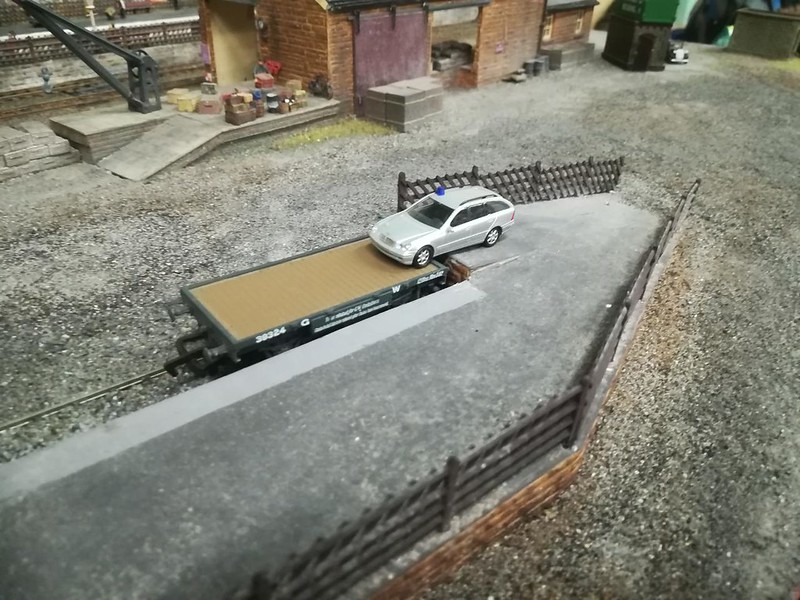
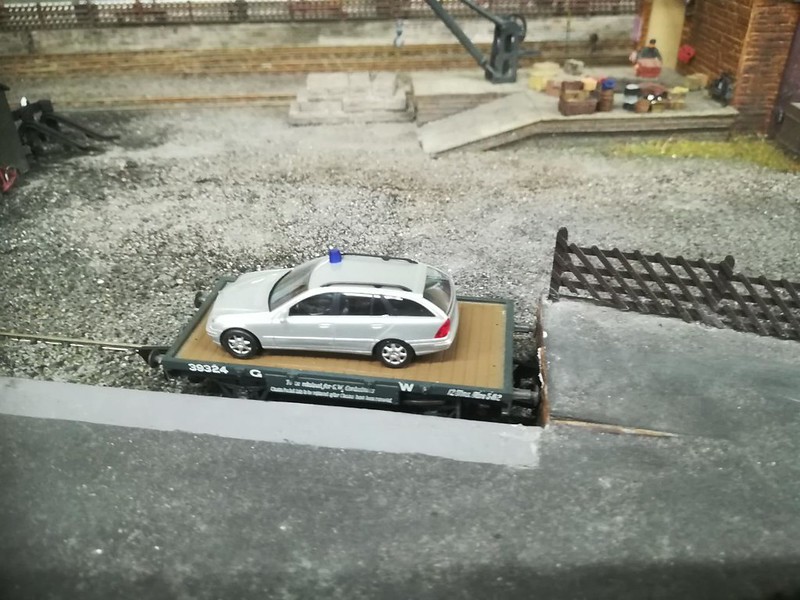
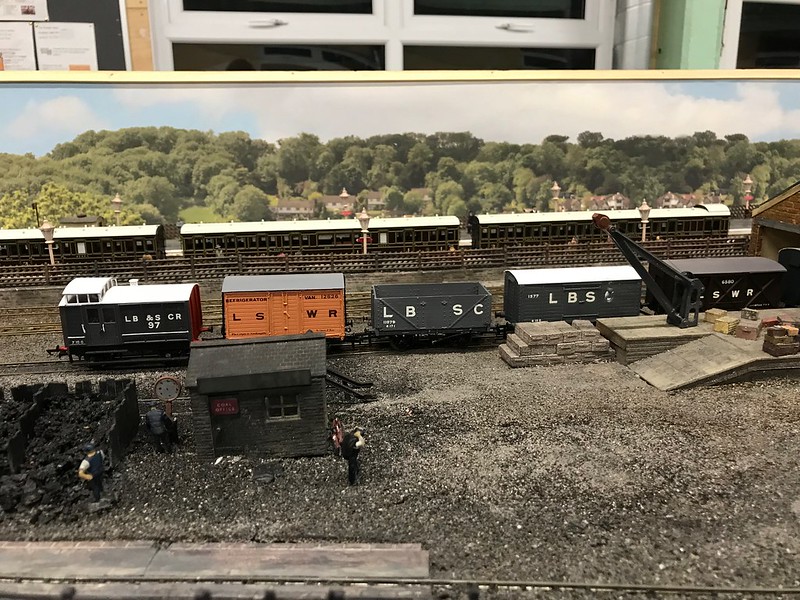
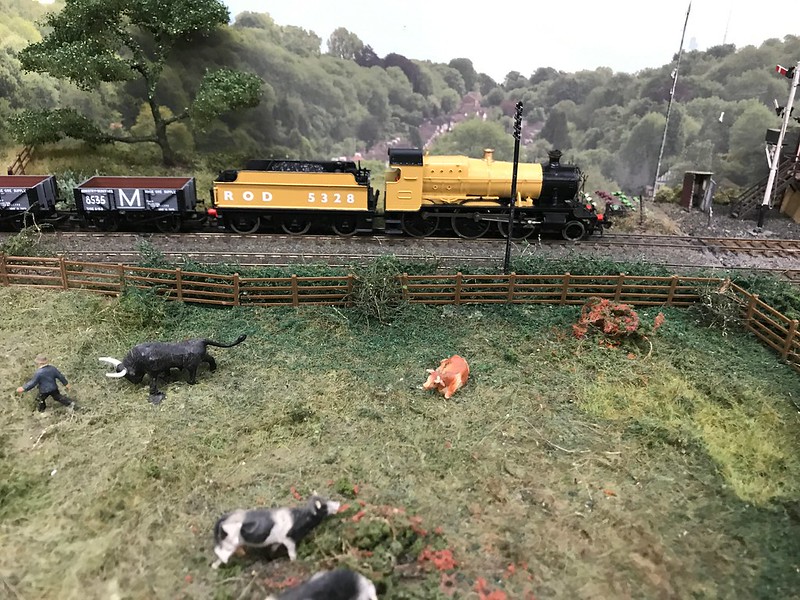
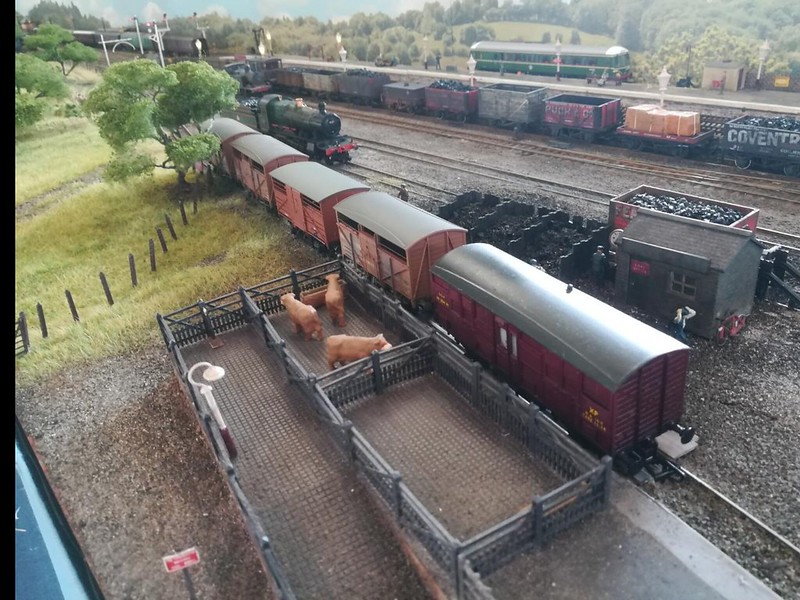
We have also been paying some attention to the cattle dock/ end unloading area the main focus at the moment has been to cut a hole in the wall of the end unloading ramp so that the couplings of the wagons will pass through is which then enables the buffers to touch the wall and so creating a far more realistic gap as shown in the pictures below.
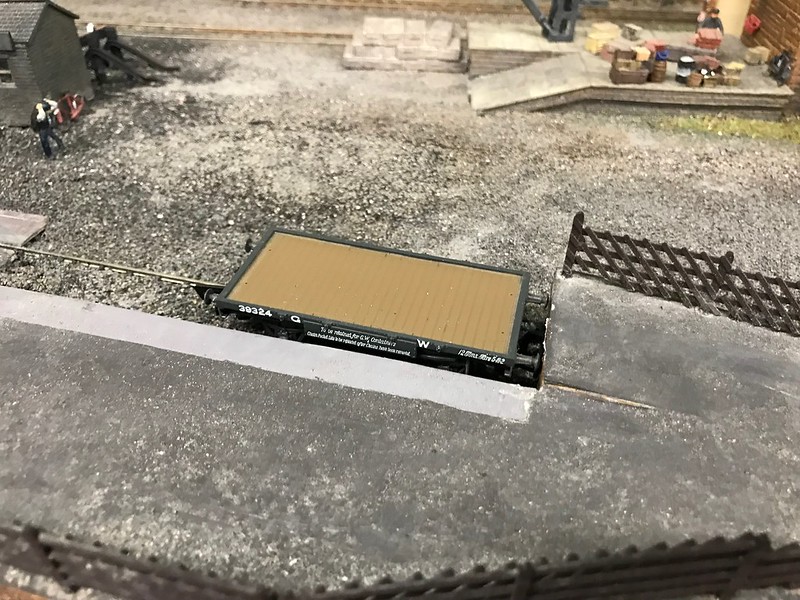
and to show that it works we put the only road vehicle that we could find on the ramp being loaded.
the hole in the wall has since had the edges painted black and a strip of wood has been added above to act as the buffer beam, I would include a picture but i can't find id at the moment.
-
2
-
-
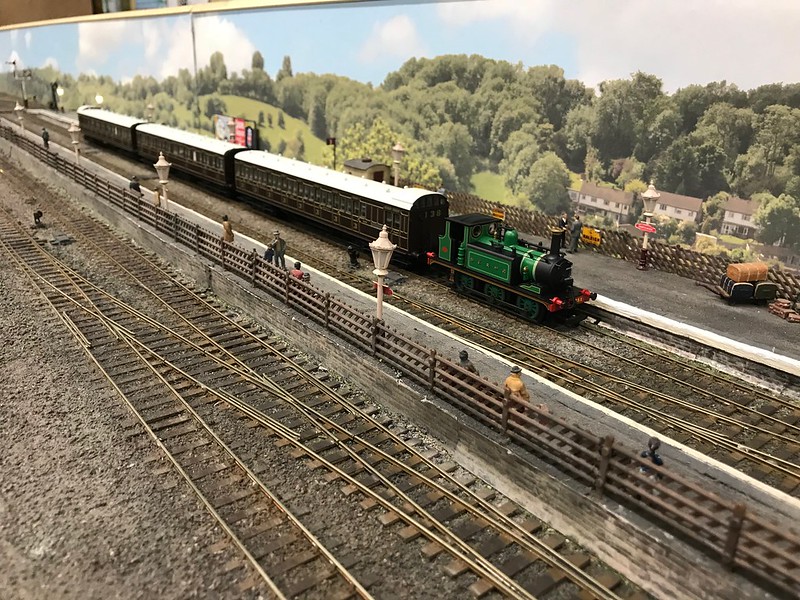
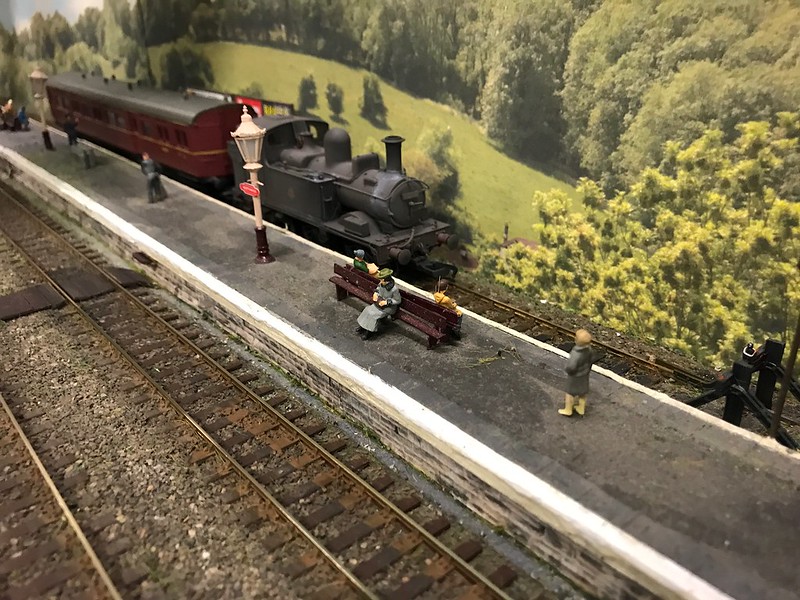
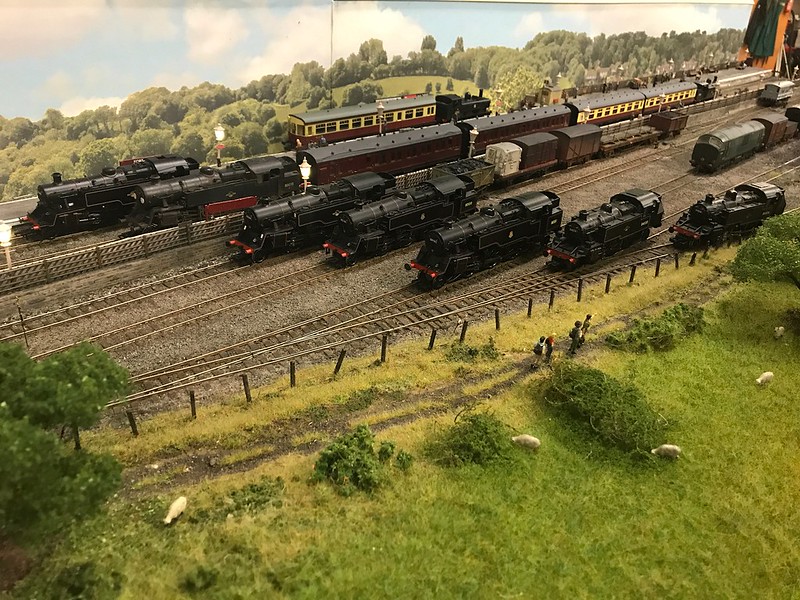
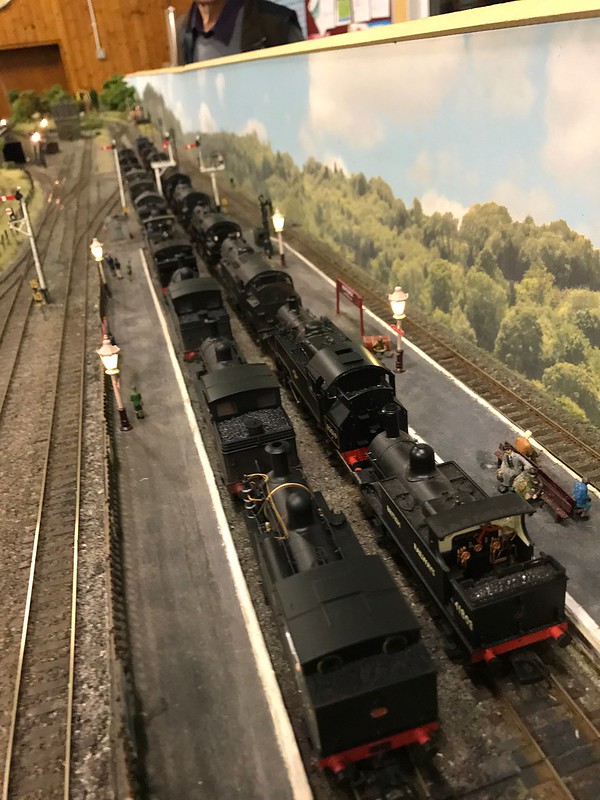
Last Friday was the first running night of the year for northwick and as usual there was a theme with Terriers & pre-grouping stock being chosen. Here are some pictures of what was running.
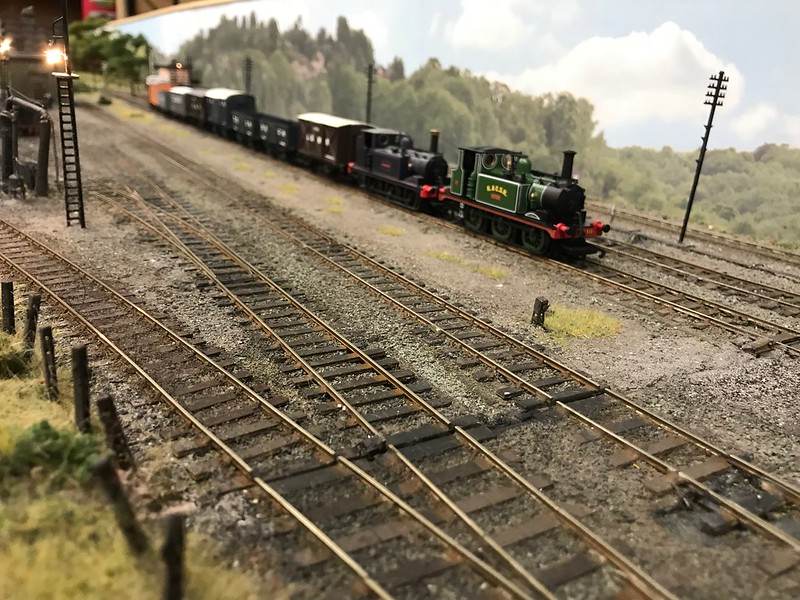

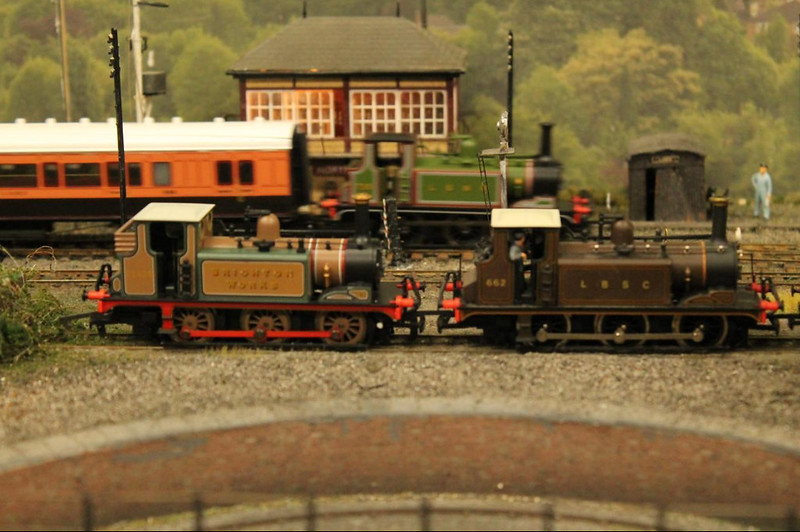
And keeping with tradition we lined up all of the terriers at the end of the night (all 16 of them in case you were wondering)
-
5
-
-
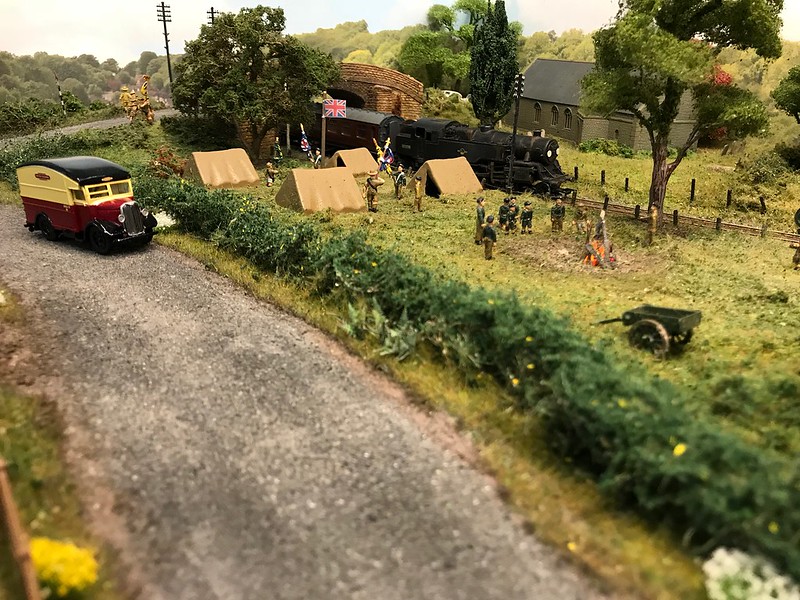
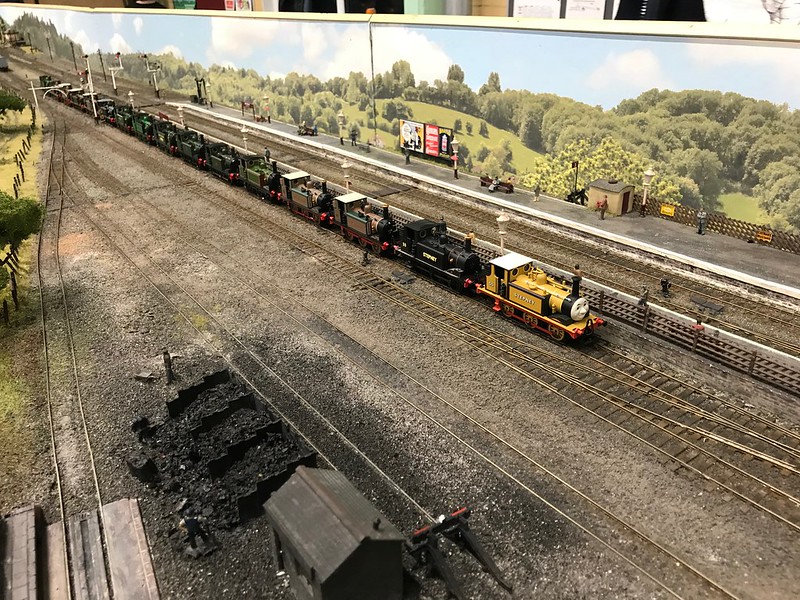
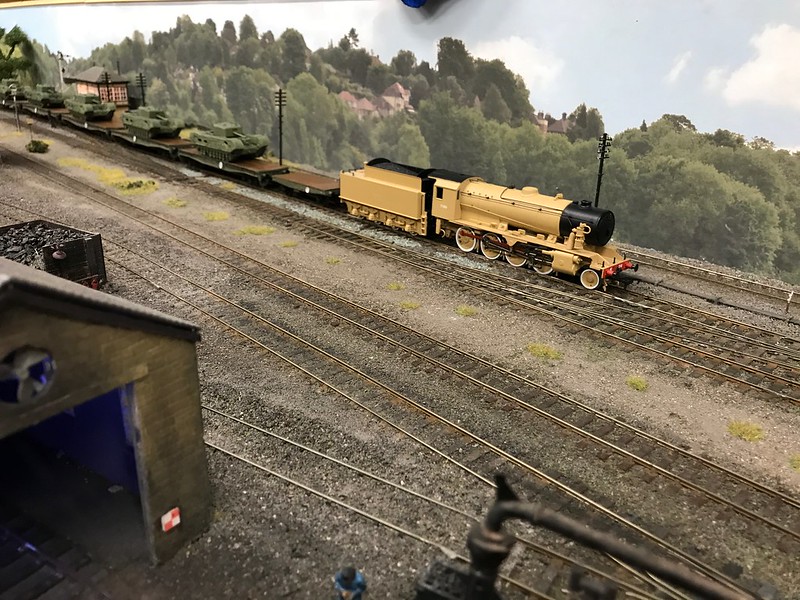
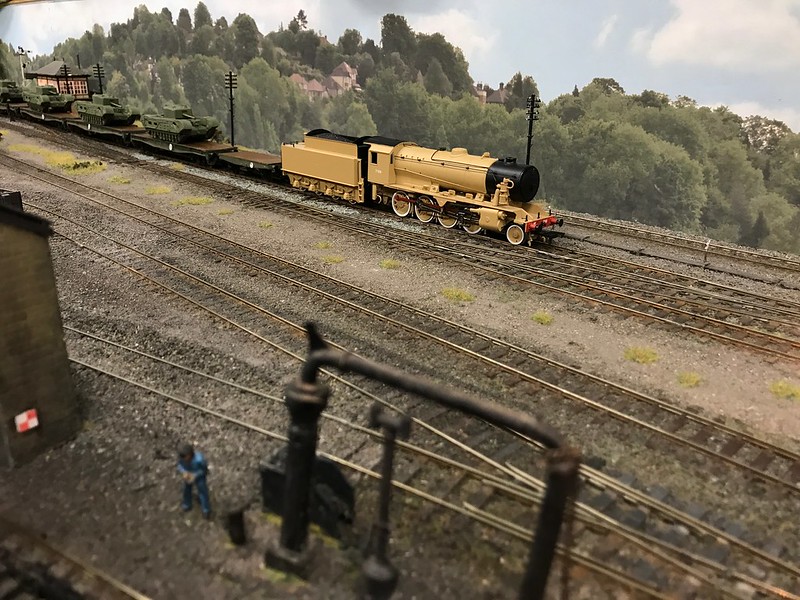
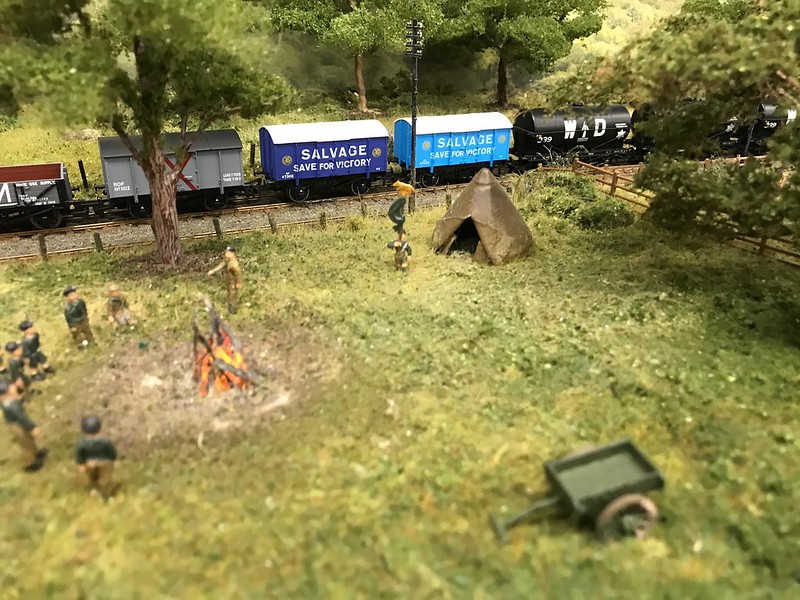
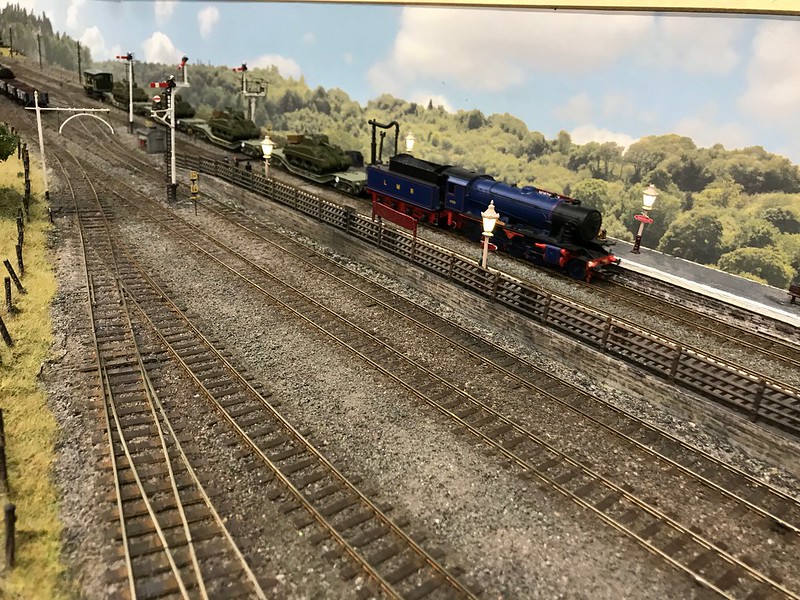
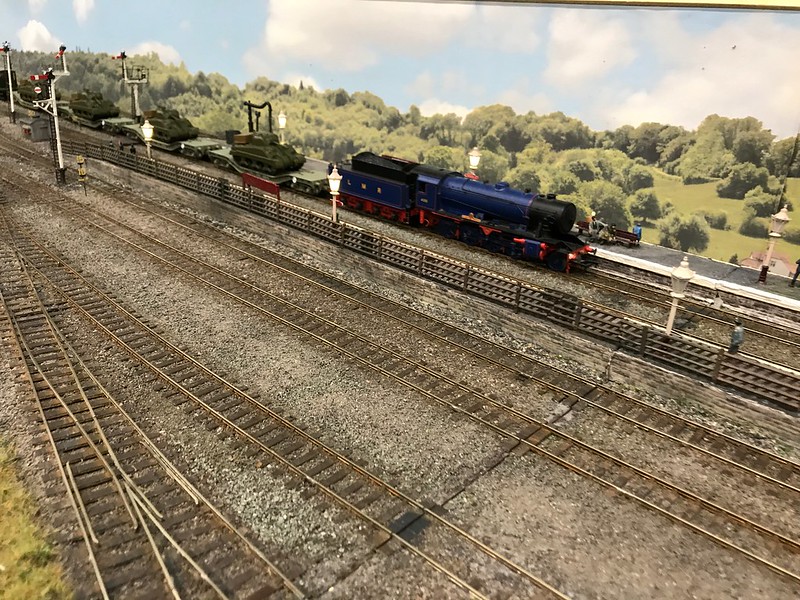
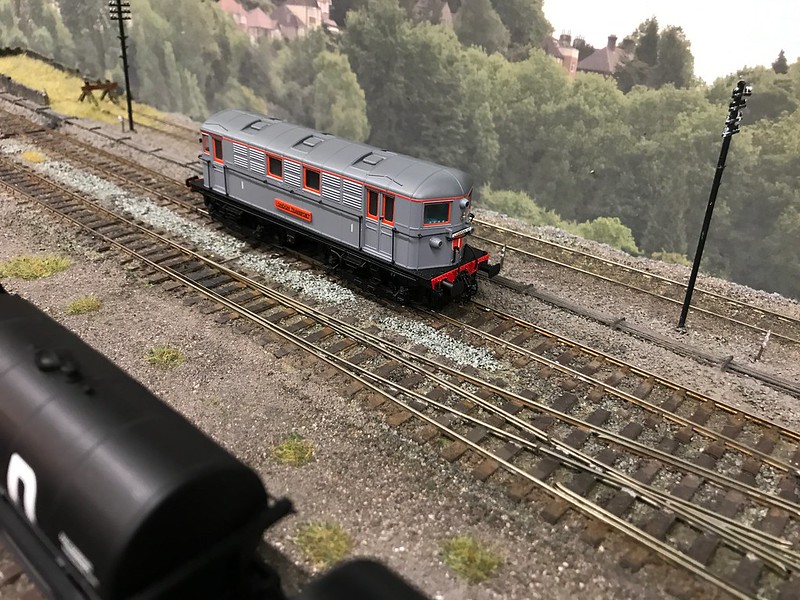
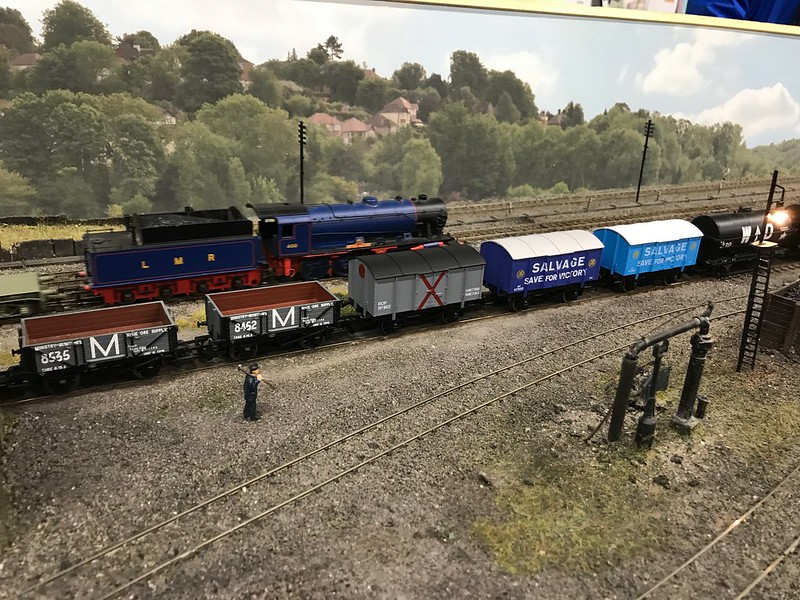
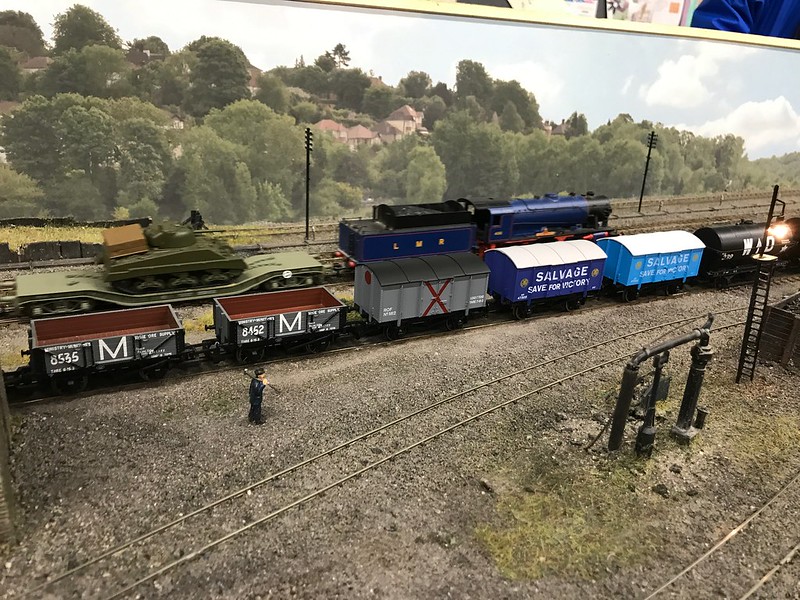
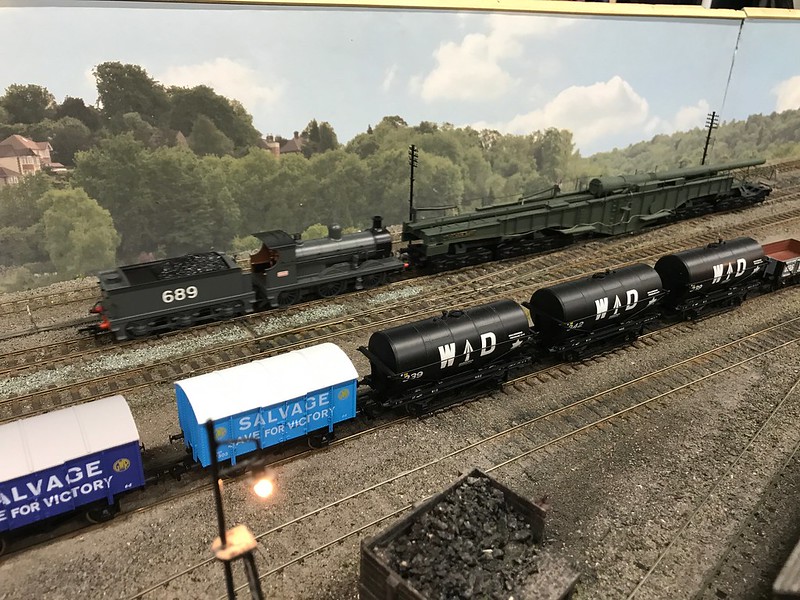
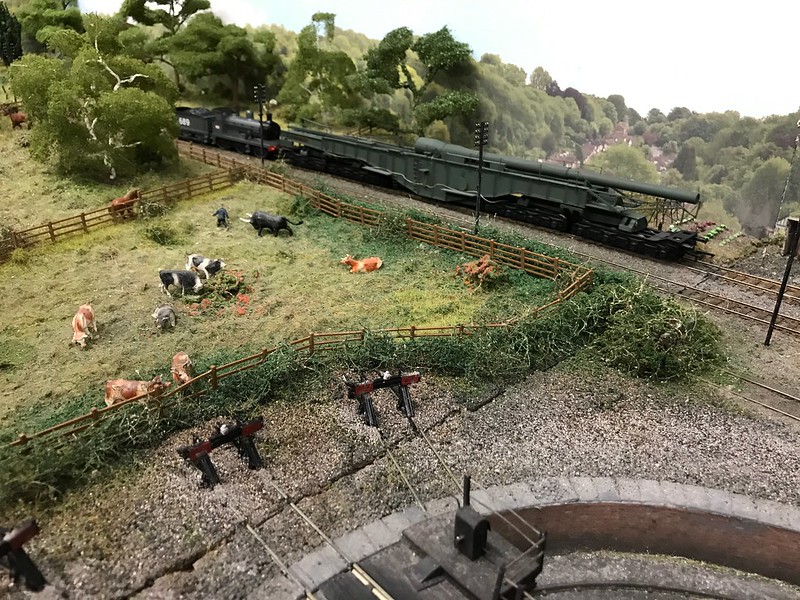
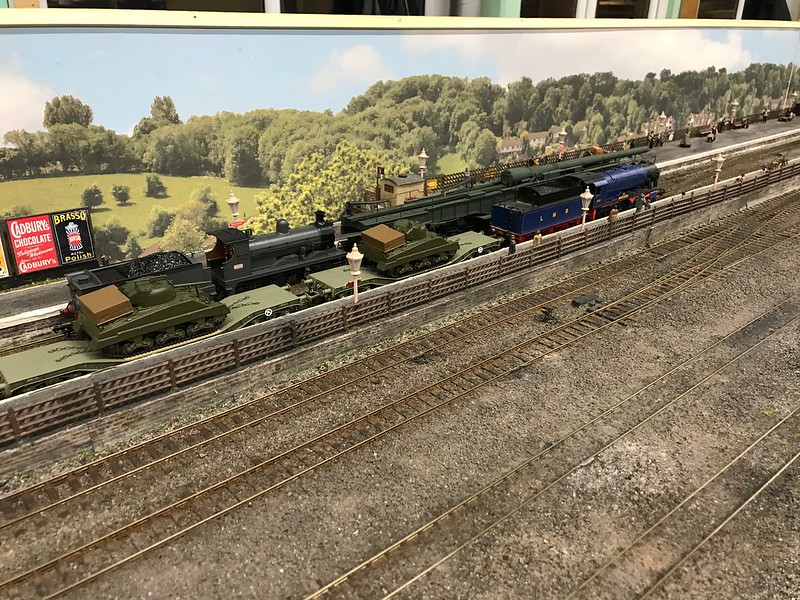
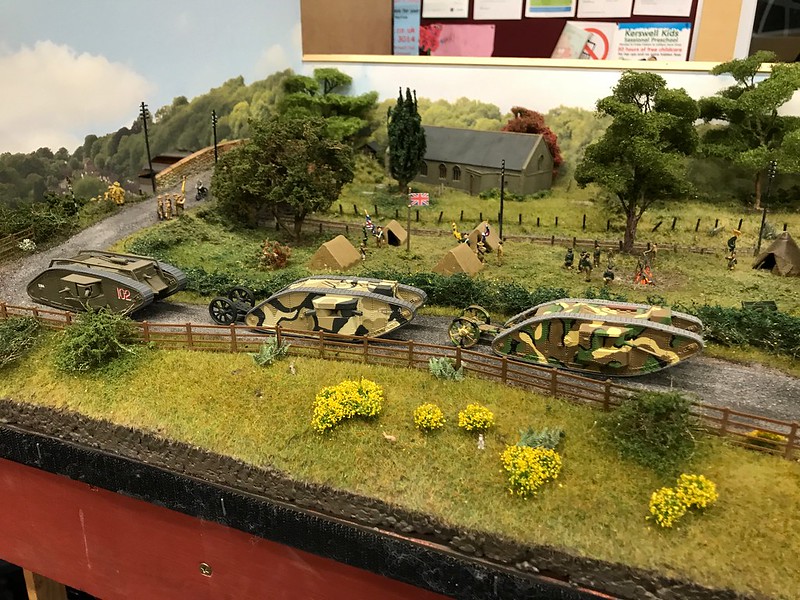
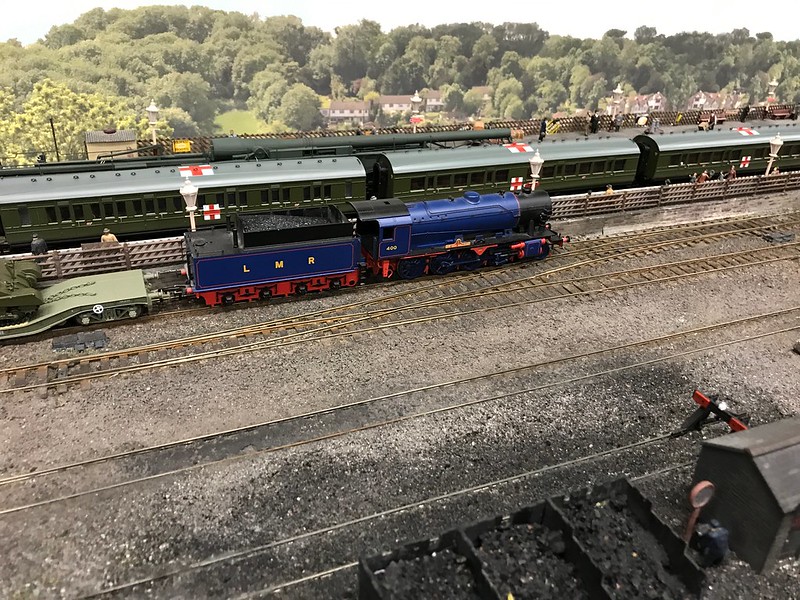
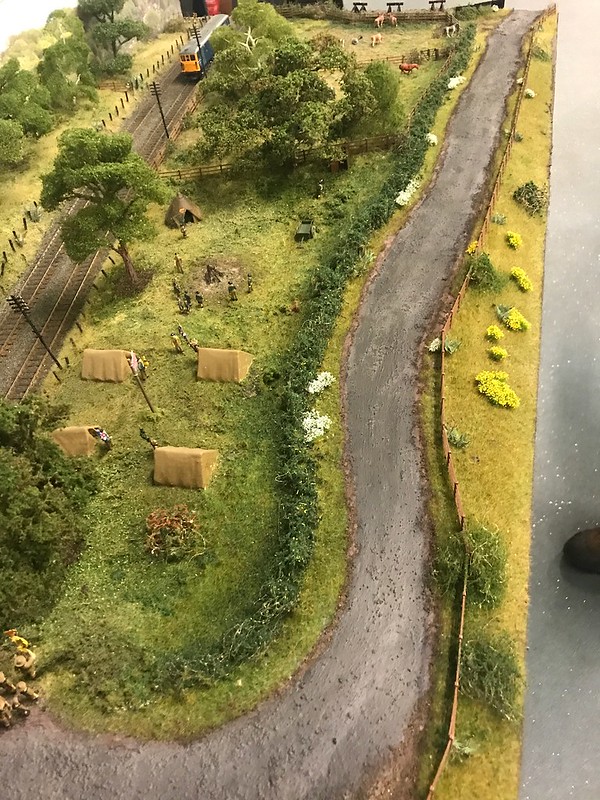
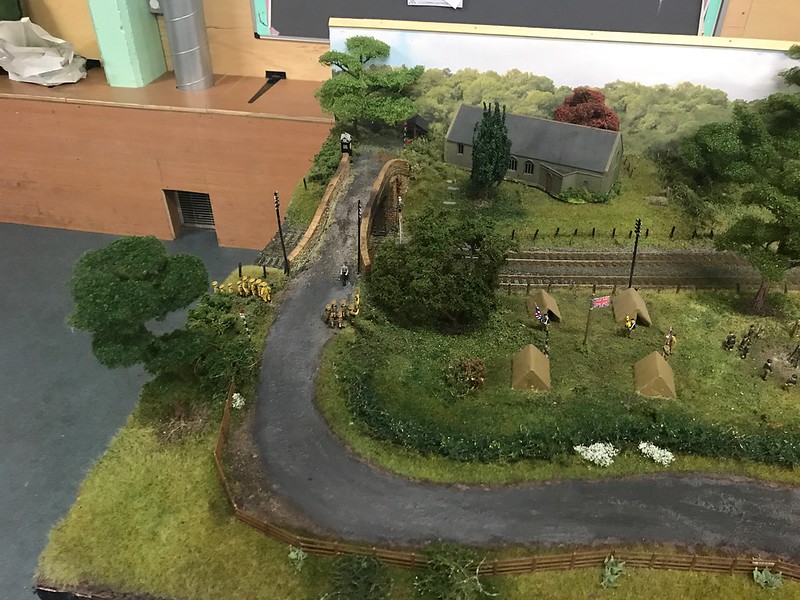
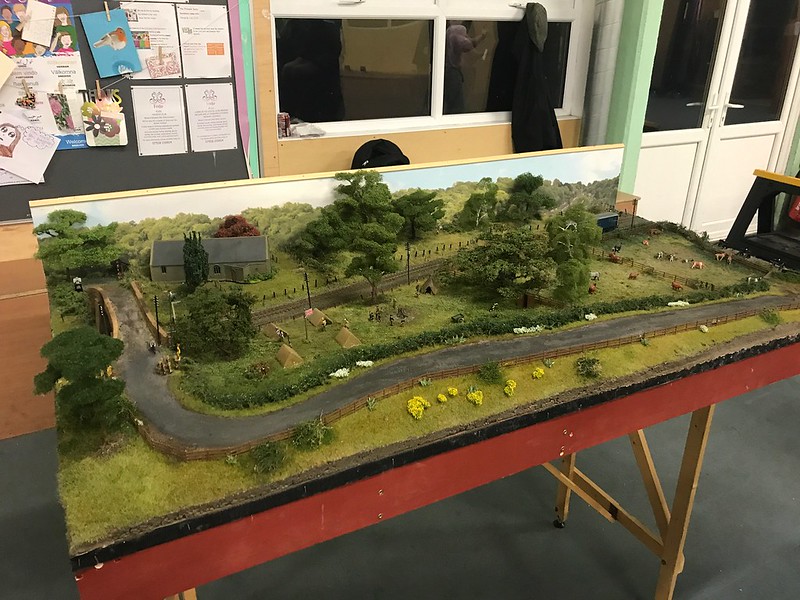
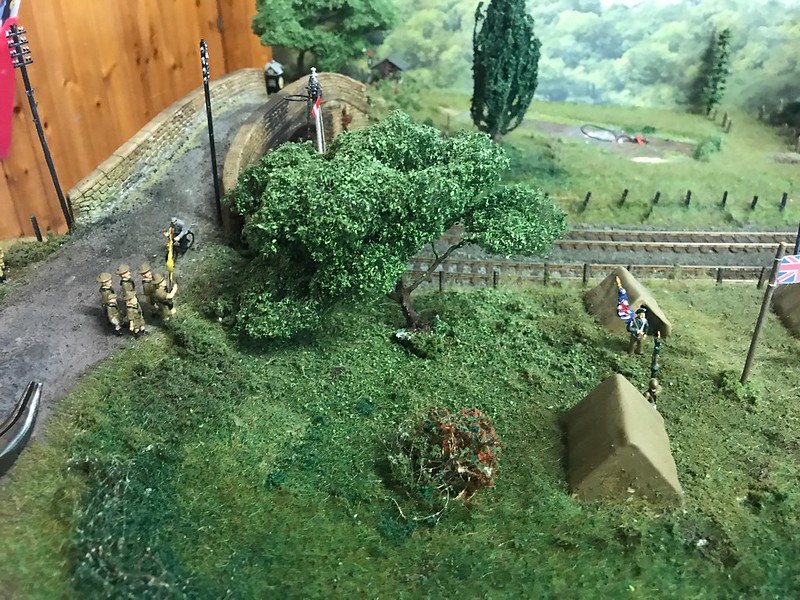
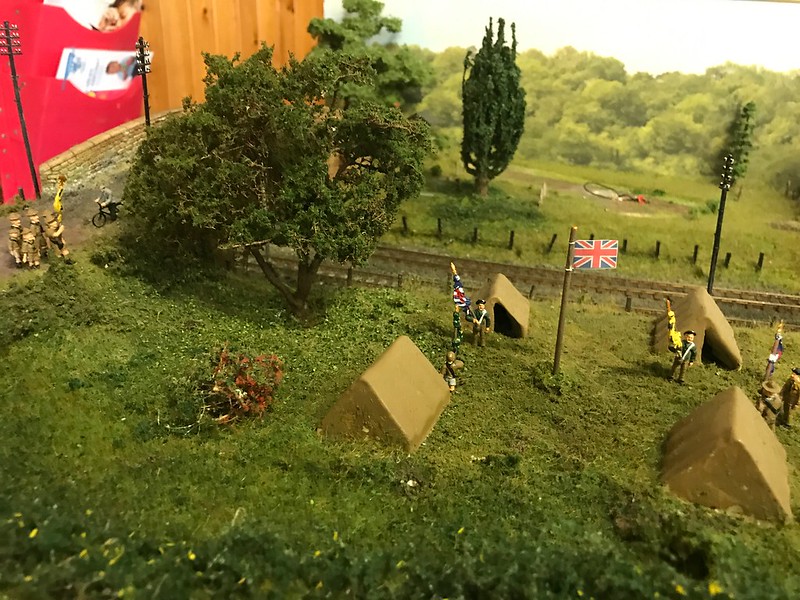
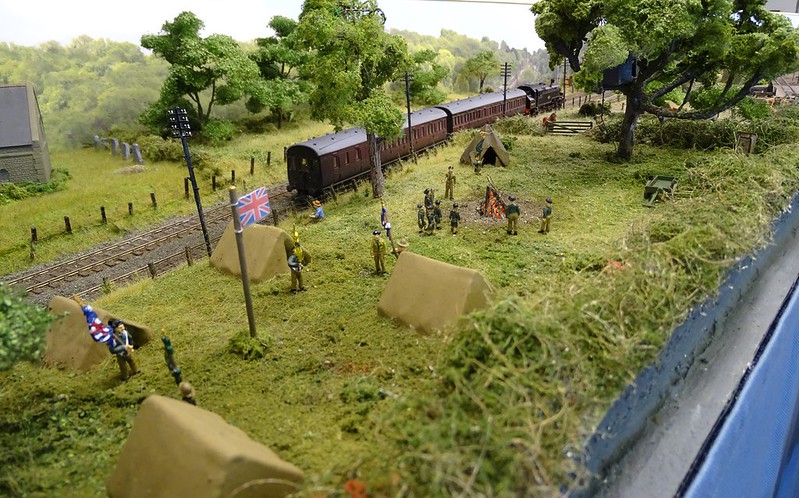
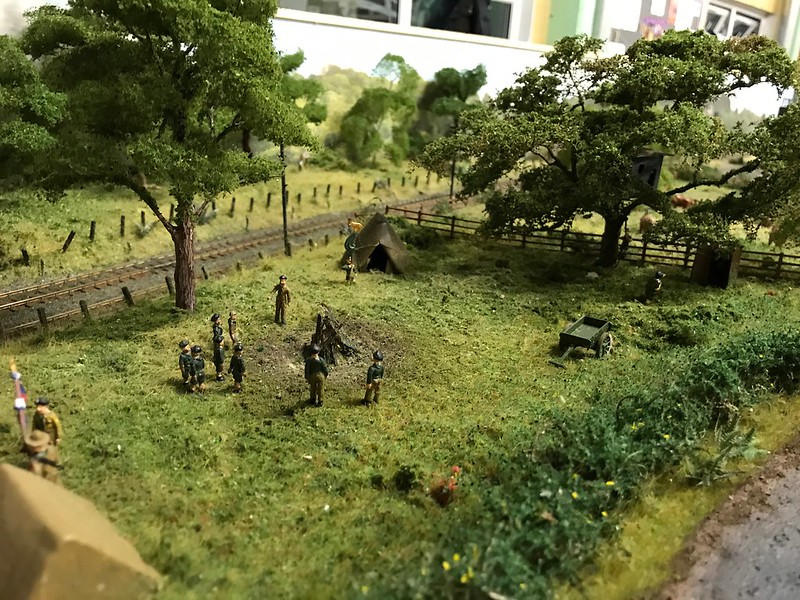
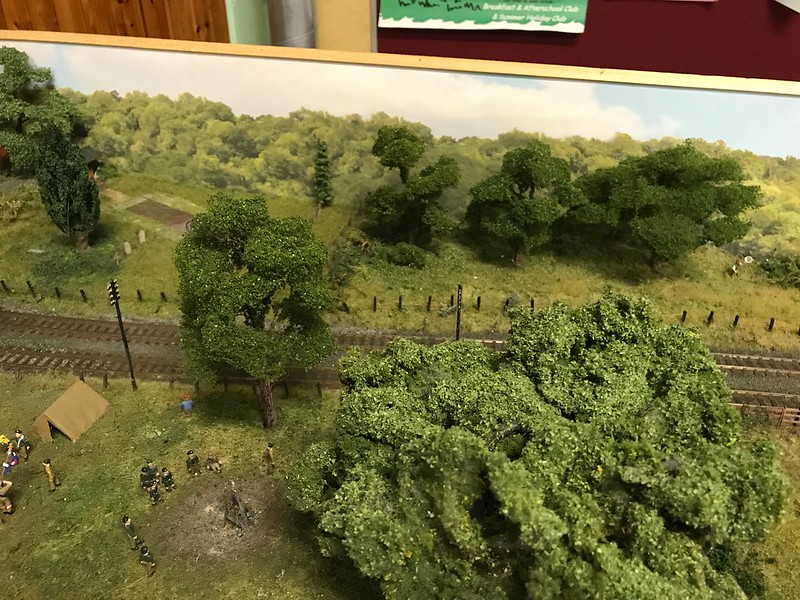
Friday evening was the monthly running session for Northwick and it was decided that the theme would be military in memory of our fallen hero’s. Hope you like the photos.


-
1
-
-
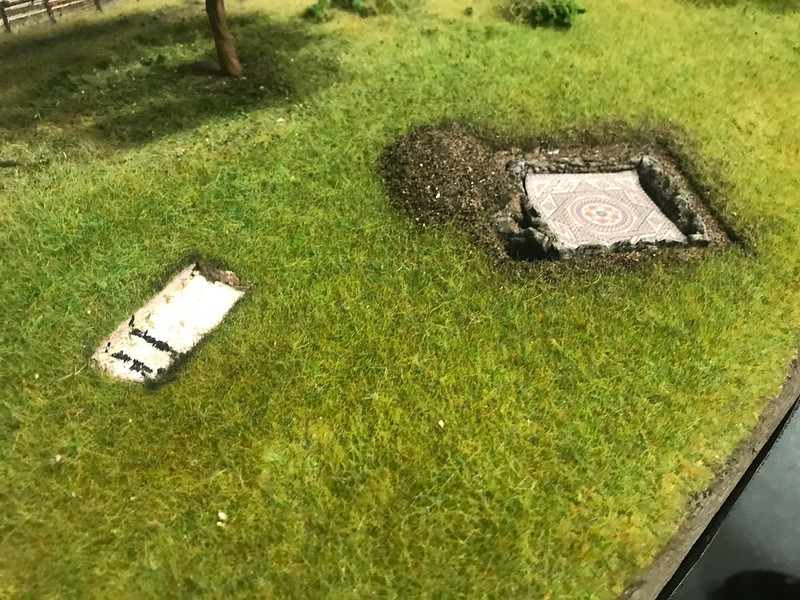
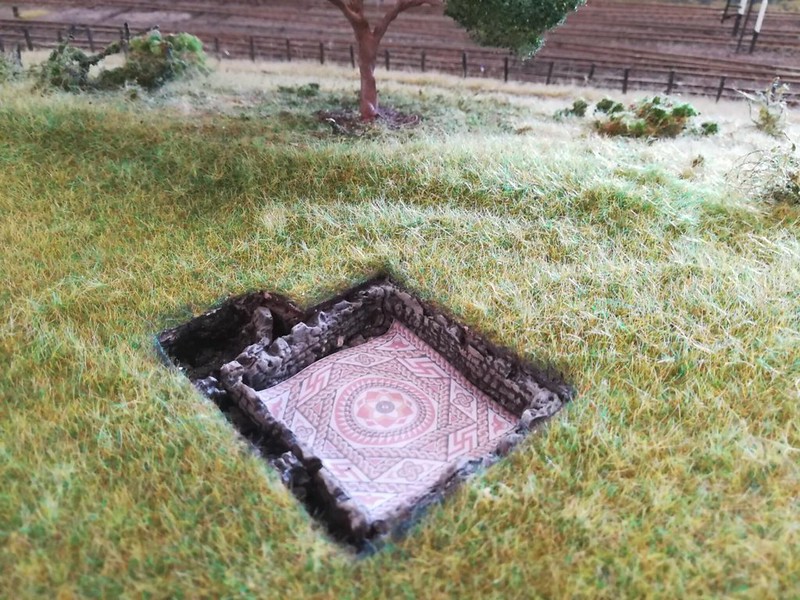
Work has now resumed on the archaeological site with the main focus currently being to install the mosaic, the first step was to turn the mosaic from this.
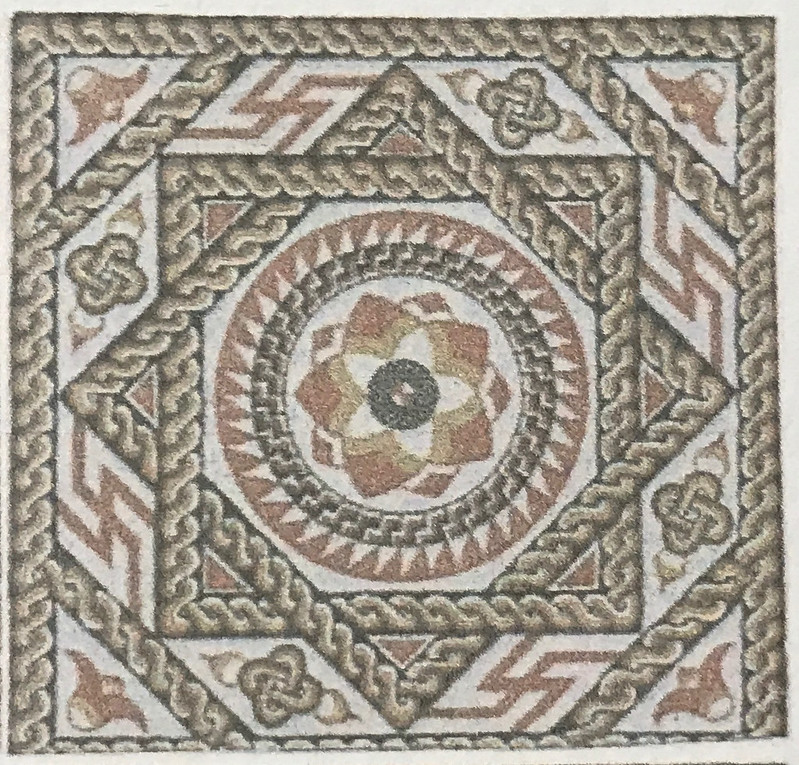
To this, so that it is more like what you would find in a dig.
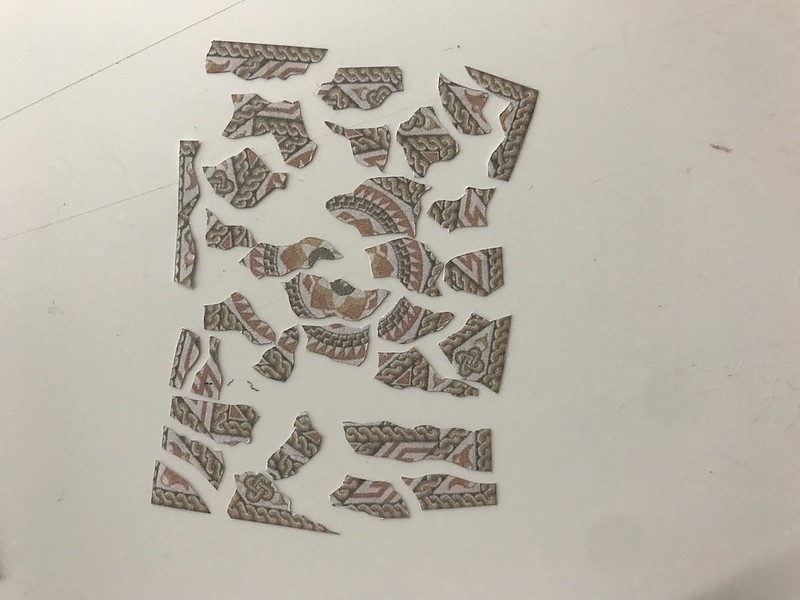
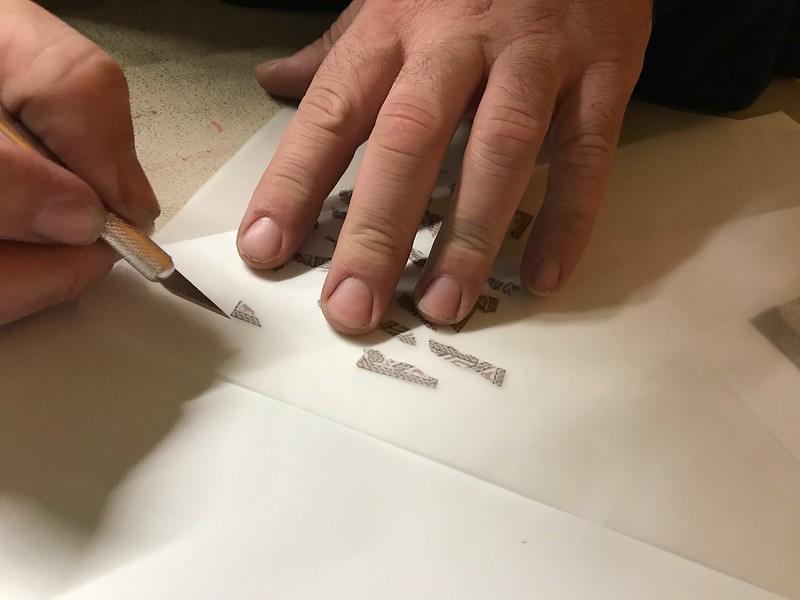
All of the parts of the mosaic were then put into a matte finish laminating pouch, put through the laminating machine and then all of the parts were cut out again but leaving a section of the lamination pouch between where we were cutting and the edge of the mosaic piece.
This was done to help make the mosaic water resistant for when we add the scenics around the pieces.
Some of the pieces were then added to the trench and stuck in position.
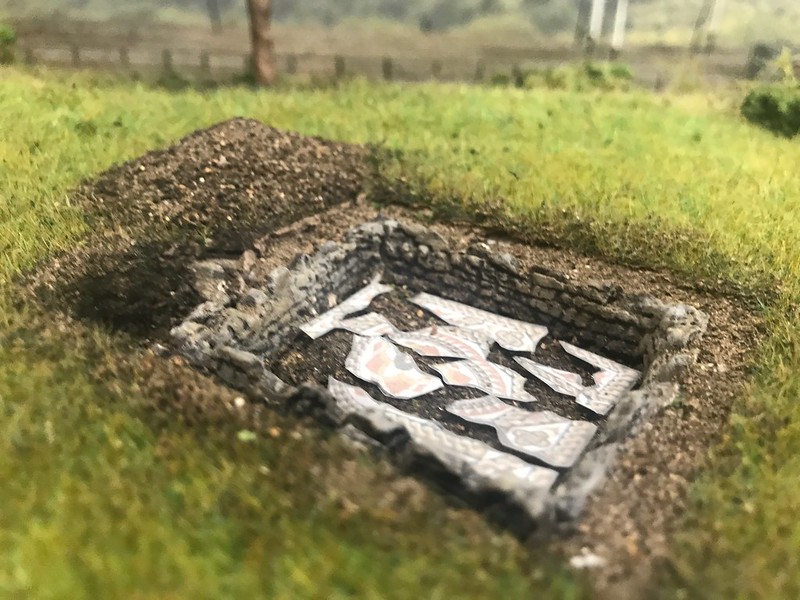
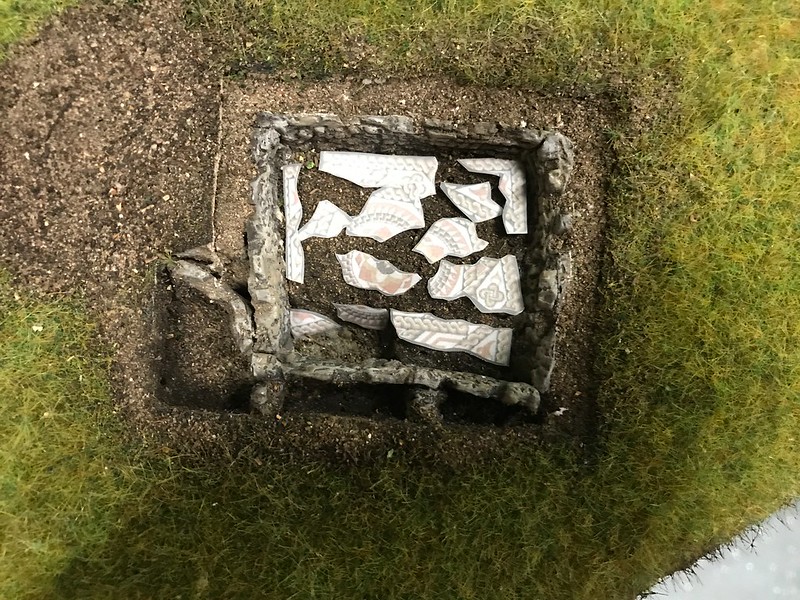
The next step will be to add soil and diggers to the trench along with some finds.
-
1
-
-
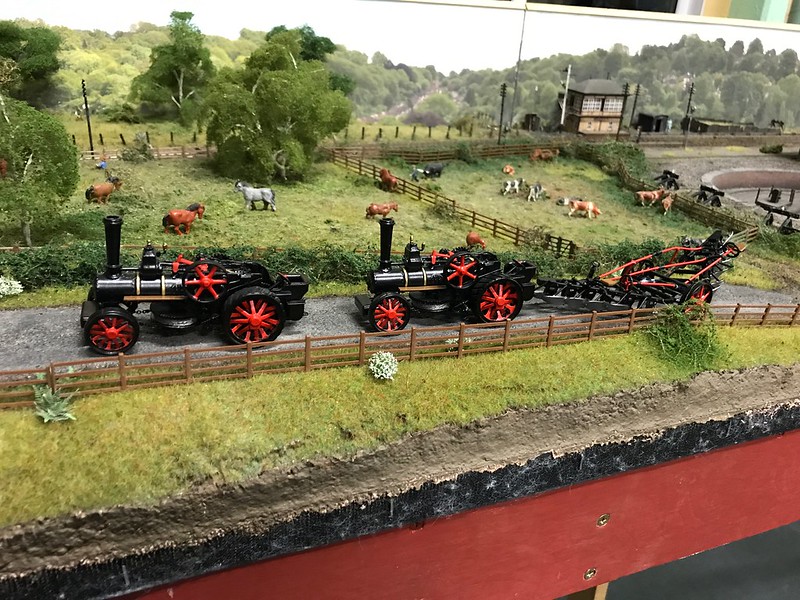
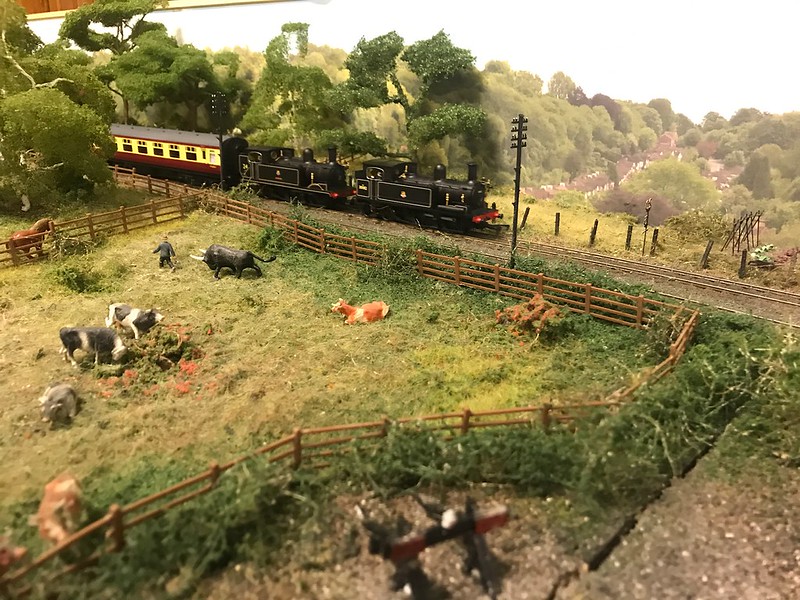
last friday saw some wild life being added to the layout with an owl placed in a tree.
and some rabbits hopping around in one of the fields.
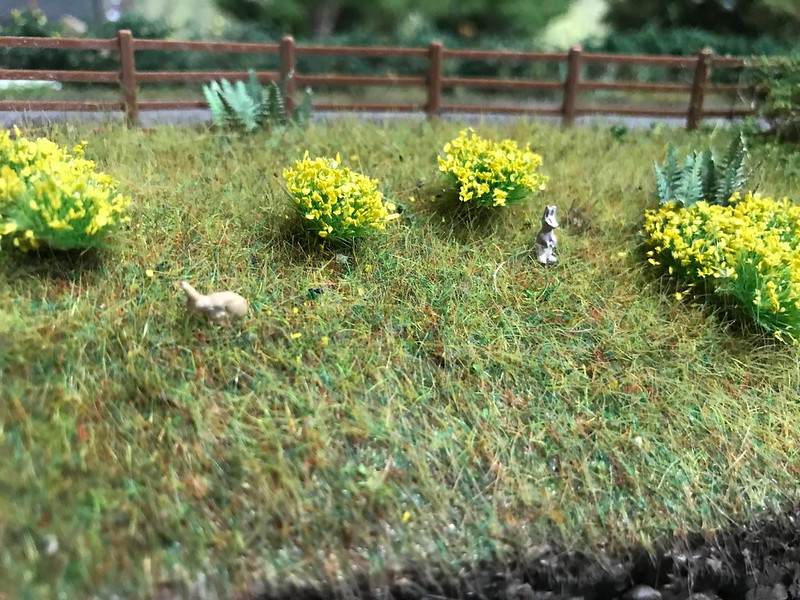
a pair of steam ploughs trundled through.

-
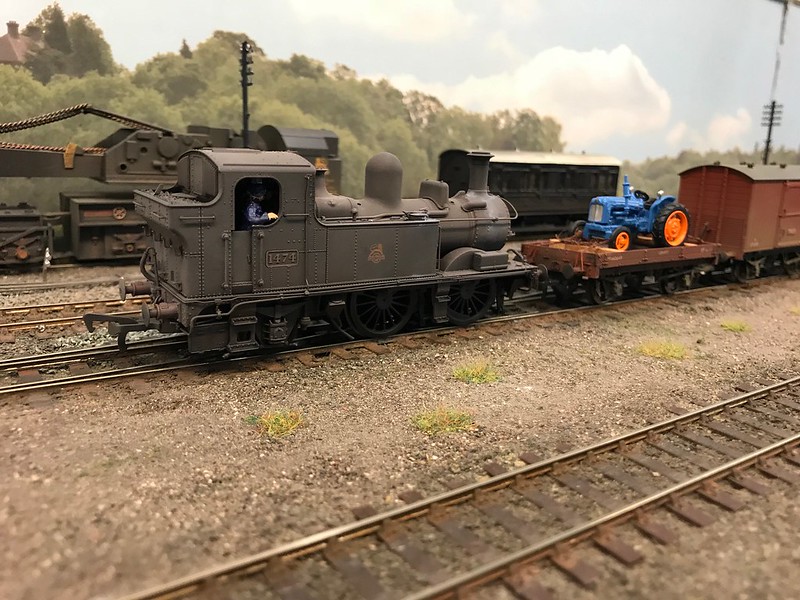
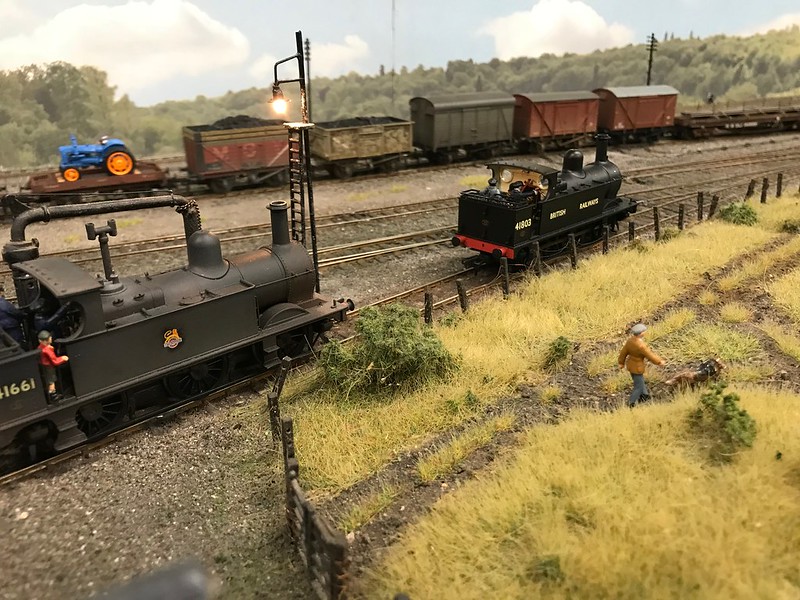
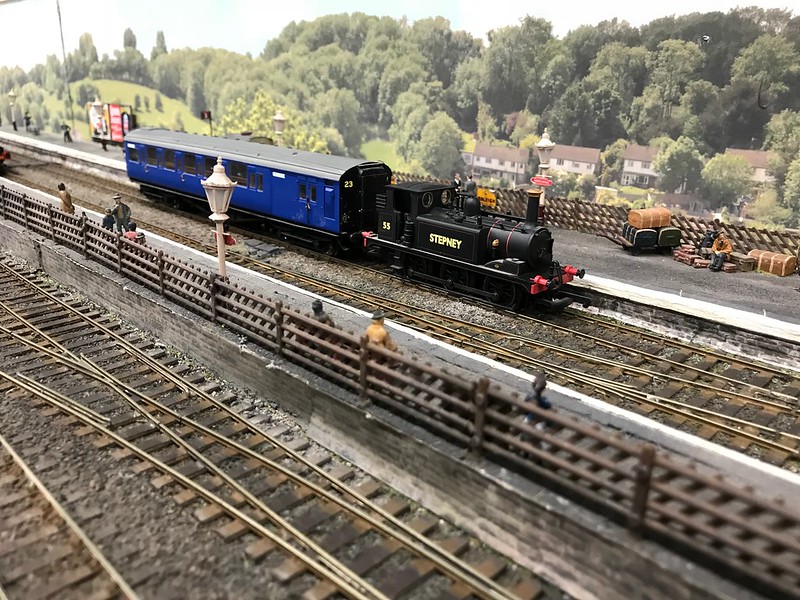
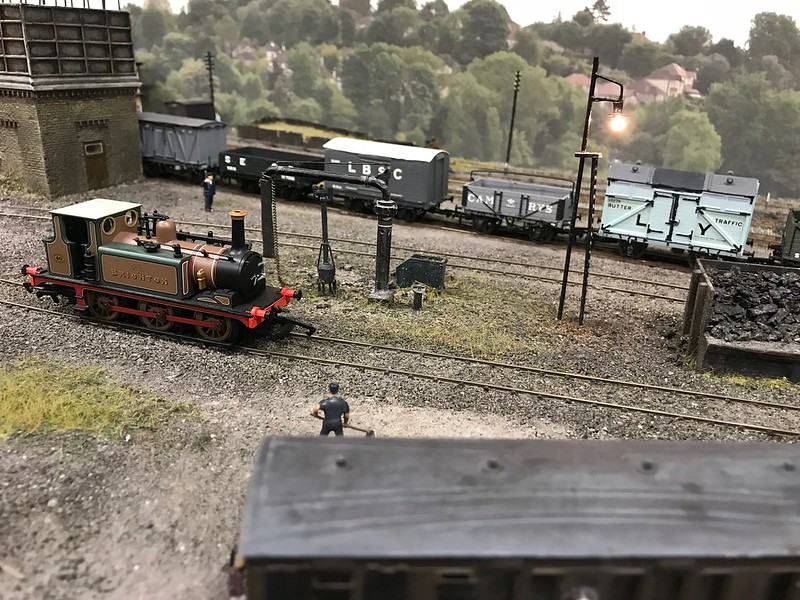
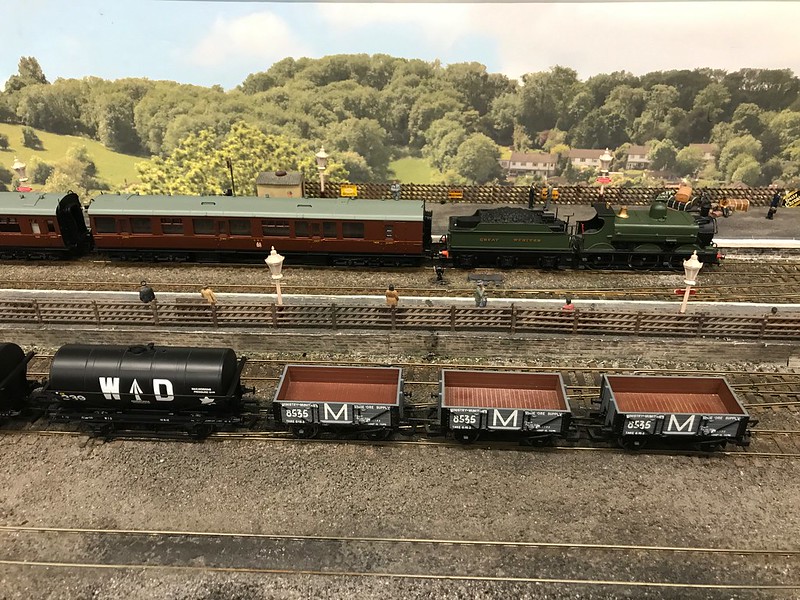
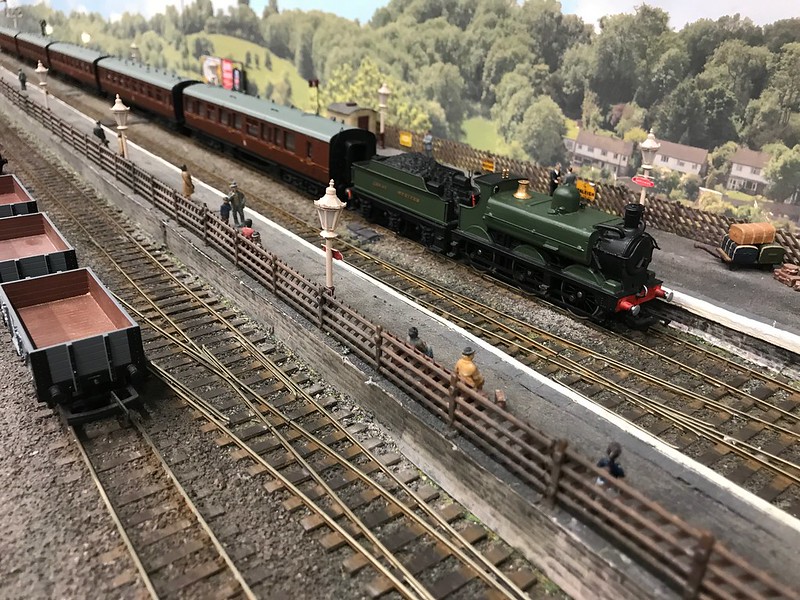
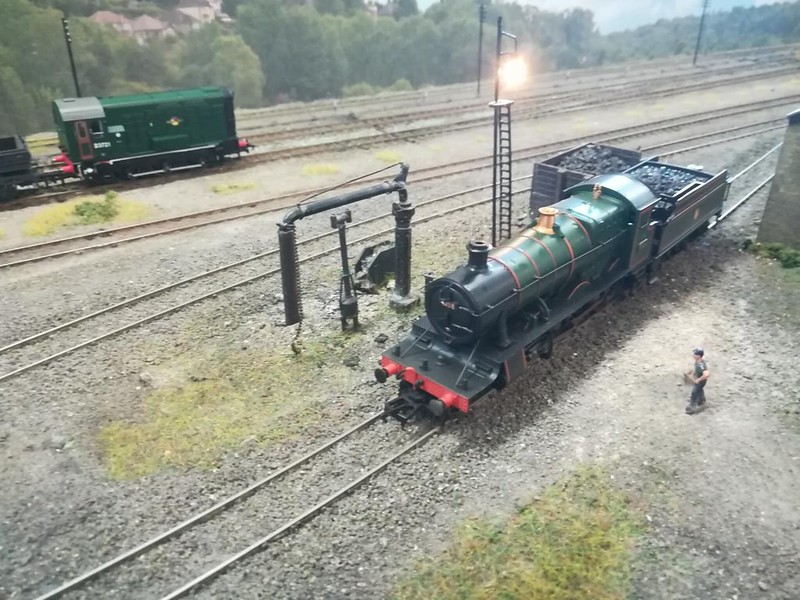
Last friday we had a running night, this time the theme was tank locomotives, and there was a very good turn out.

USA tank turned up with the goods.
GWR class 14xx arrived in the bay platform
BR standard class 2 tank with the first passenger service
BR standard class 4 tank also turned up.
Along with a pair of class O2's
A pair of Adams radials made an appearance.
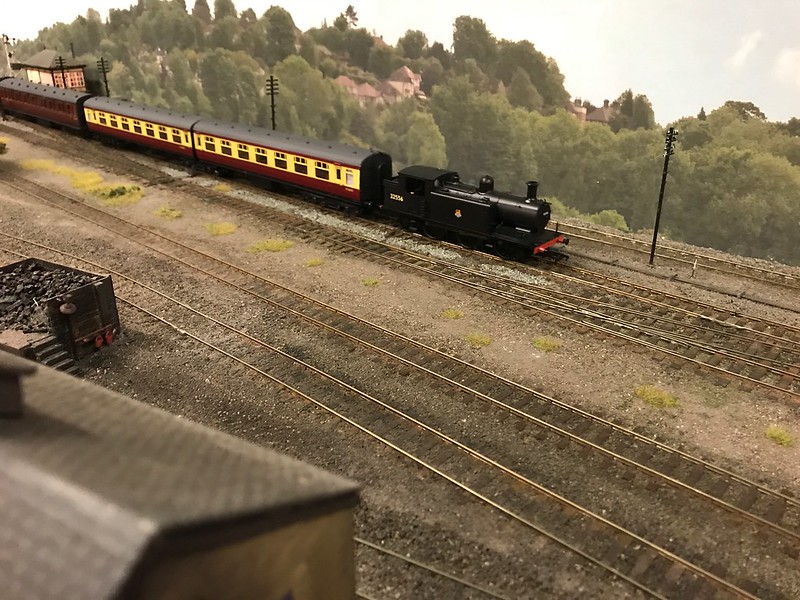
Class E4 turned up with another passenger service.
Class 45xx and 8750 double headed.
A pair of 1F's got turned on the turntable.

Class 64xx arrived with the next branch line service.
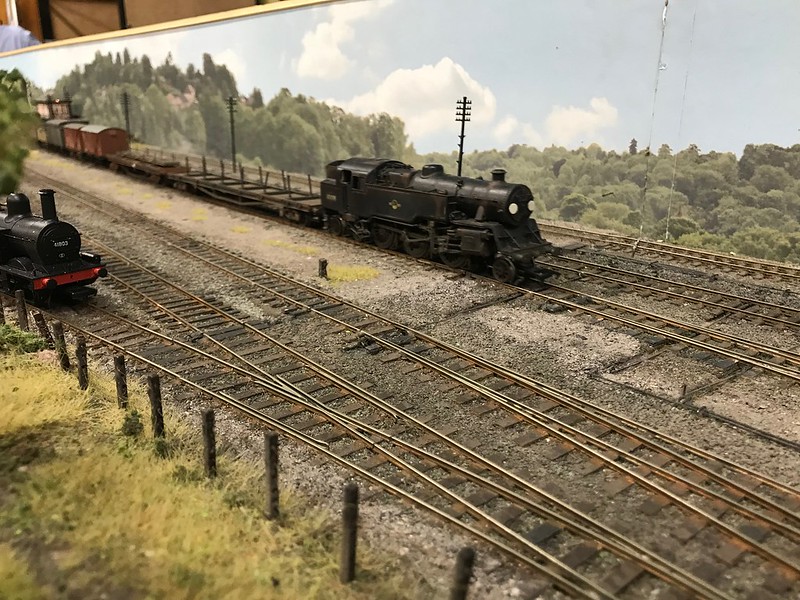
LNER class J94 shunted the wagons
and was later pictured between duties.
Nettle sat on shed for the next duty.
3 Standard 4 tanks lined up for a photo.
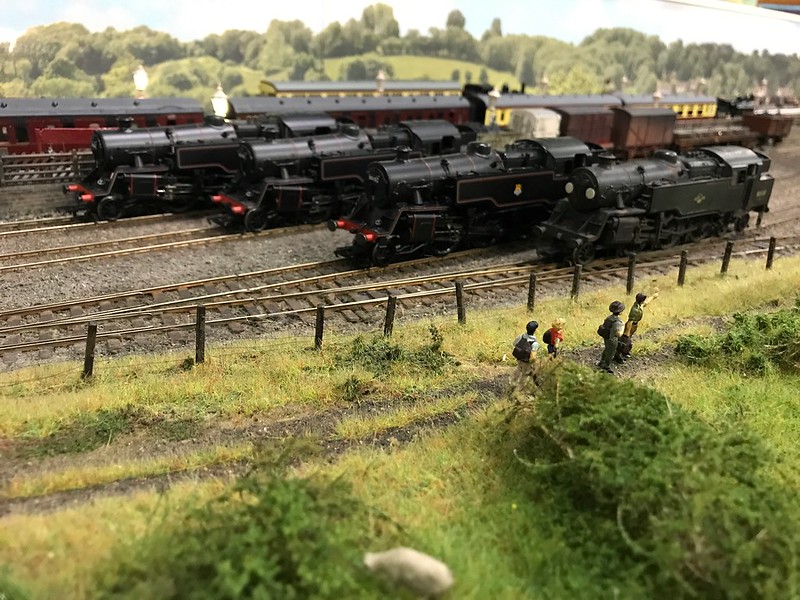
which were then joined by a 4th grubbier one.
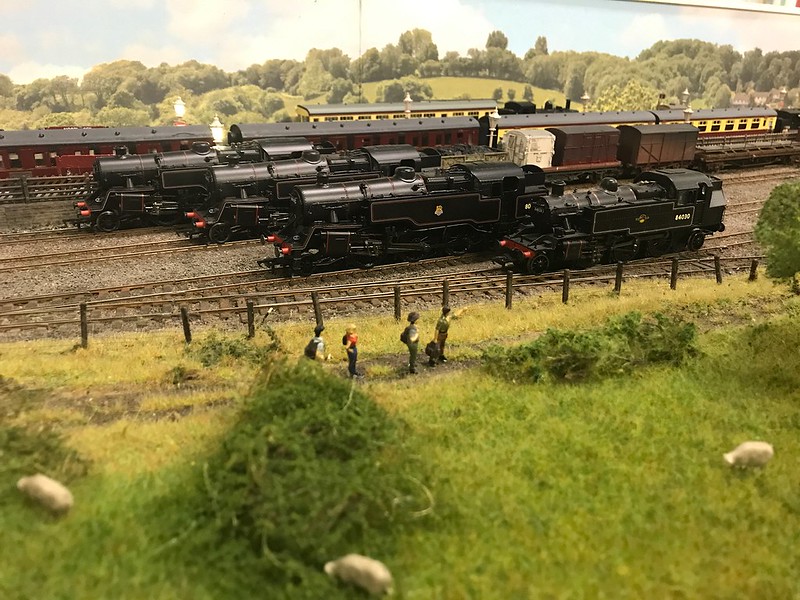
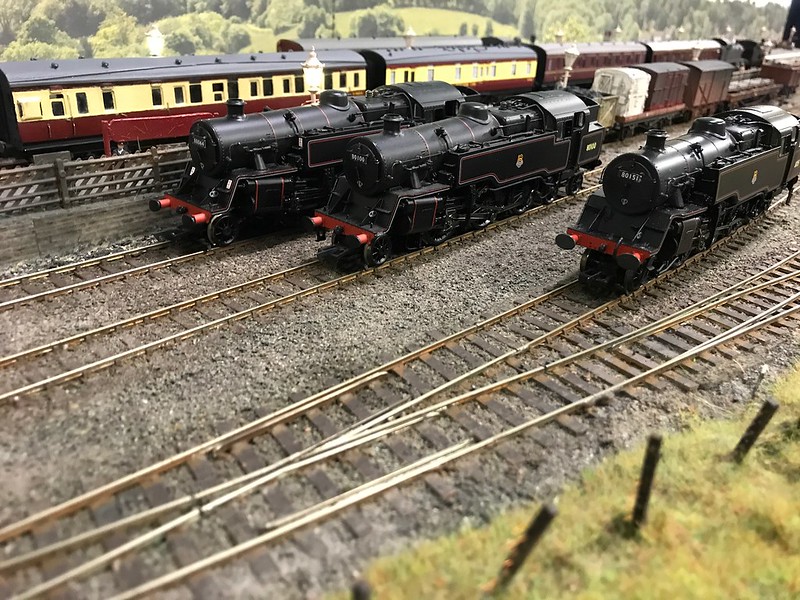
there was also a bit of a bluebell railway line up with 3 standard 4's (80064, 80100 & 80151) along with standard class 2 84030
Then all of the standard tanks were lined up (1 standard 3, 4 standard 4's & 2 standard 2's)
at the end of the night all of the tanks were lined up.
-
2
-
-
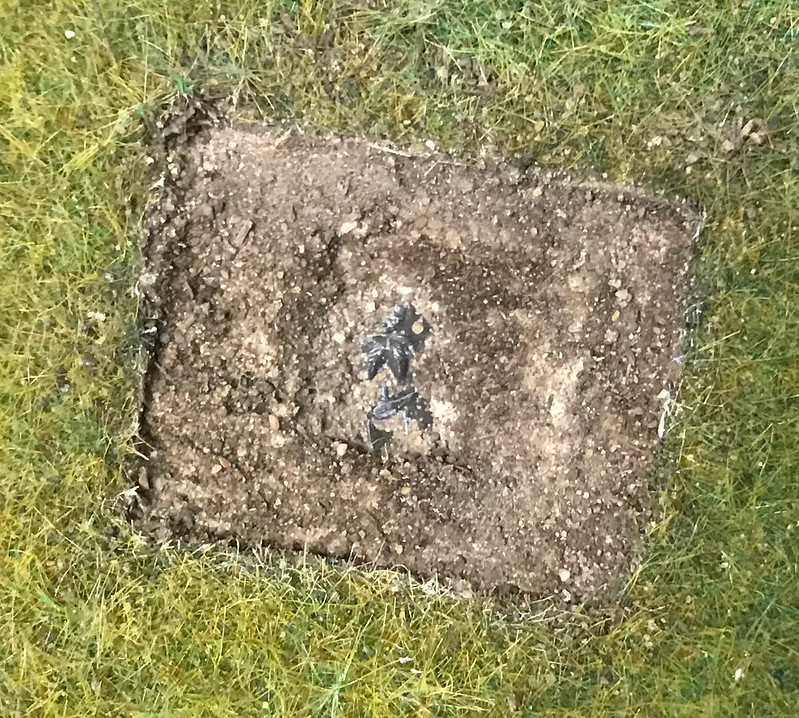
The soil has now been added to the second trench
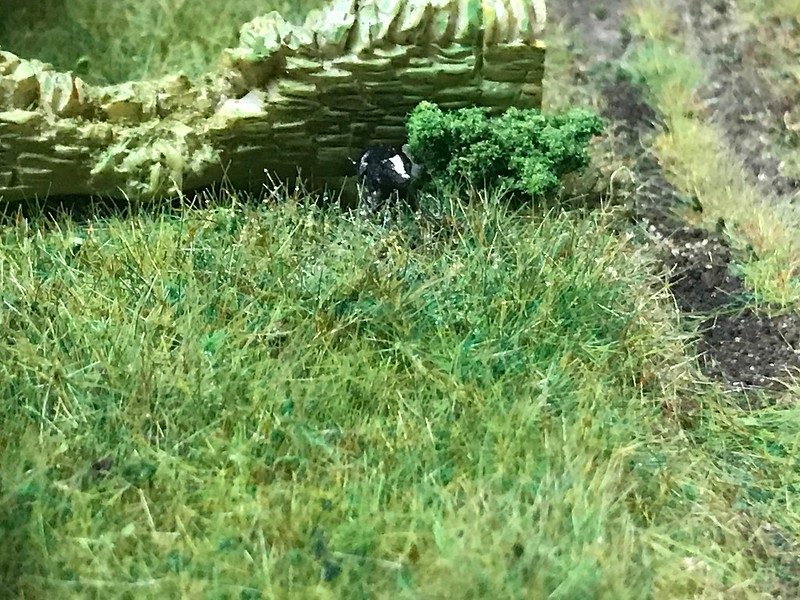
Also the badger that used to be underneath one of the trees on board 2 has been moved as it was right next to the first trench of the archaeological dig. The badger now lives next to the wall on the board joint between boards 1&2.
The opportunity was also taken to pose a locomotive in the gap between the trees and wall.
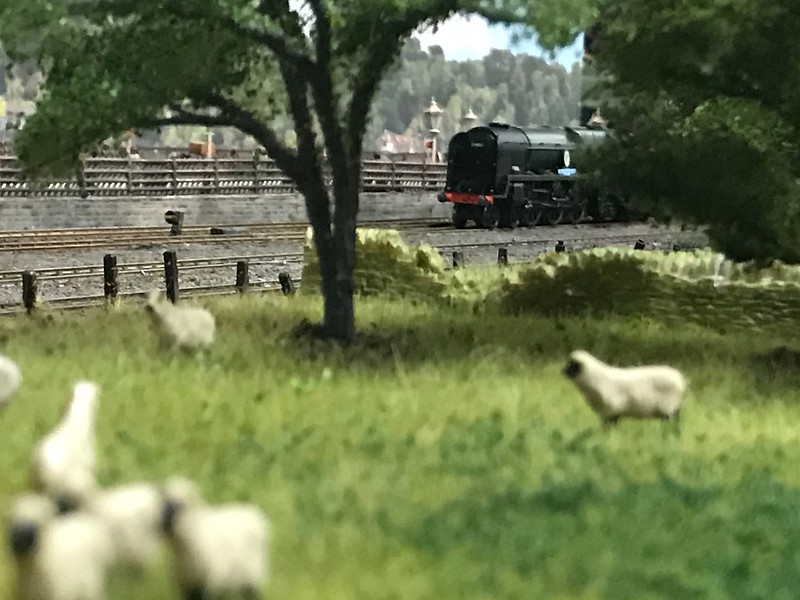
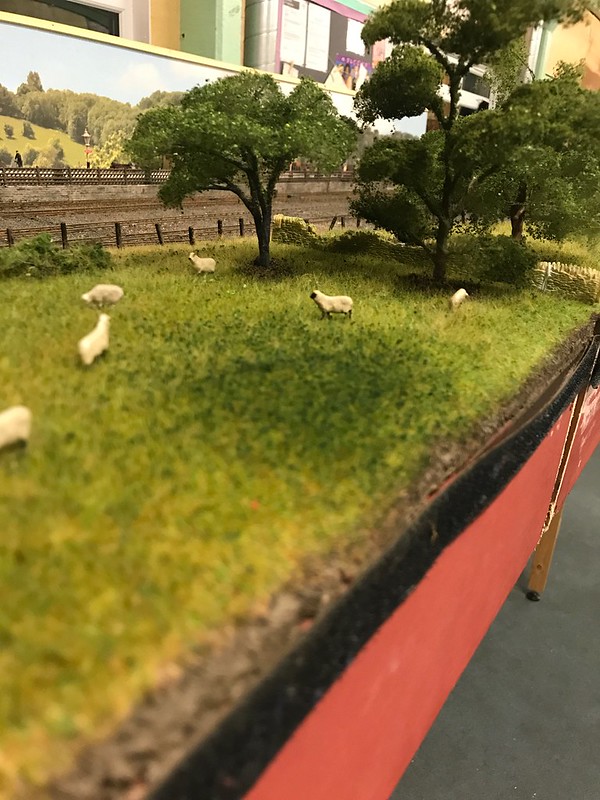
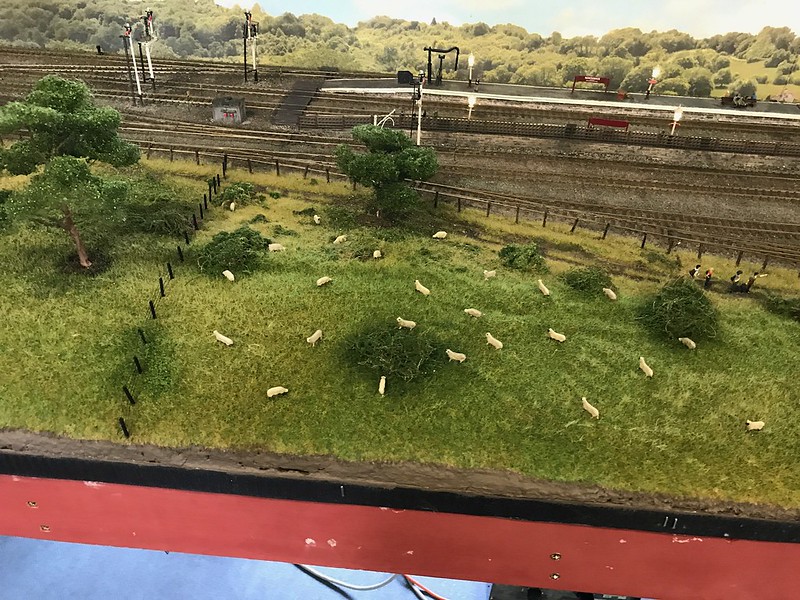
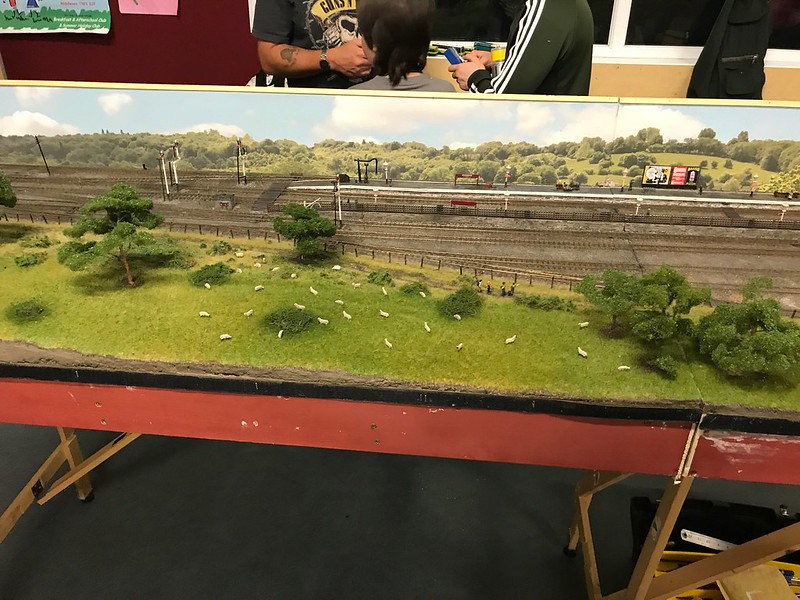
We have also moved the sheep around on board 2 as they were not quite looking right, after some scratching of our heads we decided that it was because all of the sheep were evenly spaced so we have moved some of them around, created groups of them and left some open spaces - this seems to have solved the problem.
-
1
-
-
Last Friday we adjusted the wall that usually sits over the board joint between boards 1&2 so that the collapsed part of the wall falls between 2 tree trunks which could give an interesting angle with a loco behind it. Whilst we were adjusting it we drilled 2 holes in the bottom of it and inserted nails with their heads chopped off so that it will make it easier to get the wall in the correct position in the future as the nails locate in holes in the field.
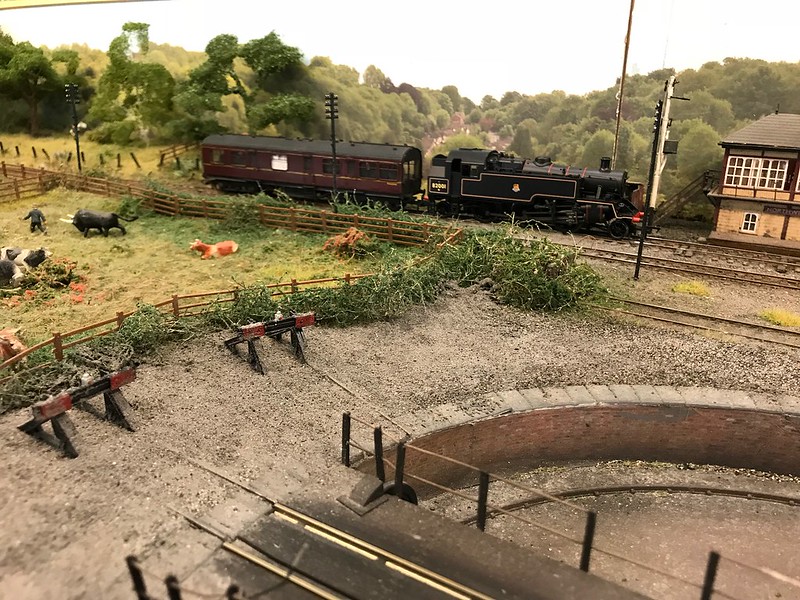
We have also started work on trench 2 of the archaeological dig which will result in a ditch being uncovered and possibly some finds.

could this be a hint of what could be found in the trench?
the position of the ditch is marked out.

and then dug (although it does not show up very well in this picture).
-
1
-
-
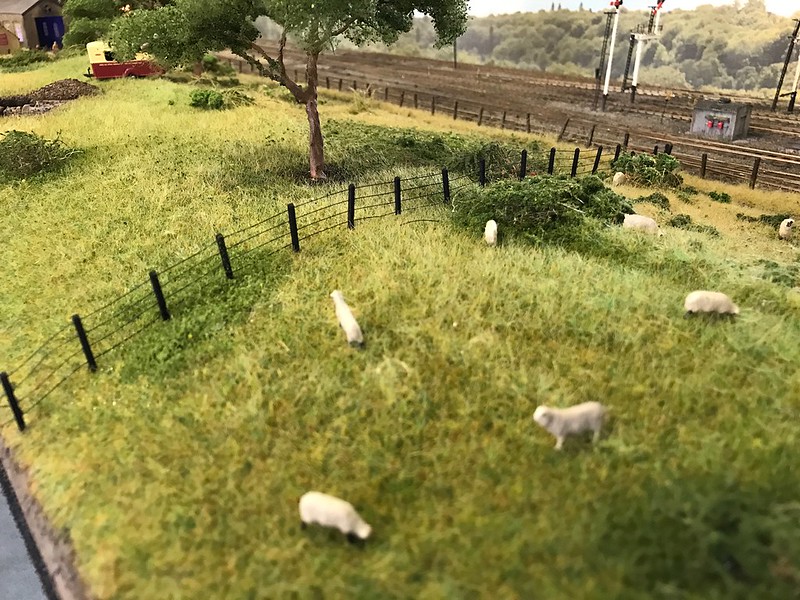
since the last post, the wire fence on board 2 has now been installed, we decided to go for a wire fence as it was the simplest type to do when the gradients of the land is taken into account.
we have also been sorting out the road on boards 3&4 as the join between old and new road was beginning to show, the first step was to paint the whole of the new road surface again witha mixture of black, brown, grey and off white to help blend it in with the existing.
The next step will be to apply a mixture of ash and dirt to further blend it in and to weather the road some more.
-
1
-
-
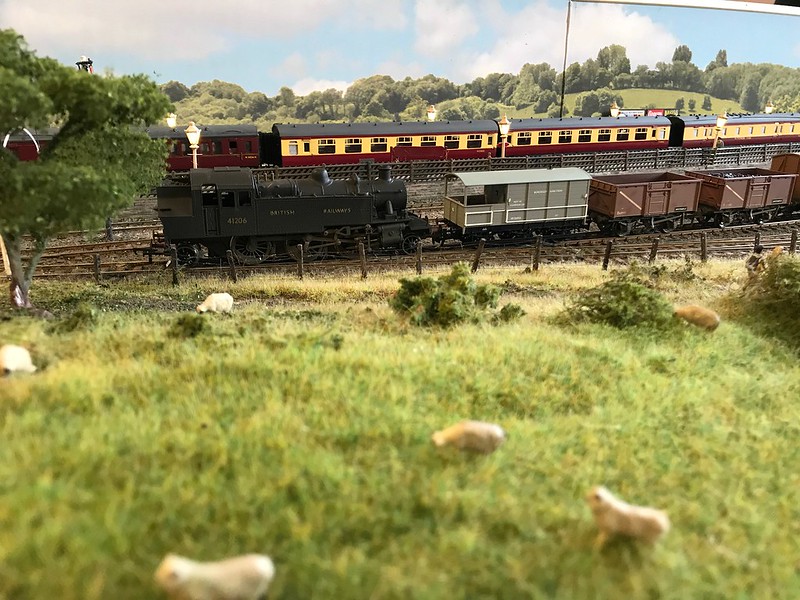
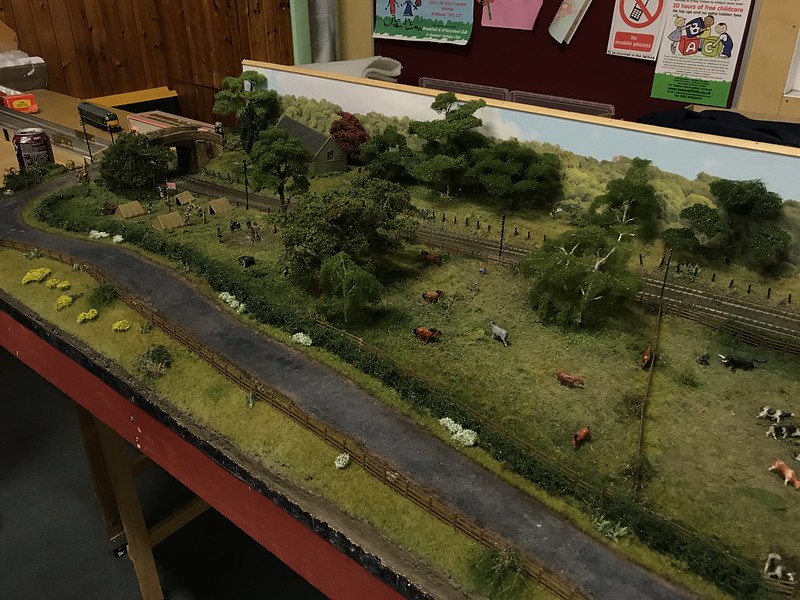
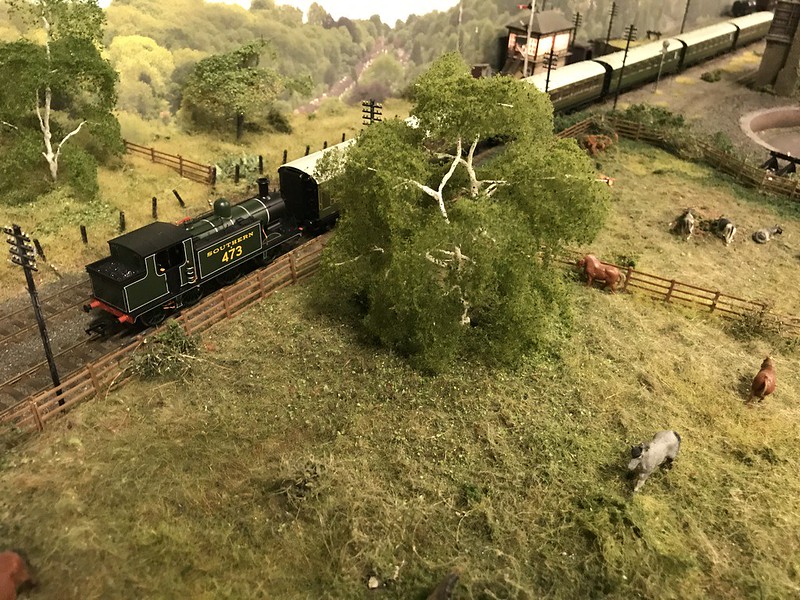
since the last update progress has slowed a bit with holidays getting in the way, the main things to have happened with the layout was- sheep being added to the field on board 2.
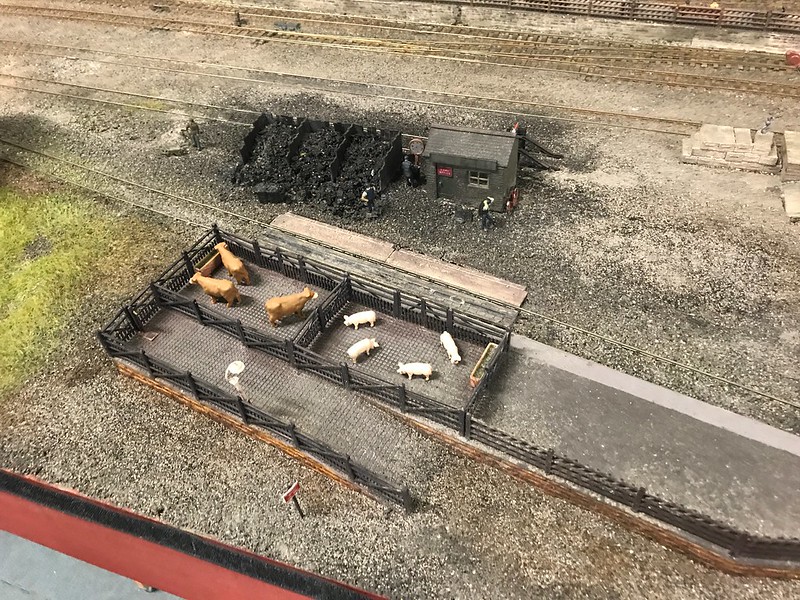
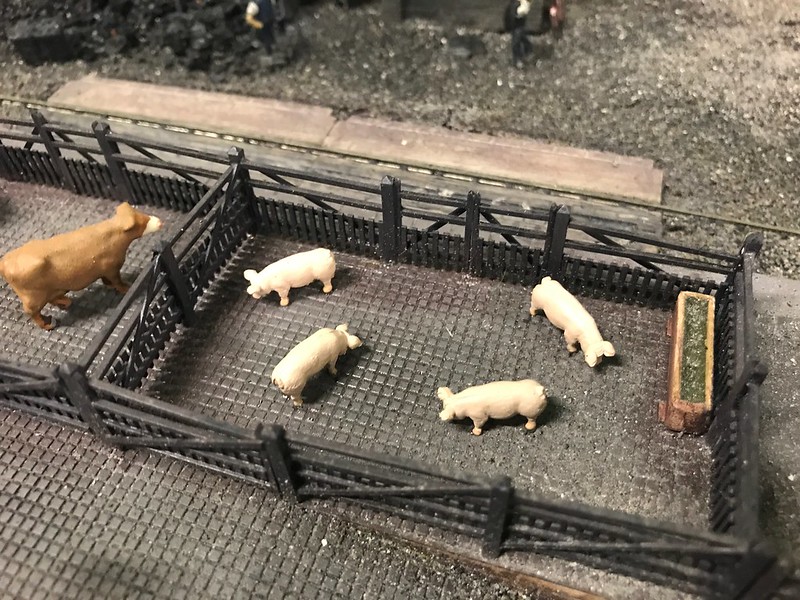
there is going to be a fence boundary added to the left of the heard of sheep which is why they currently end abruptly, also the farmer has dropped of some pigs to the cattle dock.
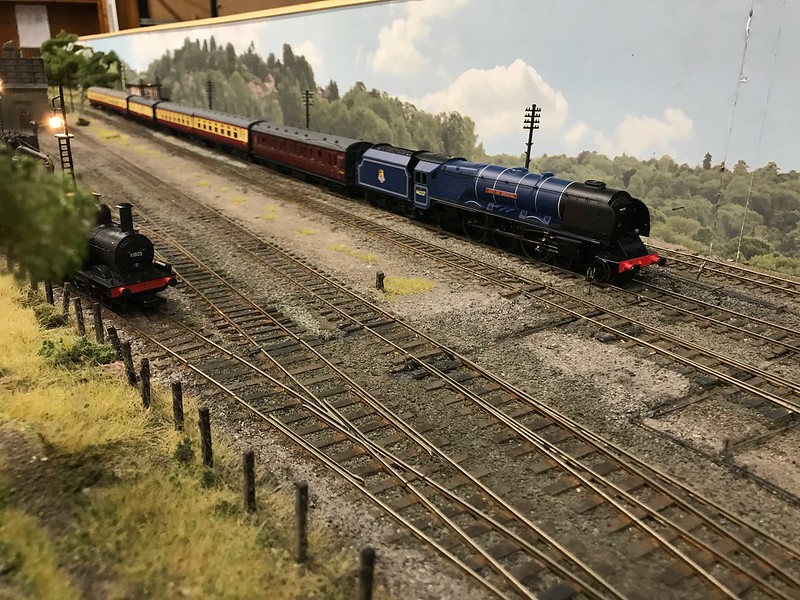
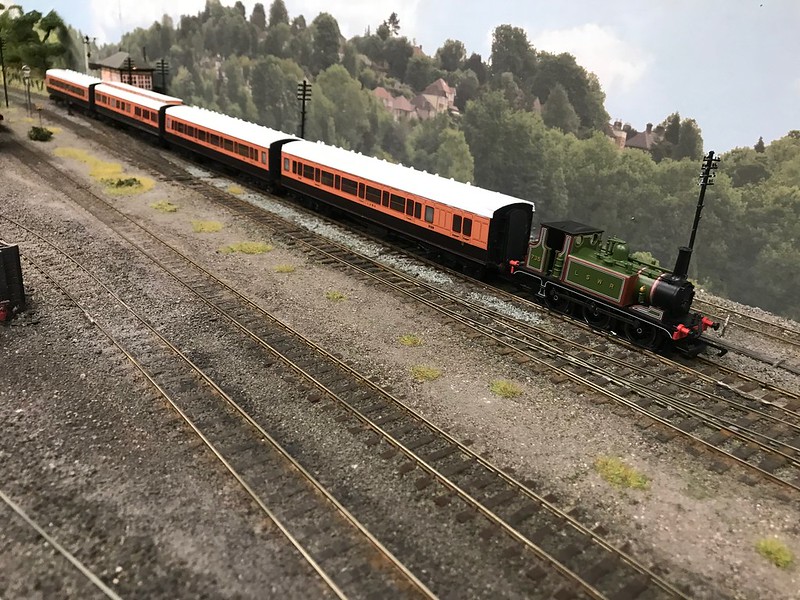
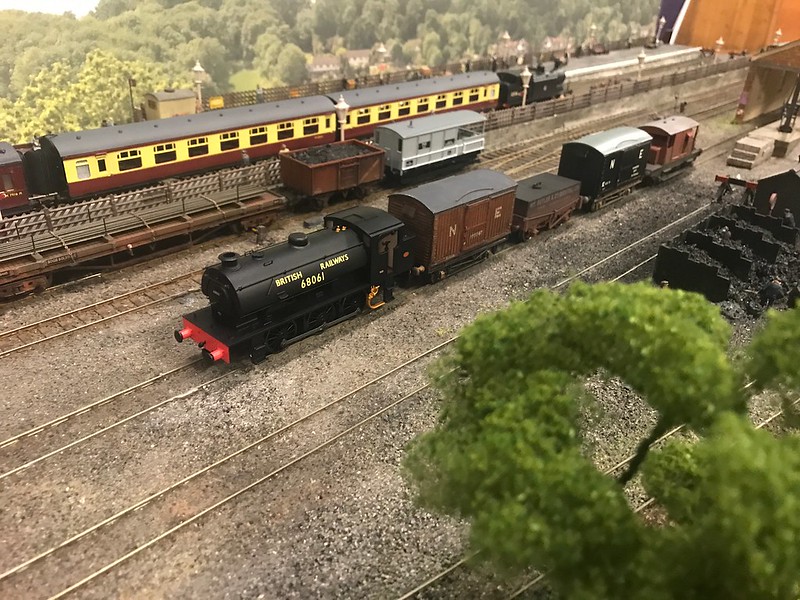
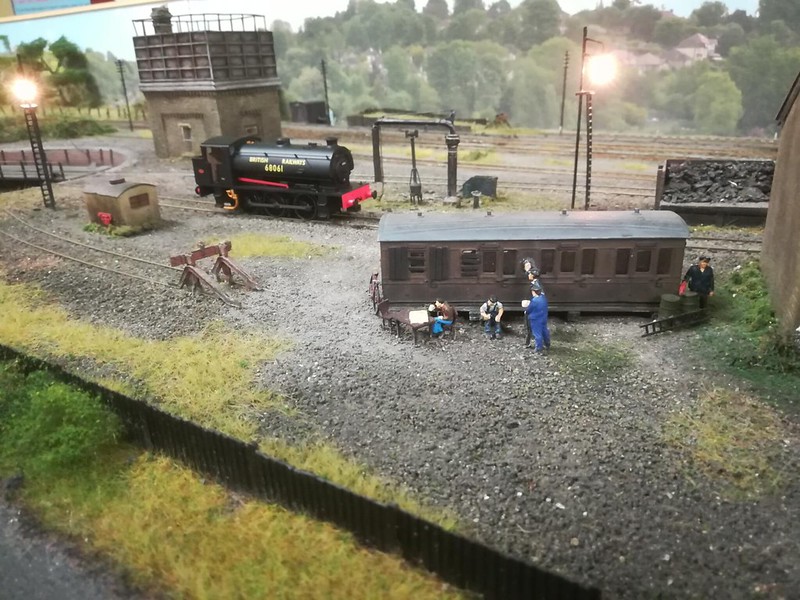
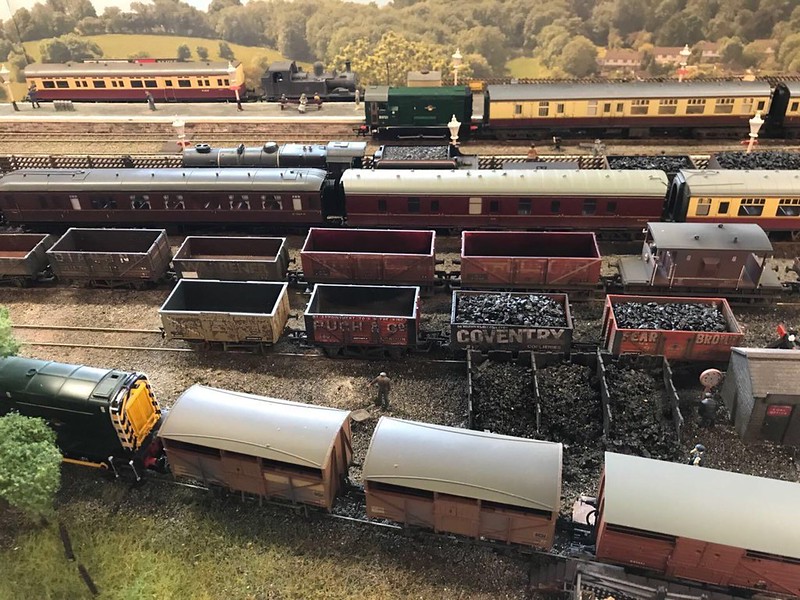
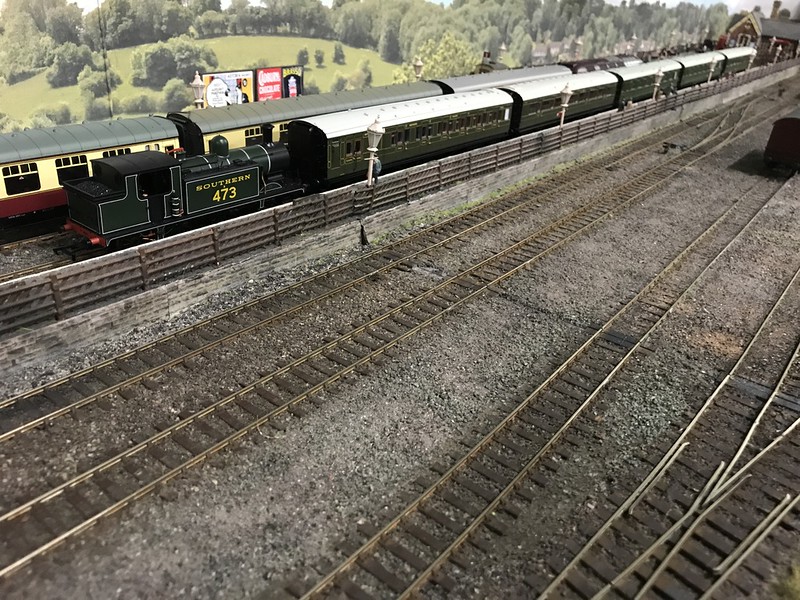
We also had a running session on the layout and the theme this month was exhibition which is where we run what we would run normally. Here we have envening star arriving with a blood and custard set of stannier coaches.
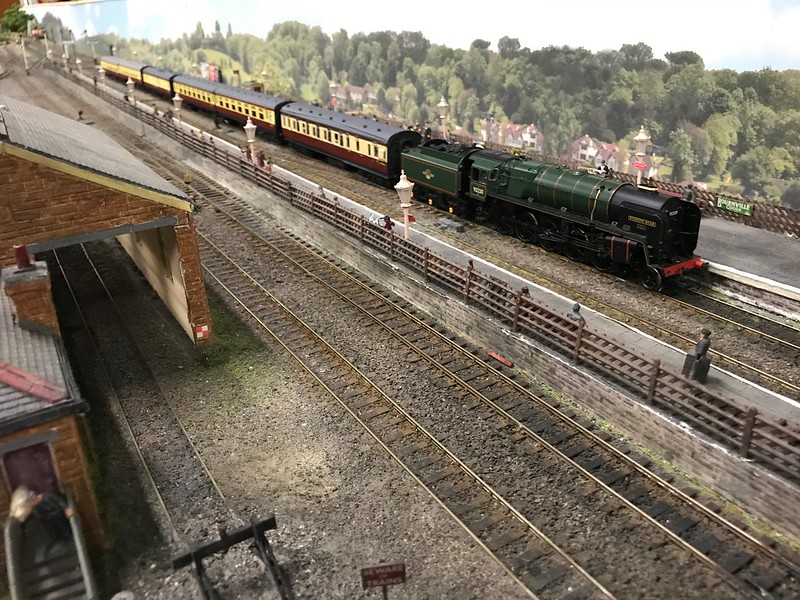
and later on in the evening Tavistock was also seen running with the same set.

-
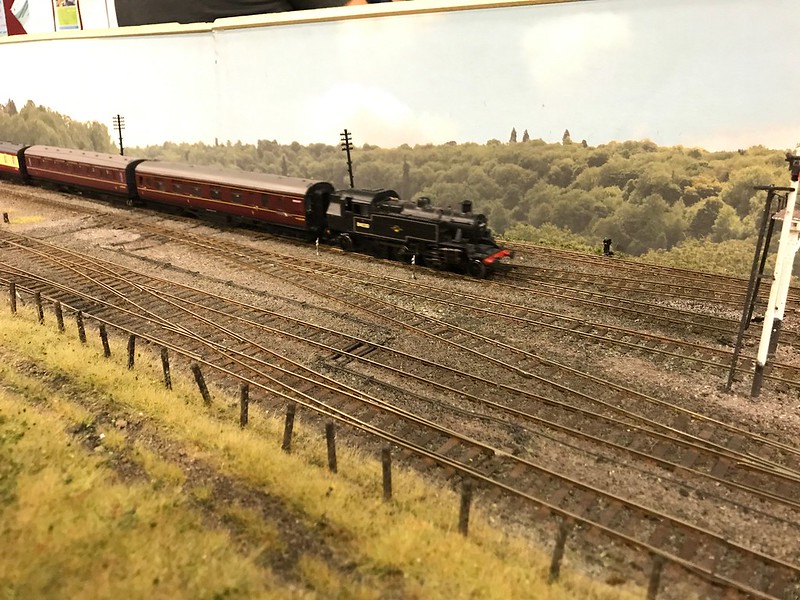
Last friday night was the layouts monthly running session and the theme for this month was the eastern region, here are some pictures from the running session.
Class A4 Dwight D. Eisenhower pulls into the station with a set for gresley stock.
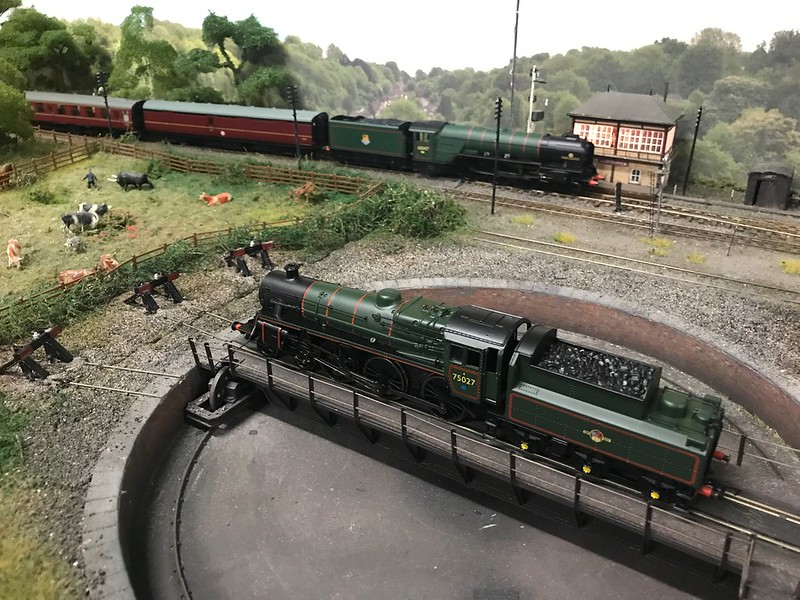
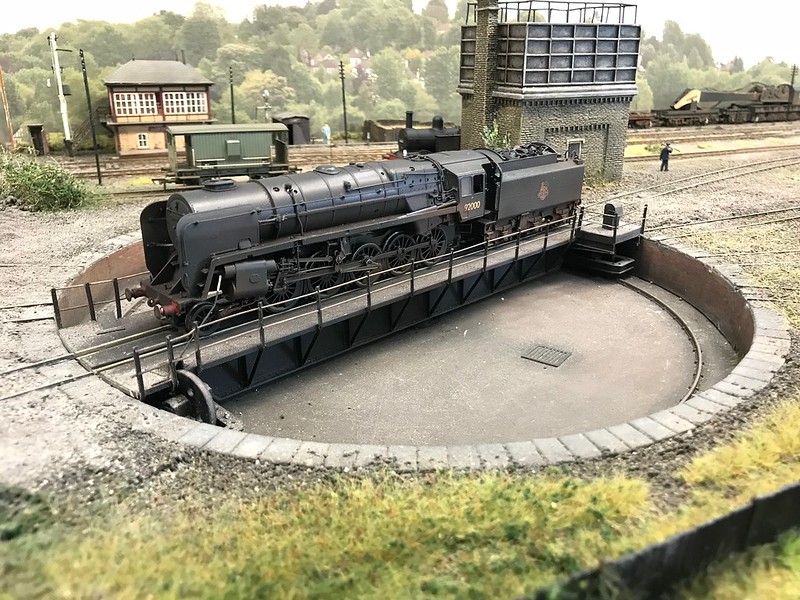
BR Standard class 4 75027 is turned whilst class A1 60147 North Eeastern arrives with a mixed rake of thompson and BR Mk1 stock.
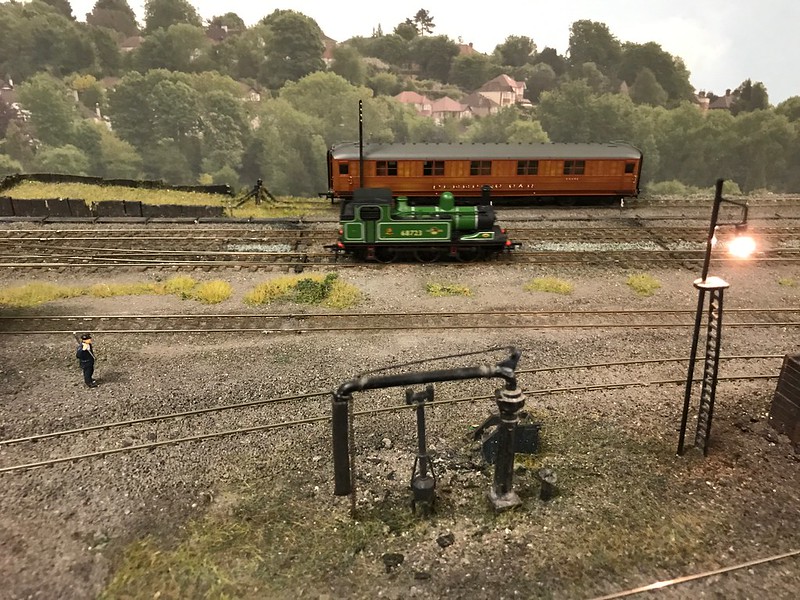
Class J72 68723 was on shunting duties.
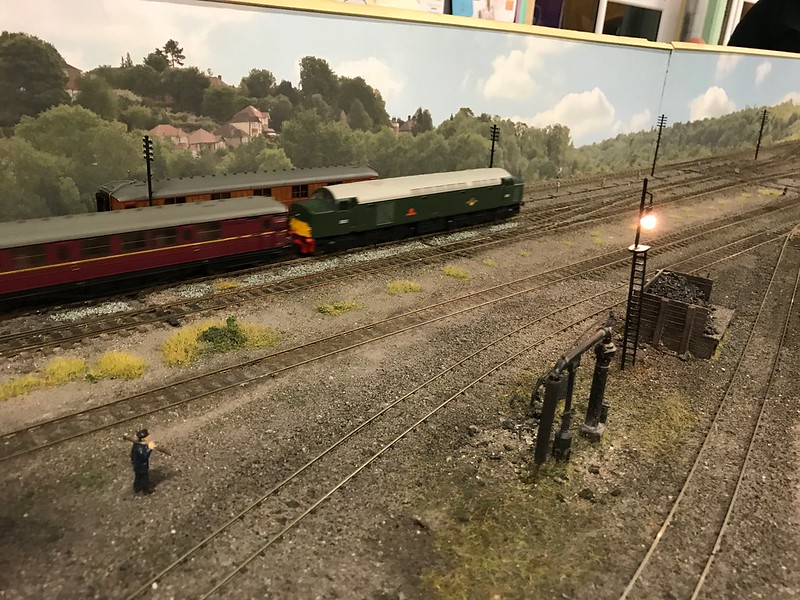
Class 45 pulls in to the station.
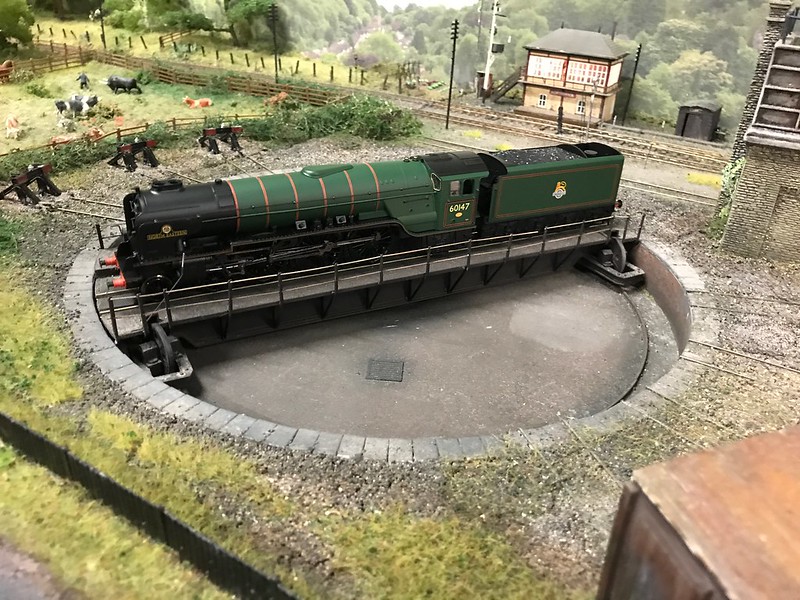
Class A1 60147 North Eastern is turned
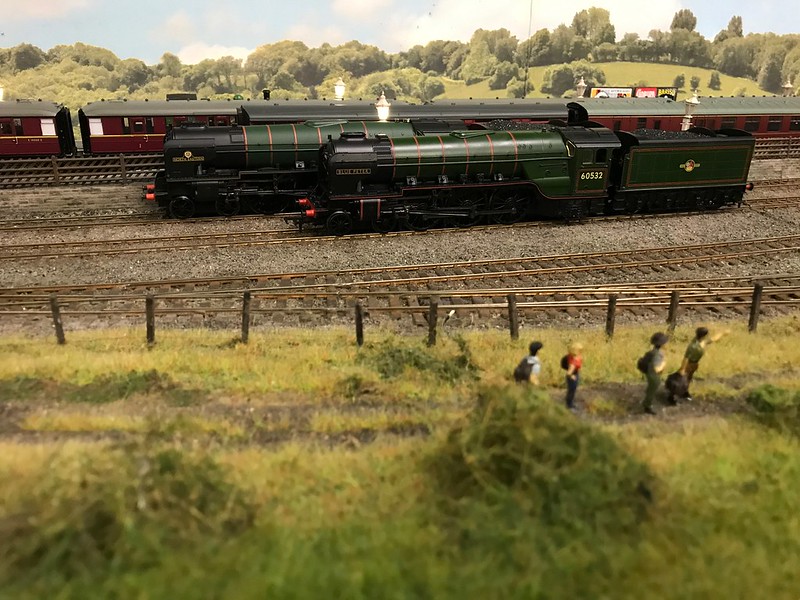
Class A2 Blue Peter poses alongside Class A1 North Eastern
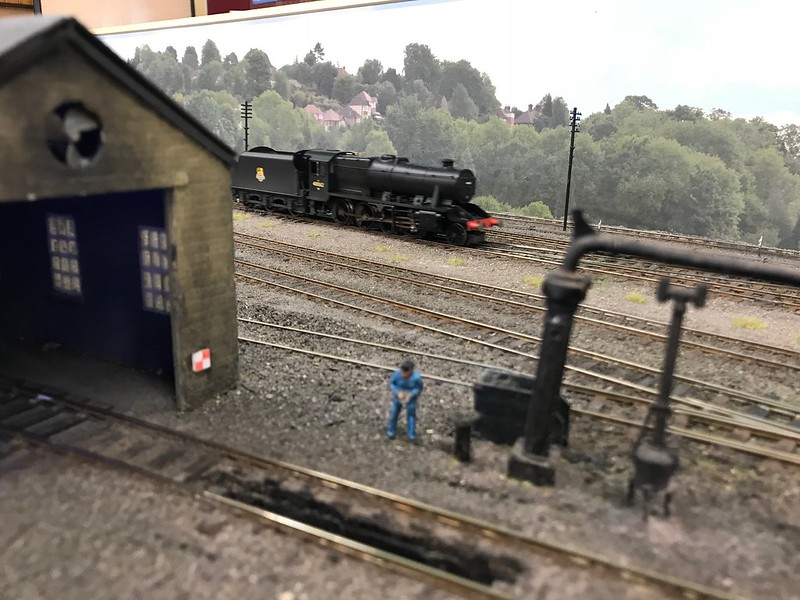
Class A4 Dwight D. Eisenhower awaits its next duty in the engine shed.
BR standard class 4 75027 arrives with a set of thompson coaches
an interesting shot with the archaeological dig in the foreground and BR standard class 5 awaiting to couple up to its train in the background.
-
1
-
-
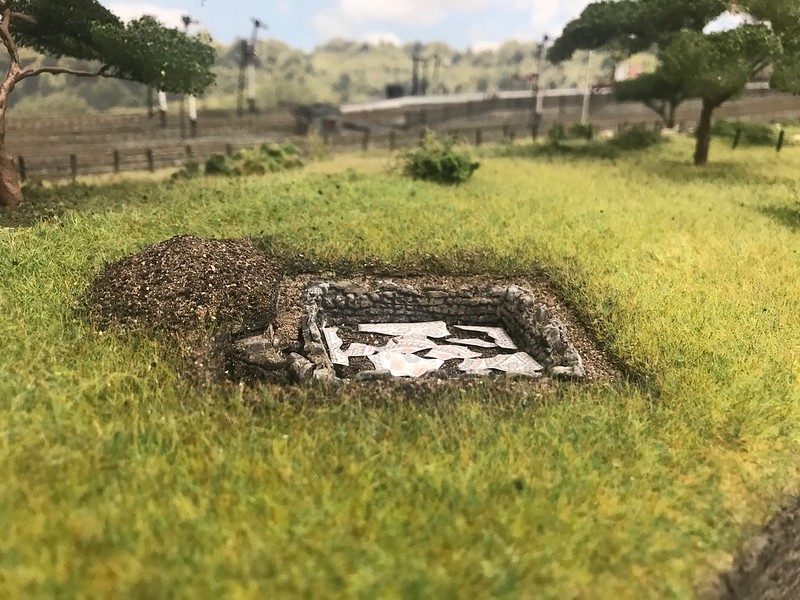
Last Friday we made more progress with the roman villa dig as it has now had the soil added, we also extended the trench slightly so that it continues on a little bit beyond the walls that were right up against the side of the trench.
The next step will be to start adding some of the details to the dig site such as a more damaged version of the mosaic and diggers.
-
4
-
-
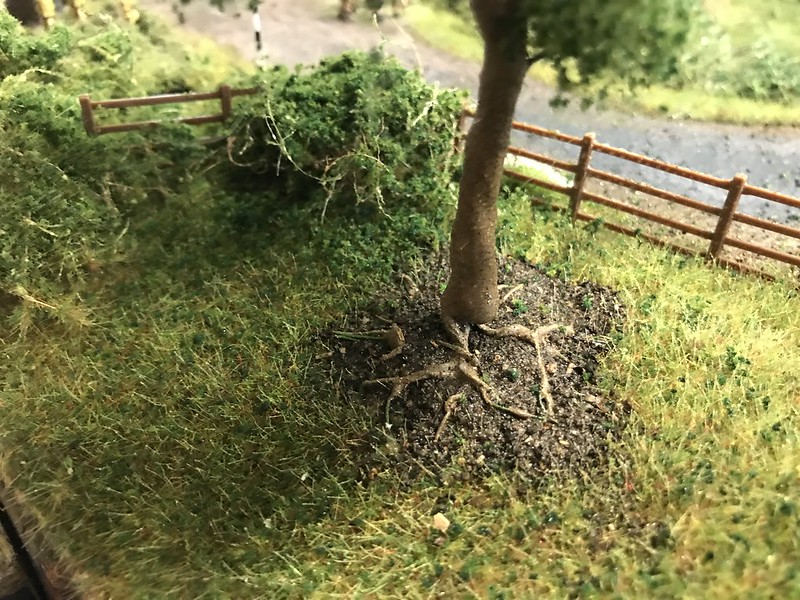
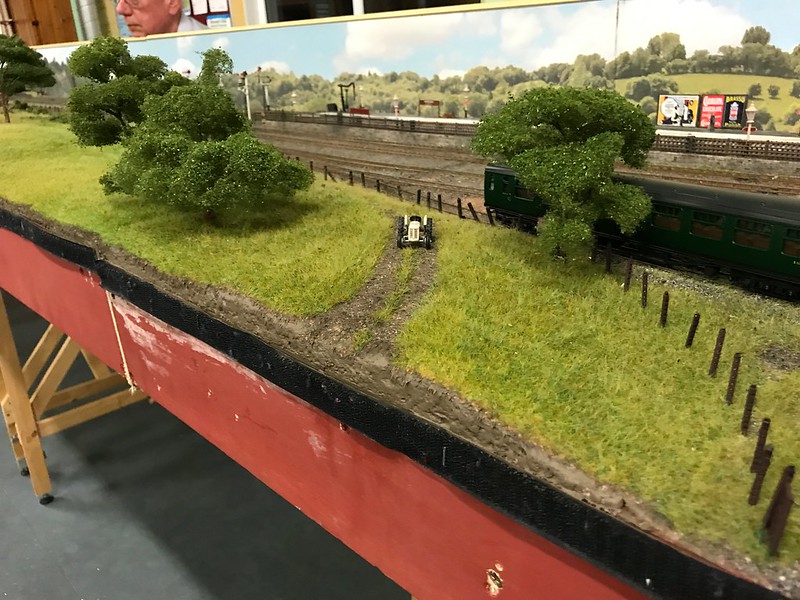
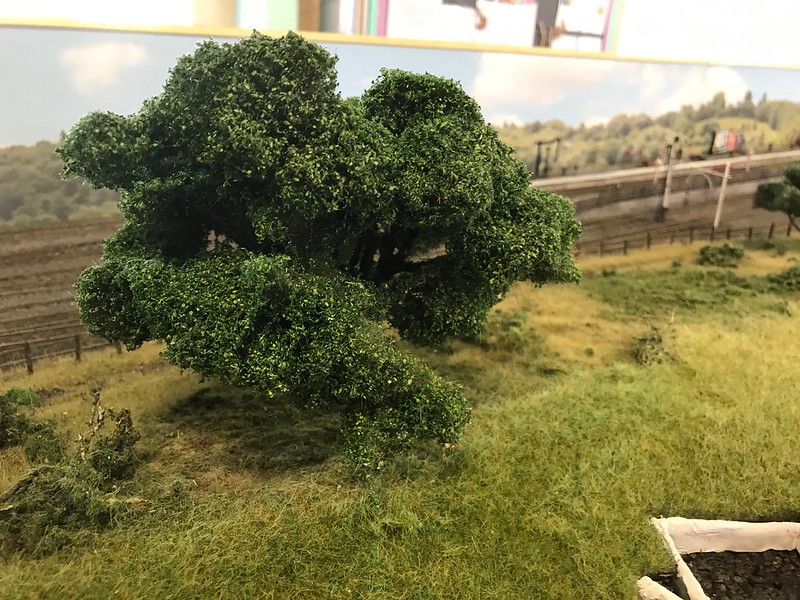
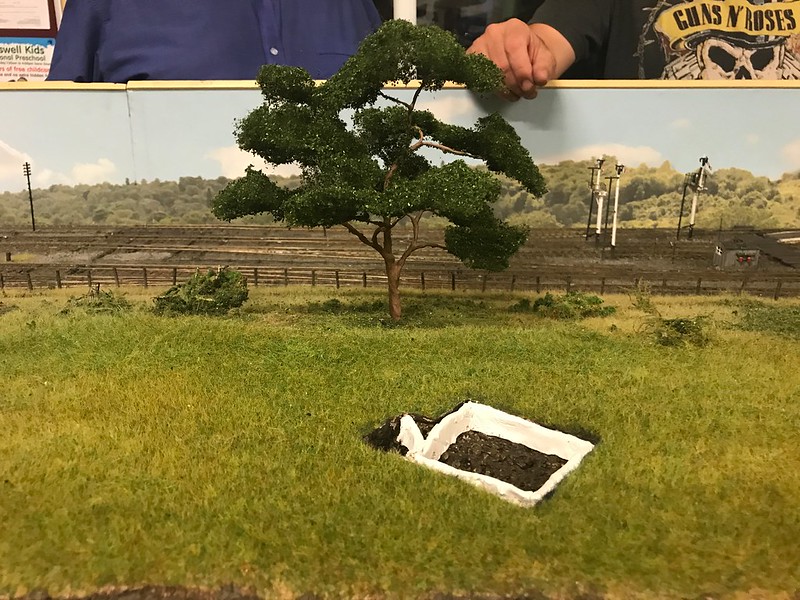
A bit of a big update this time as since the last update we have been very busy with progress made on several fronts, so I will start off from where we left the last post - trees. The last of the trees that needed refurbishing on board 4 have been done and a new tree added to behind the church in the form of a copper beech to add a bit of colour, here's an over all shot of how borad 4 looks now.
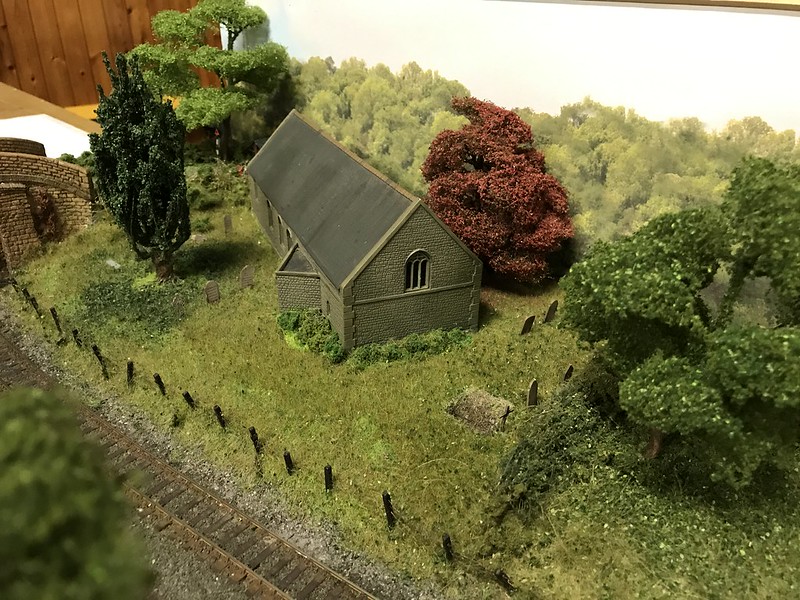
We have also added another tree to the front corner of board 4 to help hide the edge of the back scene that separates the fiddle yard from the layout.

Once it had been stuck in place we then adjusted the roots to how we wanted them and then added soil around the roots and stuck that down too.
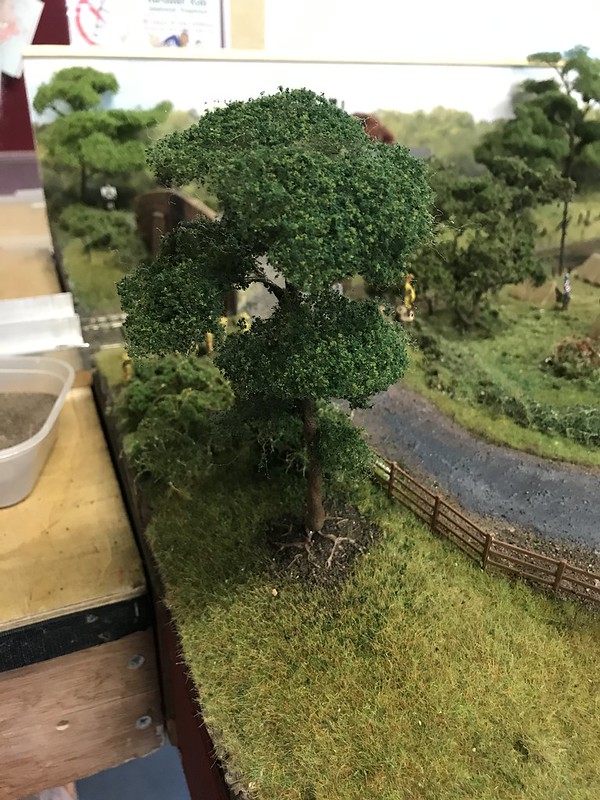
A couple of shorter trees were added to the boards 1&2 to help hide the board joint whilst not obstructing the overall view of the layout.
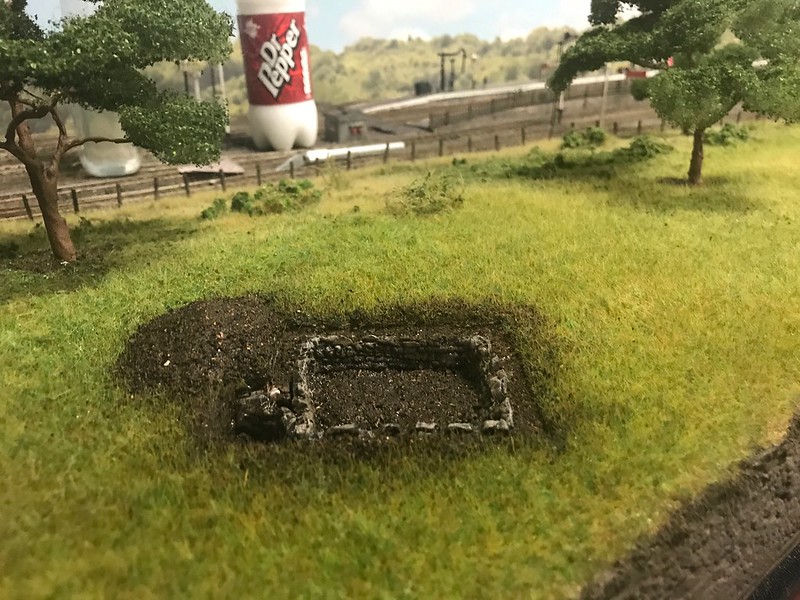
Now onto the other main project which is the archaeological site, since the last post the walls have had their stones carved into them and the tops of the walls made less regular.
they were then given a base coat of paint.
various brown and black washes were then added followed by some dry brushing of greys and lighter browns.
On the 22nd of July it was the clubs open day and the scenic parts of Northwick were set up as part of this, for the open day we temporarily added a mosaic to the main room of the roman villa to give an idea of whats to come.
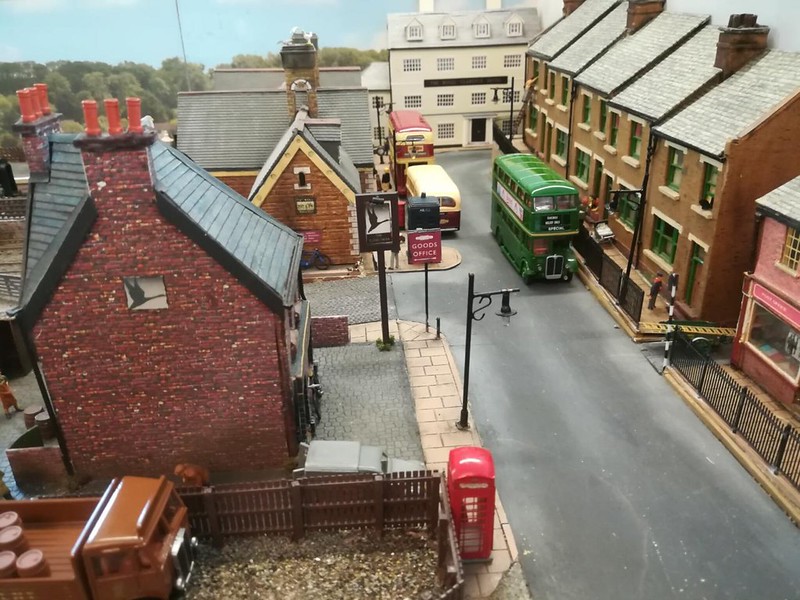
For the open day as we had the goods yard set up so that it could be shunted and posed the rest of layout as though there was a blockage further down the line which prevented the passenger trains from operating so there was a bus replacement service running.
-
1
-
-
As some of the trees are beginning to look a bit tired the decision has been taken to either refurbish the ones that don't look too bad and in some cases completely replace the existing tree with a new one. Whilst doing this we also decided to move the tree that had been put on board 1 from its current position, this was because it was near the front edge of the layout and as it is a delicate tree compared to the others it was getting damaged quite easily, it has now been moved to the field with the scouts in on board 4 and the existing tree removed to be refurbished and returned to the layout. Here are some picture showing which trees have been moved.
The existing tree on board 1.
The other existing tree on board 4.
The tree from board 1 in its new position on board 4.
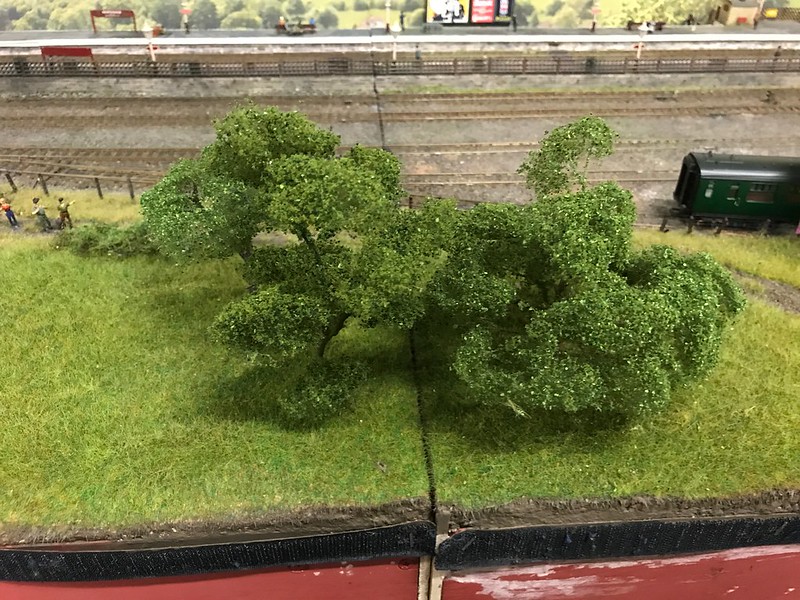
1 of the trees earmarked for replacement was the main big tree on board 2, here it is before anything happened.
It was decided to replace this one as when it was re-done last time we noticed that the armature of the tree wasn't constructed very well and so couple this with the fact that it was very dense and so obstructed a lot of the layout behind a new more open tree was made to take its place.
The other tree that has been replaced is the big tree in the scouts field, our intentions were originally to just refurbish this one as it had the tree house in, however upon removing the greenery it was found that the tree didn't look very tree like as all the branches pointed straight up so it was decided to replace this one with a new tree and fit the tree house to the new one.
Here is a before and after picture (sorry for the poor picture but I cant find a better one showing the old tree)
Here is the new tree in position complete with the tree house which has been placed so that the kids can see it easily and the adults have to take a close look to see it.

Some of the other trees to receive some attention were the trees that go along the back of board 4 as they were beginning to look a bit tired, so the were re-covered with new foliage and put back into position, whilst doing this we noticed that not only had the been all planted in a row but they were almost all the same exact height so this was addressed too.
Here's a before shot.
and after
There is still more work to be done to the remaining trees on the layout but what do you think so far?
-
3
-
-
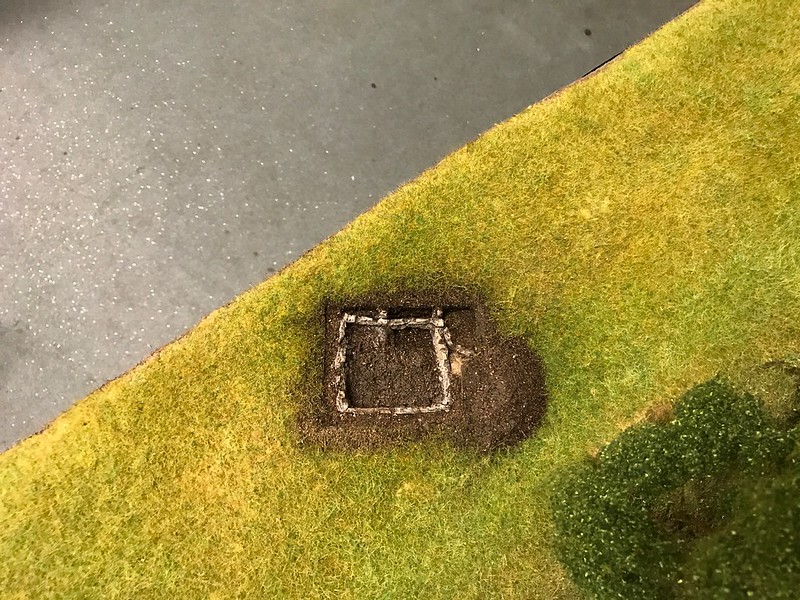
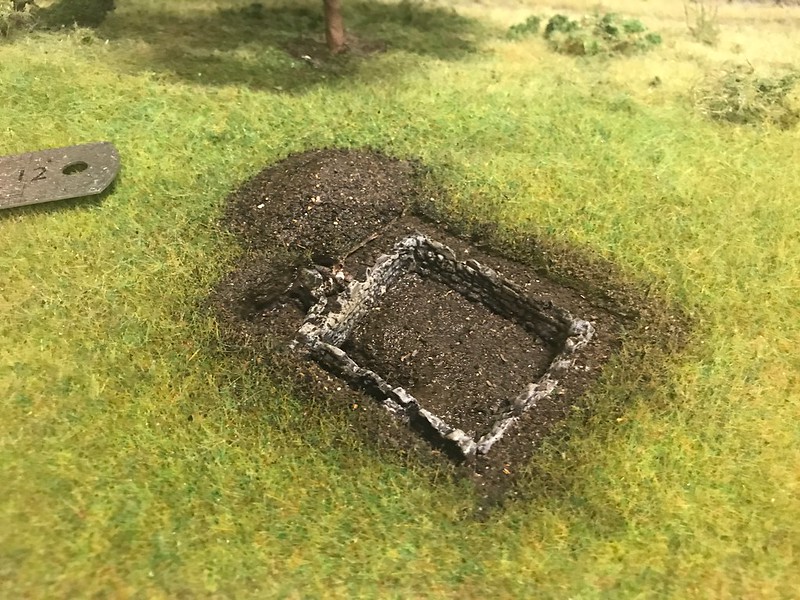
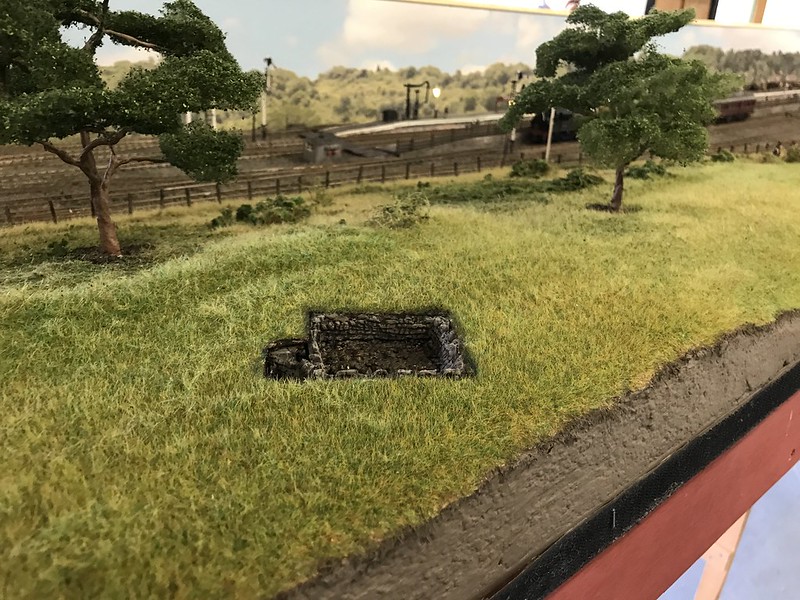
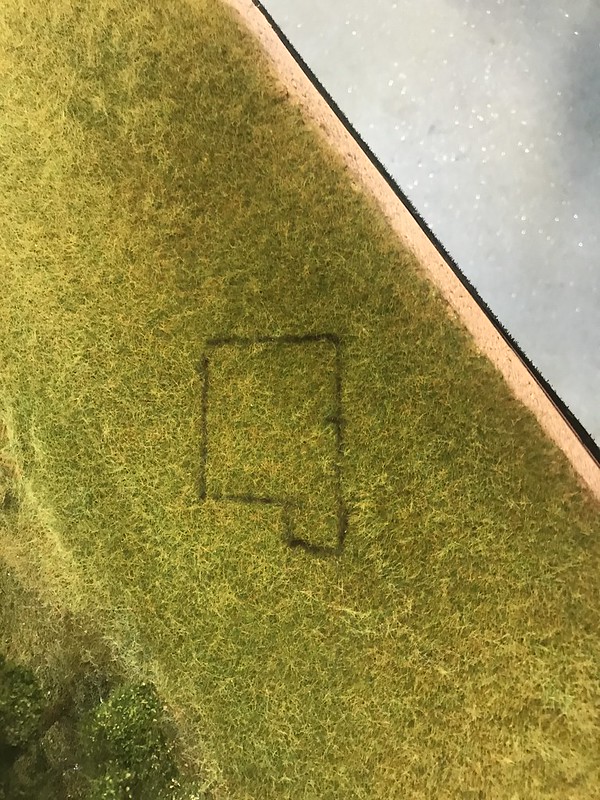
One of the main projects that we have been busy working on is the archaeological site on board 2 the aim is to have a roman villa being dug complete with a roman mosaic being slowly exposed by the diggers, there will also be crop marks on the grass around the trench indicating where the walls are underneath the ground. So the first steps were taken and the trench was marked out and the grass was taken off.
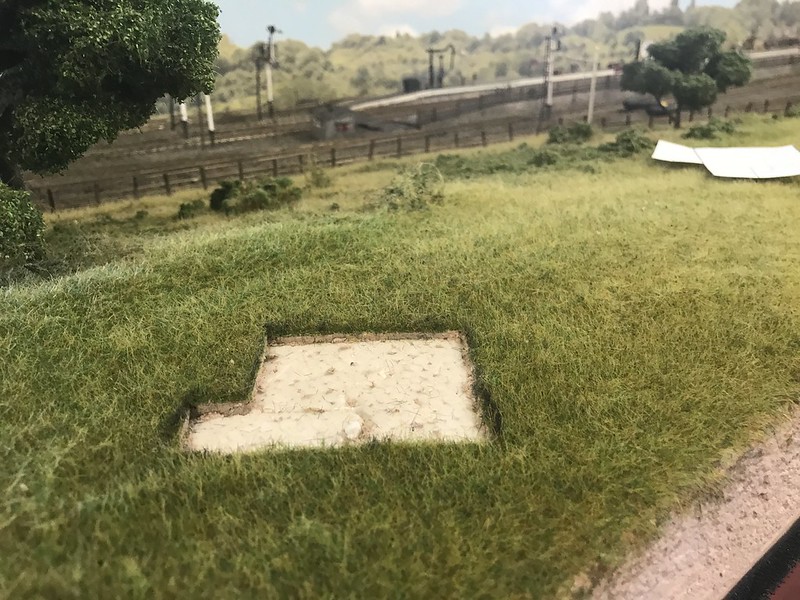
There hasn't been too much in the way of progress with this as we have had issues with creating the walls for the villa, first we used maliput but this set a bit too hard for us to carve easily once dry and so it was decided to do away with this and whilst at it we also decided to deepen the excavation as it was looking too shallow.
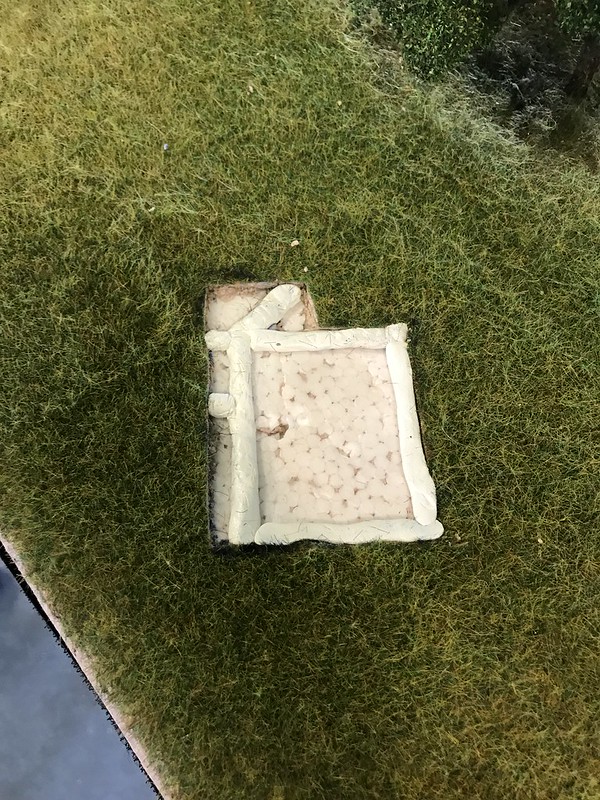
So once the maliput walls were removed and the trench was deepened, new walls were created using silk clay which was chosen as it gave a good base colour for the walls and dried in the air so this was left to harden during the week.
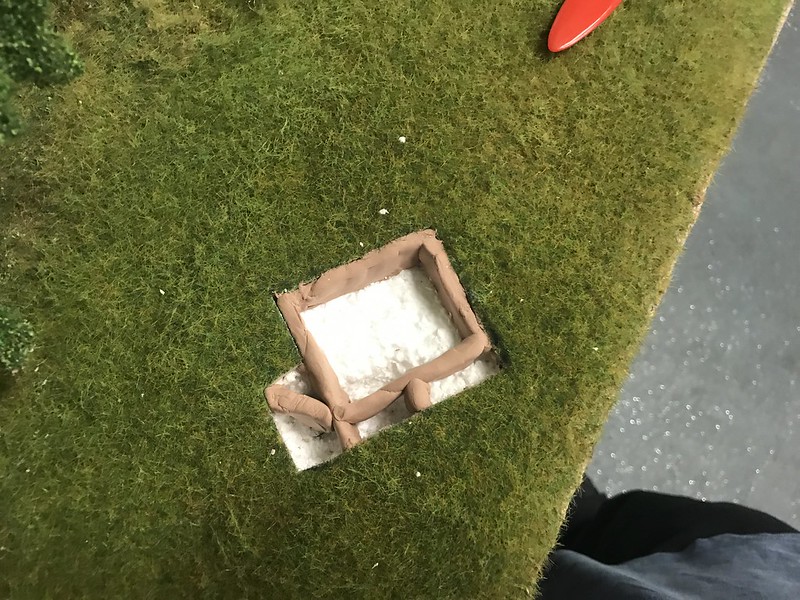
When we returned the following week we found that although the walls had dried they couldn't be calved because the silk clay had dried to a spongy finish so this wouldn't work either, so we returned the following week with Das air drying clay . So we set about removing the walls made of silk clay and before putting the replacement walls in we painted the polystyrene brown so that any bits that we may miss with the dirt that will be put in the trench shouldn't be too obvious, the new walls were then put in and having tried the sample piece it should calve nicely
You will notice that at the moment the walls are all of a uniform height (just under the grass level), we decided that we would make them of a uniform maximum height and then carve them to the desired uneven height.
-
1
-
-
I hadn't realized that it had been over a month since the last update from northwick, this is not because we have disappeared but work has been getting in the way of the updates however we have been busy working on the layout during this time.
One thing you may notice is the lack of pictures on the previous posts this is because photobucket (the website i use to host the pictures) has recently changed their T's & C's and now have to be paid an extortionate amount of money for the links to work again so I am now in the process of transferring the photos to another site and will be working through the previous posts and updating the links.
There was a running night in June and the theme was preserved.
Ex LBSCR class E4 473 AKA Birch Grove is seen running with a rake of maunsells

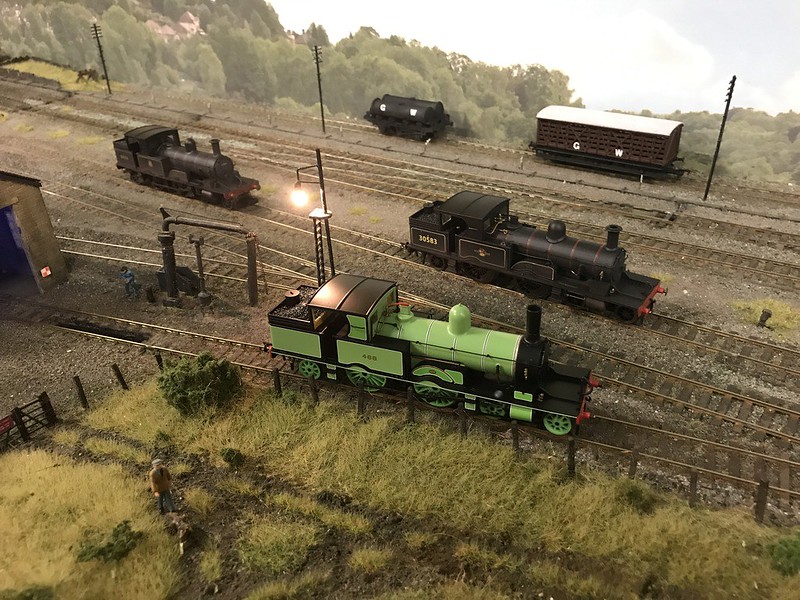
LSWR adams radial 488 hauling a rake of wagons
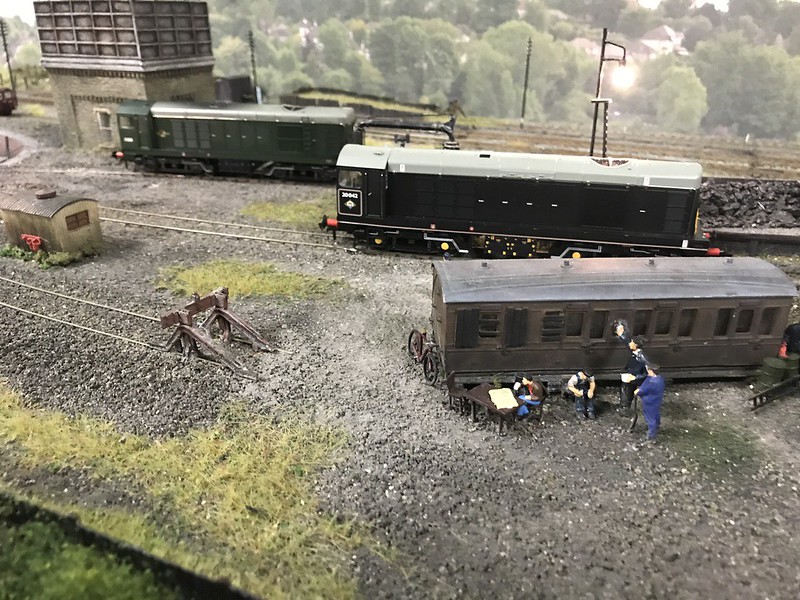
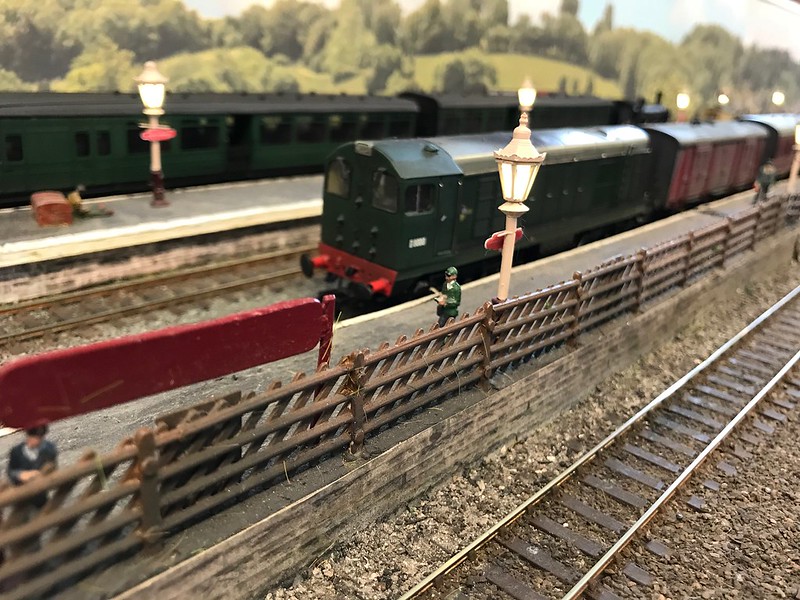
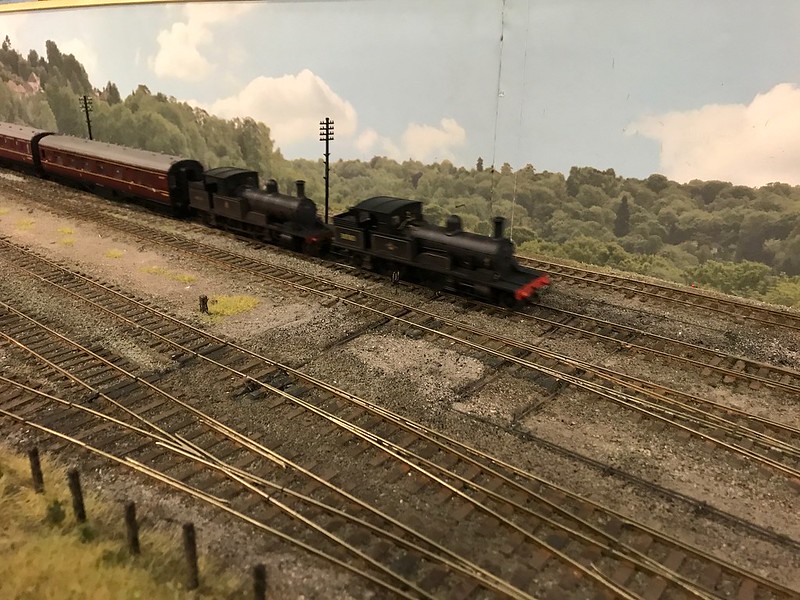
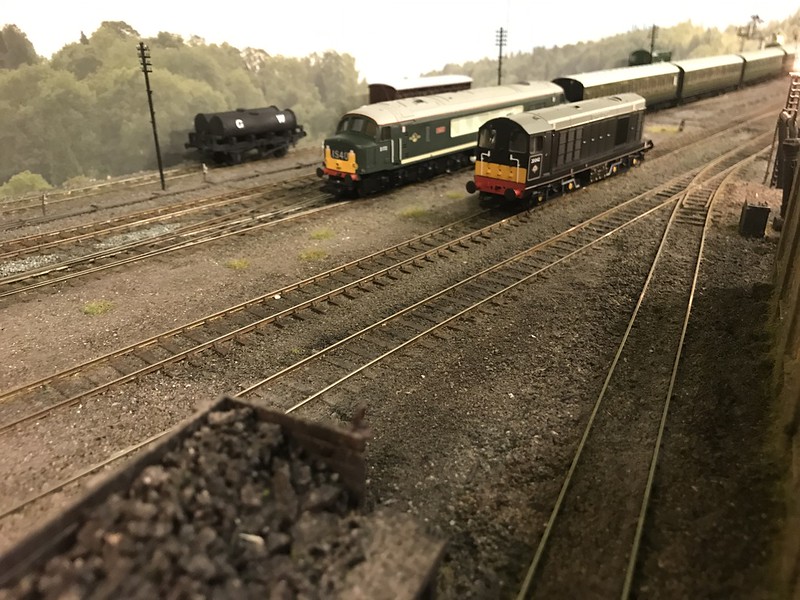
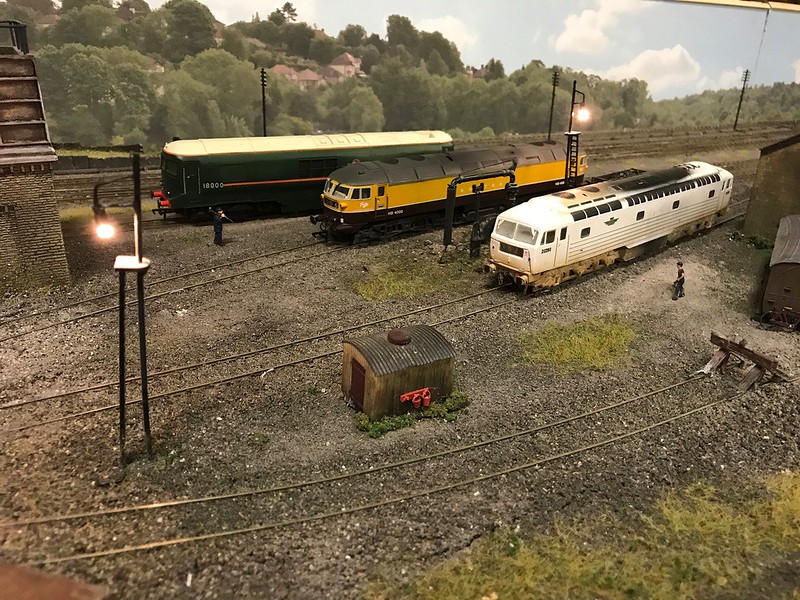
A pair of class 20's - D8000 & 20242, sit in the engine yard
BR Standard 5MT 73082 Camelot departs
BR Class 46 d172 passes class 20042
The 2 BR adams radials double head the coaches
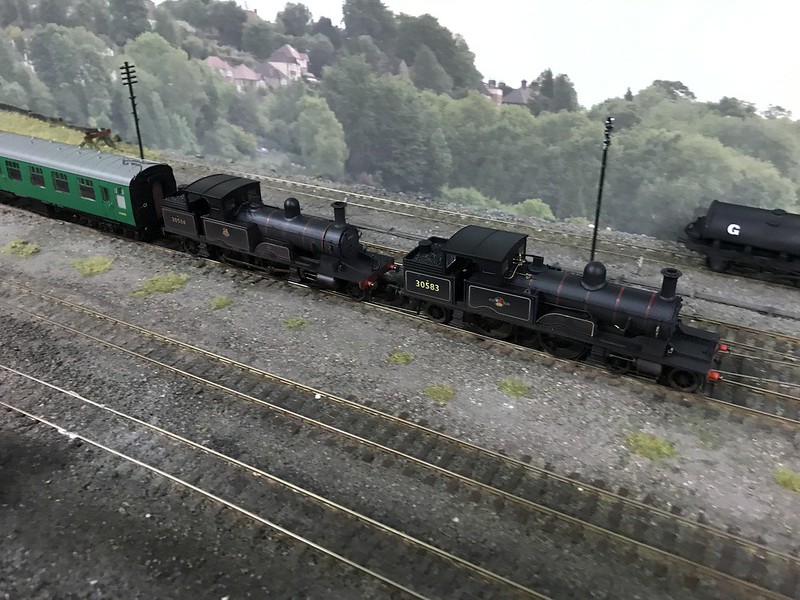
A bit of an if only, preserved Adams radial sits outside the engine shed with 2 of its class mates 30583 + 30584
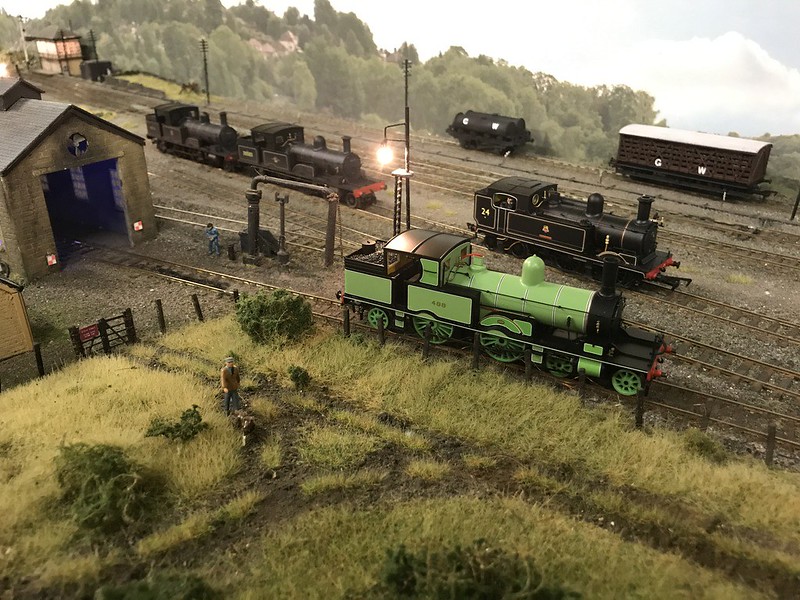
These were then joined by Ex LSWR class 02 24 calbourne
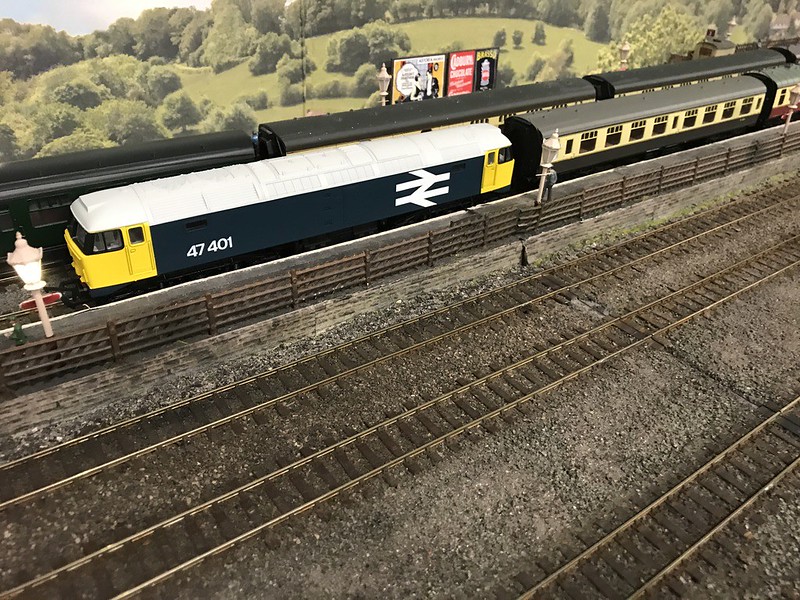
BR class 47 47401 awaits to depart
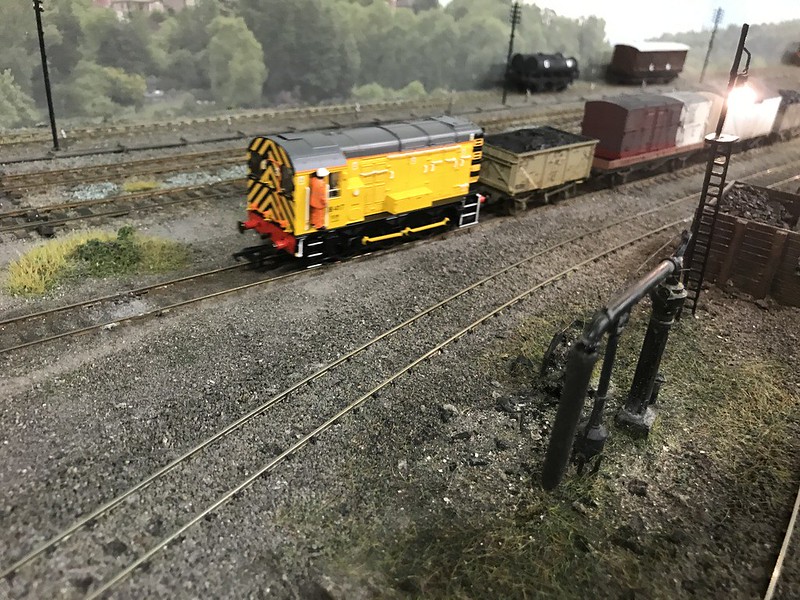
BR class 08 08417 was busy shunting

Class 57 57305 in northern belle livery was also seen having brought in a rail tour.
More posts to follow on progress made elsewhere on the layout.
-
2
-
-
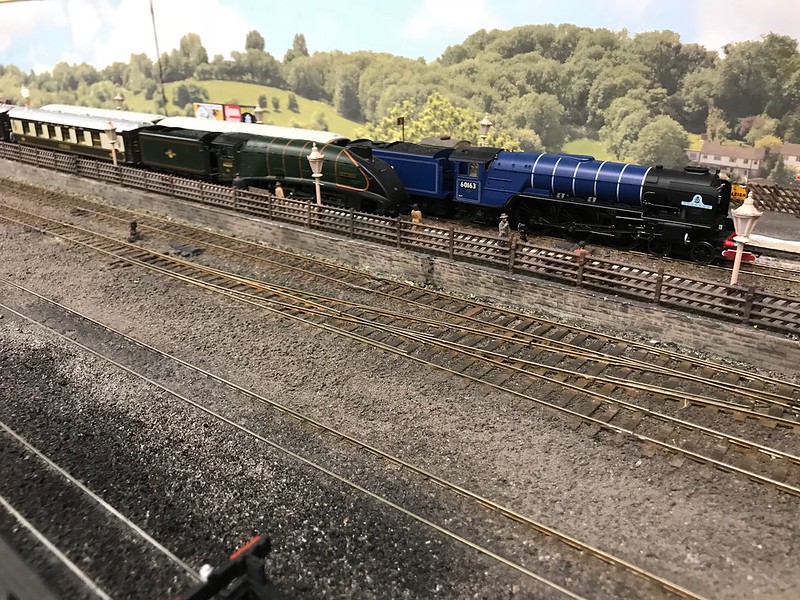
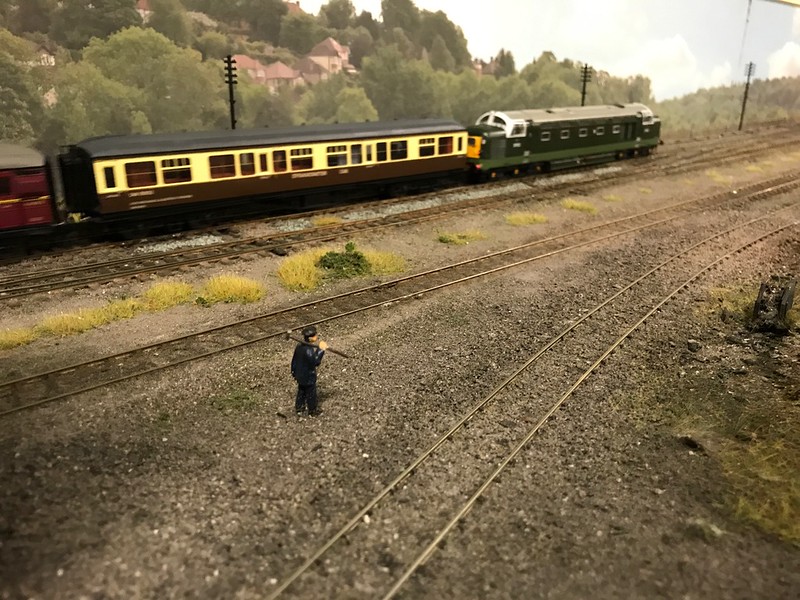
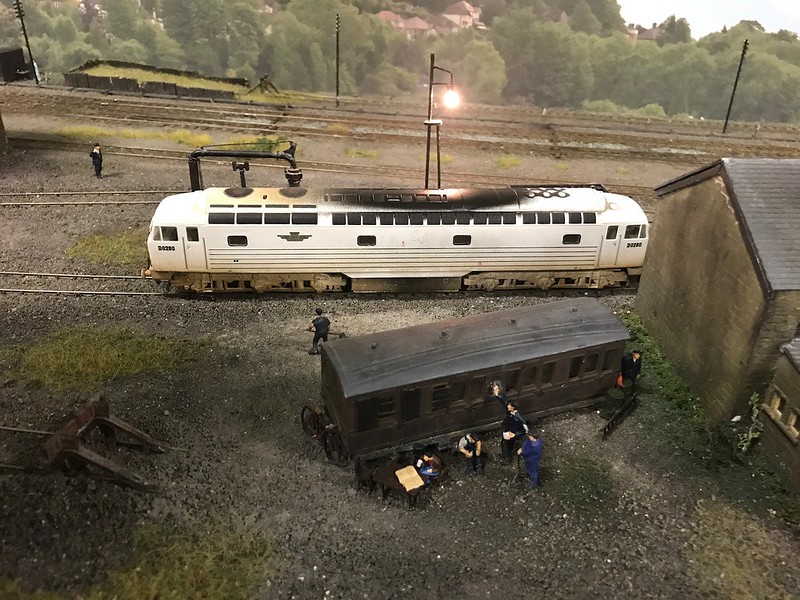
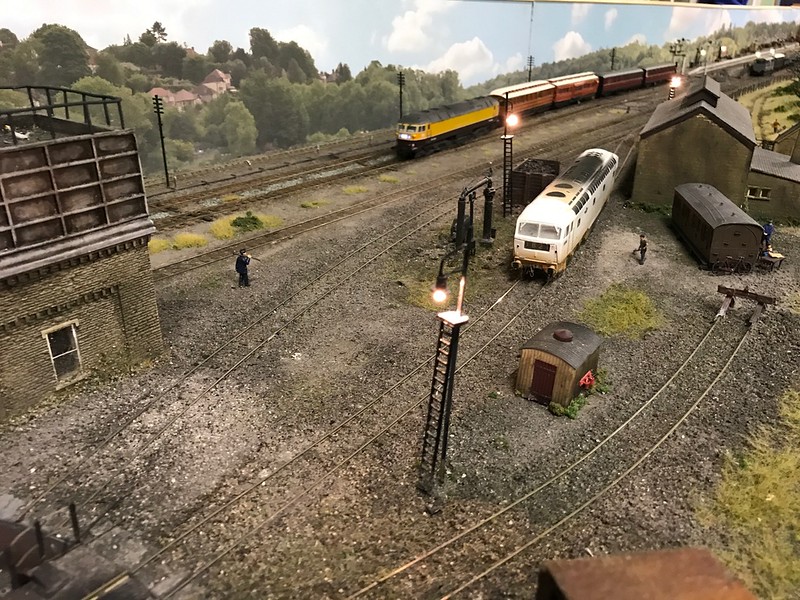
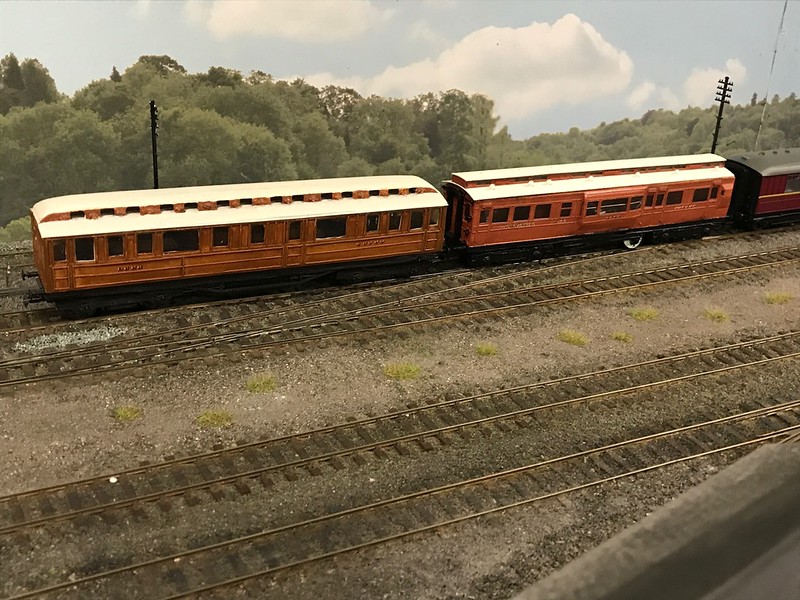
Last Friday was the monthly running session for Northwick, the theme for this month was unique/unusual prototypes and there was a great selection running.
Kestrel is seen pulling into the station
DP2 was also seen arriving with the Hawksworth dynamometer car in tow
Lion was resting between duties
Kestrel passes lion with the great northern directors saloon and the LNER dynamometer car in tow
a close up of the great northern directors saloon and the LNER dynamometer car
Gas turbine prototype 18000 also made an appearance.
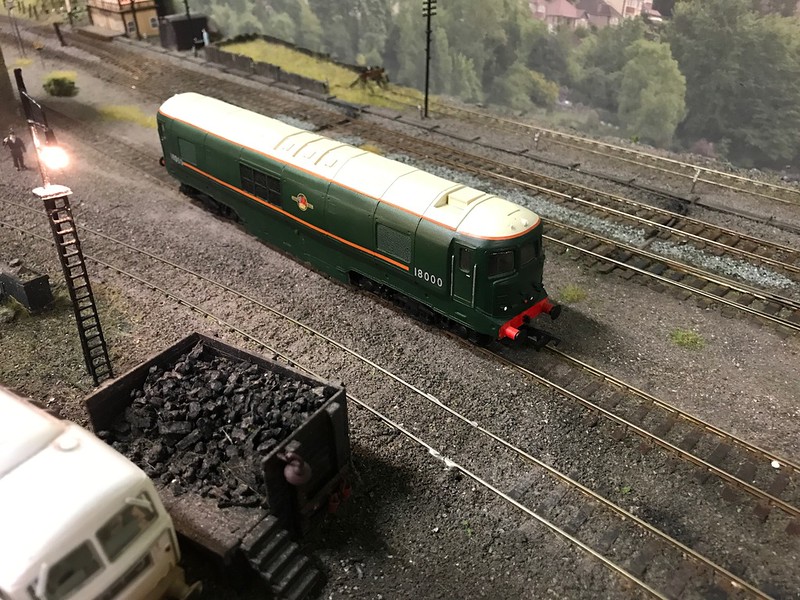
Lion, kestrel and 18000 are seen posing in the engine yard.
De Glehn class "President" is seen here on the way to the turntable
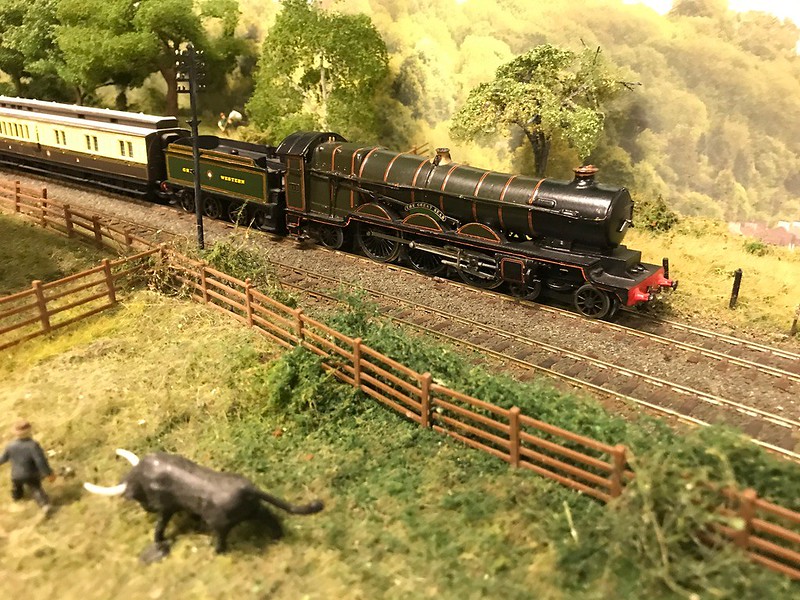
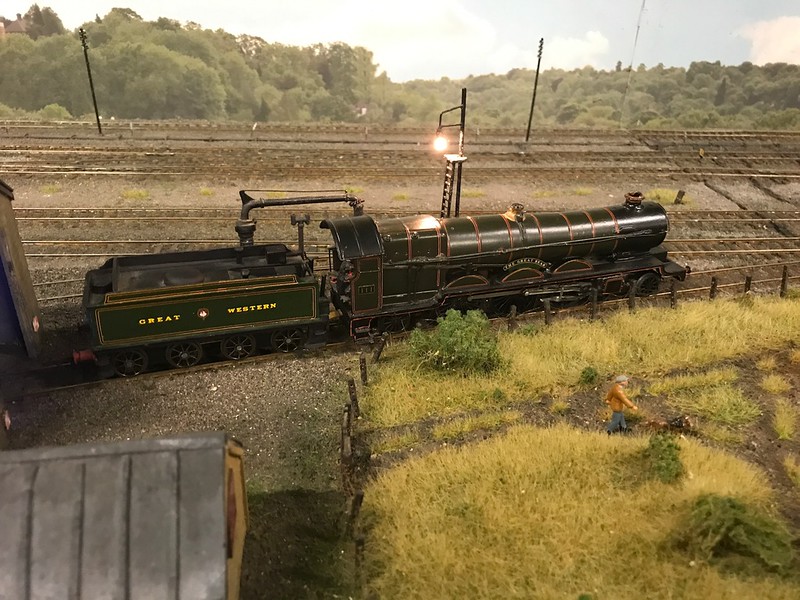
The only 4-6-2 paciffic built by the GWR "The Great Bear" arrived.
 which was followed by a strange looking beast, a Dean goods locomotive with pannier tanks added to the side of the boiler along with condensing gear and Westinghouse brakes.
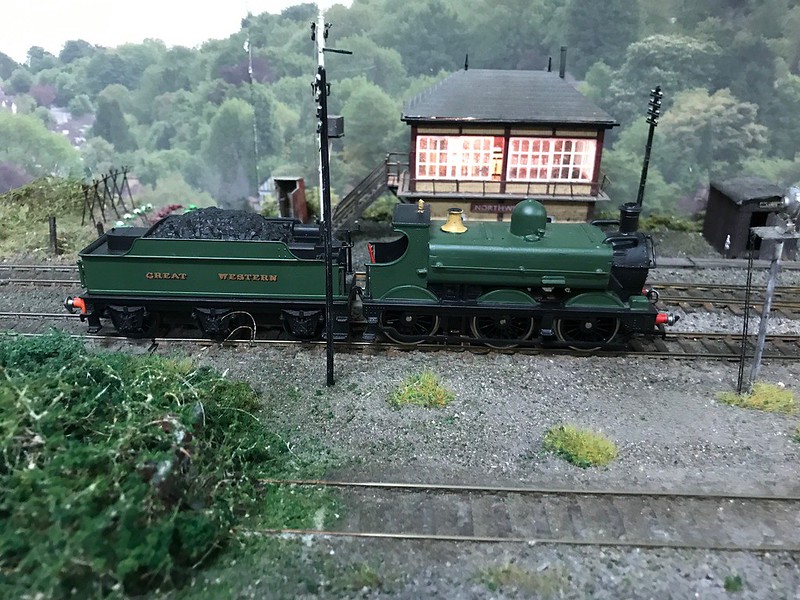
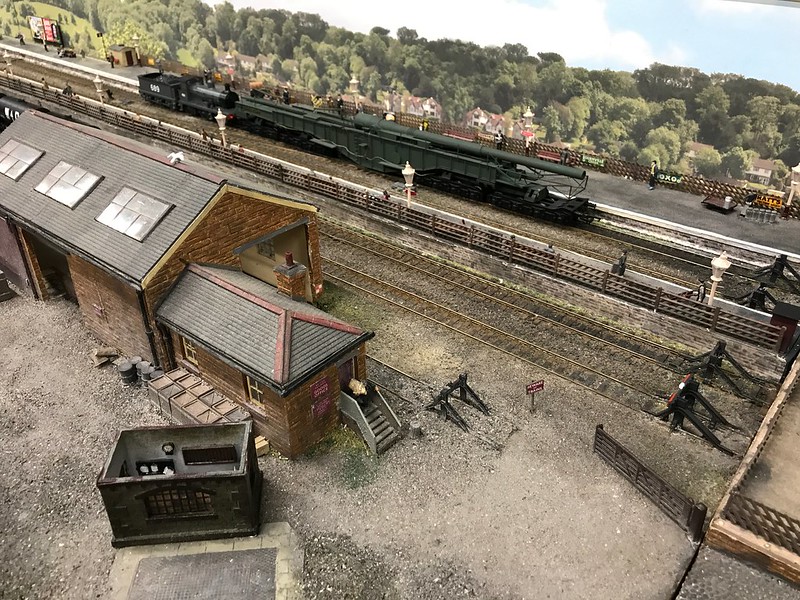
 The Duke of Gloucester also made an appearance with a freight train which consisted of the 12 axle GWR Crocodile L with flat girders, 12 axle GWR Crocodile L with the well girders, 6 axle 40 ton LMS well wagon, GWR Crocodile F, GWR Bogie open wagon (known as a Tourn), GWR Mink F and LMS 40 ton bogie brake van. All of the wagons except the last 2 have been scratch built by Tim Thomas.
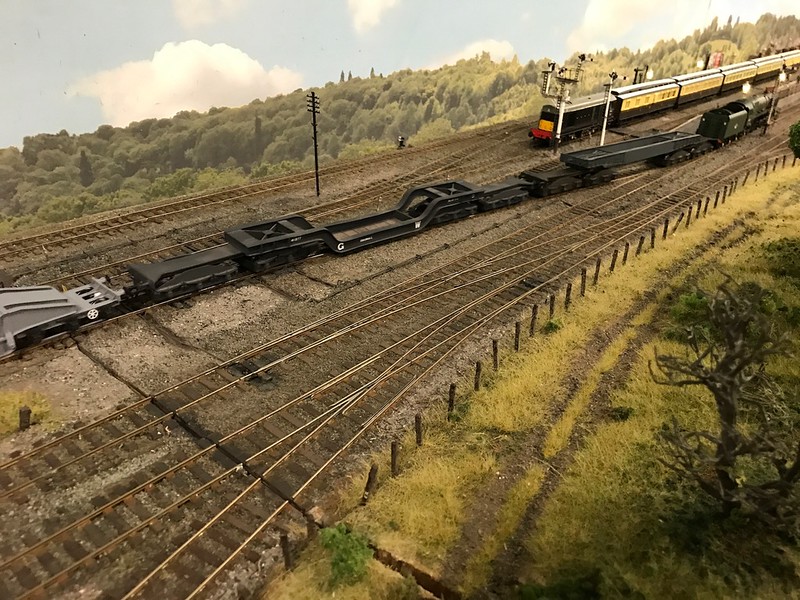
 Although the freight train only consisted of 7 wagons the total length was just under 6.5 ft!
-
5
-

Northwick a oo gauge layout by Twickenham & District MRC
in Layout topics
Posted
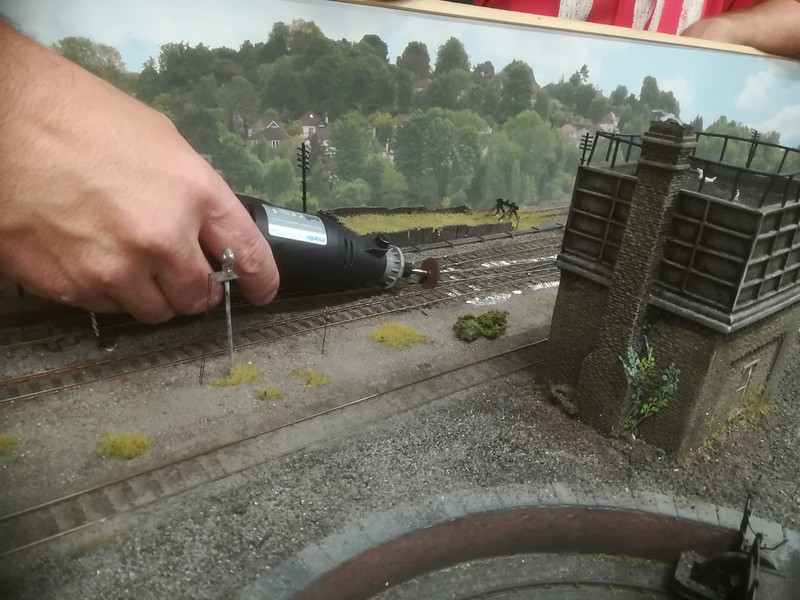
After all of the destruction the reconstruction has now started, the first part was to put down a layer of cork where the track will be going, we then soldered on the dropper wires to the points and tested them out one more time to ensure that the position of the points were correct before drilling the holes in the base board for the droppers.
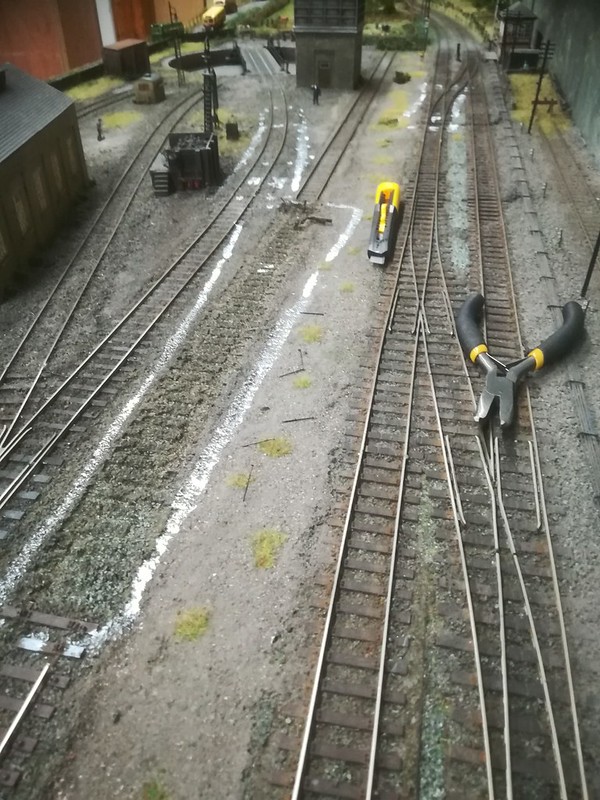
once the points were in the right place we then made a start on making the straight section of track, we decided to make the straight parts of the track from the copper clad sleepers and rail in order to make use of what we had left over from making the points.