


Chris64B
-
Posts
180 -
Joined
-
Last visited
Content Type
Profiles
Forums
Blogs
Gallery
Events
Exhibition Layout Details
Store
Posts posted by Chris64B
-
-
The shed is looking great! Brick work looks nice and the complex roof structure is neat - was it copied/inspired from something or just made up on the hoof - either way it looks excellent.
")
-
Just followed the link to this from one of your other posts - glad I did, its superb!
Love the interior detail - great stuff!
-
 1
1
-
-
Arrgghh nearly a year has gone by since I last updated this thread! If anyone is still here I apologise!
Modelling work has taken a back seat for a little while now as we moved house to something of a 'project' and I've been up to my ears in plaster dust, sawdust and paint for a good few months now - see below!

The poor layout is back resting on it's side covered in dust sheet and might stay that way for a little while longer until we sort out somewhere in the new house to get it running again - my poor son is a bit down about it as Father Christmas brought him a 'Flying Scotsman' and he's yet to give it a test run, but we've bought a few coaches for it and some crew figures to pop in the cab.
Hopefully I'm nearly ready to sort out a workshop room which will at least mean I can get a modelling bench set up and carry on with some of the scenery and rolling stock and I may also take the opportunity of having the layout on it's side to wire up some of the remaining point motors etc.
Till next time!
Chris
-
 4
4
-
 4
4
-
-
Just catching up after a bit of an absence from the forum - enjoyed seeing all your work on these locos, they look fantastic.
I particularly like the side by side of 08 623 - great work!
Cheers, Chris
-
1
-
-
Enjoying the new photos, thanks for updating us Peter!
Nice to see some of the yard and 'shed to be' - what are your plans for it? Can you share an in-progress pic?
Cheers, Chris
-
Just checking in as it's been a while - it looks AMAZING!
Well done, really fantastic stuff with the scenery and details - keep the pictures coming!
Chris
-
Maybe one of the Torro Rosso drives will be bumped up to the 'senior' team? Peter Ghastly (Pierre Gasly!) I assume over Brendon Hartley?
-
Perhaps it'll end up being a swap, with Sainz moving to Red Bull? Or is he going somewhere else?
-
P.S. Where did you get your barrels from?
-
I have limited space. So here are a few pictures of my set up.
The stock is stored underneath on storage trays I have built in the four cabinets that the layout is on.
 IMG_20180723_102648.jpgIMG_20180723_102706.jpgIMG_20180723_102730.jpgIMG_20180723_102813.jpgIMG_20180723_102835.jpg
Nice little layout, just up my street!
Weathering and grimyness looks spot on!
I'm impressed by the tidiness and organisation of your set up in that post above, puts my chaotic garage and messy workbench to shame - must try harder!
Cheers, Chris
-
1
-
-
Hi Rory,
Looks like a nice layout, and my sort of time period! I'm looking forward to seeing how it progresses.
One suggestion about your sea wall - I wonder if the walls you have still look too much like dry stone walls, rather than something sturdy enough to act as a sea defence? I was thinking that as they are there to protect the railway they would have probably been pretty serious concrete strucutres, strong and high enough to protect the railway during storms. If you made them higher and wider in that way, you could probably squeeze in a footpath/prom on top, with suitable railings and steps down to the beach - might add some extra interest?
Cheers, Chris
-
1
-
-
Thanks Mike!
Yes I found a few different methods for painting walls and in the end, it was easier to get a good result than I thought it might be. The main tip from me would be to wait until the initial brick colour is thoroughly dry (at least overnight) before doing the mortar wash otherwise you do risk wiping it off assuming you are doing both in enamel.
-
Hi everyone, if indeed anyone's still there after I’ve been so lax at updating the thread recently!
As mentioned in my previous update, my most recent efforts have been on the retaining walls and viaduct and I finally made a start painting them.
There’s still more to do, but I’m pleased with the results so far, I went with red brick (Humbrol matt enamel 70) in the end and I’ve been enjoying the process of weathering them, first with a mortar wash (Humbrol matt enamel 121), trying not to be too even with this - it’s surprising how much it lightens the initial brick colour – and then dry brushing here and there with various shades of brown, grey, white and green in both enamel and acrylic to build up the tones and variation.
See what you think…
The other thing I’ve been playing around with is trying to improve the smooth running of stock over the points into the yard. I realised that some wagons were derailing as they were pushed across the points because the moulded Peco check rails allow too much movement away from the rail head, particularly with the ‘re-wheeled’ wagons that run finer Hornby or Bachmann wheelsets. So, a quick bit of plasticard strip later, stuck against the inside of the moulded check rail (see pics below), and I can now shunt whole trains of wagons backwards across the points, on a curve, without any derailing! I’m amazed how much difference it’s made. The older Lima locos still with pizza cutter wheels also have no problems running through which is a relief.
It got me thinking about whether there was anything I could do to stop the wheels on some rolling stock dropping in to the gap in front of the frog and a bit of googling suggests there might be…
http://www.rmweb.co.uk/community/index.php?/topic/130072-point-drop-stop-for-peco-points/
So I might have a go with those (or something home made to do the same) next….
Cheers, Chris
-
4
-
-
I've been looking for some shed interior shots and found this one someone has taken of their EM gauge model of Derby...they've modelled the clutter really well....

http://
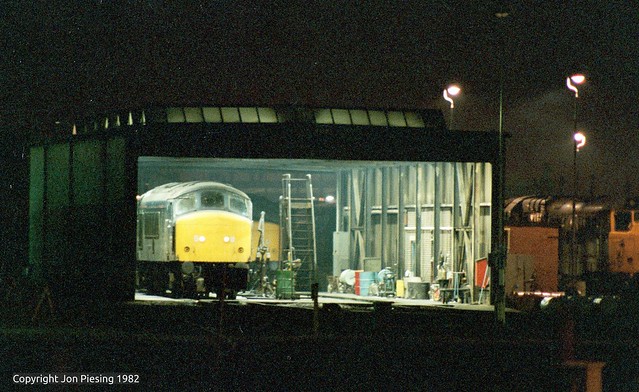
Class 45 at Derby by jon33040, on Flickr
-
10
-
-
HI everyone,
As usual when the nice weather hits, it's been harder to find time in the garage for railway modelling but I've managed to keep things moving in the right direction.
I've been doing a bit more on the retaining wall that leads to the viaduct so more photos of that once painting commences and I've finally finished detailing the last HST coach with painted interior, lights and passengers.
I've also finally wired up the yard lights and the remaining platform lights and installed three new street lamps in the car park, to replace the bulky old grain of wheat bulb lanterns, so the night time scene is starting to look a lot more atmospheric - here are some snaps...
Cheers,
Chris
-
9
-
-
Just been reading through the thread having missed the start of this project - Brilliant! What a great result, well done all!

-
2
-
-
Perfect, thanks for the advice! Will give it a try!
-
Thanks Dave!
Is it this stuff you mention:
https://www.deluxematerials.co.uk/gb/miniatures/37-tacky-glue-5060243900241.html
Or perhaps this one:
https://www.deluxematerials.co.uk/gb/miniatures/38-tacky-wax-5060243900258.html
Cheers,
Chris
-
The Bubble Car looks great Dave - tempted by one myself! The weathering you've done looks spot on!
I asked a question about your figures a little while back but it got lost in the excitement of the new videos so hope you don't mind me asking again - "Where are your figures from? They are very realistic. And are they all fixed in position or just balanced so you can move them around?"
Cheers,
Chris
-
Hi Rob,
Having been a great admirer of your other layouts but only having joined RM Web more recently, it's been great to find this thread and be able to see the progress from the start - liking how it's coming together so far and looking forward to more progress!
Cheers, Chris
-
I'm really impressed with what you have achieved here, this is going to be something else when it is finished!
Love that viaduct...
Andi
'If' it's ever finished!!
Thanks Andi!
-
Hi Kevin,
Just discovered this thread and your excellent work so far - the Class 50 is superb well done!
Really looking forward to seeing your developments in future.
Cheers, Chris
-
The layout looks superb in those photos Andy, well done!
Might have to head up to Cheltenham to see it too!
-
Thanks gents!
Just stunning coach work! The buffet car is fantastic.
What lighting have you used, the light look just right for the original Mk3s.
I got the coach lighting from Layouts4u - http://www.layouts4u.net/coachlighting.html - and went for the battery operated warm white LED with the latching reed switch. I was worried they were too bright when I first put them in but it was because most of the light was reflected back from the white interior, when the seats are painted it's about right.
-
1
-
")


Hill Street: 1980s West Midlands.
in Layout topics
Posted
Thanks for sharing your layout glasmonkey - it's fantastic, right up my (Hill) street!
Love the colours, weathering and the building construction - really captures the atmosphere of the era and area, great stuff.
Keep the photos coming!
Chris