Jump to content
 
  • entries
    172
  • comments
    1,473
  • views
    376,534

Bachmann Collett Coaches – bringing them closer?


Silver Sidelines

5,463 views

There has not been a lot of progress with the layout so instead some ideas on close coupling and corridor connectors for Bachmann Collett coaches.


8175696864_678b71b630_b.jpg

Coach Couplings as bought


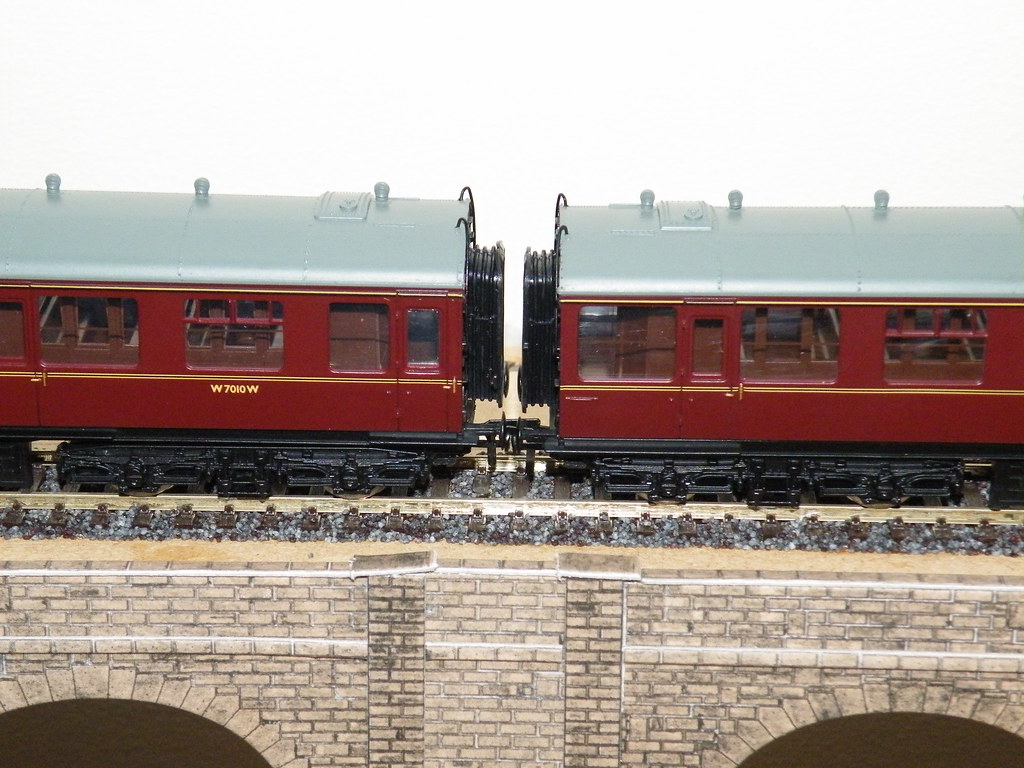
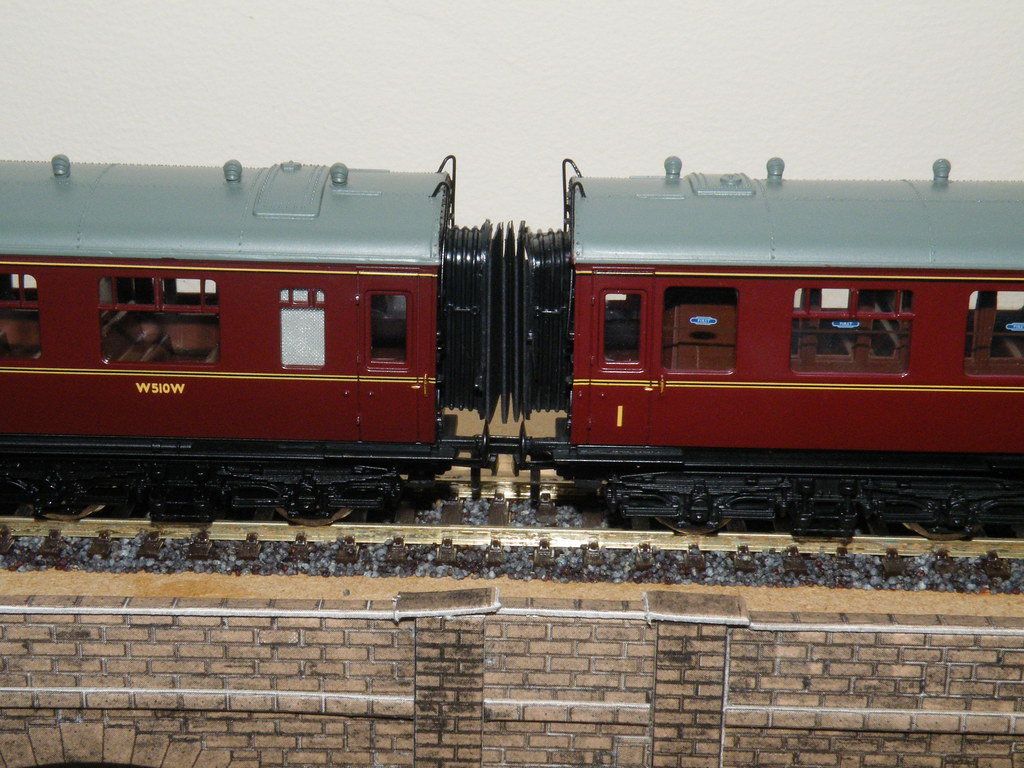
As with so many Ready to Run models there can be quite a gap between coaches. Can the gap be closed up? Is it cheap to do and will it significantly reduce the value of the original coach?


8175661257_884958c69e_b.jpg

Coach Couplings as modified


I can remember the introduction of the first Collett coaches by Mainline (Bachmann). At the time these coaches seemed to me to mark a step change in the increased degree of detail on offer. I purchased my first Collett coaches back in July 1984 from the then Cheltenham Model Centre, they came with rubber corridor connectors and wire water fillers.


8175656567_7909762cd3_b.jpg

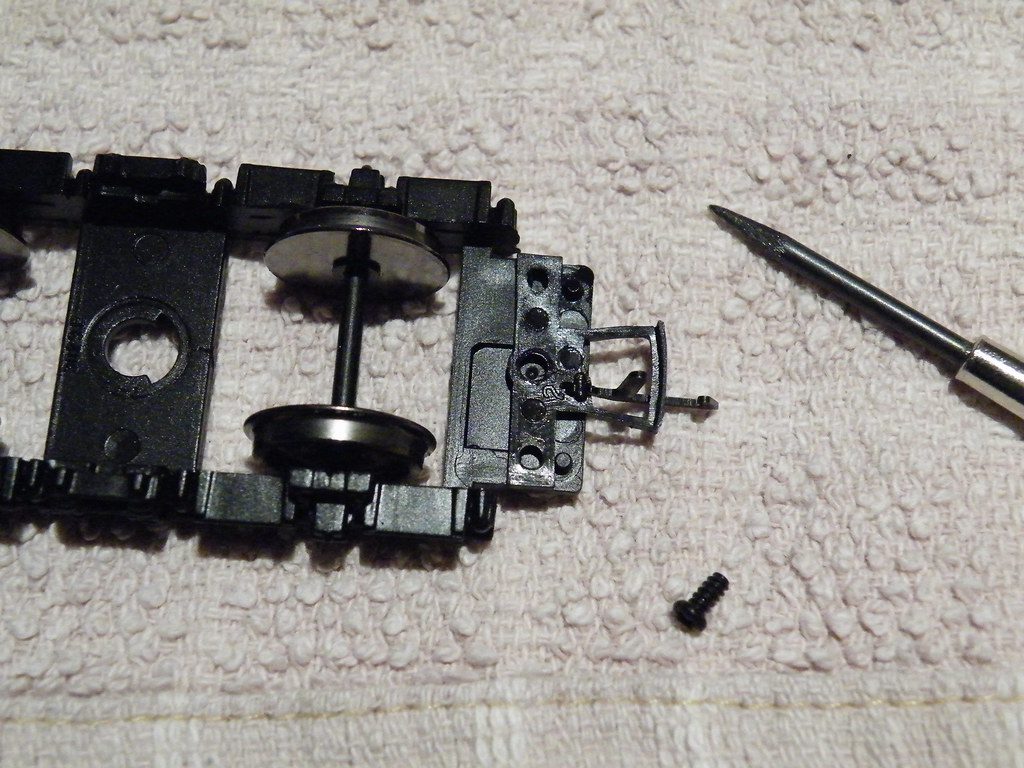
Moving the Couplings Inwards


The latest Bachmann Collett coaches are fitted with Bachmann Short Mini Couplings. The gap between the coaches can be closed up considerably by moving the couplings inwards. Remove the bogies from the underframe and unscrew and lift off the coupling. It can then be repositioned inwards taking care that is resting up against the two pegs that were used to hold it in its original position. The centre of the new hole for the retaining screw can then marked out prior to drilling. It also helps to shave off the back edge of the coupling so that it lies flat when screwed back into its new position.


8175651775_ee98c88f14_b.jpg

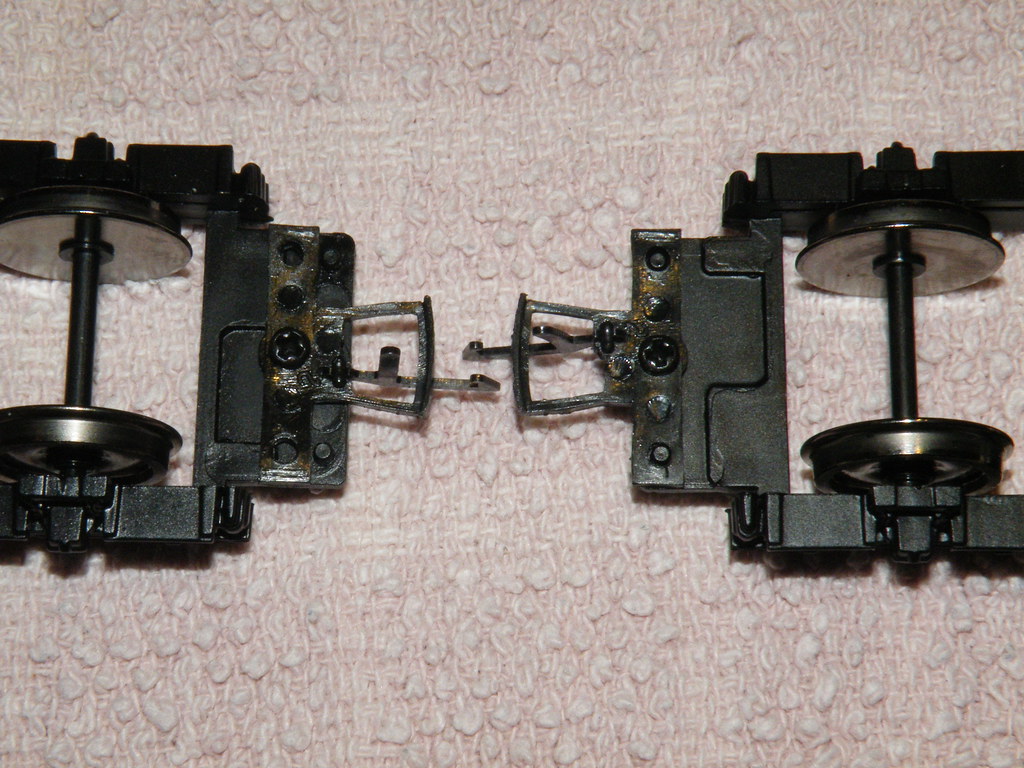
Old and New Positions


In my opinion the gap between the coaches is still very visible and I decided to see if I could improve the corridor connectors with the addition of some black ‘cartridge paper’ (Daler – Rowney A4 Canford 150g/m Jet Black card).


8176764474_e79a555ea5_b.jpg

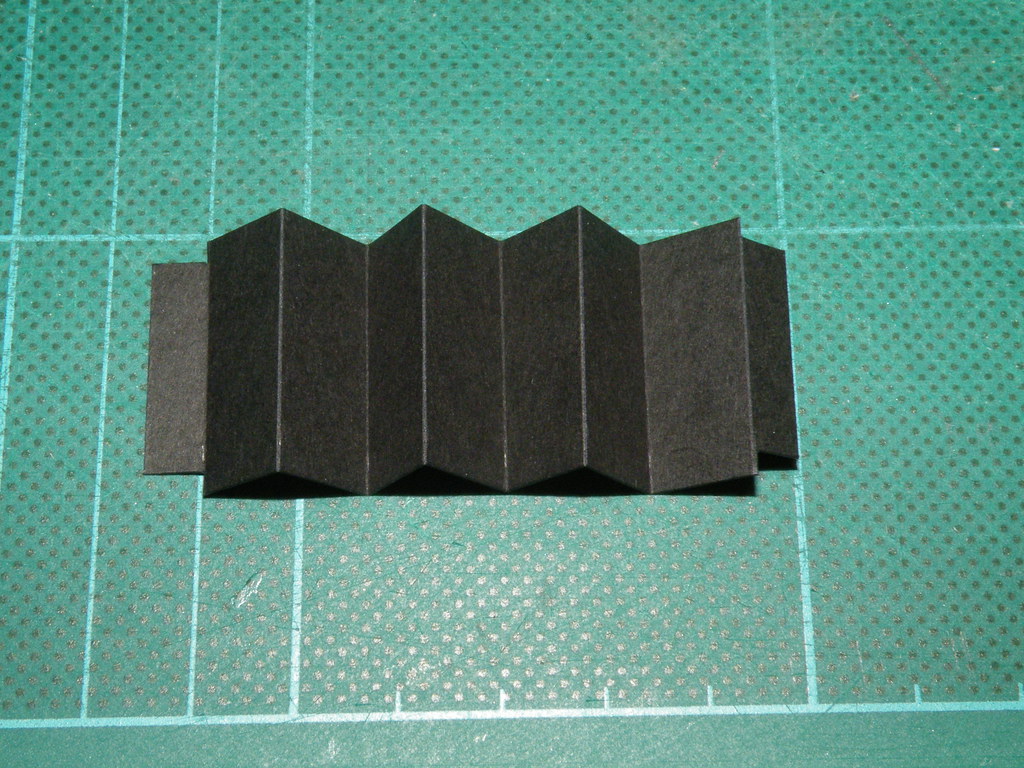
First Attempt – Single Concertina 27mm high with 12mm folds and 2.5mm indents


My first attempt was a single concertina, placed between one pair of coaches. Both ends of the connector had 2.5mm indents, top and bottom, to fit inside the existing rubber connectors which were left in place and untouched. The top corners were rounded to match the existing profile.


8176730523_84862c3e02_b.jpg

Two Single Concertinas – sufficient for a rake of three coaches


I thought – quick and simple and looks quite good


8176727767_c6a34b61be_b.jpg

Two Coaches with a Single Concertina


Unfortunately whilst the rake of coaches would handle the smooth curves on the layout the arrangement with a single concertina could not accommodate the ‘S’ shaped movement at a crossover.


8179002050_2fe4e52dd8_b.jpg

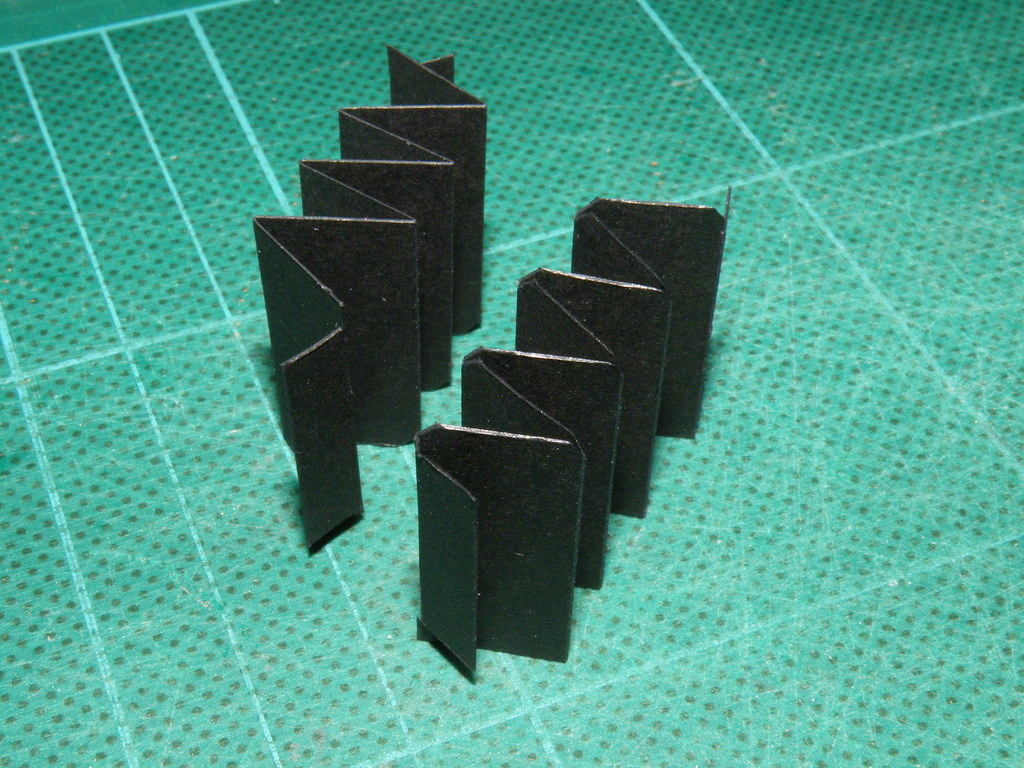
Individual Concertinas for each coach


My second and final solution was to make separate connectors for each coach that would slide against each other when negotiating an ‘S’ shaped crossover.


8178971871_12589c1e23_b.jpg

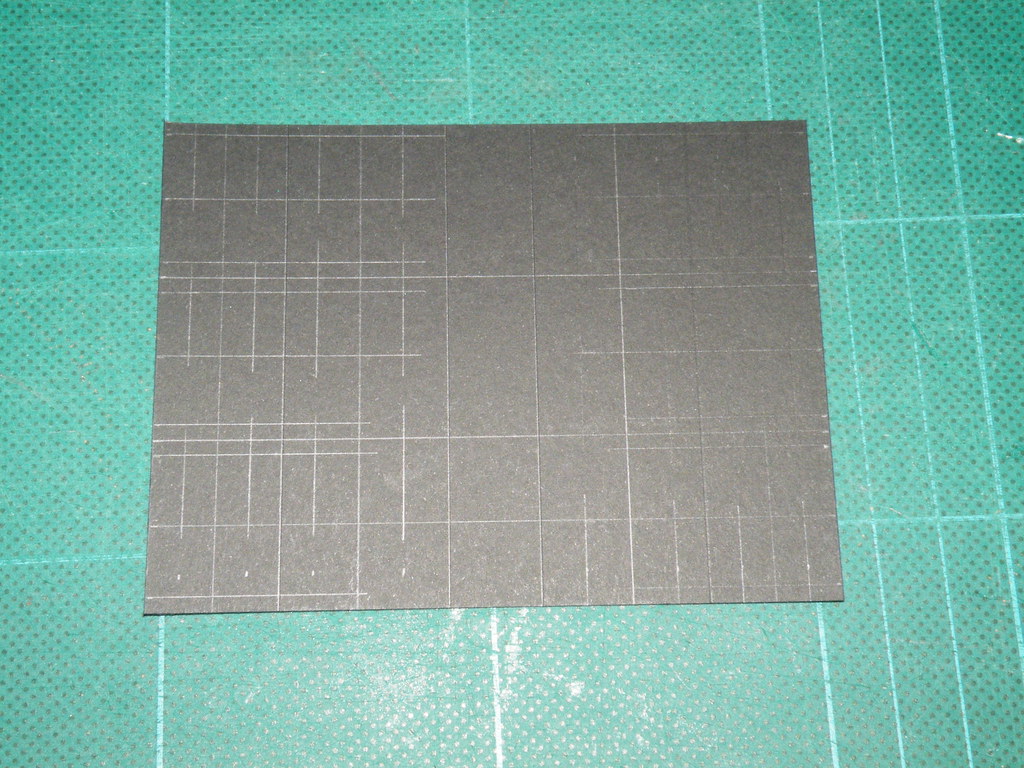
Marking Out Six at a time


To speed up the construction process I marked out six connectors at a time.


8178974201_7d86e785d5_b.jpg

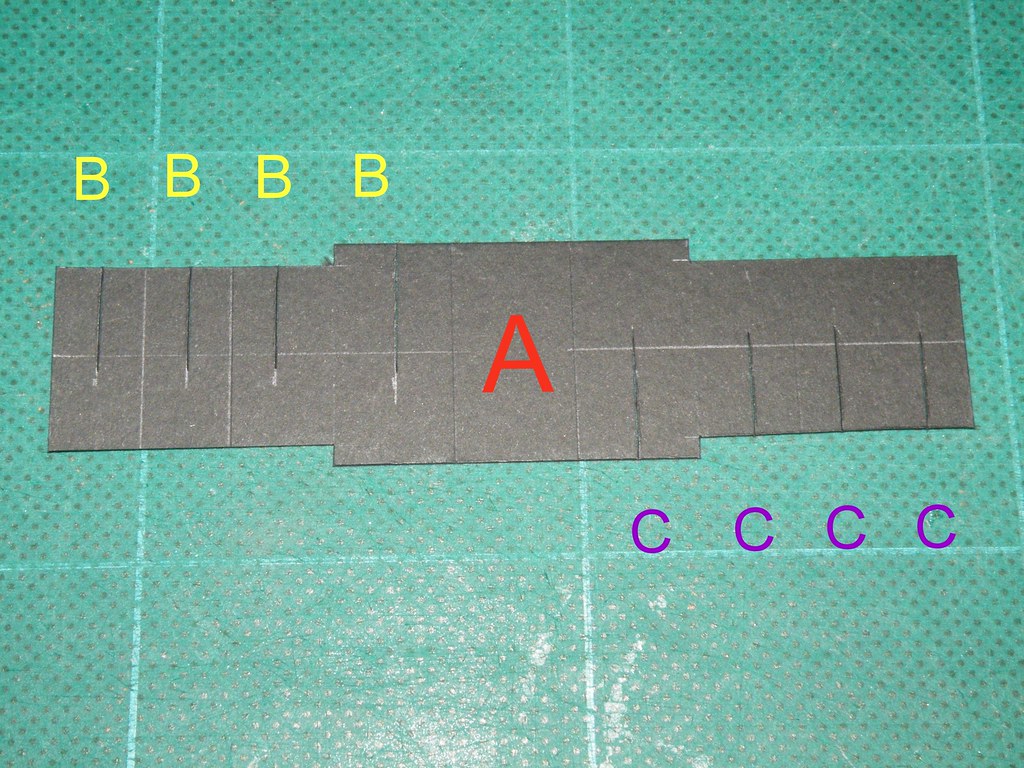
The final choice 27mm strip with 2.5mm indents, folds at 10,10,12,14,14,14,12,10 and 10mm


The centre panel ‘A’ is the rubbing plate between the coaches. There are four cut lines ‘B’ from the top and four cut lines ‘C’ from the bottom which are used to assemble and hold the connector together without the need for glue. The completed connector is a ‘push fit’ in the existing rubber connector and is held in place by the thrust from connector on the adjacent coach.


8178997528_55196e83ee_b.jpg

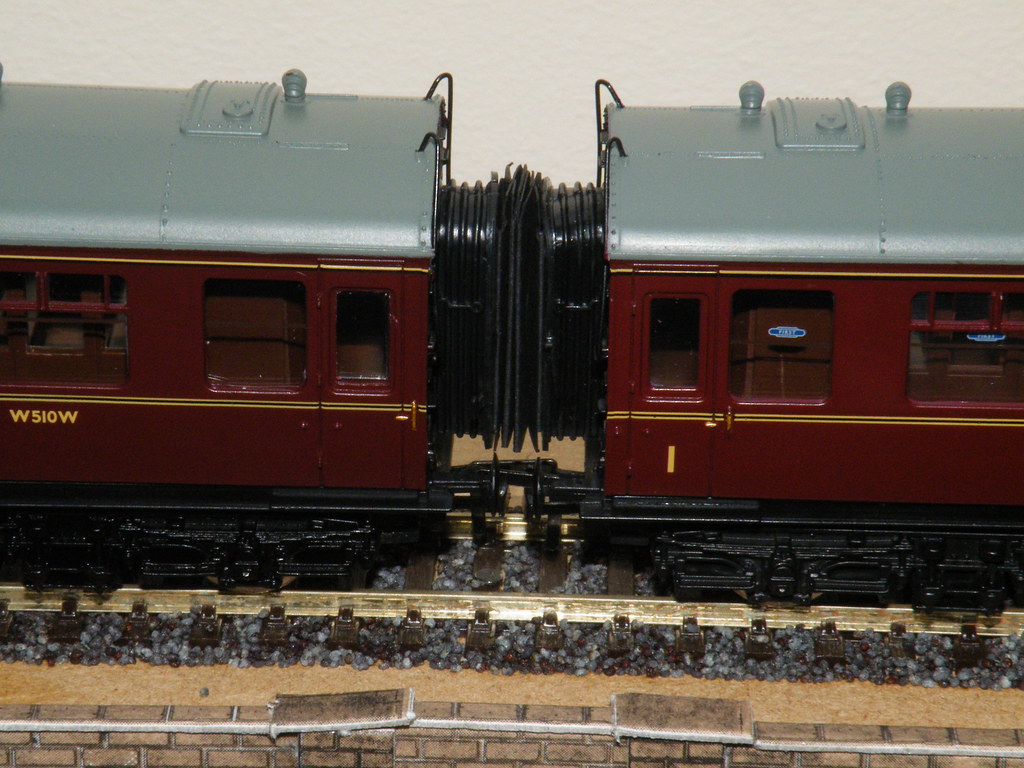
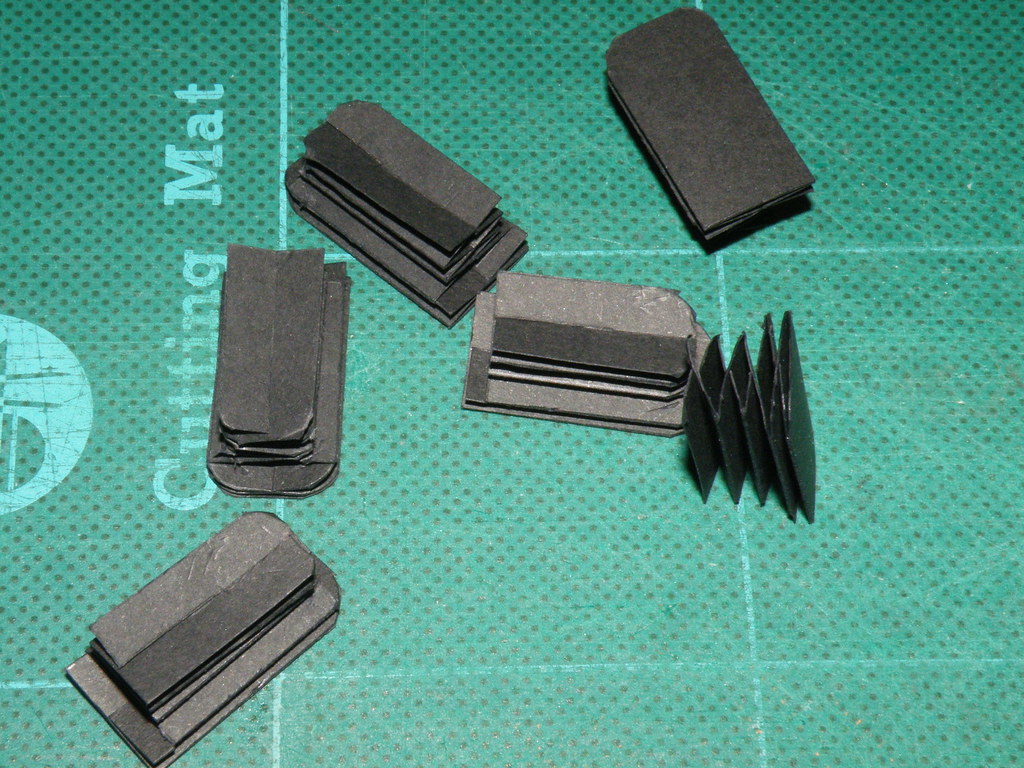
The Final Product - two individual connectors - one for each coach


Not bad - I would say. Cheap, relatively quick and easy to do and reversible should the coaches need to be sold. Must go and see if I can use the same approach on my ex-LMS panelled coaches?


Addenda


Four weeks later and I have to admit to a fault in the design posted at the beginning of November. I have discovered one set of Peco Curved points on the layout that would not accommodate the original design of connectors. The problem is that the ends of the connectors were too narrow and would slide apart and then lock. The solution is straight forward - the rubbing plates need to be at least 14mm wide. You can either glue on a separate new rubbing plate 14mm wide or the connector can be remade as detailed above using the updated sizes.

  • Like 14

11 Comments


Recommended Comments

Looks very good to me and certainly a simple and cheap option that improves the coaches no end. Will have ago at this.


John

Link to comment

John, Excellent - it has taken me some time to get round to this little job. I think using quality black card is key to the job.


Good luck


Ray

Link to comment
  • RMweb Premium

Excellent tutorial - very much like the coach connectors. Have you ever thought of Spratt and Winkle couplings. I tried this for the first time a few months ago and found them surprisingly easy to do. They are also very cheap.

  • Like 1
Link to comment

..... Spratt and Winkle couplings....... surprisingly easy to do. They are also very cheap.

Thank you for the comment - I like cheap and easy. I shall investigate further. I tend to keep coaches in fixed rakes so that is OK. Did you keep a Bachmann / Hornby coupling on the ends of the rake?


Regards


Ray

Link to comment

Addenda


Seems that I had not done enough testing:


Four weeks later and I have to admit to a fault in the design posted at the beginning of November. I have discovered one set of Peco Curved points on the layout that would not accommodate the original design of connectors. The problem is that the ends of the connectors were too narrow and would slide apart and then lock. The solution is straight forward - the rubbing plates need to be at least 14mm wide. You can either glue on a separate new rubbing plate 14mm wide or the connector can be remade as detailed above using the updated sizes.


Regards


Ray

Link to comment
  • RMweb Premium

This great stuff Ray(now why didn't I think of that) A simple approach with excellent results.

Need to subscribe to your blog and find some time to go through all your old posts.

  • Like 1
Link to comment

This great stuff Ray(now why didn't I think of that) A simple approach with excellent results.

Need to subscribe to your blog and find some time to go through all your old posts.

Thanks, it is great to get encouragement.


Regards


Ray

Link to comment

Hello Ray,

I'm attempting to modify a pair of those 60' Collettes into a BR(W) dining car pair of 1960. To do this I need to fit bow-ends to the coaches. As I'd like to re-use those original rubberized corridor connectors, I'm wondering if you've any suggestions on the best way of removing them without damage?


They look like they might push theough, from the outside, but they may be glued on the inside rubber flange. So thought I'd ask before trying anything that might damage them.


Also, I'm wanting to fit NEM Pockets to these coaches, if you've any experience/advice in that arra.


As always, Ray, your assistance is appreciated,

Rick

Link to comment

Hello Rick


Hapy New Year!


Difficult questions - you wouldn't be asking otherwise!

.....the best way of removing them without damage?


They look like they might push theough, from the outside, but they may be glued on the inside rubber flange. So thought I'd ask before trying anything that might damage them.


Also, I'm wanting to fit NEM Pockets to these coaches, if you've any experience/advice in that arra.

As you say when you squeeze the rubber connectors they look as though they should push through / pull out.


I have to admit my cheap and cheerful solution was tailored to not dismantling the coaches as they seem rather fragile.  In the past I have been inside the Bachmann ex LMS panelled coaches (which also have rubber corridor connectors).  I cannot remember whether there was any glue but certainly I can remember that one or more were loose once the coach body was removed from the underframe.  I do believe that once upon a time these connectors could be bought off places like eBay, maybe even the Replica web site which up until recently still had Collet Coach bodies for sale.  (There is actually one still available on eBay as of 07/01/15).


I have not gone down the road of fitting NEM pockets - athough I have been very tempted with the ex LMS 68ft Restaurant Car.  I have a small collection of Bachmann pockets that have come with spare couplings which might be attached in lieu of the Bachmann mini coupling.  However I don't know whether there are adhesives that will bond the 'nylon' type plastic used to make the coupling pockets.  Once when I 'won' a bag of couplings on eBay there was a 'home made' pocket in white plasticard.  Now that would not be too difficult to make and could be fixed to the bogie using MEK / Butanone.  Again if there are only a small number to be made the plastic from CD cases comes to mind - you could use offcuts as packing if the height was not correct.


Let me know if you think of anything else to ask.


Regards


Ray

Link to comment

Create an account or sign in to comment

You need to be a member in order to leave a comment

Create an account

Sign up for a new account in our community. It's easy!

Register a new account

Sign in

Already have an account? Sign in here.

Sign In Now
×
×
  • Create New...