Jump to content
 
  • entries
    172
  • comments
    1,473
  • views
    376,532

Silver Sidelines

3,189 views

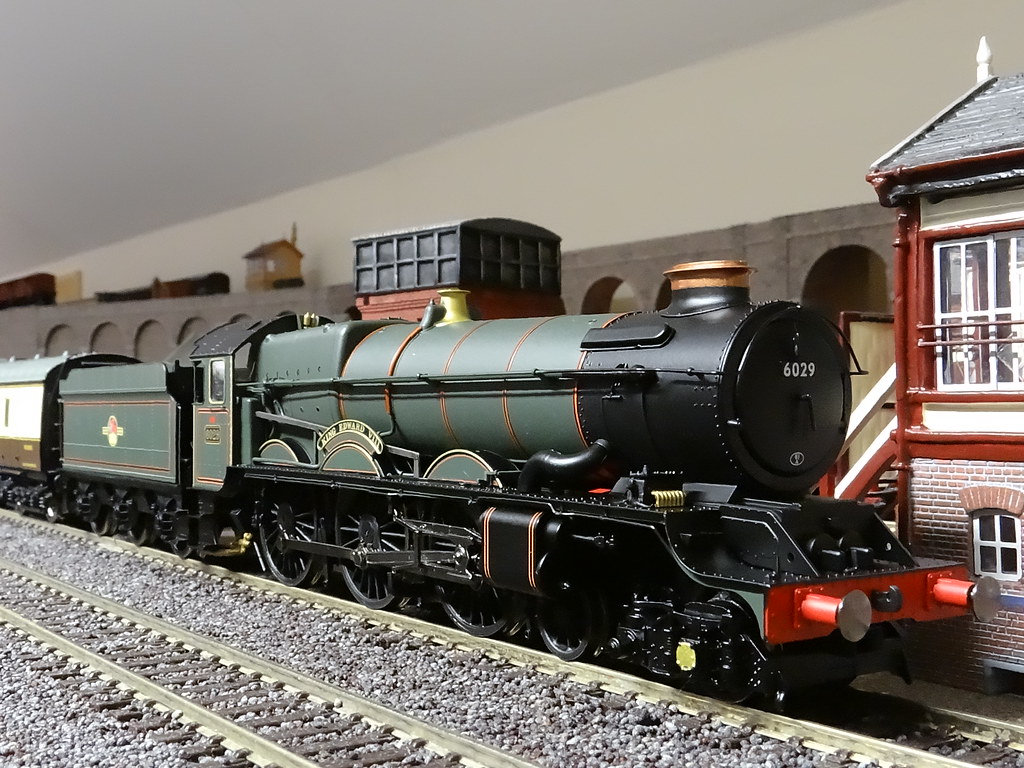
It is 1961 and here is a view of 6029 King Edward VIII with some chocolate and cream carriages behind it. This is the arrival of Hornby’s new King Class engine. The purchase was an ‘on the spur of a moment’ decision – well worth it I feel.

23315621721_90eac0acf3_b.jpg

Hornby 6029 King Edward VIII


Why 1961? Well the Great Western Archive has 6029 allocated to Plymouth Laira in March 1959 (as shown in my Ian Allen book for 1959). Also it has its last shed as Old Oak Common which agrees nicely with my Ian Allen book for Spring 1961 and Hornby’s shed code plate on the model.


I cannot vouch for the accuracy of the new model but the finish seems to me to compare very favourably with the latest Hornby Castles. Rumour has it that the spokes on the driving wheels are not quite the right shape but I have to say that this is not apparent when looking down at the engine running on the layout! My model runs quietly, smoothly and straight, and will handle seven coaches up and down and roundabout the layout. This is just the same as Hornby’s Britannia and I might be hard pressed to decide which of the two models I prefer.

23102425350_5e089ee9c1_b.jpg

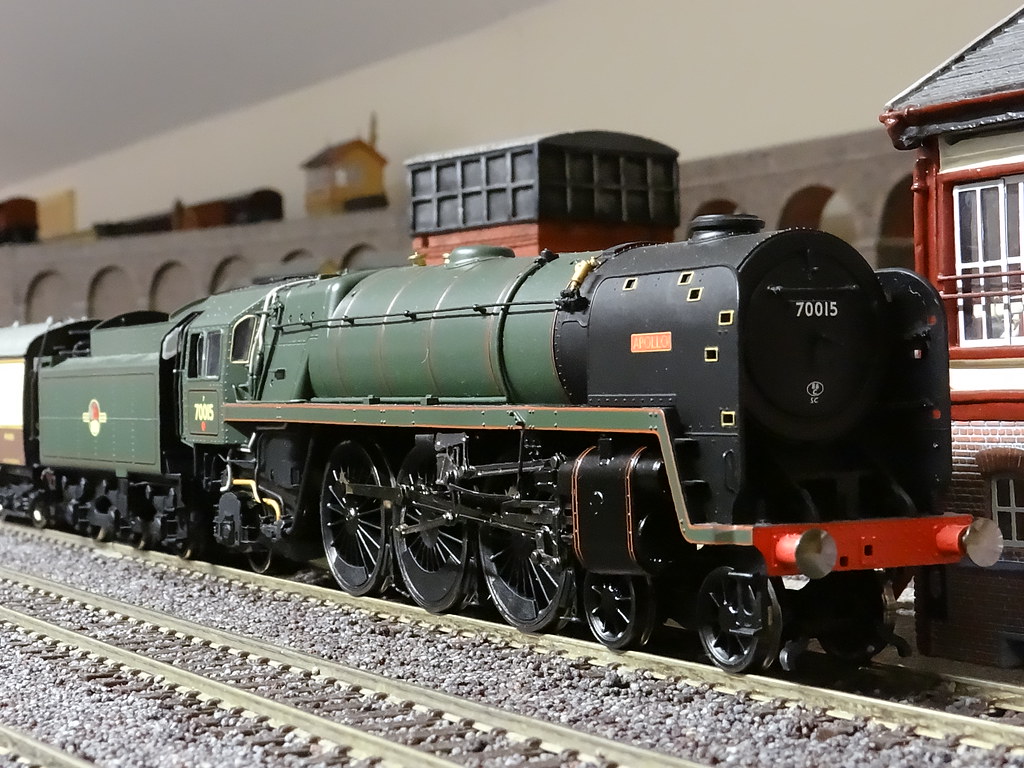
It is 1958 (see Footnote) and 70015 Apollo is just about to leave God's Wonderful Railway for Trafford Park (9E)


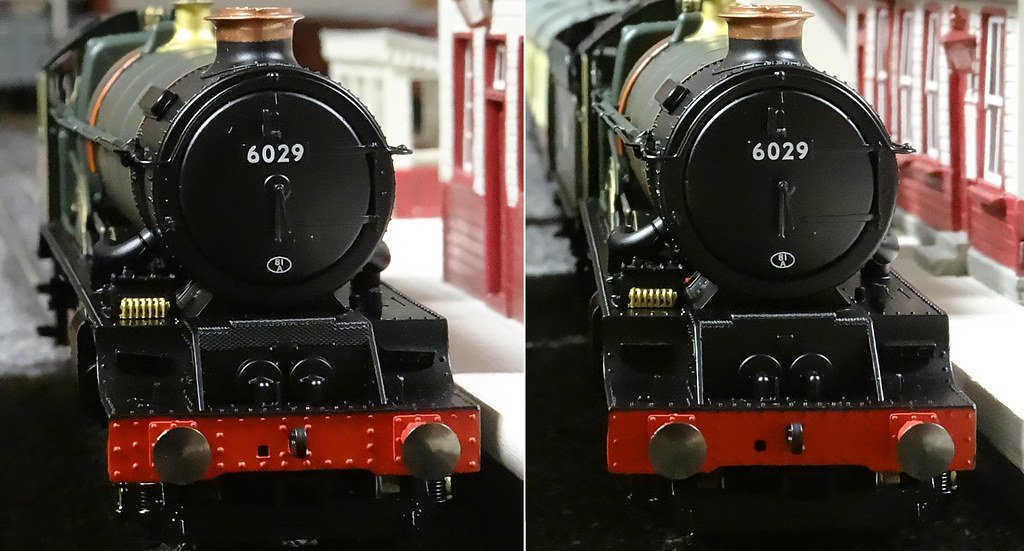
6029 King Edward will replace my earlier Hornby model of King William. King William was DC ready and to my untrained eye, quite well detailed. A comparison of the old and new models is quite instructive.

23398209755_db28d447e1_b.jpg

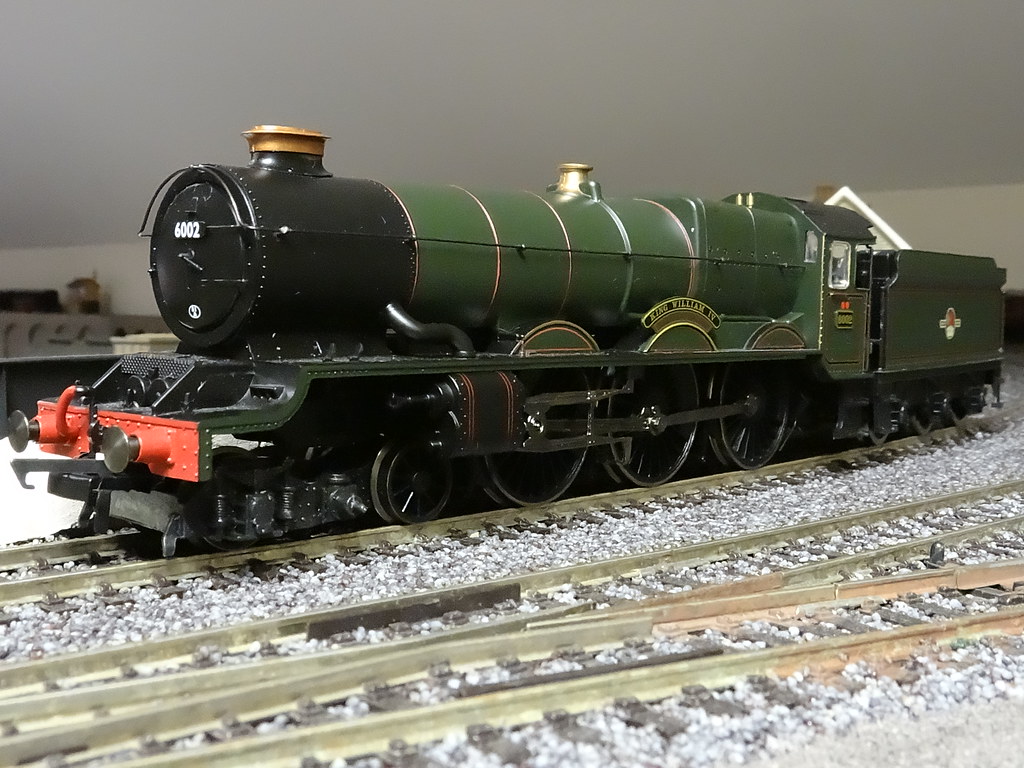
6002 King William IV, Hornby R2234


23372052676_e981d950a9_b.jpg

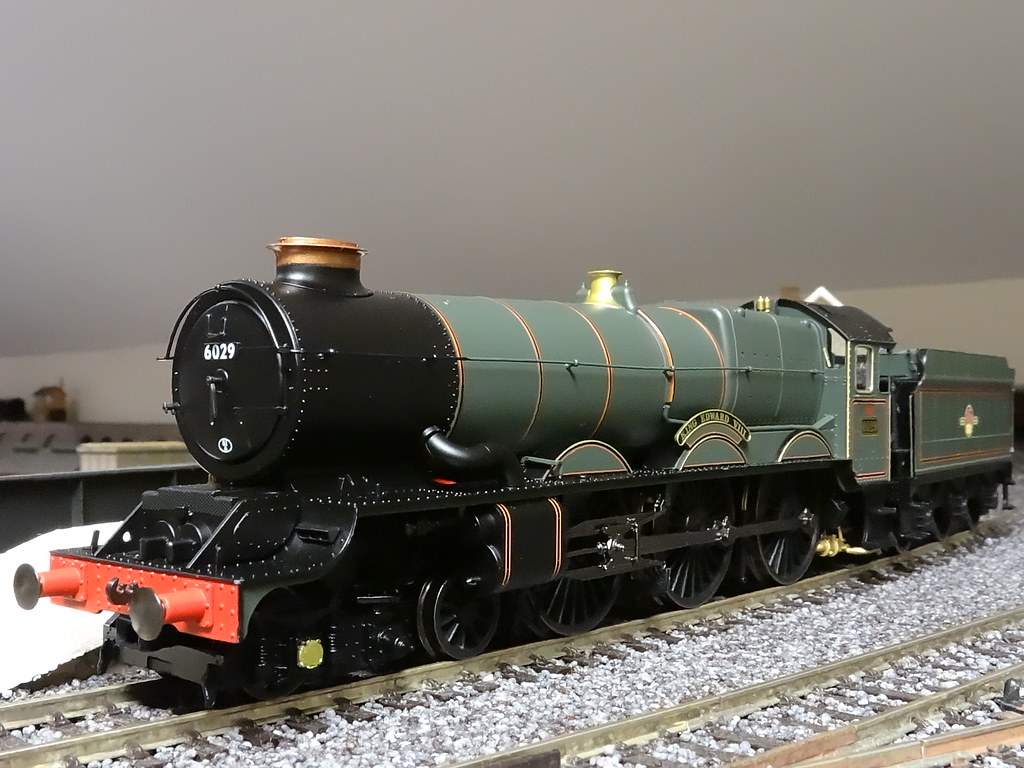
6029 King Edward VIII, Hornby R3332


Aside from the different shade of green there are other significant differences.

23030263559_c457d72c78_b.jpg

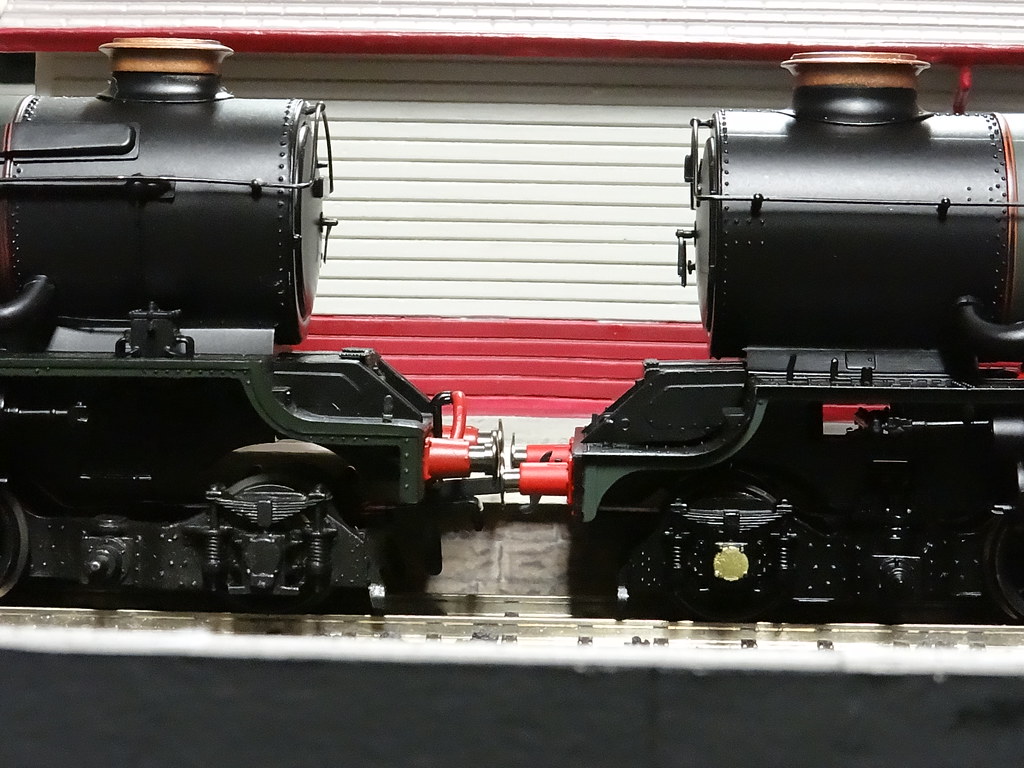
Head to head, King William left King Edward right


I always thought there was too much space between the bogie and the footplate on William and the view above shows clearly how the body shell of the old model had been raised (as were a lot of Hornby models). I am guessing that this was done to allow the buffers to clear the couplings.

22769810794_a24b0d05aa_b.jpg

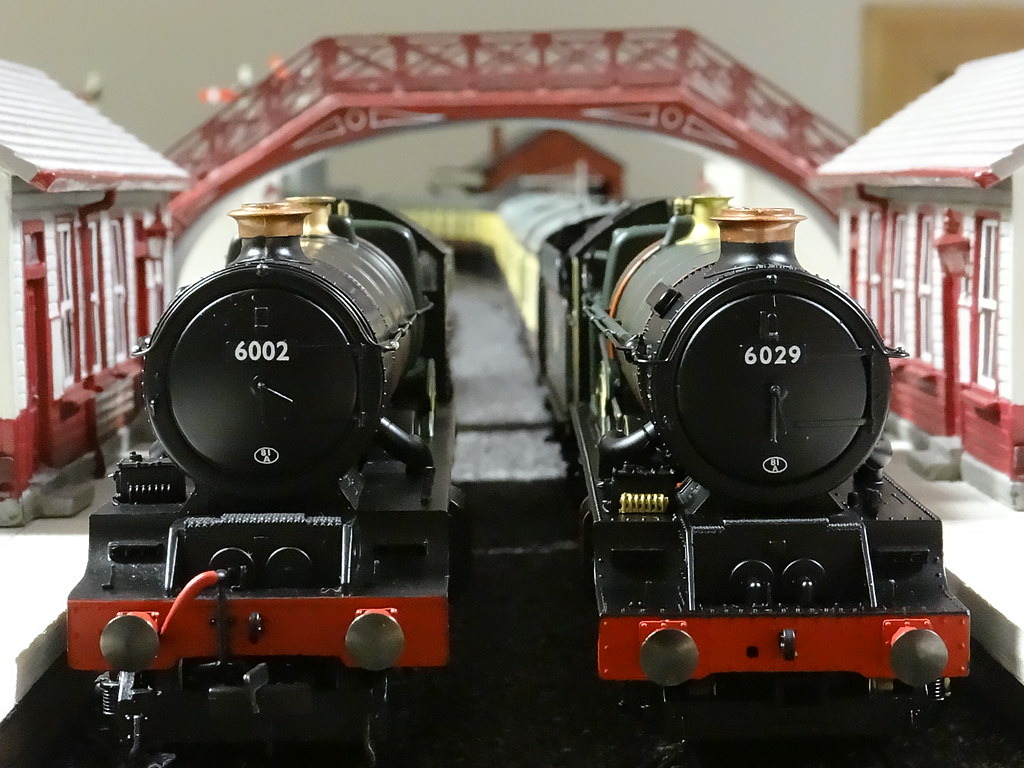
Side by side, King William left King Edward right


The view above showing the models side by side again shows William to be' raised up'.

23030259869_7eaf8a5e7a_b.jpg

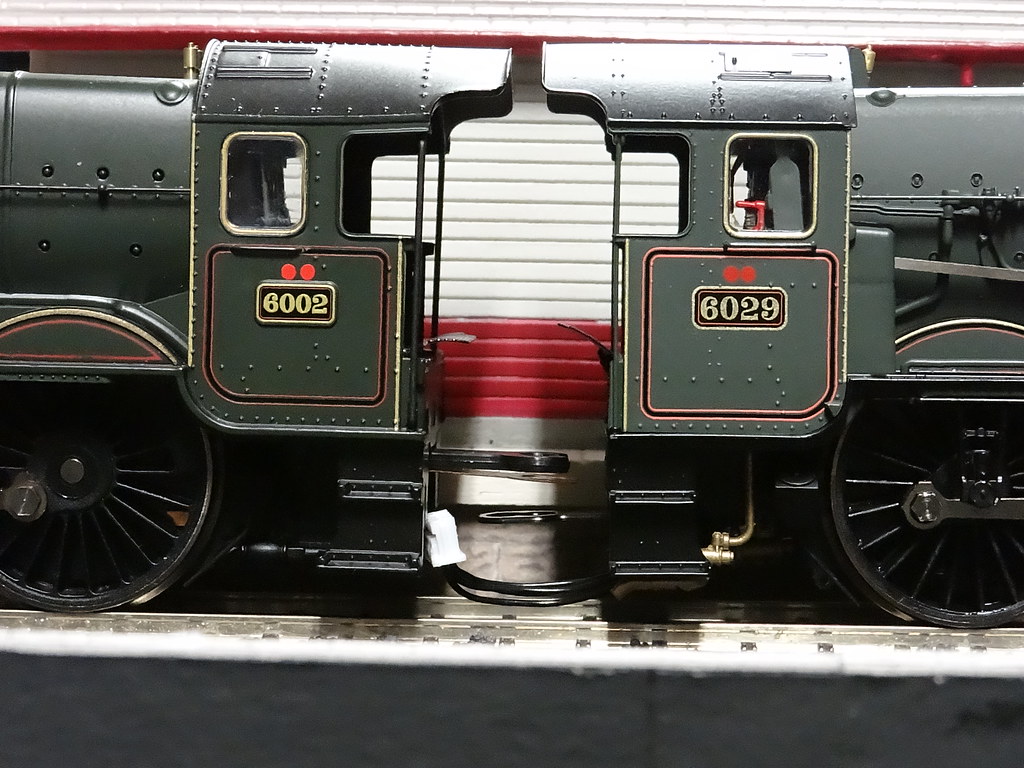
Cab to cab, King William left King Edward right


Surprisingly at the cab end Edward is now the higher. I think William’s cab looks tiny and out of proportion as if it had been shrunk to fit.

22771009363_404f958094_b.jpg

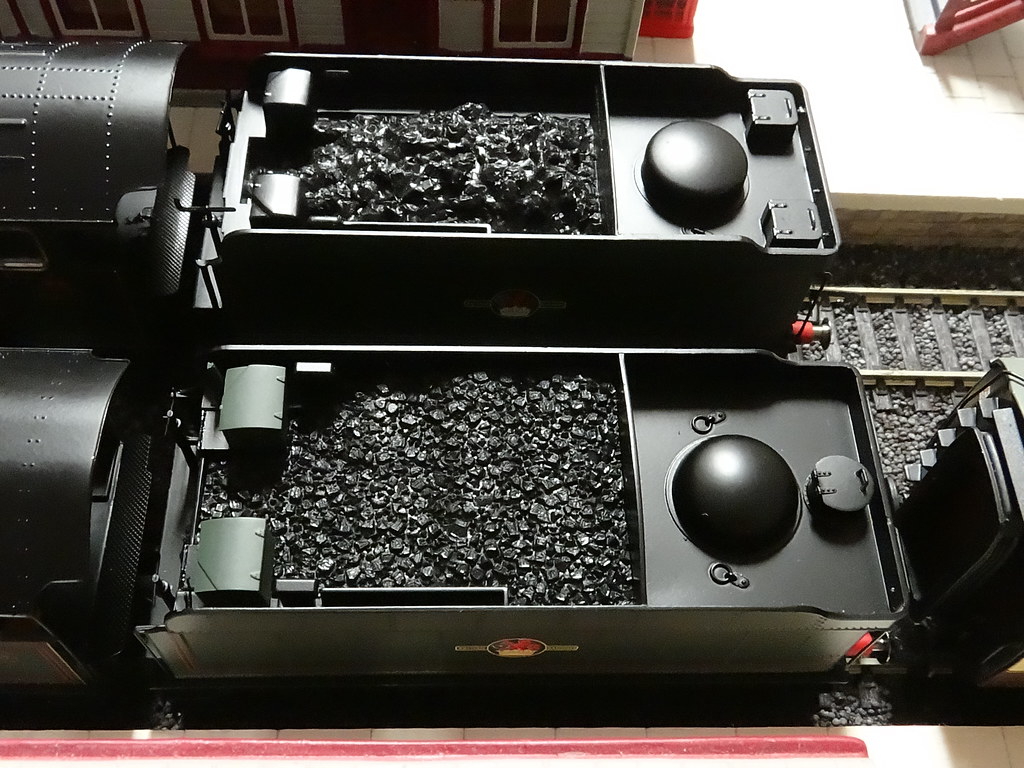
Tender tops, King William top King Edward bottom


I know even less about tenders than I do about engines, but William’s tender from the top looks to me to be a completely different beast to the one fitted to Edward.

22771042623_724961ae4f_b.jpg

King William top left King Edward bottom right


Perhaps when viewed from a greater distance the differences are less obvious? However what about the ‘wonky’ steps on Edward?

22628064384_9baec36181_b.jpg

Before and after fettling the front footplate steps


I am very pleased with King Edward and despite what follows I feel that Hornby have come up with a very good model.


It might seem that Hornby still have some Quality Control issues. Out of the box, both front footplate steps on Edward were loose and set at a jaunty angle. I was surprised to find that these steps were a separate detail with their own tiny spigots and matching holes on the footplate to fit. Well done those ladies in China – it took me five minute or more to get one set of steps back in place.
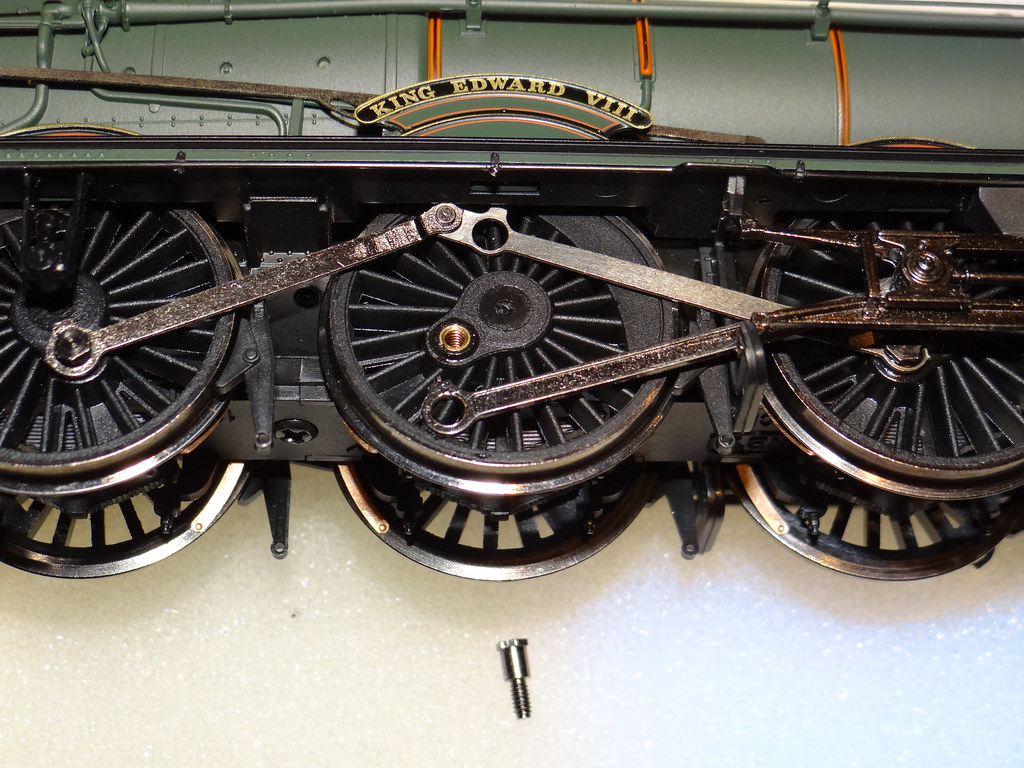
22874294850_ff1d5bb6b6_b.jpg

Oh dear!


My model had only been out of the box a few minutes before it shed a crank pin. There is supposed to be a spacer between the connecting rod and the coupling rods but this had escaped, never to be seen again. Not to worry I had a bag of Hornby spacers and would fit something suitable.
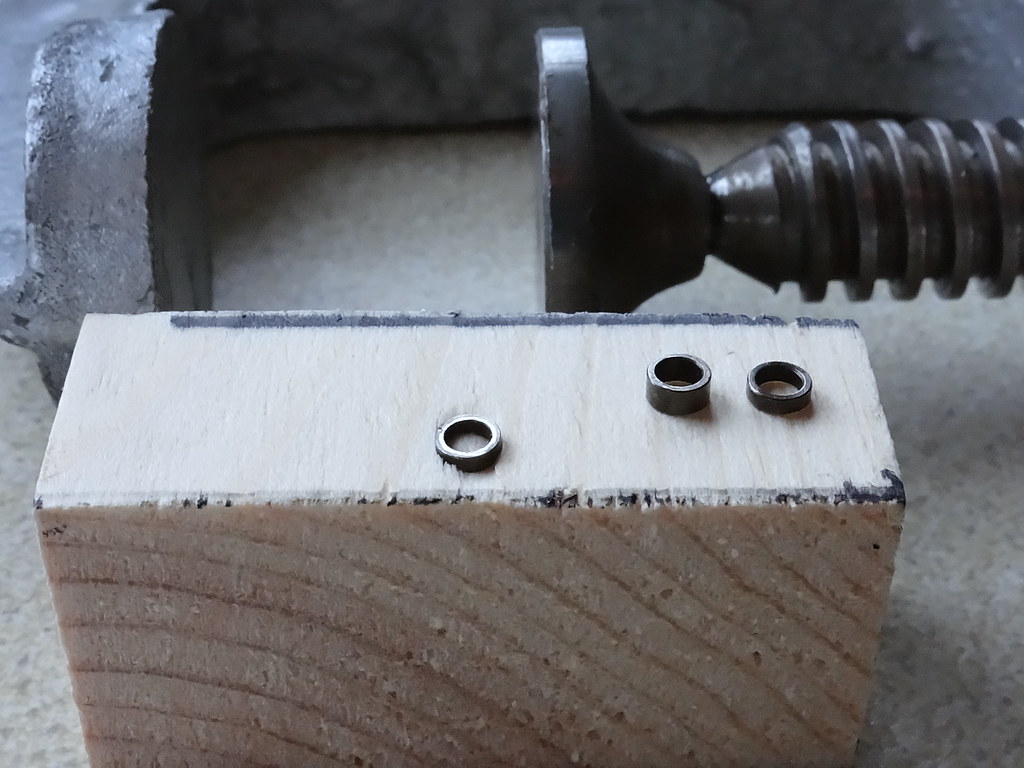
23056283879_8423d780c9_b.jpg

Hornby Spacers


Up until Edward, Hornby coupling rods seem to me to have come with either a big spacer or a little spacer. I have shown these two sorts of spacer in the picture above at the right hand side of the wooden block. The spacers on Edward are smaller again. I tried fitting my smallest spacer but I felt the motion was too tight. I would file down one of the small spacers. How to hold the spacer whilst working on the kitchen table? I used a small G clamp to press the spacer into a block of softwood and this held it sufficiently to allow it to be filed to size.

22722240334_4241f8b3db_b.jpg

Hornby New King Tender Wheels


The tender with my model felt very light and had a noticeable wobble. It seems that Hornby have removed some of the metal ballast weight to hold a speaker and that this has reduced the tender weight from around 72 gm down to 57 gm. Comparing wheel sets from recent models shows that the tender wheels that came with Edward are a slimmer profile. It is just a pity that they didn’t run true. I had to double check the tyres on the engine but these were still all regular Hornby profiles.


Well – I had better start saving as there are more options due in 2016.


Footnote


According to David Hey Apollo was allocated to Cardiff Canton (86C) late 1956 and only stayed 18 months before being transferred to Trafford Park (9E). Interestingly David indicates that Apollo only received its BR (WR) smoke deflectors in 1958 some six months before transfer to the BR (LMR) Region. It was during the 1958 works visit that the tender received a late crest, but it would be 1960 and a visit to Crewe works before a speedometer was fitted.


Addendum


24065765292_4262f5b2be_b.jpg

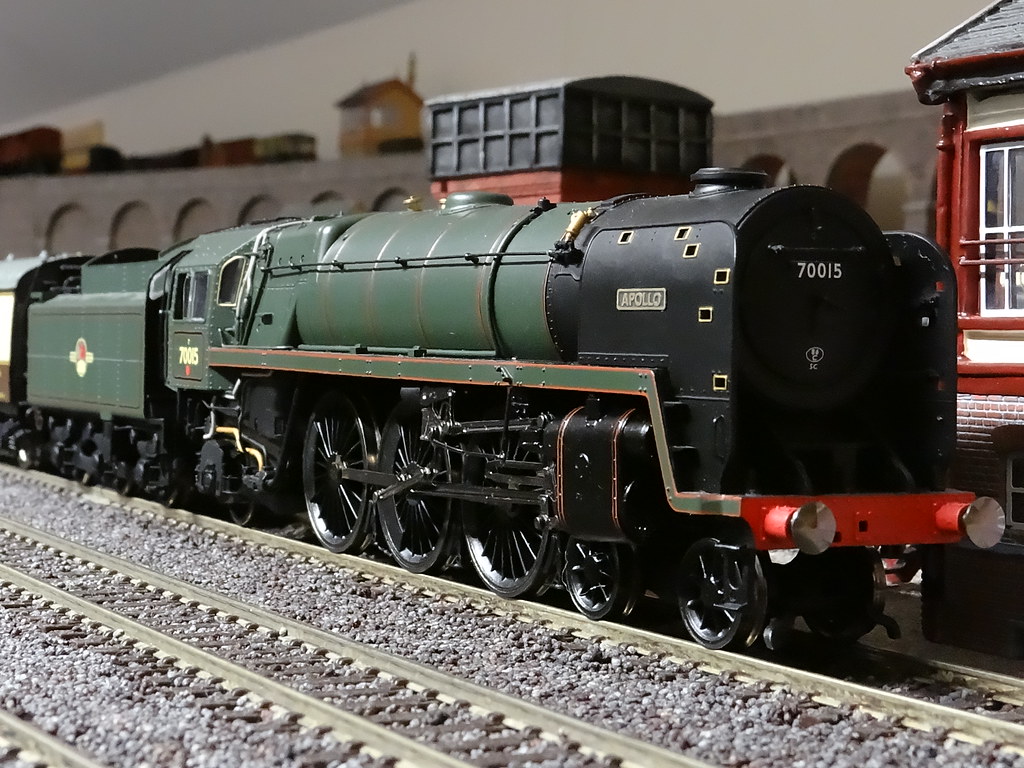
Hornby Apollo with its Xmas Present - a set of ModelMaster etched plates

  • Like 2

9 Comments


Recommended Comments

Interesting that Hornby, while going to the trouble of giving Apollo WR smoke deflectors, used a body moulding with the cover plates for the lubricator on the valance still in place when other releases had it removed. (70015 had lost hers by 1951). I don't blame them for not fitting a short lubricator rod but they could have got the colour of the name plate correct (black). Now where are those rivets I was going to count......

Link to comment

Thanks Killybegs,

.... Now where are those rivets I was going to count......


I was a train spotting fanatic for only two or three shorts years, probably 1959 to1962.  However memories as opposed to pictures tend to blur with time and now as a railway modeller it is frequently all too convenient to accept combinations of locomotive detail / livery that could not have happened.


I like Apollo - sounds like a good excuse to buy some nice etched plates (black).


Regards


Ray

Link to comment

As usual, excellent photography. I struggle with room lighting. Can I ask what you use? Proper photographer's equipment is so expensive - but you do seem so, so perhaps I've answered my own question!


Regards, Tony.

Link to comment
  • RMweb Gold

Top Link!


6029 looks rather splendid. Your comparisons of old and new models are always interesting, I think, because they illustrate what it takes to make a scaled down model look "real" - and where the pitfalls are. Eg when I look at the two versions of the King here, there is something about Edward that gives it more mass than William. It's partly the bogie area of course, but also other things, eg the cab as you point out. For me the comparison also shows how much the shade of colour means - but that's a well known can of worms.


As Tony says, your photos are so clear and well lighted it's almost better than actually having the locos in your hands!

Link to comment

Thanks Tony and Mikkel


The comments about the pictures are very good for my ego!

As usual, excellent photography. I struggle with room lighting. Can I ask what you use? Proper photographer's equipment is so expensive - but you do seem so, so perhaps I've answered my own question!


Regards, Tony.


Top Link!


6029 looks rather splendid. Your comparisons of old and new models are always interesting, I think, because they illustrate what it takes to make a scaled down model look "real" - and where the pitfalls are. Eg when I look at the two versions of the King here, there is something about Edward that gives it more mass than William. It's partly the bogie area of course, but also other things, eg the cab as you point out. For me the comparison also shows how much the shade of colour means - but that's a well known can of worms.


As Tony says, your photos are so clear and well lighted it's almost better than actually having the locos in your hands!

As Mikel points out - you can often see details in the pictures that otherwise you might not have noticed.


As to cameras and photography you can view all our pictures on Flickr which shows the make of camera and the settings used below the individual pictures. I do not use any special equipment other than a rather clever camera and a little patience.


I have had the current camera two or three years.  I did get water into the rear screen a year ago and after a silly repair quote from Sony I investigated upgrading.  Interestingly the iinformed opinion at the time was that the later model with more pixels and a bigger zoom didn't actually take any better pictures than the old model.  I ended up importing a new screen from the States and fitting it myself for not many pounds. 


The camera is a Sony HX200V which is described as a 'bridge' camera - something btween a Compact and SLR.  Sony make seemingly similar models of their cameras - some with Sony lens and some with more expensive Carl Zeiss lens.  Mine has the latter which I would say accounts for the sharper images.  I rely on room lighting or 'flash' with the majority of pictures made using manual settings and long exposures.  To avoid camera shake I place the camera on boxes or pieces of wood and use the self timer to fire the shutter.   Like all things railway modelling there is a need to pay attention to detail and with digital images there is no cost penalty for having a second attempt.


Thank you again for the encouragement.


Regards


Ray

Link to comment
  • RMweb Gold

Thanks for the info Ray. I've also started using the self timer, it does make a difference. 

Link to comment

Yes Mikkel

... I've also started using the self timer, ..... 

Even when taking a close up of bits of engine on the kitchen counter I will use the self timer whilst holding the camera tight against a box.


Ray

Link to comment

As someone who is enjoying the use of a new Nikon bridge-camera I'm a bit relieved! It has a massive 42X zoom - which is handy for taking pictures from the other side of the model-room, but it's not Zeiss, unfortunately. I'll tell you one funny tale. I took a long distance picture, which had a fairly shallow depth-of-field,  but I found a missing vacuum-pipe, hidden in a crack but visible in the photo. I am guilty of too much auto, though. I must get down to the manual use.


Thanks again for all the information,


Tony.

Link to comment

Hello KB


Father Christmas was very kind to himself and I have added a picture at the end of the Post showing Apollo with ModelMaster black etched plates.

....but they could have got the colour of the name plate correct (black). .......

Thanks again


Ray

Link to comment

Create an account or sign in to comment

You need to be a member in order to leave a comment

Create an account

Sign up for a new account in our community. It's easy!

Register a new account

Sign in

Already have an account? Sign in here.

Sign In Now
×
×
  • Create New...