

((Post 1 & 2) LBSCR 'E2' 0-6-0 kit builds into 'Thomas' (x2))

Entry posted by Knuckles
1,986 views
Rather than call this, 'Moving to P4 Post 41' I think I can safely say I have now 'Moved to P4', Although 00 isn't 100% abandoned. I'd like your opinion on whether you think it's safe for me to call myself a P4 modeller yet. I would rather have it collectively said of me than me say it becasue I know I'm still new to it. Opinions please. 
Ok...
As some of you may know, I'm going to try to build two LBSCR E2 locomotives, the first one as a straight E2, and the second as a slight kitbash. Both are going to be an enathema to some of you as I'm basing them on 'Thomas', but hopefully in a way more realistic than may have been seen before.
I've only built one working locomotive before and that was a fixed axle 0-6-0 in 00. It ran but not brilliantly, it sometimes derailed on the straights and was sometimes jerky at slow speeds, ergo, I have next to no experience. I'm comfortable soldering and bashing things, but getting a chassis to run well is something I fear greatly, especially when one consideres the cost of kits and components; not great if you make a boo boo of it all. Any advice I greatly welcome, and as usual I'll be documenting the progress in this thread. This time I'm going to try to do it with hornblocks.
Kits arrived today, proof....
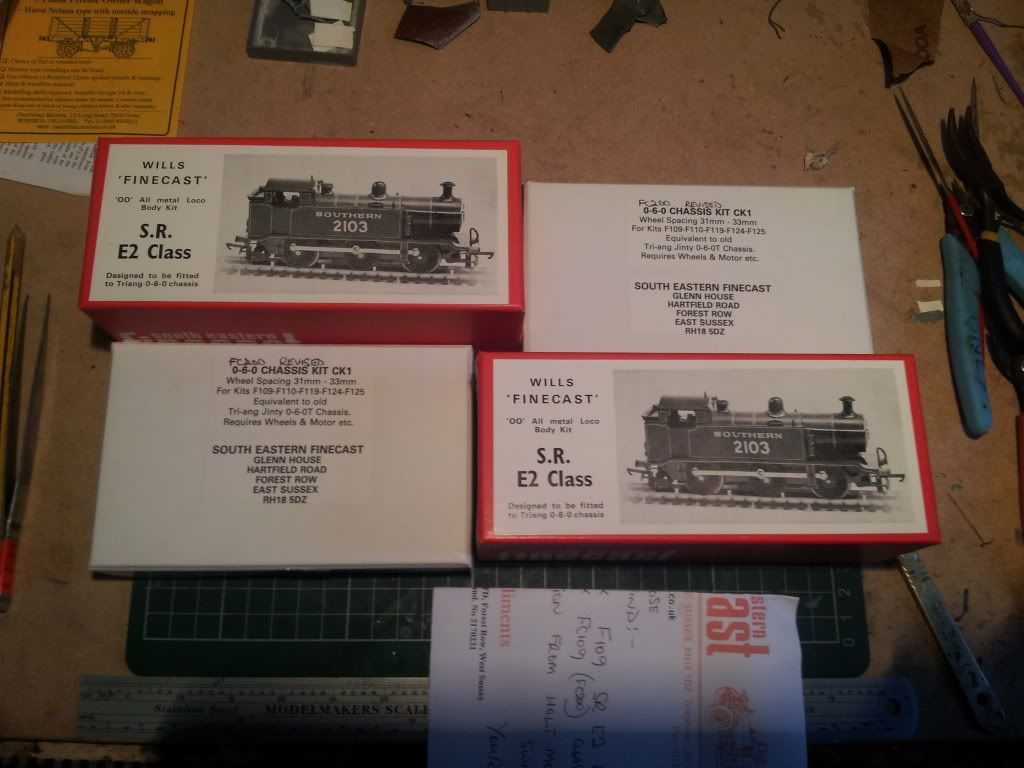
After haveing a quick look through it seems I need to make my own tank extensions. Not happy about that at all, I was hoping not to have to kit bash until the 2nd model. Considering there were only 10 Real E2's and half of them had bigger tanks you would have thought they would be supplied in the kit as optional parts, but no.
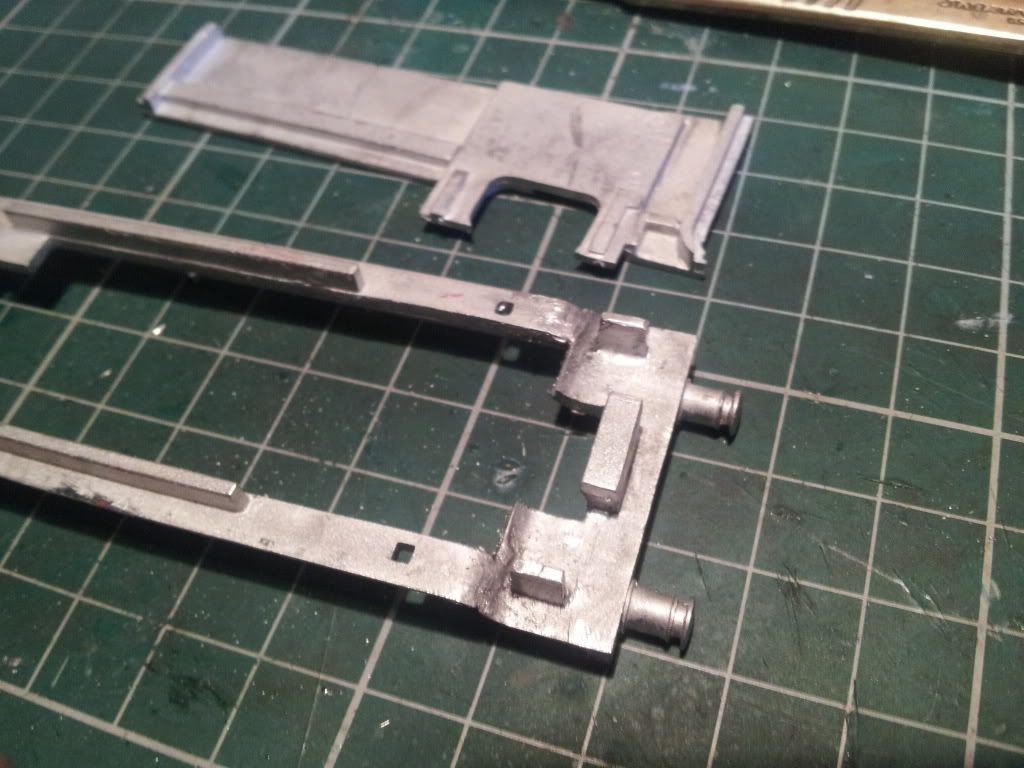
The chassis needs little bits removed for the E2, just a warning.
Also I need to buy is motors and gearboxes for both of them but that's why I waited so I can now asses what to buy, suggestions welcome.
Wheels, axles, crankpins, P4 spacers, better buffers etc I already have recieved in post.
POST 2
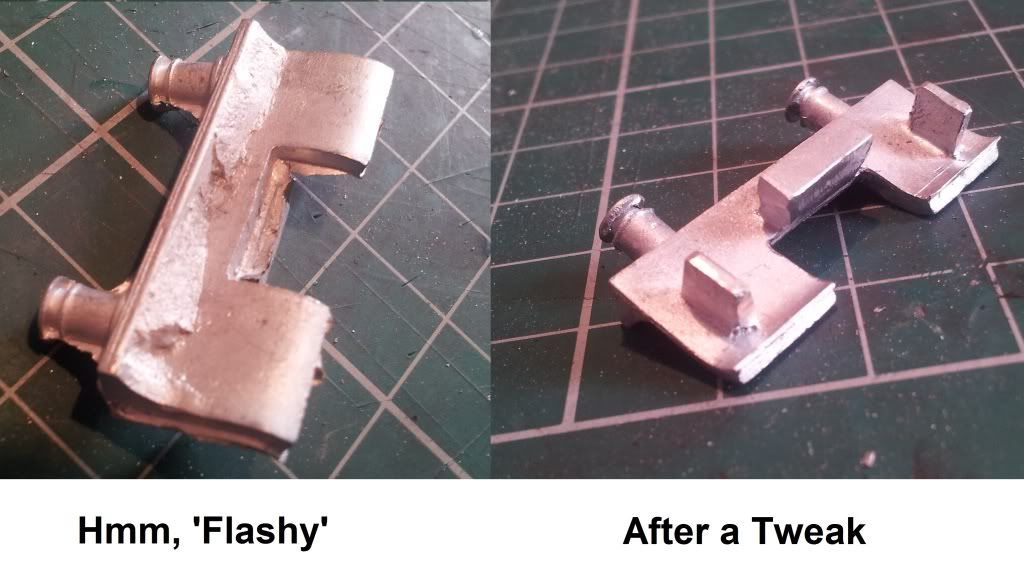
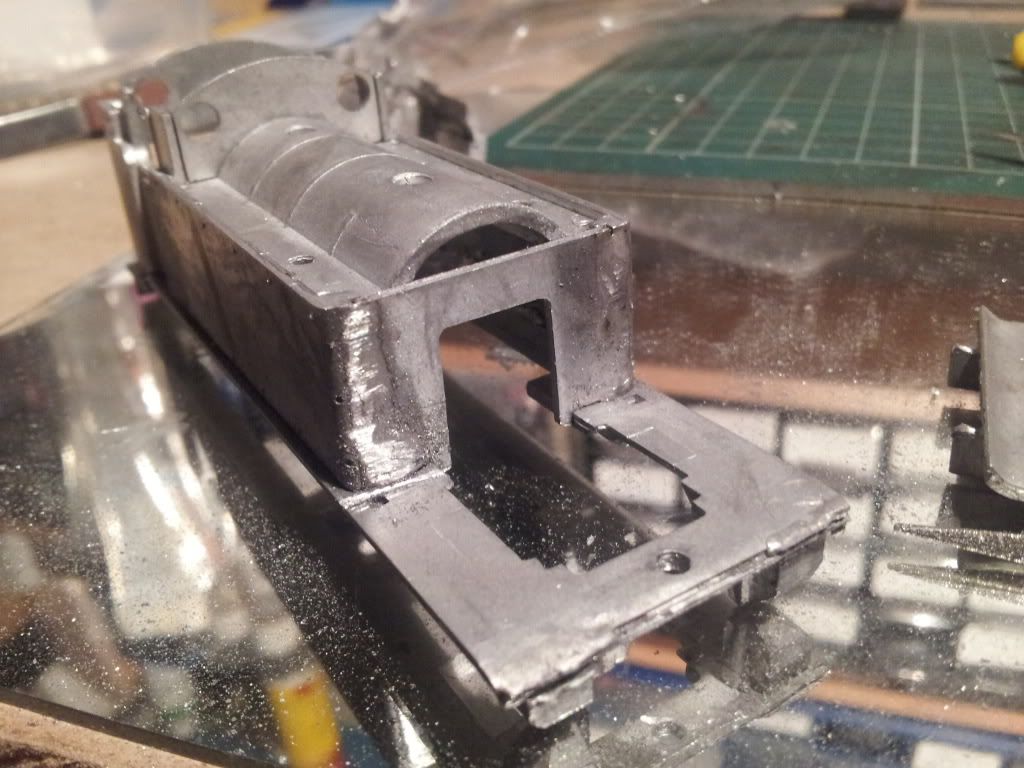
First off, lets just say you need to be prepared to do ALOT of remedial work, and I don't mean just the flash. The kits has loads of flash, but I'm about 70% through building the body and NO components fit without severe filing, and I do mean severe. Ive been on it 6 or 8 hours today and I'm convinced that I could have done it in 2 hours if the peices actually fit together properly...we are talking a full 1mm too much casting in some areas I kid you not. I battle on and pick up experience along the way.
To be fair, the kit is very old and maybe the tooling could do with being updated or something, I don't think it'd badly designed or anything but it isn't impressing me much in the buildability department, gimmi etches anyday. I don't know if this is normal for white metal kits as my only experience with them is detailing parts, but whatever, I'm determined not to let it win. Oh yeah, the hand rail pillars have been drilled out on the half indented guide holes...but they don't all register, neither are the dome and chimney holes central. :shock: So how can I say the kit is accurate? I don't want to slate it but I'm finding it hard not to.
The instructions keep talking about glue but I decided to ignore that and just get my 70 degree solder out. My iron is variable from 200-450c, so I set it to 200. So far I've found it to be perfect, melts the solder, Carrs Green flux to flow and so far no holes in the castings or self formed sculptures, and I have diddled around with the tip a bit. Maybe I'm just lucky.
1st picture. Like a deranged eliphant I took this picture thinking how successful I was....then noticed I put the bufferbeam on the wrong end. :x Tit.

Sorted.
I ordered some sprung buffers from Alan Gibson but wern't sure if they were the right ones or not. They look smaller here in this pic and I was going to ask your opinion, but since looking at prototype E2 photographs they indeed are smaller than the height of the bufferbeam, whereas the caseted buffers are as deep as the buffer beam, ergo, the casted one are likely a shade too big, plus one buffer on each beam is casted at a funny angle. :? Think I'll replace them with these brass efforts.

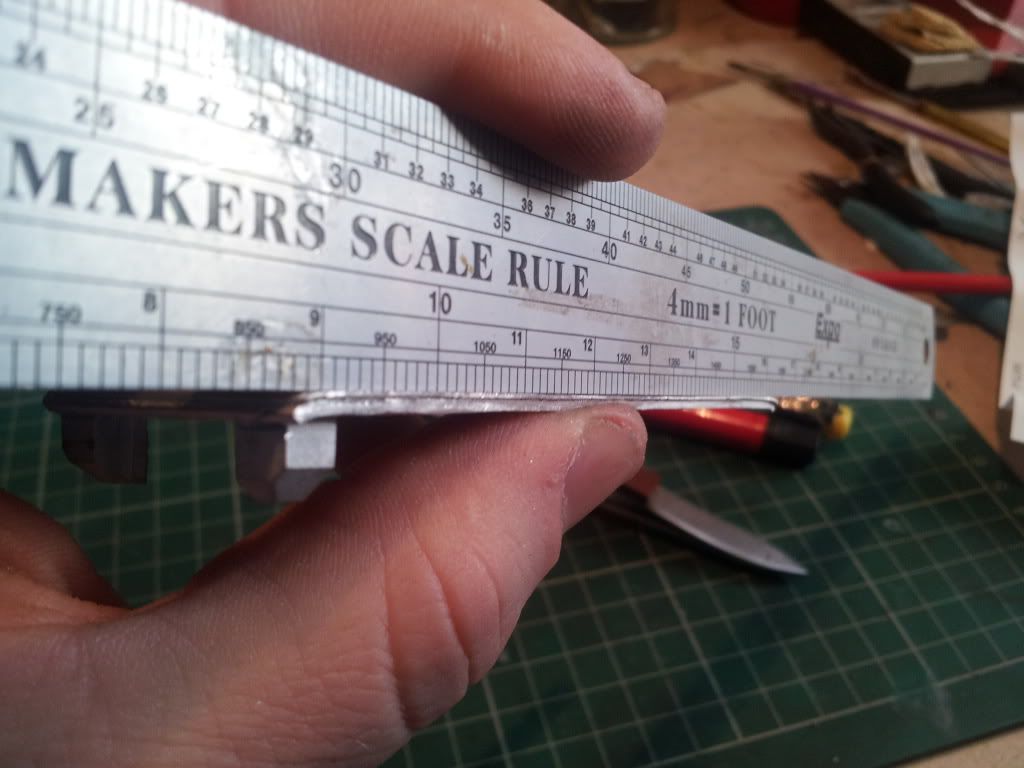
The running plate looked more like a bananna. I had to bend it alot. Stil isn't 100% perfect now but I've done the best I can.
An idea of the flash level
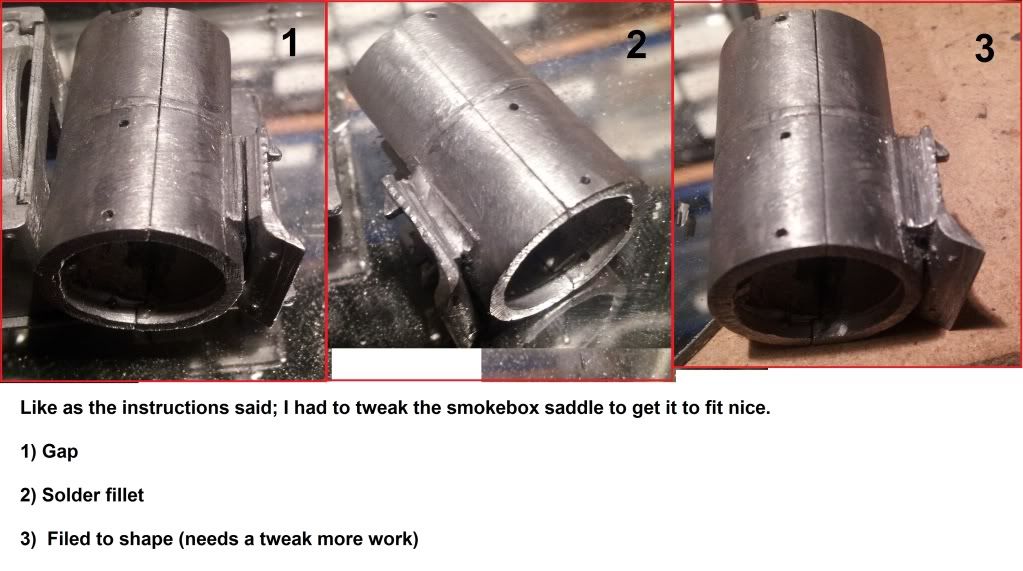
The smokebox wouldn't fit on properly and I think I' spent at least 2 hours pidelling with it. The saddle needed bashing and the instructions said this too. So the pictures tell the story. It still isn't perfect in my opinion but again, I've done the best I can. The gap I will have to fill.
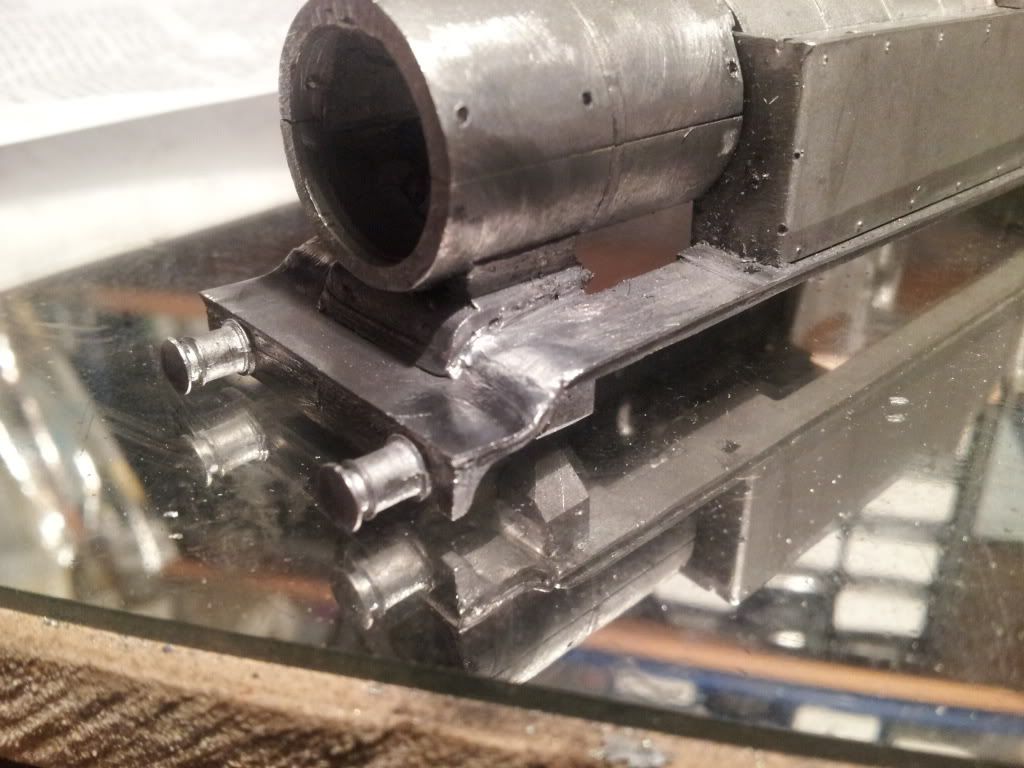
Tank fronts. I filled the gap with solder then this picture shows it half way to being filed smooth.
Every E2 kit I've seen has a join mark at the front curve. I'm trying not to follow suit. The last two pics show the same method. Solder fillet and shaped afterwards, although it needs a little bit more work still. Massive gap as it joins the tank covers needs filling - this was due to me having 2 or so hours trying to get it to fit properly.

Ok, that's it for now. Comments welcome.
-
 3
3

1 Comment
Recommended Comments
Create an account or sign in to comment
You need to be a member in order to leave a comment
Create an account
Sign up for a new account in our community. It's easy!
Register a new accountSign in
Already have an account? Sign in here.
Sign In Now