


Entry posted by Knuckles
871 views
3 posts from S4 crammed into 1.
?
1) ----
I have a small update. Nothing mind blowing.
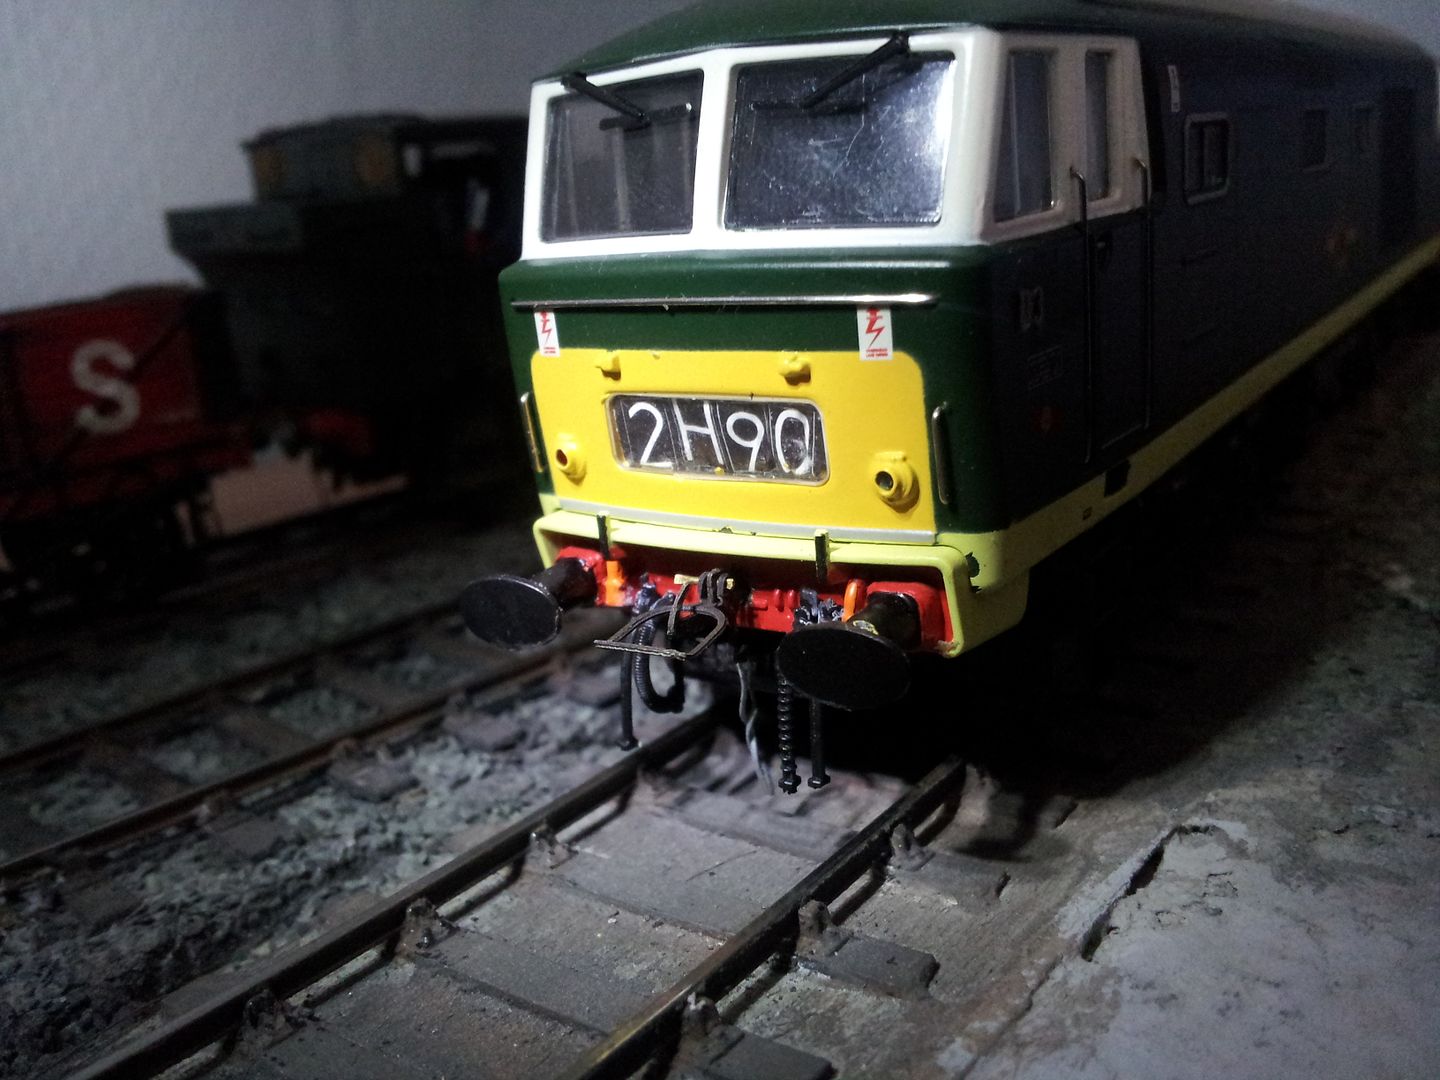
I've rebranded the numbers to D3 in nickel silver by Fox-Transfers.
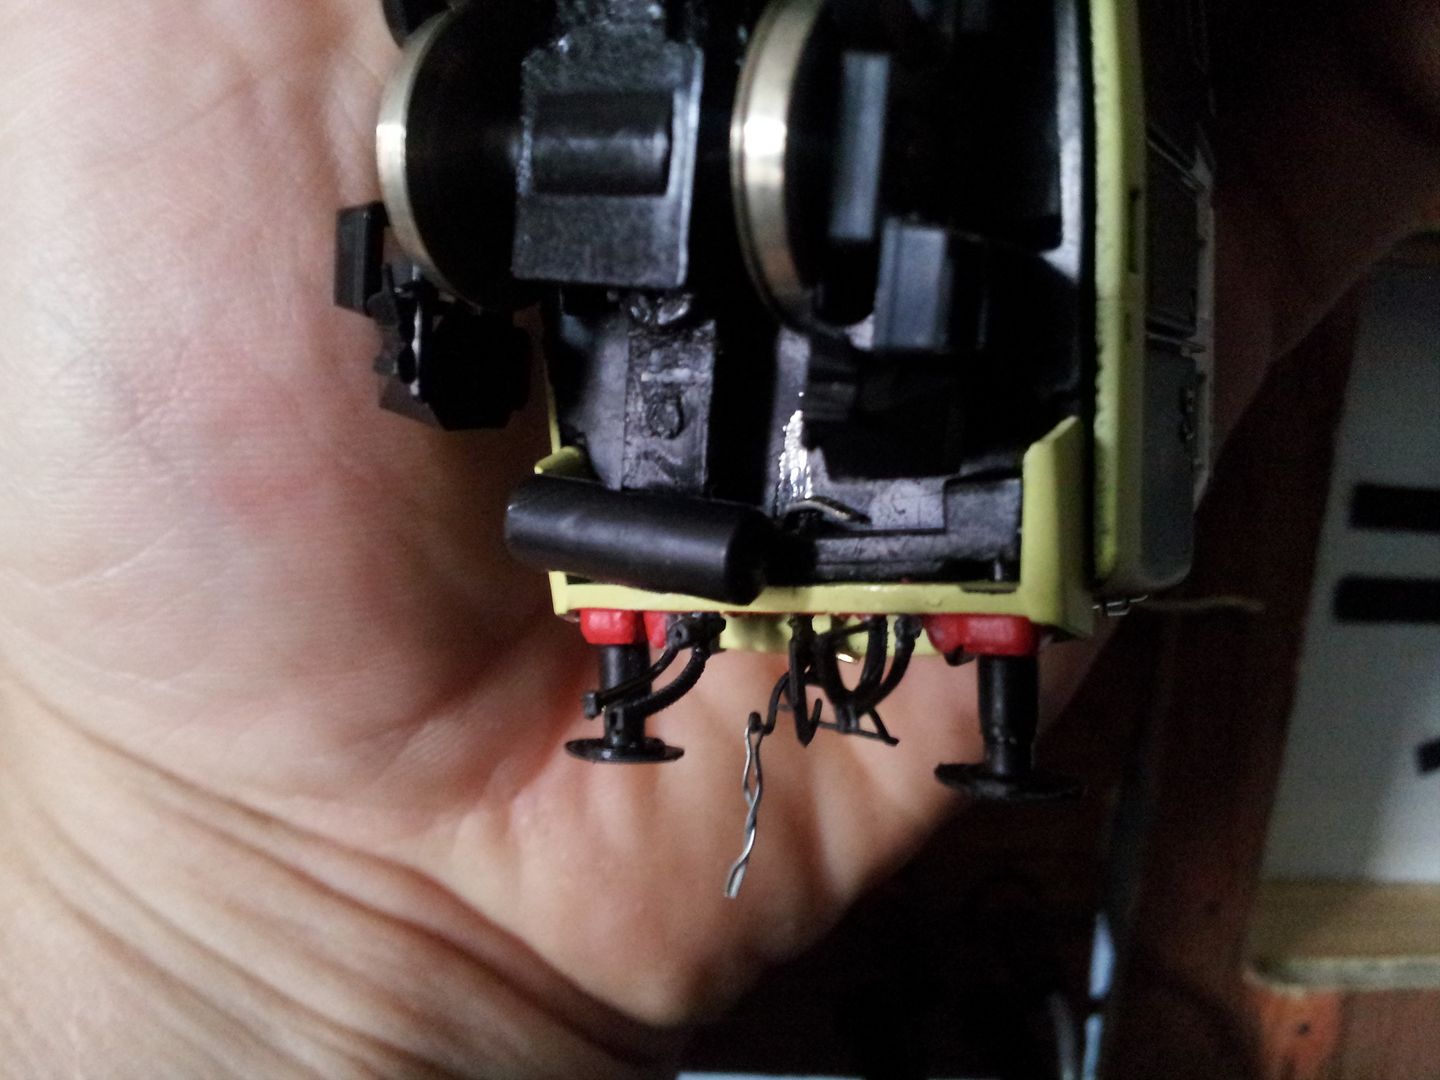
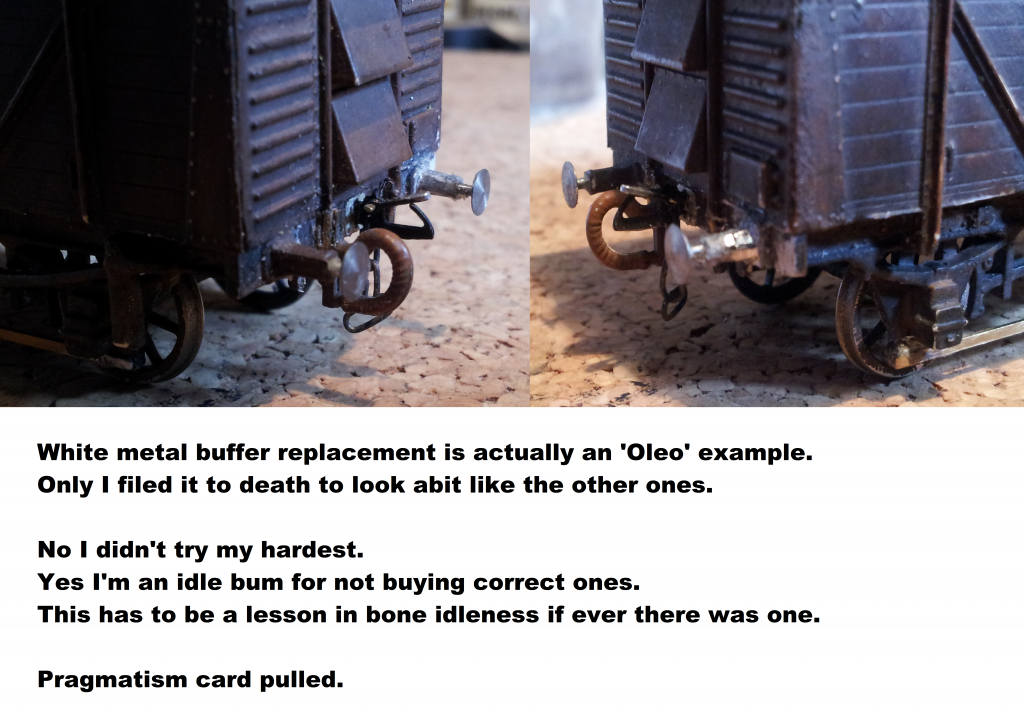
Added all the buffer beam detail to both sides. Ignored the plastic screw link and forced a Hornby semi working one in instead. I had to drill a hole, file the hole and also file the stub on the coupling to complete the join.
I've also fitted the letters to the front, but they look cack because I cannot put them in neatly to save my life.
A blackened dingham has been fitted to the back, but I had to drill a hole through the metal chassis to accept it. I think this means I won't be able to get inside the model unless I remove it, but the good news is I have it retained by a simple bend, so if there is a problem I'll just bend it back, if I do make a pigs ear of things then I'll have to make a new coupling.
Like I say, nothing mind blowing.
2) ---------------------------------------
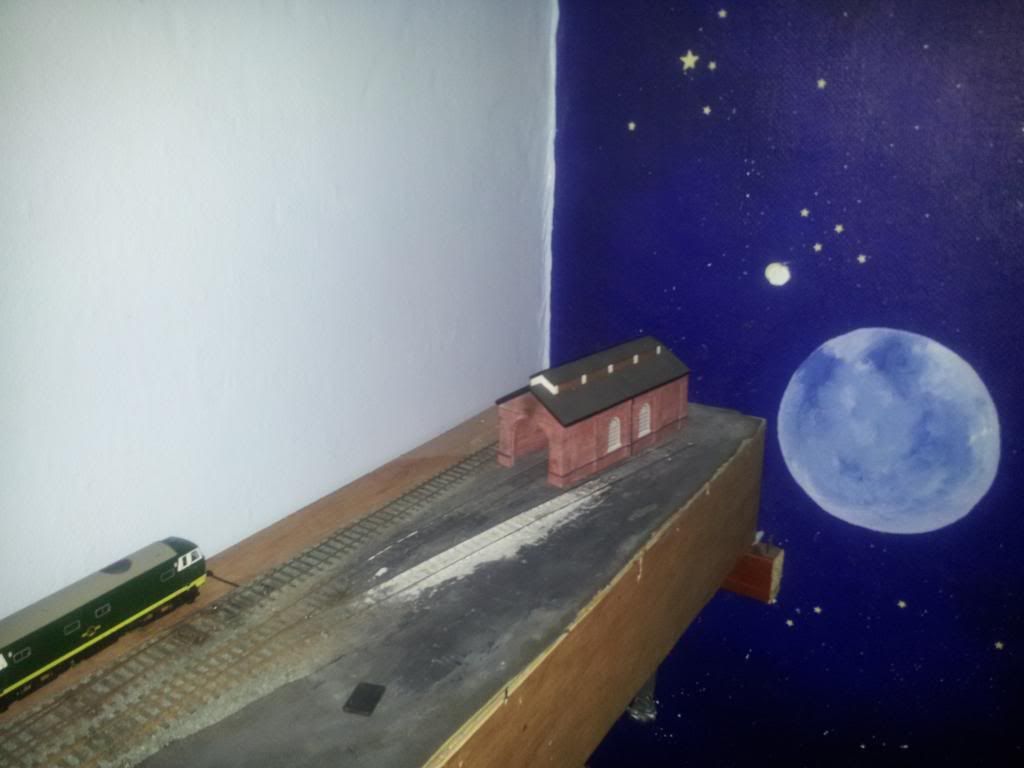
I gave my desk a mini clean yesterday. Took the old board off it and dumped it. Then I dusted the layout and painted it in a sort of cream coloured acrylic mix. Not the same as the desk but similar. Now my mind doesn't hurt when I look at the desk and it's more inviting, "Build something" it says to me.

So I went in the loft and dragged this shed out from a box. I like the shed as RTP buildings go, but I'm not sure it really fits the scene. Seems too grand a shed to me, as I'm thinking more a wooden bothy with corrugated roof or something. Plus the clearance on the adjacent rails is fag paper. I'll probably change it, what you think?
Something else I did was to hunt for the remains of my Vollmer Roundhouse shed. I knew it would come in handy. I'm thinking of using some of these panels to form the basis of the workshop / factory, or whatever building it will be. I think it looks suitable, within reason.
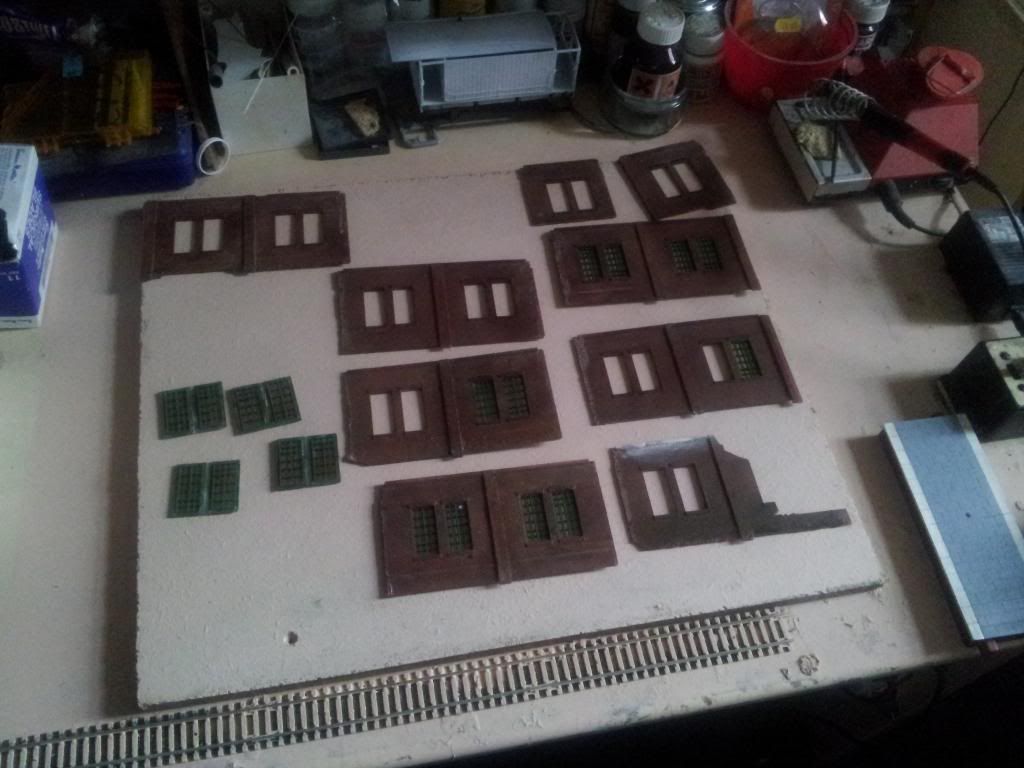
This is the general idea. The 2 tracks that go inside will have a lower roof. The wooden block further right represents the dock thing. It's actually my right angled wooden soldering aid for chassis construction.
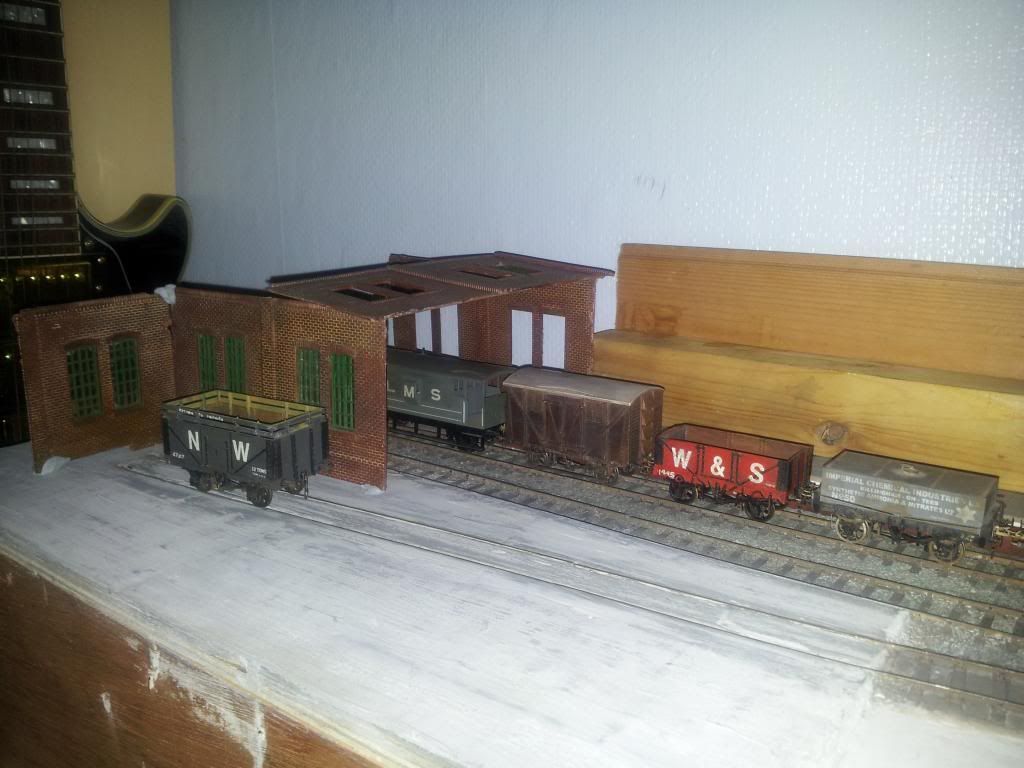
What you think? I still haven't decided on the industry or theme but I know roughly how I want the buildings to look.
3) ----------------------------------------------------------------
I built a wagon way back in 2004, when I was working for the UN in Cyprus. I fitted it with Slaters 3 links, and other than that it was pretty much a standard build. Over the years it got somewhat battered on my layout and was generally neglected.
Being a slightly nostalgic piece and wanting another P4 wagon, I thought I'd have a go at simultaneously restoring and converting it.
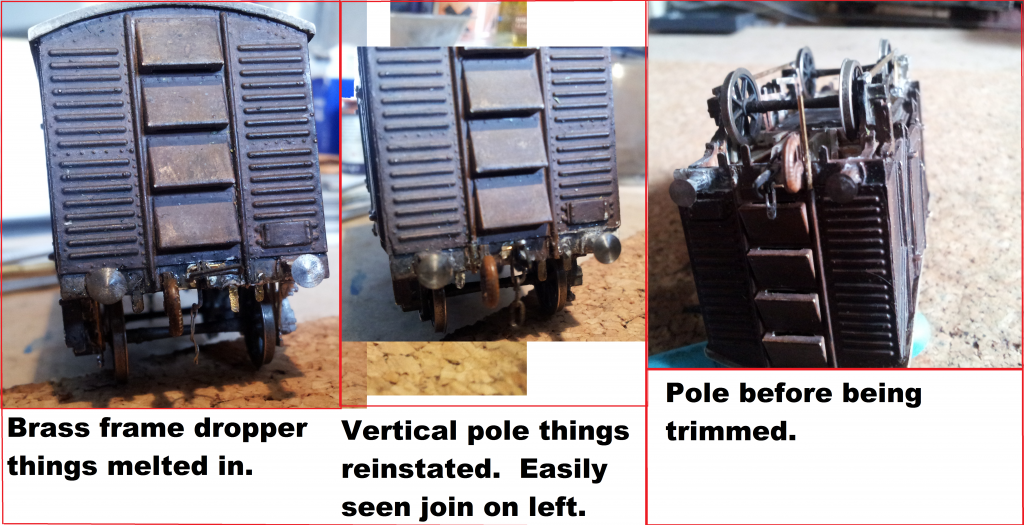
Now with P4 wheels popped in, one wheel-set rolled nicely, the other didn't. This I tried to rectify by melting in some bearings which I'm sad to say became a whopping great fail. There's no way to explain it, it just...well, didn't work. So then I thought 'Oh dear, looks like I'm going to have to faff with this one'.
I like Bill Bedford's springing units as I think you know. Real easy to make, and not that hard to install. Wagon rolling resembles greased cow dung. That scores high in my book, only problem is I've only so far built them off the wagon, not in situe. Seeing as I wanted to know how a fixed axle combined with one sprung axle ran, I guess now was my time to find out.
I proceeded by Xuron clipping the frame detail to oblivion, followed by trying to clip the W-Irons thinner as I would if already off the wagon, being fixed I didn't do too well and ended up clipping them off and retaining the axle box and springs like on my other wagons. One I broke....AS ALWAYS! :twisted: It's a rule you see, I finally understand it. It must be a rule of Will's Carpet God...
"Thou Shalt break at least one axle box and spring when attempting to retain them, for in doing so though shalt build up the railway modelling industry by necessitating the purchase of a cast replacement." Luckily I already have some replacements.
?
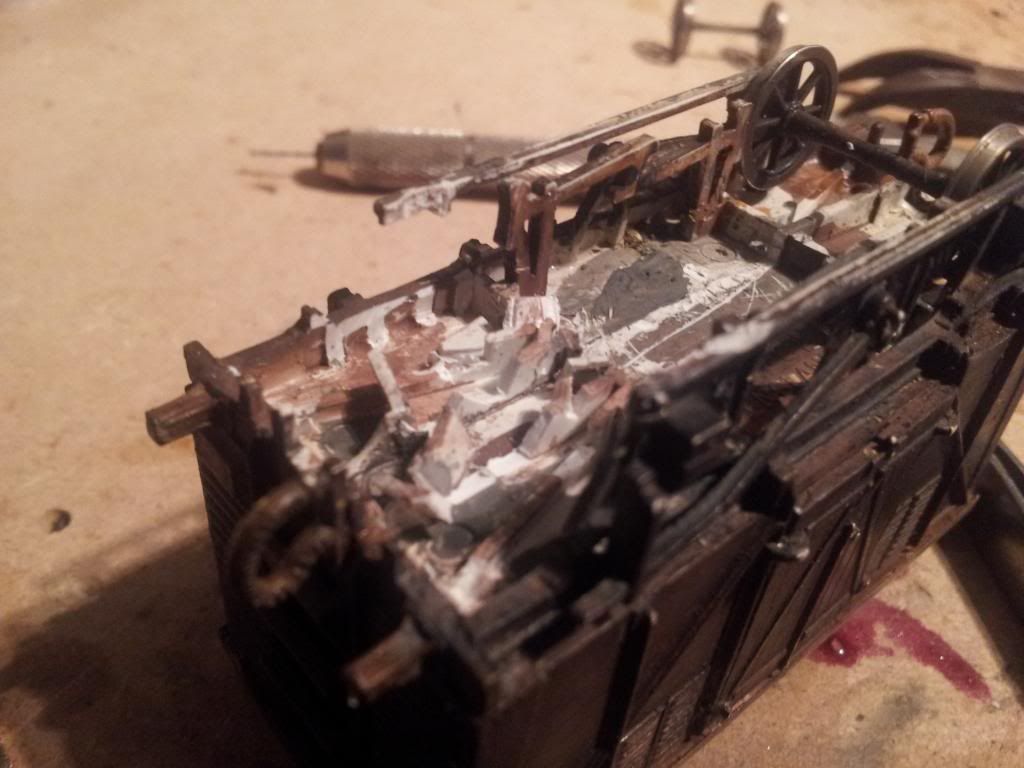
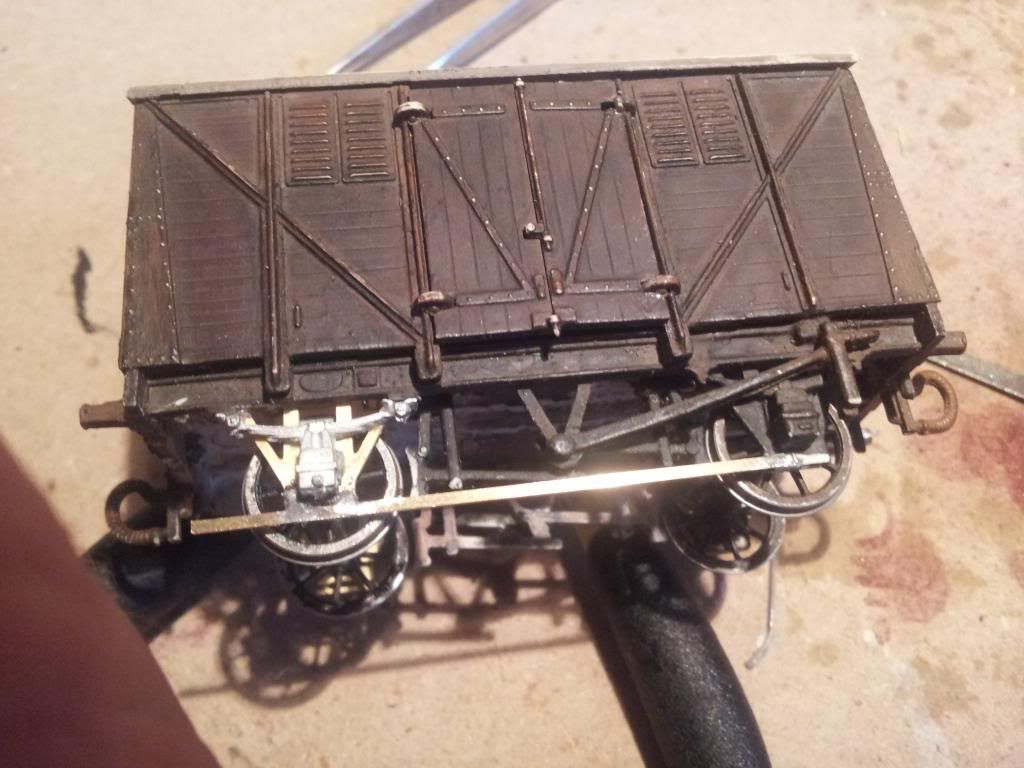
First pic. Nice mess.
?
Second pic. Clipped space smoothed with mini drill, complete with a packet of Oatcakes and my favourite tea mug containing Yorkshire tea, black, one flat sugar - perfect.
?
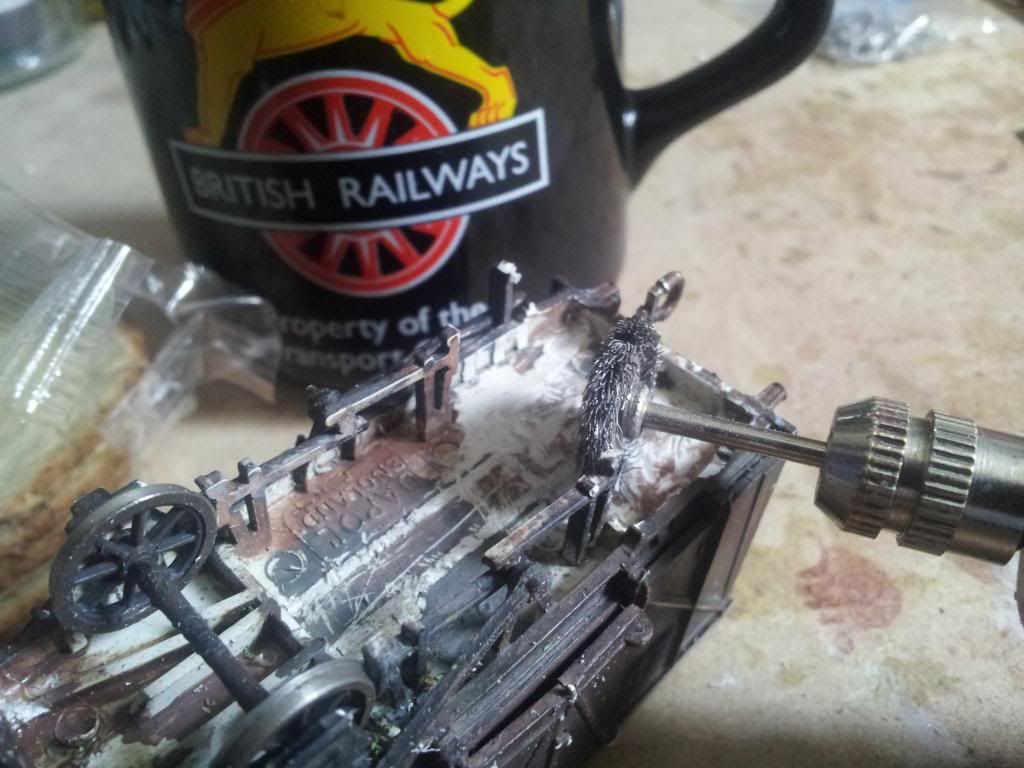
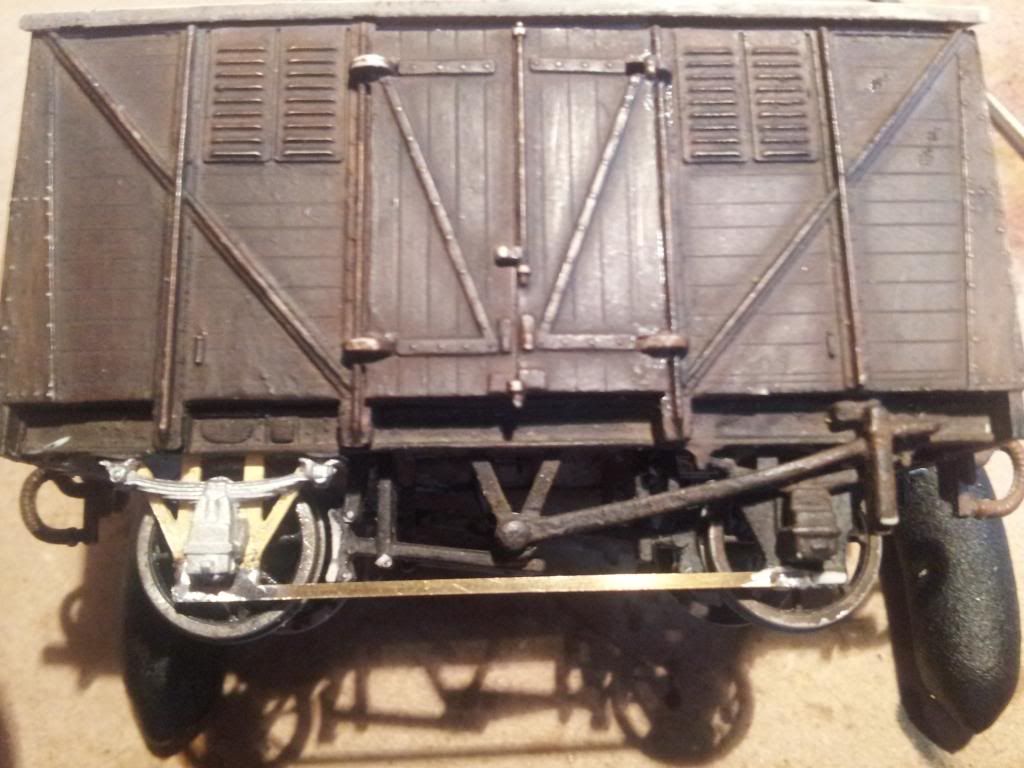
Third pic. W-Iron assembly test fitted. I used Brassmasters axle spacing gauge to help as always, but Unlike most times when doing this, it was a very tight fit which helped a lot for roll testing on my layout. I usually use some contact adhesive to test it then superglue it when happy. (Unsure on best methods, open to suggestion) Whilst testing I used a little bit of lead stuck to blue tack on top of the roof. I was very surprised with the performance. Usually I have to piss fart about getting it to roll straight because maybe an axle is at an angle or whatever. I suppose only having one won me a success first attempt. Rare indeed.
?
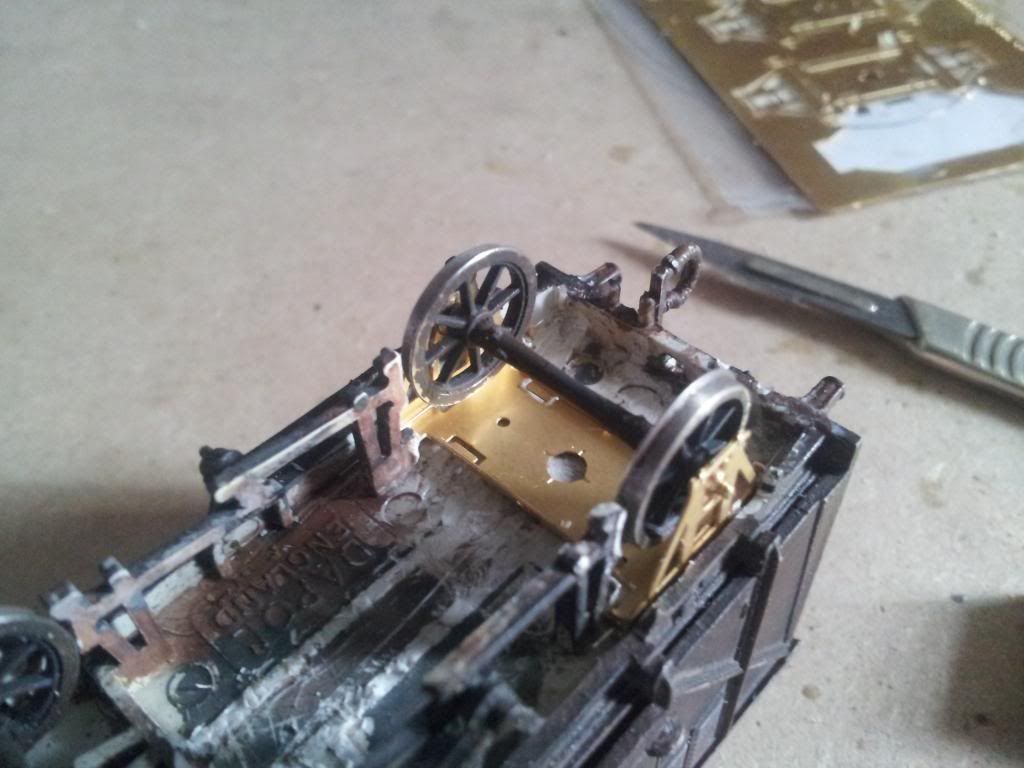
Fourth pic. Having drilled the axlebox holes into an oval to make room for the springing, I superglued the retained plastic box and springs on one side, and on this side you can see the casting with superglue. I think actually the casting might be a different type of box altogether, that or a much more accurate one. it looks a wee bit different. Either way I can live with it. Furthermore the ba that joins both W-Iron bottoms has been reinstated by soldering with some 1mm x 0.5mm x How Long Do You Want Me? Oh yeah, I melted it in on the plastic end, followed by a small superglue dab.
?
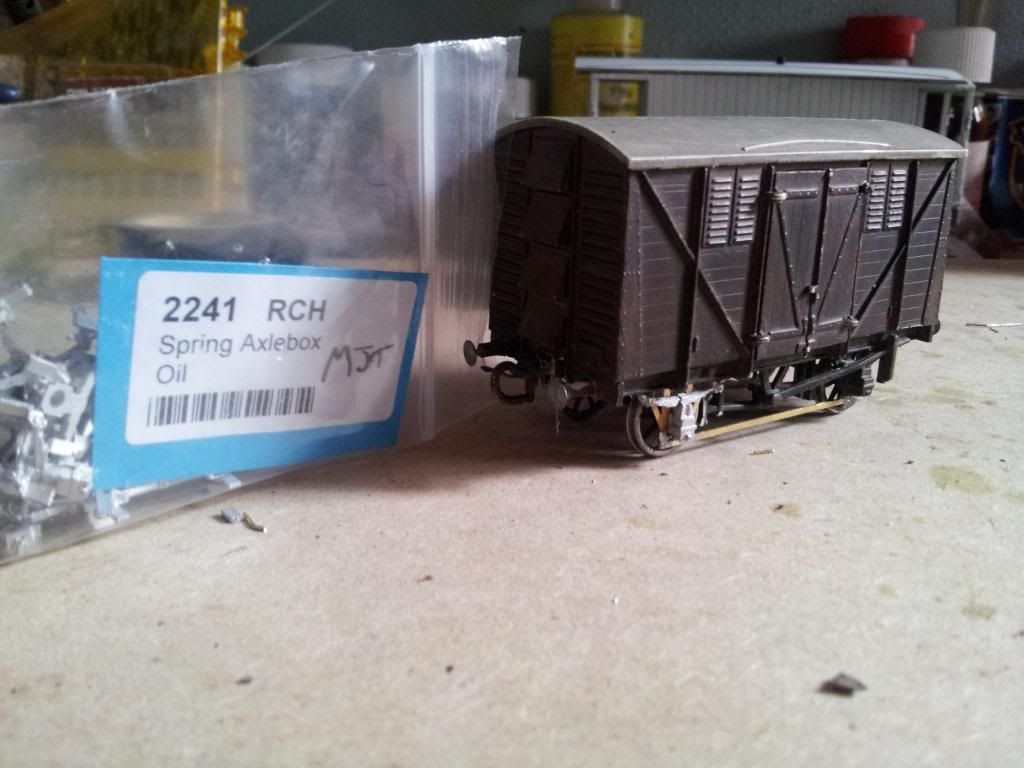
Fifth pic. Ends clipped. Might need to trim or file a bit more though. Wagon paintwork here is 9 years old btw. Still quite happy with it.
?
Sixth pic. These are the castings I used if anyone's interested.
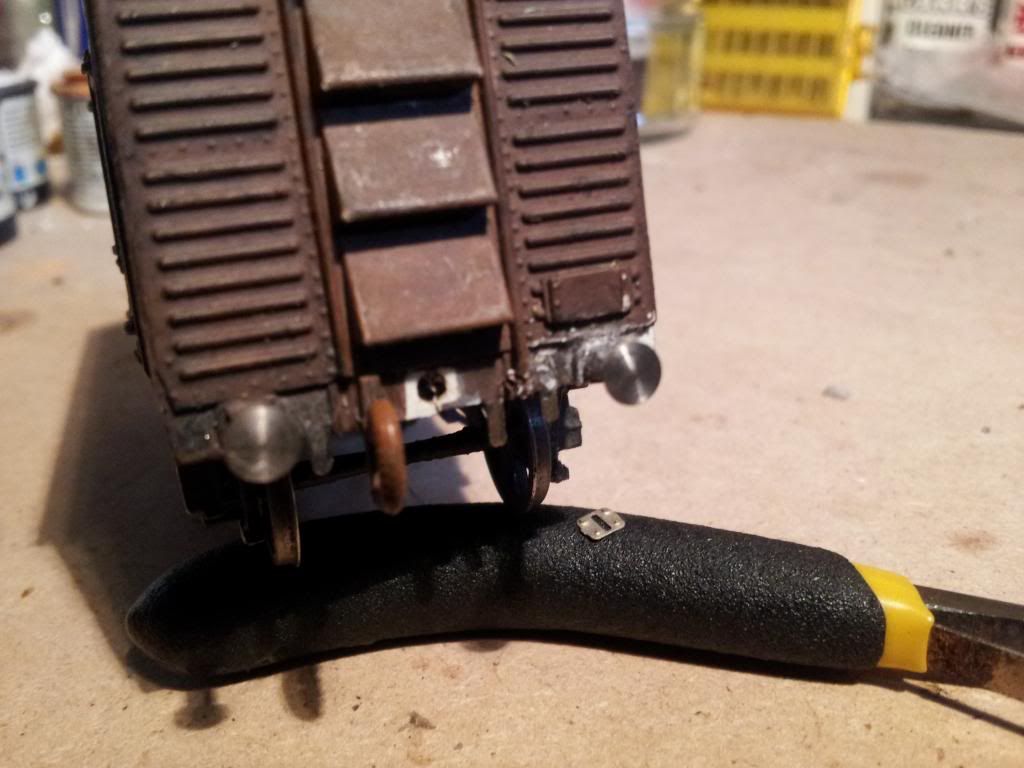
Seventh pic. Becasue I drilled a massive hole in the past, the 3 links kept twisting sideways, now that I have the hole I needed to close it. Luckily Dingham supply several 'Thingummy's' on the fret. You can see it on the black handles. To make room for it I cut the original thing out of the way. Name please? 
Eighth pic. Please read text in pic.
Ninth pic. Please read text in pic 2.
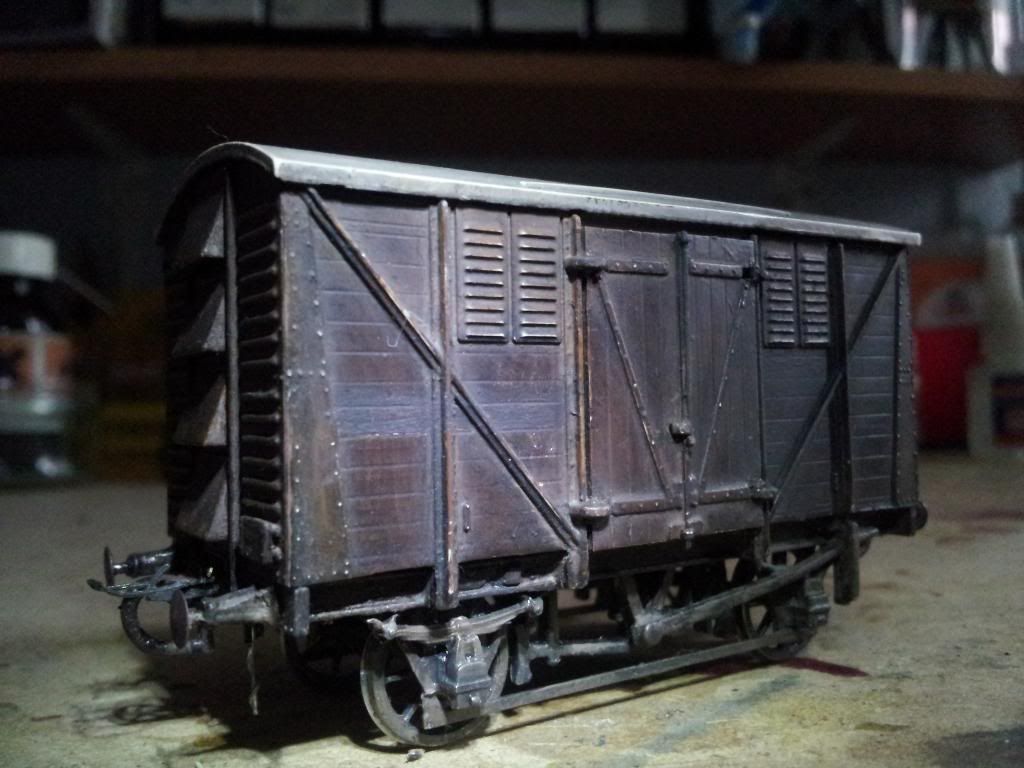
Tenth pic. Sort of finished. The lighting was real bad at this point so all the colours are wrong, plus I have weathered it a slight over how it already was. Not sure those black blanks are real, might make them lighter to represent new ones. I was going to wait until I've lettered it before I showed you but I haven't any the right size so that will have to wait.
Eleventh pic. REWARD!!!

-
 5
5

0 Comments
Recommended Comments
There are no comments to display.
Create an account or sign in to comment
You need to be a member in order to leave a comment
Create an account
Sign up for a new account in our community. It's easy!
Register a new accountSign in
Already have an account? Sign in here.
Sign In Now