

0 Gauge 20T Brake Van - Scale Experiment

Entry posted by Knuckles
1,147 views
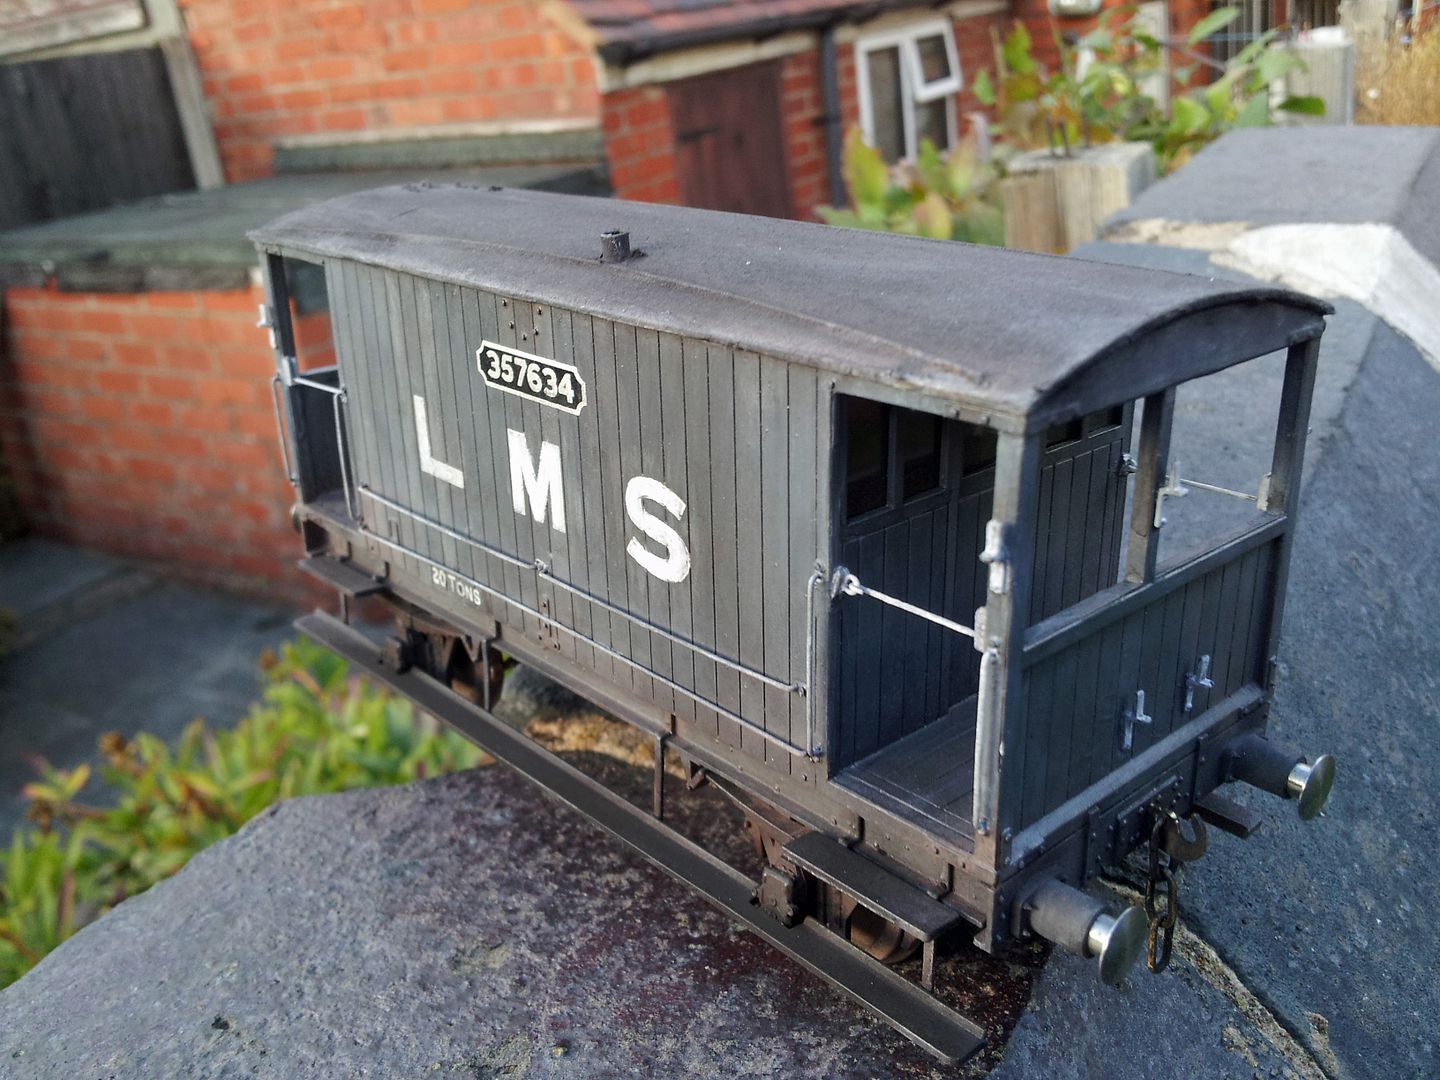
0 Gauge 20T Brake Van. Not exactly P4.
Why? Because I've always fancied having a crack at 0 gauge but am always put off by two things; lack of room for anything substantial and the price, often being around 8 times as much. It's a bit unrealistic for some of us. Anyway, when I was on holiday in Devon I picked up this Parkside Dundas kit for £40 save a penny. Thought I might as well have a go and see how I feel about things. I've decided to model it in Pre 1936 condition.
Don't worry though, If I do decide to do anything about it, like a layout for instance, it won't be to the detriment of P4. I'm still very much determined to get the planned layout/s done in good time. If I ever do an 0 gauge (or Scale 7??) layout, it will have to fit above the P4 one. This might just about be possible as I looked, but I'll know in the future.
-
So, this is the kit mostly built. I decided early on to leave the couplings, buffers and glazing until almost last to avoid gumming or frosting things.
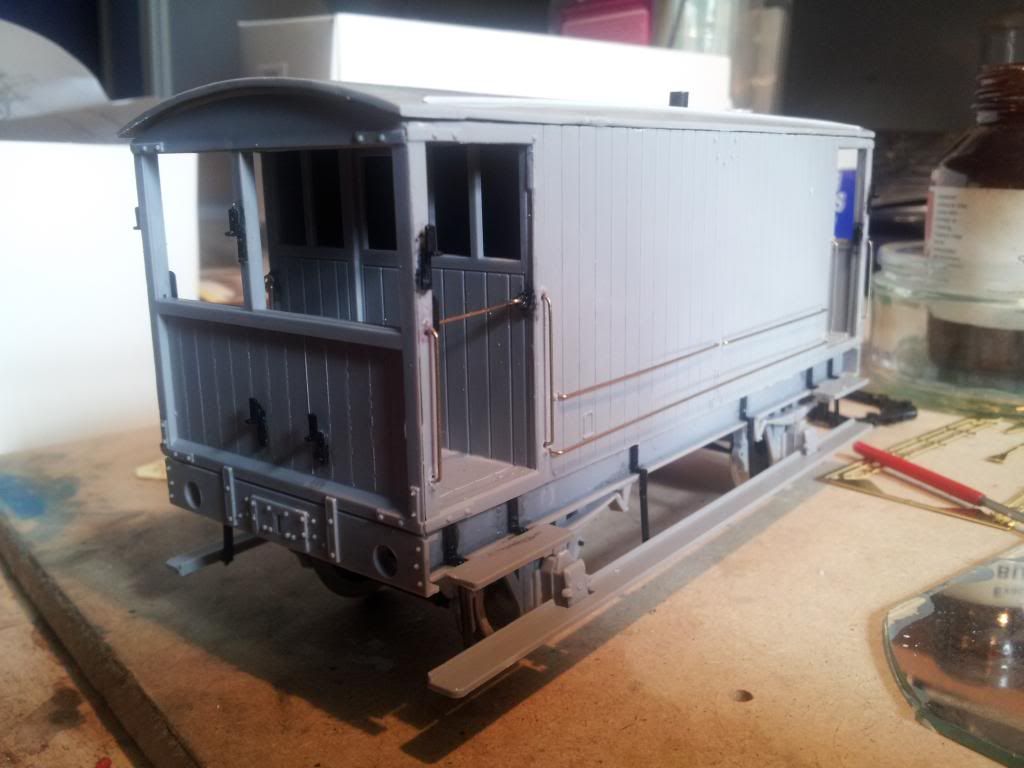
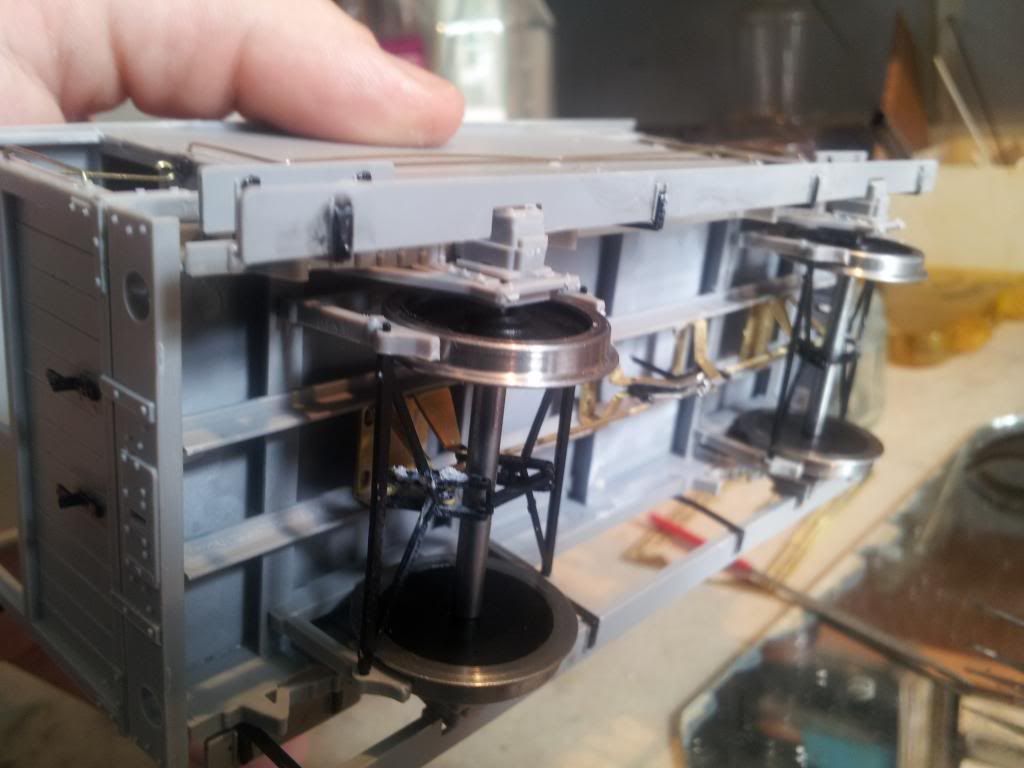
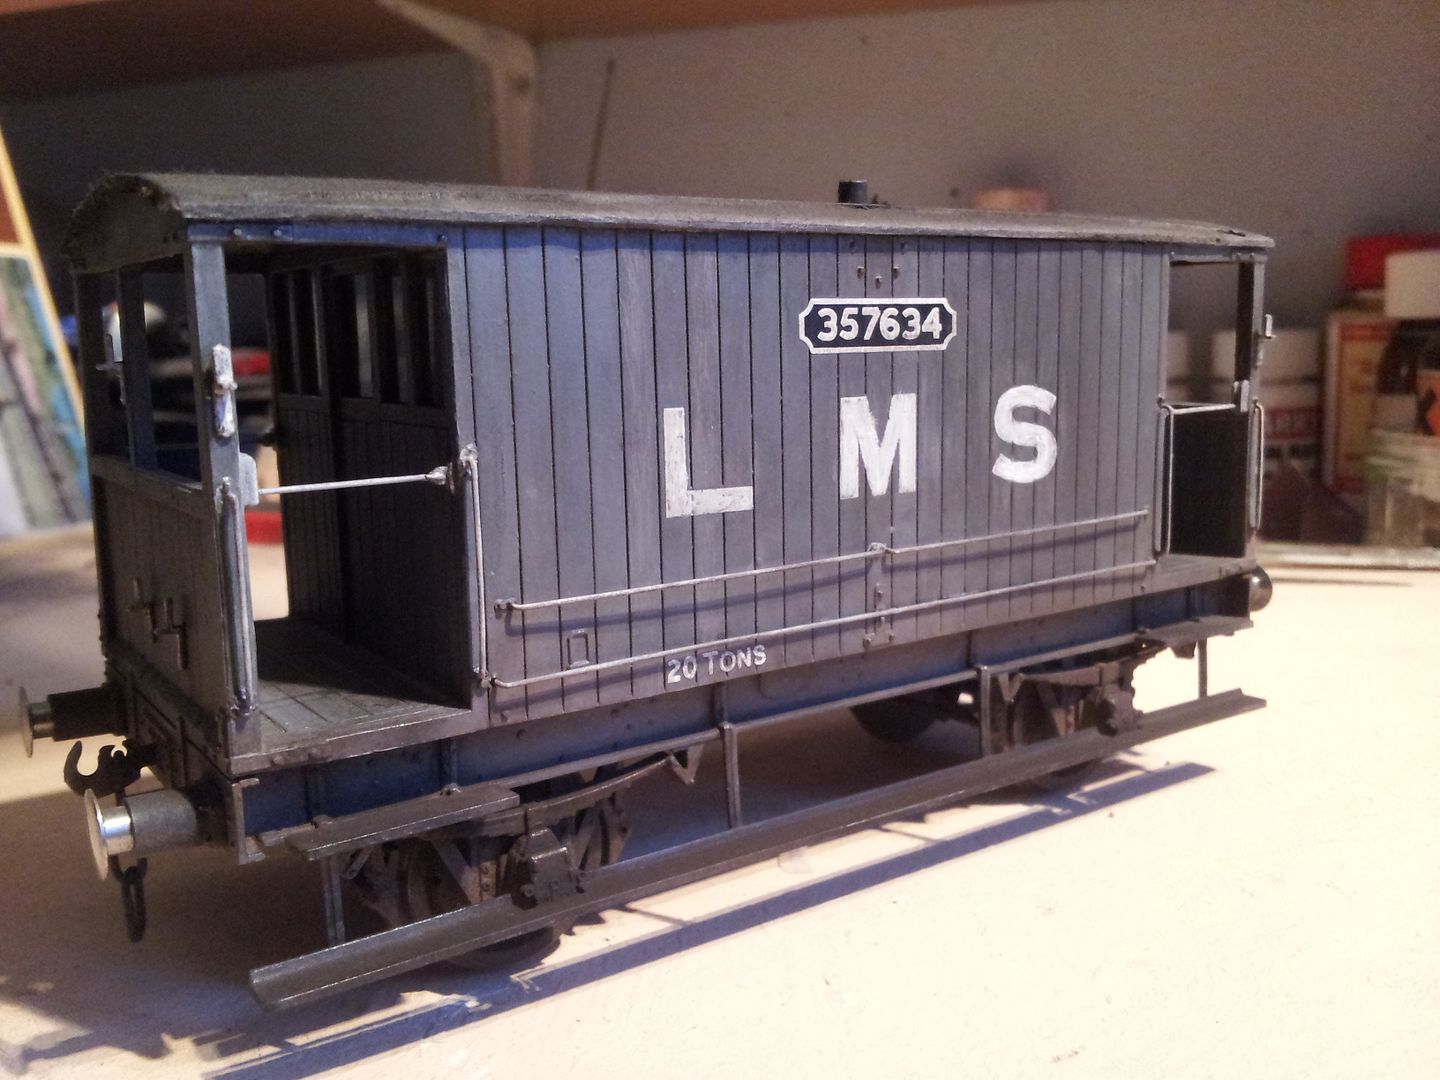
This is the complex brake gear you have to model. It took me an age understanding the instructions and ended up cutting something in half that I wasn't supposed to. After fixing things I finally managed it. I must admit though, I made a mess of this, was about the first thing I can honestly say beat me outright. It' done, but bodged, badly fitted and I left one bit stiffly hinged to provide wheel release. Plus I just couldn't do it right. Much weathering to the rescue. (Isn't it always the case?)
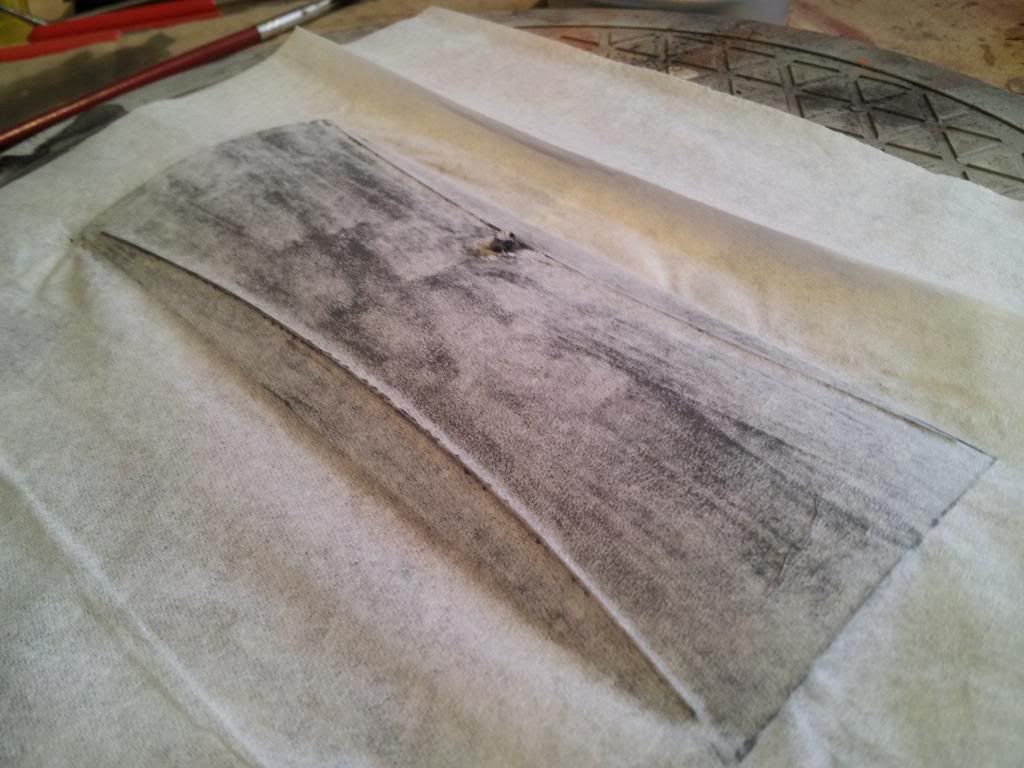
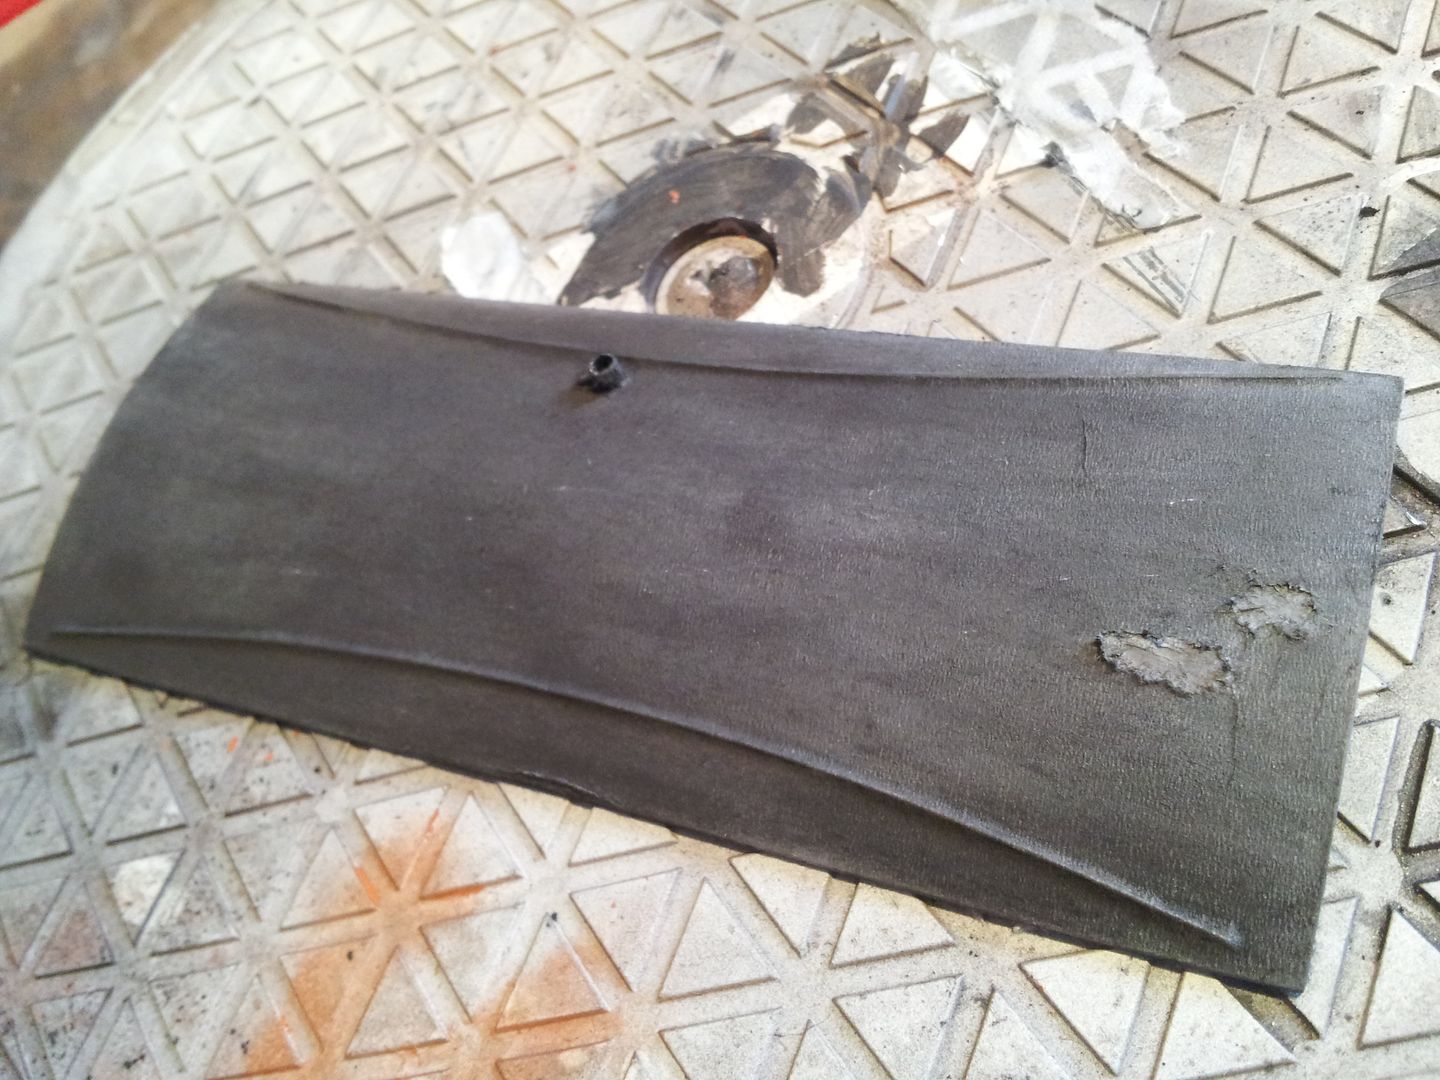
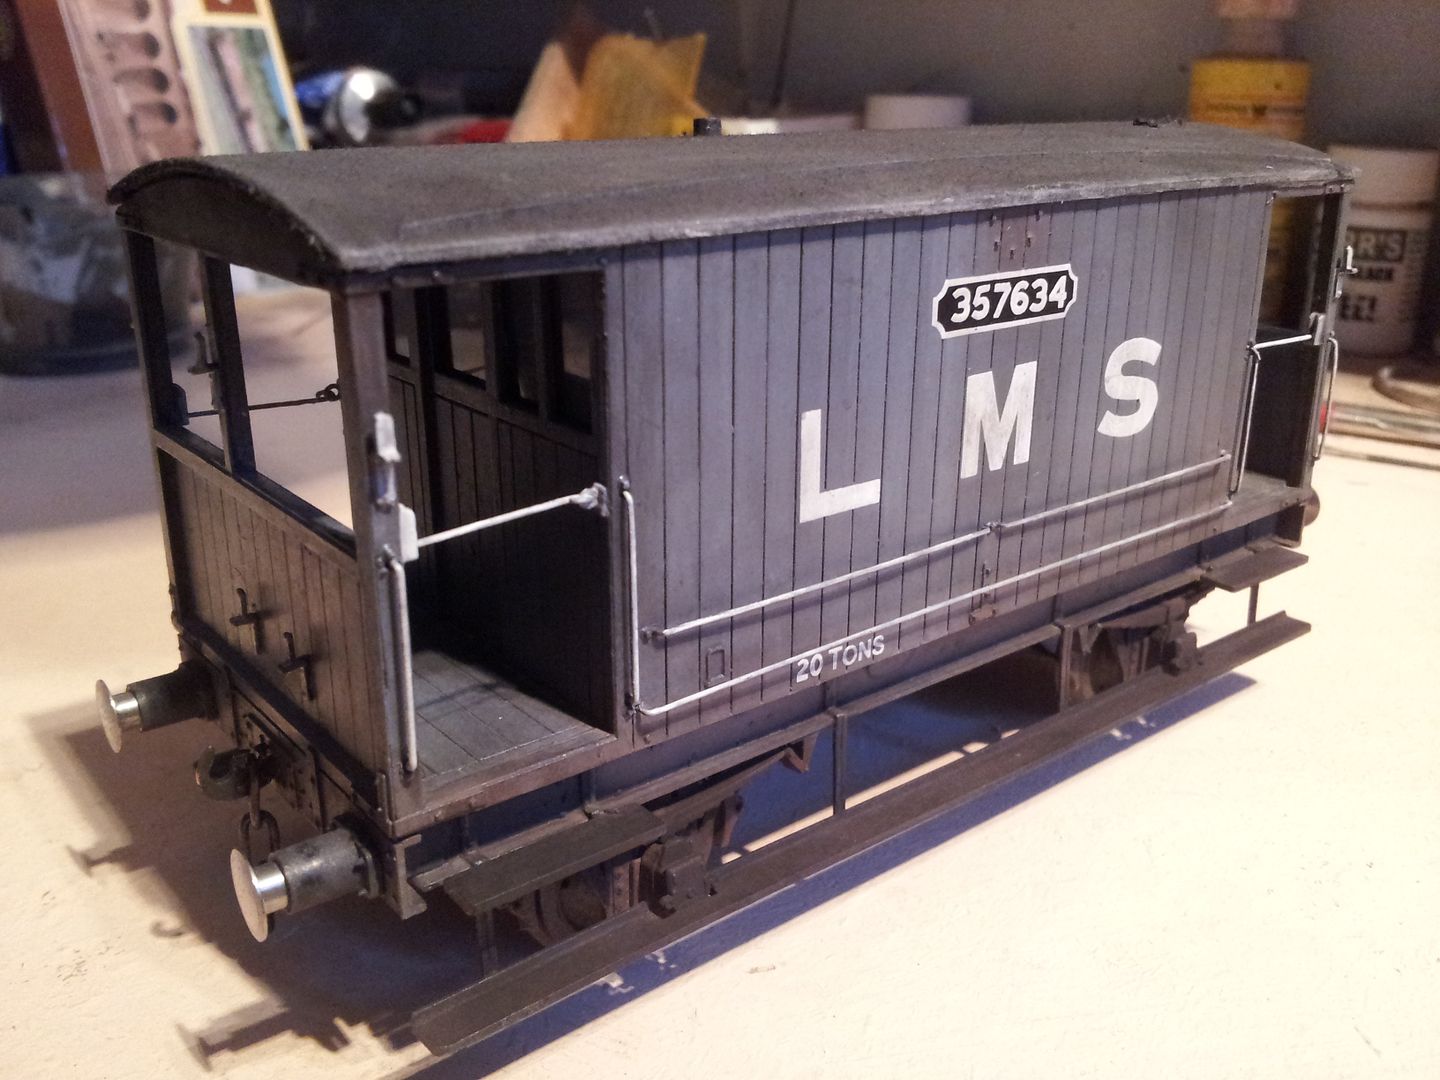
For the roof I wanted to try that '1 ply tissue paper' trick to represent canvas material. I've only ever read about it many times, so after a think I decided how to go about it.
First I painted the roof fairly thickly with grey, then smoothed the tissue ply over the top so half of it soaks in, then after a short time completely soacked it in Butanone. This stuck the tissue properly and released some more colour. After that I weather powdered it followed by chipping some away to represent damage. Verdict: Very happy with the result.
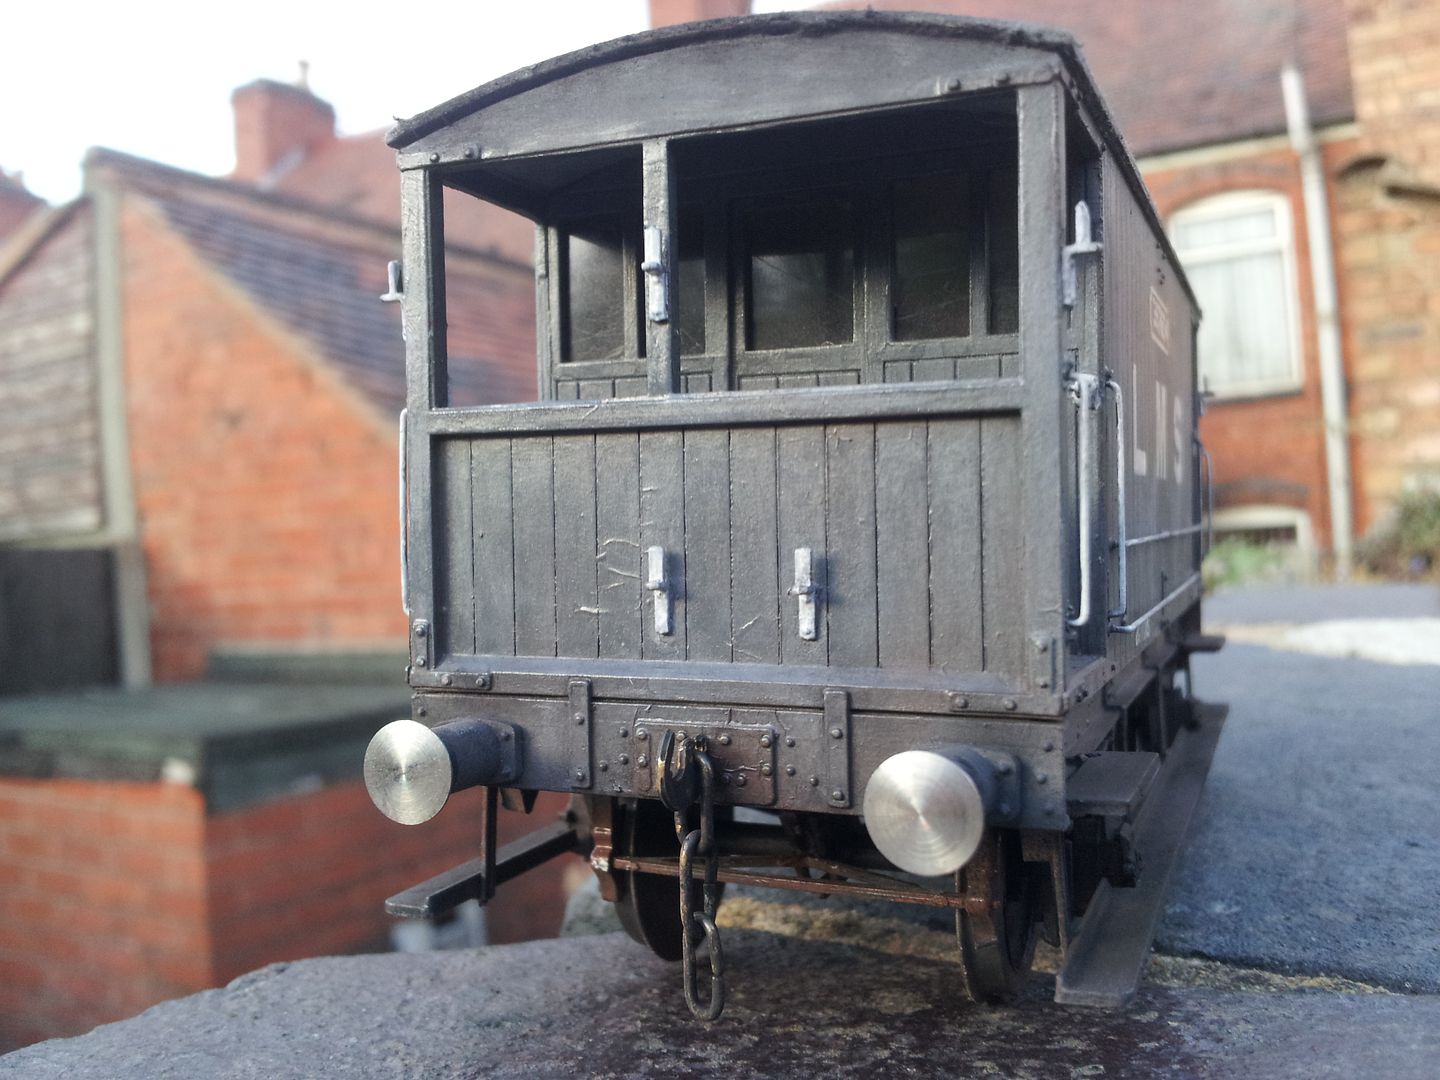
The following pics are just a collection of finished shots. Please understand I couldn't get the lighting, and thus colours perfect in shot so you'll have to mentally put it all together.
It was painted with Humbrol enamel paints, and weathered with both enamel and acrylic, but mainly the former. Weathering comprised of my usual method of applying a few washes, followed by dry brushing, followed by weathering powders. It has had a coat of hair spray or two also inbetween powder layers. I find for some reason hairspray of any varnish from a spray seems to blow away and change the colour of some of the powder. So It's usually a repetition of these last two stages until I'm happy. Oh yeah, the door bars have been made to be hinged, so if I lift them off the holder they dangle! Extra play value, even better now they are painted, for they don't bounce out so easily due to the extra thickness.
On one side the lettering is abit of a mess, this is because for some reason the weathering powders decided to stick to much, then when I tried to soften things it just looked dark grey, and so a session of painting over the letters in white, followed by more weathering and rubbing down, repeat, ensued. I'm not touching it any more as it's the best I've managed to get it. You'll notice it in the pictures. I've never used these type of transfers before but I like them; you apply them like a Pressfix but then soak them to remove the backing off. The wagon numbers are a little off angle too in places, but I've done my best. These had to be applied on top of the black base.
This first pic shows where my solvent washes got a bit excessive and lifted some of the paint. At first I thought 'Arse', then when it dried it layered itself 50%, I actually like the effect because to me it looks like paint has started to lift and peel.....well, it has, but I mean it looks realistic to me also. Good excuse again!
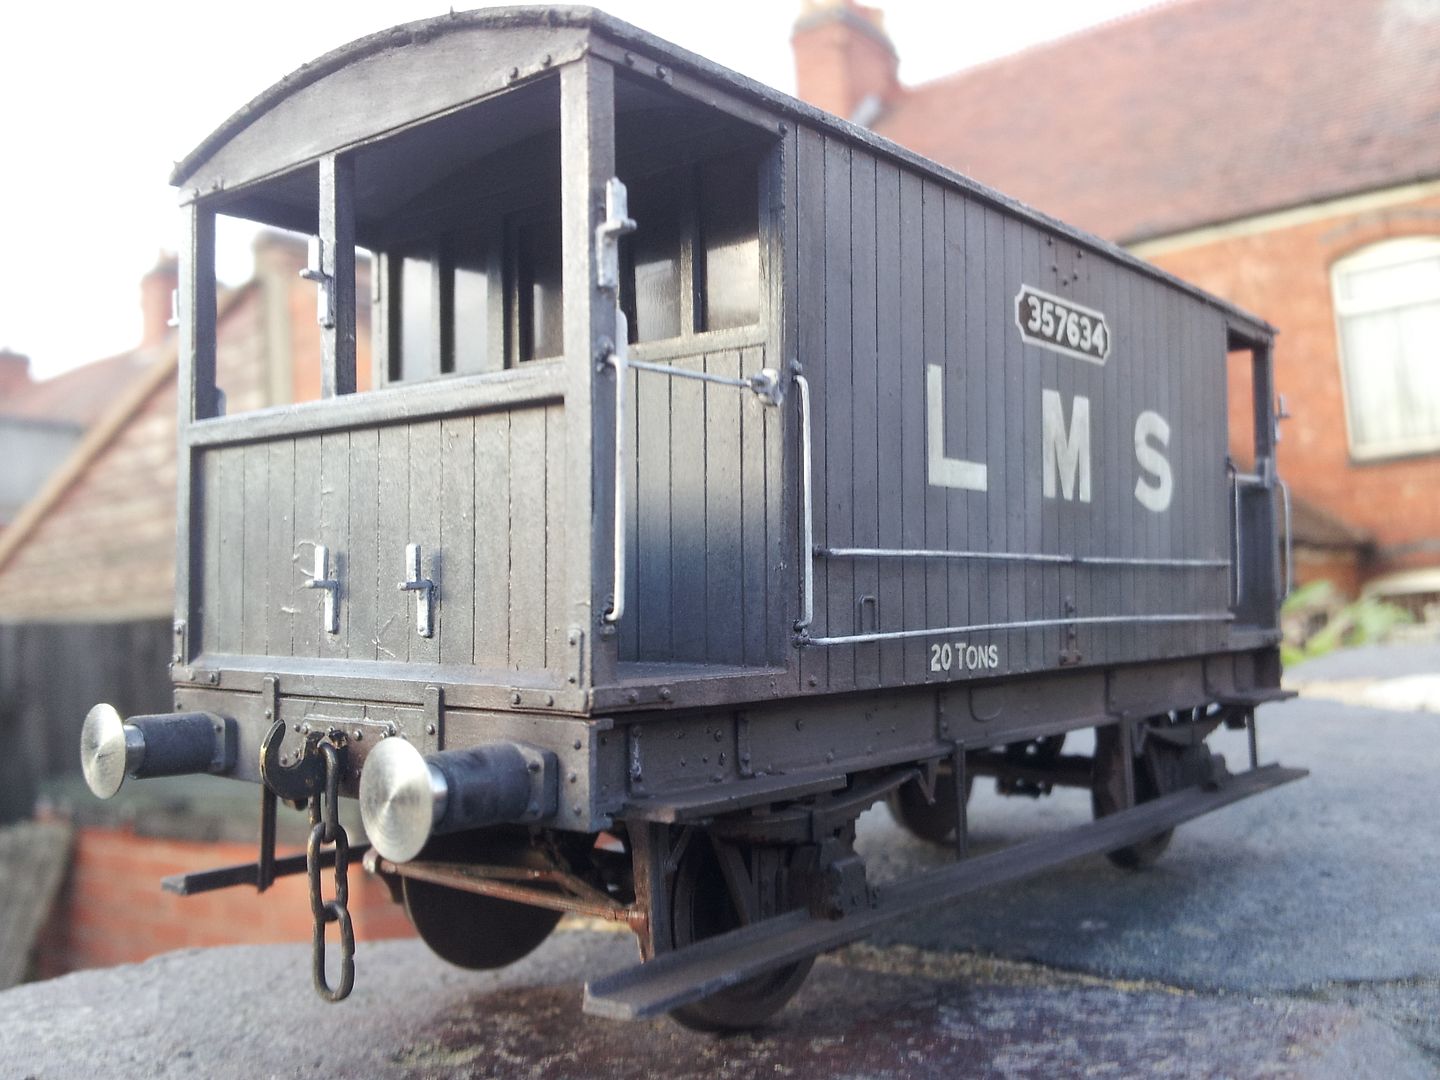
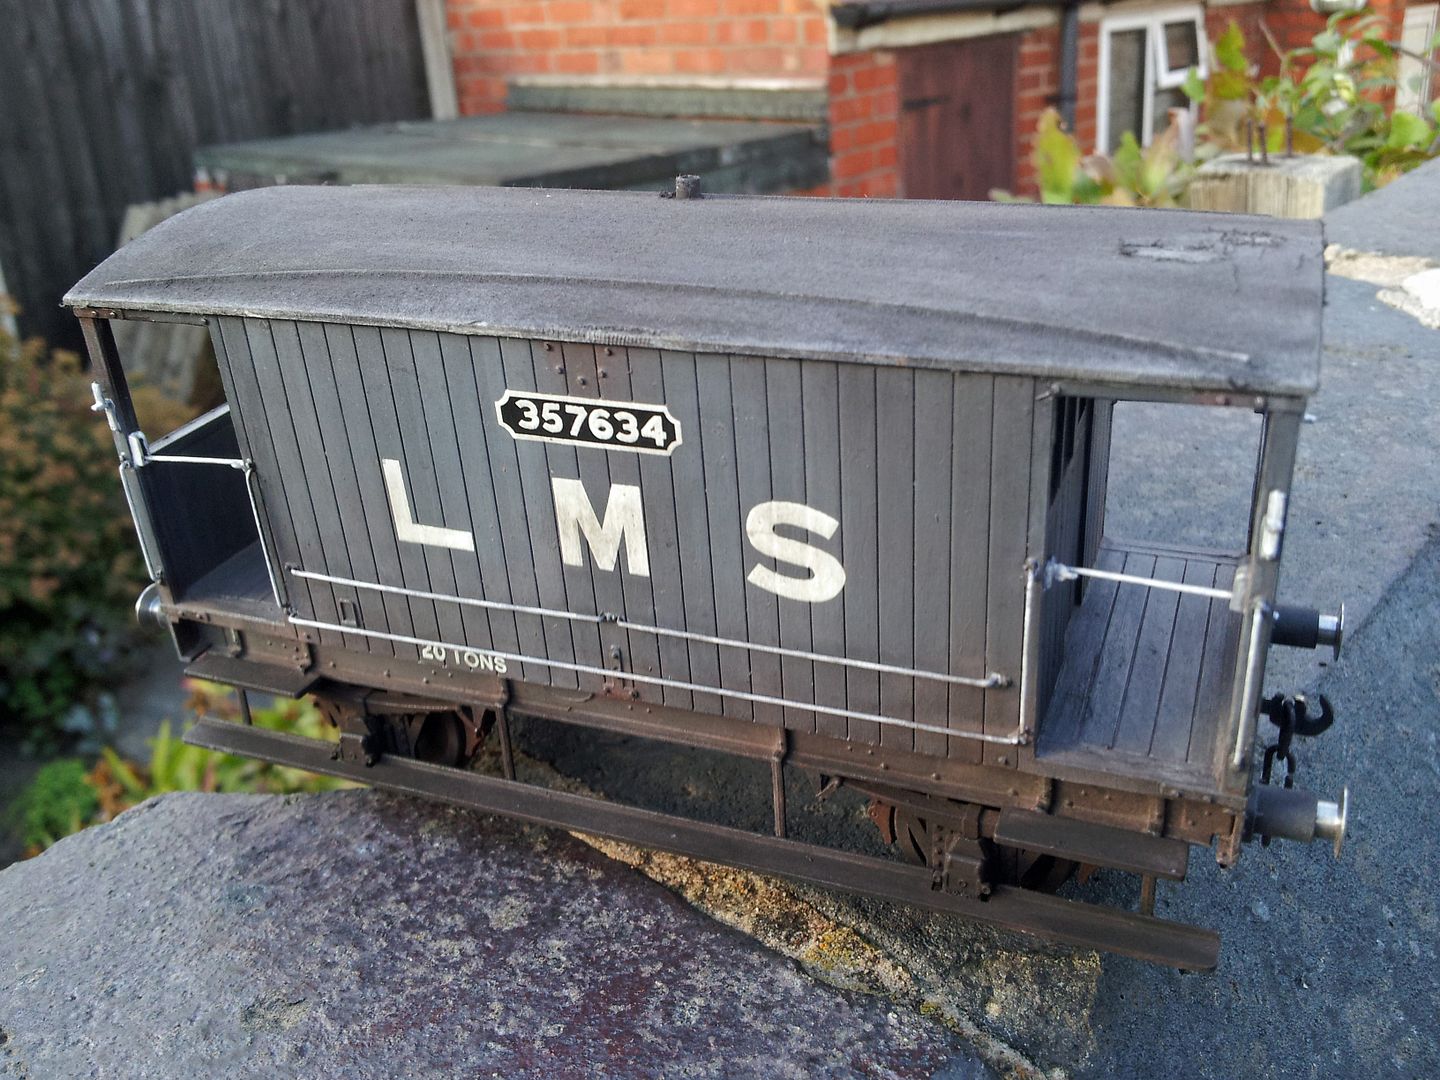
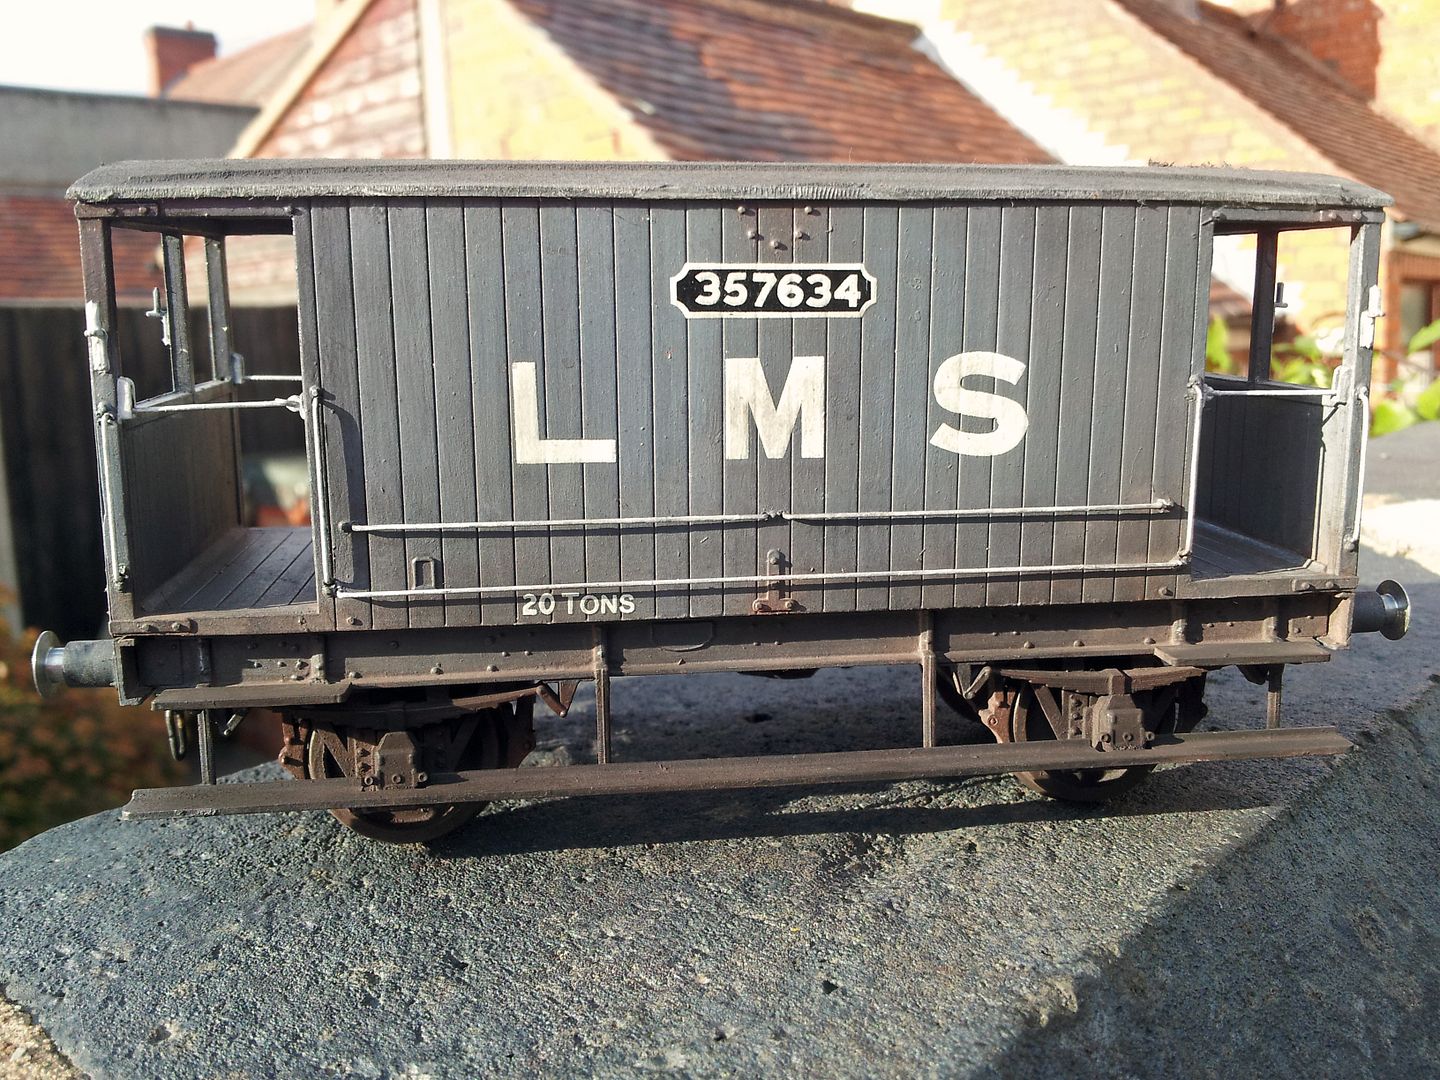
Minor quibbles aside, I'm really pleased with this. Not only has most of it gone together nicely but I'm feeling a little smug. I've amazed myself with the finished result, it's just to my eye looks so real. That's probably because it's a bigger model.
Well, I'm happy regardless.
What you think? 
-
 6
6

3 Comments
Recommended Comments
Create an account or sign in to comment
You need to be a member in order to leave a comment
Create an account
Sign up for a new account in our community. It's easy!
Register a new accountSign in
Already have an account? Sign in here.
Sign In Now