Well, The first half of this post I already posted on S4 on the 12th of August, but as it took me an age to find out how to paste on RMweb (that 'light' switch - pointless?)I give you a double whammy to catch up.
Greetings all. I will have to look into the slate issue for my next build, thanks for the info. This layout itself is loose so I'm not to worried, but anyway, here is a significant update in quite some time.
Time for a Bash.
I think this is the first time I have ever attempted to kitbash a building as the slate roof et al is a scratch build. Ok, here we go, nothing finescale, just good old bodge job bashing from me!
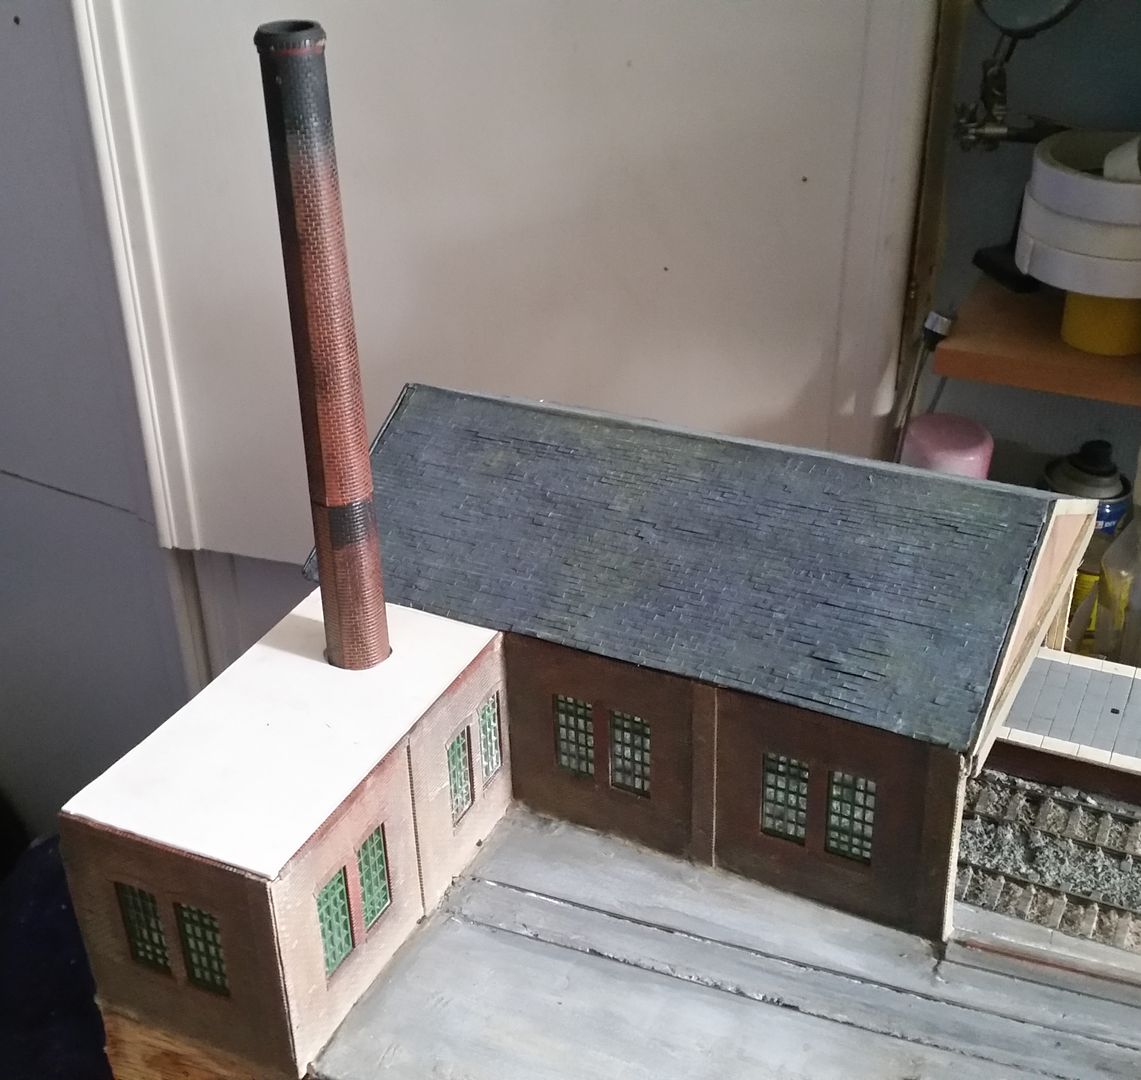
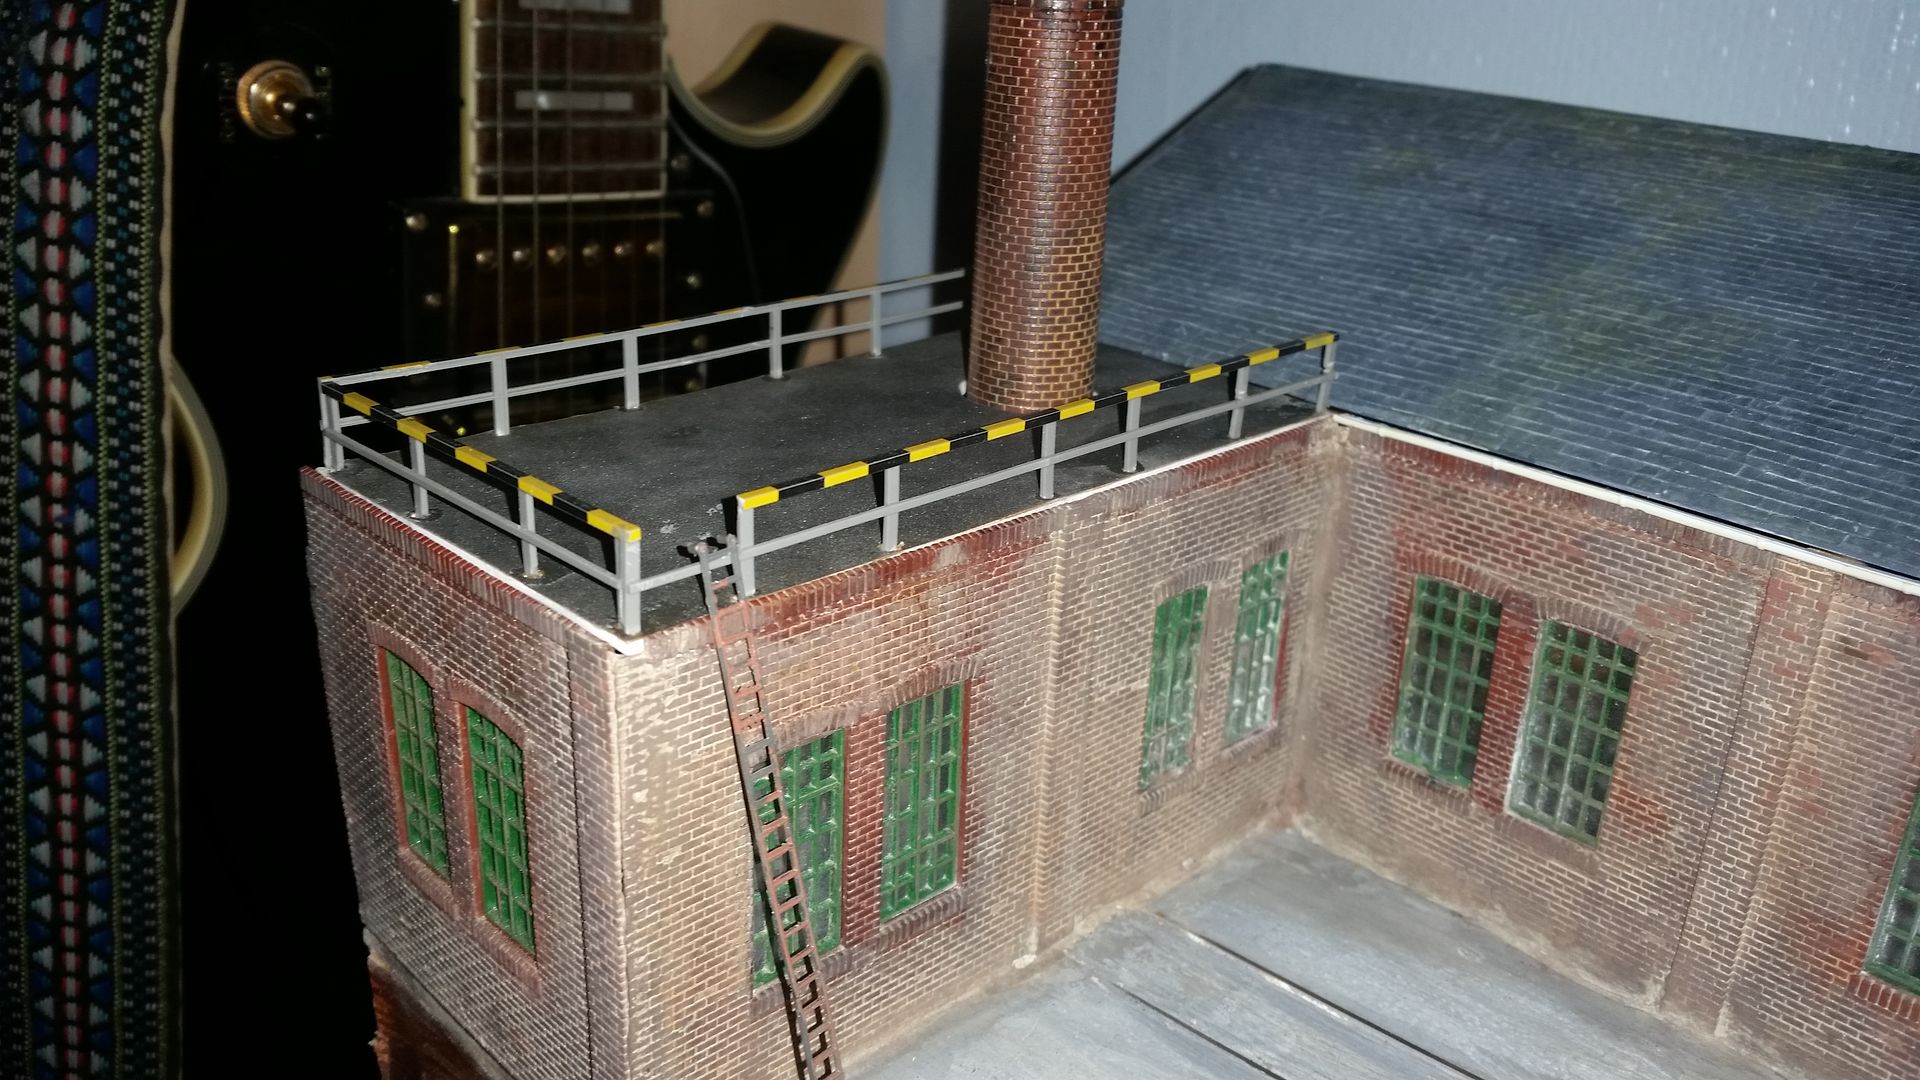
Firstly the sub roof....thingy. What is it? I have no idea, probably a boiler house or something as it has a fat chimney salvaged from my Vollmer Roundhouse shed kit (as are the main shed panels) and it will have a water tank of some description going on top...or a gas tank?? My lack of planning and vision clarity will probably make you question my sanity but my attempt at this layout is as originally stated, partly to try different building techniques, much about and experiment. I'm going for an industrial look, but impressionist will do for most of it. So, I started out with a bit of plastic card and cut a rough hole in. The roughness won't matter as I'll eventually 'seal' the chimney in place with a rubber washer or elastic band or something representing concrete, haven't decided yet.
I layered the top with some P600A abraisive paper for a textured look. I know the convention has evolved to not bother with it due to it being too course, but err...well I don't care. Wanted to try it. Looks good to me, just needs some light grey paint and dirt effect.
The handrails are too modern looking but again I don't care, I salvaged them from my old knackered Flieshmann turntable, drilled some holes and Bob's your Auntie. Ladder isn't refined or fixed yet but plonked for impression effect, good init. :shock:
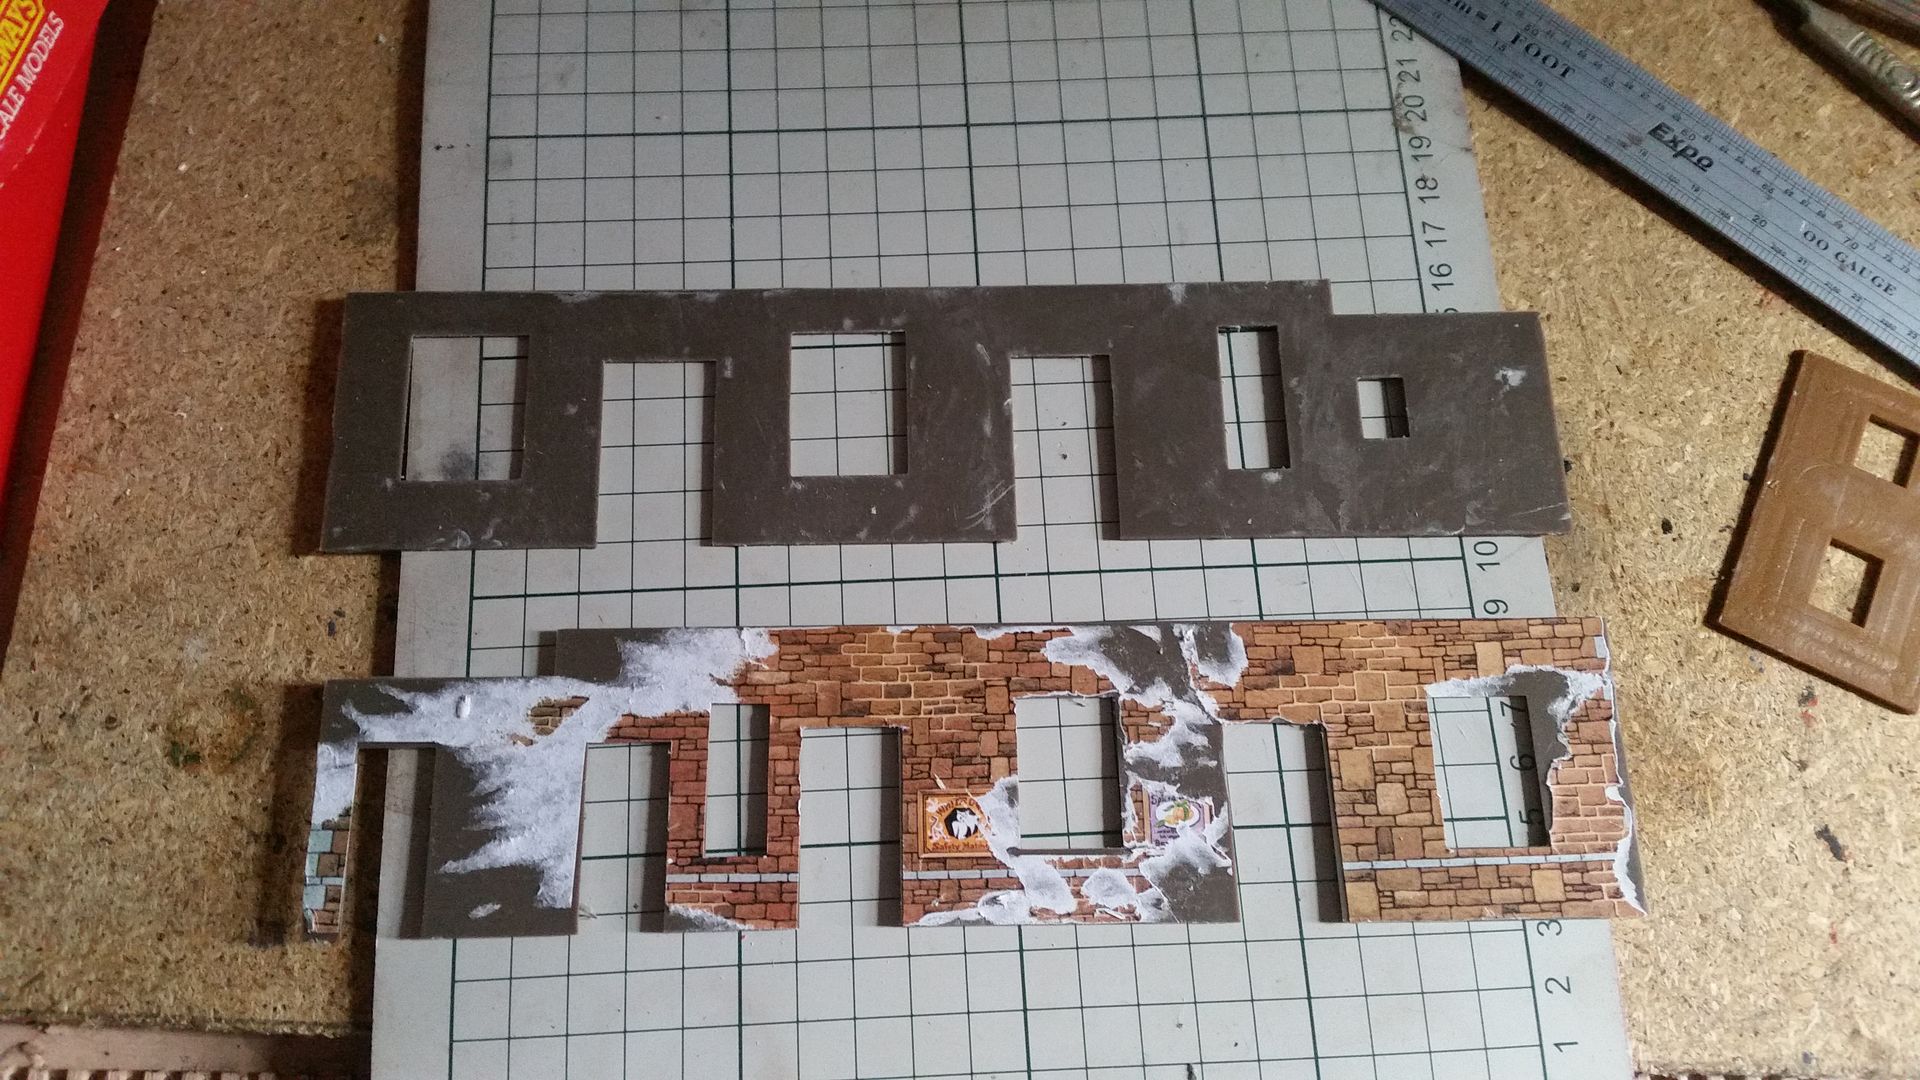
Next is to make use of the old Dunster Station kit from Hornby. I've got the kit in bits part built and thought it'd make a good basis for a loading dock. It was glued together with...um, PVA. Yep, PVA, what the hell was in my mind I don't know but in my defence I was very very young. After spending about an hour scraping the glue and paper off you can see the basic difference.
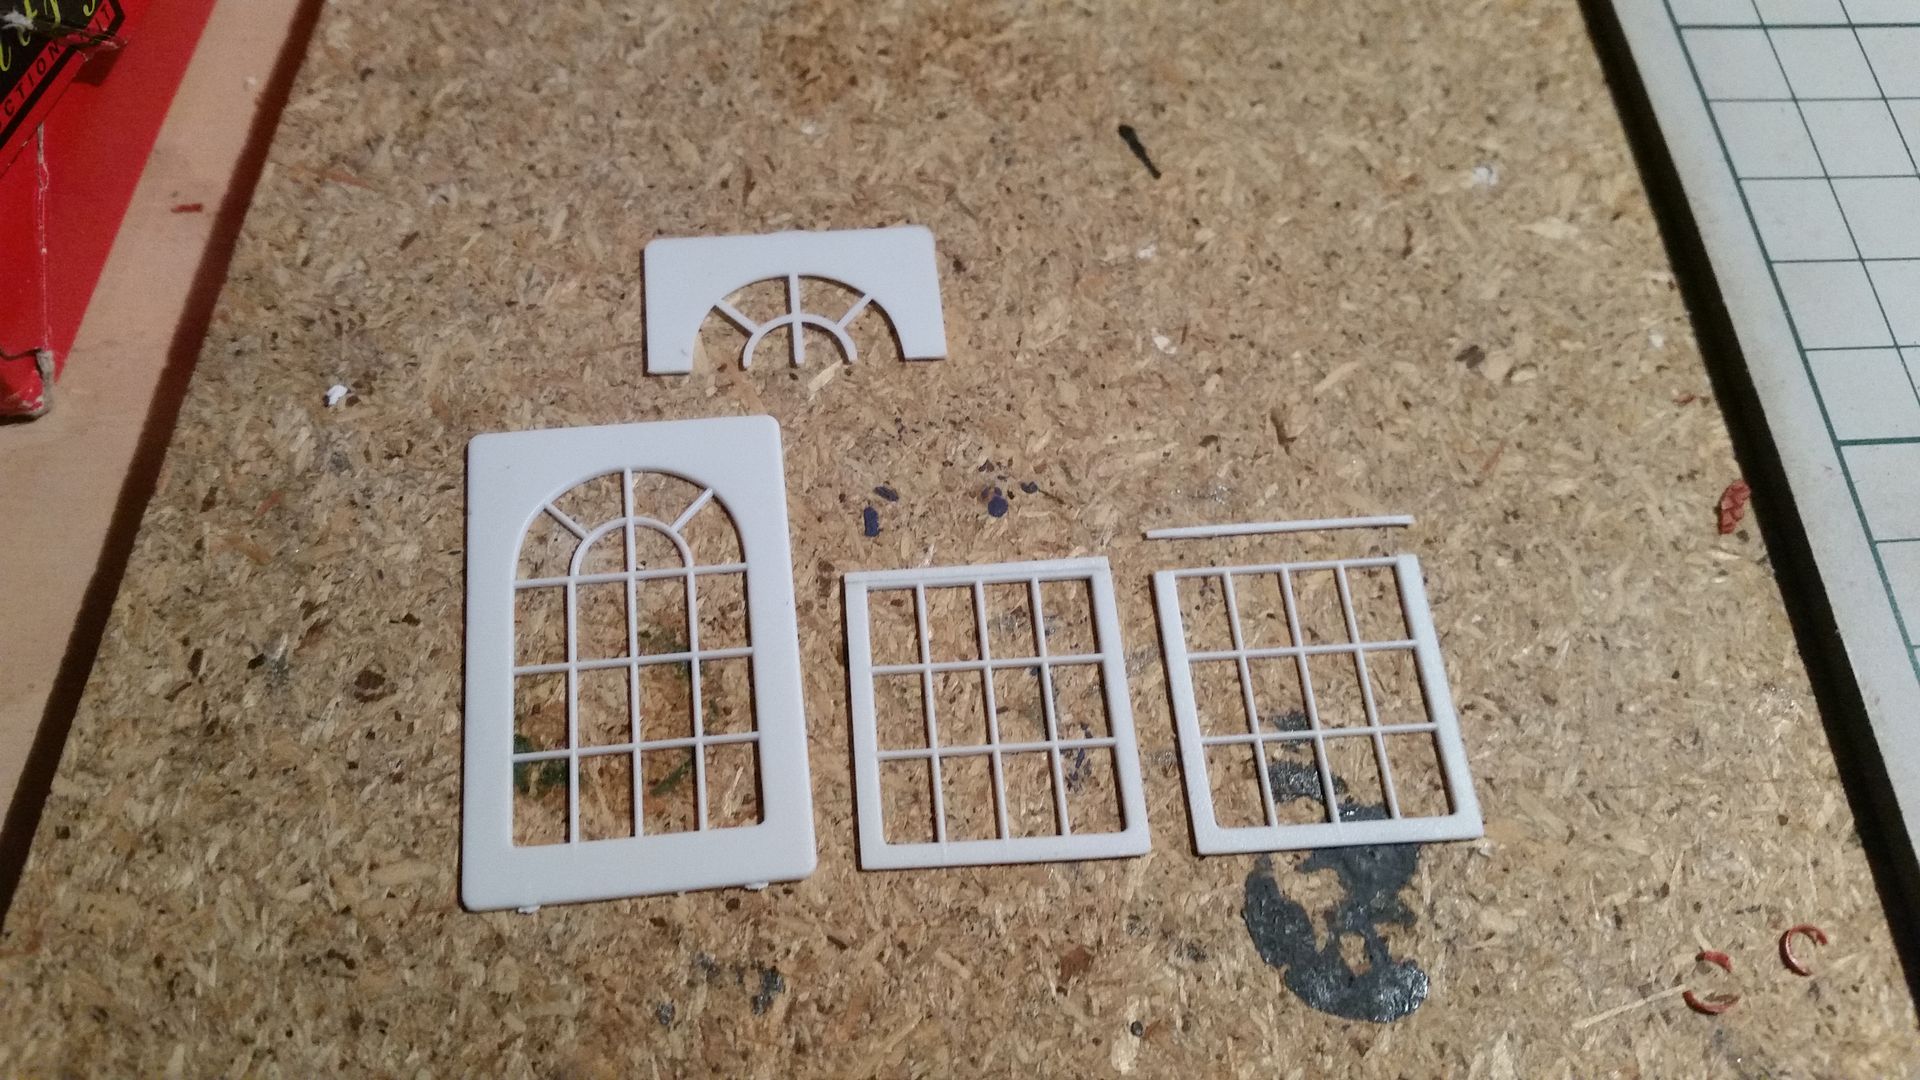
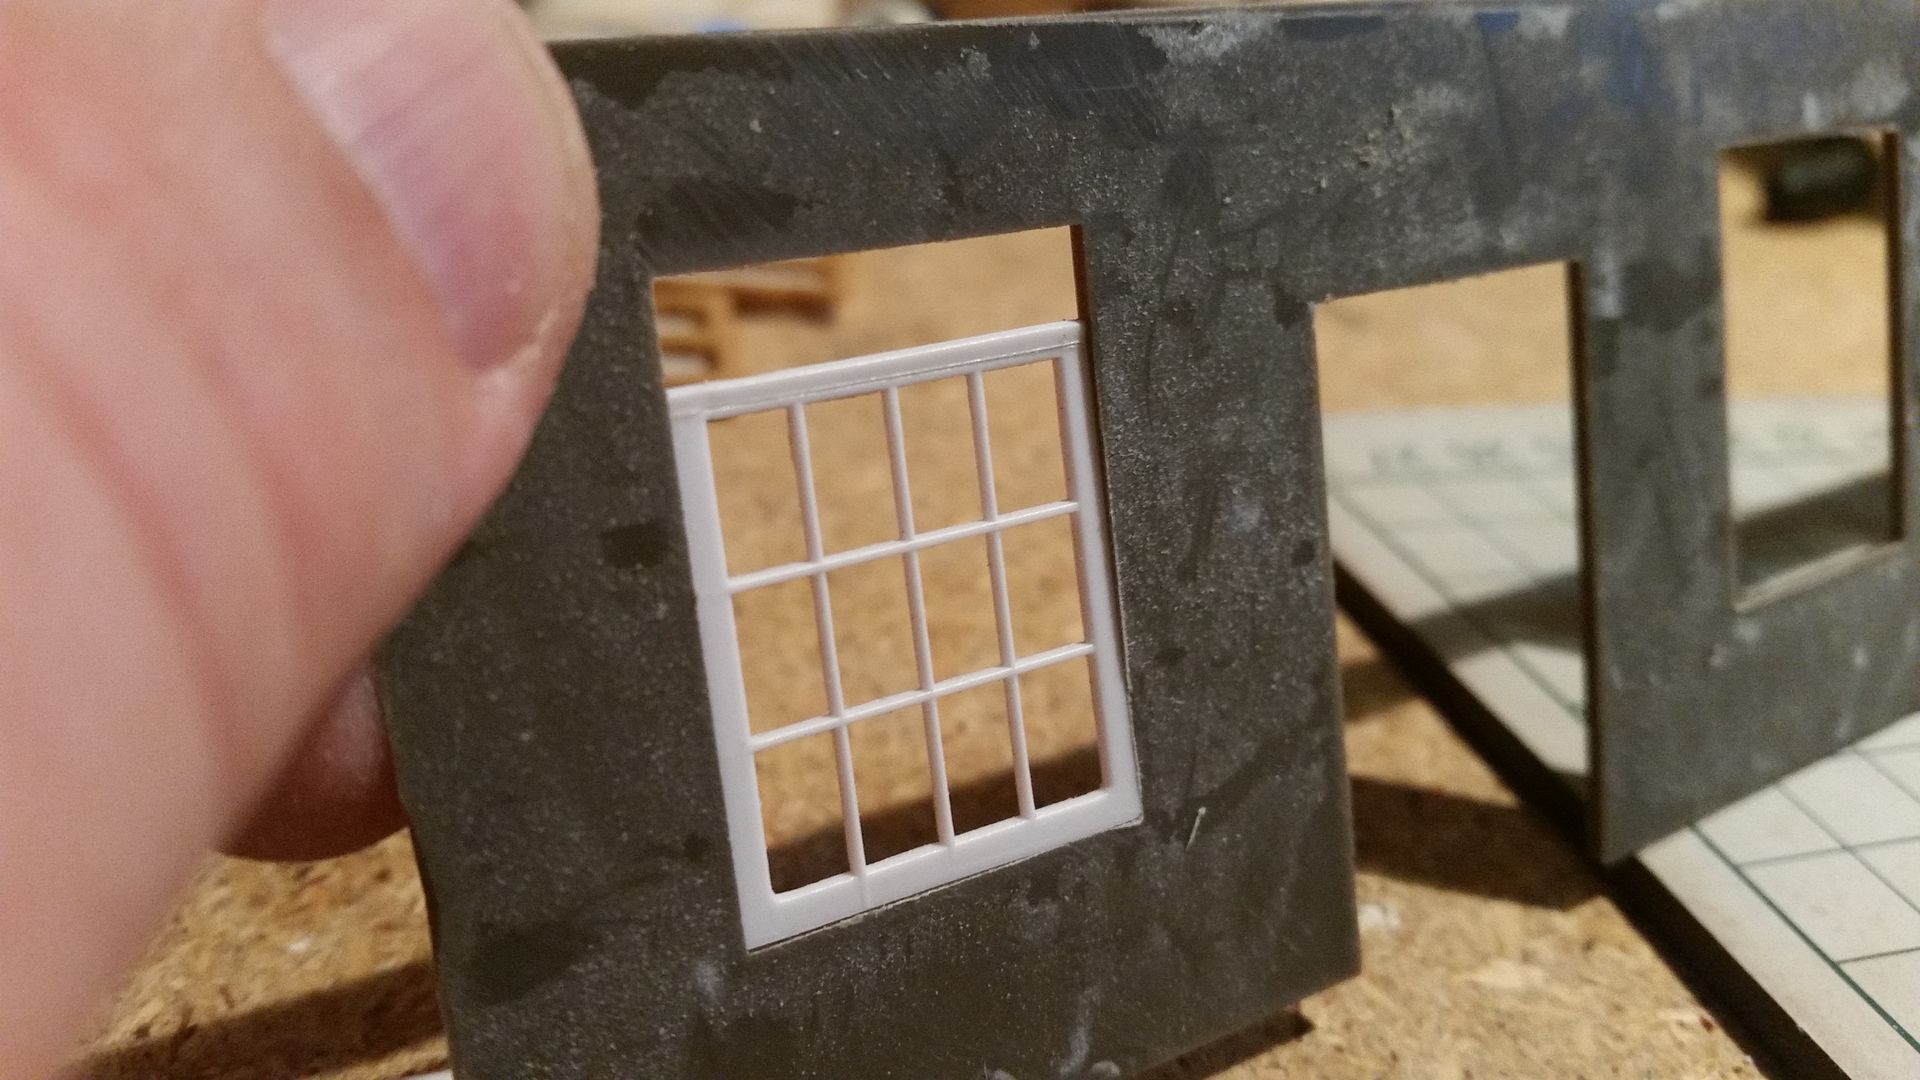
Next the windows, you probably recognise it's from the Wills window kit. I had a look and thought of cutting all the Cubular (is it even a word??) holes out and rounding the tops, then I had another idea. Cut the tops of the windows to be Cubular (there's that word again!), cut the sides down to fit the space and use slivers to repair the tops to be even.
The massive Lion Flap at the top won't matter as it'll be covered over. This isn't' glued in yet.
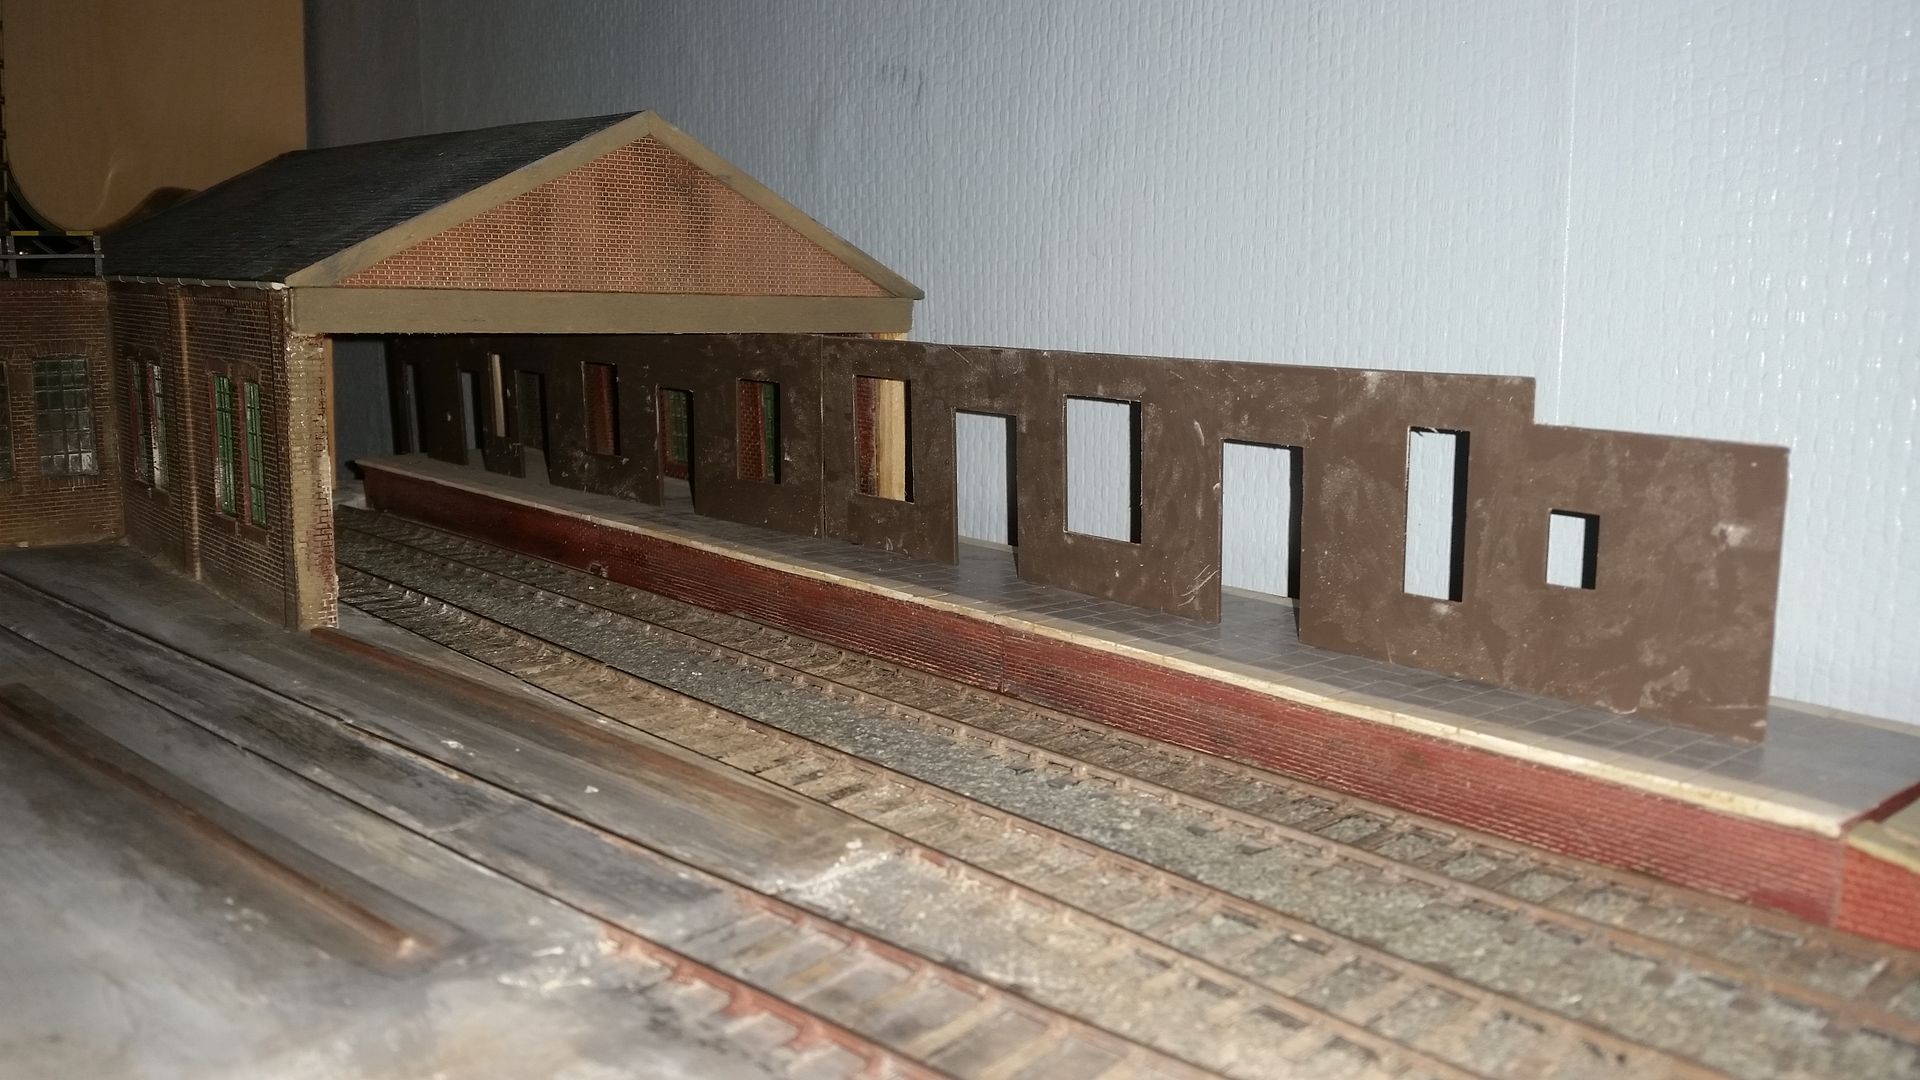
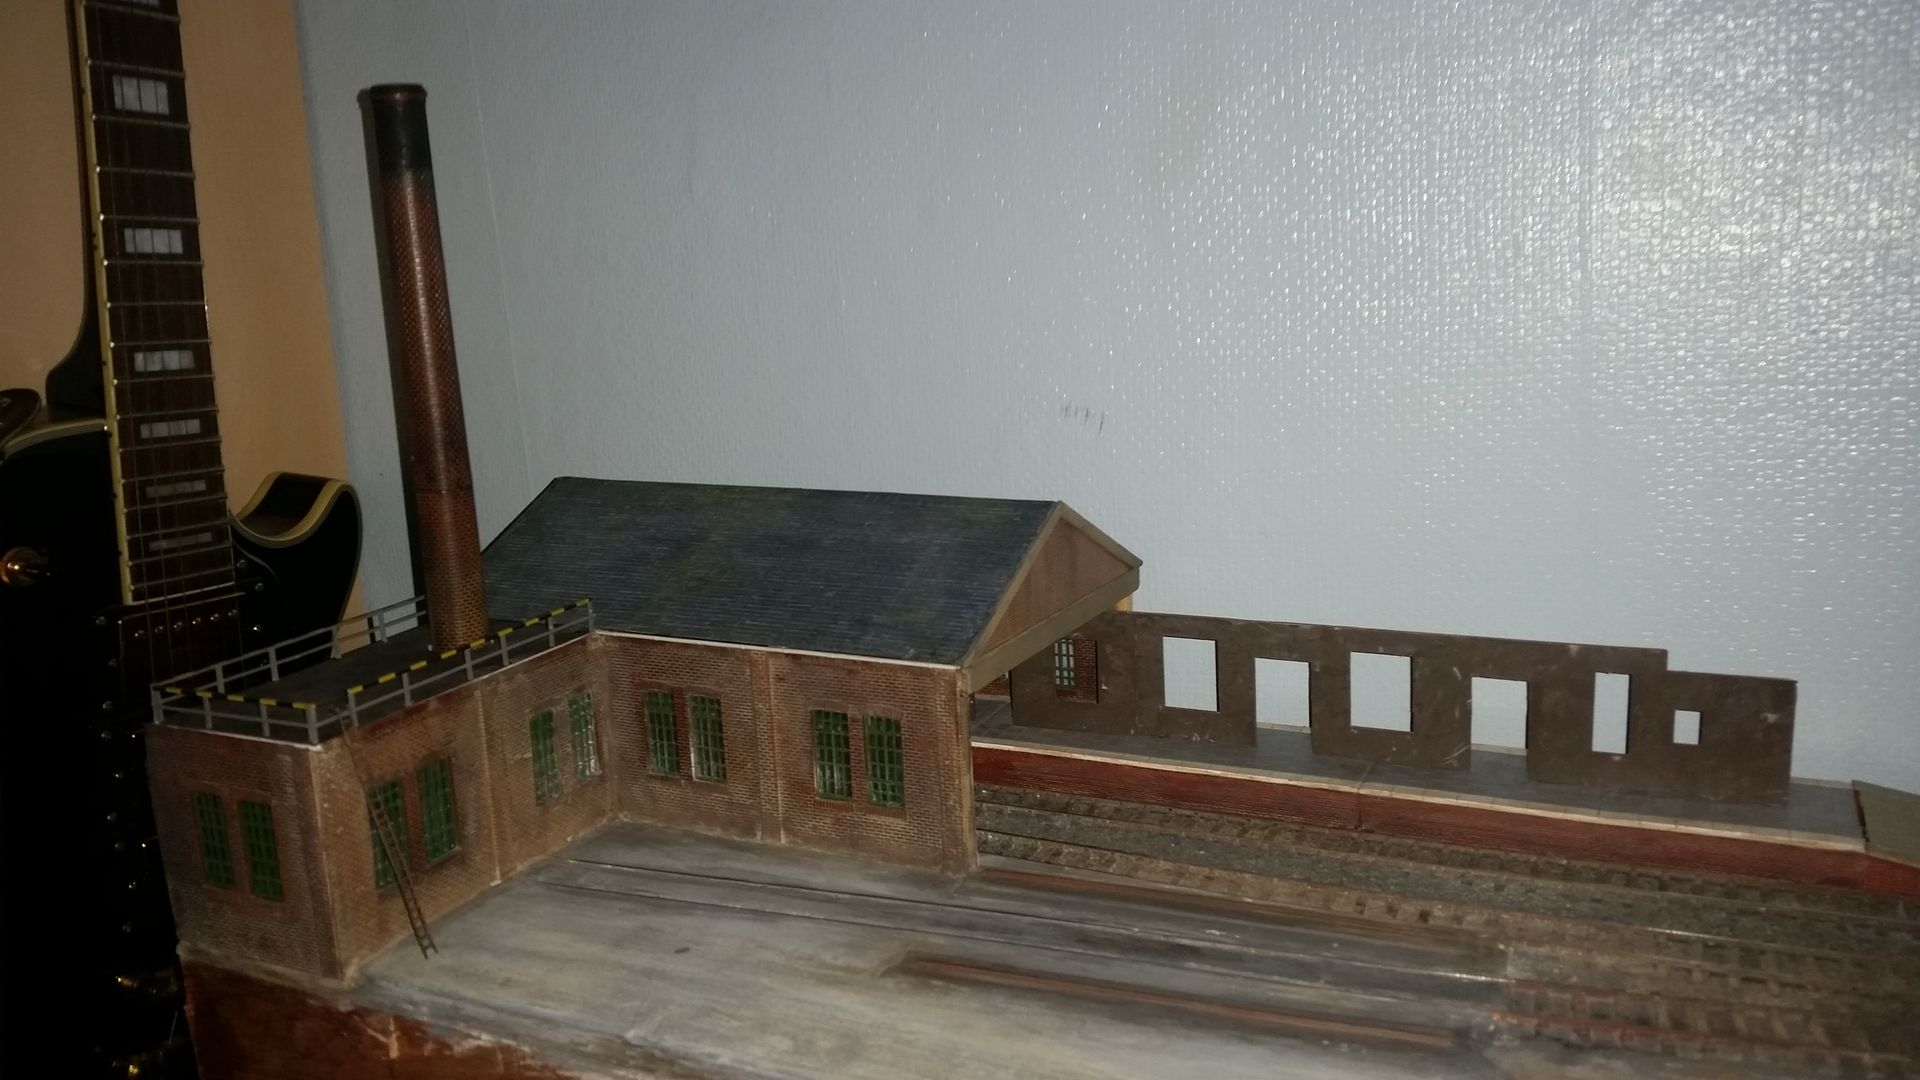
As a reminder, my idea is to have the loading dock extend inside and become one with the shed. The theory (excuse) is that originally it was a 3 road/track shed, but then later they scrapped a line in favour for a platform. Gives me reason to model this effect of progression as it's how for no reason I can think of, I've wanted it to look for a long time. This pic gives the basic idea.
And finally the overall impression. You have to use your imagination but you get the idea I'm sure.
There you go, hope you enjoyed this instalment of mine as it indeed has been a while.
Chow for now, comments welcome, good or bad. 8-)
OK, now for what I am uploading today on 22/12/14...
This BBB (Building Bash Bodge) started life as the Hornby Dunster Station kit. I used the main flat panels that came with the kit as the general basis idea, covered everything in plastic card brick, and for some of the windows I changed and some doors and windows I made my own by clipping off some of the protruding stone work. Lintels were plastic off cuts. I confess the lintels are a bit big.
This is no fine scale model I freely confess. I didn't put 100% effort into it either, no research or anything, just pure bodging freestyle. I don't even know what it does! But I'm learning ad enjoying it so that's all that really matters. Making the framework for the building bored me silly and is beyond wonky, but being a 75-80% relief building you don't really see it.
Ok, so from the previous pictures where I feasted your eyes on the Dunster station panels, I've pretty much gone and completed the whole thing for upload. Again, nothing is fine scale and it is a bit crude if I am honest, but the finished result I am surprised how well I reckon it has turned out. It's my first ever building that isn't a straight kit. so it is a kitbash with scratch built bits I guess you could say. Anyway, enough of my waffling.......Hmm, waffles. ![]()
This first picture shows it pretty much done. I ran out of drain pipe in the kit so had to cobble up my own, as a result it is a bit naff. Down pipe was bent plastic rod and the brackets behind were plastic strips. Simples. I also made a crude control box with dado.
I added a lip border thingy to the roof, this ensures any inebriated cats trespassing will trip over the lip and sub-sequentially fall off. Wonderful. I like cats, you don't believe me? No seriously I do.
Ok, I added the lip because I thought it would be an interesting modelling feature that I have seen on some real buildings....and that's about it really. Seeing as I didn't model a drain cover and another down pipe I guess it will one day turn into a rather unorthodox but eloquent water feature.
The wall rendering is another experiment of mine for no logical reason other than I wanted to try it and thought it might look interesting. P600 abrasive paper glued was the answer; maybe a tad over scale but no biggy.
Ok, now the model is painted and complete. I splodged and stippled some light grey weathering powder into paint to make the rendering even more out of scale, just to wind up really good S4 modellers. No not really, I did it as another experiment and then once dry I dusted it over again. Despite the over scale look I think it works. Maybe if I just dusted the abrasive paper it would have been enough, or maybe stippled the powder into the paint from a flat base. Lessons lessons.
Why is the cubed area of the building (Toilet Block?) boarded up instead of having a nice window in? Erm, some drunk got angry and punched it out or the author of this blog entry couldn't be bummed to scratch build a proper one. You choose. ![]() For the down pipe bracket wrap arounds I just painted some dark paint to represent them by impression. I know older brackets wee thick and chunky but I guess this is Bakalite or something. Why are some bricks missing you ask? Well err, that angry lager swiller abused it repeatedly with a sledge hammer or something. Or maybe he was wearing steel toe capped boots and just went for it...I dunno, eeeeuh.
For the down pipe bracket wrap arounds I just painted some dark paint to represent them by impression. I know older brackets wee thick and chunky but I guess this is Bakalite or something. Why are some bricks missing you ask? Well err, that angry lager swiller abused it repeatedly with a sledge hammer or something. Or maybe he was wearing steel toe capped boots and just went for it...I dunno, eeeeuh.
Here we see my shutter door that keeps people away from the cat fighting racket inside, plus a large stash of exported...
I scribed some plastic card repeatedly but after a while the gap intervals changed and I slipped a few times and it is rather messy. Not accurate, BUT! At a quick glance it gives a good impression in my view. As well as weathering I dry brushed some silver paint to give it that 'shutter door look.' My description ability is priceless.
The control box also received silver paint, maybe it is OTT shiny but never mind. Three blobs of paint; green, redthen green represent up, stop and down.
We have some serious degradation here. Why didn't I model the doors and windows you may ask? Weeeeyyl, you know that wine bibber I mentioned earlier and those battle worn drunken cats I mentioned earlier? The cats are finished off in style in the form of short range Kamakazi Katz. Or I couldn't be bothered to make or buy some? Eeu, just a thought. Honestly, this building is pure experimentation, you aren't getting any serious efforts with this blog entry.
Overall impression. I'm quite pleased to be honest as it hasn't turned out too bad in my estimation. The glazing has a touch of blooming to it but again, this was really lots of projectile vomit from the booze brothers.
And the overall impression, taken with a flash to ensure completely misleading colour definition and hue. The overhang from the platform isn't an issue as I'll sort that out later.
It gives the look I was after, that in the past there were 3 tracks going thought the shed, then later they ripped up a track and replaced it with platform and buildings that extend inwards. All my excuse to try this effect out. I think it works ok, the difference in style and brick colour give it that more modern innovation look.
Tada! Cheers.




0 Comments
Recommended Comments
There are no comments to display.
Create an account or sign in to comment
You need to be a member in order to leave a comment
Create an account
Sign up for a new account in our community. It's easy!
Register a new accountSign in
Already have an account? Sign in here.
Sign In Now