

Reworking Vitrains EWS Class 47

Entry posted by 43179
2,370 views
Hellow! Its been ages since ive posted on here -
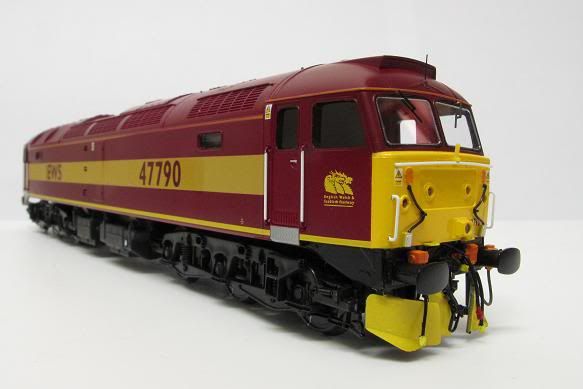
I've been doing a 'quickie' project using one of Vitrains latest 47 releases - 47773 The Queen Mother
This being reworked into 47790 - a nice distinctive EWS machine with its eliptical buffers and snowploughs 8)
The printed names have been slowly and carefully removed with tcut - this left a little bit of a mark on the maroon paintwork but ive patch painted/feathered this in with some precision EWS maroon
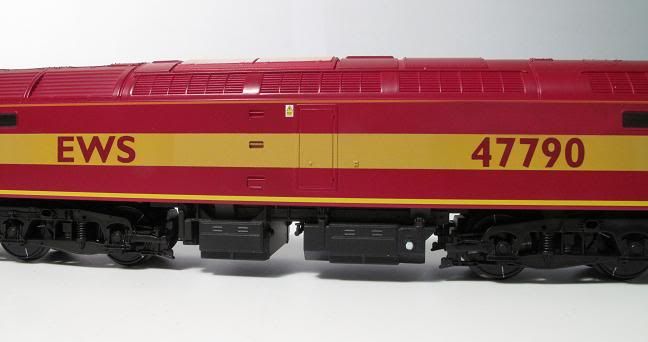
Ive lightly rubbed down the numbers and EWS brandings on the gold stripe , then resprayed this with Precision EWS gold . New Numbers and EWS lettering hs been added with Modelmaster decals - these are a superb match for the vitrains paint finish.
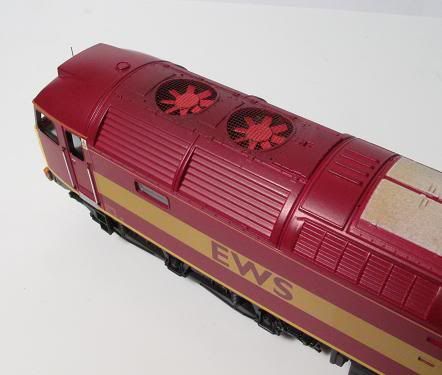
Shawplans new roof fans and grilles have been added - I found it was easier to solder all the layers of the fans together first - then twist the blades to shape.
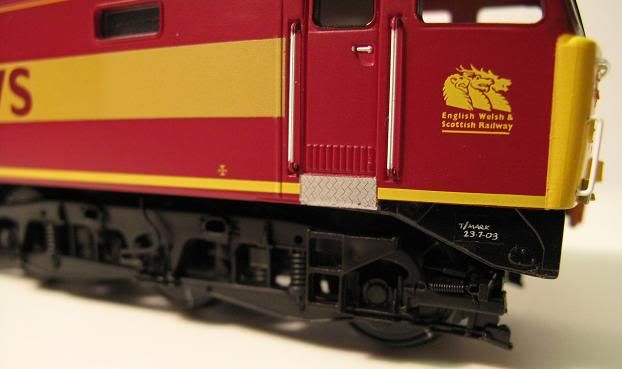
Im not sure about other EWS 47s , but '790 only had the straight bit of its handrails painted white - the top and bottom being maroon - so I sprayed the vitrains handrails to match this while they were still on the fret. I also added a little transfer for the bufferbeam saying when the trye markings were added
a cruel close up of the bufferbeam -
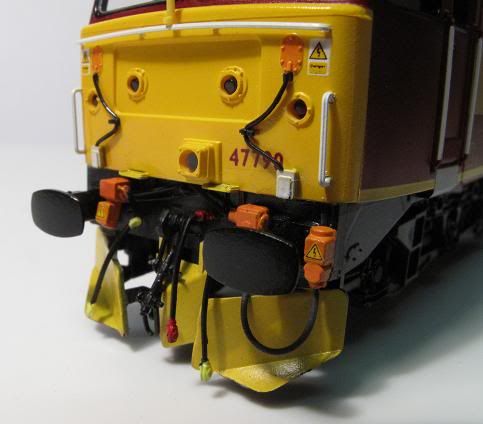
Ive chopped the vitrains buffers to leave just the mounting/backing plates- then put a shawplan etch over the top to restore the fixing bolt detail. Then Hornby 60 buffers are added. The snowploughs and ETH bits I'm sure you recognise - Heljan bits with some wiring added - I've the jumper cable with some fine elastic cord as its a bit more durable. I've also Heljan bits for the lower sections of the TDM cables as the vitrains parts are a bit undersize. The bufferbeam is Finished off with a Hornby screw coupling and pipes.
As you can see ive made a start fitting new Shawplan Laser cut glazing - not a 5 minute job - but well worth it - I've done the windscreens so far - fixed with PVA so if it ll goes wrong I can dunk it in water and start again. The Winscreen wipers (A1) are also just held on with a tiny spot of PVA so there shouldnt be any damage if they get knocked.
Nearly finished - although I havent got any microstrip to do the bars on the cabside quaterlight glazing - of course i forgot to buy any at Ally Pally  .
.
tfn
Jon
-
 2
2

8 Comments
Recommended Comments
Create an account or sign in to comment
You need to be a member in order to leave a comment
Create an account
Sign up for a new account in our community. It's easy!
Register a new accountSign in
Already have an account? Sign in here.
Sign In Now