


Entry posted by Will Vale
750 views
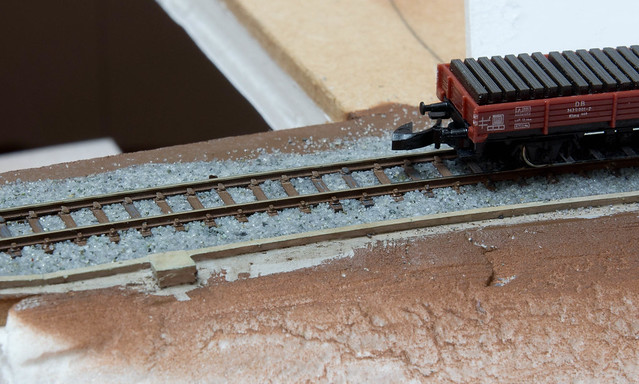
Ballast by Will Vale, on Flickr
This always feels like a make-or-break point for layout building. You've got to do it, but once you have going back is impossible, or at least wildly unpleasant. I have ballasted Z track before, as seen here on Igelfeld, but the ballast I used was pretty coarse. I was happy with it at the time, but given that the new layout has closer-to-scale rail profile, I felt it needed closer-to-scale ballast as well.

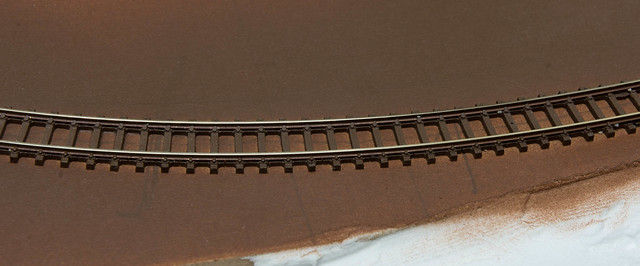
Before getting into that, I laid the track with superglue directly onto the MDF trackbed. This was previously sealed with 50:50 PVA and water. Finally the whole lot was painted with Tamiya red-brown from a rattle can, getting things to the state shown here:
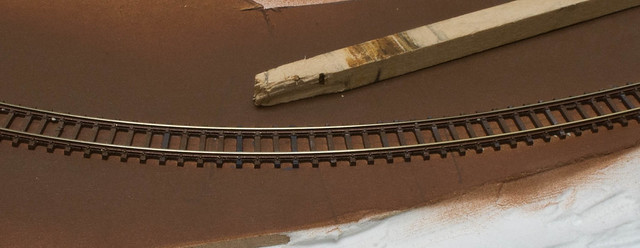
I then touched in various sleepers with various blends of thinned dark grey and brown acrylics:
and that was all the easy wins won. Time to go rooting around in the ballast supplies. I did some dry tests with a whole range of things from my scenery box, including Woodland Scenics fine, and sieved Hornby fine gravel which is what I used on Whitemarsh. I really like the colour of the latter, but they were all overscale:
Counting lumps on prototype pictures, I think something like eight to ten grains between each pair of sleepers is required to be somewhat close to scale. In my tray of scenery bits I have some very fine gravel/rock dust from (I think) Jordan or one of the other European scenery manufacturers. I used this to make gravel walking routes on Whitemarsh. The size is good, but the colour is wrong - too uniform and too cool and dark. I ended up mixing in some fine silica sand from the art shop, which lightens things a bit and breaks up the uniformity:

Not too bad, although rather messy.
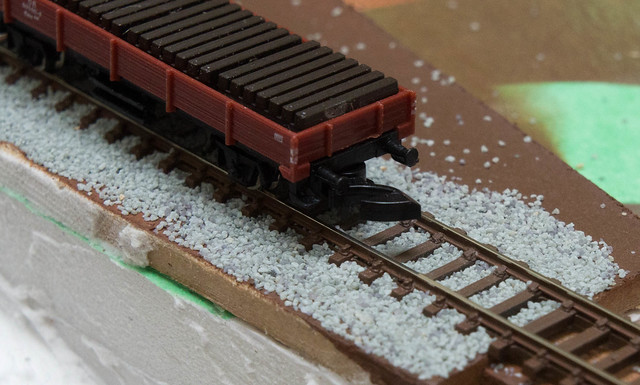
Yesterday I got the lineside cable trunking finished off and painted, so I couldn't put off the ballast any longer. Brushing it into place was a royal pain - it's light enough that it doesn't sit naturally, plus the track has a webbing between sleepers, so everything had to be very carefully positioned and tamped with a very fine brush and my fingers. Plus the invaluable "bit of folded postcard" for dishing it out in the first place. Doing a couple of feet of track was incredibly hard work, surprisingly so since ballasting is normally something I quite enjoy. A trapped nerve which is bothering my left bicep didn't make things any easier either!
Thankfully, after the (literal!) pain of spreading the stuff, bonding it was easy-peasy. I misted everything with neat alcohol (IPA) from a pump spray bottle until it looked wet, then applied Klear to the edges with a pipette. It absorbed beautifully and, joy of joys, drew itself under the rails to set the ballast between the sleepers. At least provided it was damp enough on either side. This was a huge advantage since applying the Klear between the rails can leave glossy spots on the sleepers - this are hard to get rid of without a lot of painstaking painting.
A few hours later it'd dried up quite nicely:
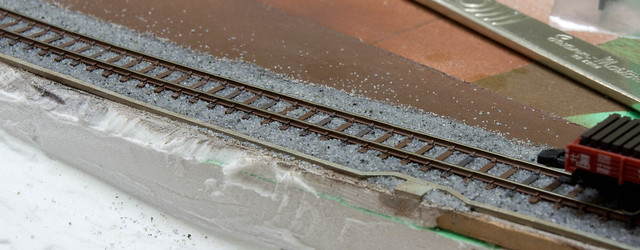
It's still not the right colour, and in a couple of places it's a bit darker than this, so I'm not out of the woods yet. I think some very careful dry-brushing (or possibly a wash of MIG pigments?) should lighten the colour to the point where I can then apply brown washes to correct the hue. Watch this space...
-
 1
1

3 Comments
Recommended Comments
Create an account or sign in to comment
You need to be a member in order to leave a comment
Create an account
Sign up for a new account in our community. It's easy!
Register a new accountSign in
Already have an account? Sign in here.
Sign In Now