


Entry posted by Will Vale
1,134 views
(click pictures for big versions)
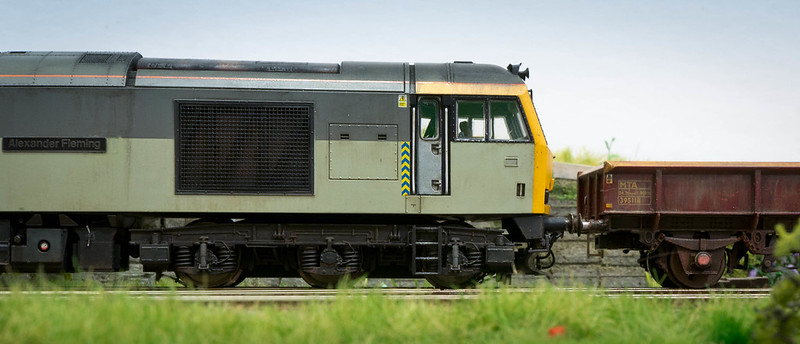
I spent time on Whitemarsh last week so that I could enter in the NZAMRC 2012 Convention competition. I opted to just take the bridge end - nothing's been done to the other module which is definitely lagging behind now 
My main aim was to try and fill in various unfinished or messy-looking areas. The worst offenders were the last-minute patches of grass I added before Railex in 2010 which were applied straight over the ballast, and didn't have any "reinforcement" from earth or weeds. They looked a bit odd as a result, so I've been sprinkling on various mixtures of scenic fluff to fill in around the grass, and tamping it down with a dry brush before wetting and applying matt medium. I also pulled up some of the grass and thinned it out near the bridge.
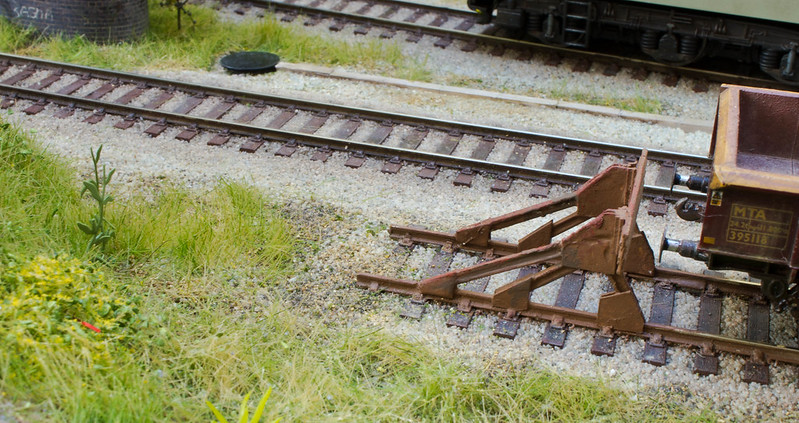
You can see the results around the buffer stop and ballast/grass edges which I think look a bit more "faired in" than they did. I also replaced the (prototypical, but odd-looking) single Rosebay Willowherb between the two lines with some more subtle weeds:
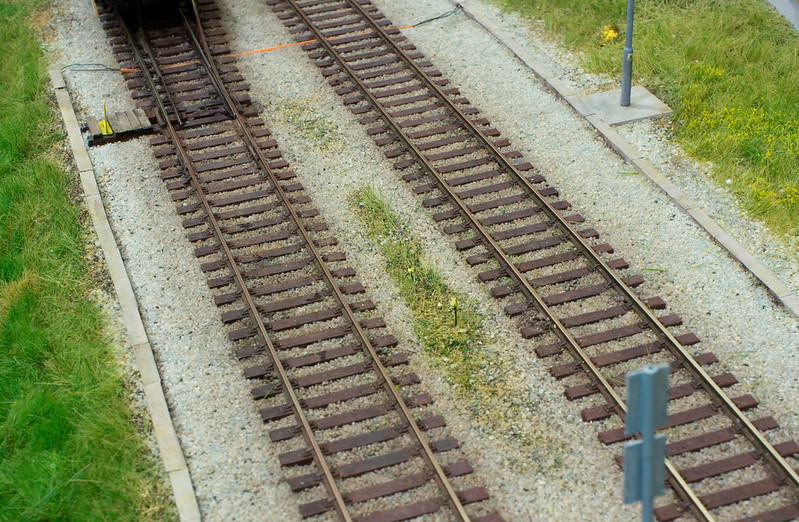
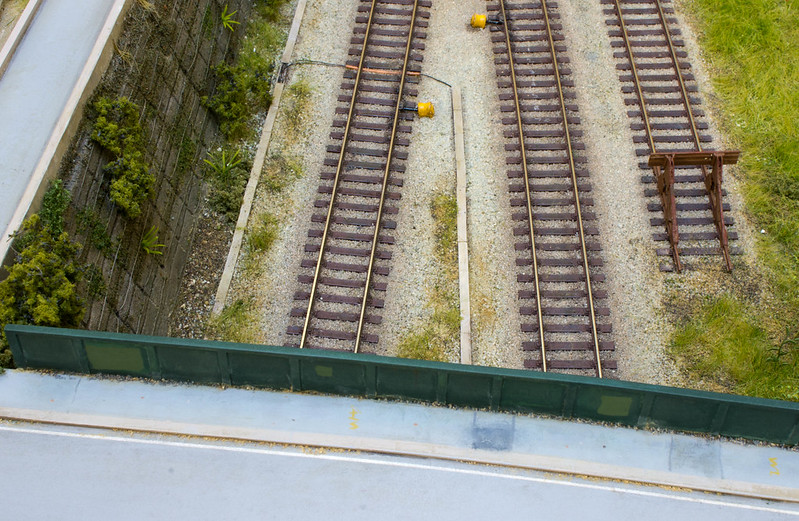
Another job was finishing off painting the concrete trunking. Once that was done I added some shadows on the ballast with a dark wash (not everywhere, but patchily) to define this a bit better. Also on the concrete front, I nicked the four lamps I made for the other end of the layout and added some new pads for them to sit on. They aren't wired up yet, and I need to get some more brass tube to make proper sockets for them, but they look nice and help reinforce the connection between layout and prototype.

I noticed (only after a while...) that the neat alcohol I use for wetting the fine textures had faded the paint on the bridge girder, which was a bit annoying. Luckily it wasn't hard to recover it by drybrushing with the original colour, keeping a little bit of the faded paint in places for variety. On the other side of the girder I've painted some details on the footpath and weathered the road.
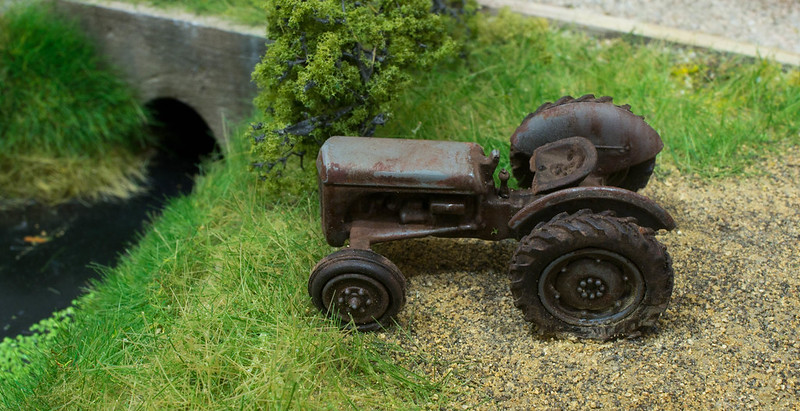
Lastly I filled in the empty spot with a rusted Little Grey Fergie (TE20) since we used to see them around when I was growing up in the fens. The weathering job is very simple and comprised three steps - Dullcote, MIG washes, and MIG pigments. It's not subtle but I think it does the job OK. I also removed the overscale steering wheel.
I'm afraid these pictures look rather strong and punchy, and the white balance is off in a couple. I think that my colour calibration isn't set up properly somewhere since they look more subtle in Lightroom. I'll try and sort that out before doing too much more.
I've also done some quickie experiments with focus stacking, which is cool but tricky to get right, so I don't have anything to show yet.
-
 13
13

9 Comments
Recommended Comments
Create an account or sign in to comment
You need to be a member in order to leave a comment
Create an account
Sign up for a new account in our community. It's easy!
Register a new accountSign in
Already have an account? Sign in here.
Sign In Now