


Entry posted by Will Vale
725 views
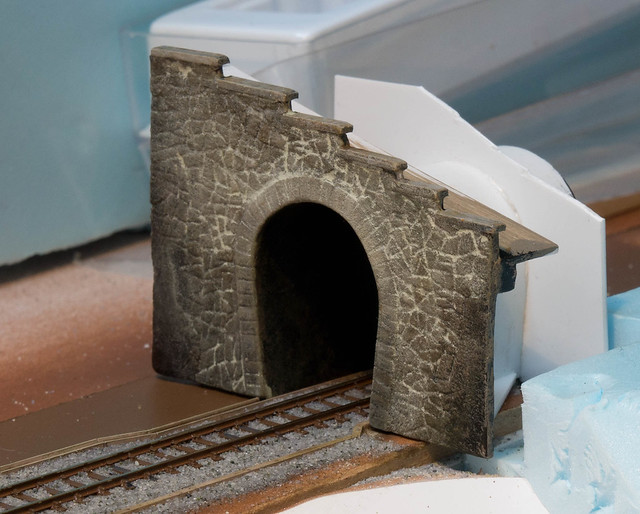
Unteren Hirschsprung Tunnel (West) by Will Vale, on Flickr
I dunno, you wait ages for a blog entry, then two come along at once! With two months to go until the exhibition, my progress really needs to make the leap from "glacial" to "avalanche".
My current focus is the track bed (see previous entry) and civil engineering - once those jobs are out of the way I can finish the basic landforms and get the profile boards on. The main things required are four tunnel portals, some retaining walls, and a bridge. I've already made a start on one tunnel portal, so I made some blanks for two more in front of the television last Sunday night, and then took them with me to a local club meeting where I sat and sliced off 1.5 x 3mm 'stones' from an Evergreen section and stuck them around the arches:

When I got home, I looked at my reference again and realised that what I thought was a common constructional style encompassed a lot more variety than anticipated. In particular, the two new portals both had larger stones, and one (the Oberer Hirschsprung Tunnel Westportal) had a mixture of stone types, an interesting coping, and was made of blockwork rather than random stone. I filled the gaps between the lower arch stones with Tamiya putty and re-carved them, and added a suggestion of the coping with Evergreen rod.
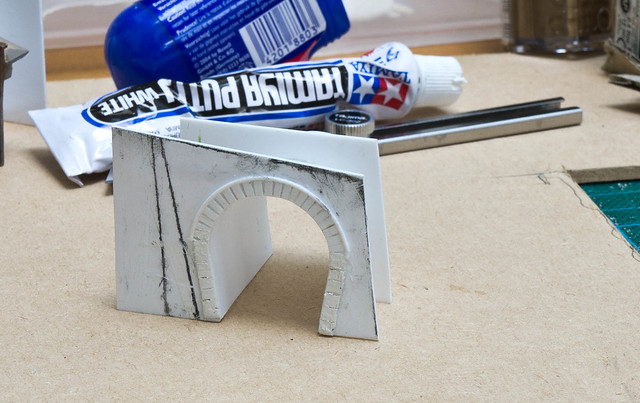
The reason the ink lines are so messy is twofold - I picked up an unsuitable pen from my desk to mark the approximate line of the wall, and I'd already scuffed the surface in preparation for the clay layer. The ink went wandering off down the scratches giving the whole thing a rather spidery, gothic appearance 
Once the arch details were more-or-less there, I smeared neat PVA over the surface and pressed small pieces of DAS clay into it to make a fairly even layer. As you can see it ends up being very thin, but it hasn't shown any signs of flaking away or causing trouble despite being well under 0.5mm thick in places:
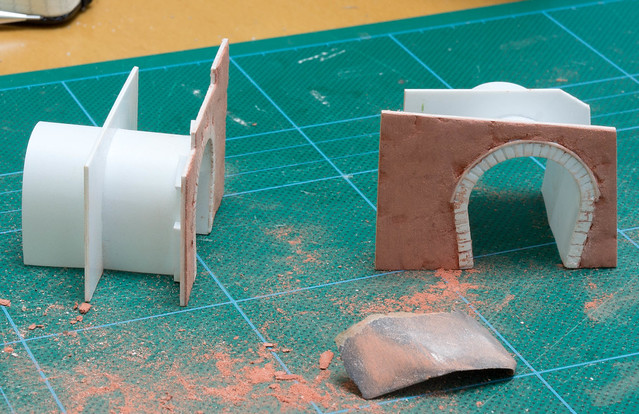
Once dried (overnight) and sanded back slightly I carved the random stone and less random blockwork with a small screwdriver. There are likely better tools but it does the job!
It would make a lot of sense to do this in the flat rather than after building the tunnel liner and supporting framework. It's not a problem for the random stone at all, but it makes holding a ruler across to carve the regular blocks a bit of a pain. They are somewhat wonky as a result, but I don't think that's too obvious.
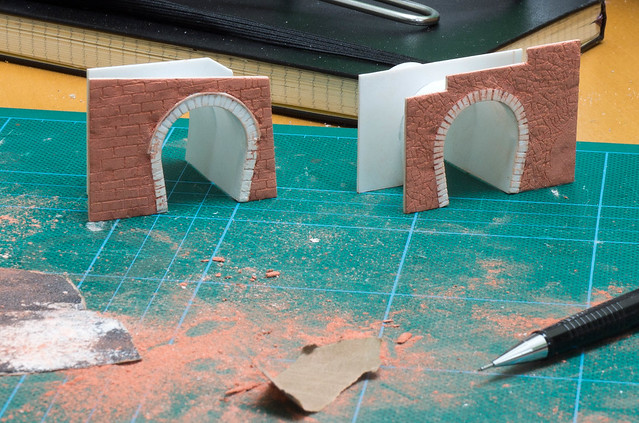
For finishing, I undercoated everything fairly heavily with Citadel black acrylic and let it dry. The stone colours were built up with drybrushing rather than brush painting, using various browns. I then touched in individual stones with darker and lighter tones and highlighted various edges.

I'm not delighted with the gappy arch on this one, I think I'll have to fill the gaps and retouch it since there's not so much greenery I can use to hide them. I am quite pleased with the stone colour which seems pretty close to the prototype pic. It's not shown in the correct place on the layout either - it goes at the far right - but there was too much junk in the way 
For the random stone tunnel in the header pic, the mortar was created by washing the surface with MIG concrete pigment dissolved in their pigment fixer. A bit scary since it goes green! I wiped it off the raised part fairly quickly, and waited nervously for it to dry. The effect isn't bad I think, and it had the side effect of tying together the rather speckly stonework into something more coherent. I need to spend a little while running a dark wash into some of the joins, because they don't all have obvious mortar, and redo some of the detail painting of stains, bloom, etc. which the wash has masked.
More soon hopefully - various capping stones to make, and I need to box in the tunnel interiors with foamcard so scenery can go over the top.
-
 2
2

0 Comments
Recommended Comments
There are no comments to display.
Create an account or sign in to comment
You need to be a member in order to leave a comment
Create an account
Sign up for a new account in our community. It's easy!
Register a new accountSign in
Already have an account? Sign in here.
Sign In Now