


Rob Hayes
-
Posts
407 -
Joined
-
Last visited
Content Type
Profiles
Forums
Blogs
Gallery
Events
Exhibition Layout Details
Store
Posts posted by Rob Hayes
-
-
Hi Rob
I hope everything is going ok for you.
I too have an A4 in the form of 60029 Woodcock.
I am wondering if there is a possibility of converting the rear wheels under the cab to the old swinging rear pony set as modelled in the 90s.
This is so I can make it easier for the loco to run backwards over turnouts without derailments.
Any ideas, also I hope I am not committing a cardinal sin by asking.
Hi mate thanks for the kind words.
I know what you mean if your using the flanged wheels they don't like tight radius but the flangeless ones are ok if the track is flat otherwise they catch.
I have been thinking about modding this myself I cant understand why Hornby didn't do what Mainline did with the 56XX or is it 66XX GWR 0-6-2. Its been a while since I saw one but I think it rotated or the wheels each side had a lot of side play. Actually thinking about it. It might be a 14XX its so long since I have seen one now I'm not so sure.
either way there is plenty of room there to make a new way for that wheel to attach to something.
At some point ill get the plasticard our and make something for it if I can and give you the details here.
All the best Rob

-
Well I am finally back at it after a difficult few years. I always intend to be back here and something gets in the way its only been a few years.....
However here is a short video as promised I will do better ones soon. Just give her a few tweaks today and will be showing you Bittern and Sir Nigel Gresley soon.
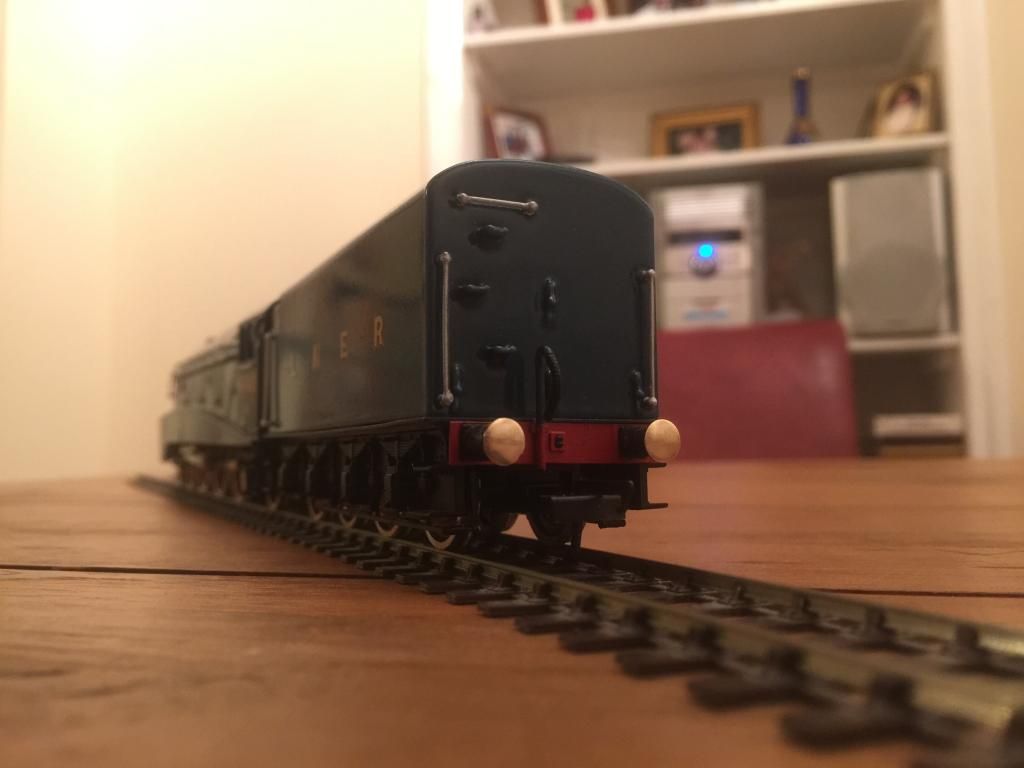
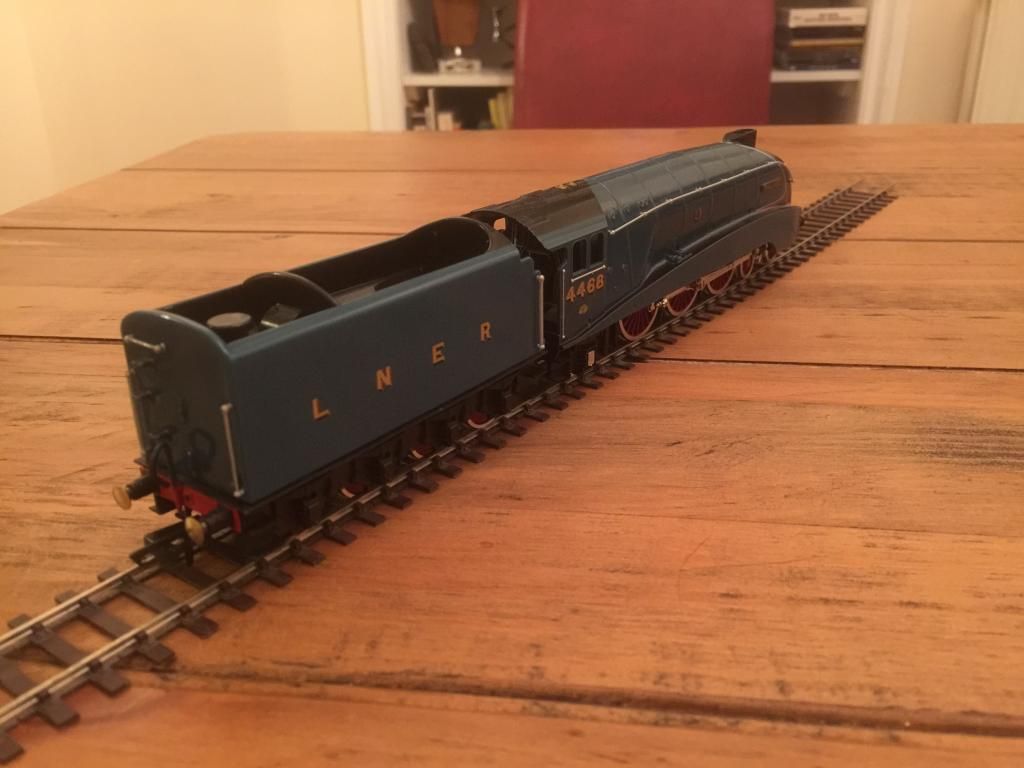
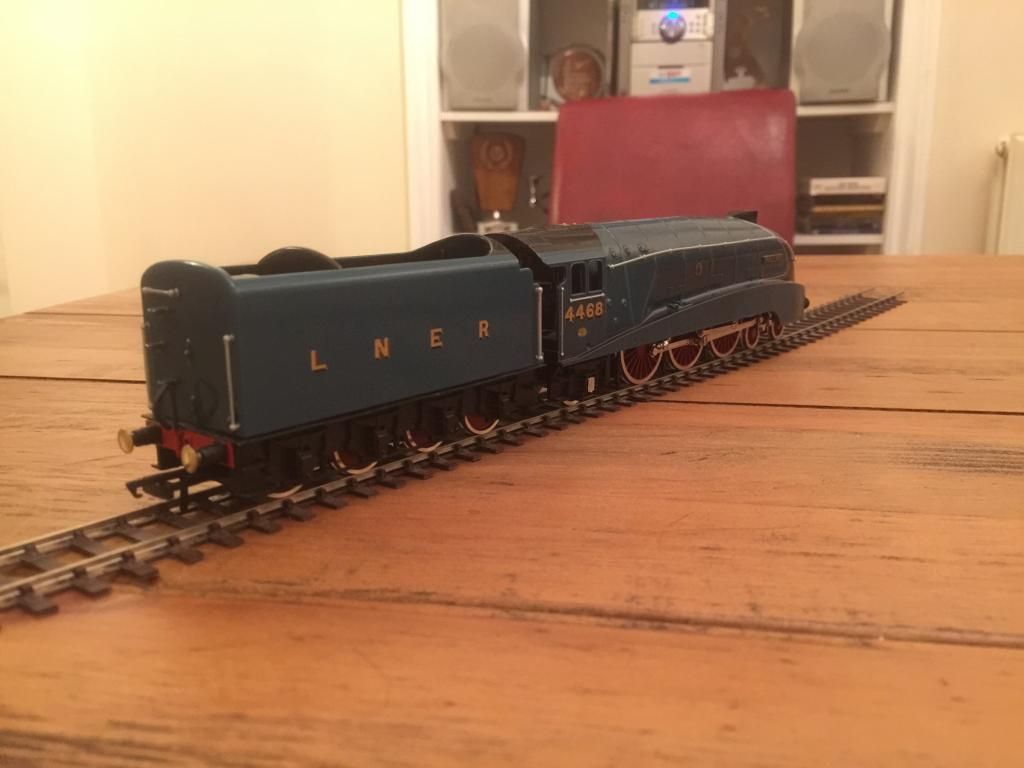
I am please Hornby are now producing Gloss LNER locos so I been buying those up.
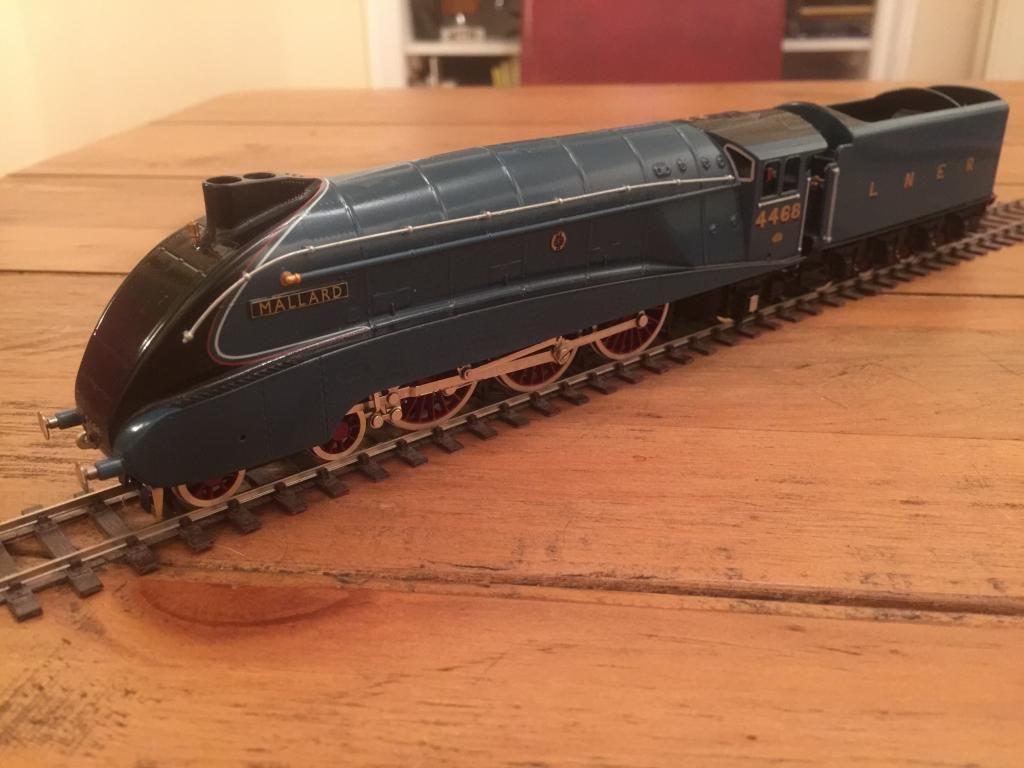
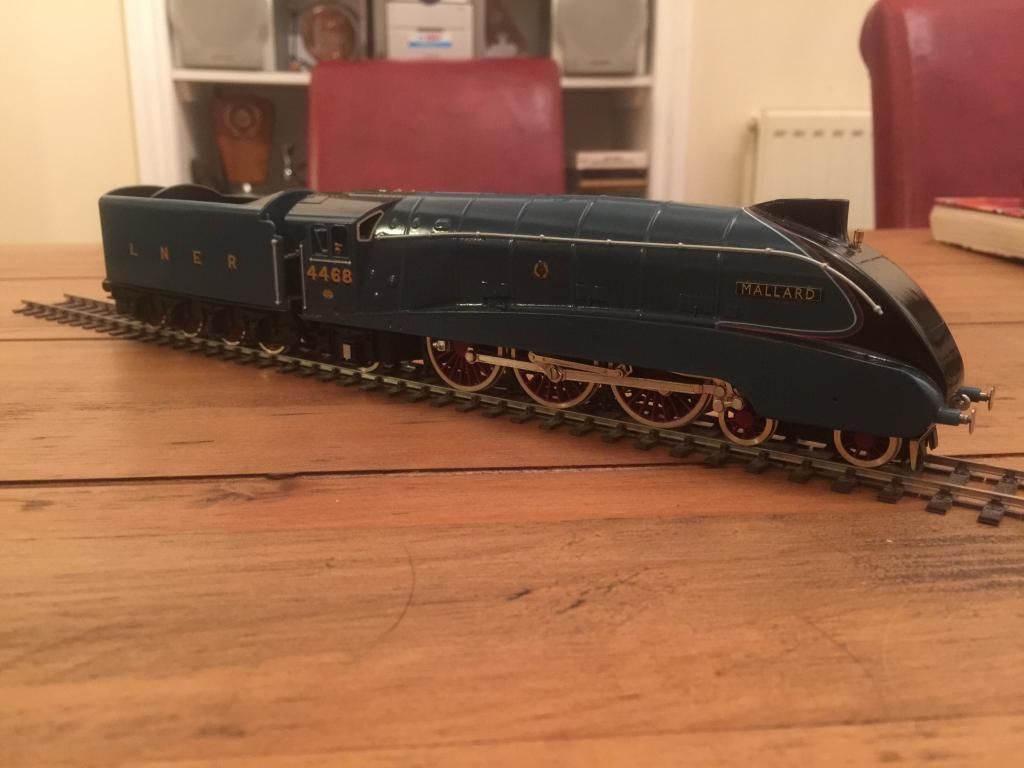
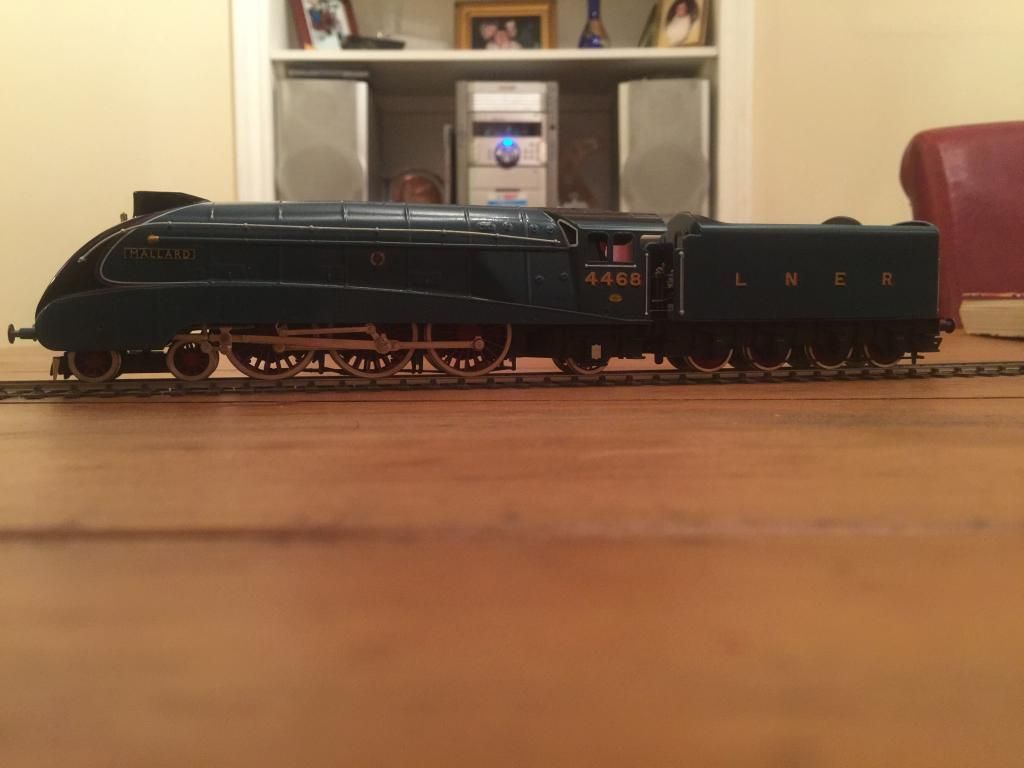
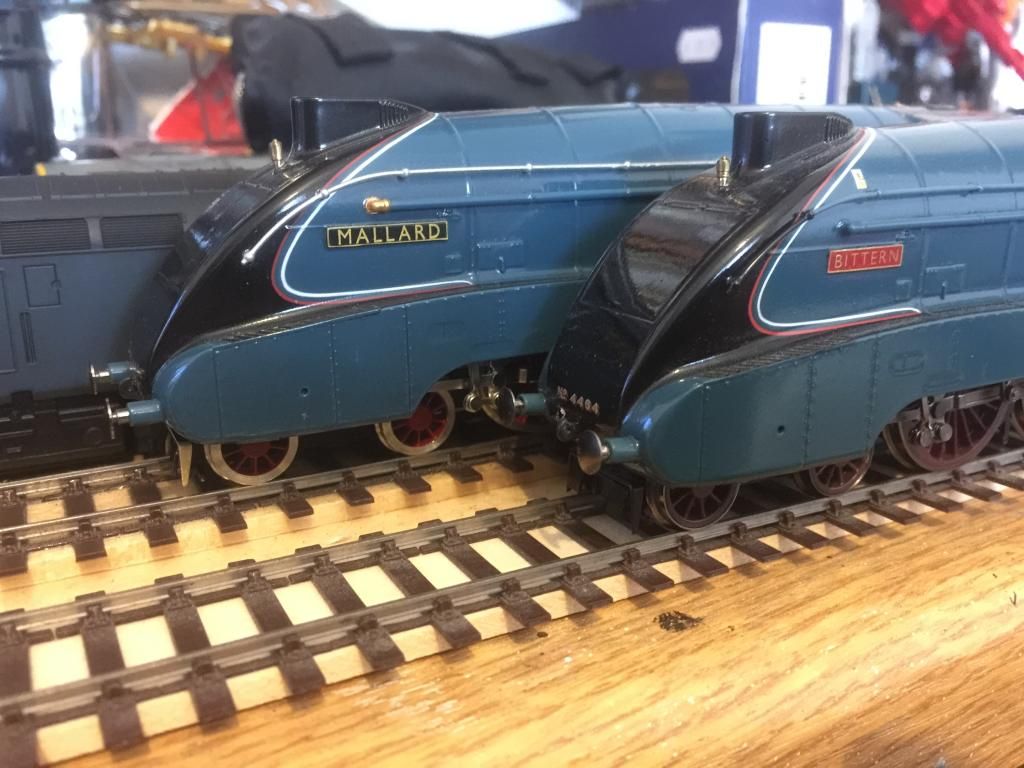
Here is Mallard as is today
-
 1
1
-
-
Oh my I'm so sorry I've not logged in for ages now nearly 2 years !!! My gosh I'm so sorry if I seemed rude I will reply properly soon. I will also do more on this thread soon.
I've been really busy since completing mallard I've been through some massive life changes with. Jobs and life I joined a Hard Rock band called Sister Shotgun and that's been taking up much of my time as we recorded an ep wrote new music and performed at gigs and festivals around the country.
I will resume this soon. All the best Rob
-
1
-
-
It looks fantastic. Seeing your thread last year has inspired me to add upgrades to my 2002 vintage tender drive Mallard. I don't know if i will go as far as the crazy gloss coat and upgrading the running (since its got nowhere to run in my world), but i have picking out the handrails and such in silver and some of the brass fittings as you've done to improve the look, and the wreath plates for the cladding to install, just need to get to the point of starting doing mine!
Stephen
Ah thanks very much there Stephen and cool I inspired you with yours , photos please
 ,
, I must get some decent photos and vids done of this but I have been uber busy with work, getting into a band (guitarist) and my many model projects on britmodeller , (mostly vulcan bombers) for out IPMS shows with Bomber Command SIG.
Hope I can start my Hatchette Mallard soon and translate what is done here onto 0 gauge and that will be glorious if all goes to plan I hope.
I might even make a NRM style turntable to have her spinning on.
I'm a bit distracted with my new Aquisition at the moment my lovey new Heljan Class 40 and my First 0 loco ,,, what a beast it is too
-
I hope I am lucky to nab a bargain like that. I would like one with a de solderer too
-
It's a tiddly OO model Rob. Onwards and upwards with your 7mm

Well that's still great news but 7mm as well would be a very good idea I reckon
-
Thanks for he help guys, I need to invest in a good solder station first me thinks
-
You have my attention. I have a Bachman D of C (split chassis) and want to do sound for it, with "bells and whistles" of course. Well outside my current abilities though.
Well looks like I best get on with it then. Keep in touch and when I finally get around to it (sound ) might be able to help.
Cheers Rob
-
I am ok with soldering for decoders and repairs etc I have done a hell of a lot of that in my time but as for soldering kits and getting neat lines that is a new thing for me. I'm guessing it requires more skil that how you would use a blow torch on copper pipes
-
Well thanks for the tips. I would prefer solder as I see this being more permanent with superglue not getting on well with oil which it's likely to come in contact with I think solder is the only way.
I have never soldered a kit however. I will practice first making a few comet chassis kits and I quite fancy having a crack at this little gem from conniseur models. Looks ideal to get started.
http://www.jimmcgeown.com/Loco%20Kit%20Pages/Starter%20Loco.html
-
Why are the Brass parts lacquered is this normal for a kit ?
-
Looking good Rob...
Cheers David
Not the biggest fan of the A4. But that looks the dogs ba##@$ to me. Any other plans up your sleeves.
Thanks very much it's largely gone to plan but the tender is a little heavy on varnish due to me not following my own rules about the weather and the varnish I use in October 2013.
I have plans to continue to learn about kit building in both 0 and 00, I also want to re chassis my manor with a comet one. As regards the A4s which I adore I have others I want to model and quite fancy a go at a comet chassis and making it fit one of these new Hornby bodies as a hammered wartime black loco. As I really fancy the idea of an A4 on freight.
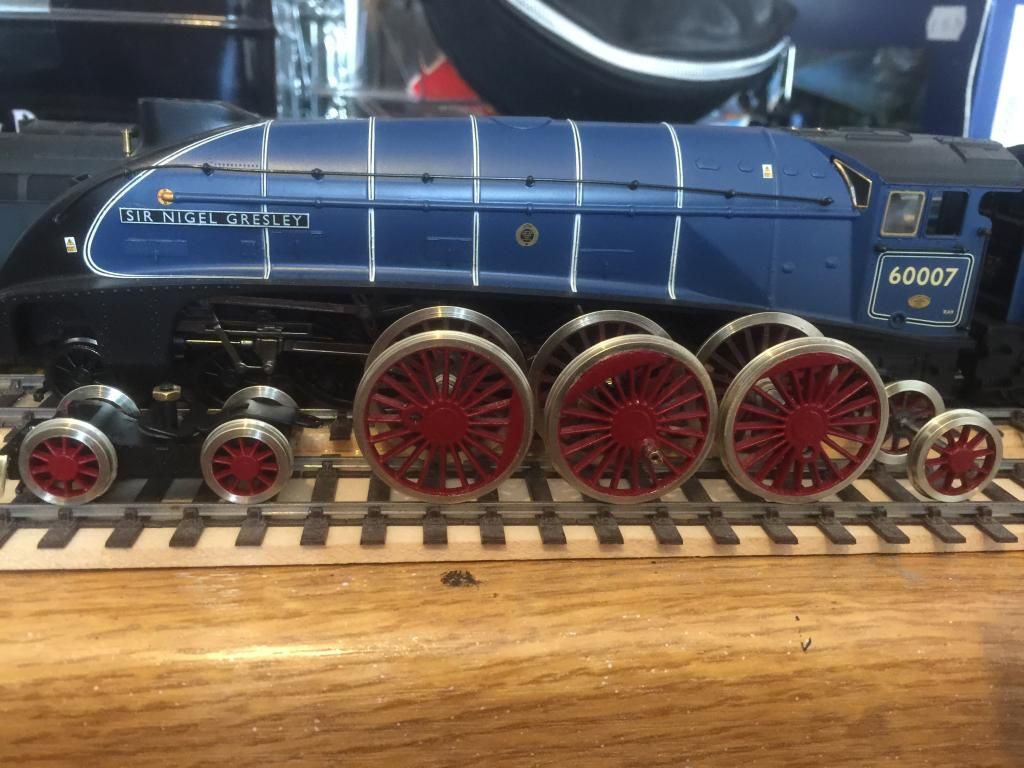
I also wish to make a model of Sir Nigel Gresley as she was when I had "a go" at driving her in the early 90s at Carnfourth, LNER blue with black nameplates, it was just before it come to Kiddy I think in 94 however I seem to recal she had red plates at Carbfourth but when she arrived at kiddy they had been done black for some reason, I guess it was just prior to her going to BR blue.
Another plan is to construct my own A4 sound files and also do one with Canadian bell and a 5 chime whistle for Dominion of Canada.
I have a Bachman one and toying with the idea of a new chassis maybe comet.
Cheers Rob
-
2
-
-
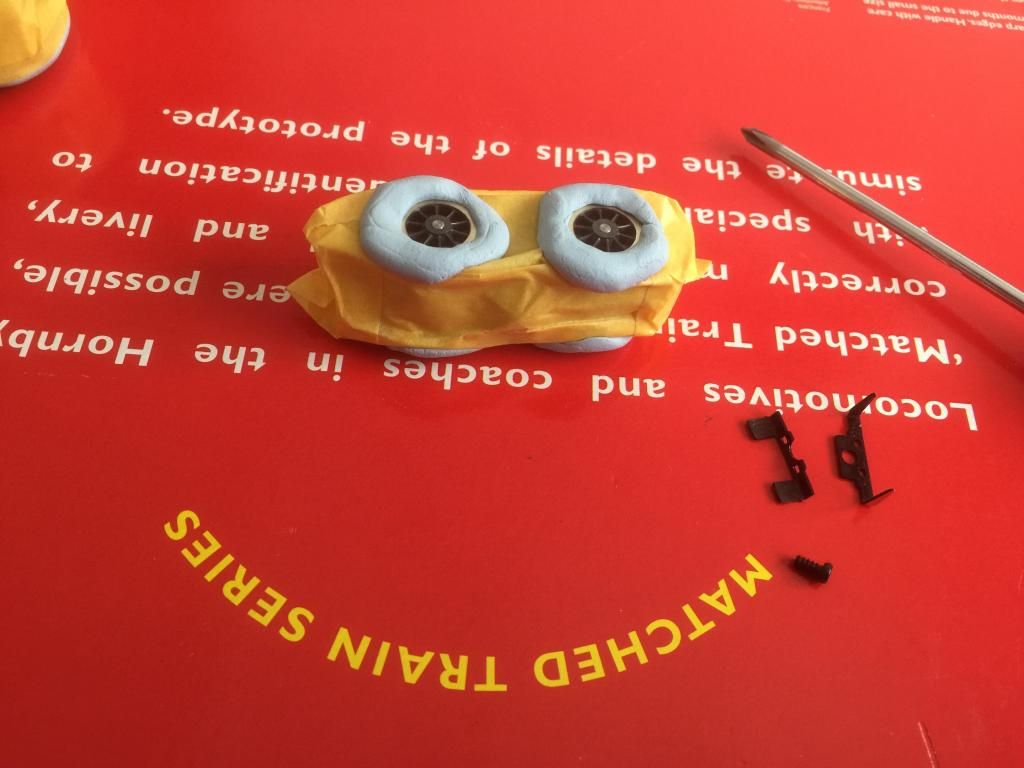
Well I dunno what I have missed but I see I need to address that broken coupling hook on the back.
Looking back at this I need to do some decent photos outside like I did earlier I must get on and film a video of her running too.
Next plan is to try and make up some copper pipes that attach to the front bogie spikes and to the bogie using the valance to hide this and still allow movement of the bogie to negotiate tighter curves.
cheers Rob
-
1
-
-
What Gauge is this destined to be, I am hoping 0 gauge. Though 00 is also welcome.
Its my fave version of the Pannier and I am just beginning 0 Gauge with the Heljan 40 and Hatchette Mallard from DJH.
I would like to Join the Guild soon and this would make a great start to my Micro Layout I have planned for a small section of preserved line where I can run anything.
The CAD looks very nice indeed I am sure there will be a way to get sound in.
Rob
-
Well she is nearly finished, The hard parts are over and it has been a big learning curve, Challenge and fun too. Also a bit difficult at times.
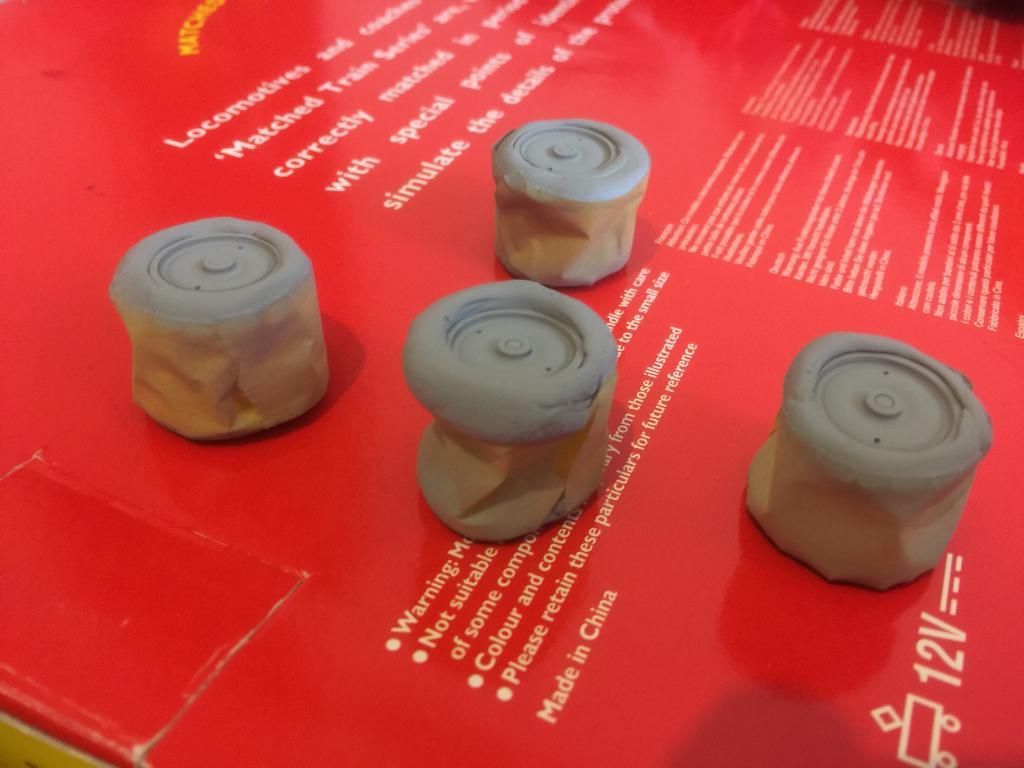
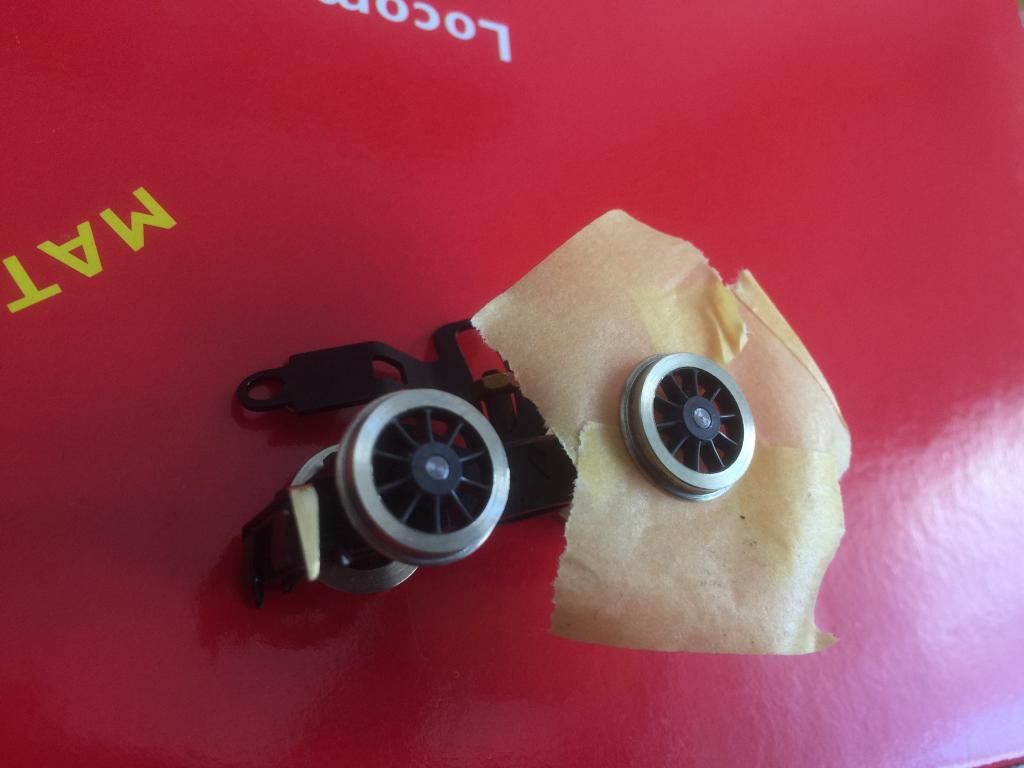
I have fitted the wheels to the tender and painted the silver axle boxes with Dark Star Paints bright steel then over coated with tarnished steel then a coat of Klear.
I buffed the buffers with 12000 micromesh.
I hope you like here its been a very long time getting Mallard to this stage from her Railroad/legend origins. I feel its an Improvement even though I love the original spec Hornby give us.
Comments both good and bad welcome.
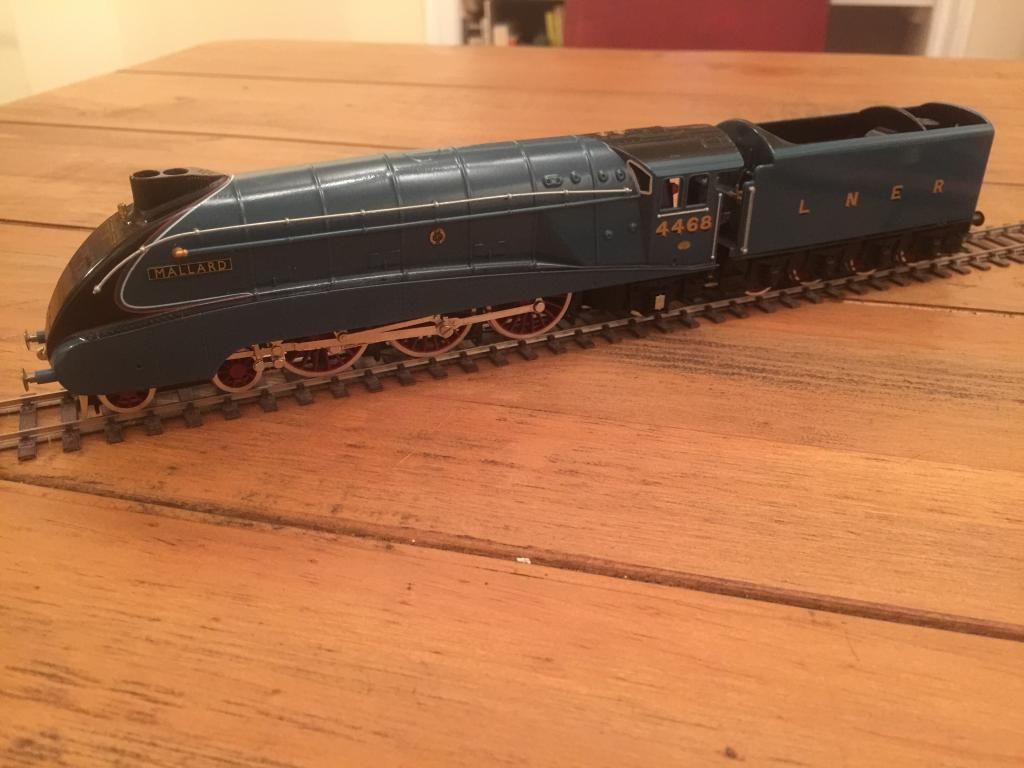
She has also been chipped with a Digitrains sound and a sugar cube in the loco.
Cheers Rob
-
4
-
 1
1
-
-
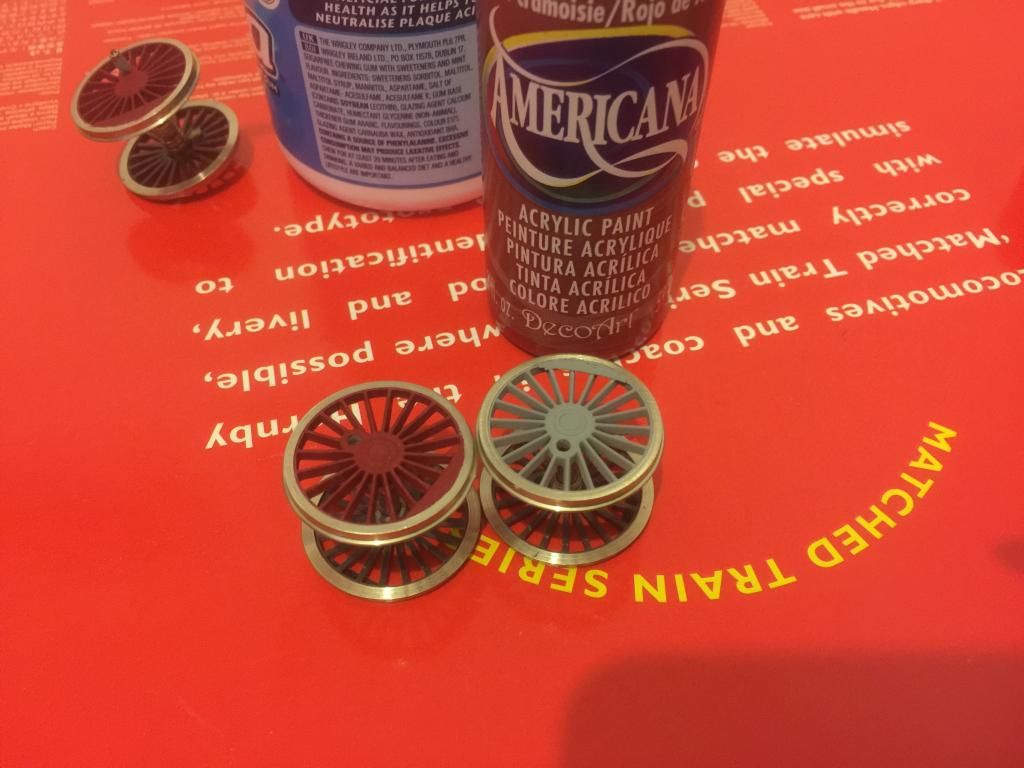
The tender wheels are getting the same treatment as the others, Humbrol 64 base coat from spray can, 2 coats of Americana Alizarin Crimson and 2 coats of Klear.
I do apologise if this is boring anyone but it's a useful reference for the future I need to do this again.
It might seem obvious to some what I'm doing but I like to share to help those who might need it. I have not posted as often as I would like on here and still settling in even though I've been a member for years now. I regularly post on britmodeller so I am learning how this community operates still.
Cheers Rob
-
2
-
-
Well I'm really happy with how this has turned out, nearly there just the tender wheels to do then the final tuning and then a video and some photos.
Hope you like her and a glimpse of my bittern since she's had her gloss coat.

-
3
-
-
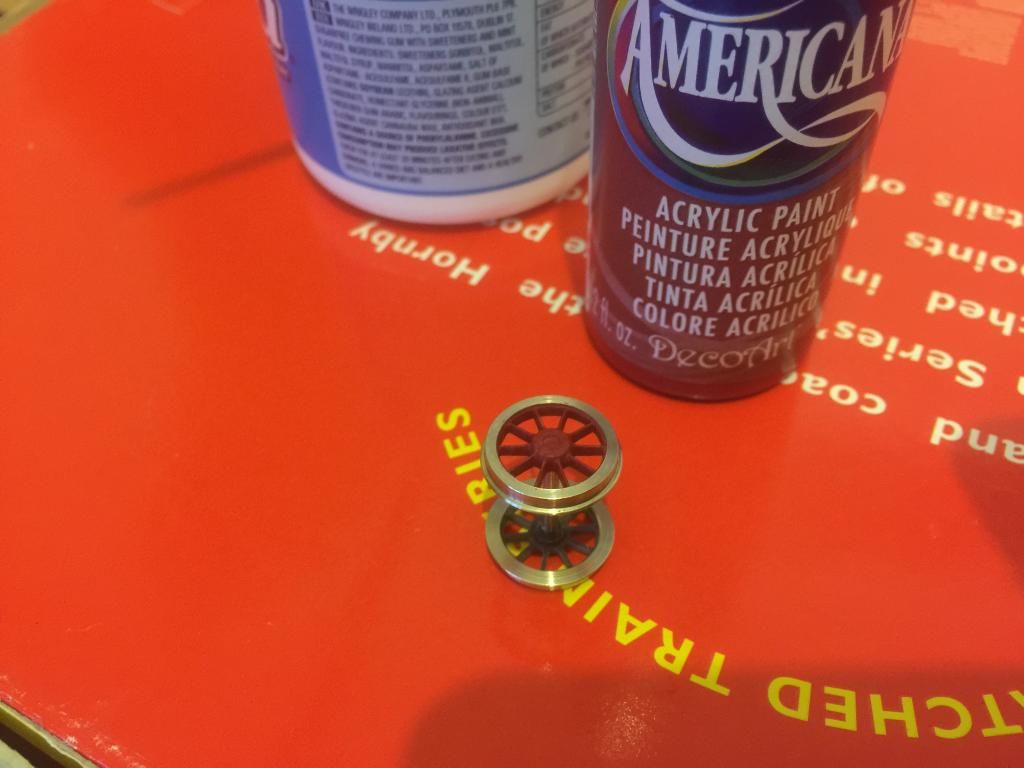
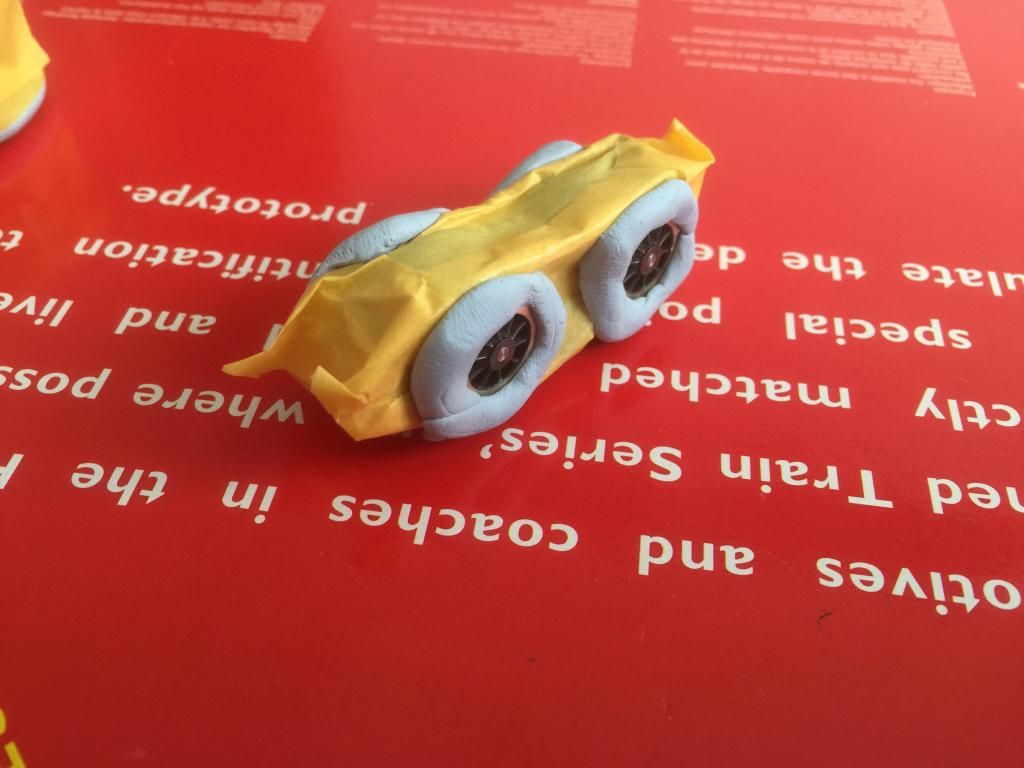
Right then the wheels have had 2 coats of the Alizarin Crimson and 2 generous coats of old slyly Johnsons Klear.
Now the exciting part .. The Finish is in site !
-
2
-
-
Hi Rob, very impressed as an A4 lover!
Can you tell me where you got the finer motion from please?
Cheers
Ron
Hi Ron, are you referring to the finer motion that was put into my Blue Mallard prior to this new chassis I'm working on as in the super detail variant. If so I got them from Peters spares on eBay, you could also try new railway modellers or the other Hornby spares department just get the info from the data sheets on the Hornby site and they can sort you out.
If you are asking about the new motion here that is silver in colour these are from the old Margate 70s - 90s issue ones which are the same pattern for the crank eccentric as the current railroad with a few Mods as I have carried out with the cross bar that connects them. These might be harder to source individually but there must be 1000s off older A4s out there you could grab for spares though.
Glad you like the project it's a childhood dream slowly coming true for me.
All the best Rob
-
1
-
-
A little more progress as I work on the wheels another coat and a bit of Klear to seal and shine them and she will nearly finally be done hopefully.
Then I will have to make a video of her running.
Shame I have not got a layout at the moment or a big loop to stretch her legs. If I can find anywhere local to go to it could be nice to give her a good run.
Cheers Rob
-
2
-
-
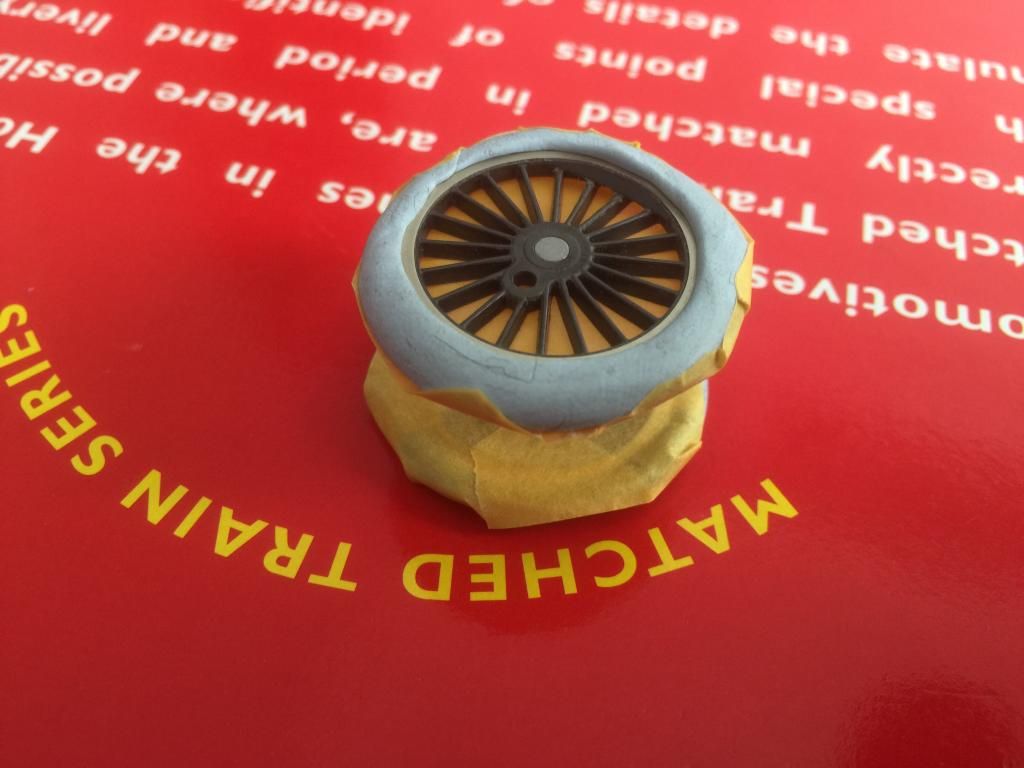
One coat and it's already covering well. I think light grey is my fave primer for red
-
1
-
-
Right then, it took longer to mask than spray, As always but well woth the effort.
The Humbrol sprays I use always they give such a great fine and robust finish these days and level out as they dry.
I have become a fan of these decoart acrylics from Americana available from hobbycraft. They give a great finish brush beautifully and have a very dense pigmentation and level off with little to no brush marks.
I will add some Windsor and Newton flow improver to these to further enhance the levelling and streak free effects of the paint. It also makes them brush like enamels. Combined with the Humbrol grey base coat they will stick to this like muck to a blanket an give a tough finished further protected by a few coats of Klear or similar.
The range of Americana paints are vast and useful, these two reds / crimsons I selected by eye as looking good for LNER Reds not being to strict on the shade as I find hornbys too purple and dark but look good and seem to have an oily worn look but as I am modelling Mallard as I have seen her in the 80s and 90s on many occasions she has quite bright wheels more toward red than purple. I like the look of the Alzarin Crimson and will be using this. I do like the Humbrol 20 but few this is two dark on this occasion but will be using it on future A4s.
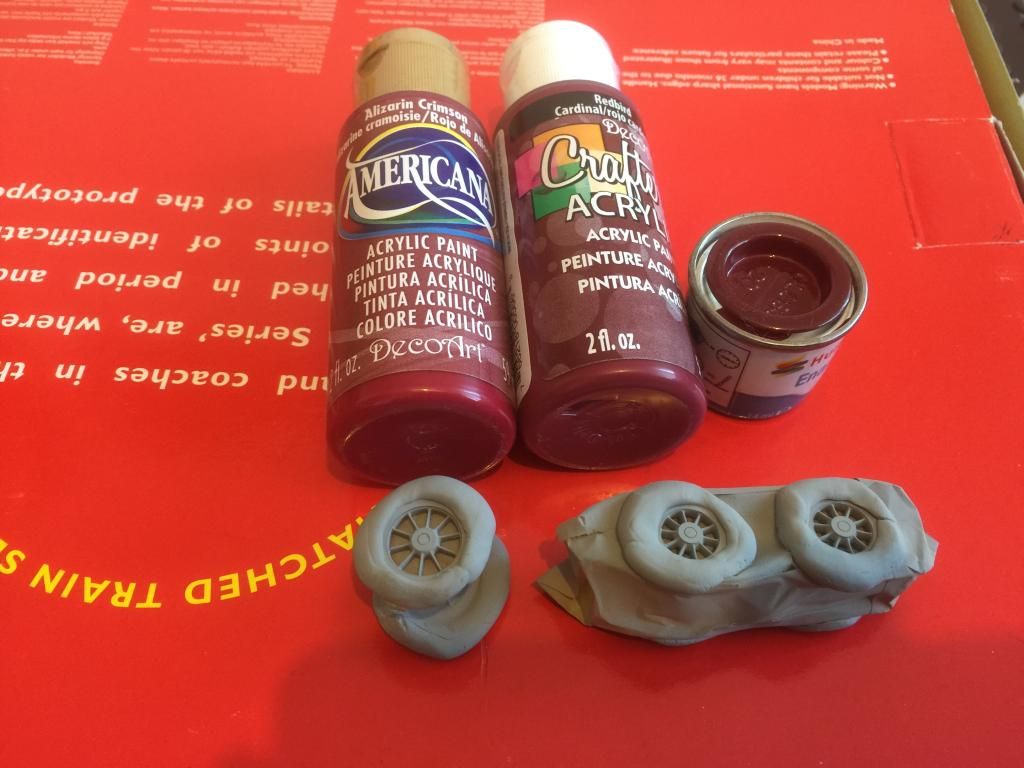
The Redbird colour is also a good shade, A bit of variance don't hurt and if the other is looking too light I can over coat it with the darker one.
Right then time to get the Hairy stick out !
Cheers Rob
-
1
-
-
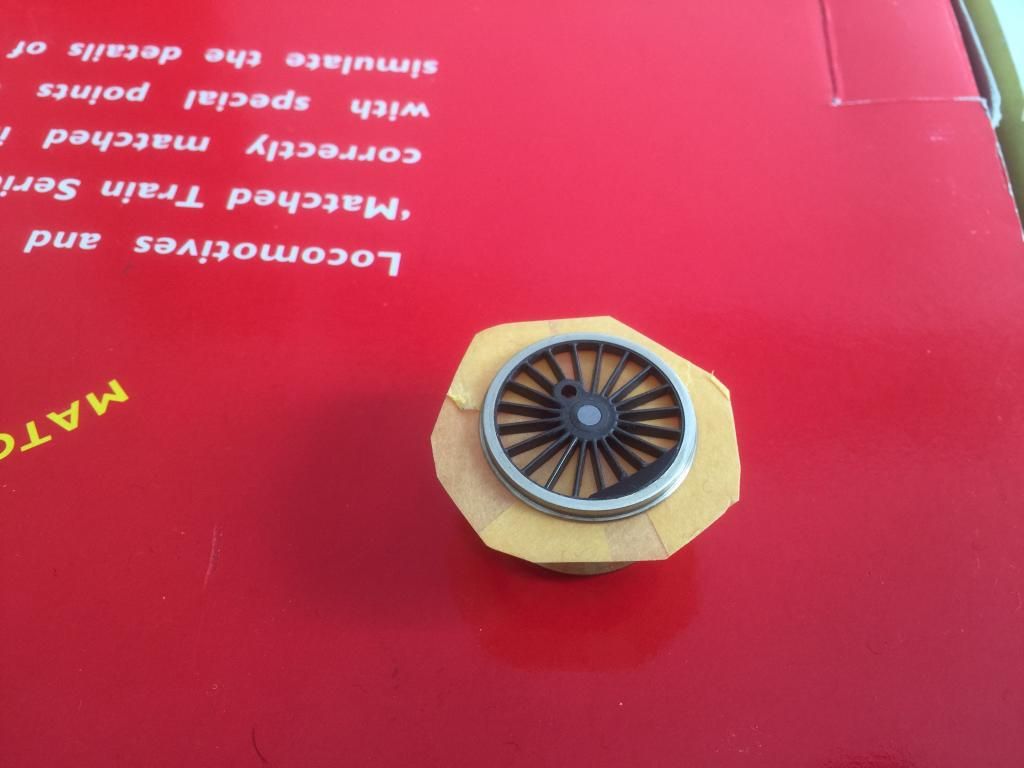
Hello good folk I am still plodding on with this project and have been making sure the wheels roll as slick as possible. There was one slightly tight area which I first worried was quartering the. Thought it might be the eccentric but in the end I tracked it to a slightly tight hole on the first driver crank pin hole. This was widened a little more and now she rolls like greesed pig spit.
I have fitted the ultrascale balance blocks to the wheels I could have used the compass cutter but these are very handy and priced so reasonably it hardly seems worth the bother.
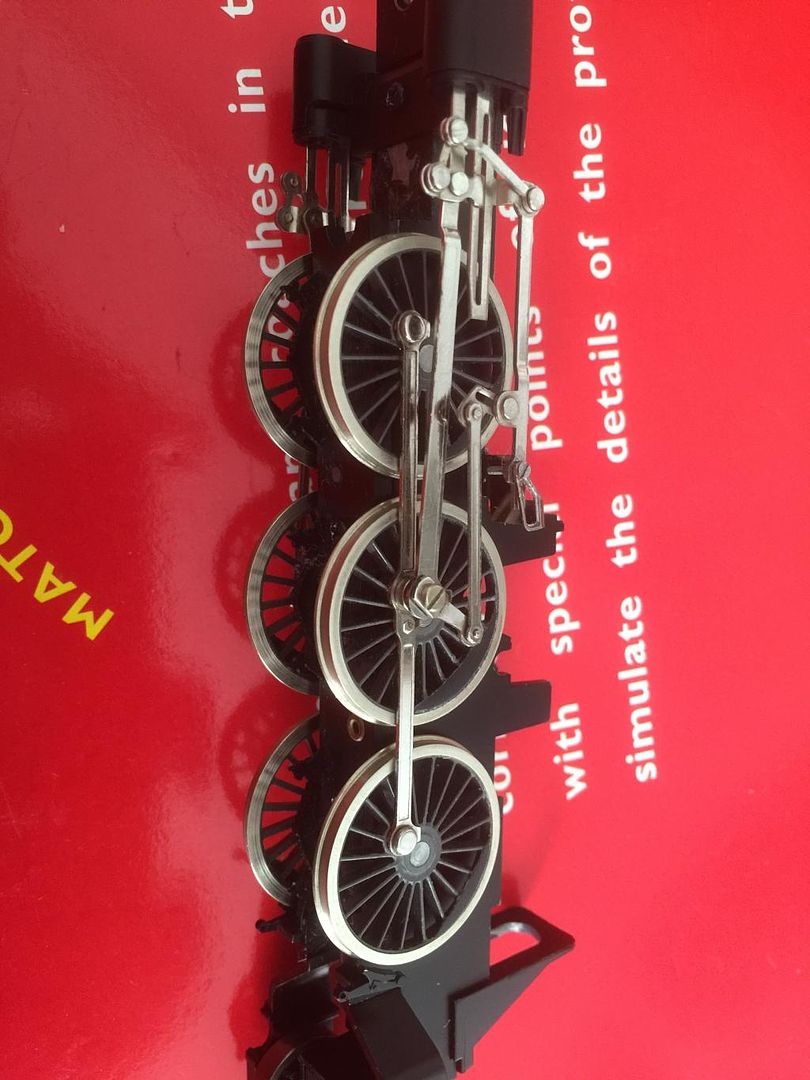
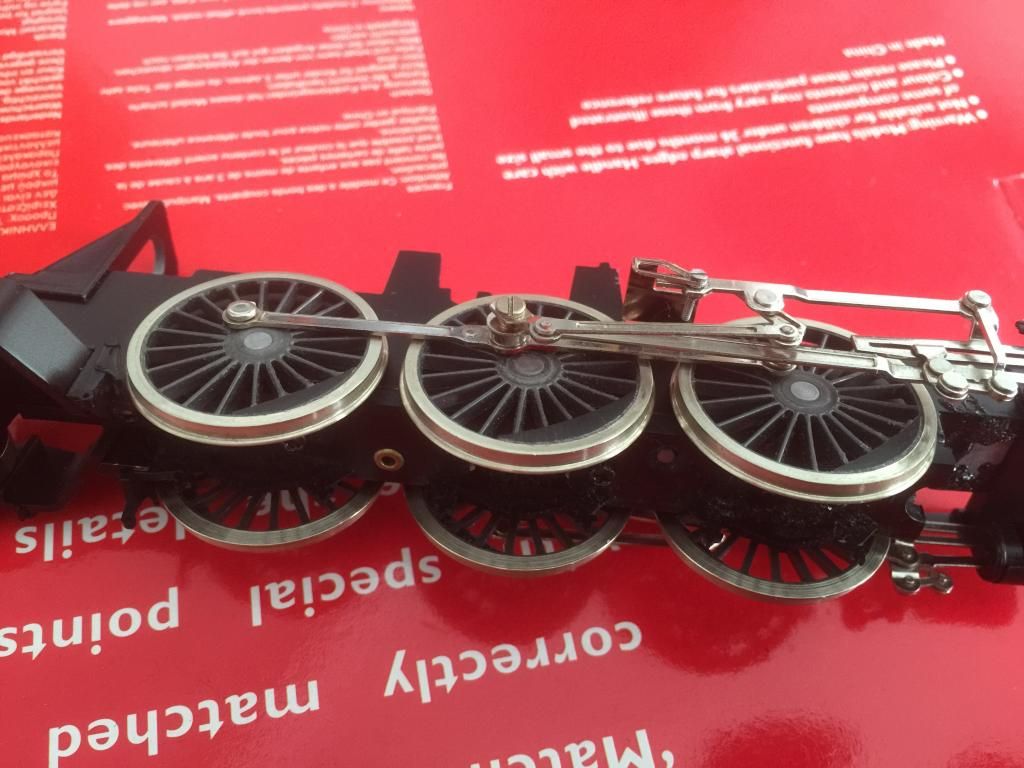
Once the super glue gel had dried I micromeshed them flush to the wheel rims to both tidy them up key them for primer and make sure there would be no collision with the connection rods. The test chassis was re assembled to test it was still rolling and now I'm moving on to the paint stage.
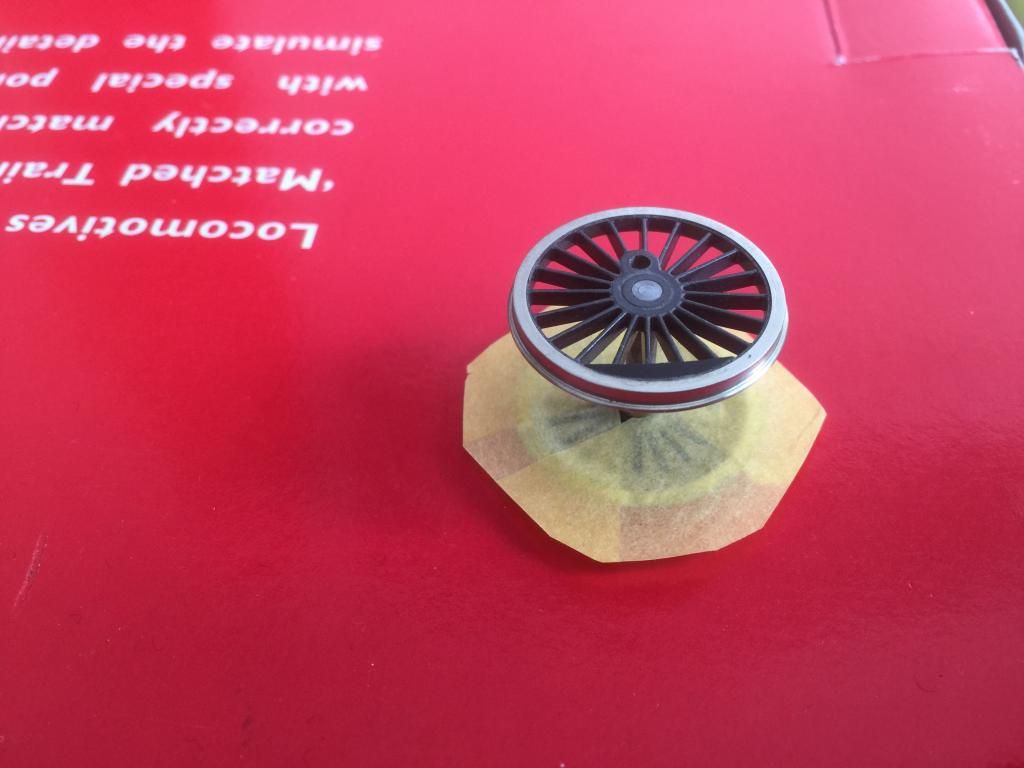
I used tamiya tape to back the wheels and blue tak to mask the rims and running surface. These can then be misted over with Humbrol 64 Matt grey direct from the rattle can this will give me a good key for the red after I remove the slight over spray from the metal rims.
Hopefully this will give some permanence to the red (now I know why BR subjects are more popular ! )
Same treatment for the front pony wheels but I am leaving them in place. I also polished up the front bogie spikes down to the brass/nickel to look like mallards ones, it's not steel but it looks pretty goodas a compromise however I may burnish over some kitchen foil with microscale foil glue as one would approach a Bare Metal finish on a fighter jet. I may try and emulate the quarter polished buffers using this method too.
So with that onto the primer I have opted to use light grey as it will be easier to cover than white or black. Red being an awkward colour to paint.
More soon Cheers Rob
-
1
-
-
Great work I will be following this as I have also been gathering the parts to do this and learn. I started a thread off on Britmodeller and not started yet so it's good to watch what your doing for when I start.
Looks like a great model from what I've seen so far.
I also like the Hurricane you have on the go.
Cheers Rob


GLOSSY Hornby A4's ON GOING PROJECT. 4464,4468,4498, ETC CUSTOMISING THE Hornby MODEL
in Modifying & Detailing RTR stock
Posted
Just been thinking the New Bachmann A4 locos have a fantastic chassis under them with a metal fixed rear truck. and much better looking wheels than the Hornby model with the thick tyres on. The rear truck has a sprung articulated rear wheel that is flanged. if you can figure out a way to fit that under the Hornby body should be a winner. Might have a go myself.